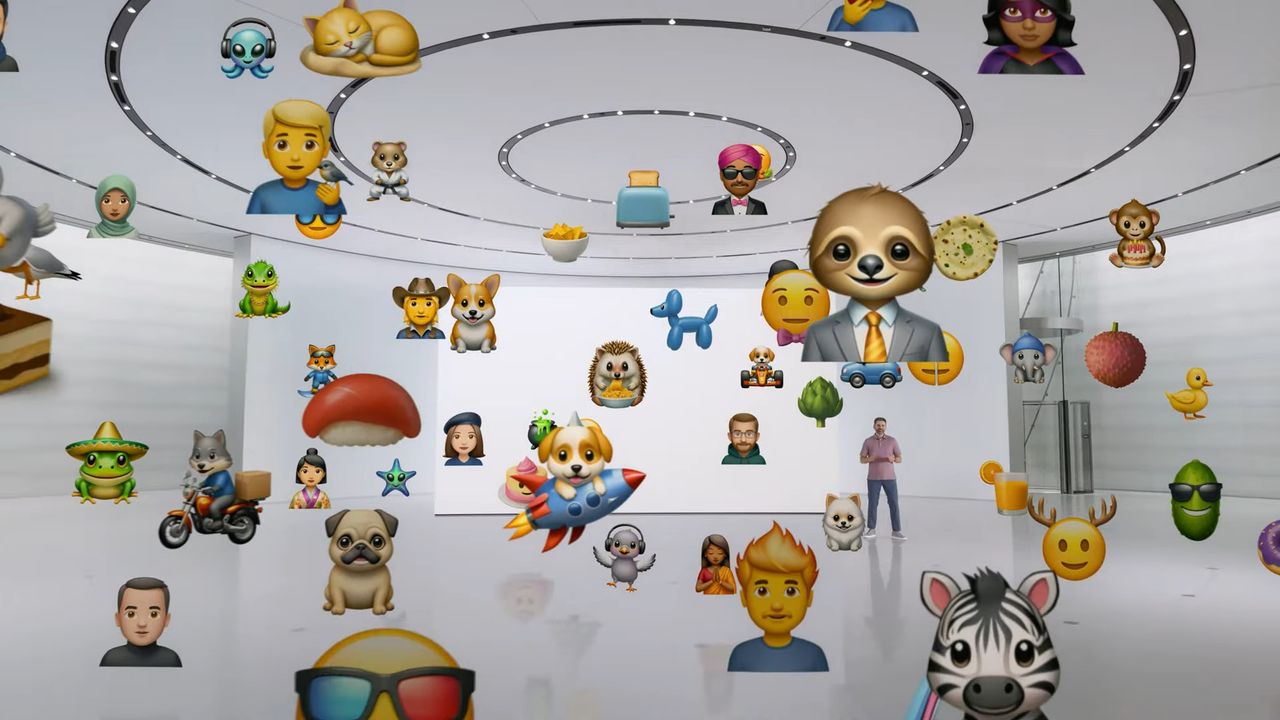
Forget the standard emoji library. Genmoji lets you create completely custom images using Apple Intelligence. Whether it is a simple cartoon version of a person or reflective of a mood, occasion or idea, they're great fun and useful when it comes to visualizing a point.
By playing around with customization options and entering simple text prompts, you are able to quickly produce images that can be saved as stickers and shared with others. What’s more, if you’re using macOS Tahoe, you’re also able to use new options such as hairstyle customizations.
It’s certainly worth trying out or even revisiting if you haven’t used Genmoji in a while. Let’s check out what you can do.
1. Access Genmoji
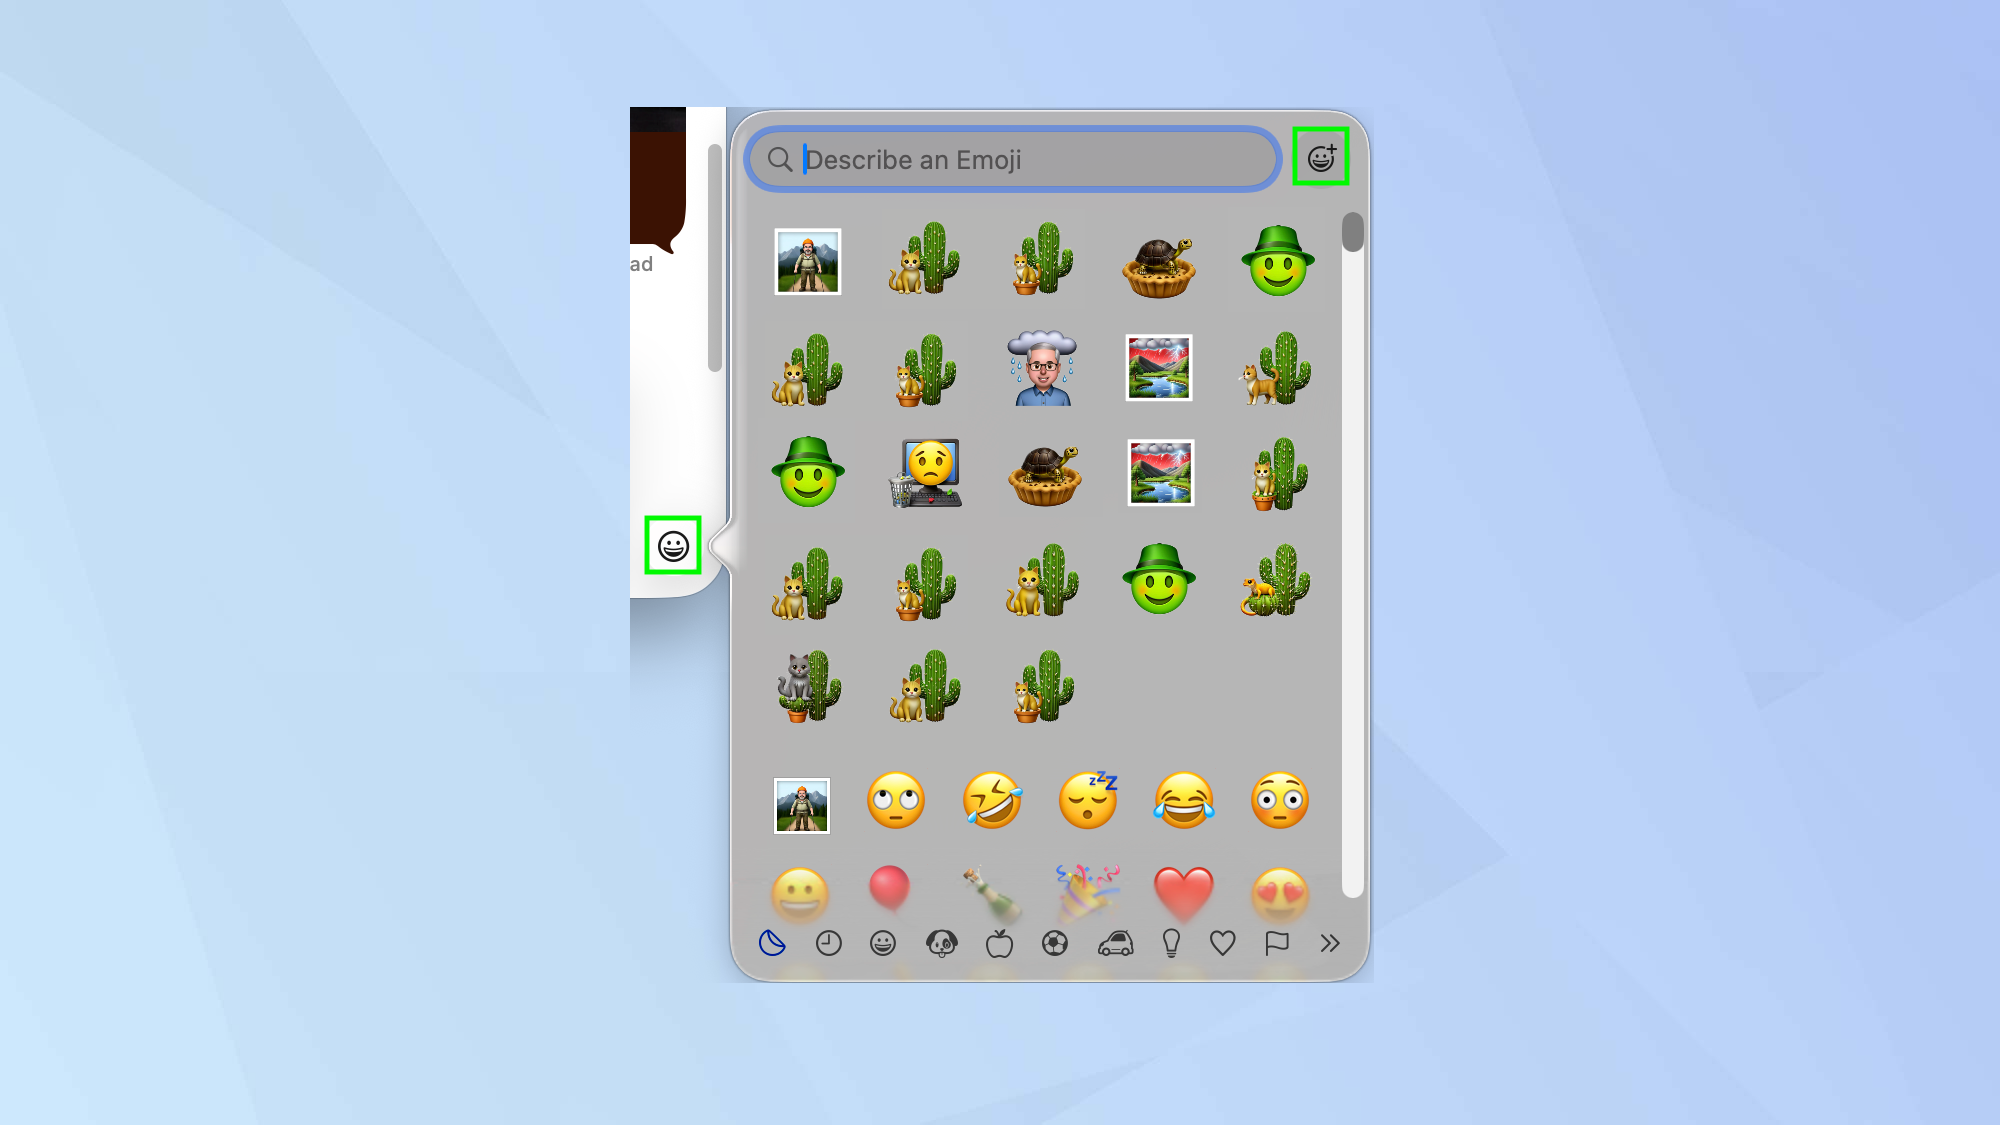
To access Genmoji, open a text-based app such as Messages or Mail and either click the emoji symbol or press Fn or together with the letter E on your keyboard. Next, when Character Viewer appears, select the emoji+ symbol.
Alternatively, you can launch the Image Playground app.
2. Describe a Genmoji
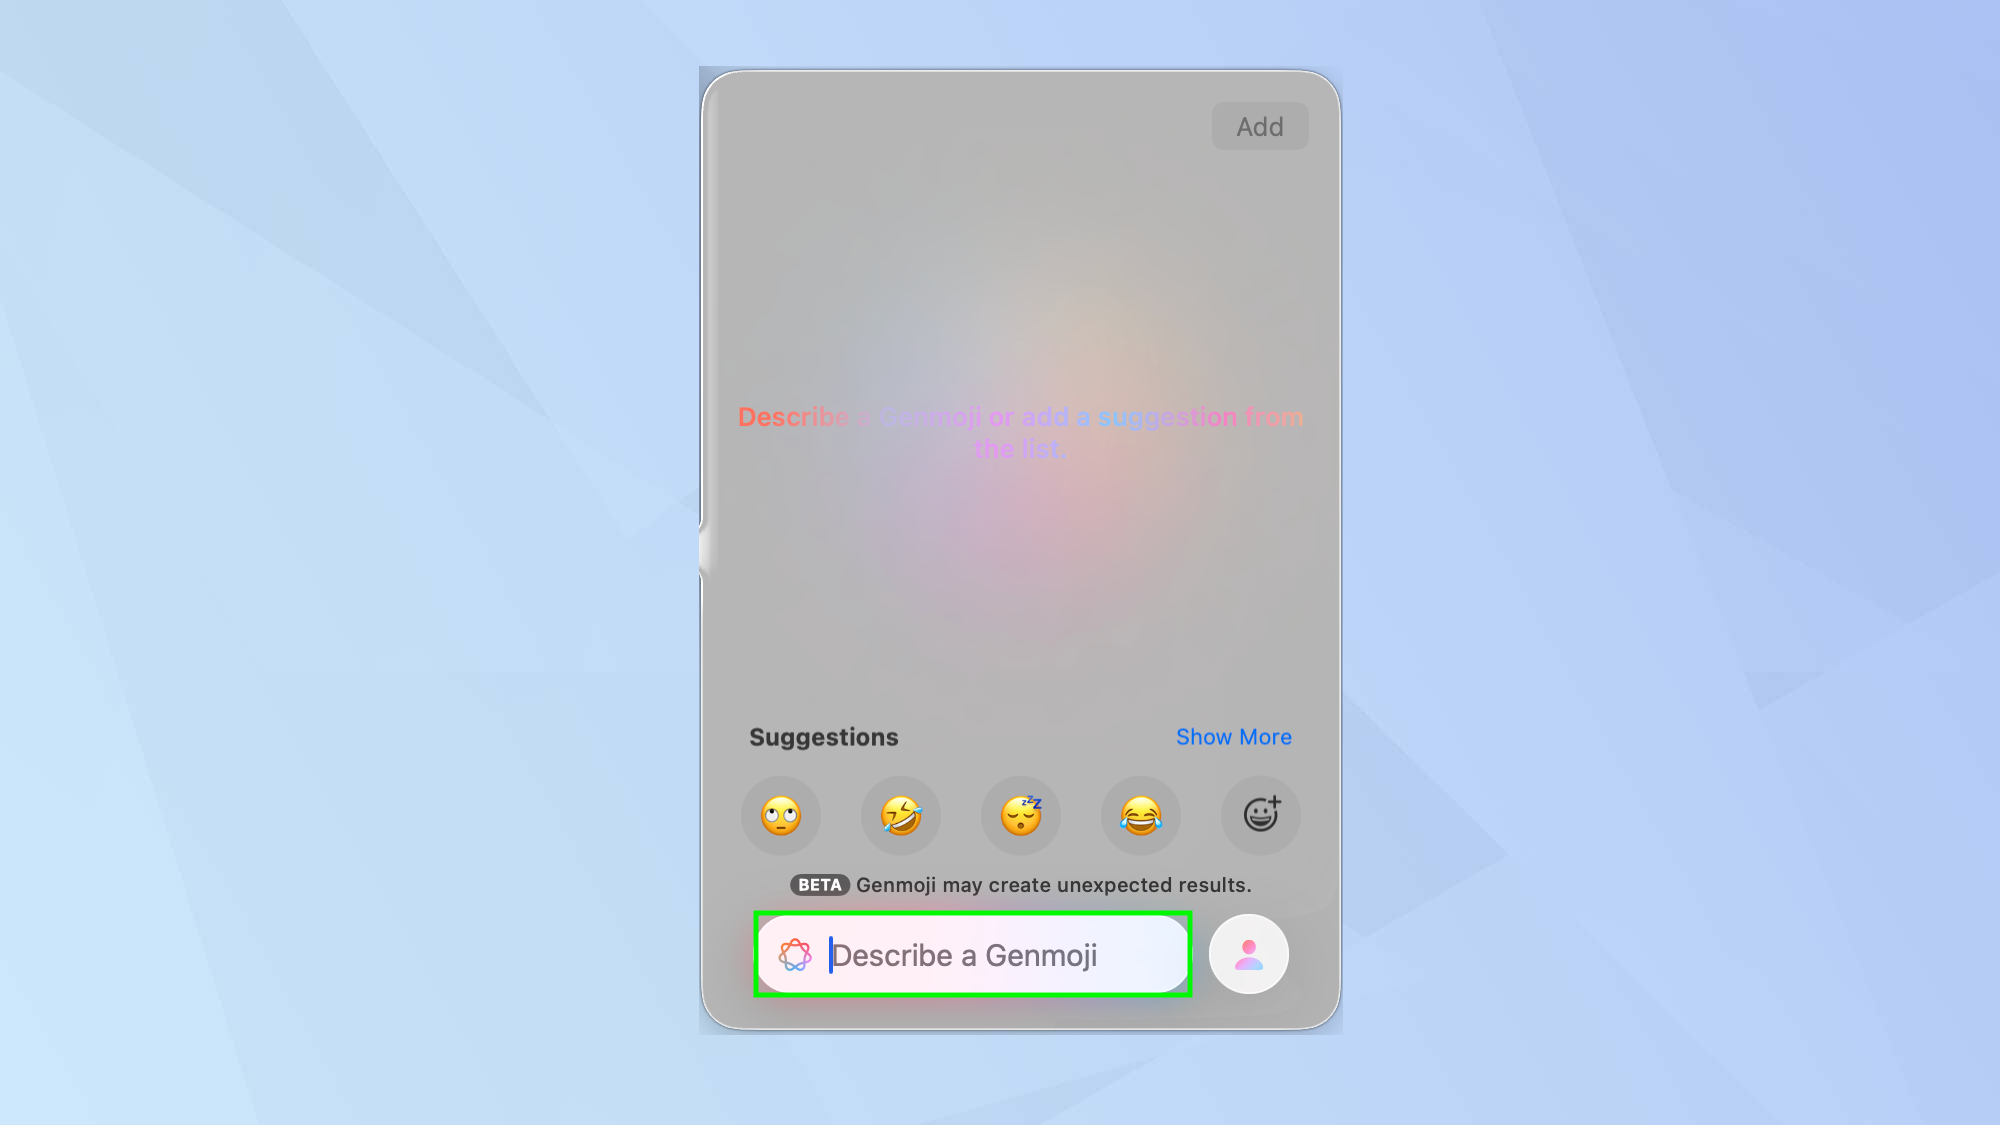
Now you can start to have some fun. Write a description of the sort of Genmoji you would like by simply selecting Describe an image, write a description and press return when you are done.
3. Choose a person
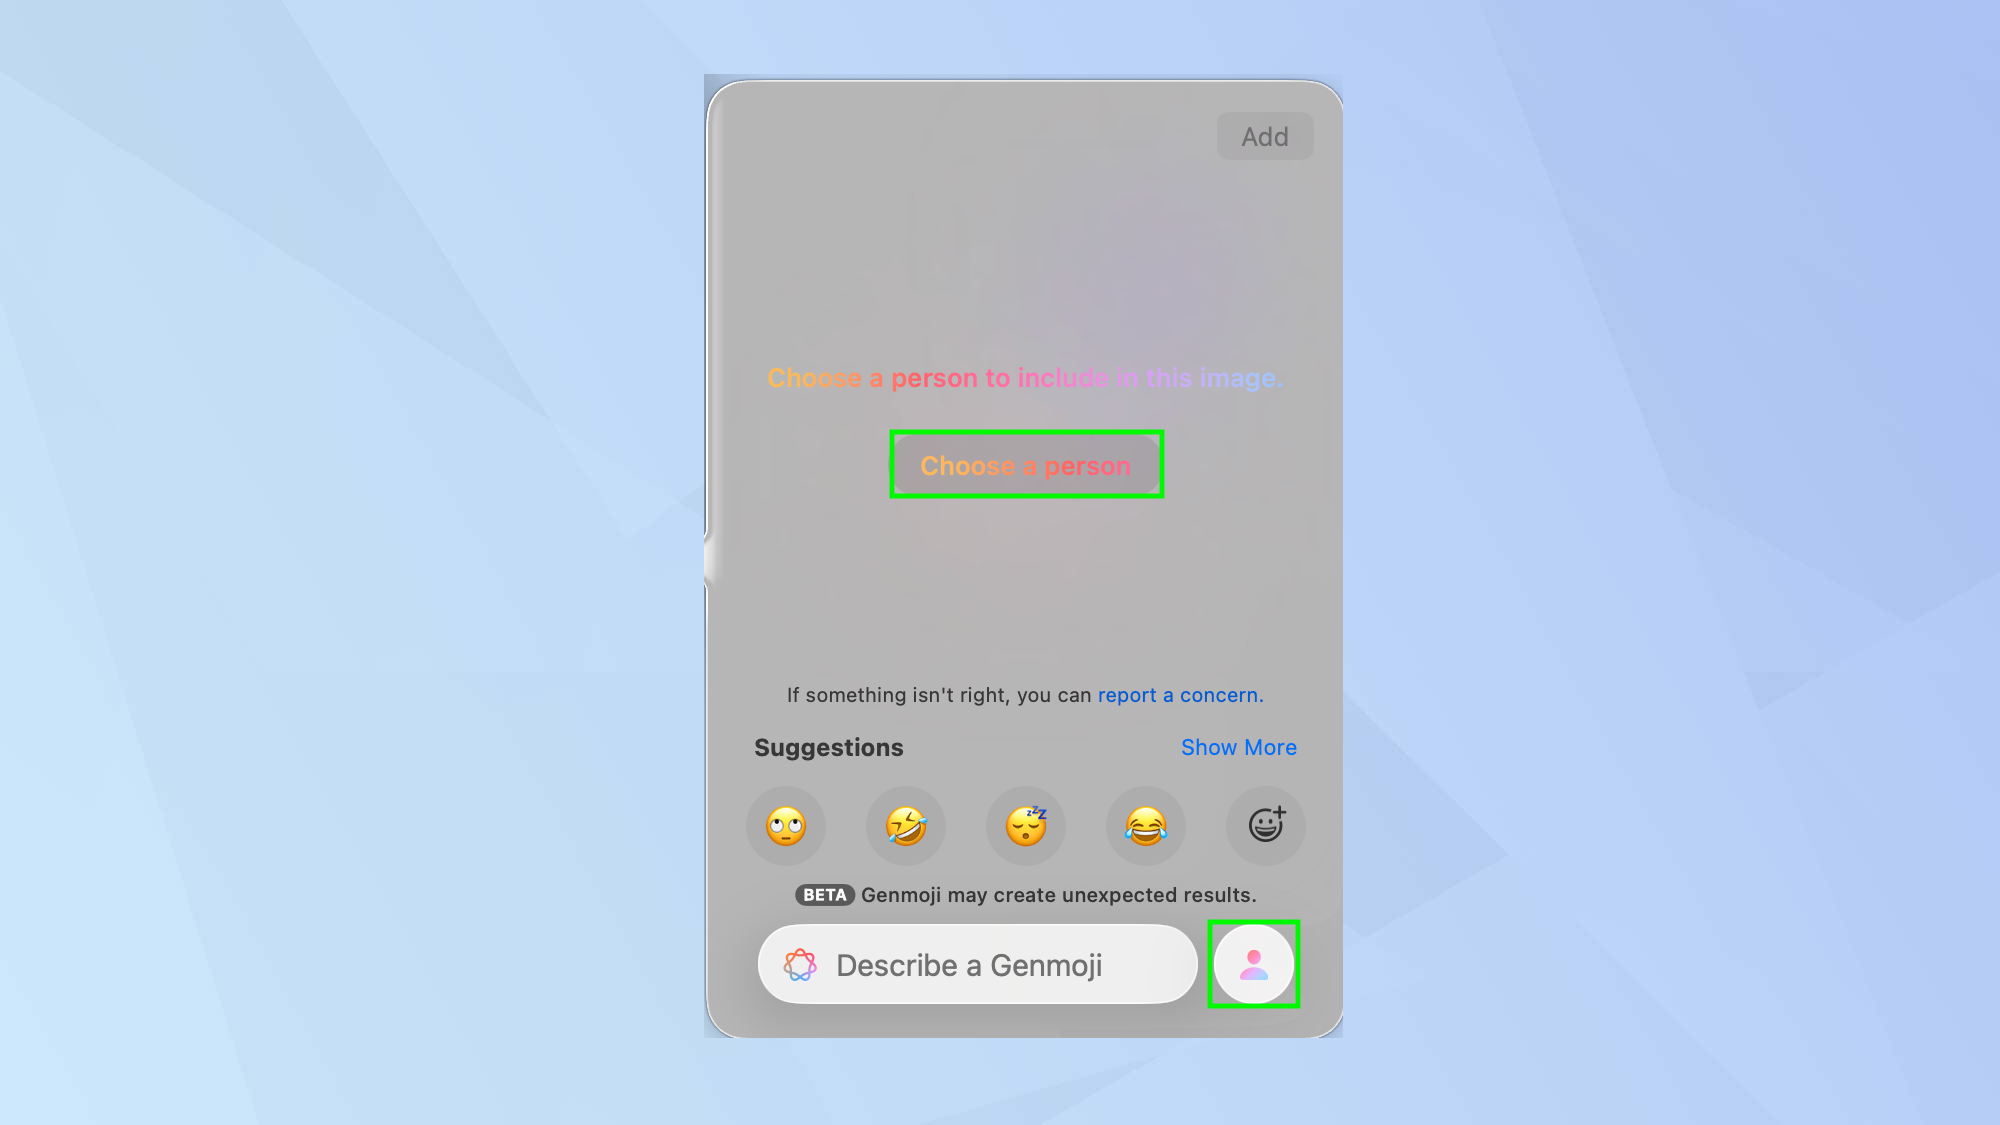
If you want to include a human, you can select Choose a Person when prompted or click the person icon. This will allow you to select someone from your photo library or choose an emoji.
If you select an emoji, you will get some basic options such as a basic face, hairstyle and skin tone.
4. Edit a person
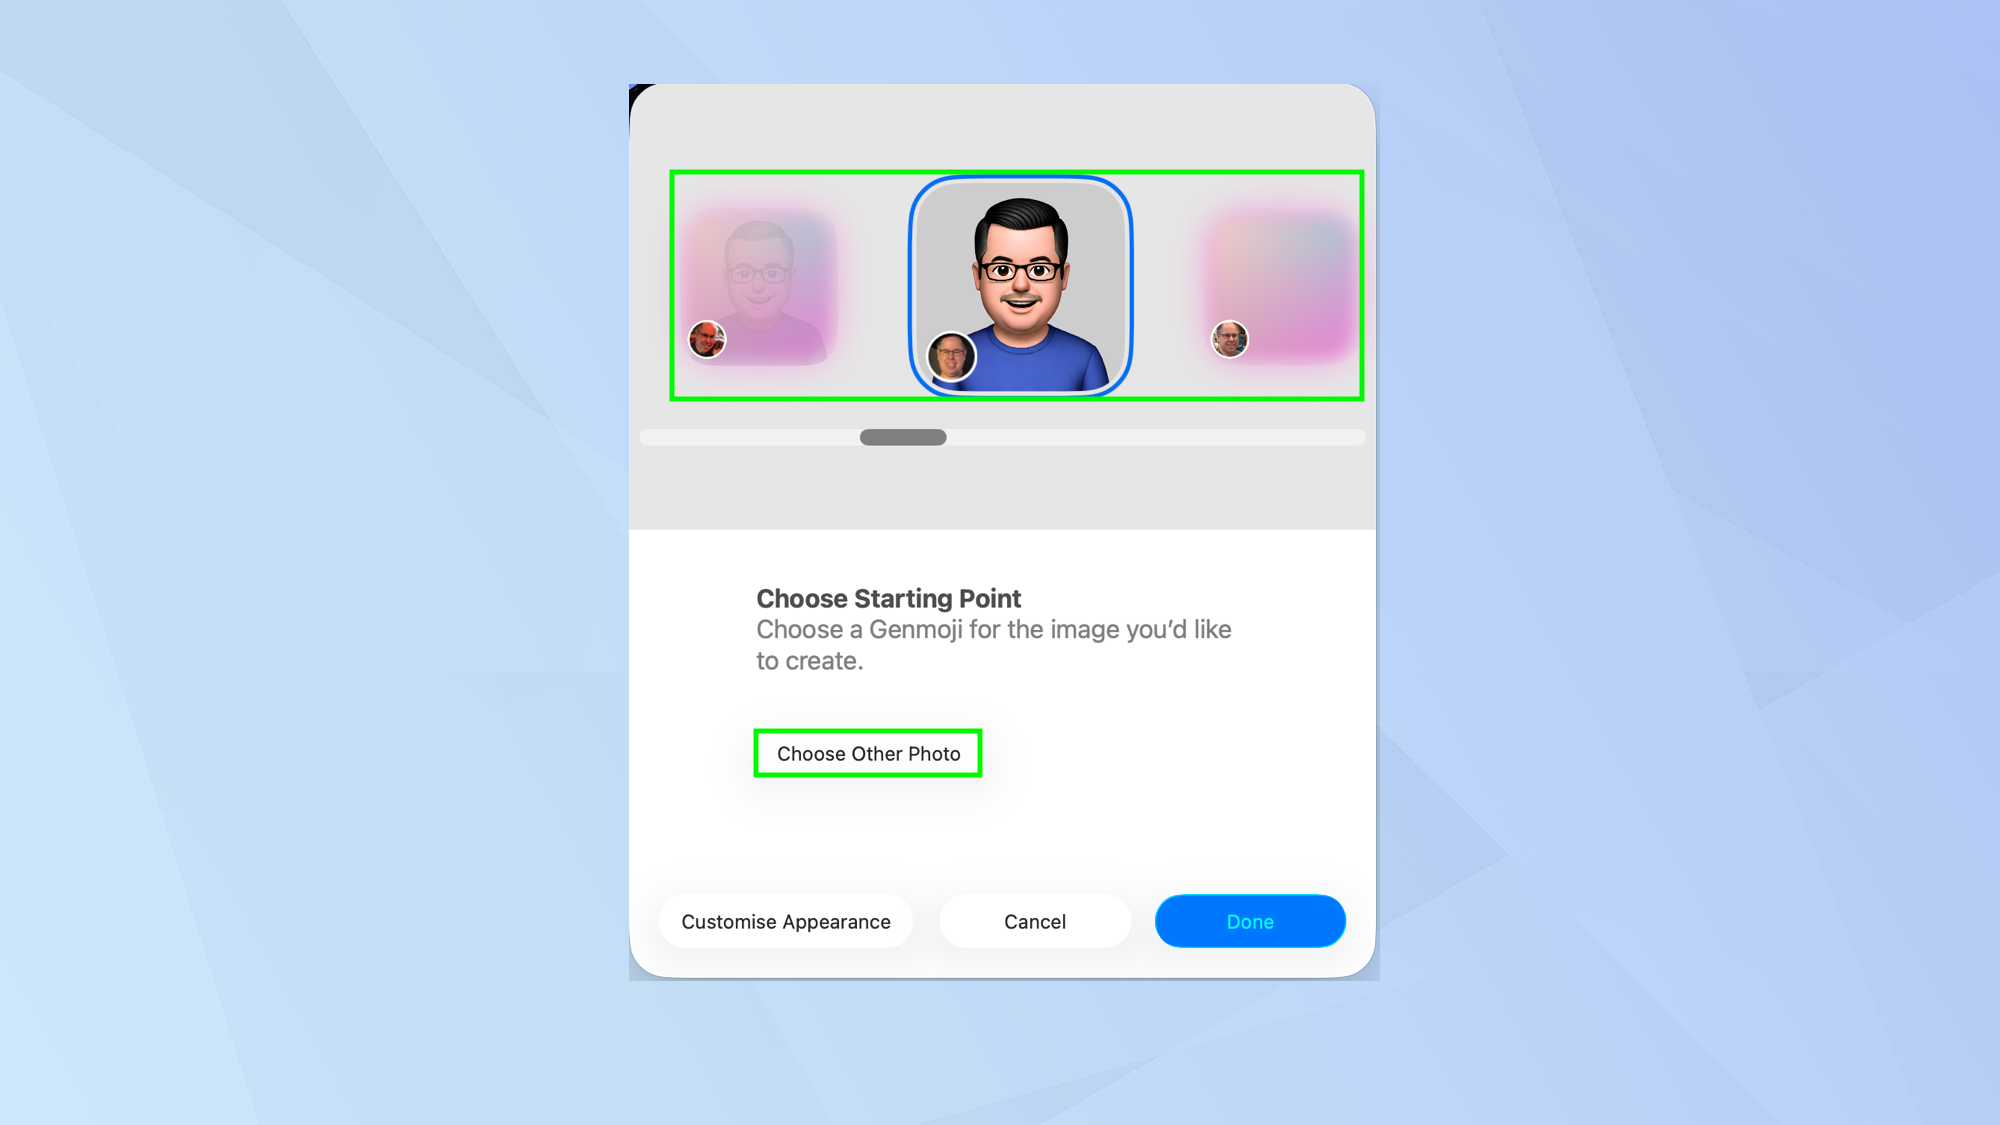
Genmoji gives you a range of options in relation to a person, allowing you to set a starting point. in order words, a basic look upon which a particular Genmoji can be based.
You can scroll through the different Genmoji based on different images of a person or select Choose Other Photo if you have another in mind.
If you’ve already produced a Genmoji based on a person, you can review these options if you click their profile image in the bottom-right corner and select Edit.
5. Customize appearance
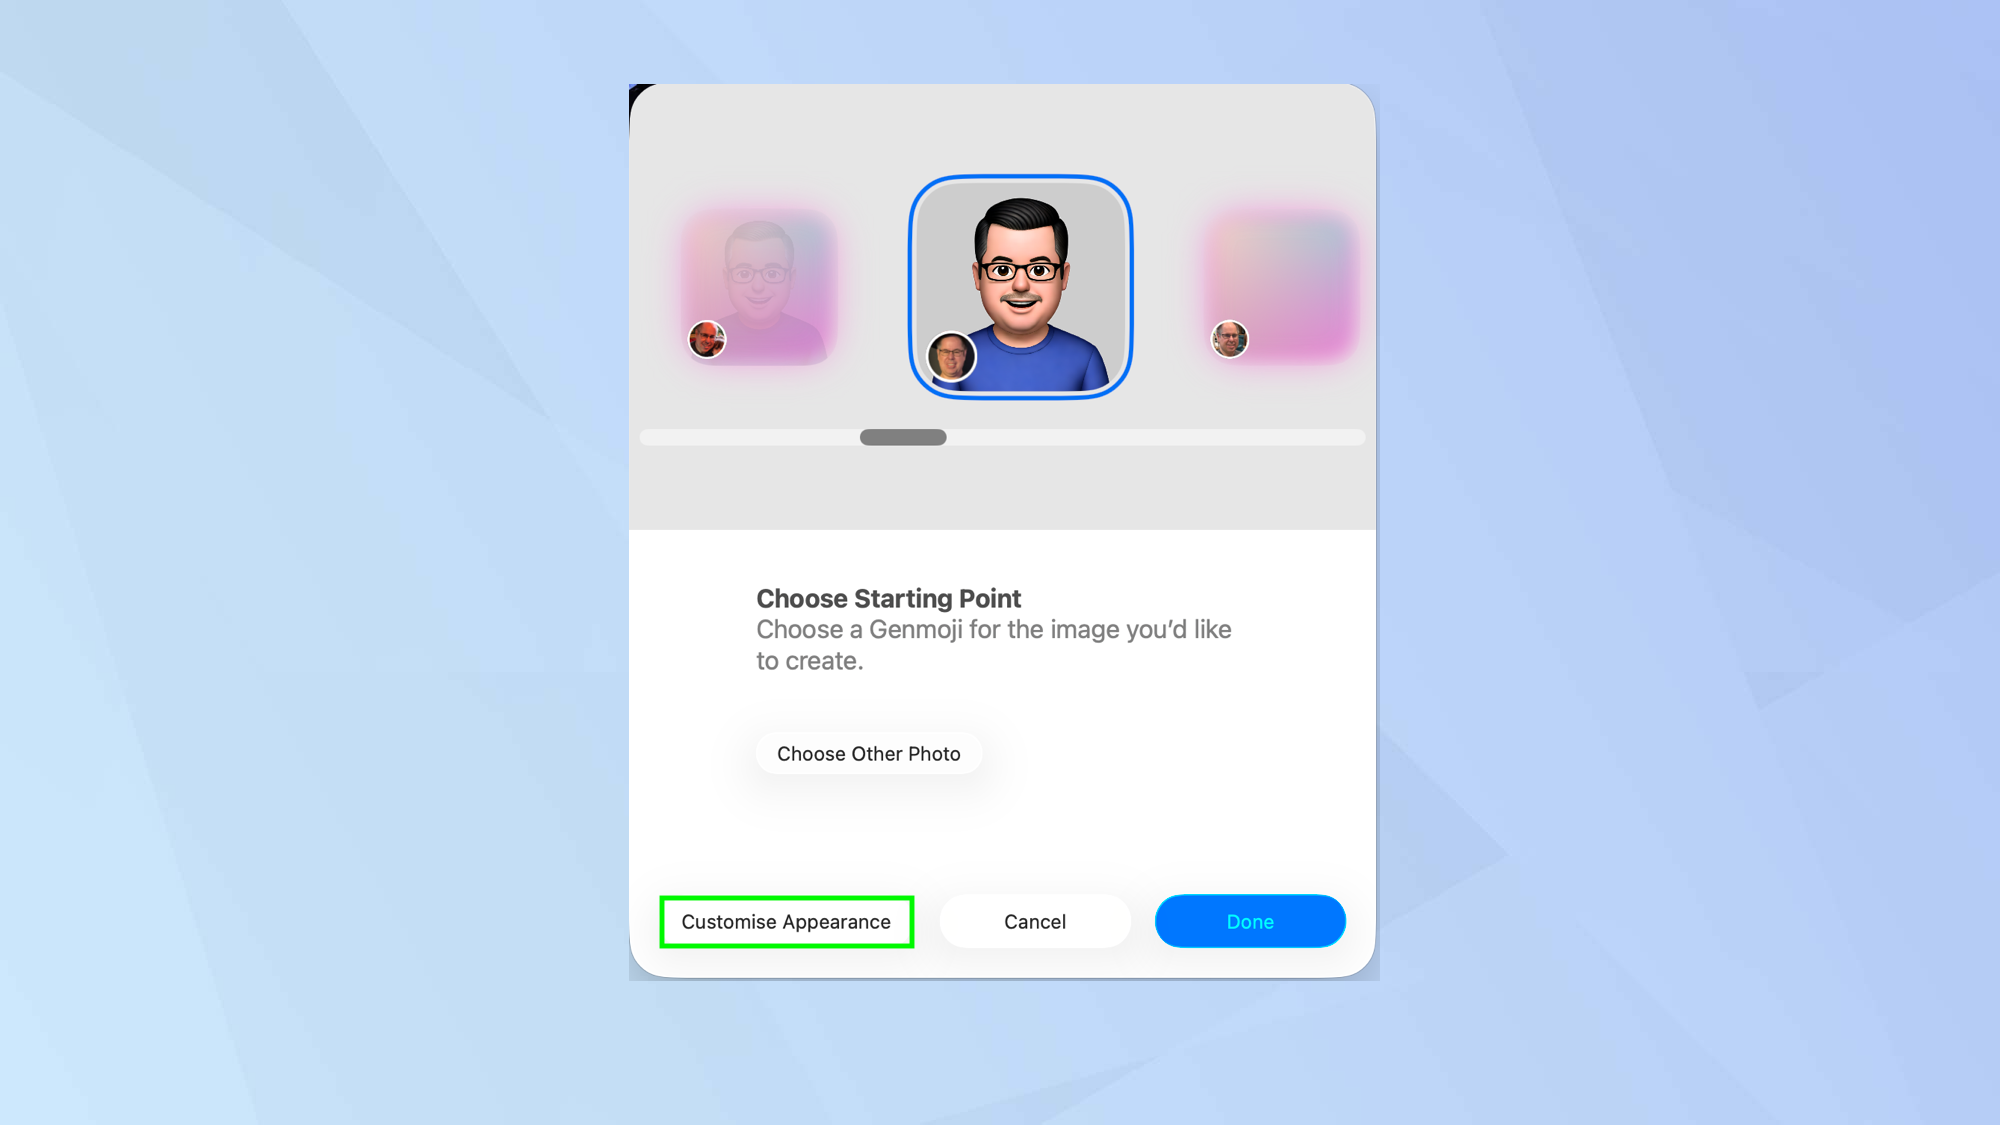
You can then begin to play around. To start, click Customize Appearance.
6. Make alterations
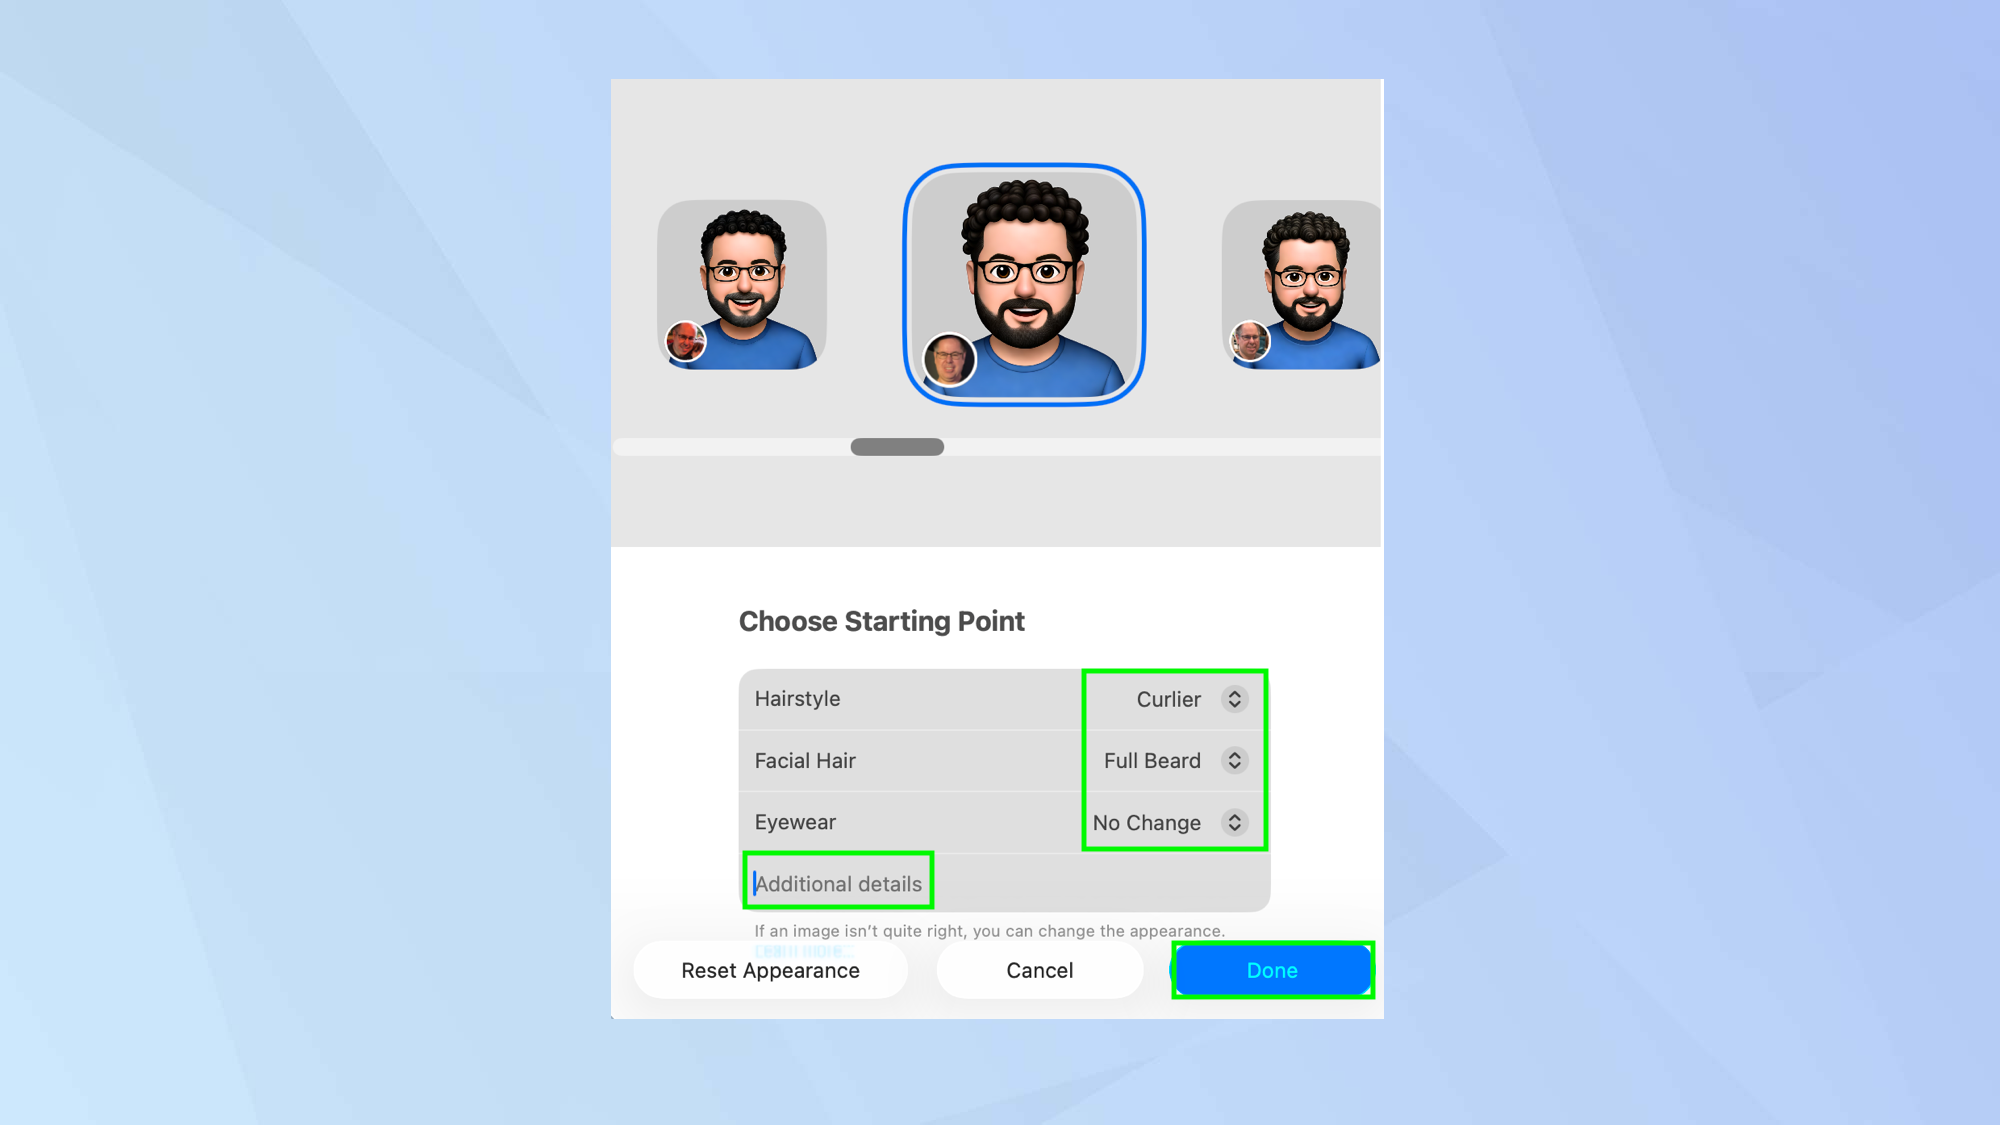
You can alter a person’s hairstyle (curlier, wavier, bald and more), change facial hair (full beard, goatee, moustache) and choose eyewear (sunglasses, prescription glasses). You can also type additional details.
7. Use suggestions
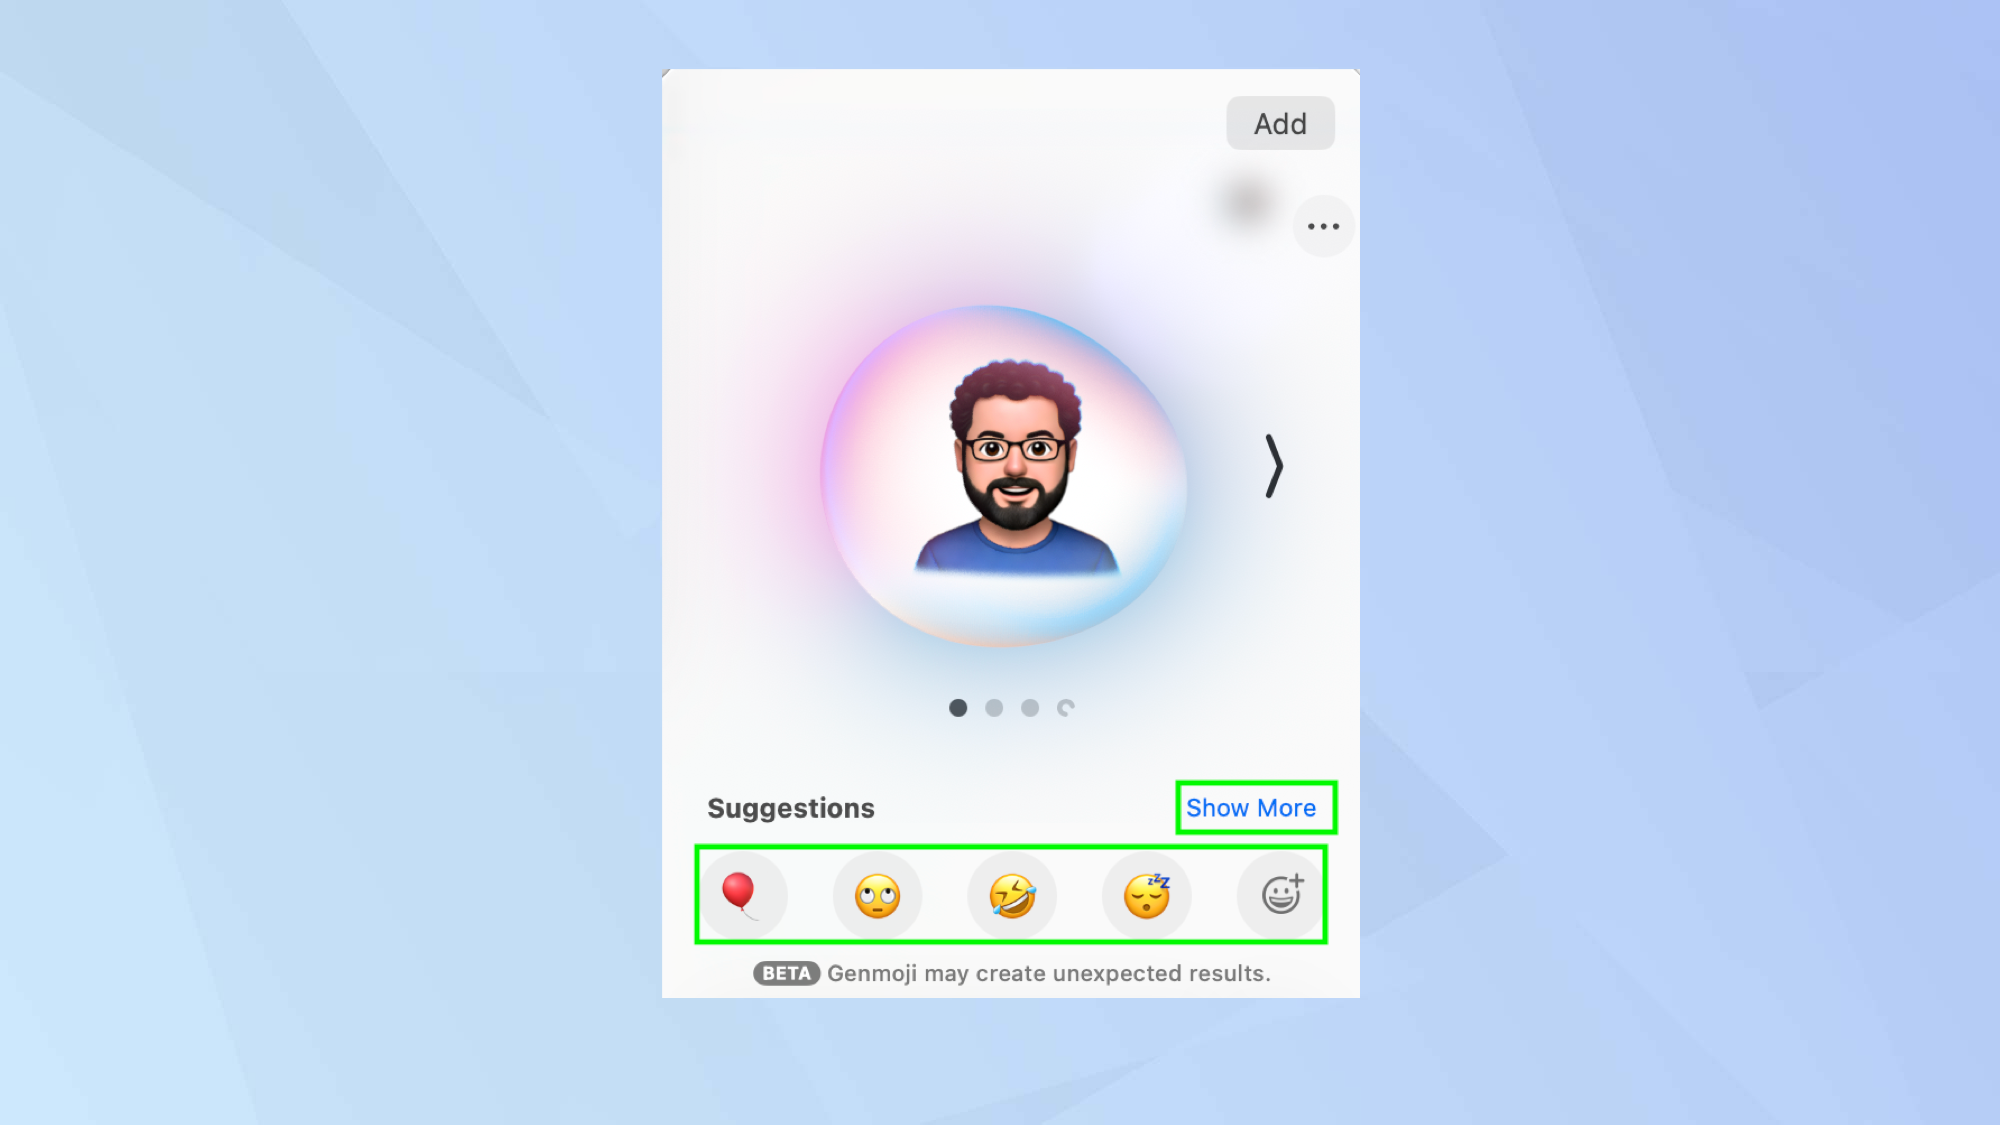
When you have a suitable starting point, you can then go further and look through the suggestions. Click Show More and you can check out lots of themes, expressions, costumes, accessories and places.
When you click on a suggestion, it will be thrown into the ring, allowing a fresh Genmoji to be created based on what you want.
8. Add a Genmoji
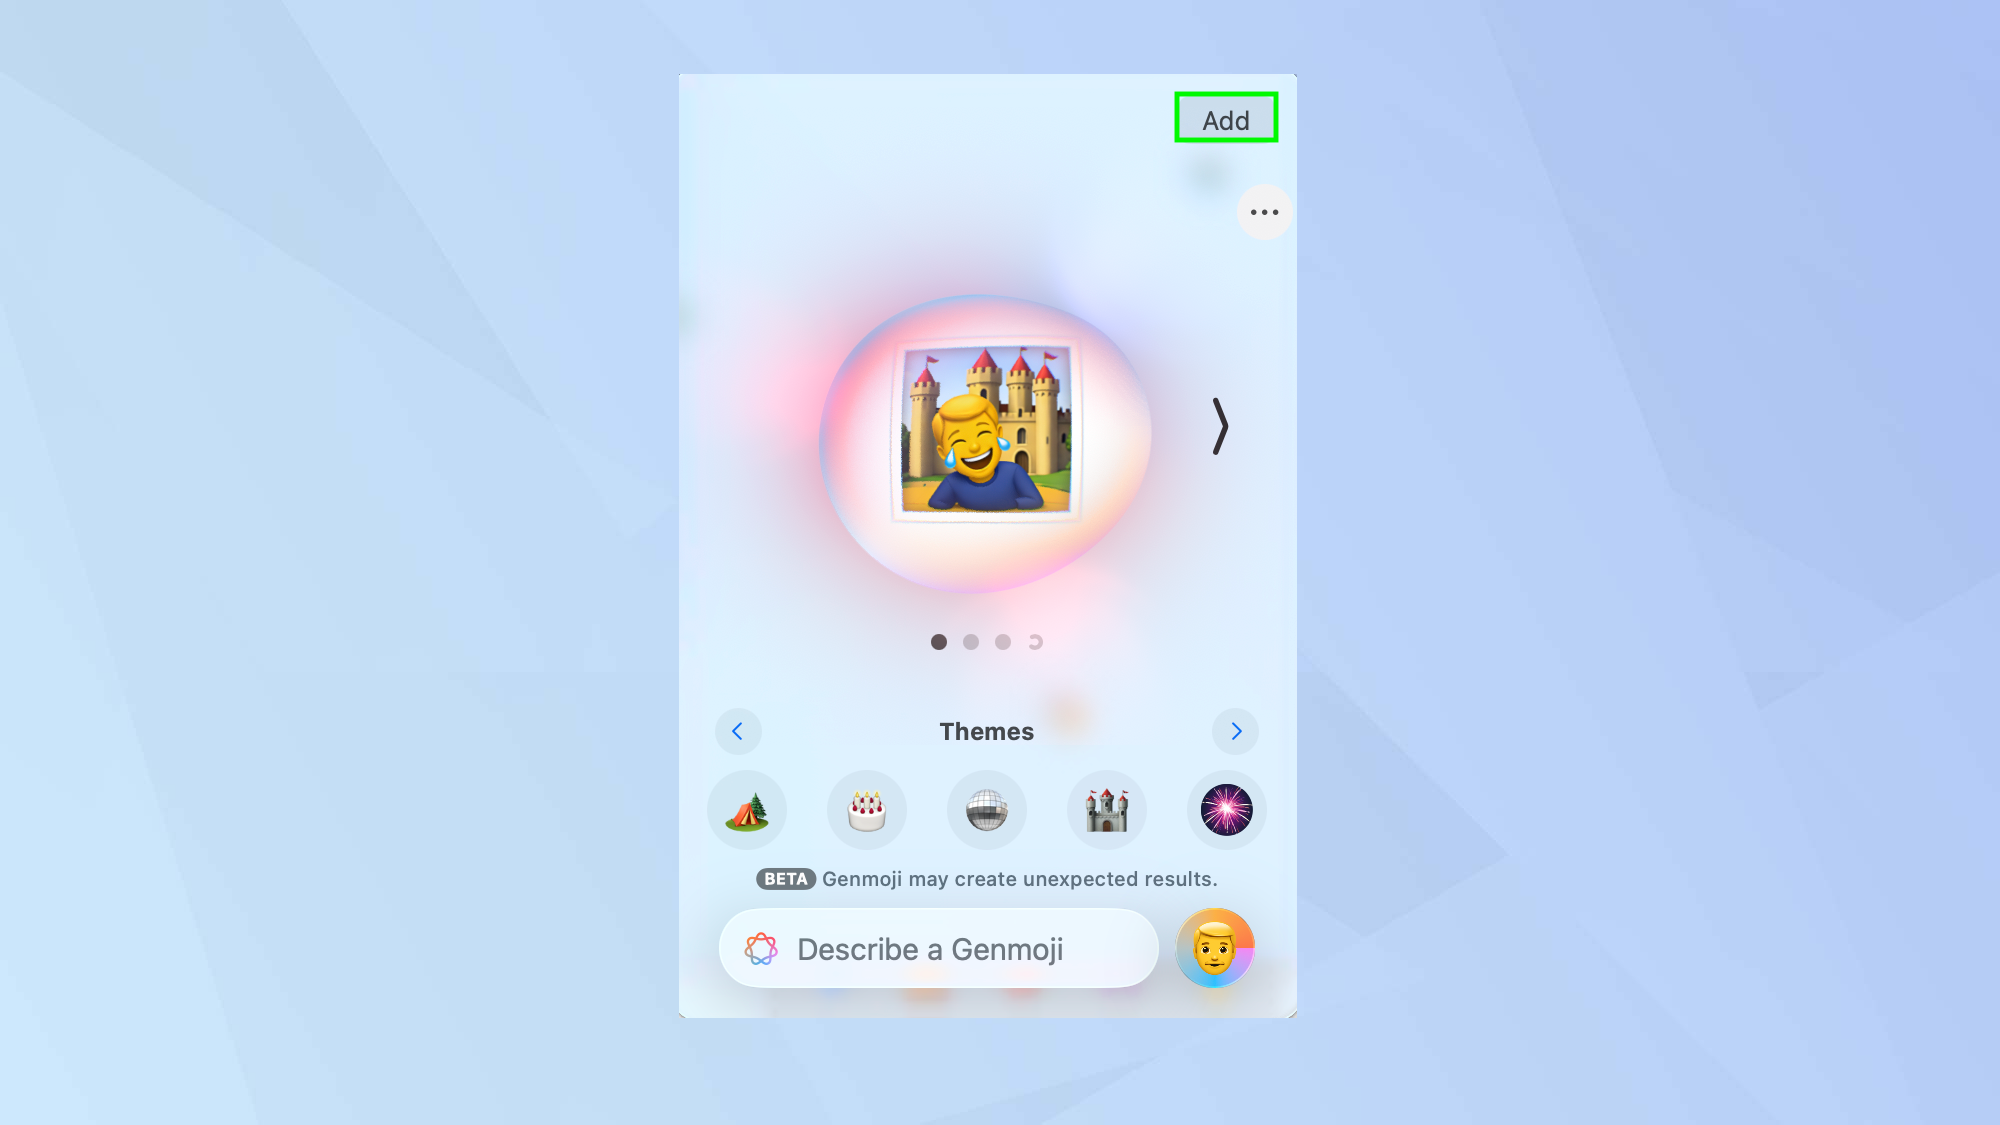
Once you have created your Genmoji and you’re happy with it, simply click Add and it will become usable. You will find it is saved as a sticker in the Character Viewer.
Follow Tom's Guide on Google News and add us as a preferred source to get our up-to-date news, analysis, and reviews in your feeds. Make sure to click the Follow button!


