Watch video: Shoot sports portraits with slow-sync flash
A burst of flash enables us to freeze motion, while a long exposure can create motion blur. Both are great techniques but, if you’re looking for a creative approach to action shots, the slow-sync flash method has it all in a single frame.
• Stay on top of the action with the best cameras for sports photography
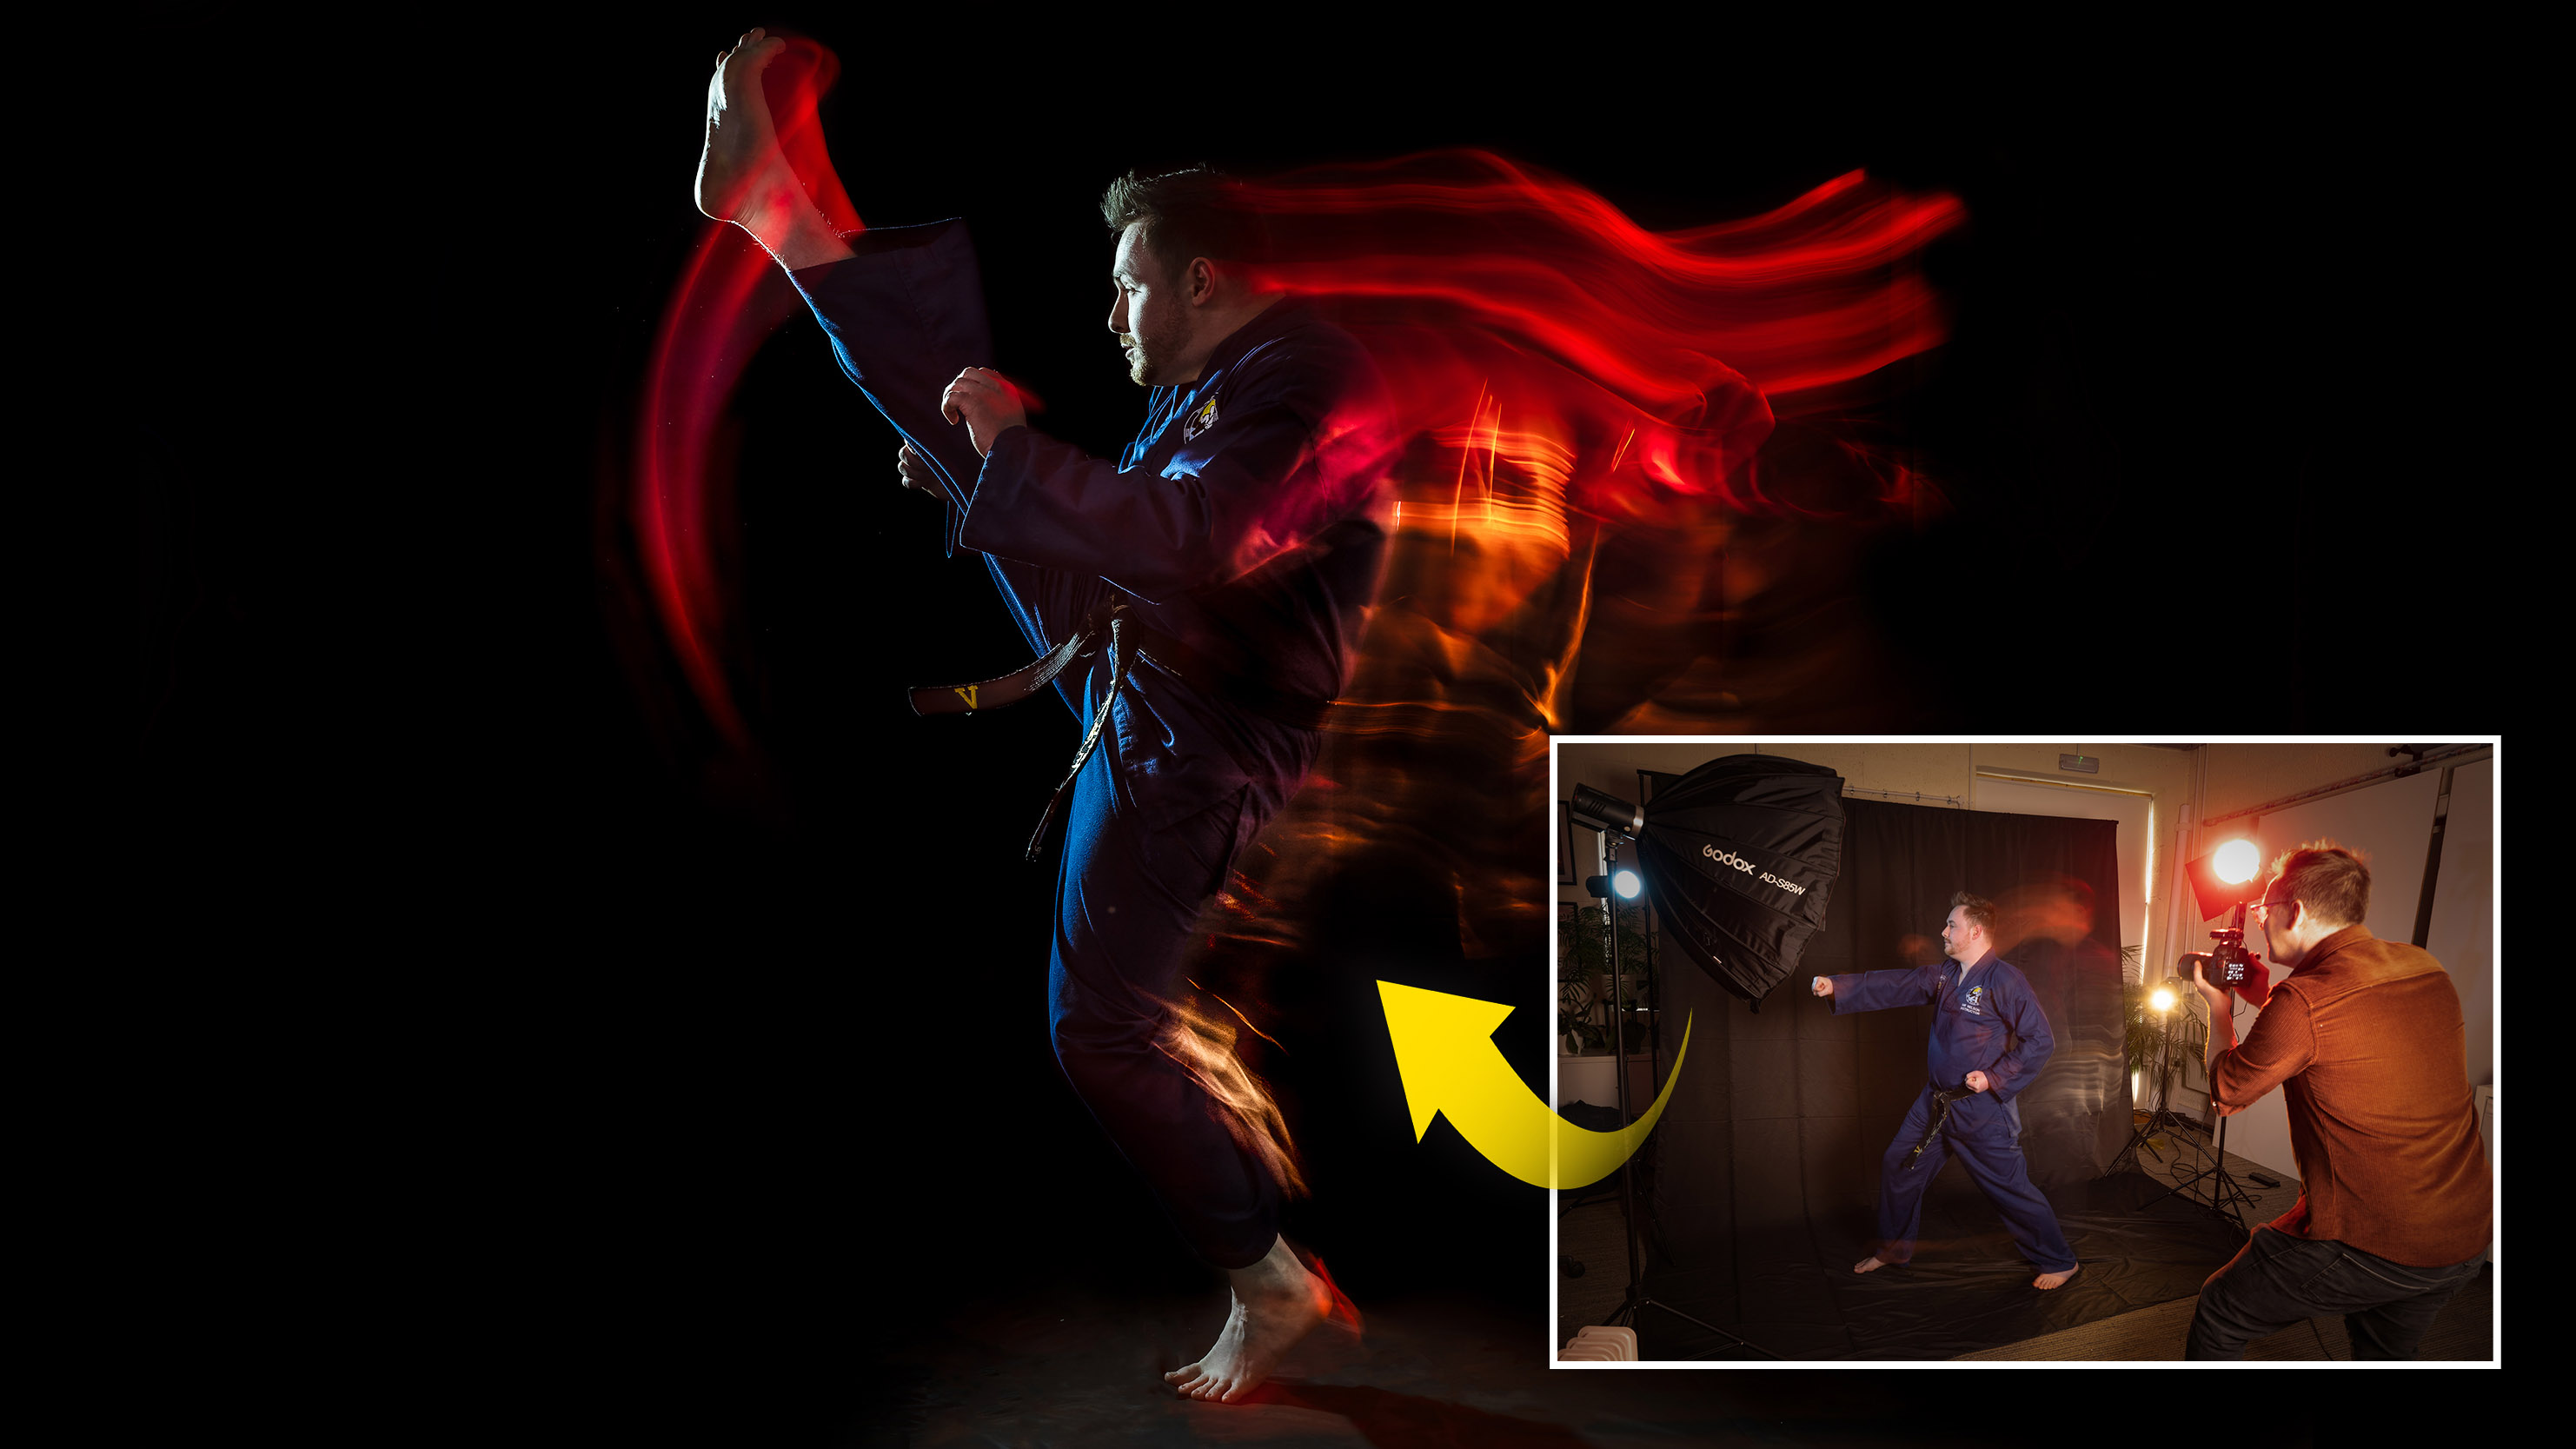
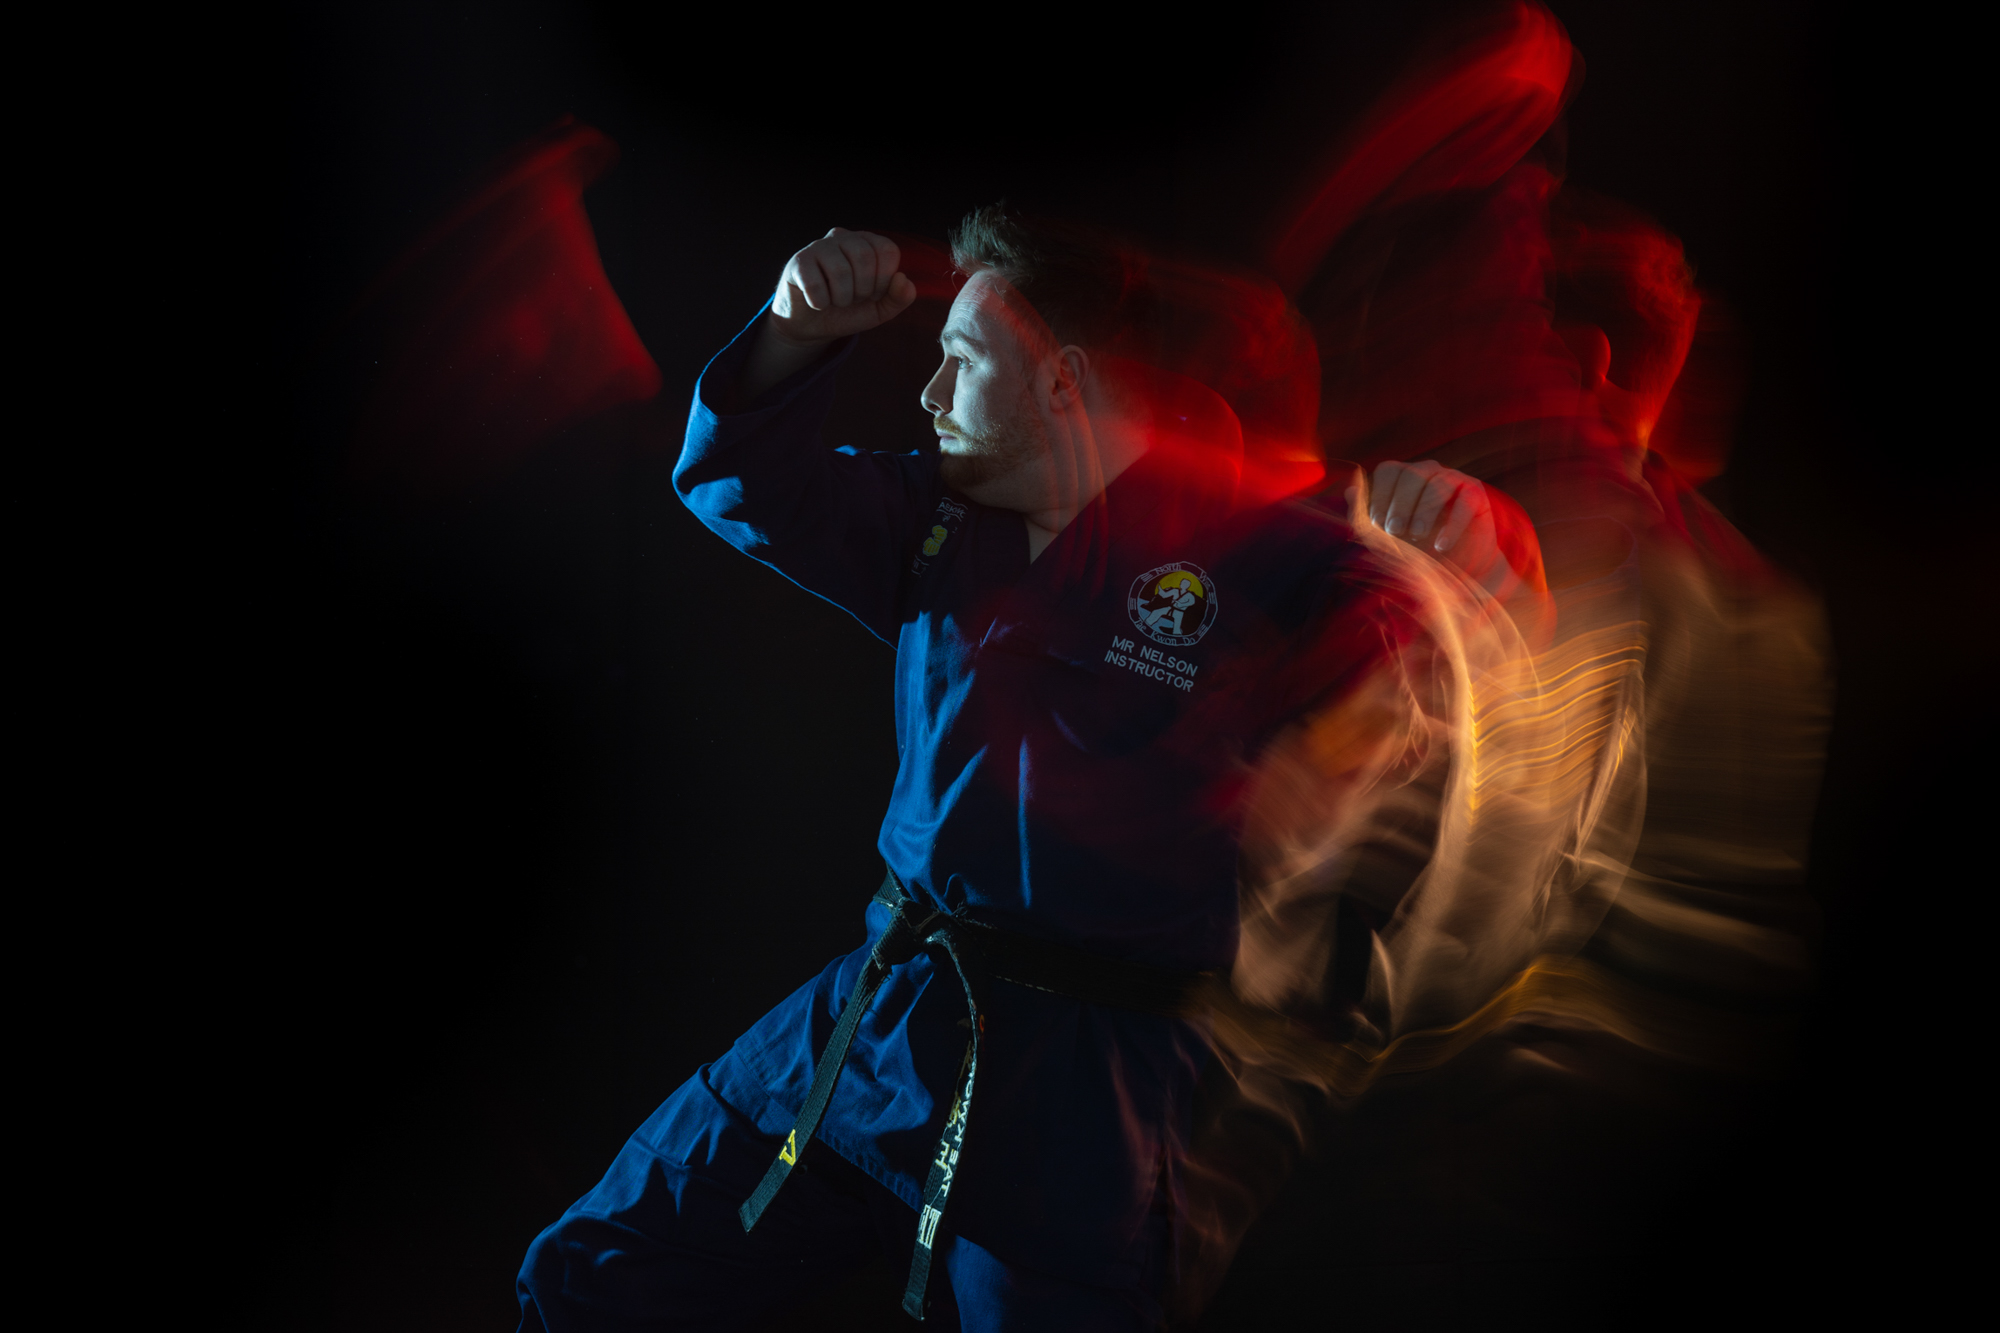
Sometimes called shutter ‘dragging’, this is where we use a flash with a longer-than-normal exposure to introduce motion blur. It’s a great trick to try out for action or sports subjects, such as our Taekwondo expert. By using a combination of flash and gelled LED lighting, we can create gorgeous streaks of blur to convey the movement of the subject, along with a burst of flash to freeze the motion.
Whenever we use flash, we are effectively making two exposures in one. First there’s the flash exposure, where the subject is lit by the near-instant burst of light. But there’s also the ambient exposure, where the light in the scene – whether natural daylight, room lights or other artificial lighting – plays a part. Often the flash is so powerful that ambient light plays a negligible role in the overall exposure. But here, by stretching our shutter speed to several seconds, the divide is obvious.
The ambient exposure creates the blur and the flash freezes the final movement of the subject. It might look like a Photoshop effect, but this is done entirely in-camera. There’s an element of trial and error in timing the motion of your subject and balancing the lighting, but when it all comes together the results can be jaw-dropping.
1. The problem with first curtain
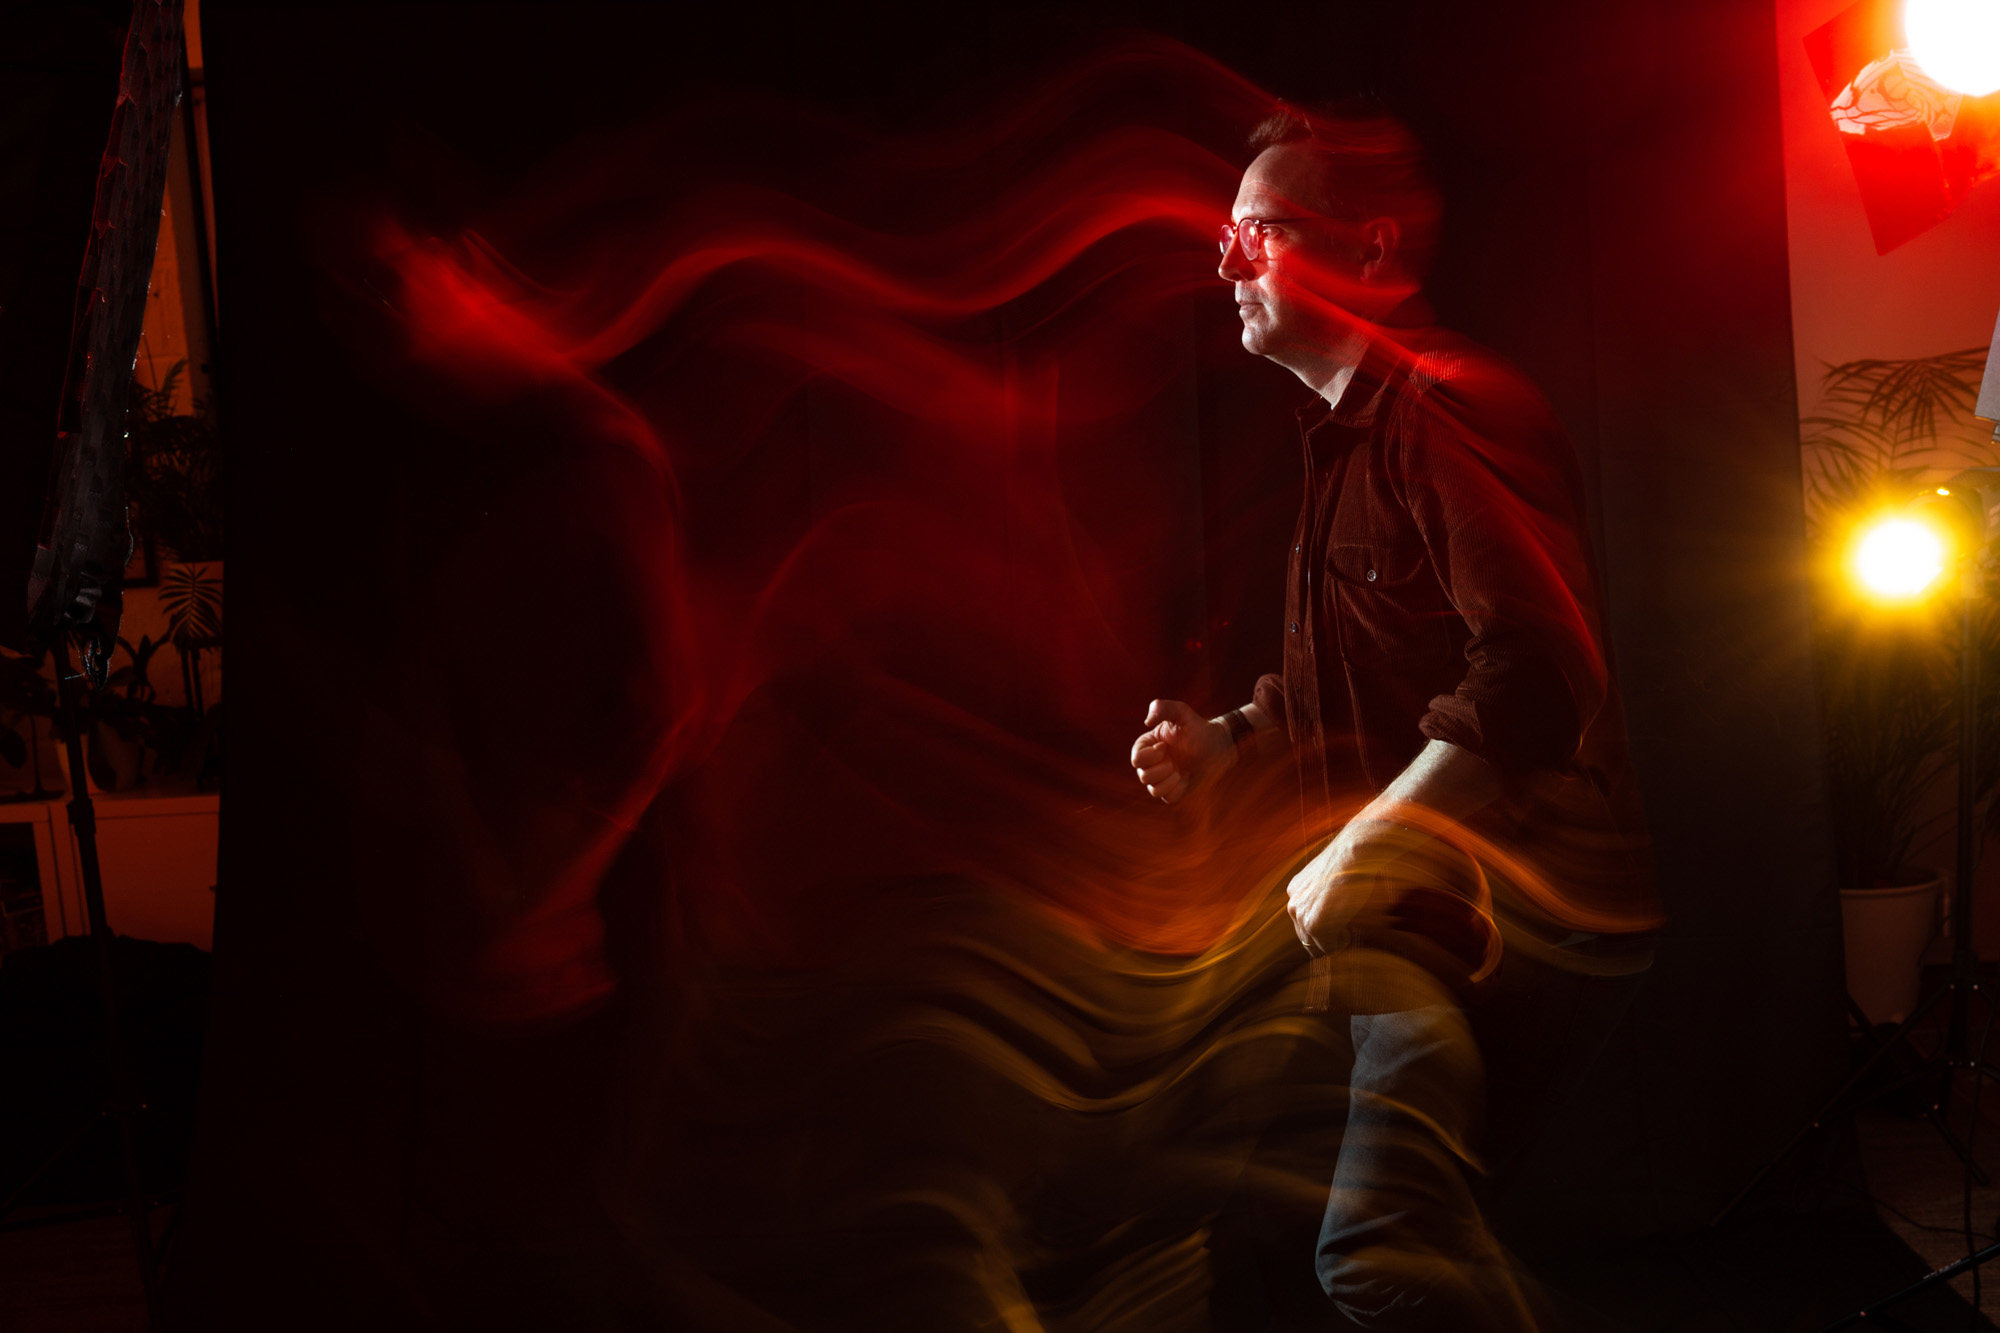
The default is for flashes to fire at the start of an exposure, called the first or front curtain. But when using a slow shutter speed, it can look a bit strange. Take a shot of yourself running from one side to the other; here, the blurry parts overlap the sharp parts and it looks like the subject is moving backwards.
2. Set rear curtain sync
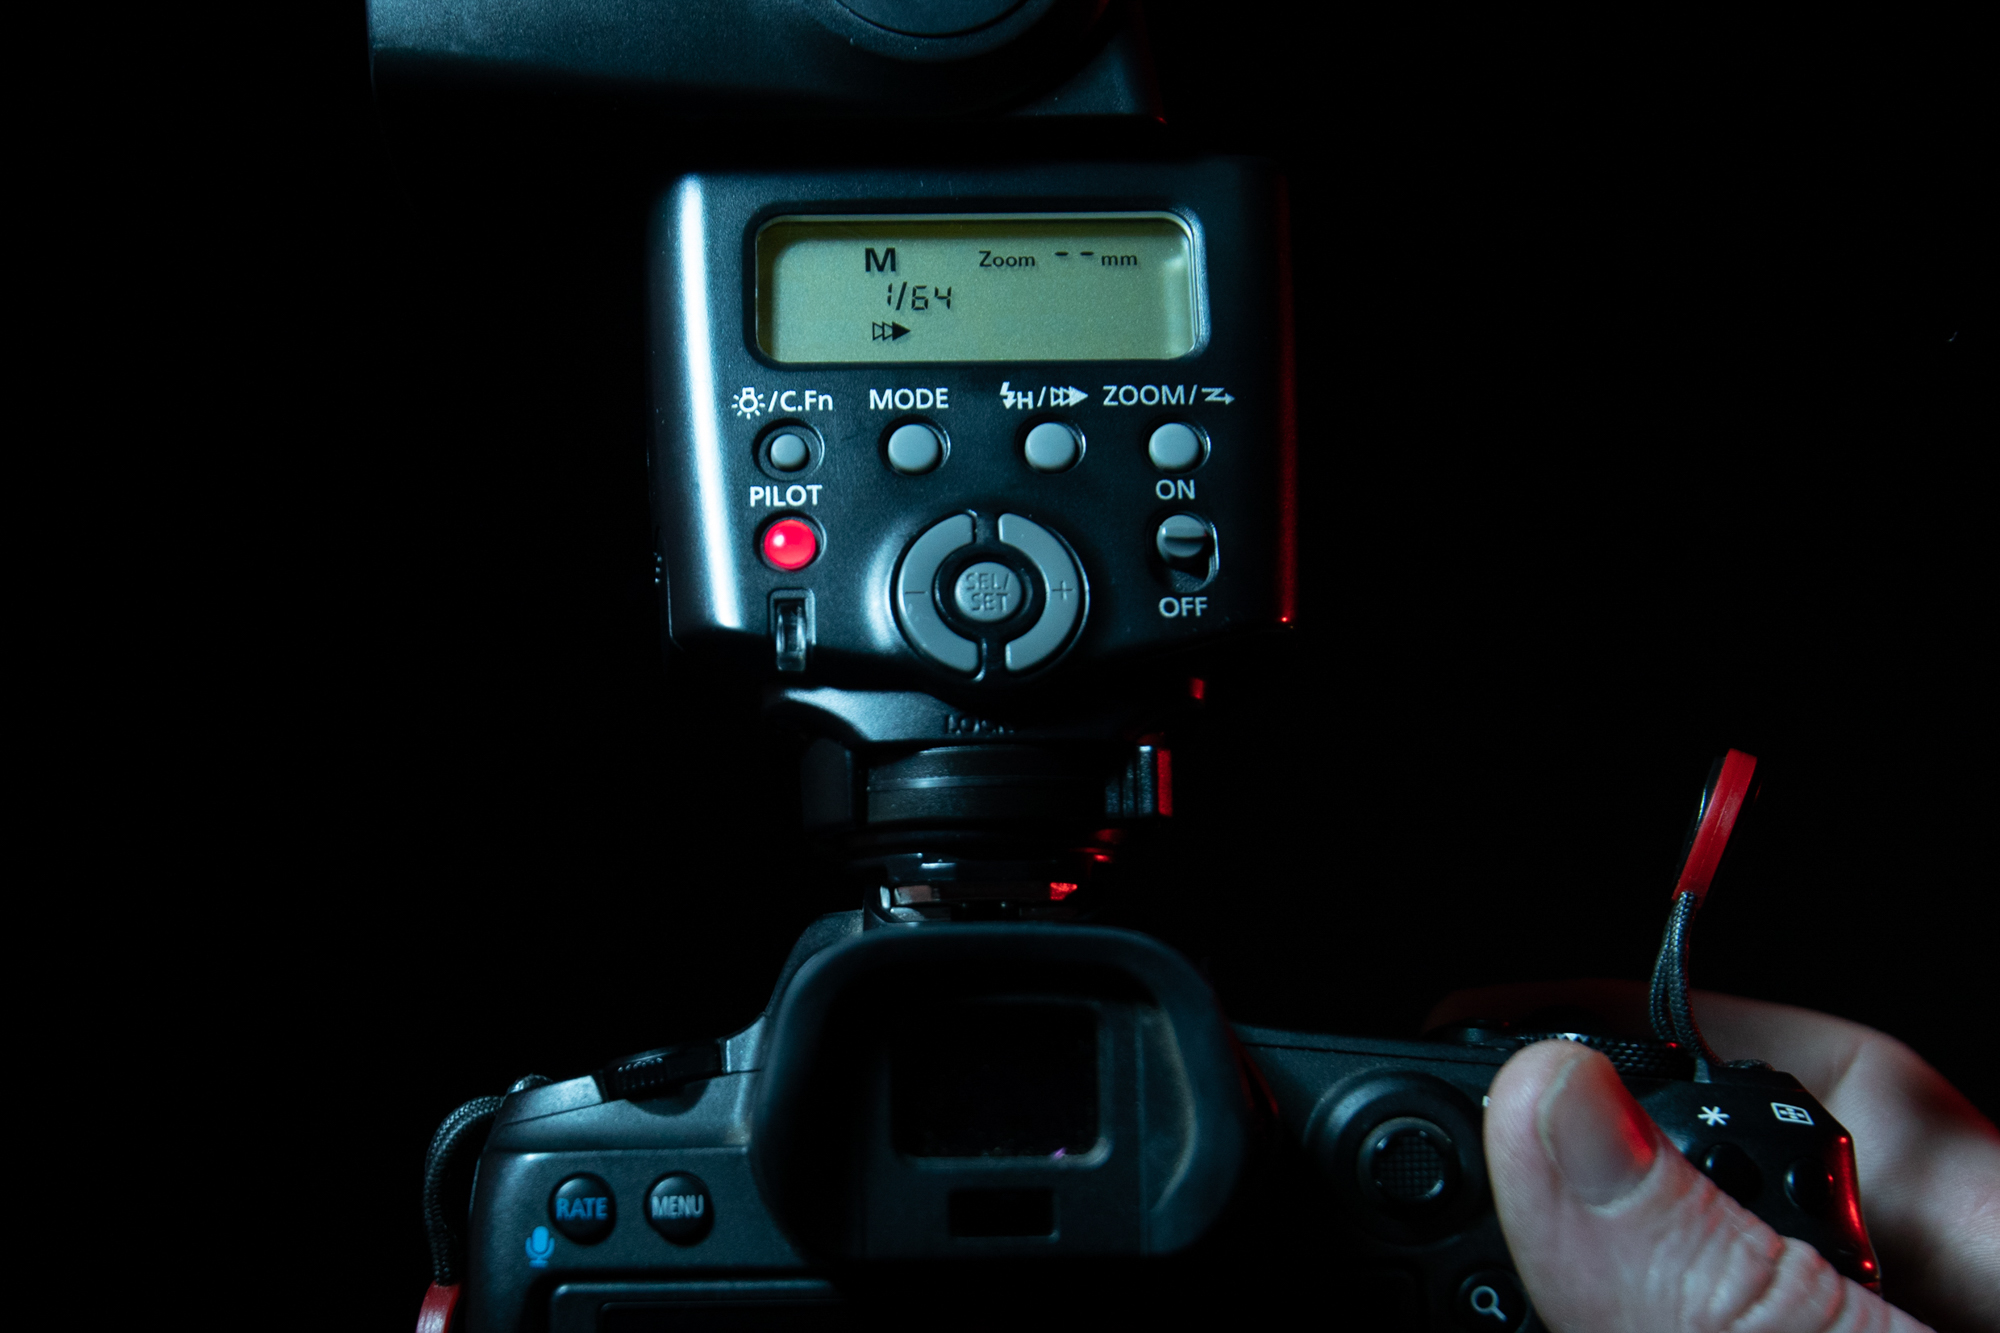
To get the flash to fire at the end of the exposure instead, we need to use rear or second curtain sync. If you have a compatible wireless trigger for your flashes, set it on the trigger. Or you can use a hotshoe-mounted flashgun, then set the off-camera flashes to optical trigger mode, so they fire upon detecting the light.
3. Natural motion
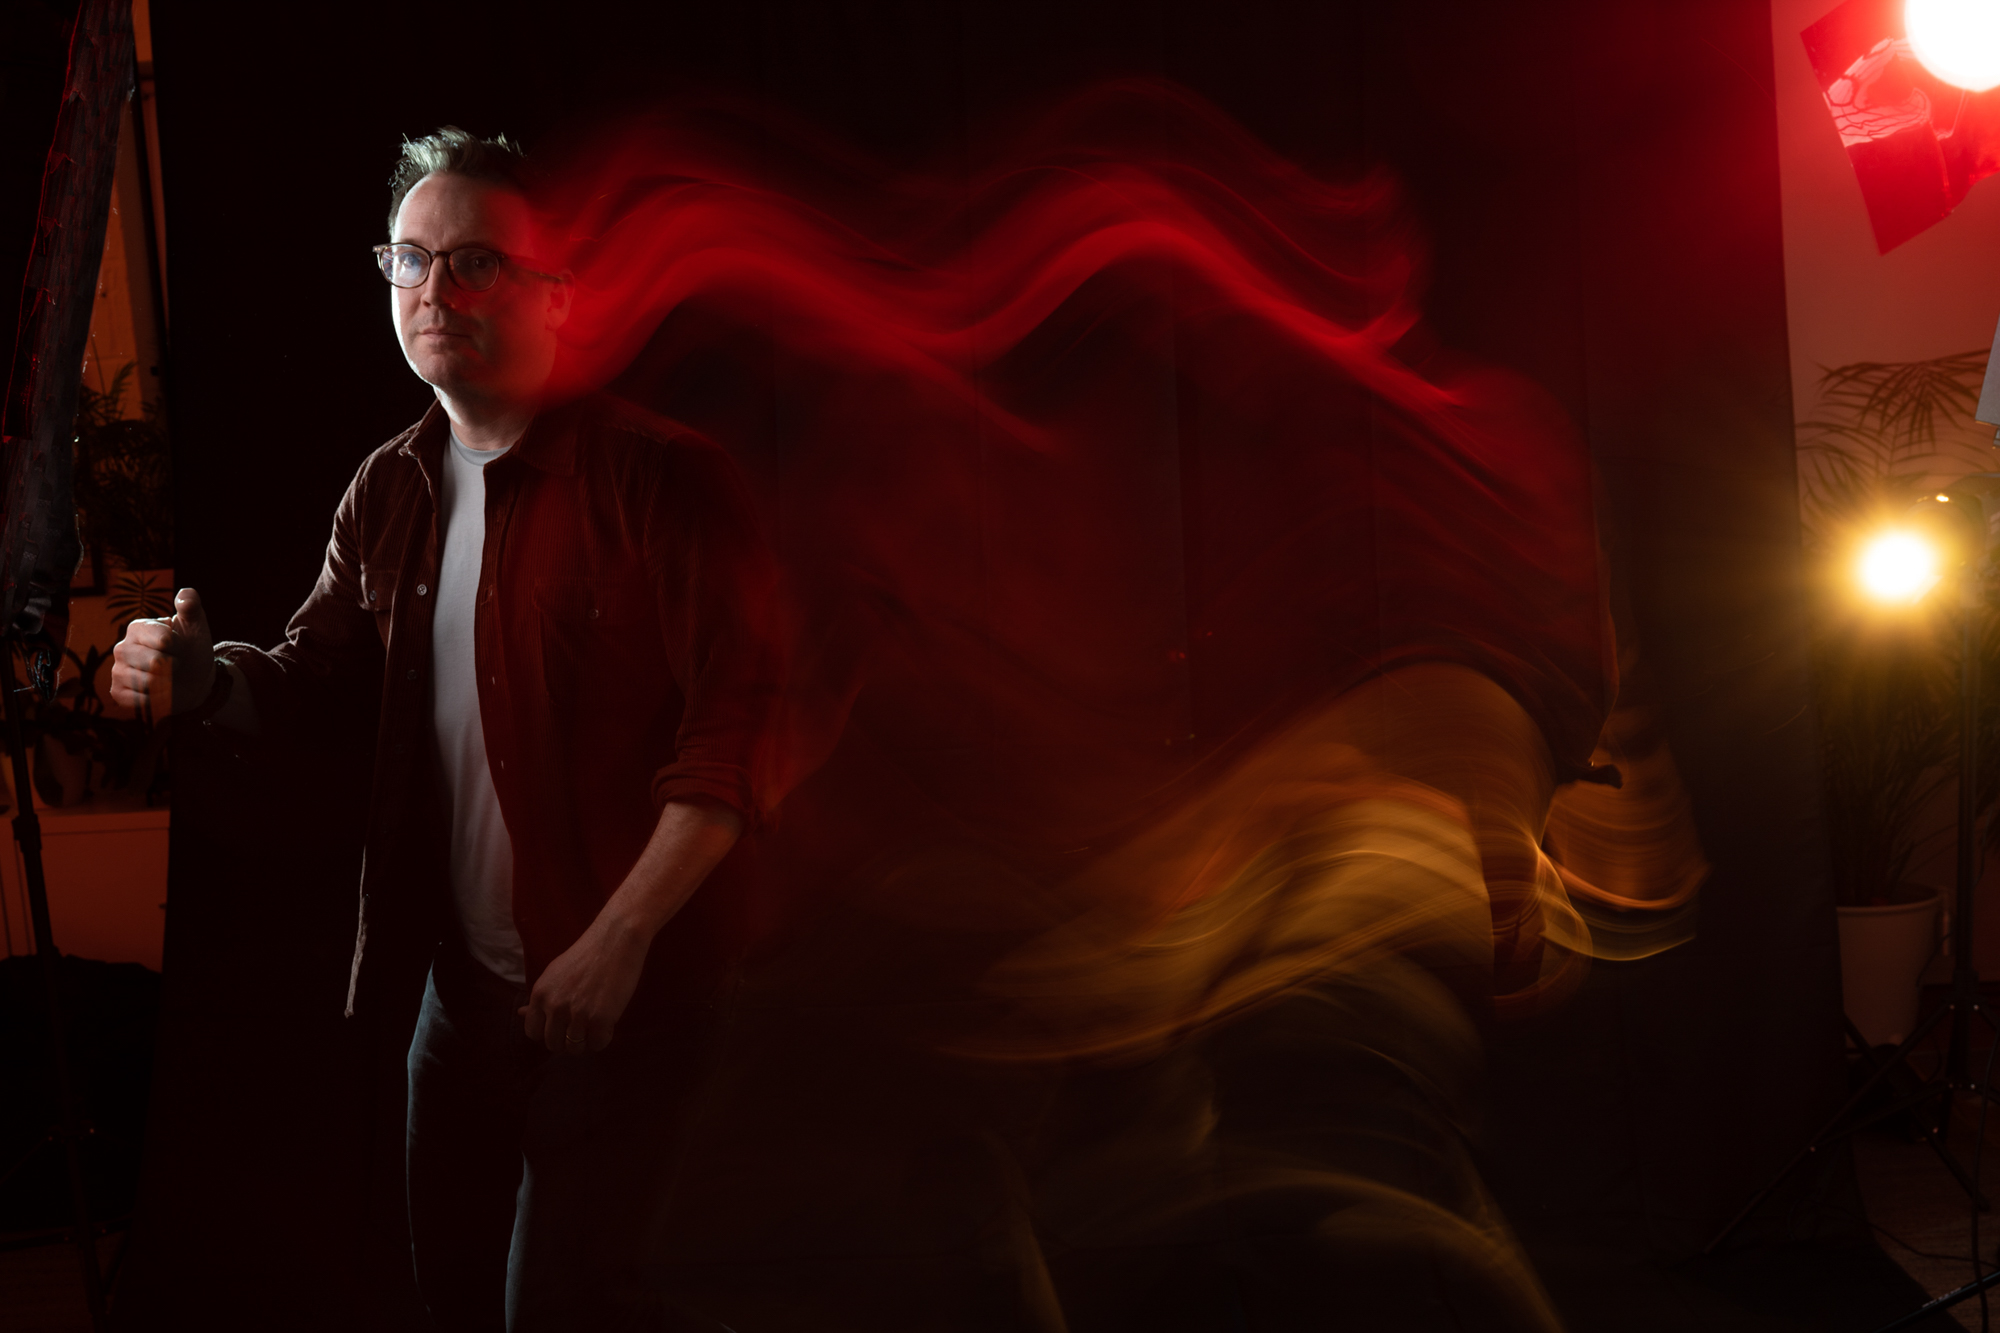
When set to rear curtain sync, the flash fires just before the second curtain closes the shutter (or for electric shutters, just before the sensor readout stops). Here this results in better definition, a clearer divide between flash and blur, and visually it makes more sense because the blur trails behind the motion.
4. Tint your lights
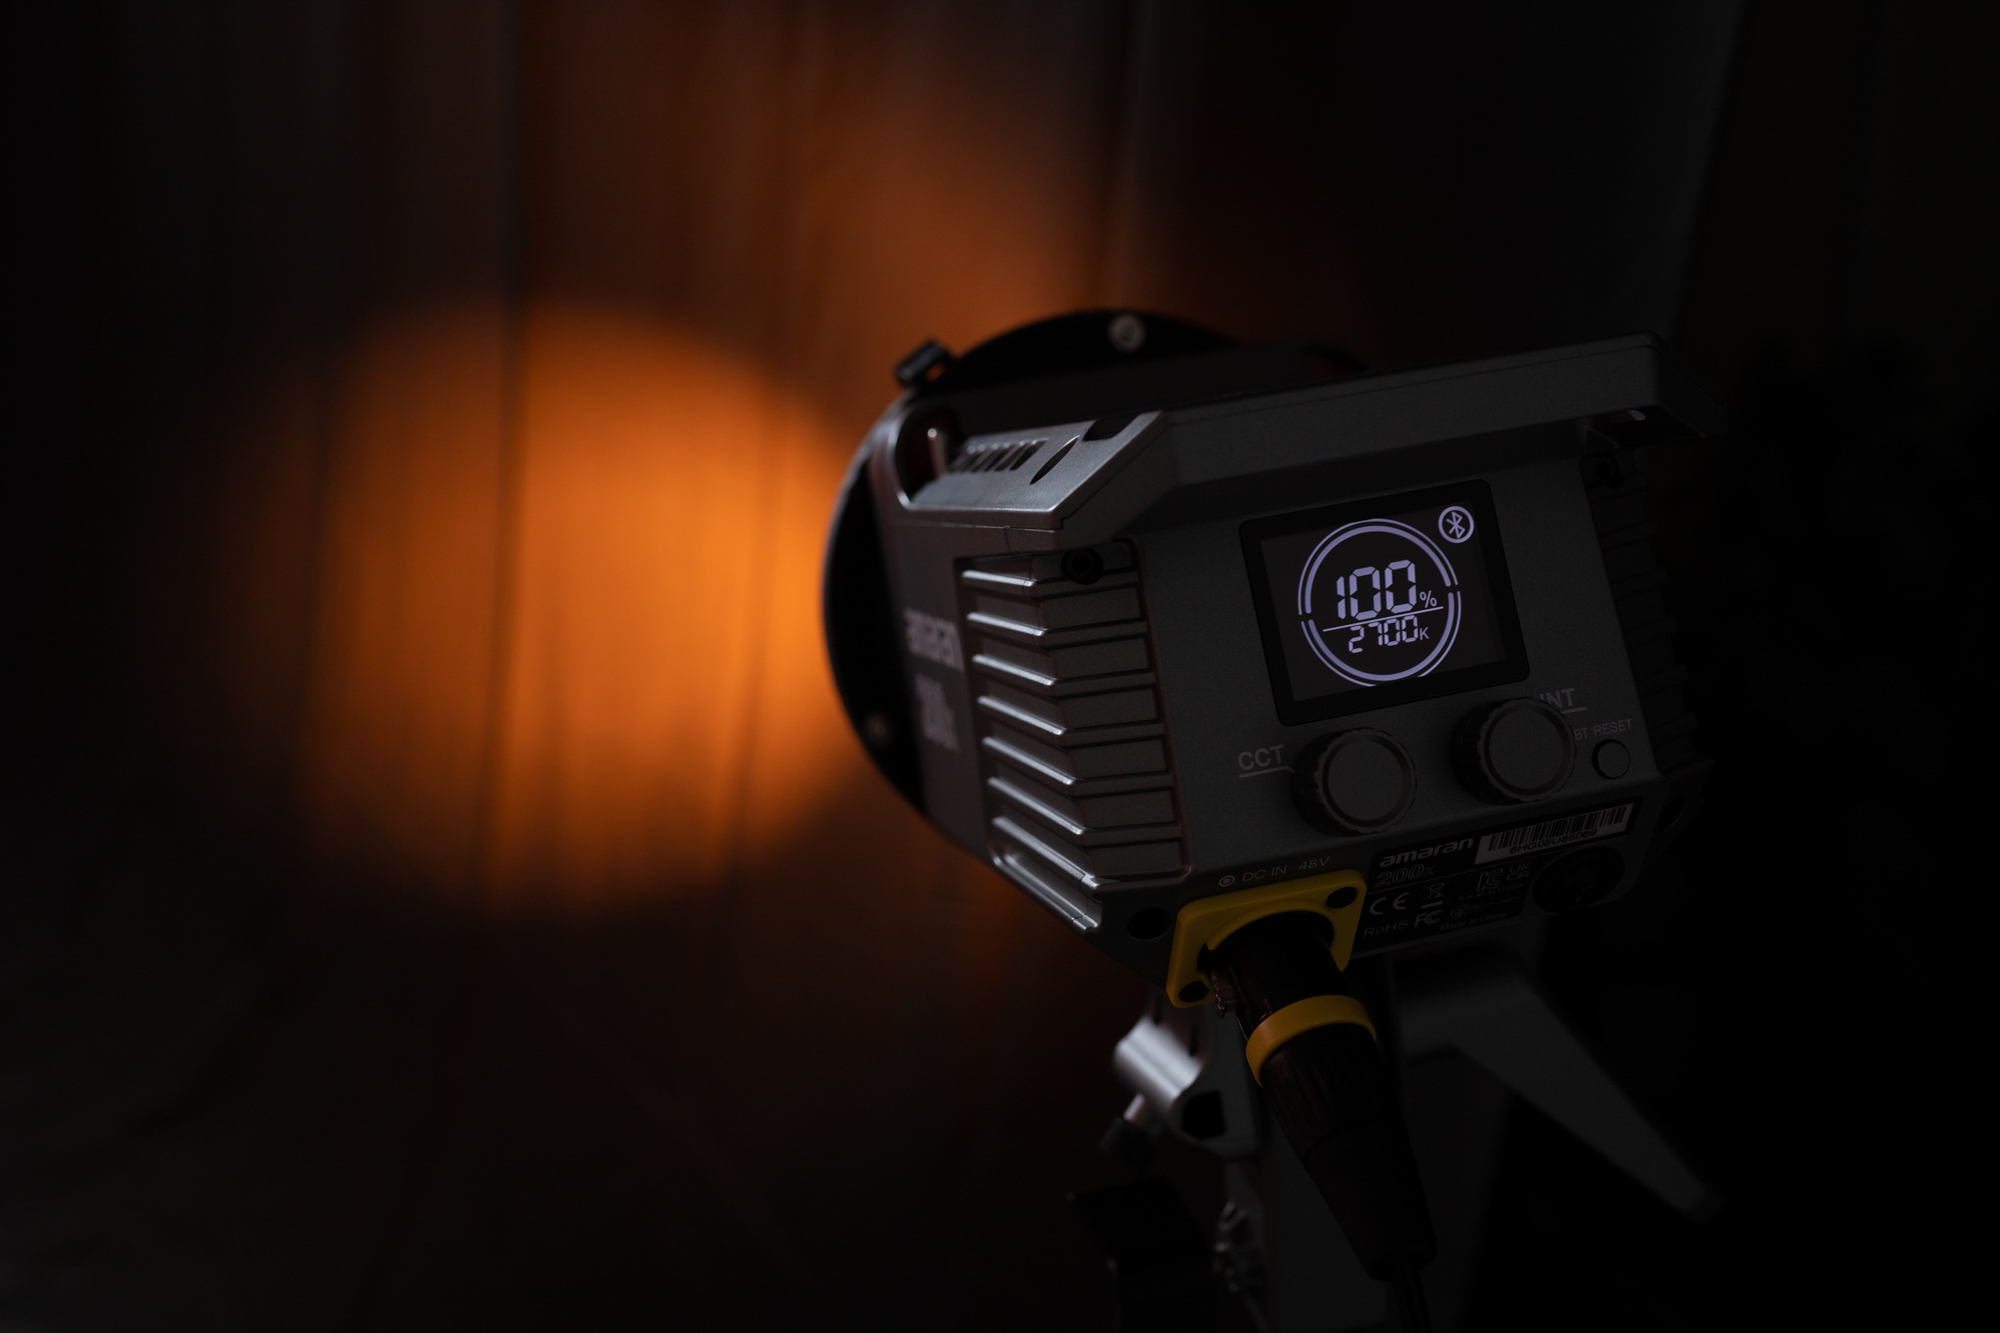
Try adding colours to your constant lighting to tint the blurry parts of the photo. We used a red gel in front of one of our two LEDs. If you’re using bicolour LEDs like this, you can also experiment with different color temperatures. Here we set it to 2700 kelvin for a warm tint.
05. Build the lighting
Start by working out an exposure for the constant lights, so leave the flash off to start and find a manual exposure that works. A good stock setting is a shutter speed of around 1 sec (or use Bulb), with the aperture set to f/8 and ISO100. Next turn on the flashes. Don’t touch your exposure settings, but tailor the flash power to suit.
06. Bulb mode

Bulb mode can help us time the shot to finish at the perfect moment, as we can simply end the exposure by releasing the shutter. This way we need not worry about timing a one or two-second exposure to the subject's movements. Here it meant that we could hold our finger on the shutter, then let go at the apex of his kick.
07. Paint with Clarity
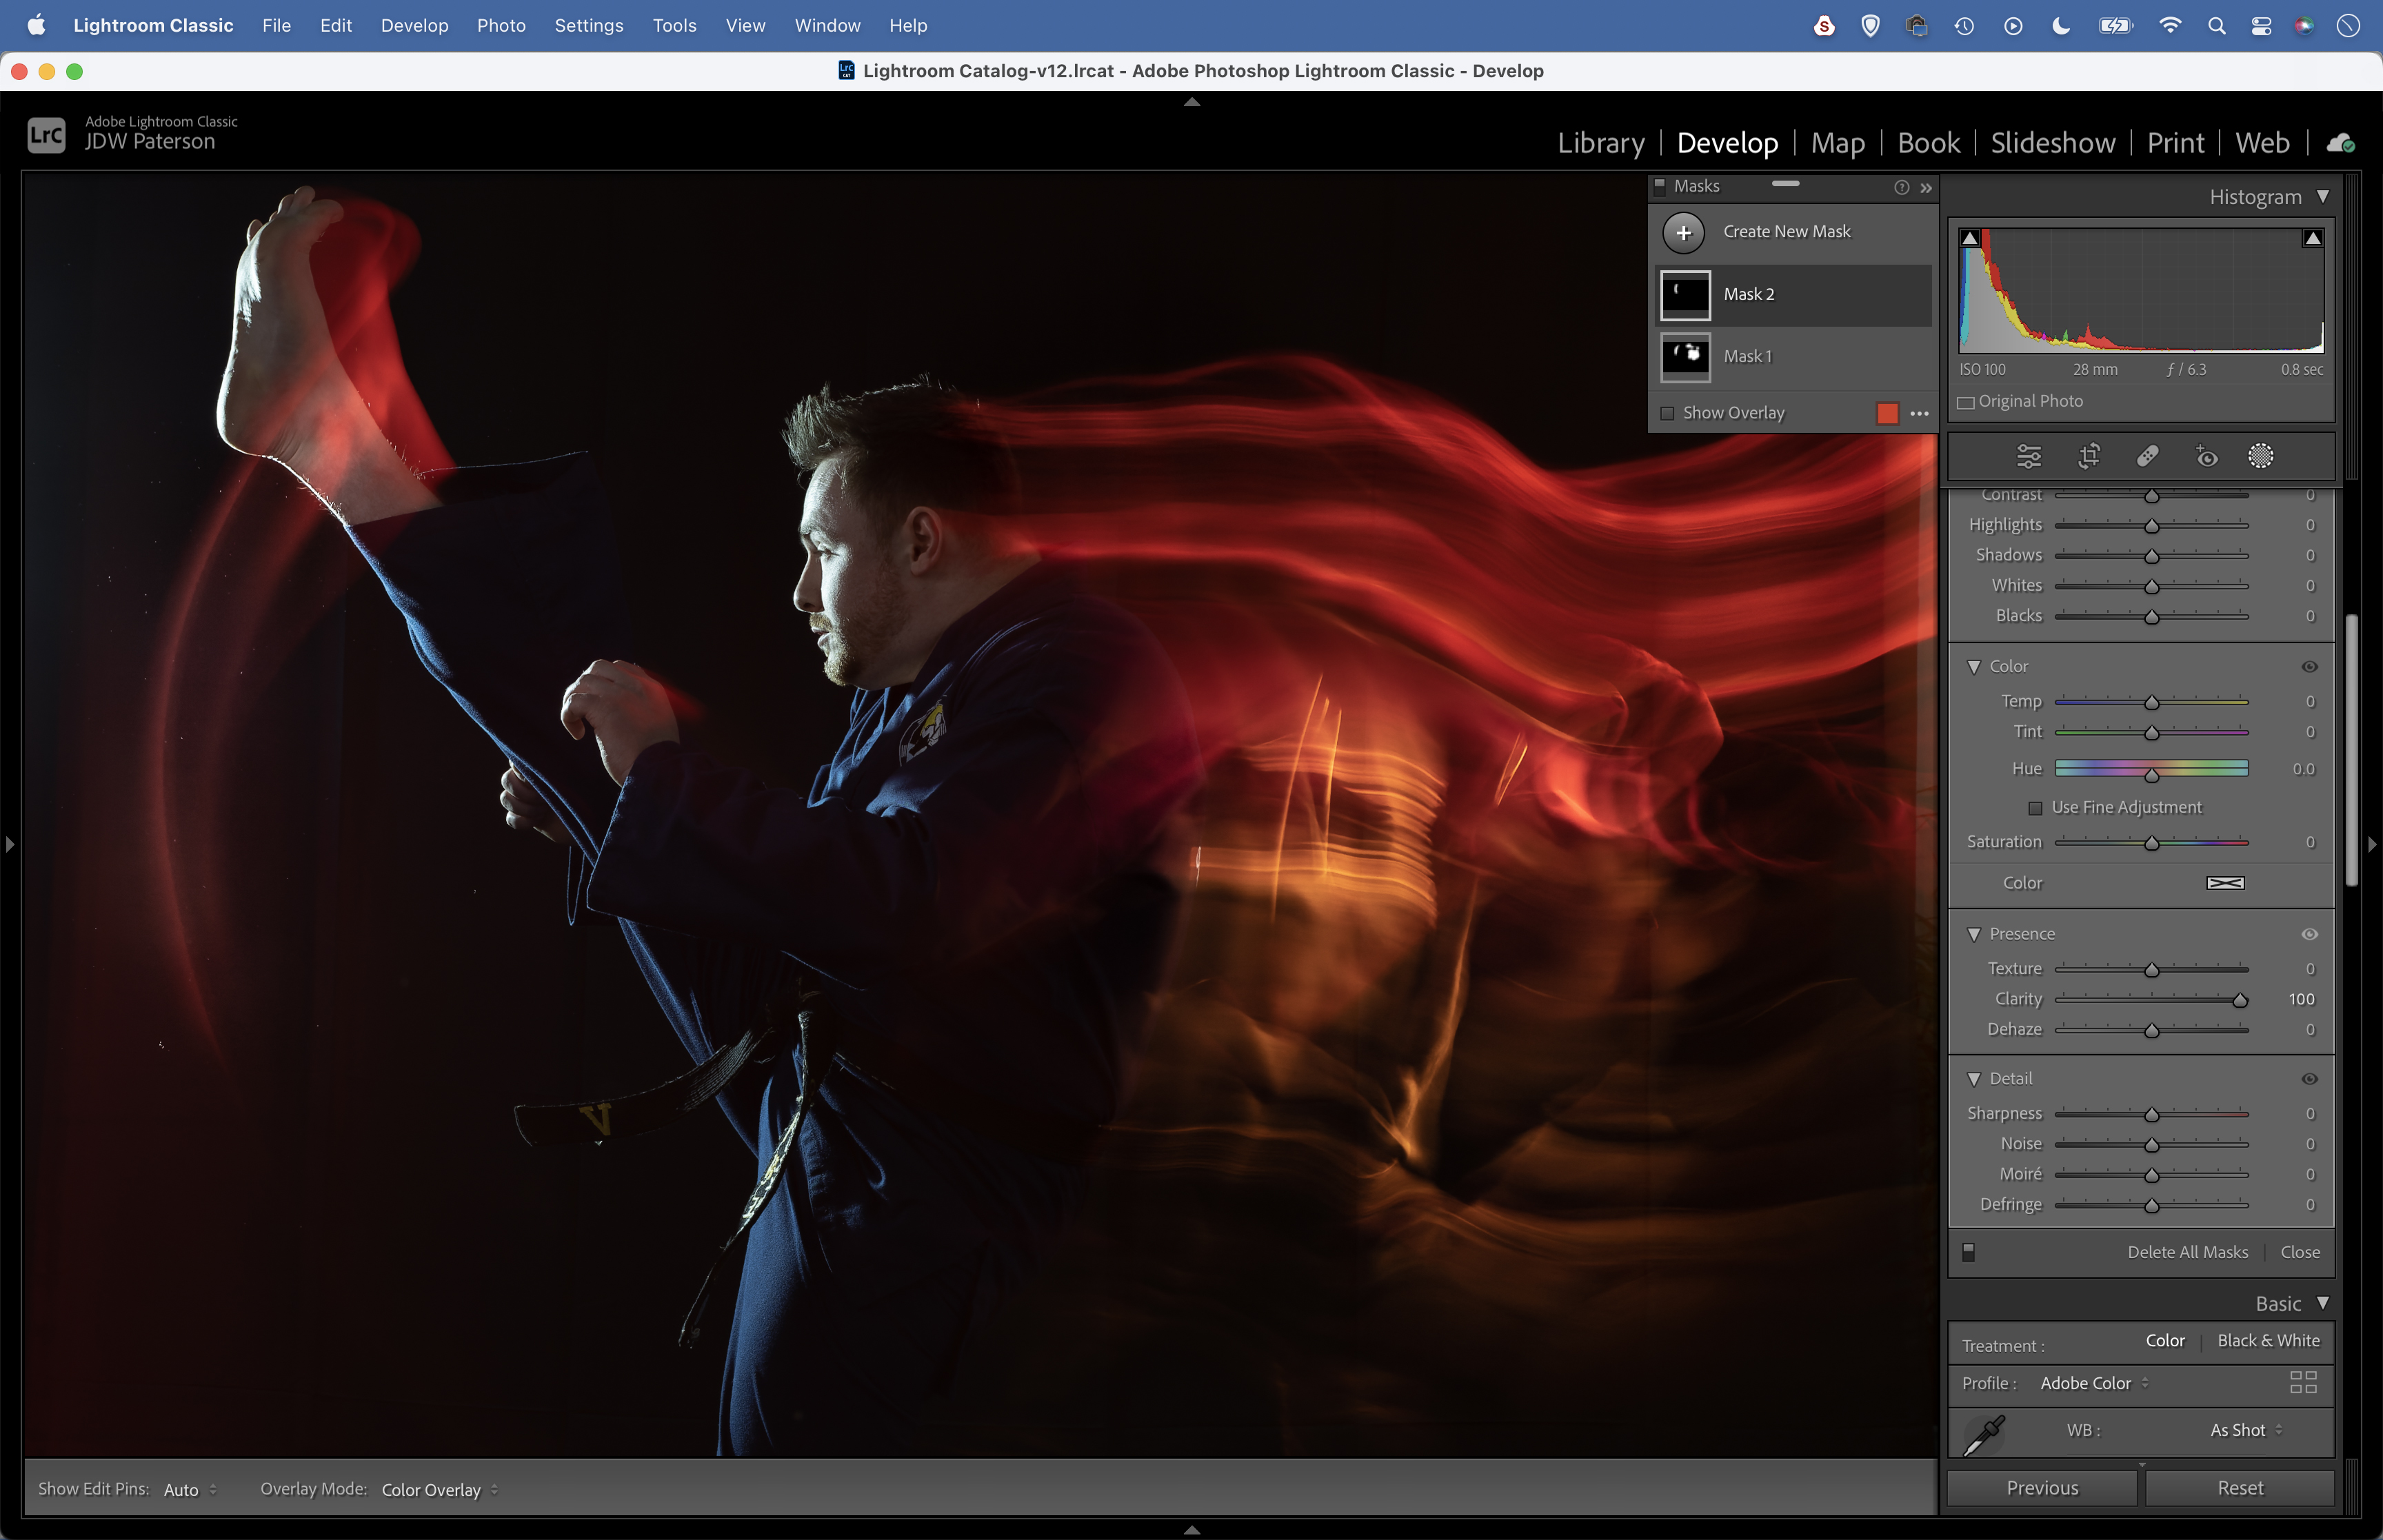
Open the image into Adobe Camera Raw or Lightroom and hit K for the Brush tool. Paint roughly over the blurry parts, then try increasing Clarity using the settings on the right. This crisps up the flowing lines for more defined blur. Of course, you can also lighten or darken the blur with this tool.
08. Tidy the edges
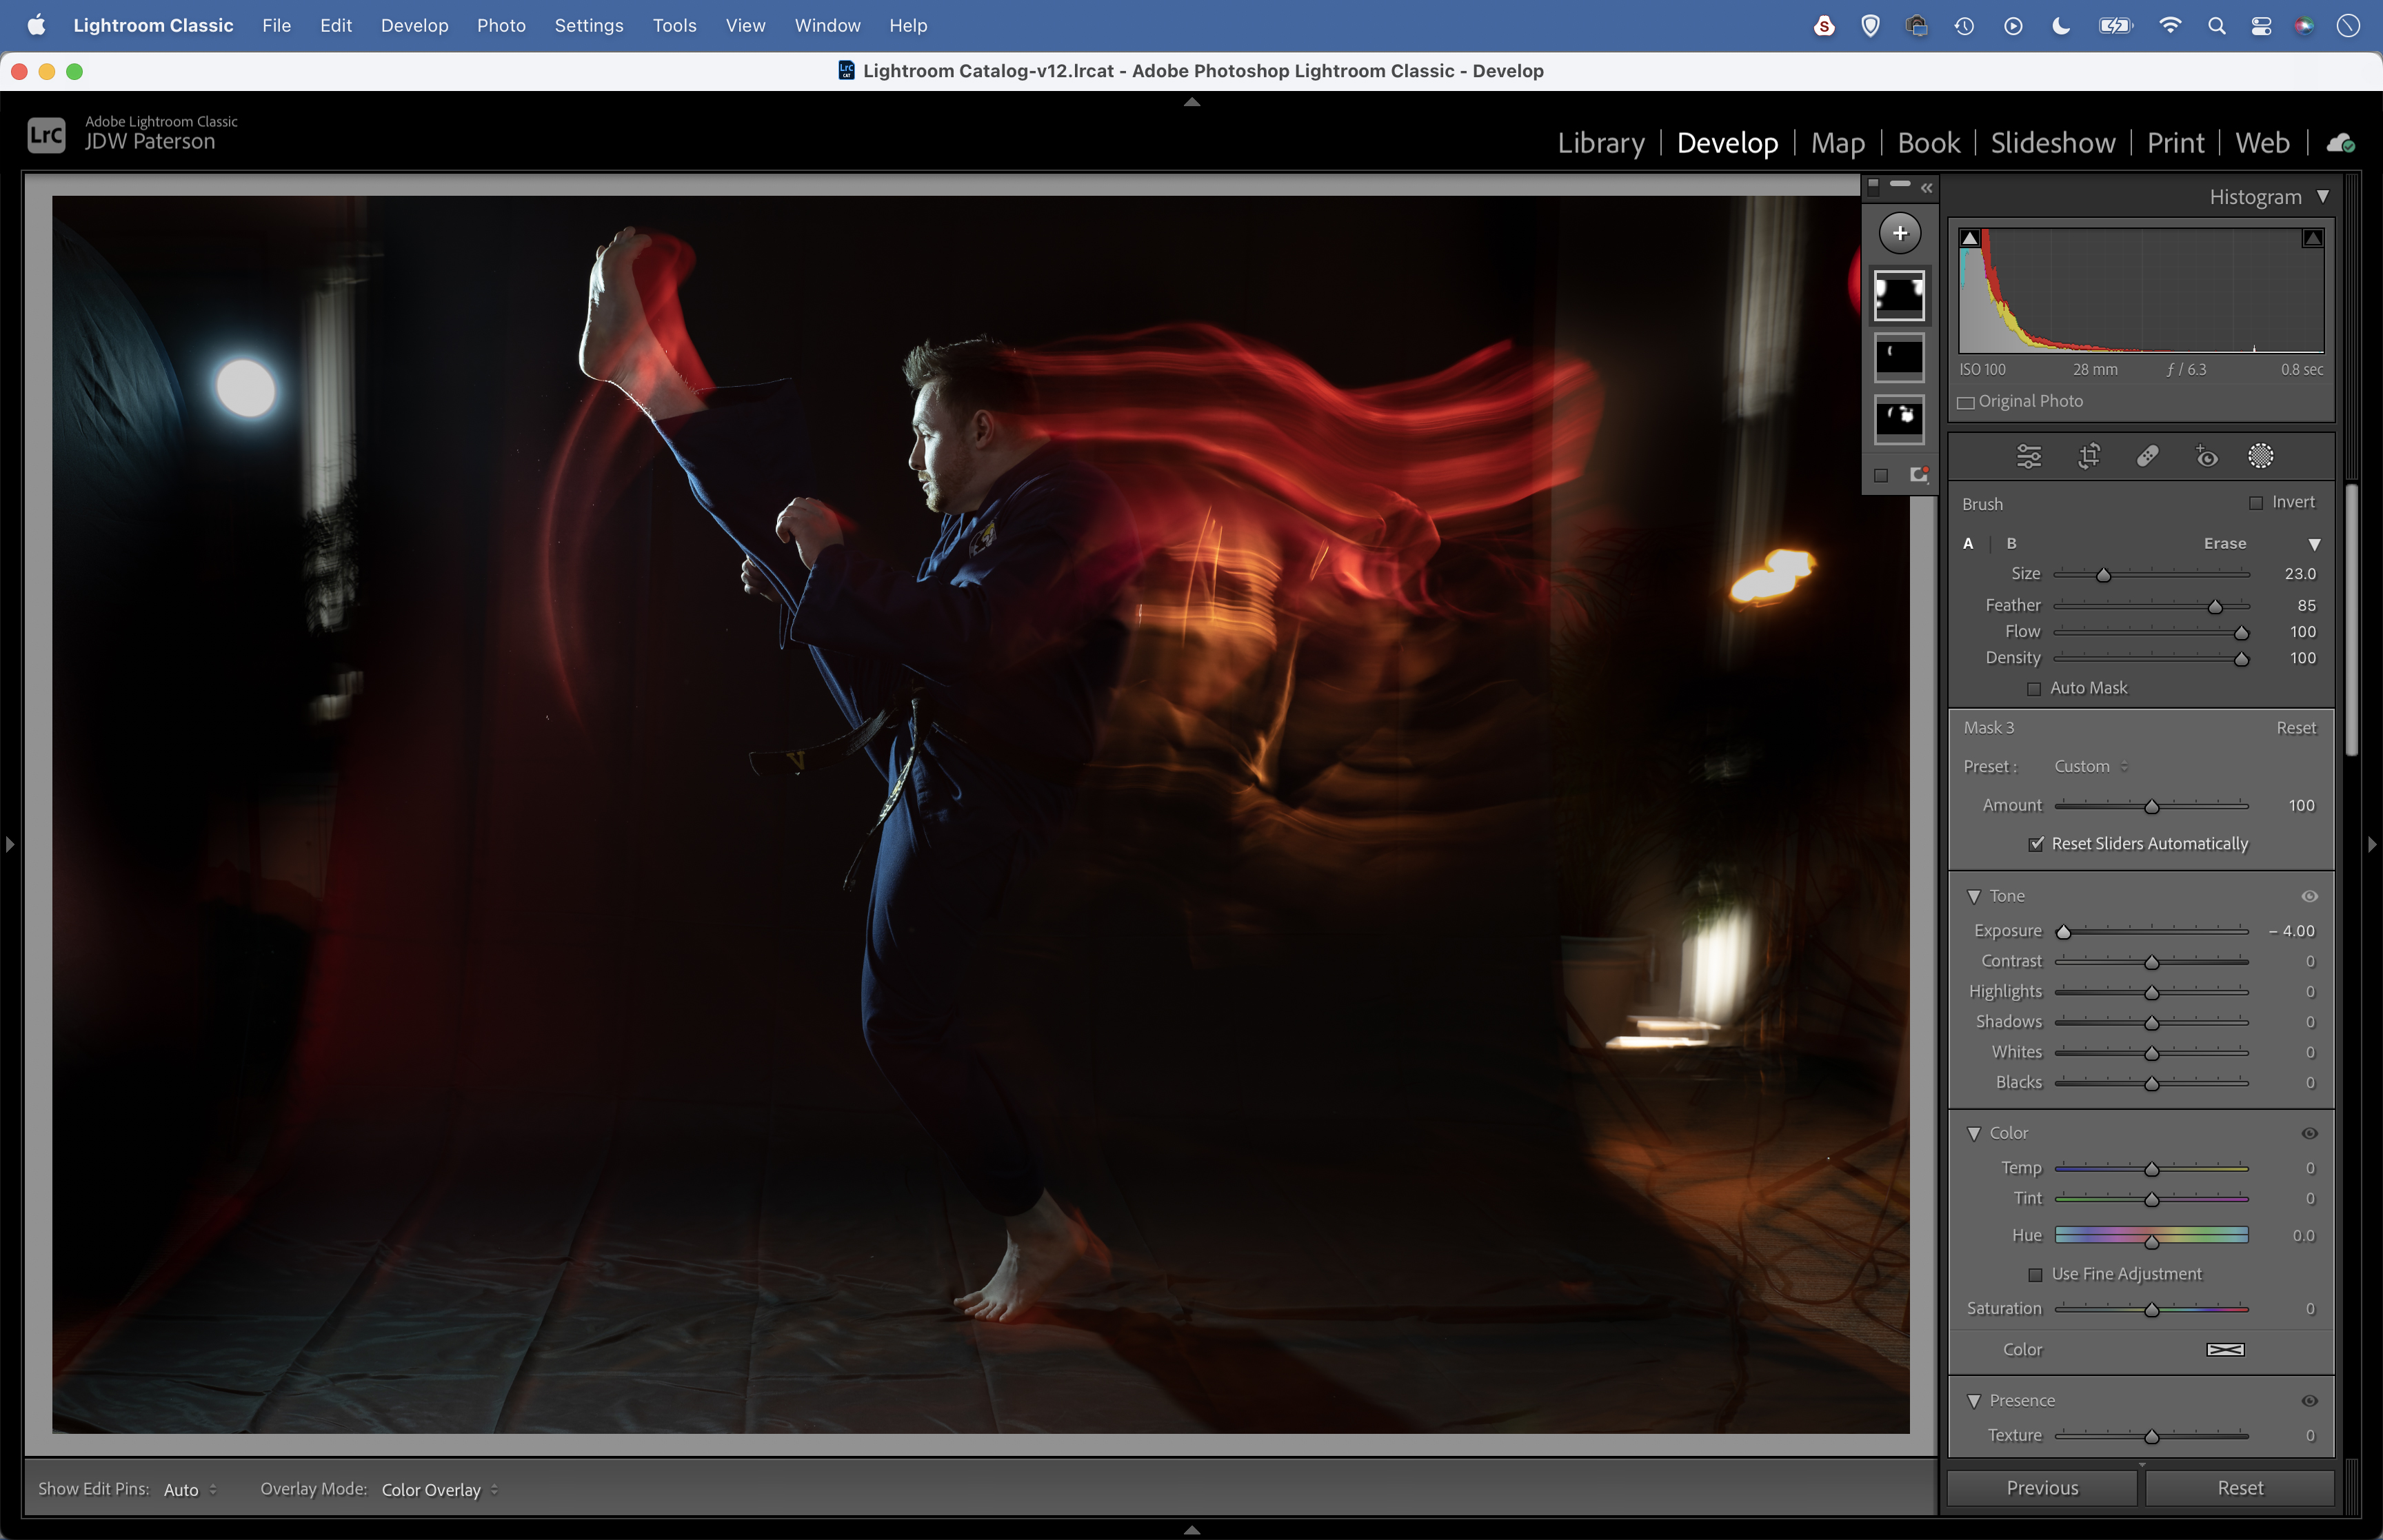
There are likely to be parts of the frame that look messy, because you’ve included areas of backdrop or because of lens flare. Hit K again for another brush mask. Paint around the messy areas, then decrease Exposure to darken them. Repeat if necessary until they’re fully black.
09. Check the shadows
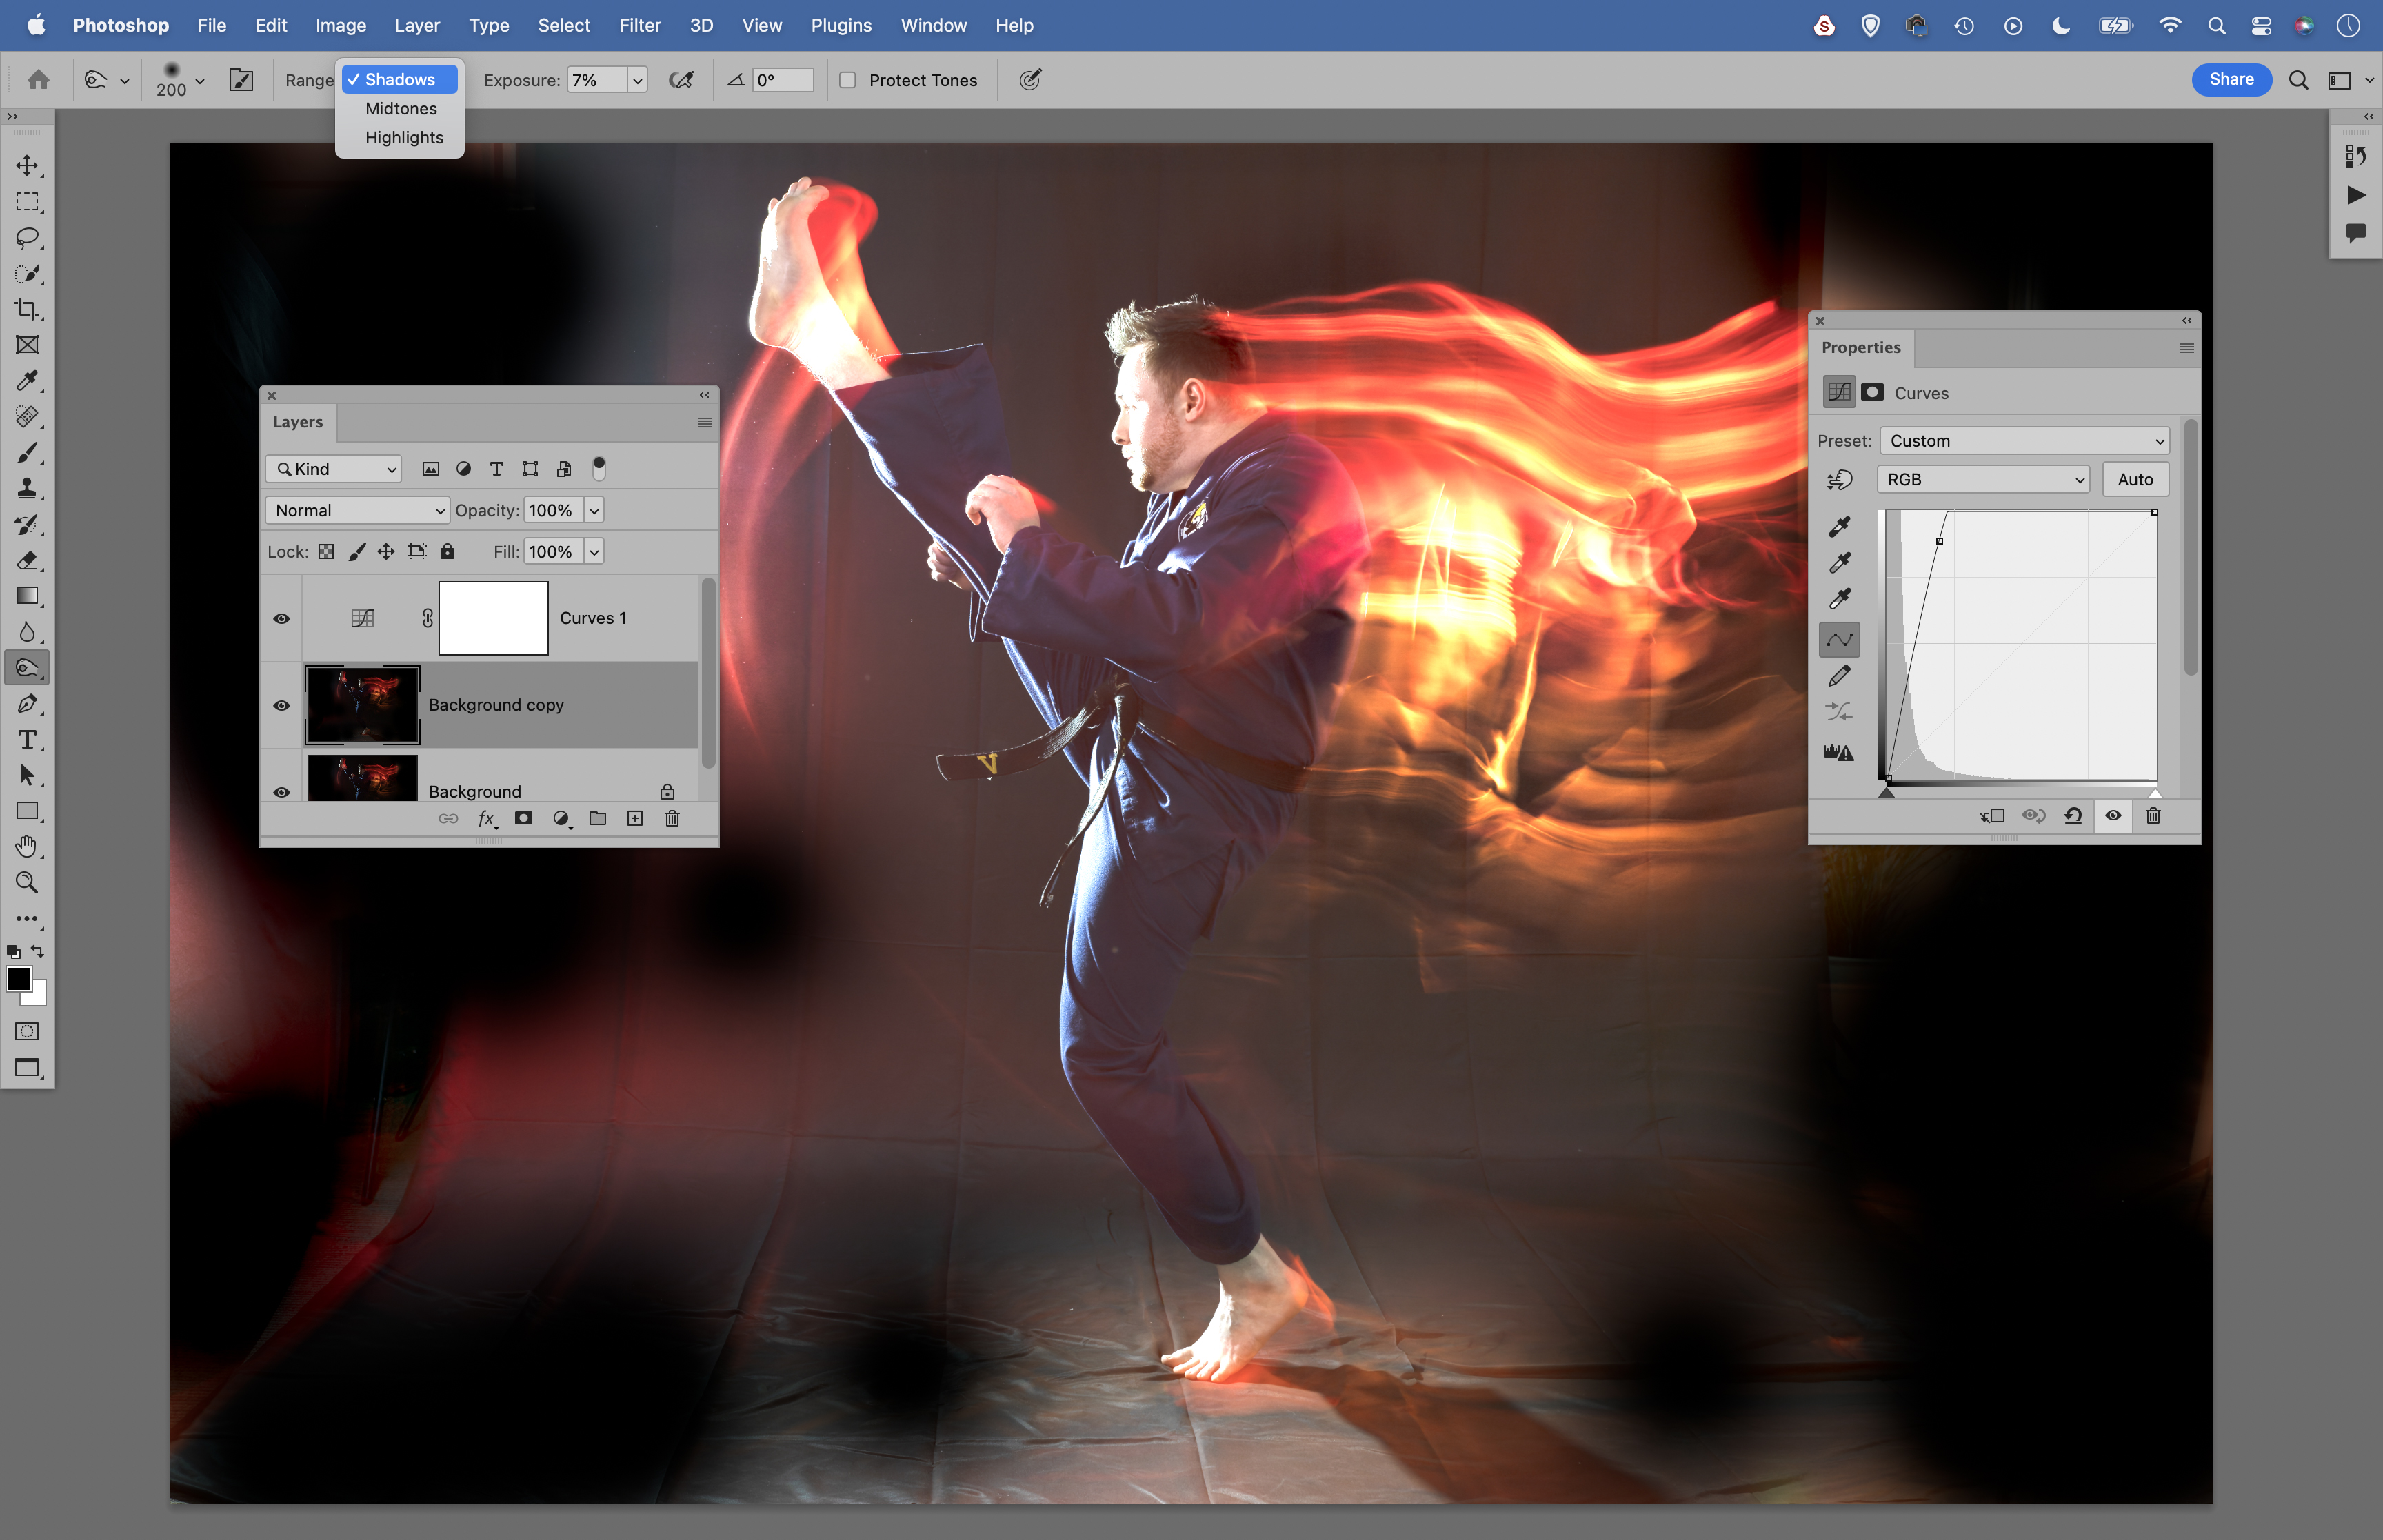
We can also use the Photoshop Burn tool set to Range: Shadows to make sure that the backdrop is fully black. It can help to add a temporary Adjustment layer to lighten things, so you can see what needs to be burned. The Dodge tool can also be used to lift any streaks, by setting to Range: Highlights.
These are the best cameras for portraits and the best portrait photography tips. You might also like to read about the best photo editing software.