While the headlines of Live 12 might well be about the Meld synth and its new generative music capabilities, one of our favourite additions is the Roar saturation effect. Roar has such a flexible and routable setup that it might well become the highlight of this major update and a firm effect favourite for years to come. Here's why it could well be Live 12's biggest not-so-secret weapon...
The heart of the effect is three stages of saturation but its soul lies in the way that these are combined
Roar is another great addition to Live's mighty lineage, a saturation effect that is capable of gentle colouring, maybe, but should really be unleashed to fulfil its full potential as an out-and-out sonic bender, a tool that is capable of truly out-there, mind-melding, powerful effects that can make – or indeed break – a production.
The heart of the effect is three stages of saturation but its soul lies in the way that these are combined, with several routings possible, and some truly eclectic and varied results, even with the same core ingredients. As with Meld, it comes into its own with modulation and as with Meld, you get an expandable window to see it in full.
However, that's where the similarities end, because this is no instrument but a mighty effect - and what drama it can bring to existing sounds. And there's plenty at play here, which we will dive into with some extensive tutorials, quick tips and more in this ultimate guide to Roar.
We've been testing out Ableton Live 12 for a month - here's what you really need to know
The basics
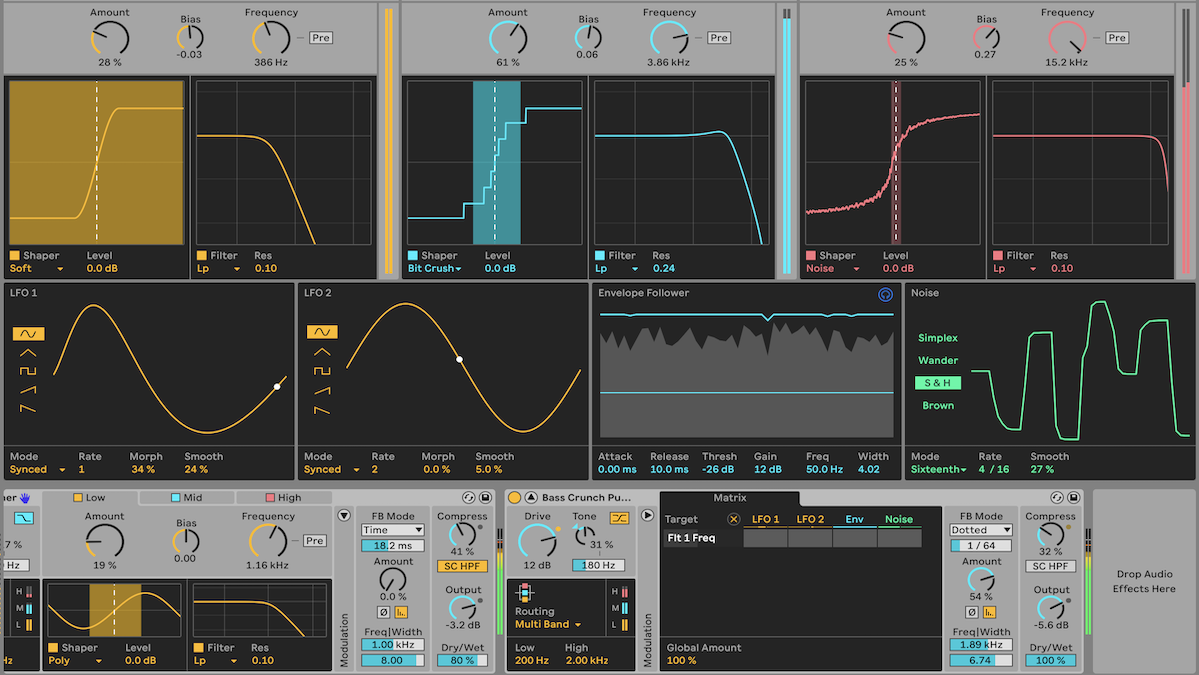
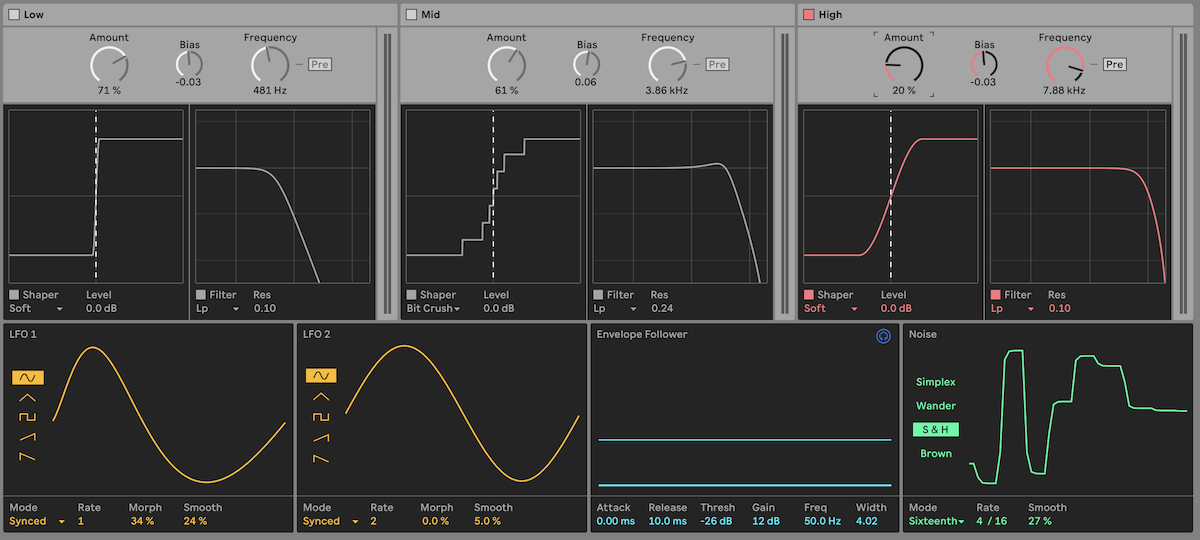
Roar is a saturation effect that is capable of subtle colour or bizarre glitchy effects. It features several non-linear saturation curves to deliver character, three saturation stages to deliver power and several ways to combine them to deliver huge versatility. Because you can run these stages in series, parallel or even as mid/side or multiband styles, you can get some truly outstanding effects.
You can use Roar to beef up weedy sounds, tracks or even entire mixes. Or you can use it to absolutely shatter them!
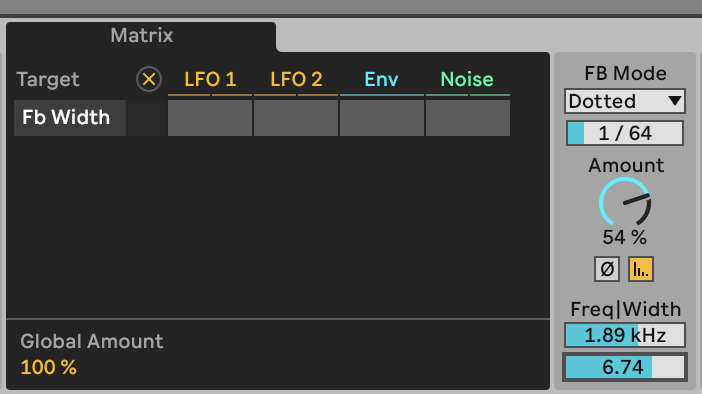
Like Meld, which we looked at in this extended tutorial, it features an amazing modulation matrix. Only this time, it's easier on the eye and and even easier to use.
Combined with the feedback routing, the modulation matrix can deliver predictable and (very) unpredictable results
Combined with the feedback routing, the modulation matrix can deliver predictable and (very) unpredictable results. We like that in our effects, because unpredictable usually means inspiring and that is certainly the case here.
At the very left of Roar, the first Drive control can push the input level of the signal, adding some distortion from the off if you want to go in hard – you don't need to, believe us. Tone, as on Meld, adds higher frequencies while pulling back the lower ones as you dial right, and pushes the lows and pulls back on the highs as you dial left, with a kind of crossover frequency set beneath it. It's not an EQ knob per se, as the results can be more dramatic in either high or low areas and it has a similar feel to a dramatic filter.

As with Meld, one beautiful aspect of this plugin is its expandability. Click on the arrow far left and you get to see everything bigger, above the plugin. And this time it's a lot more graphical, with a detailed overview of each of Roar's saturation stages and its modulation sources.
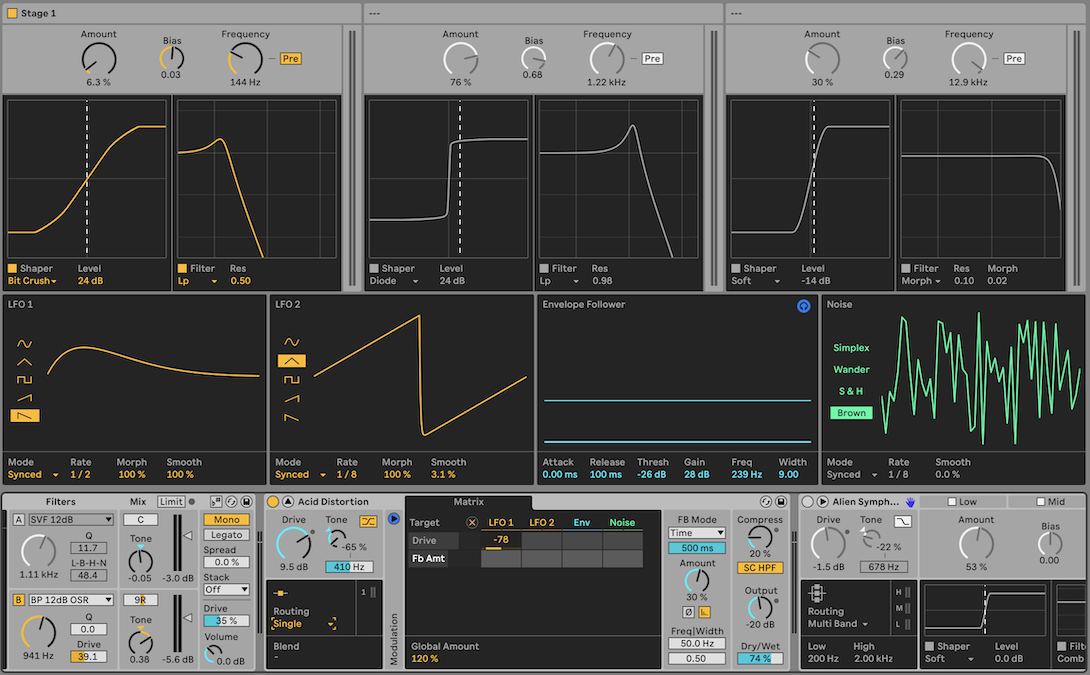
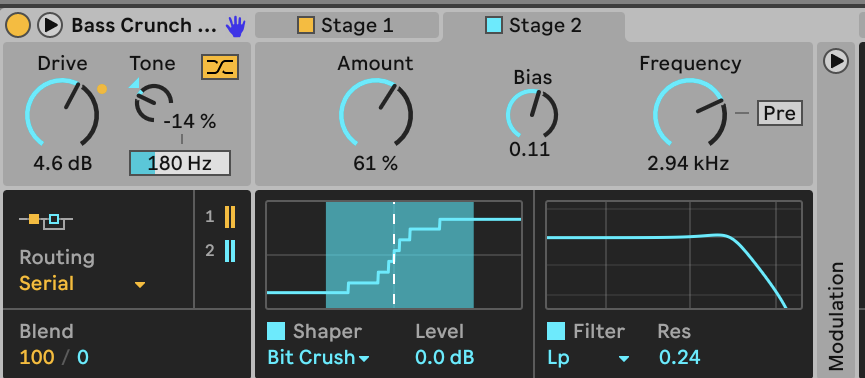
And it's these three stages which we turn to now. We should say 'up to three stages of saturation' really because it is dependent on how you route the stages together. There's a tiny drop-down menu under Routing and this really is the crux of Roar, five options to route these saturation stages together.
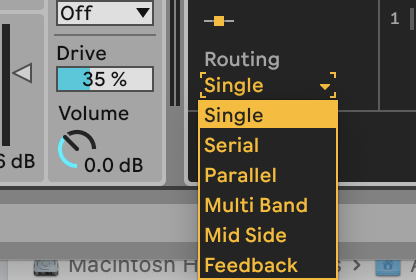
Single obviously just means a single stage of saturation; Serial means two, one processing after the other, with the second able to feedback on itself; Parallel means both stages running side-by-side together; Multiband gives the full three stages in parallel, each split into low, mid and high frequency bands; Mid Side means the middle part of your signal is processed by one saturation stage, the sides by another; and finally Feedback looks to be parallel processing with feedback running back into the bottom stage.
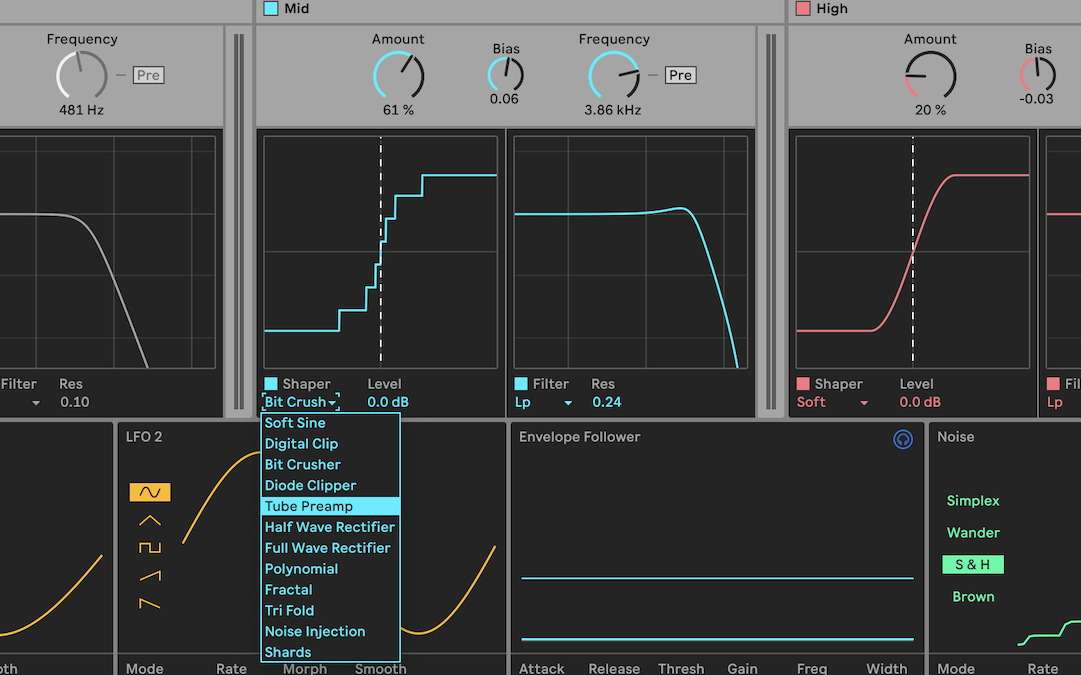
Here's the Mid Side setup in full flow with two saturation stages.
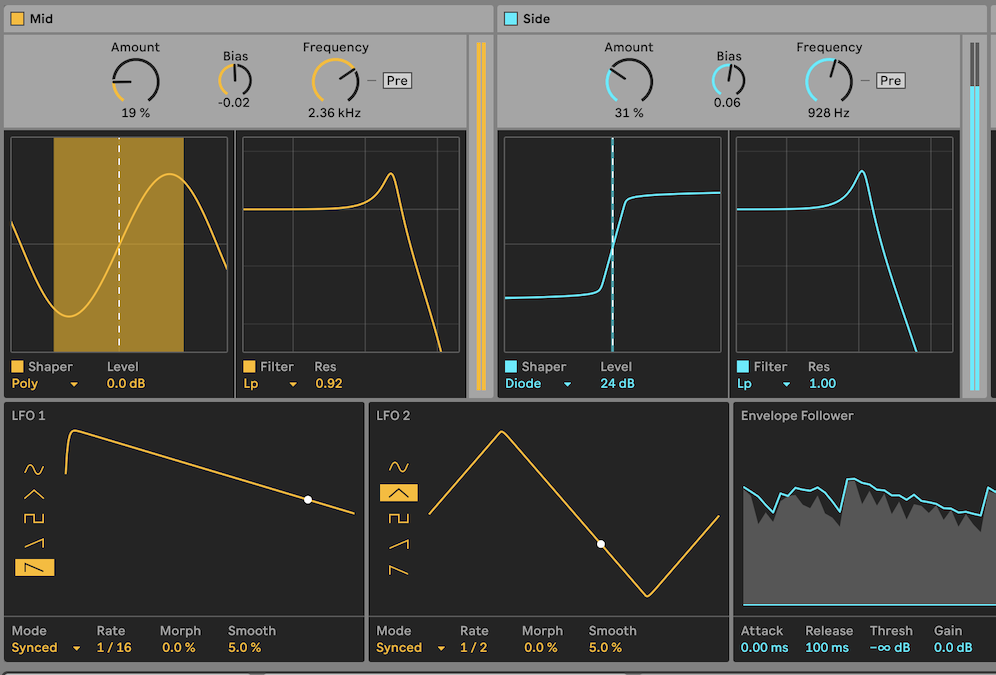
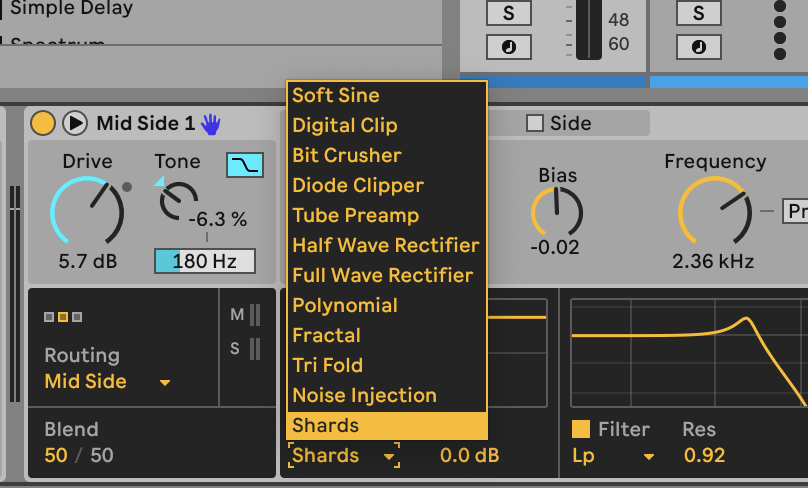
Next up you choose the Shaper shape – from around a dozen – in each saturation block in your setup. These waveforms can be pretty standard, more gentle Soft Sines or distorted Tube Preamp shapes, more gritty Diode Clipper and Bit Crusher, or full-on and aggressive Tri Fold and Shards. Lots to play with here and we will do just that below.
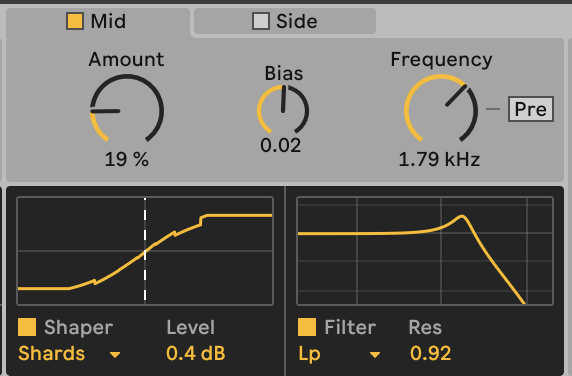
Level adjusts the impact and gain of each of your choices while Bias effects how the sound clips or dies out. This is harder to describe as it varies so much with each but it can result in incredible clipping effects that ties in well with the modulators. Finally Filter is just that, allowing you to sweep the effect across the frequency range.
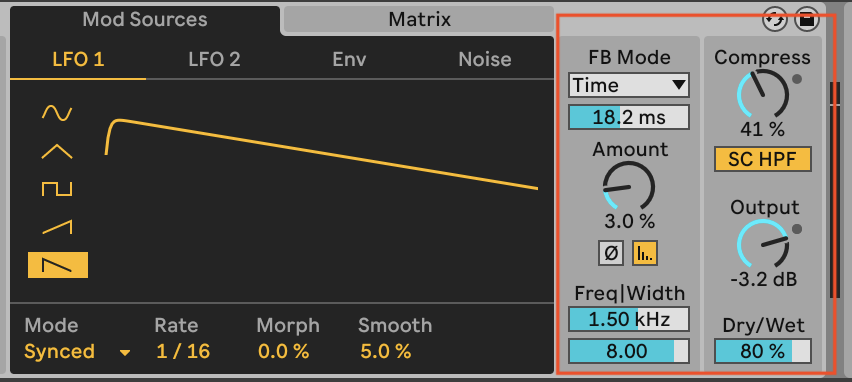
We're covering the main modulation stage in the middle of the plugin below, as that is a particular highlight that needs some depth, so that leaves the feedback stage on the right. This has its own useful compressor that comes in handy when things get out of control (which they do).
The Feedback dial is very cool as you can choose to set a feedback time or by note pitch or timing and set it in sync. It's also easy to overdo this as we'll see!
Three quick tips when using Roar
1. The IT crowd
It's very easy to accidentally get more than one instance of Roar working or set your feedback levels too high so that when you press stop in Live Roar decides to carry on. So do be cautious about how many you have linked together and get ready with the off button if you have too many. And if that feedback keeps going? Do what every IT expert does: turn it off and on again.
2. Start with one
If you are new to Roar, kick things off with the single routing option and give yourself a single saturation block to play with. With this set up, get to know the different Shapers, play with the Bias and find out what these core components do before chaining too many more together.
3. Use the expansion
Using Roar really made us yearn for a bigger computer screen as its expanded version is a dream to use and modulate with – as we'll discover below. When in full flow it is a dream to use, so if you can, keep it expanded as you use it; it will draw you in and you will get more from it.
Get some modulation to Roar
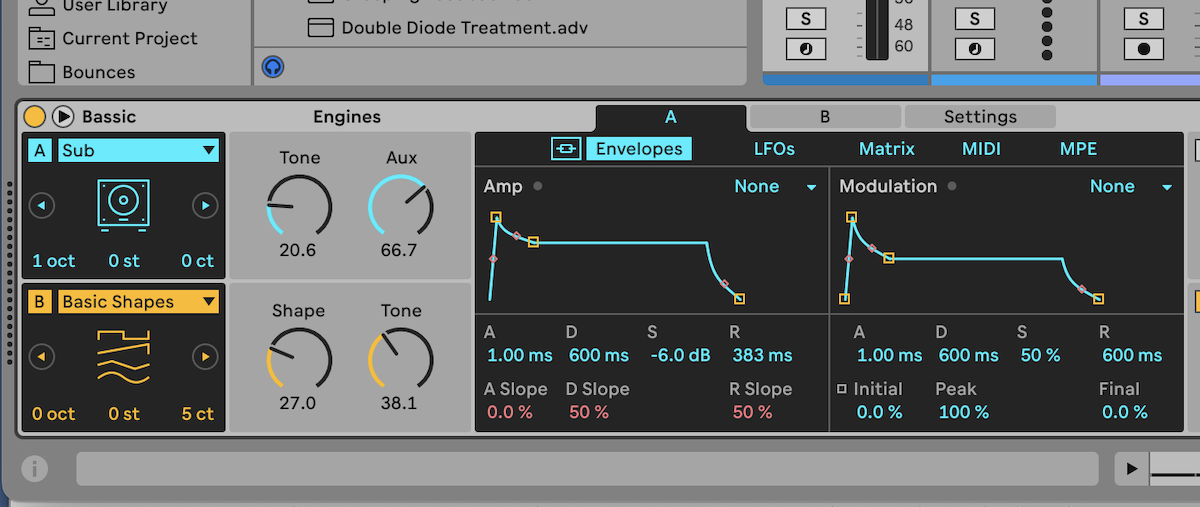
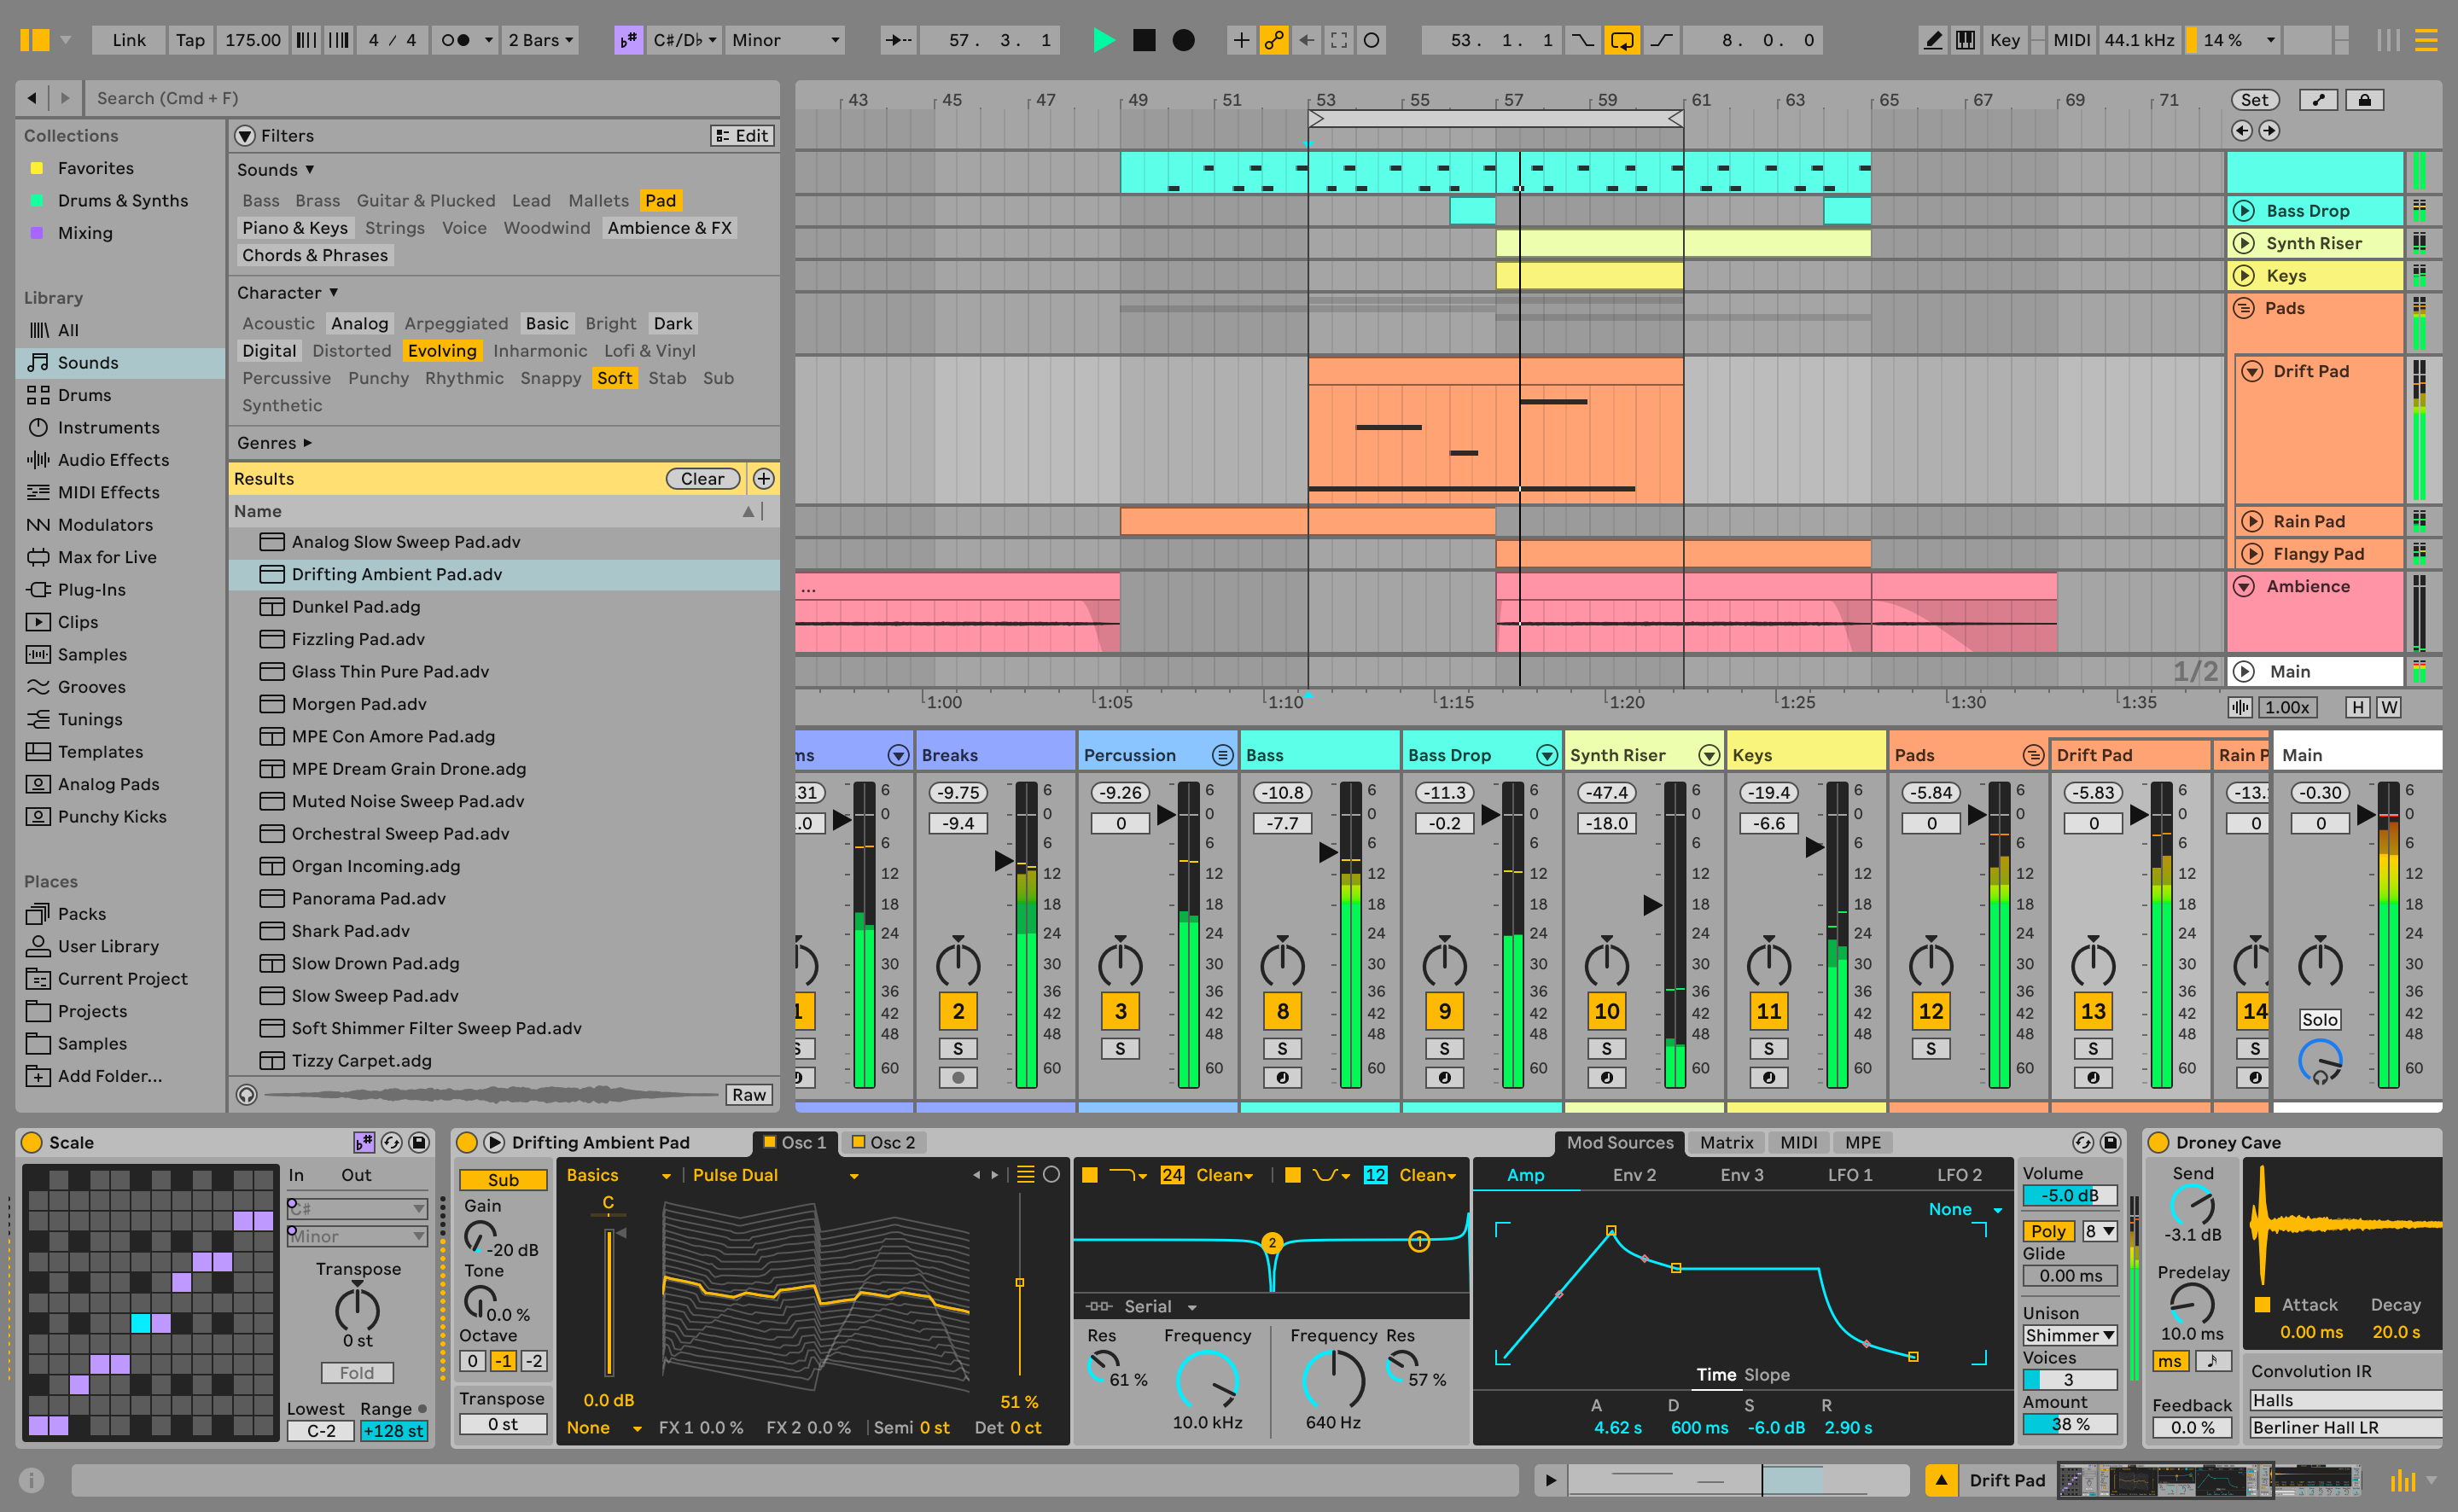
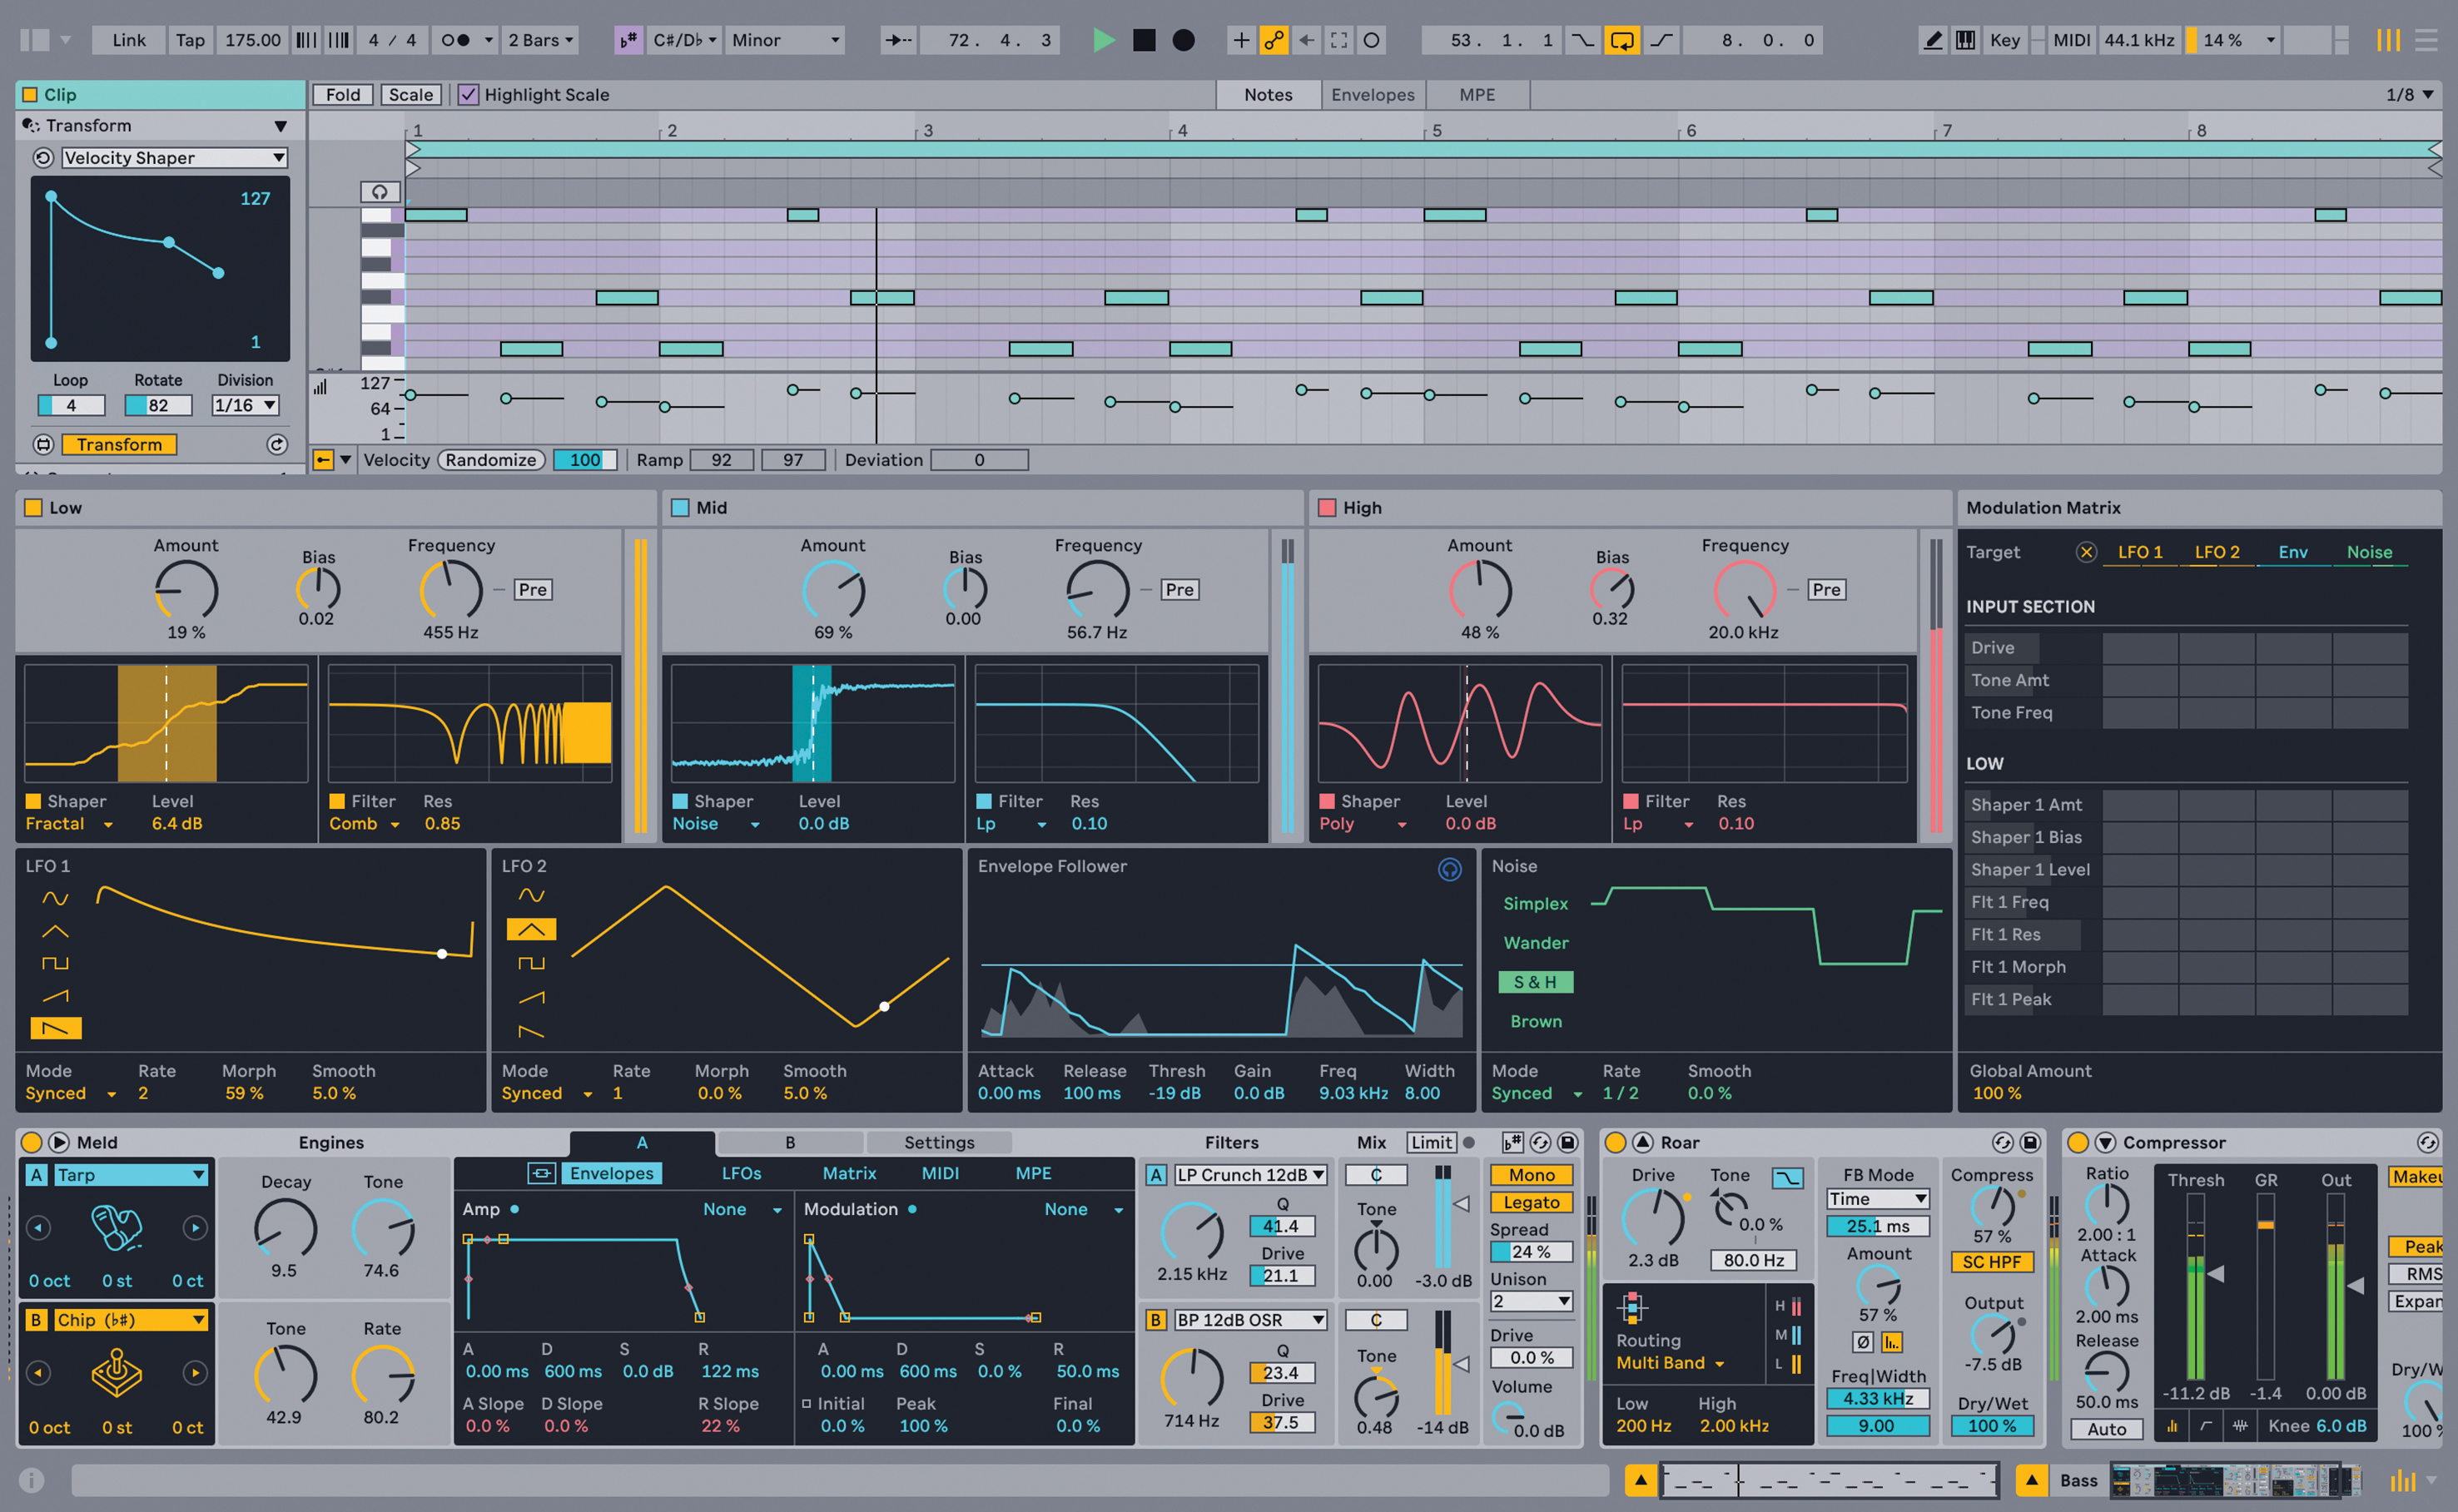
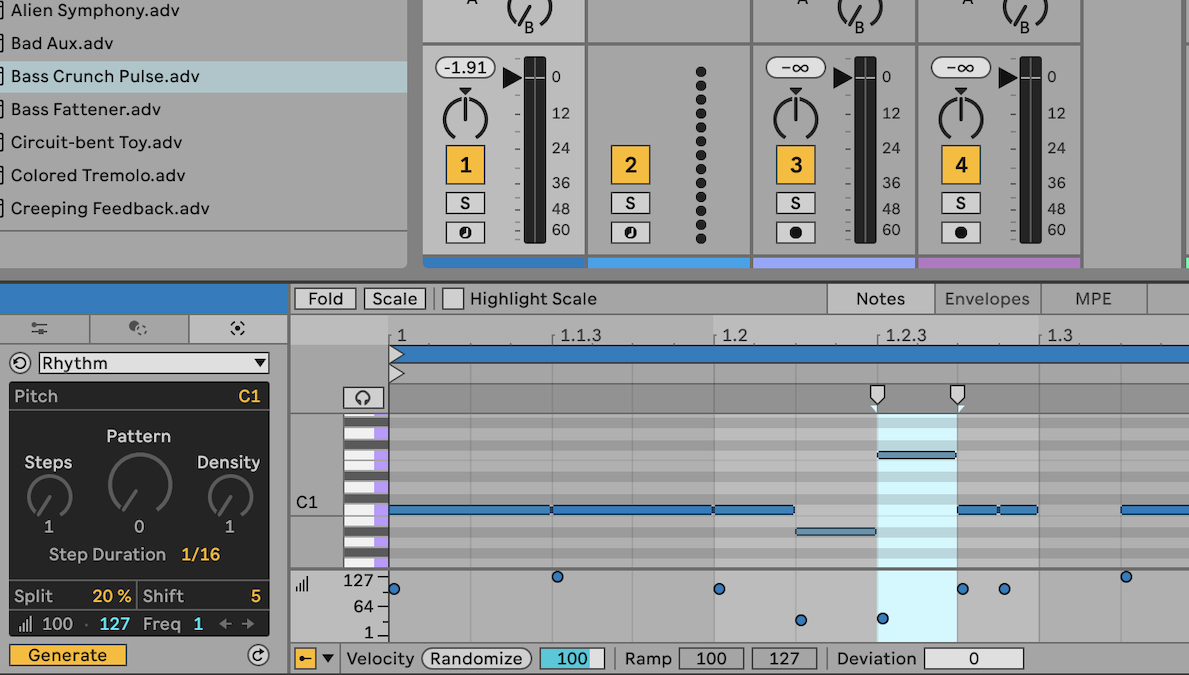
First of all lets get some notes running through Roar and for this we might as well turn to the excellent Meld (above) and, while we're at it, use Ableton Live's new note generation tools to create them! We load the Bassic bass sound for Meld and use the Rhythm generation tool for a bass line.
Next, add a Roar to Meld and select the suitable BassCrunch preset. This does exactly what it says on the tin and will be a great way to demo Roar's superb modulation setup.
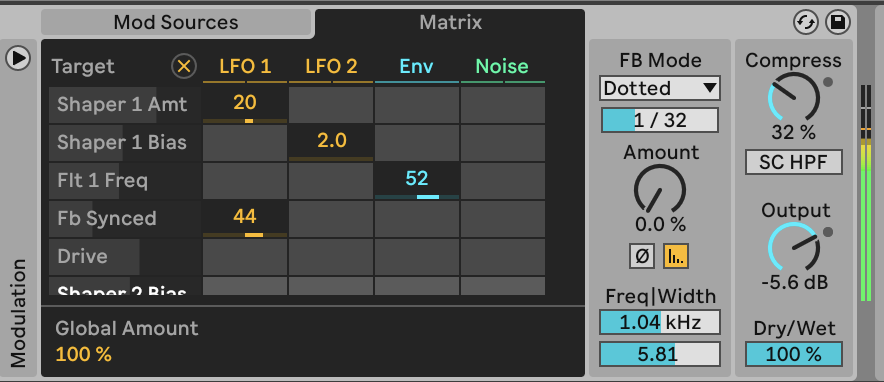
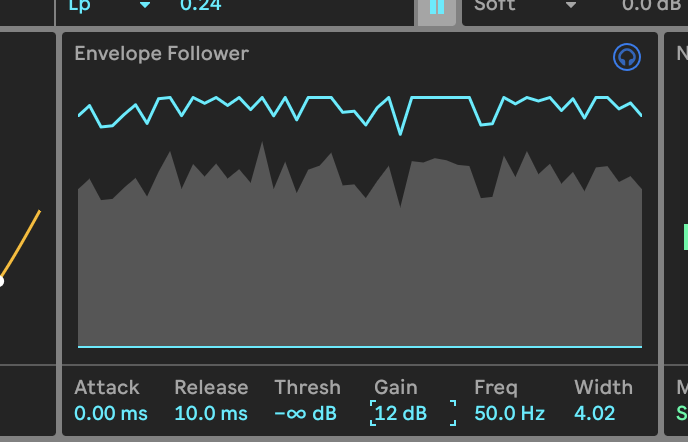
Open Roar's Modulation Matrix if you haven't already. You'll see that it only has four sources going from top left to right (LFO 1 and 2 plus Envelope and Noise). However, these can be applied to pretty much every Roar control.
Now we want to expand Roar to its maximum window size so you can see everything that is going on. With this particular preset, two of its engines are running in series. We're going to use LFO 1 to modulate, so set its speed value to a relatively low 1 as shown in red.
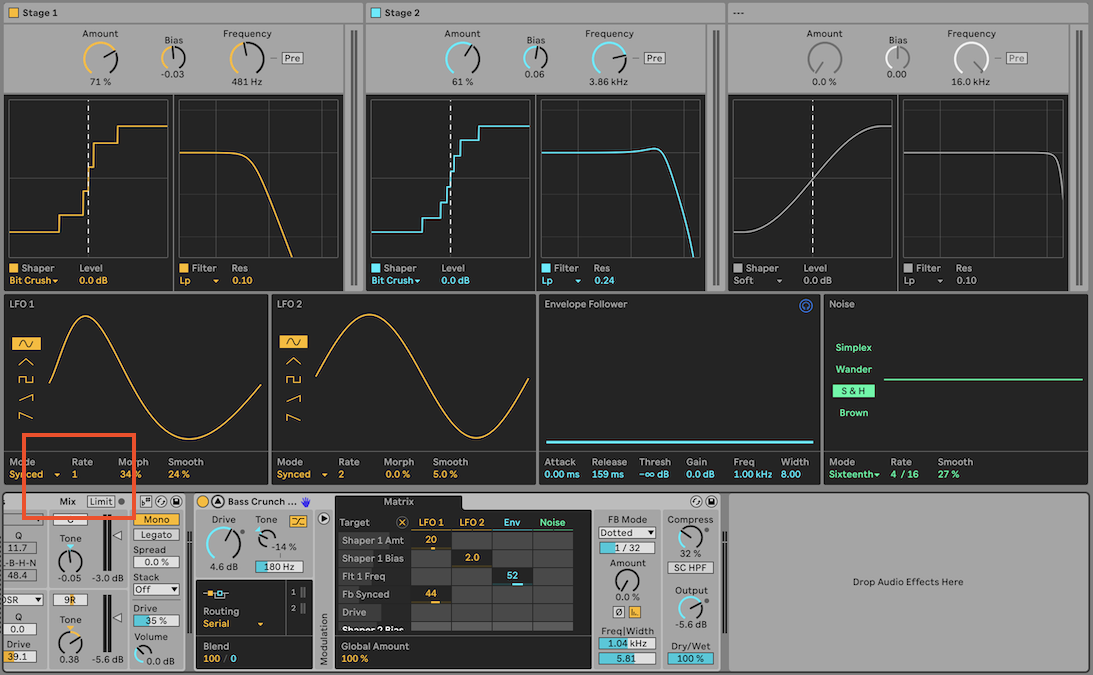
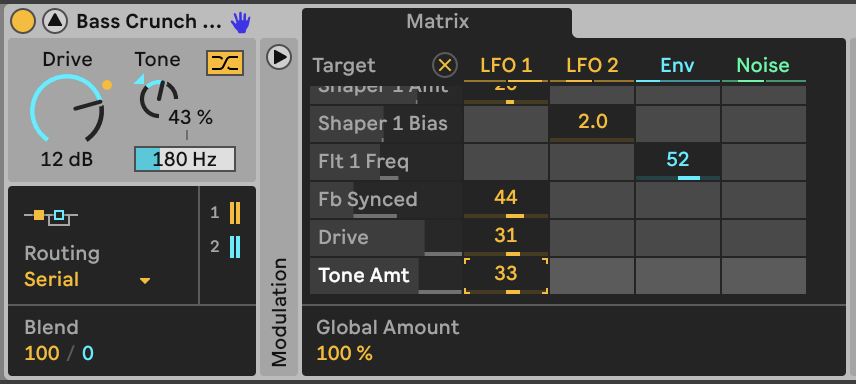
We'll get LFO 1 to modulate the Drive parameter so you can hear it clearly in action. Mouse the Drive rotary up and it will appear as a destination in the Mod Matrix. Now click and drag up in the newly-created Drive cell under LFO 1 to 30 and you will hear Roar pulse with each LFO cycle, and the screen top left gives you a cool visual representation of this pulsing too!
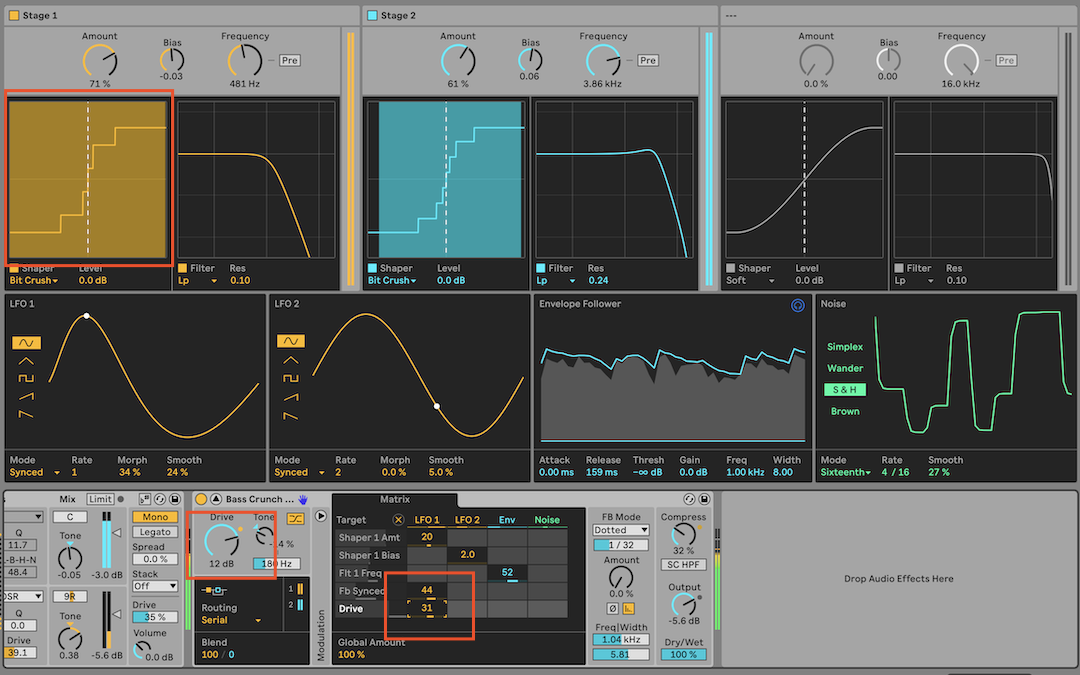
Now do the same with the Tone control. It appears in the Matrix, so nudge that value up and both it and Drive are now modulated by LFO1 and it sounds particularly filthy. Roar is starting to do its thing.
Envelope modulation
In the Mod Matrix, reset both the Drive and Tone amounts to zero by double-clicking each. Now push the Envelope modulation up to 100 so we can explore that. You can hear the Drive rise and fall with the Envelope.
Raising the Attack smooths out the effect while raising the Release prolongs it. Keeping the Threshold low and Gain high (above 10dB) and you accentuate the effect. Again, it's very dirty.
But if you think Roar is roaring, wait until you assign the Noise as the source and Drive as destination and select the S&H wave. Now you have extreme Drive changes as Roar reaches its maximum carnage level.
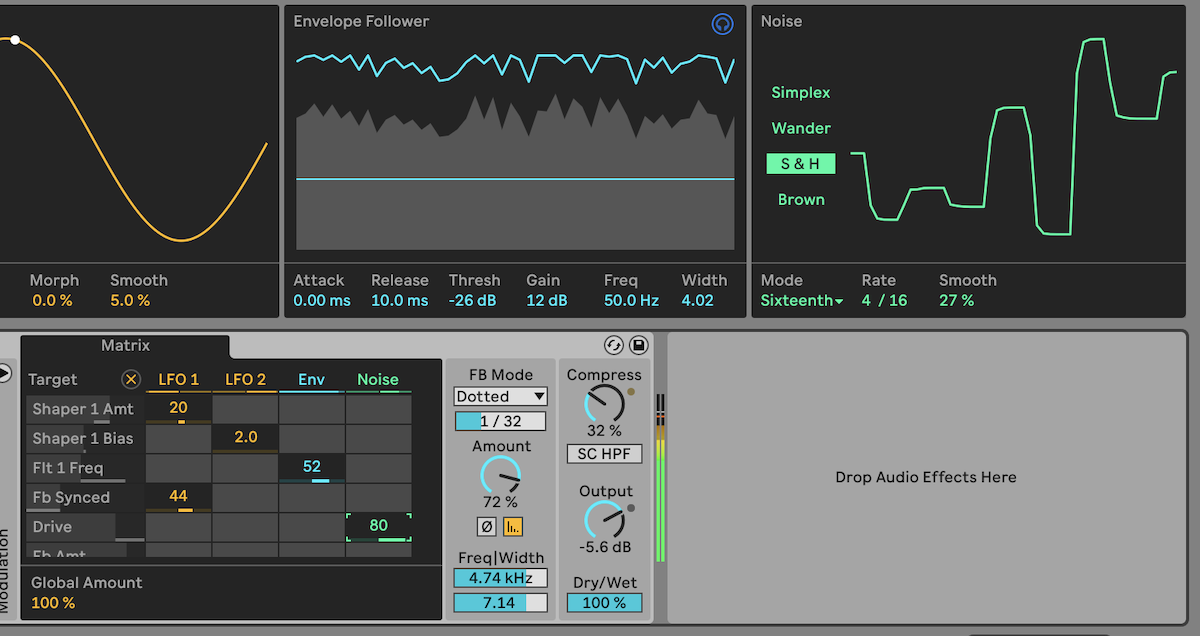
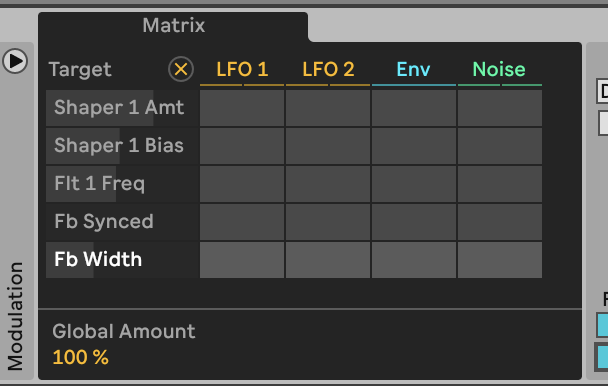
We've pushed it a little too far now so will reset all of the Mod Matrix parameters back to zero with one click of the X as shown. Brilliantly, standard undo and redo work with all changes you make so you can go back to those extreme settings whenever you like.
Multiband processing
That's the modulation done for now, but do experiment with assigning those sources to the many destinations on offer. There's just time to now look at Roar's Multiband processing which gives all three saturation stages running in parallel. This gives our combination of bass and Bassic preset a massively distorted, but still usable sound.
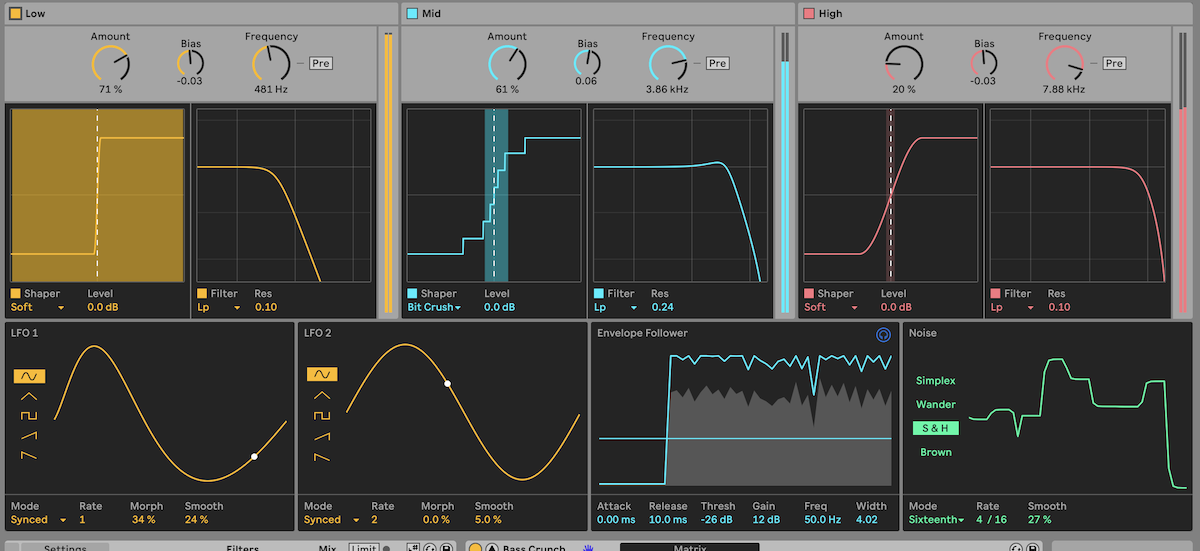
It also gives us the opportunity to work within each frequency band that the three stages are focussing on. You can easily switch each stage in and out by clicking the Low, Mid and High boxes. We've switched Low and Mid off here so can just hear the High.
If, as with us, the High band is not contributing much, you can easily change its saturation curve, Bias and Frequency so that it becomes more audible. The Bias, Amount and Frequency dials are all modulatable too, if you want to go wild. The Mid band is doing the most work so changing its curve really affects the results.
Finally experiment with Feedback. Adjusting the Frequency affects the tone of the fed back signal which you can easily hear (and indeed modulate). The width too, really thickens the effect and can be modulated as shown.
That's our deep-dive tour of Roar completed. As you can see there's a lot to love here, and we'll be exploring it further and letting it loose on a lot of our sounds and tracks in the coming weeks, so expect more roars from us soon.
Please note that we used the beta of Live 12 for this feature and the finished version of Live 12 may look slightly different.