
An auxiliary or return channel is an empty channel that can be called up in your DAW’s mixer, much like a bus or group track. However, instead of routing individual channel outputs directly into this, you instead use a channel’s send fader to route its signal to the aux in parallel.
This is most commonly used for reverb and delay effects: load a reverb effect on a single aux return, and you can pipe portions of your channels’ signals to this aux. This will leave the original untouched in the mix, but their signals will hit the aux, and the reverb will be output via this channel.
This kind of parallel processing is a staple in modern productions. By keeping your main mix signals intact, but piping them separately to an aux channel, you can add processing on top of the source sounds in question, to maintain mix solidity and achieve a more ‘3D’ effect.
Another reason to use parallel processing is the fact that you can combine multiple processors on one aux channel, meaning you can build custom chains for supreme control. Most DAWs allow you to store your pre-made effect chains, so you can easily stock your presets folder for easy reuse (download ours, below, with this issue’s samples).
The concept of pre- and post-fader routing is also important. Let’s say you’ve got a clap in a track, and heavy EQ is applied directly on its channel. If you route the clap to a reverb aux track post-fader, the signal that will hit the aux will be the EQed signal.
Alternatively, if you route the clap pre-fader, the signal that hits that reverb will be piped before the clap’s insert effects and volume fader. This can be useful if, say, you want to set up a custom headphone mix for a vocalist, independent of the main mix balance you’ve perfected.
Three useful auxiliary tools
1. 808 fattener
Send a clean 808 kick drum to an aux chain, designed to add parallel midrange harmonics while leaving the weighty dry signal intact. Two stages of distortion can add characterful grunt, then a high-pass filter removes unneeded bass.
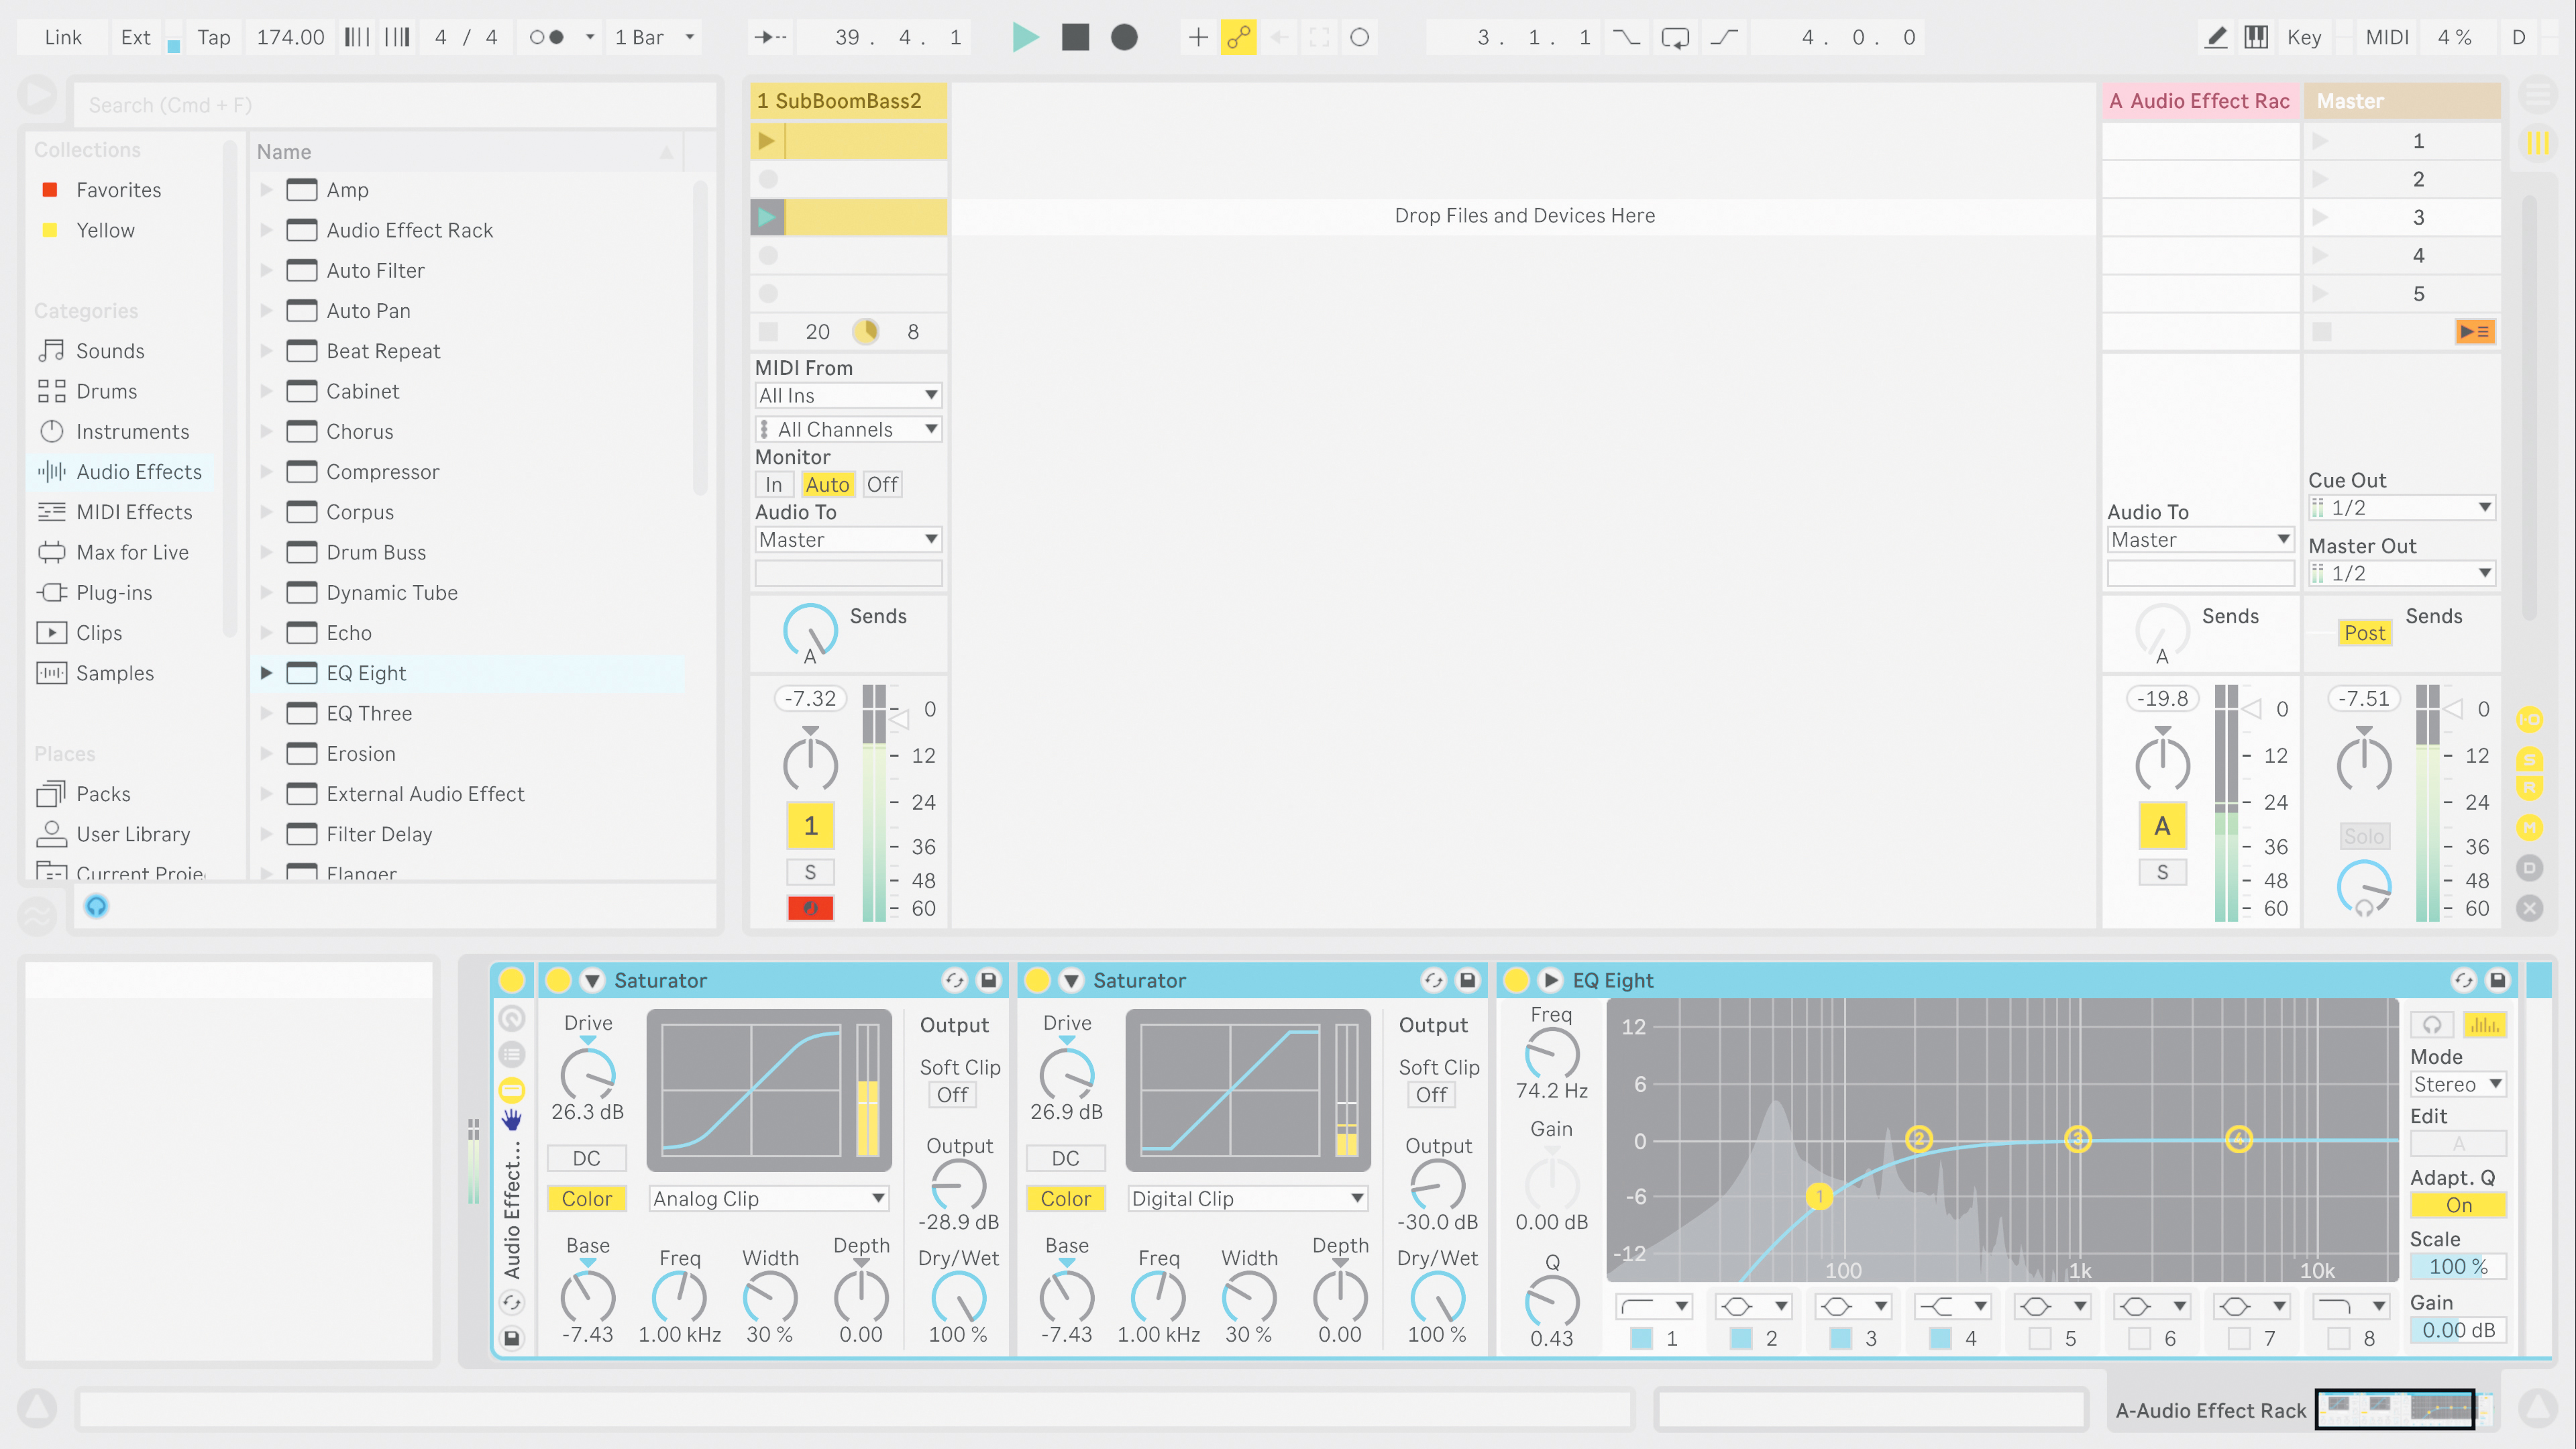
2. Stereo spreader
By loading a stereo widening plugin on an aux, then following it with a mid/side utility and M/S EQ, you can send narrow signals to the aux and then precisely control the width and position of this stereo information in the mix.
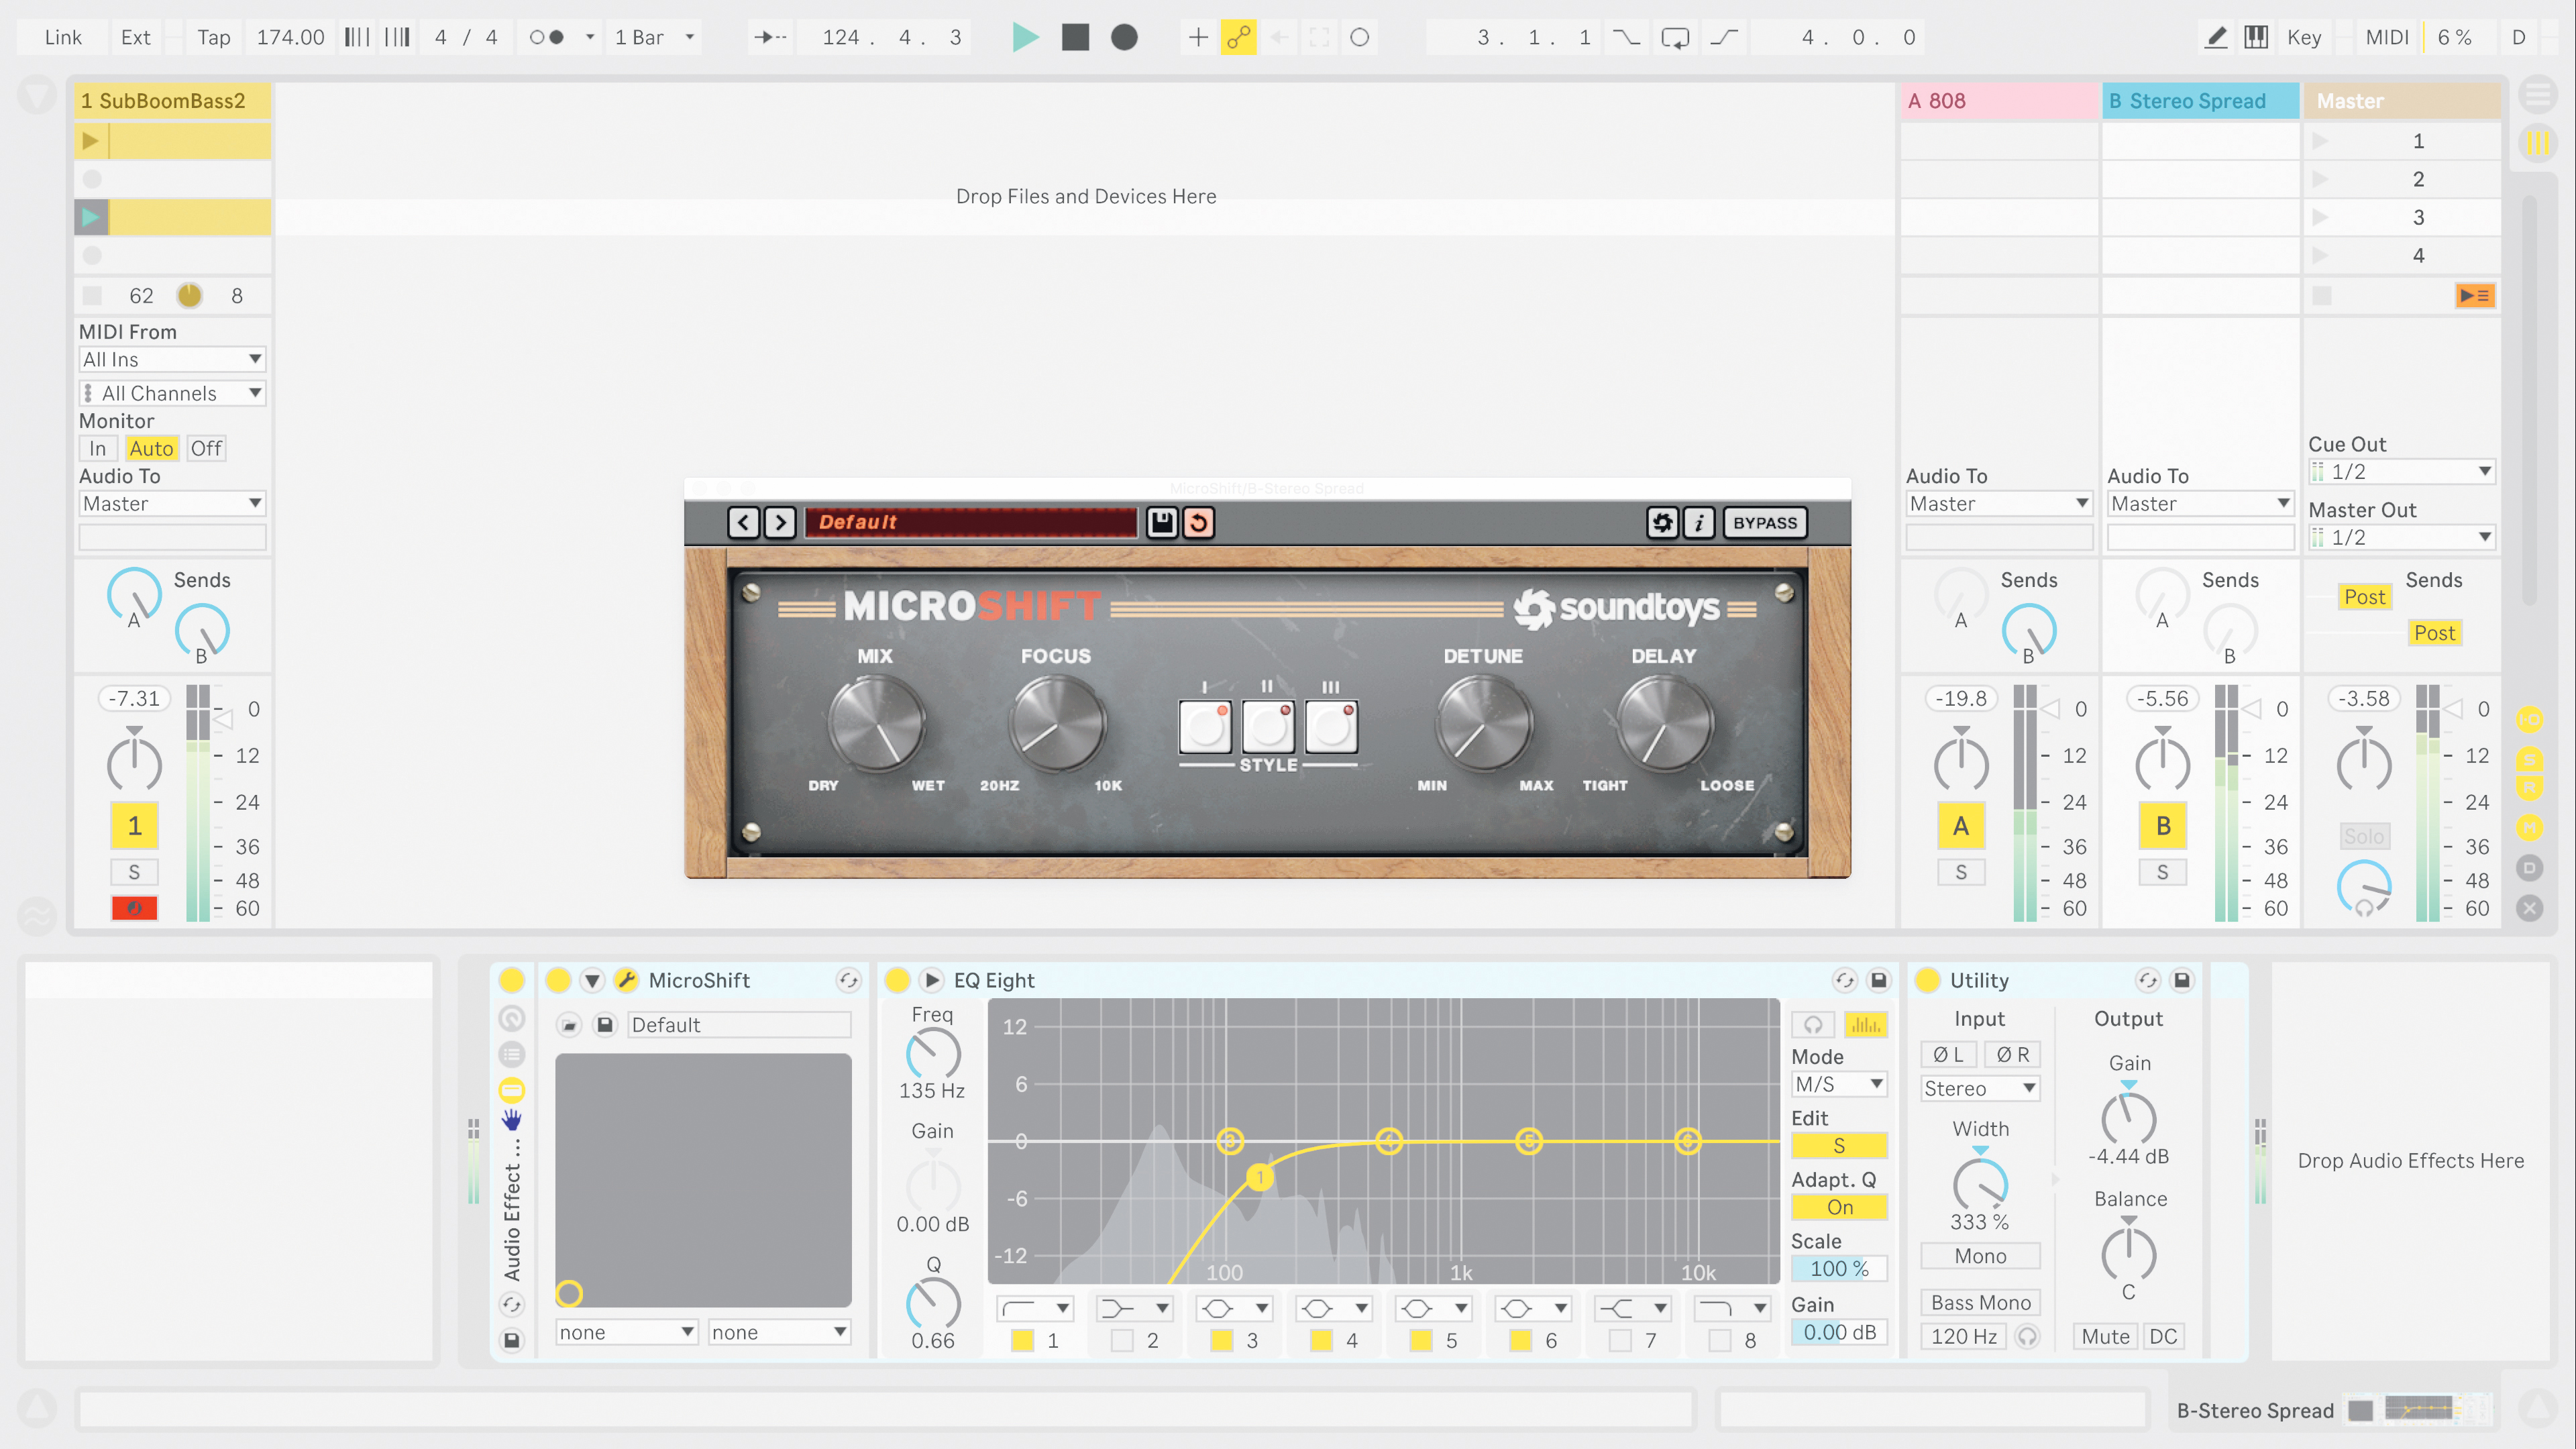
3. Reverb pumper
Load a huge reverb on an aux, then place a sidechain compressor after it. Send a signal to the reverb, and key that same signal into the compressor’s input. This tells the reverb to duck when the dry signal fires, and swell up after.