While other 3D printers are trying to catch our attention with speed, the LotMaxx Shark V3 is preaching versatility. It prints in two colors and laser engraves thanks to a swappable tool head.
The Shark has an unusual “2 to 1” hotend – meaning it has two sets of extruder gears and two Bowden tubes feeding into one Y-shaped hotend. This eliminates the calibration woes seen in an IDEX printer, but still needs a purge tower to dump filament between color swaps.
The included laser is very simple, with limited software and safety precautions. I wouldn’t buy the Shark V3 for the laser attachment alone – but perhaps treat it as a curiosity to see if I wanted to spend more on a desktop laser.
Currently on sale for $359, the Shark V3 has an intriguing design, but is a little too frustrating to use to be considered one of the best 3D printers. It’s definitely easier to use than an IDEX, but the fact that it can’t read modern MMU files used by Bambu Lab or PrusaSlicer limits its creative potential.
Specifications: LotMaxx Shark V3
LotMaxx Shark V3: Included in the Box
LotMaxx Shark V3 comes with everything you need to build and maintain your printer. You get a pair of side cutters, a set of Allen wrenches and screwdriver, a microSD card and USB adapter, spare nozzles, a spare Z limit switch and thermistor, a wooden board to laser and two small coils of PLA.
The USB flash stick contains several test models, a PDF copy of the manual and a LotMaxx branded slicer. A paper quick start guide has directions to get the printer up and running. The LotMaxx YouTube channel has helpful videos tutorials that pick up where the guide leaves off.
Design of the LotMaxx Shark V3
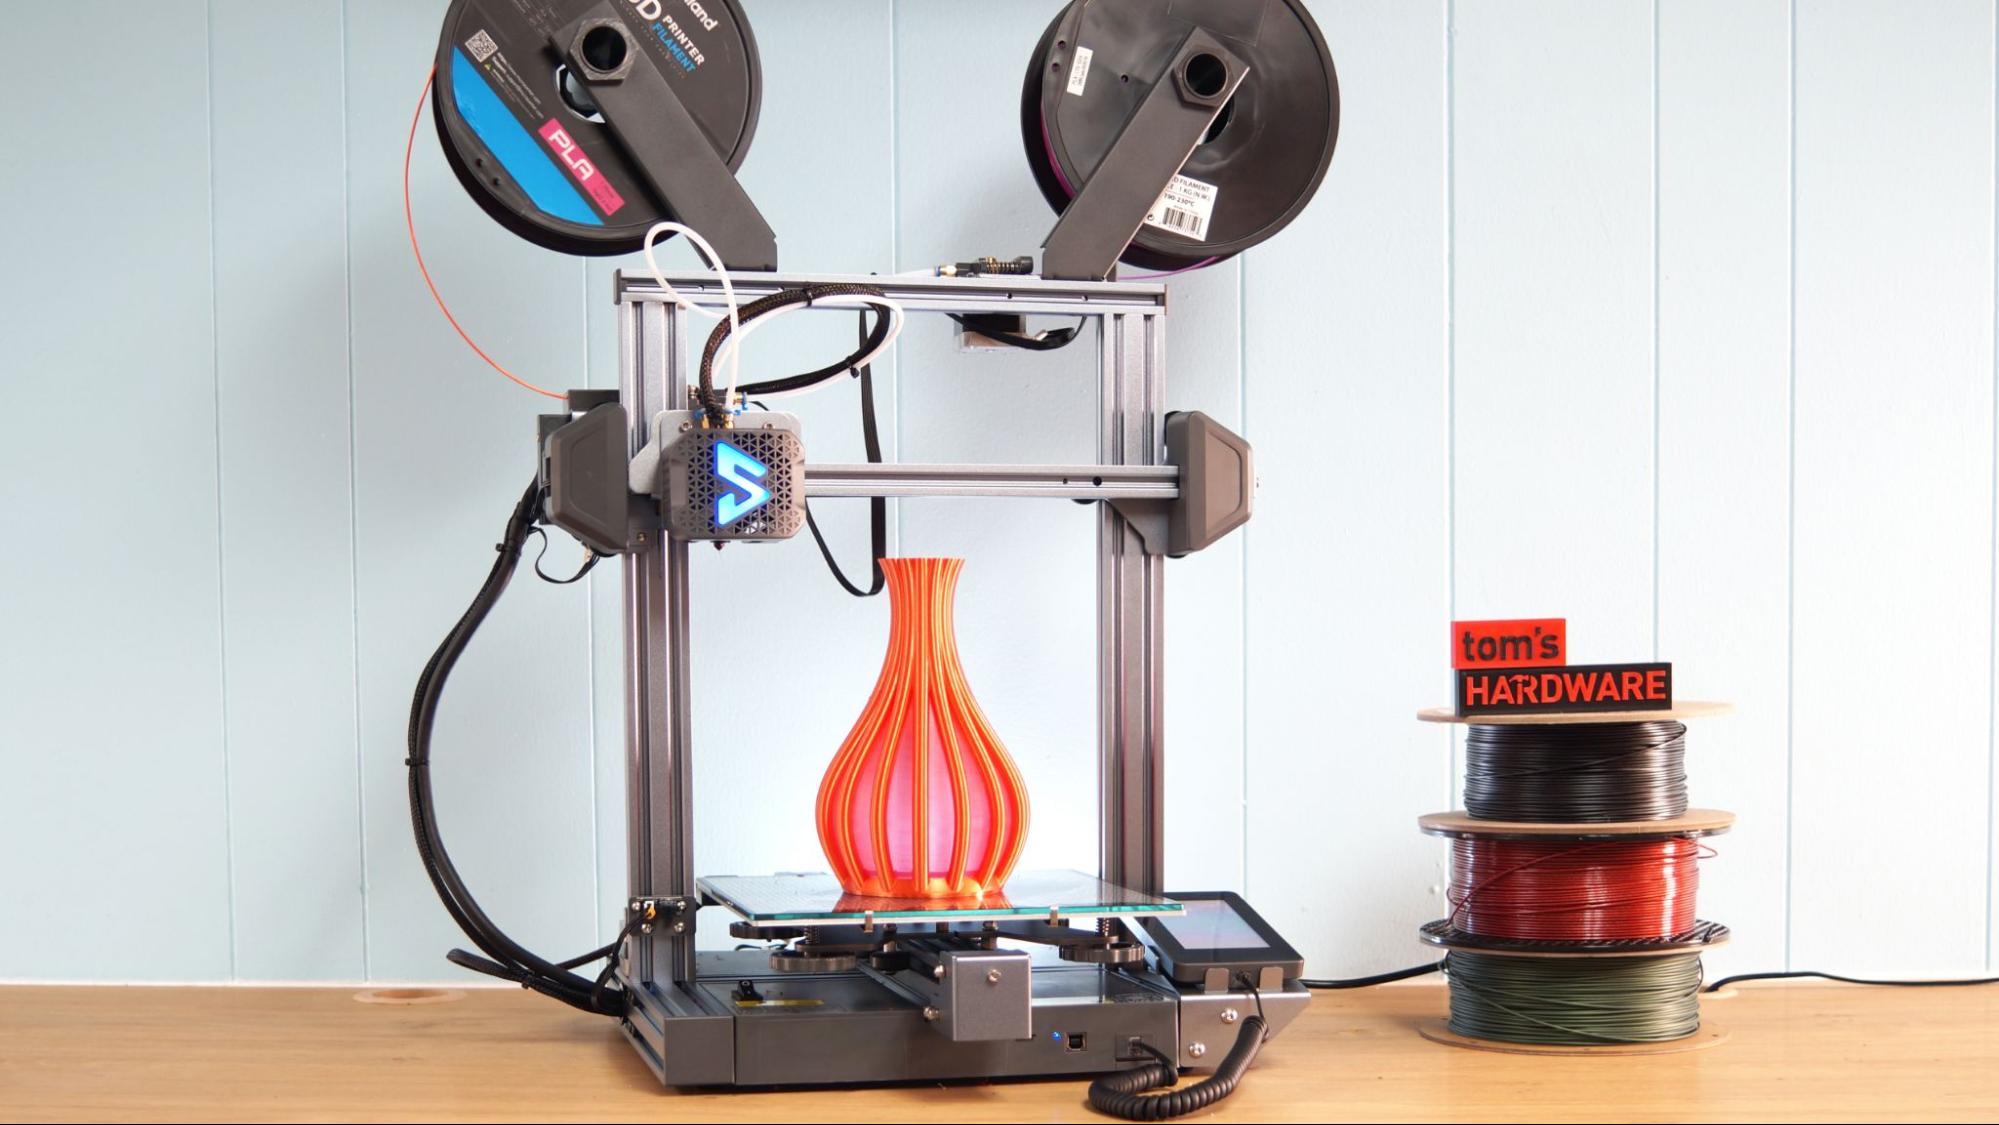
The LotMaxx Shark V3 is visually striking and looks like it would be at home in a comic book superhero lab. Its twin spool holders jut out like antenna, a giant S pulses blue on the fan shroud and a Shark logo is painted on the glass bed surrounded by a comic book dot pattern. I immediately liked the fun vibe and thought it would be appealing to teens and cosplay makers.
Sadly, the dots are just painted on the reverse side of the glass, and not a superhero coating to help with bed adhesion. I’m not a big fan of glass, and the Shark V3 behaved as I feared, requiring villainous amounts of elbow grease and a wicked chisel to remove prints. Though it held on to my test models with a grip to rival Spider-Man, it wasn’t enough to keep my purge towers from toppling and ruining several prints.
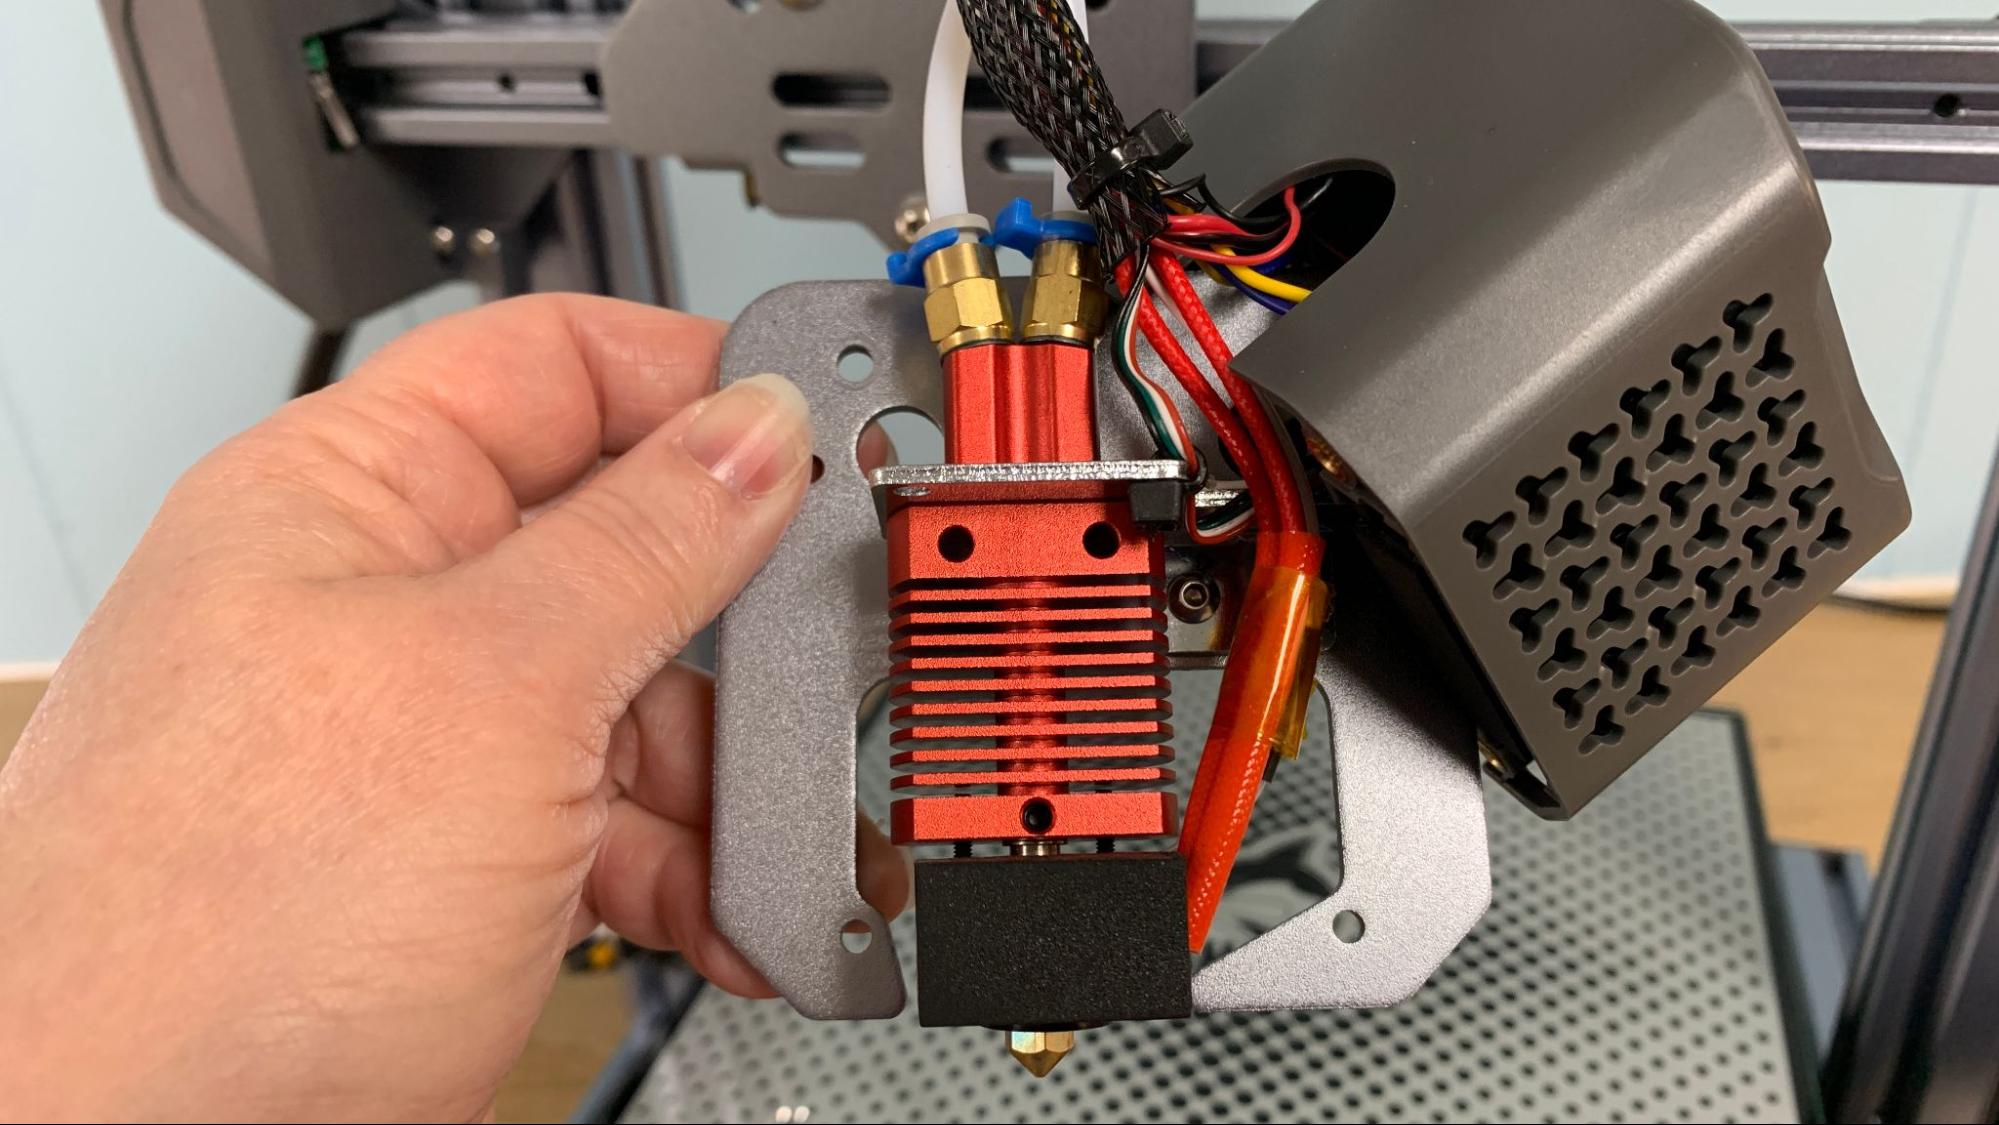
The Shark V3 is a dual color 3D printer with a secret identity as a laser engraver. More about that later; let's dive into the hotend first. You don’t see 2-in-1 hotends very often, but it’s an ingenious way to achieve multicolor without a lot of hardware. The Shark V3 has two Bowden tubes feeding filament from two spools into one Y shaped hotend. The filament is swapped back and forth on the cold side, so it will blend for a short time (if you don’t use a purge tower) but it can’t mimic dual color filament.
The 2-in-1 hotend is only $19 on the LotMaxx website should you need to replace it. Though the design is unusual, there are other 3rd party hotends if you wanted to upgrade. The nozzles are the standard MK8 design and easily replaced with anything made for a traditional Creality hotend.
The Shark V3 is a well-made 3D printer. The hardware is solid, with three cooling fans on the hotend and exceptionally quiet performance from both fans and stepper motors. The auto bed leveling worked like a charm and the detachable touch screen is large, bright and easy to understand. It only has one Z axis rod, but at this size, it’s not much of an issue.
Switching it to laser mode requires removing two screws from the tool head and reattaching it to the upper gantry for storage. This is clever and gets it out of the way, without needing to remove all the tubes and wires.
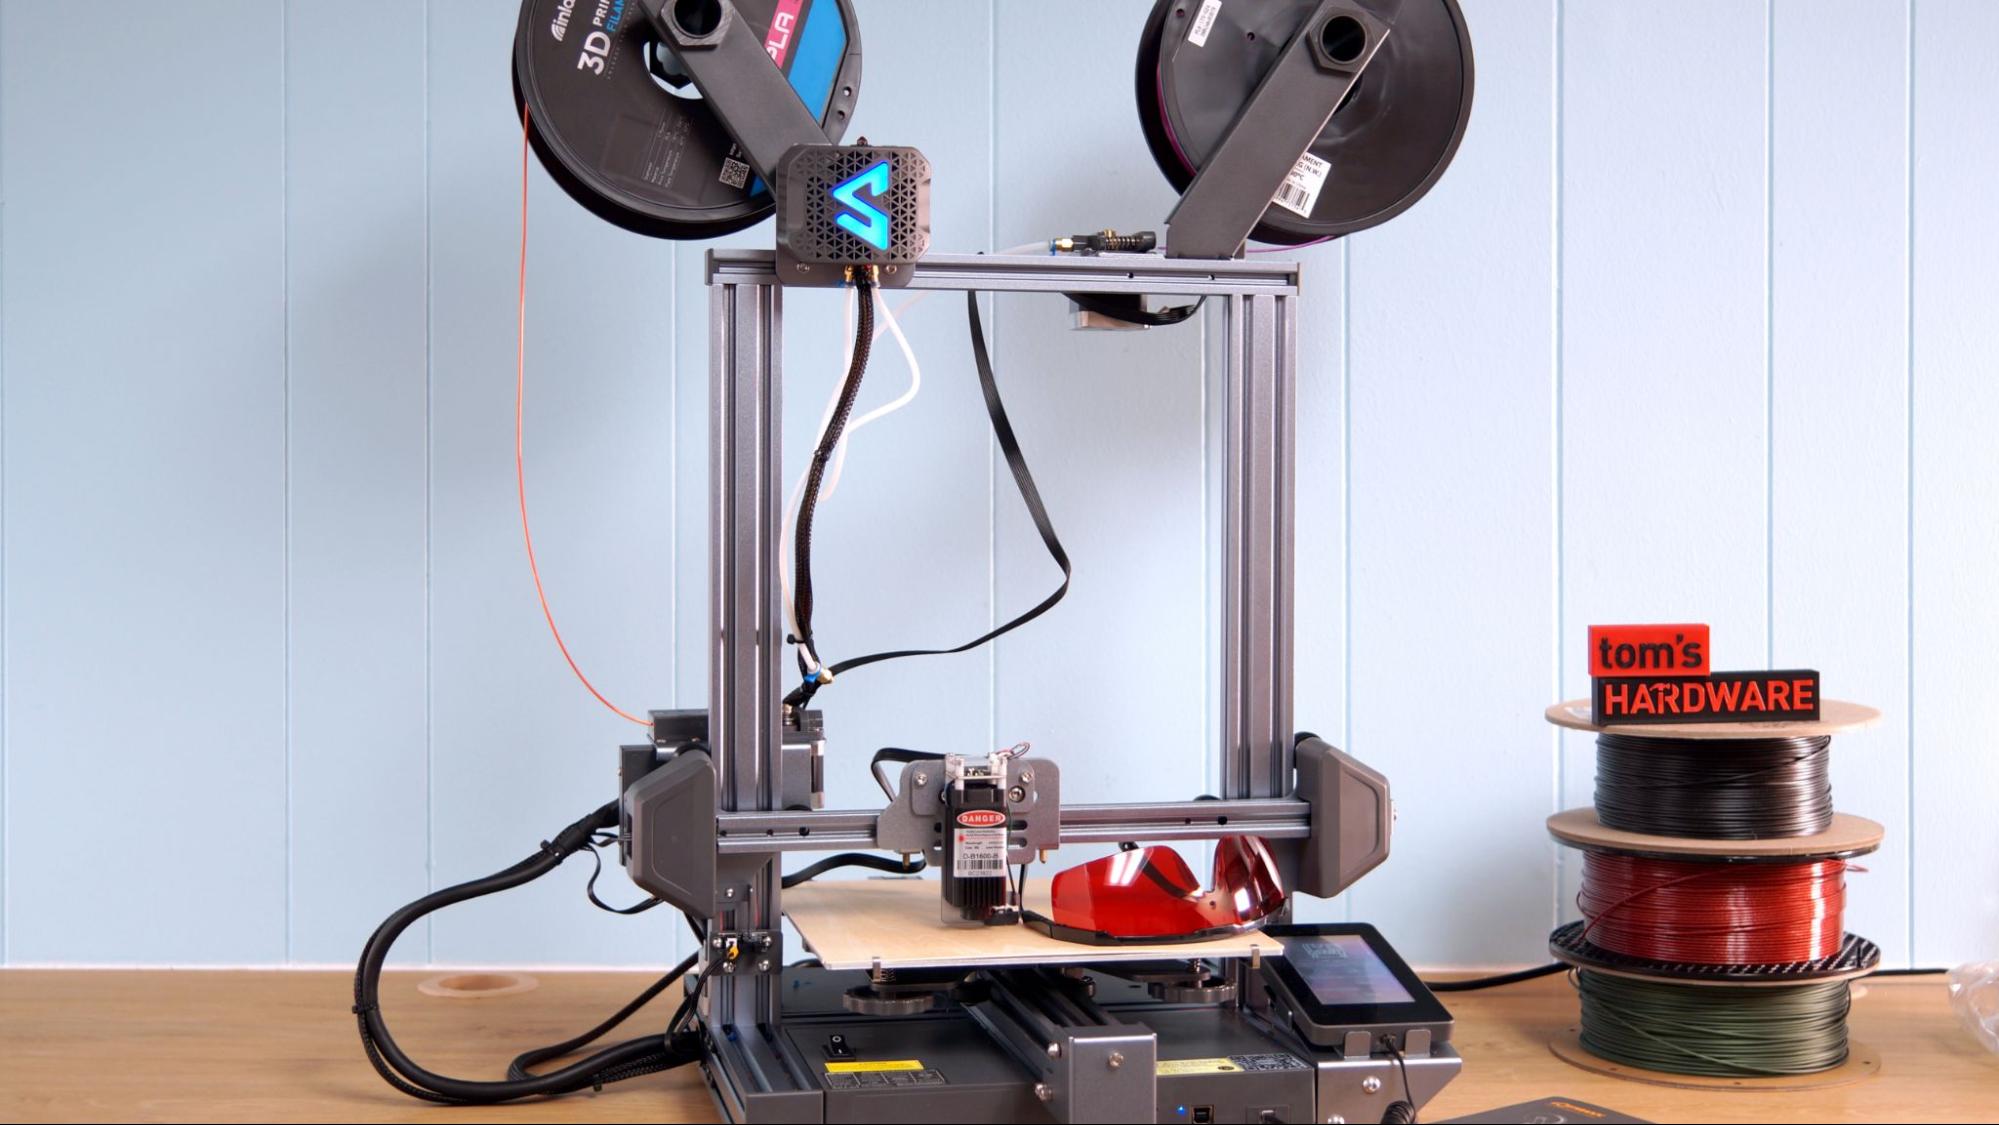
The laser is very basic and must be hand focused. Directions on how to use the laser are limited, as is the software included to run it. The 1.6-watt laser isn’t for cutting, but can engrave wood, leather and paper.
I would prefer the laser to come with an enclosure for greater safety. Even a low power laser could damage your eyeballs if you look at it. LotMaxx includes one pair of safety glasses, so I would recommend that you only work with the laser in a room with a door so you can prevent other people, pets and small children from wandering in unprotected while it’s in use. Additional safety glasses can be purchased from a variety of manufacturers on Amazon. Look for lenses rated for a 450 (blue) wave length.
Assembling the LotMaxx Shark V3
The LotMaxx Shark V3 comes mostly assembled. You’ll need to attach the gantry to the base with four large bolts, screw in the spool holders and display, then attach the second extruder. There’s no slot to fit the gantry onto the base, so you’ll need to take care aligning everything, However, the bolts are very easy to start by hand and finish with a good twist of the Allen wrench.
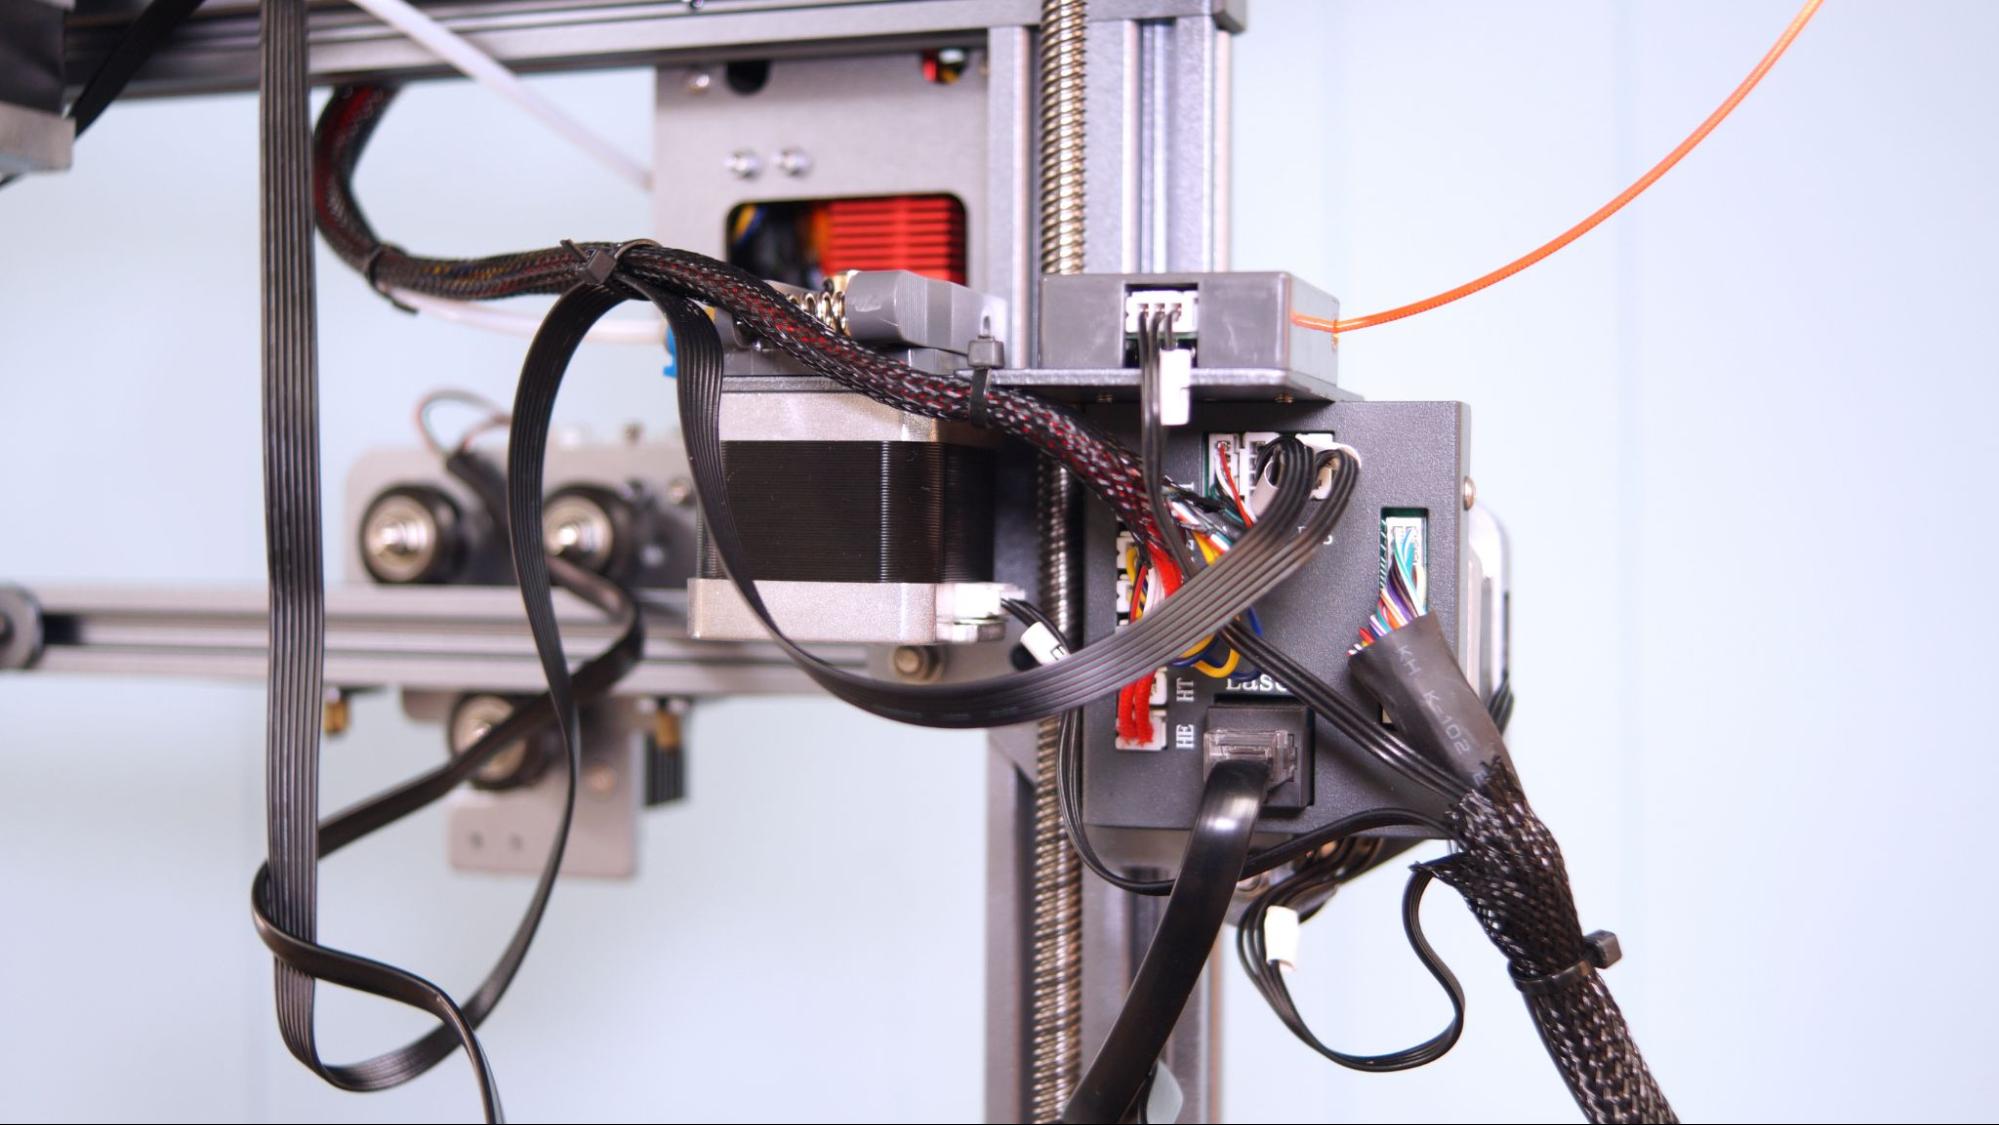
The wiring itself is labeled. However they could do a better job of illustrating where each connector attaches. I should point out that the website has a supplemental photo of the board – though it's listed as the “V3 Adaptor plate wireless guide” instead of “wiring”. I only clicked it because I was hoping there was a WiFi module, but there is not.
Another small issue is cable management. The printer comes with a handful of zip ties and no suggestion where to put them. If you’re unfamiliar with 3D printing, you may not even realize what to do with the zip ties until you get tangled on the loose wiring.
Leveling the LotMaxx Shark V3
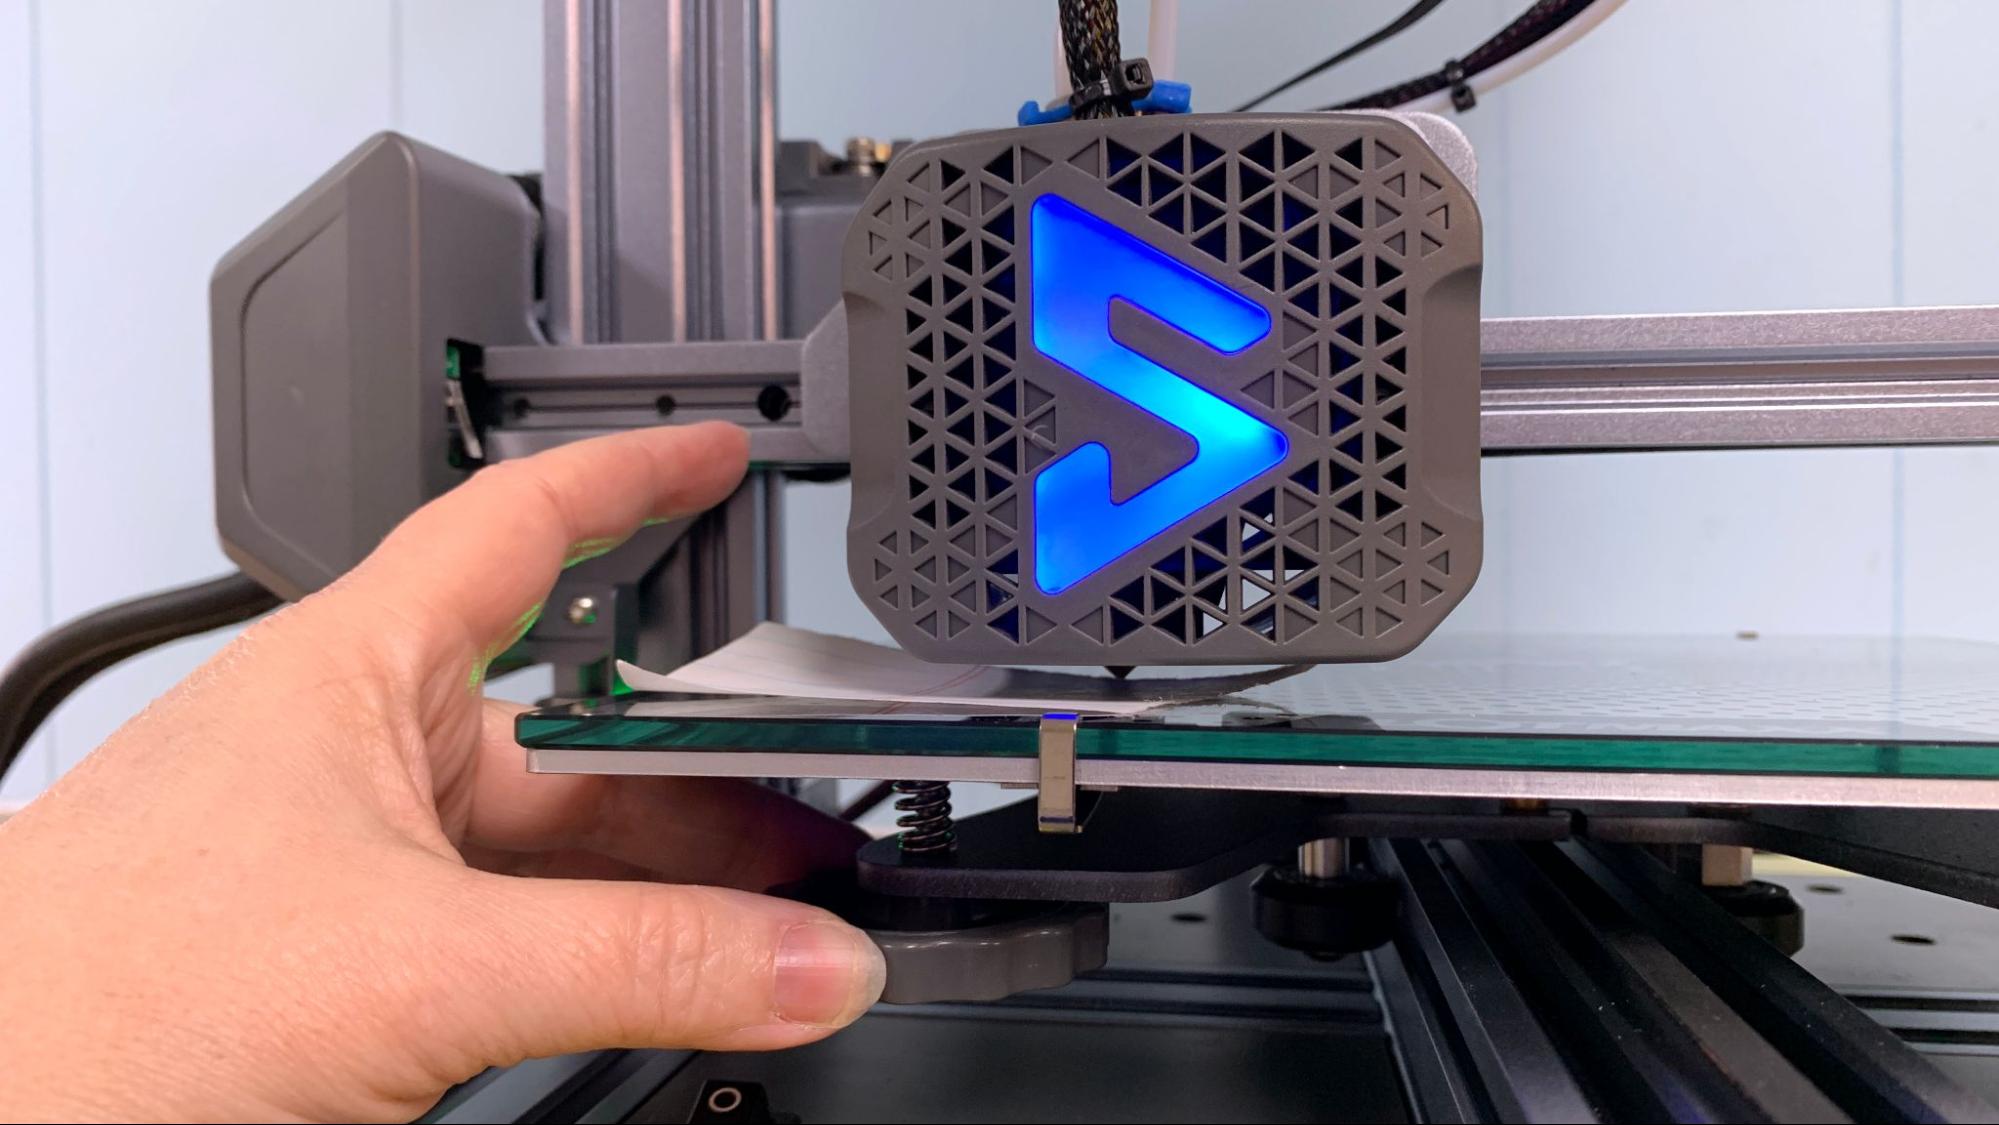
The LotMaxx Shark V3 has automatic bed leveling with a sensor built into the nozzle. It also has bed leveling wheels, so the initial leveling requires manual adjusting to get it within an acceptable range. Switching from manual to automatic leveling is done within the setting menu, rather than inside the leveling menu. This placement is rather strange, and if you’re not following the manual closely, you might think that the machine doesn’t even have auto leveling.
Manual leveling is straight forward. The machine will move the nozzle to four corners of the bed for you. Slide a piece of ordinary paper under the nozzle and move the knob underneath until the nozzle just scrapes the paper. Check out my article on how to manually level a 3D printer bed for more tips and illustrations.
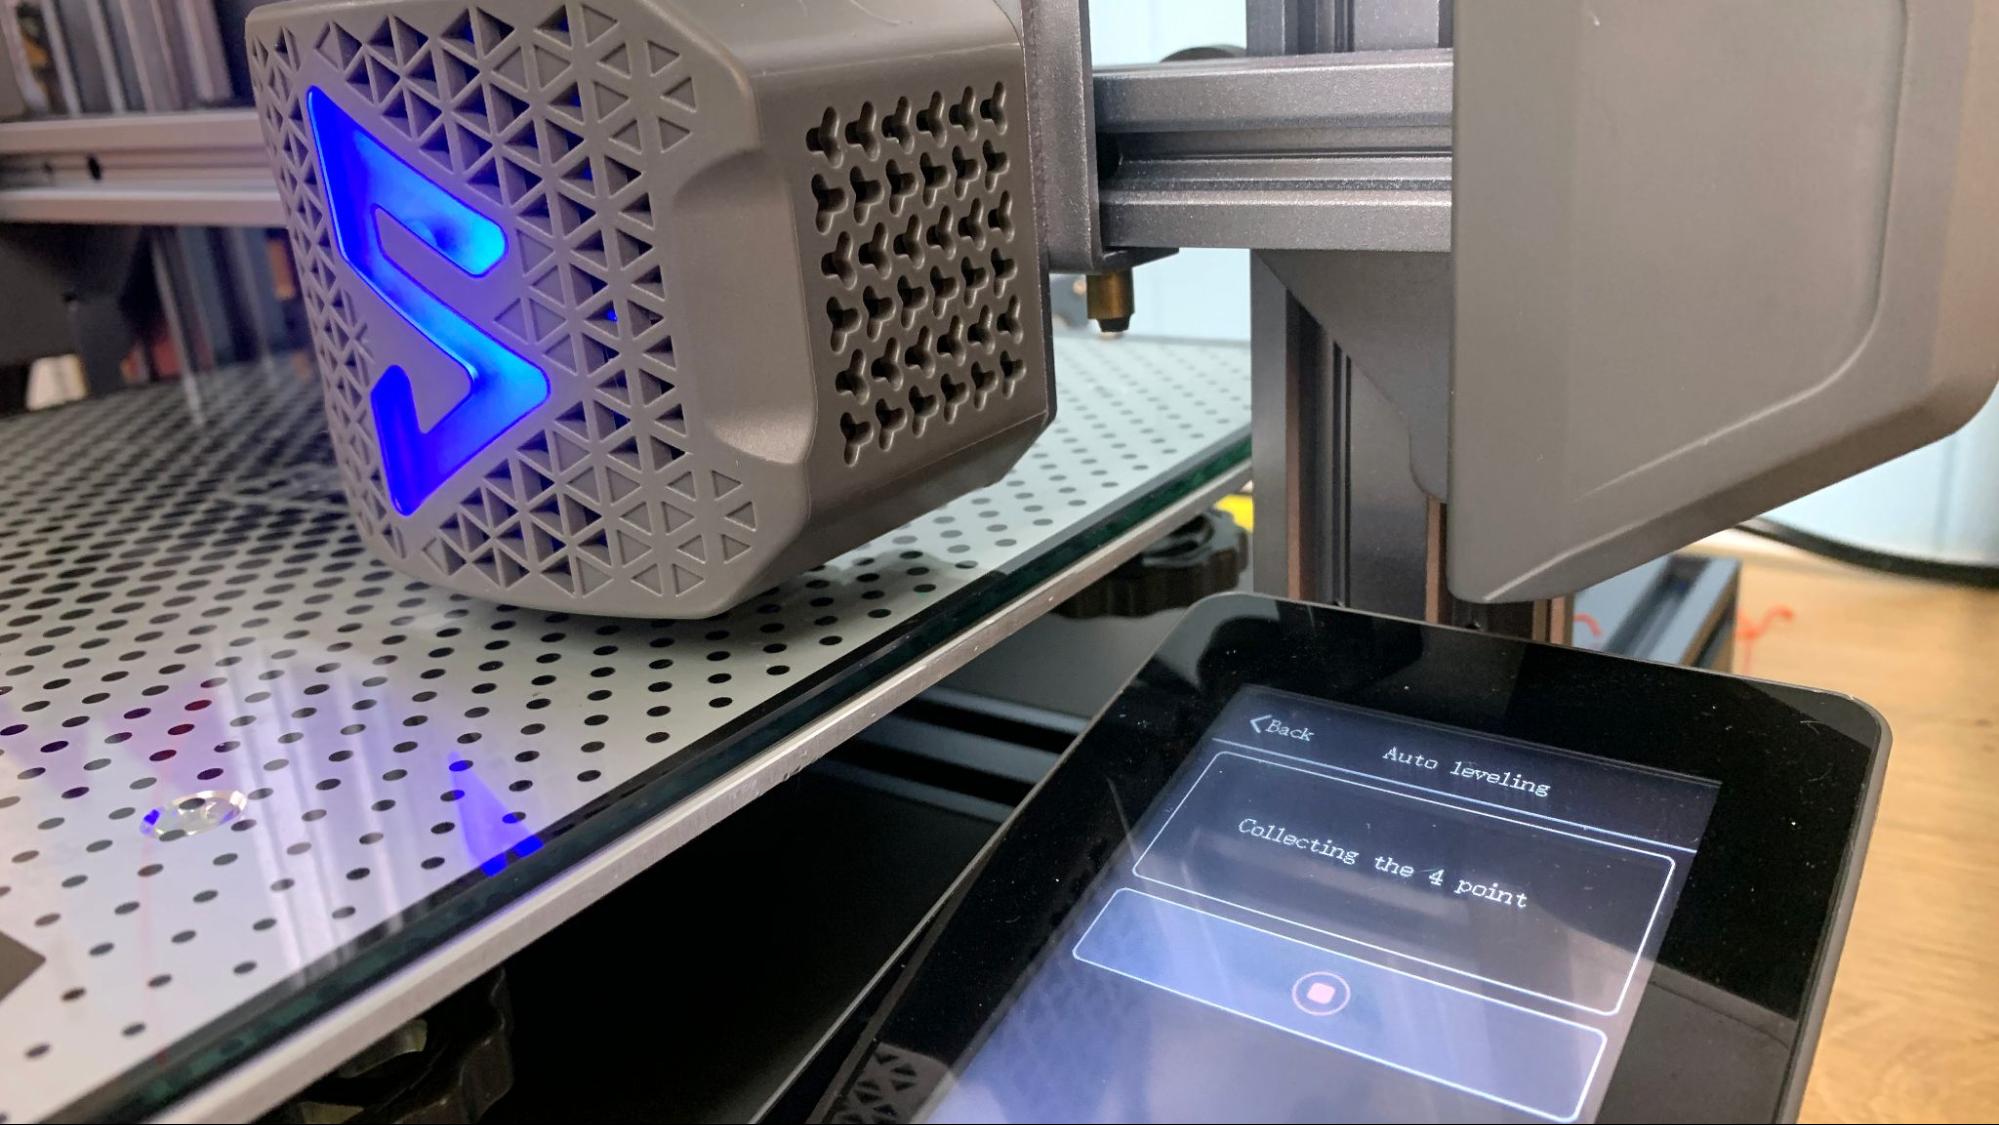
After the bed is manually adjusted, click on the setting menu and switch to auto leveling. It will quickly tap 9 points around the bed and return to the center at 0 Z height. Click “Set Z height Comp” to perfect your Z height. I found the stock setting to be a bit tight and raised it up a fraction of a millimeter.
Loading Filament on the LotMaxx Shark V3
The LotMaxx Shark V3 has two extruders located on either side of the build plate, both with filament run out sensors. One extruder is in the usual place on the left, and the other is on the right at the top of the gantry.
To load filament, click Control on the main menu, then preheat. There is an automatic setting for PLA and ABS. Click PLA and it will heat to 210 degrees. You can change this preset by clicking the gear.
Click the back button, then click Extrusion. Select which extruder you’re loading – left or right. Feed the filament into the run out sensor and push it against the extruder opening. Click “fast” then “load” and it will grab a hold of the filament and rapidly feed it about 75% of the way to the hotend. Click load again, and stop once it is at the top of the hotend.
There’s no need to push filament all the way into the hotend. Gcode written in the LotMaxx Slicer (which can be copied over to Cura) will advance the filament 100mm before starting to print, which is adequate to reach the nozzle and a bit beyond.
At the end of each print, the Shark V3 backs up the extruder and parks the filament on the cold side of the hotend. When you want to change colors after a print, there’s no need to warm up the hotend, just release tension on the extruder level and pull the filament out.
There are unload buttons in the Extrusion menu if you want to use them. You will need to warm up the hotend first – as a safety measure the extruder will not force filament from a cold hotend.
Preparing Files / Software for LotMaxx Shark V3
The LotMaxx Shark V3 comes with a copy of LotMaxx Slicer, which is a rebranded version of Cura. I would highly recommend starting with this slicer if you are unfamiliar with two-color printing.
Even if you are comfortable with multicolor printing, you’ll still want to load this slicer and copy the start and end gcodes to your preferred version of Cura. Though LotMaxx has had a color printer on the market for a number of years (we reviewed the Shark V2 in 2021) they have not submitted a two color profile to the UltiMaker Cura team.
The Shark V3 came with a file called “Cura Parameter Installer” on the SD card. I can’t tell you what the parameter installer is supposed to do, because on my PC, it broke Cura so badly that I had to delete all my saved profiles and reinstall Cura from scratch. This included custom profiles I hand built for other brands of machines. I would advise you to ignore this file and just cut and paste the gcodes from LotMaxx Slicer.
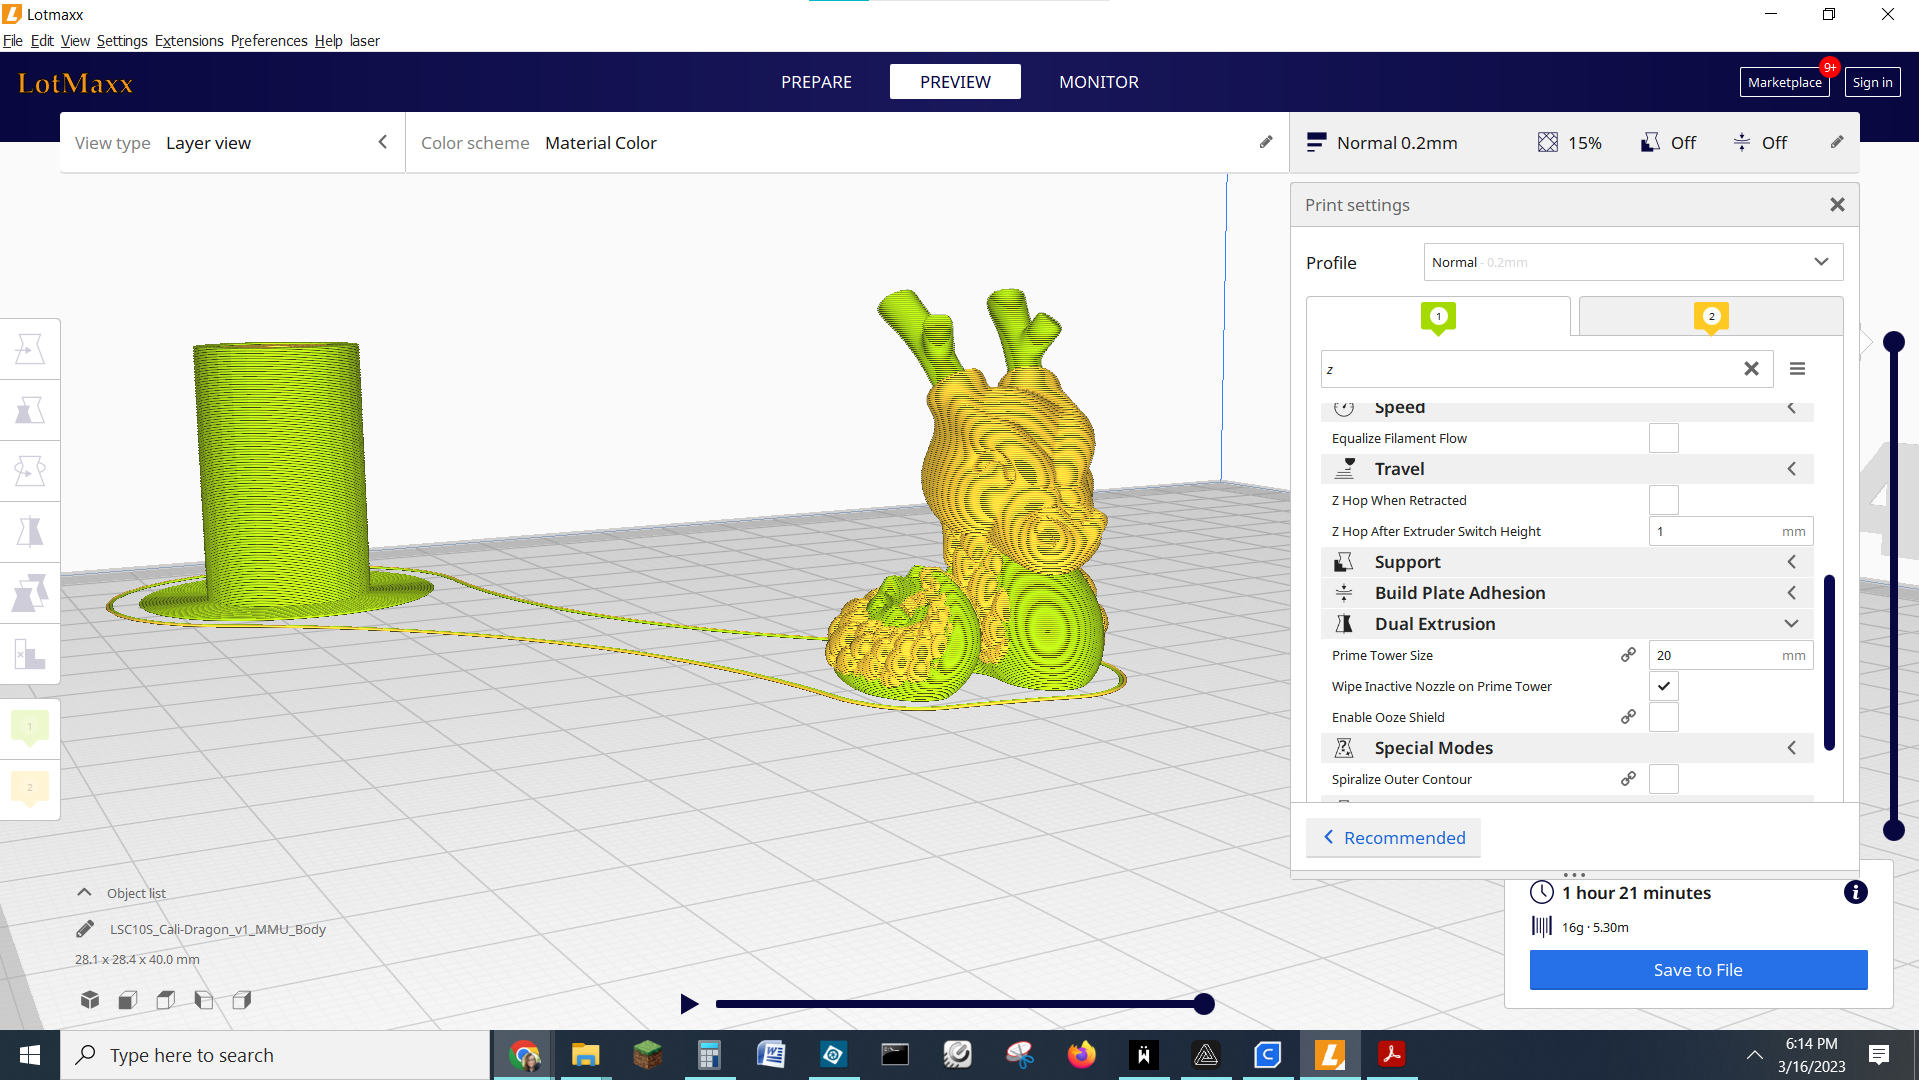
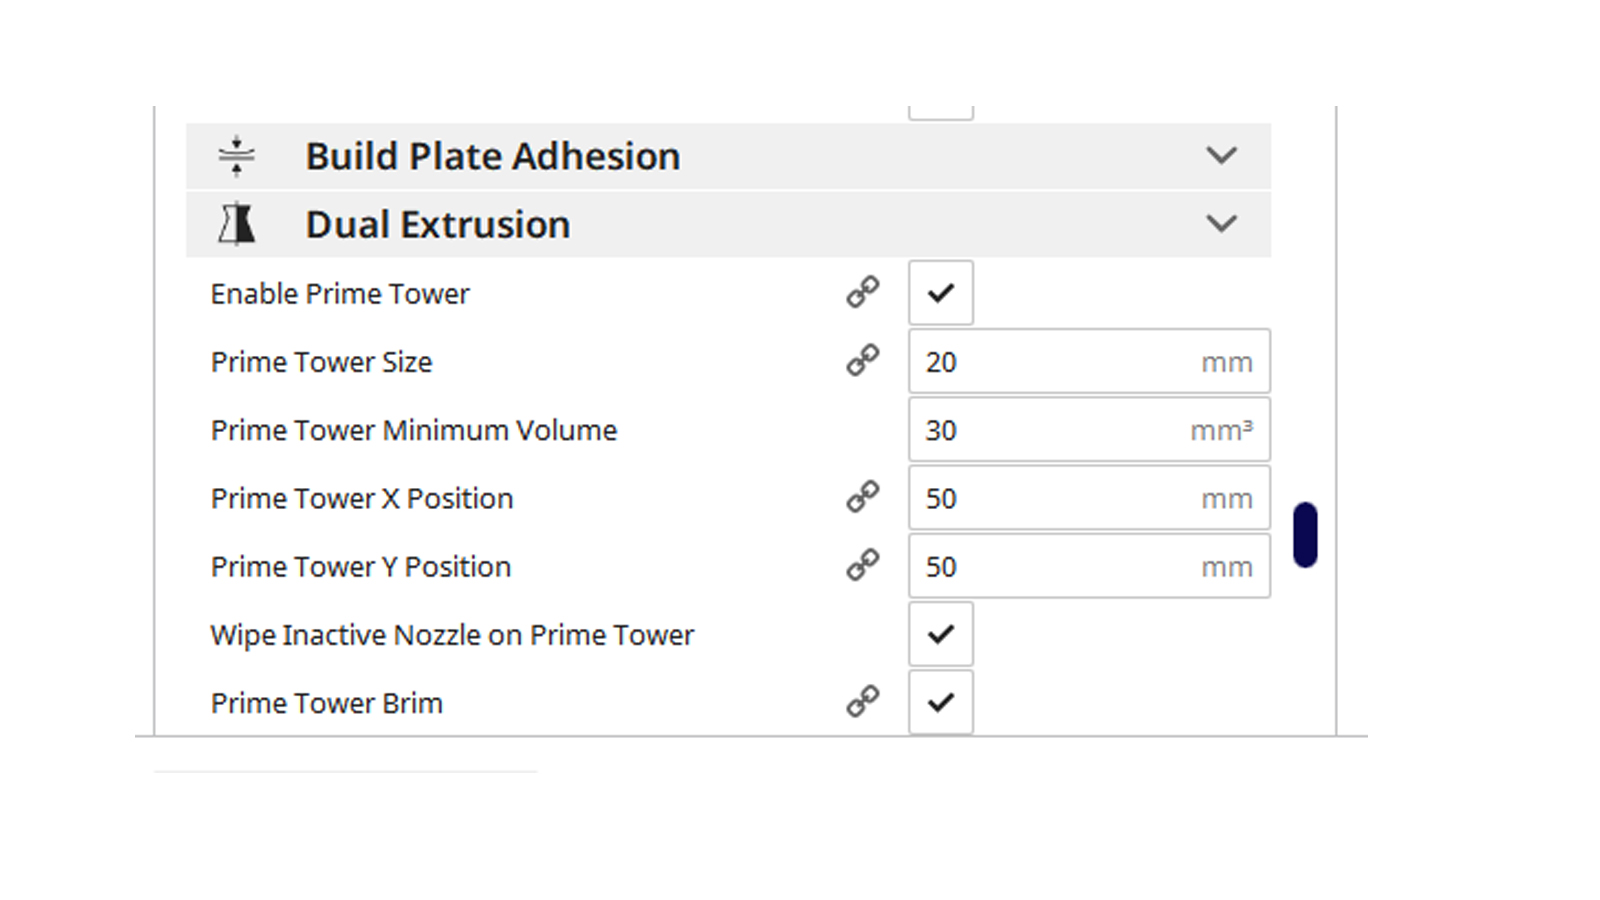
LotMaxx Slicer uses Cura defaults on the Dual Extrusion settings. The number to pay attention to is the “Prime Tower Minimum Volume” which is the amount of filament purged into the tower in order to switch colors. You should run a test print (like McGybeer’s Cali-Dragon) to see if the volume is enough to switch colors to your satisfaction.
Please note that the Shark V3 does not understand Prusa Slicer’s or Bambu Lab’s “paint on” multicolor files. It only understands old school MMU files where each part is saved as its own stl file. These parts are then assigned to the left or right nozzle in the slicer and merged together in one print.
Not understanding newer MMU files is disappointing, as this severely limits the number of designer created multicolor files you can access. It is possible to separate files yourself if you have an advanced understanding of design software.
Printing on the LotMaxx Shark V3
The LotMaxx Shark V3 comes with small samples of PLA in two colors. You will soon need more material, so check out our guide to the best filaments for 3D printing for suggestions.
The following test prints are mostly two color, but I should point out that it does single-color prints equally well and in less time. To use it as a single color printer, you’ll only need to choose the single color option from the print menu. When you load a file to print, the Shark V3 will ask if you want to use left, right or both spools.
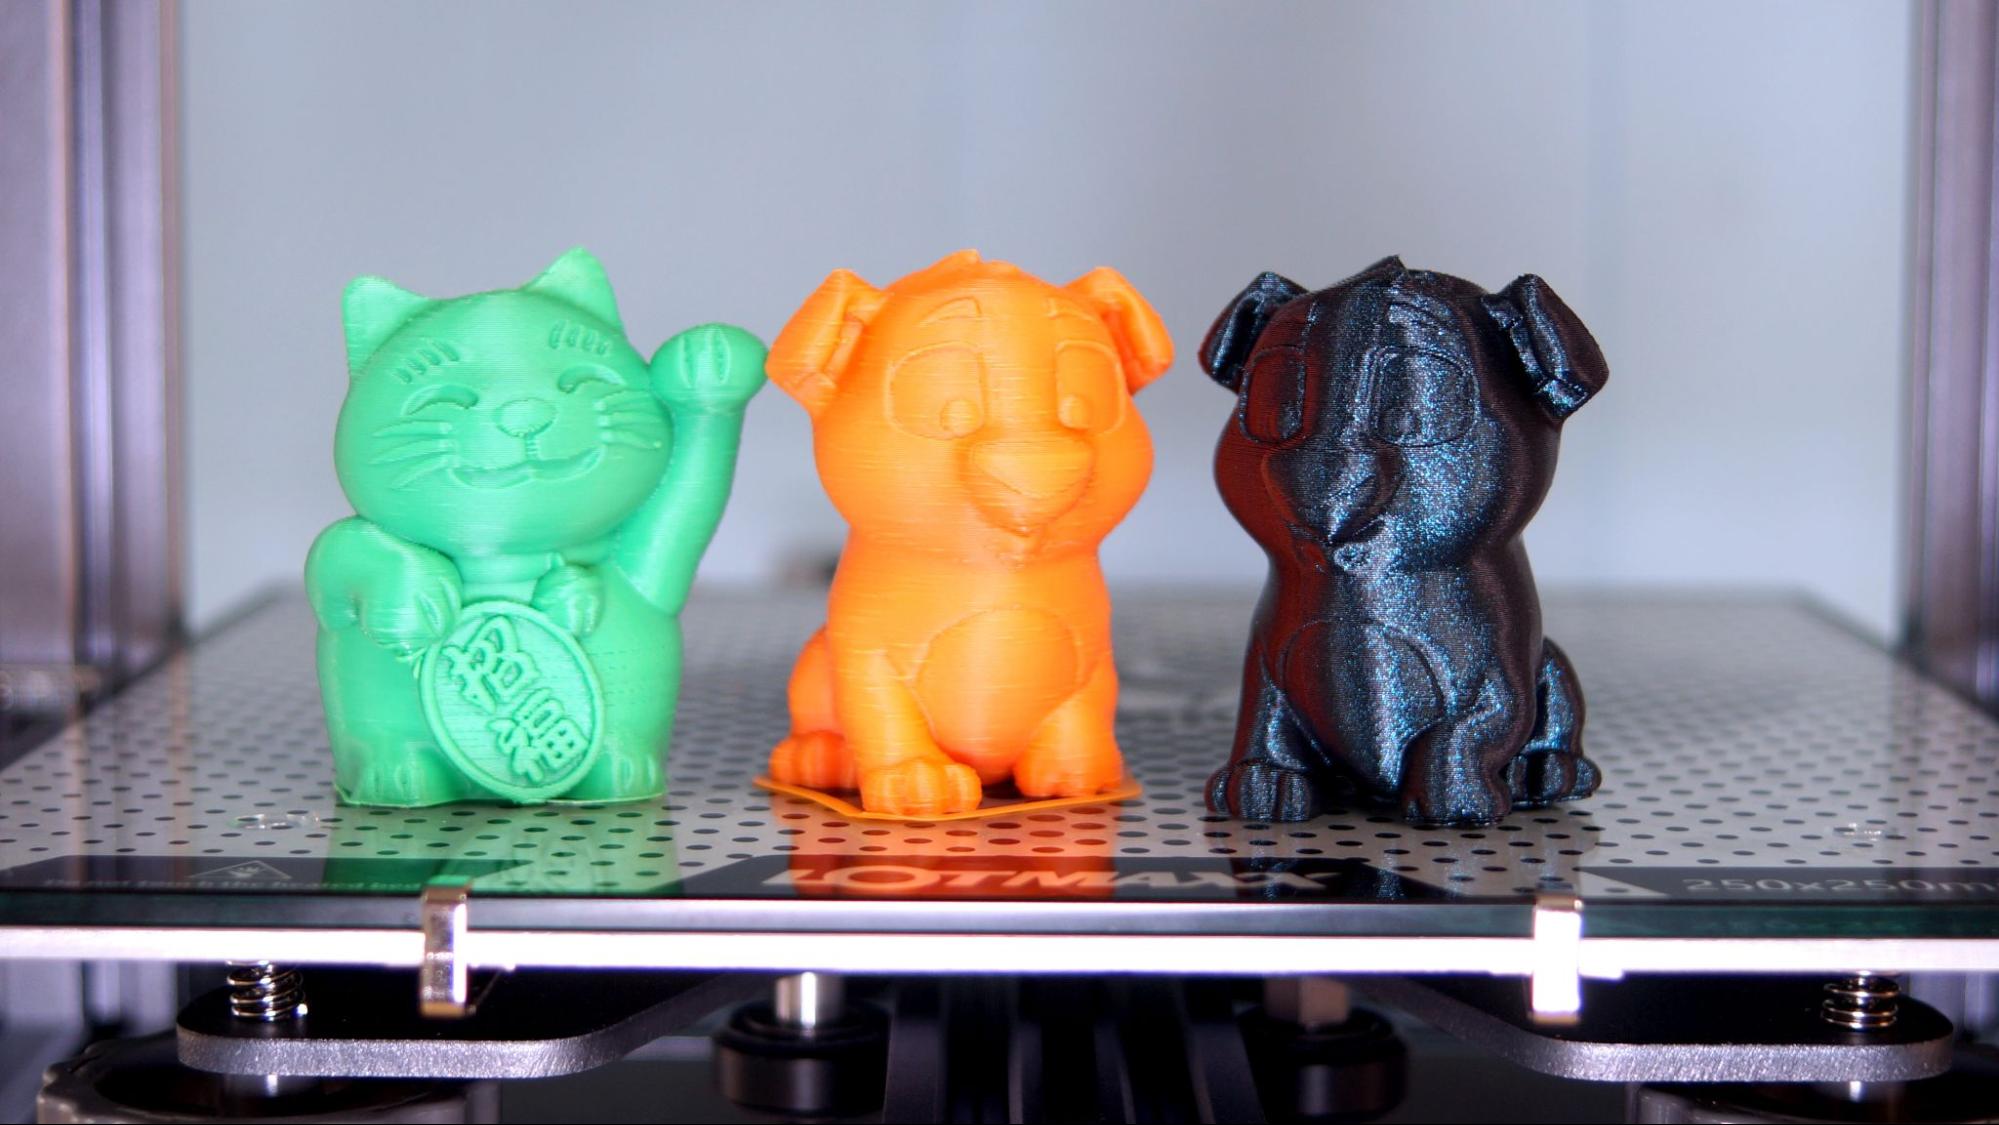
The Shark V3 has several test prints on the SD card, for both single and multicolor printing. I can’t say that I was super impressed with the quality of the pre-sliced dog test print, which had a poorly placed skirt and a lot of rough layer lines.
I resliced the dog and the lucky cat, and they came out very clean as single color prints. The cat has a little drooping under one paw, which is typical when this model is printed unsupported. Below is the Lucky Cat, sliced in Cura 5.2 using a .2 layer height and 65mm/s speed. It took 1 hour and 4 minutes. In the middle is the pre-sliced dog, no recorded stats. Both of these are using the sample filaments. On the right is the dog sliced in Cura 5.2 using a .2 layer height and 65mm/s speed, also taking one hour and 4 minutes, printed in Flashforge Burnt Titanium PLA.
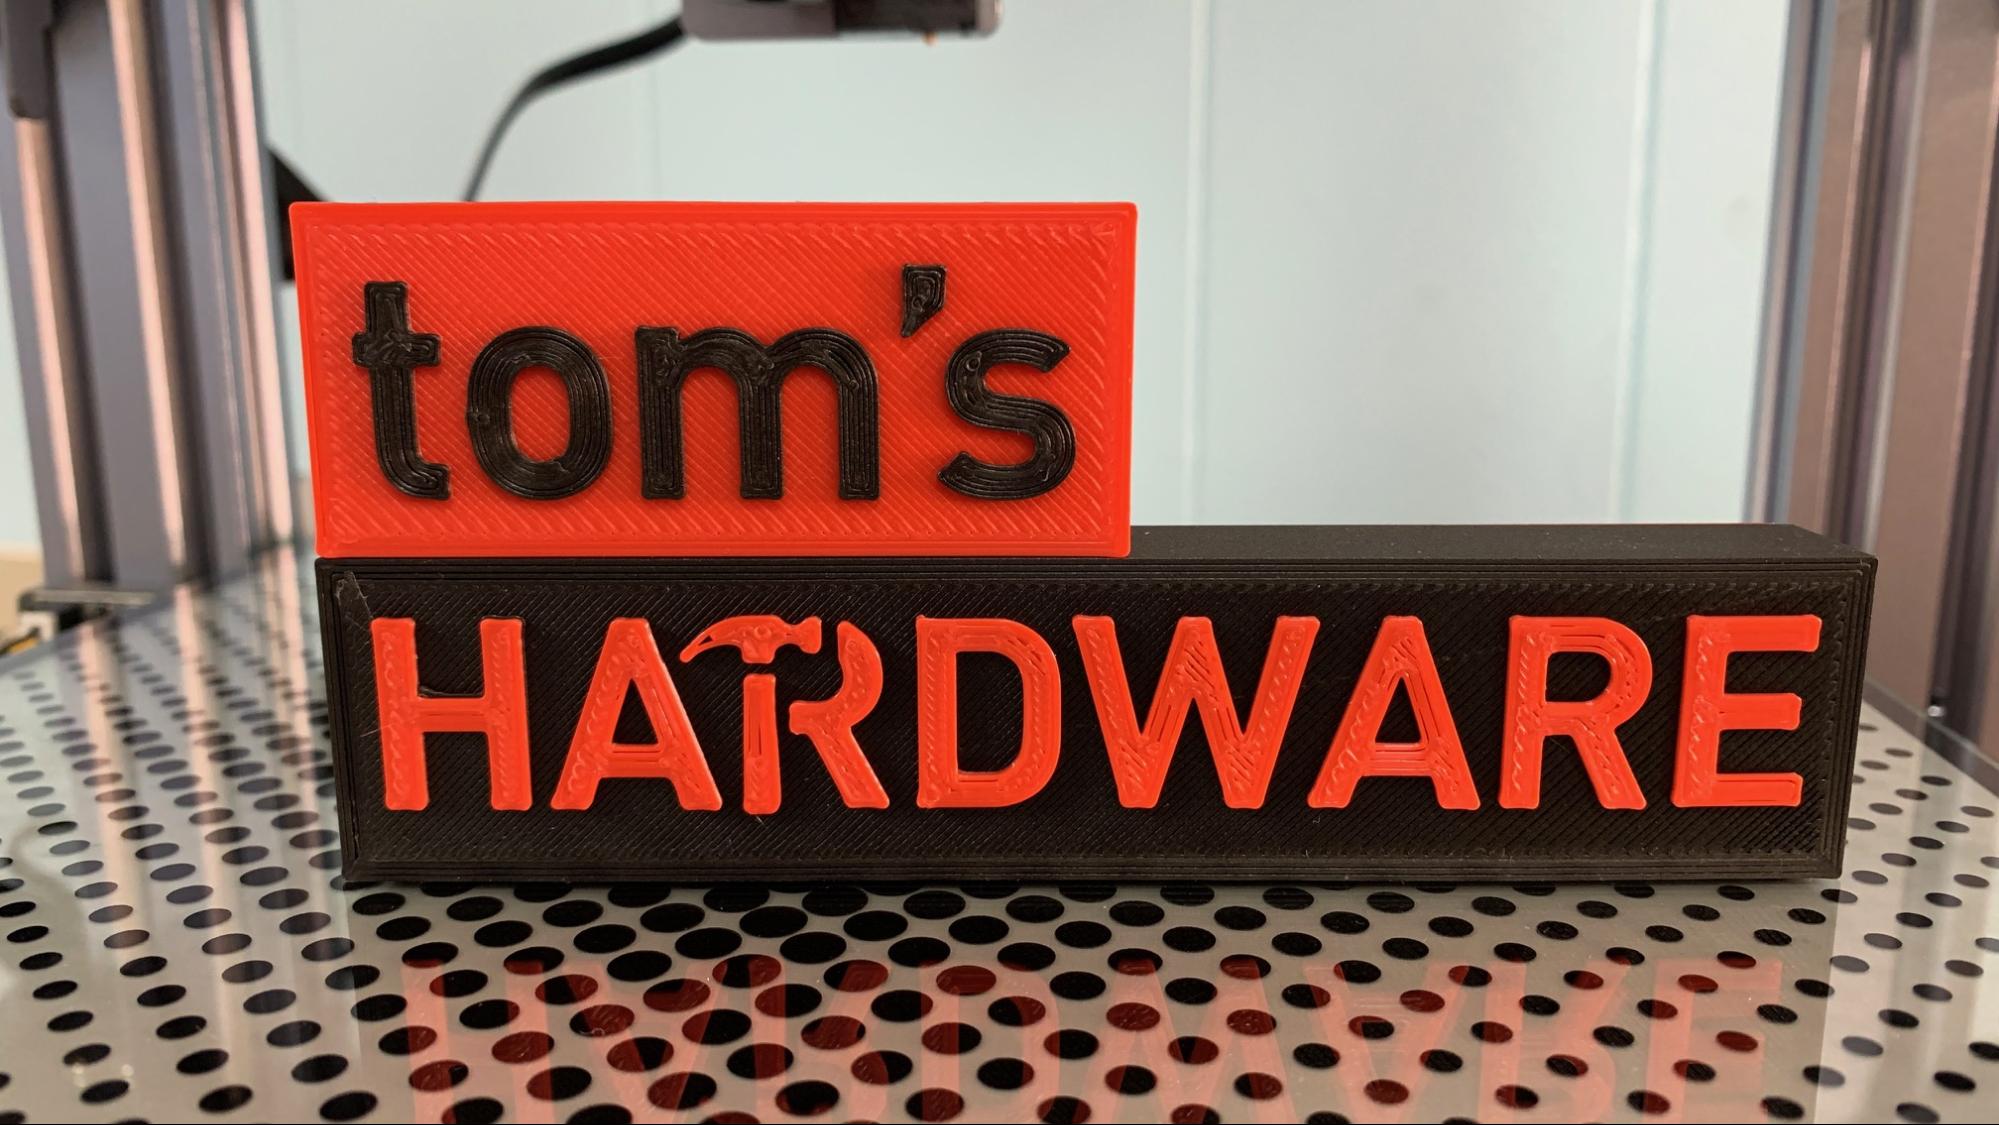
Right off the bat, I knew that the Shark V3 needed to print a fresh copy of the Tom’s Hardware logo I slide into review photos. The old one has very pronounced letters, which easily catch shadows from my camera lights. This print took 4 hours and 16 minutes, using a .2 mm layer height an 65mm/s speed. I printed it in Matterhackers Build Series PLA in red and black.
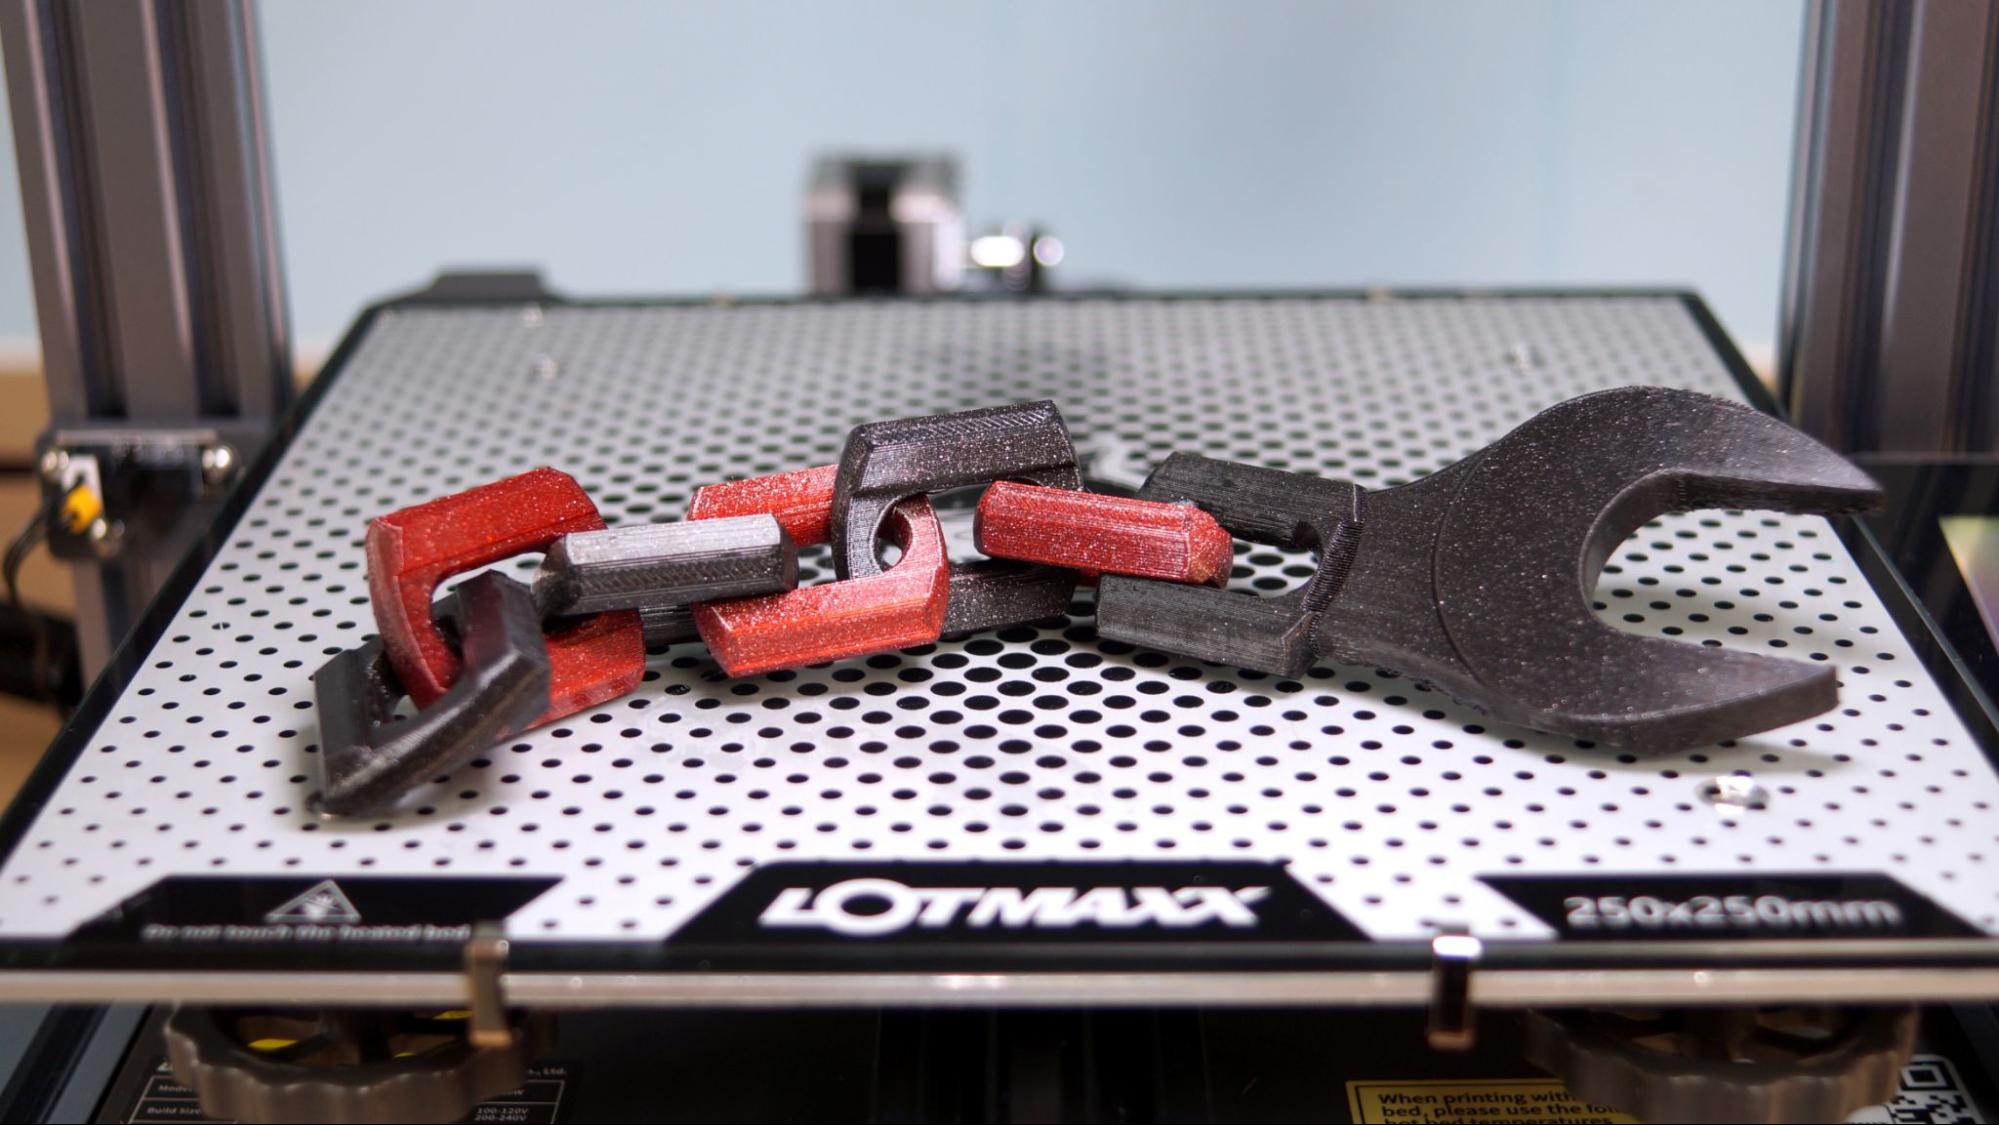
To test PETG, I ran this flexi chain wrench. The model was difficult as it had 45 degree angles and lots of bridging, but I didn’t use any support. Instead, I turned on bridging in Cura and got fabulous results. The print was shrunk down 80% to fit the Shark V3’s bed and printed really well. This took 2 hours and 54 minutes at a .2mm layer height at 50mm/s speed. I printed it in Prusament Carmine Red PETG and Printed Solid Soul Black Glitter PETG.
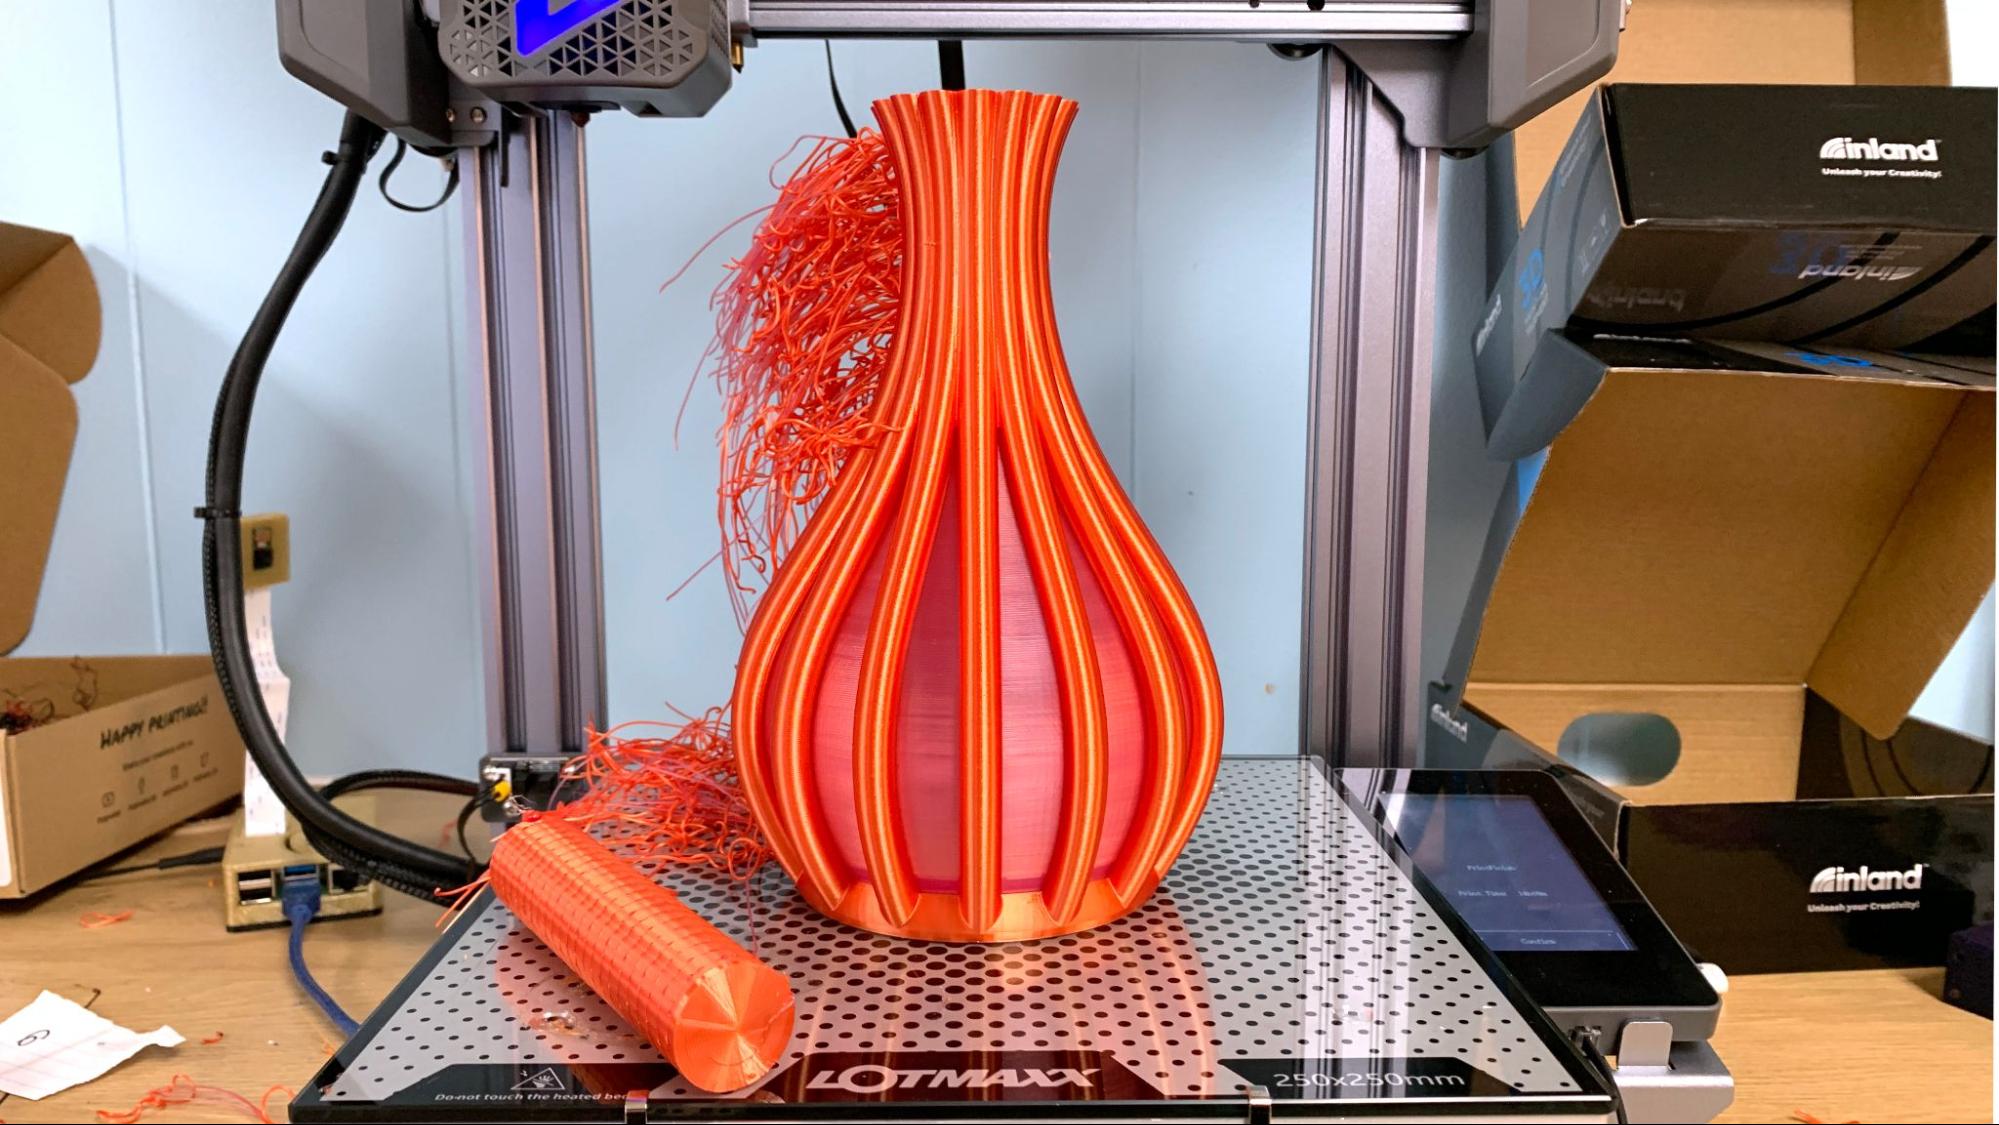
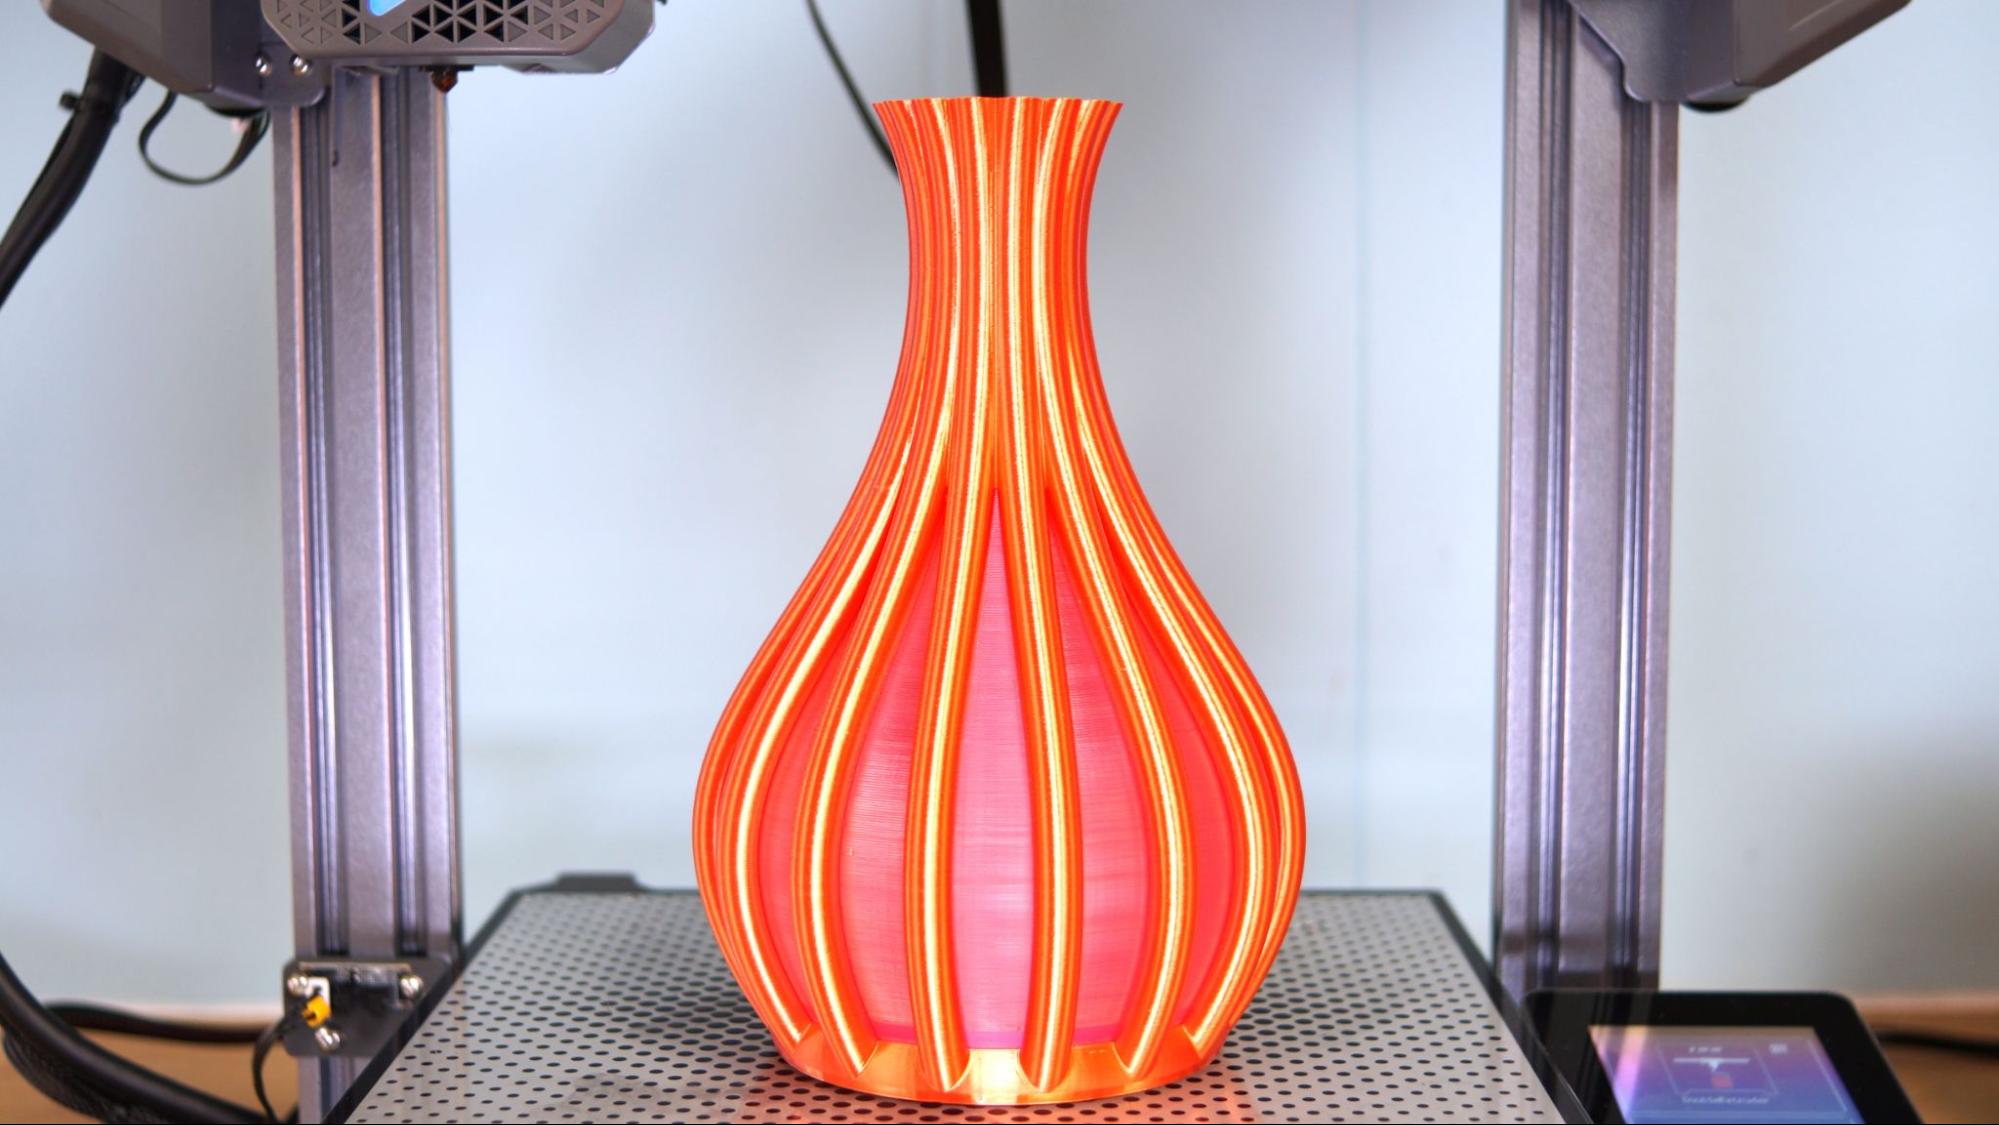
I needed a big print, so I ran a vase from AbbyMath. This one needed some care in slicing as it’s two prints nestled into one design. Fortunately, Cura allows a lot of leeway between print settings on the left and right filaments.
The entire model is solid, so you could set it up as a vase mode print, but you can’t do two-color vase mode. Instead, the right side was programmed to run the outer vase like a regular print – 3 walls and lightning infill. The inner vase was run with 2 walls, no infill and no top layer. The purge tower was knocked off its brim around the 60% mark, making a huge mess. I decided to let it continue in hopes it would clean up (it did). As long as I keep the bad side against the wall, no one will notice.
This was printed in Inland’s Glass Purple PLA and Shiny Silk Jacinth PLA.
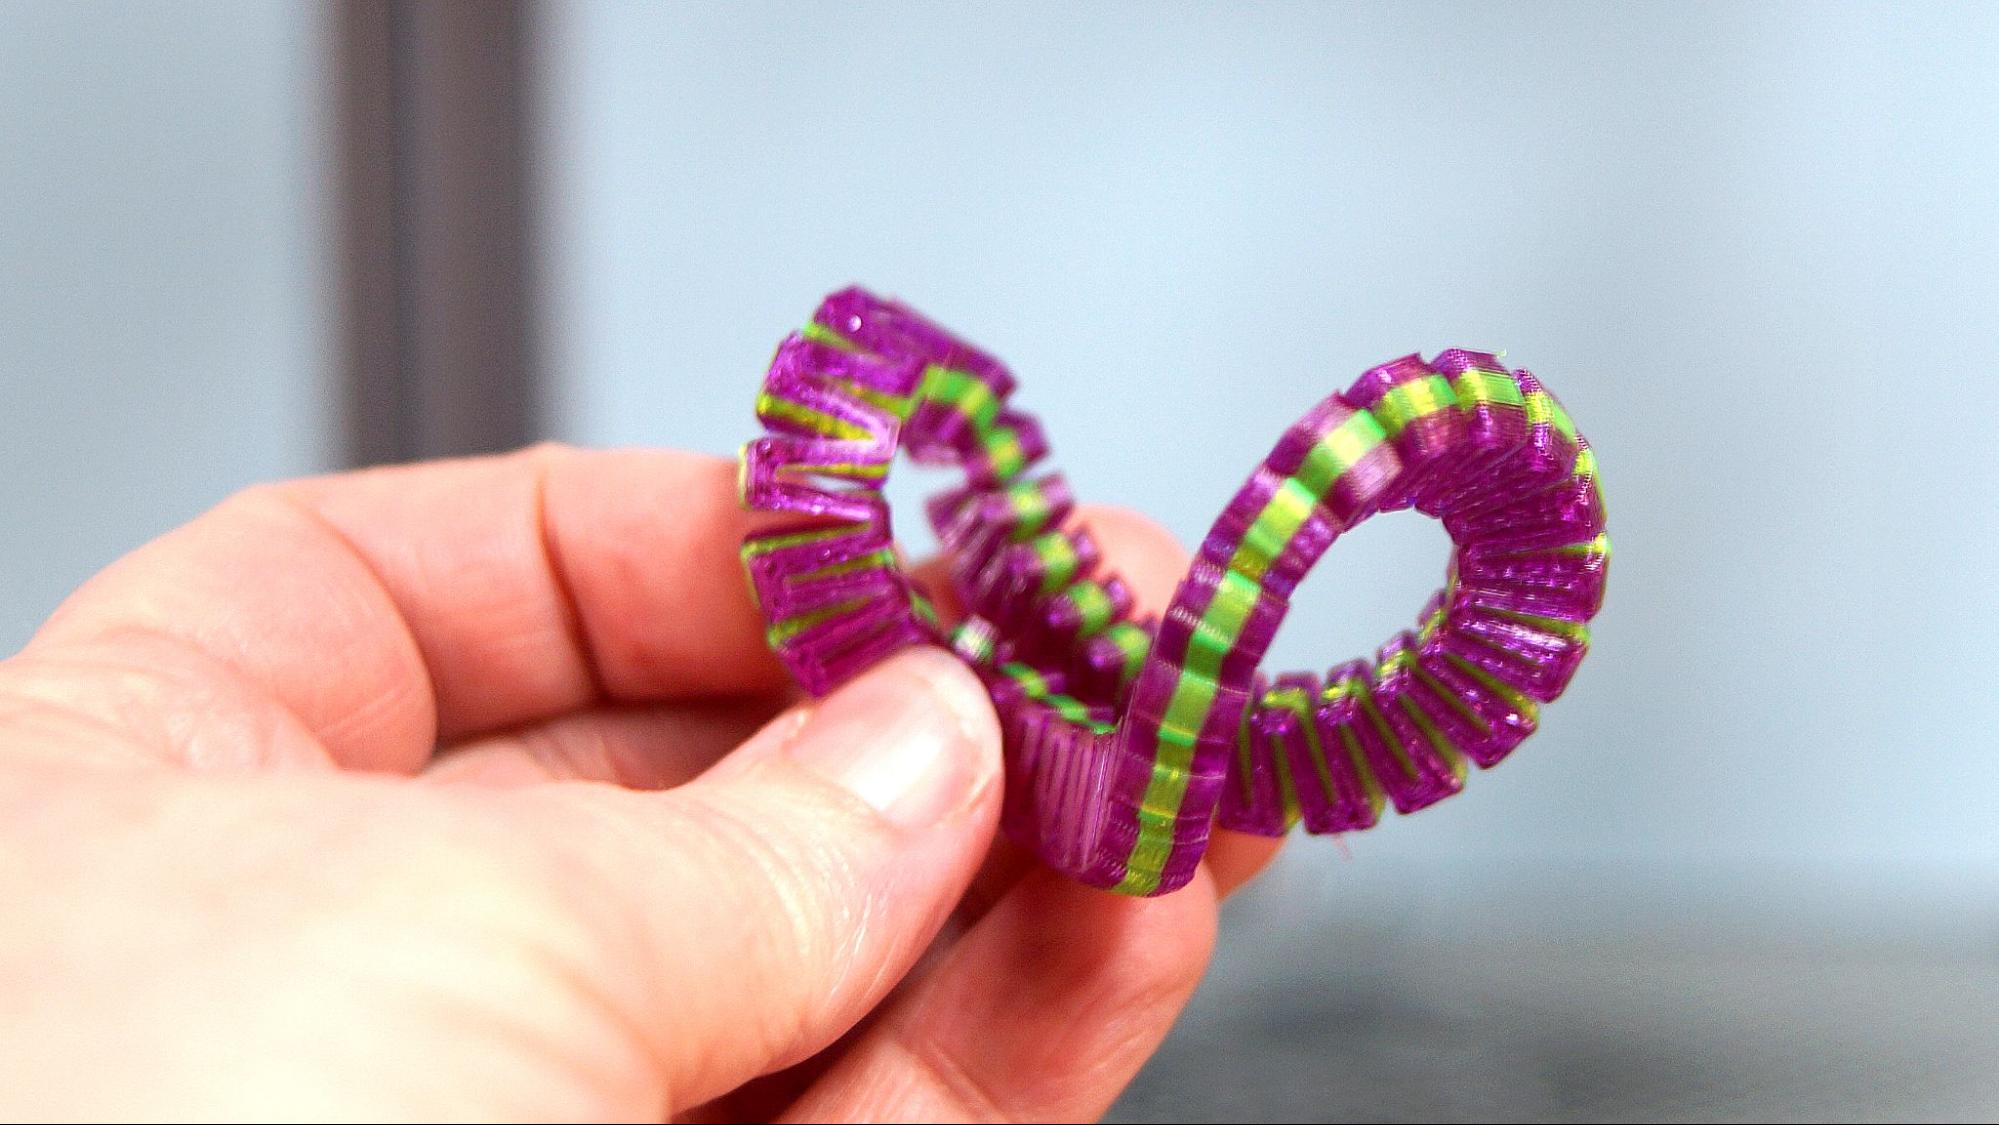
I was surprised at how well the Shark V3 handled TPU. Flexible materials are more difficult to run in a Bowden style printer, and the floppy filament needs to be pushed through the tube rather than pulled. This is printed in Matterhackers’ Build Series TPU in Translucent Purple and Translucent Green. It took 37 minutes to print at .2mm layer height and 40mm/s speed.
Before we talk about the laser module, a word of caution. Lasers are dangerous tools that emit hazardous light that can cause eye damage. The LotMaxx Shark V3 is an open laser and must be used in a controlled environment and no one – neither pets nor people – should be within visual range of this machine without eye protection while it is operating in laser mode. It should be used in a room with a door that can be closed, perhaps even locked, to prevent others from entering the workspace without eye protection. Looking at the laser light can cause eye damage and touching the beam will burn. Always use proper ventilation as the laser is literally burning what it touches like a tiny campfire.
The Shark V3 comes with a low-power, 1.6 watt laser. This is powerful enough to engrave wood, bamboo, leather and paper. It is not a cutting laser, but it can still set things on fire if you’re not careful. Never leave your laser unattended.
The manual is a bit vague on how to focus the laser, only saying that you should engrave a test dot and raise the Z axis until it is round. Further directions on the Lotmaxx YouTube channel show that you need to twist a focusing ring – like a camera lens – until it comes into focus. Obviously putting your hand on the laser while it’s operating is a bad idea, so I had to work in pulses, turning it off and on until I achieved a decent result.
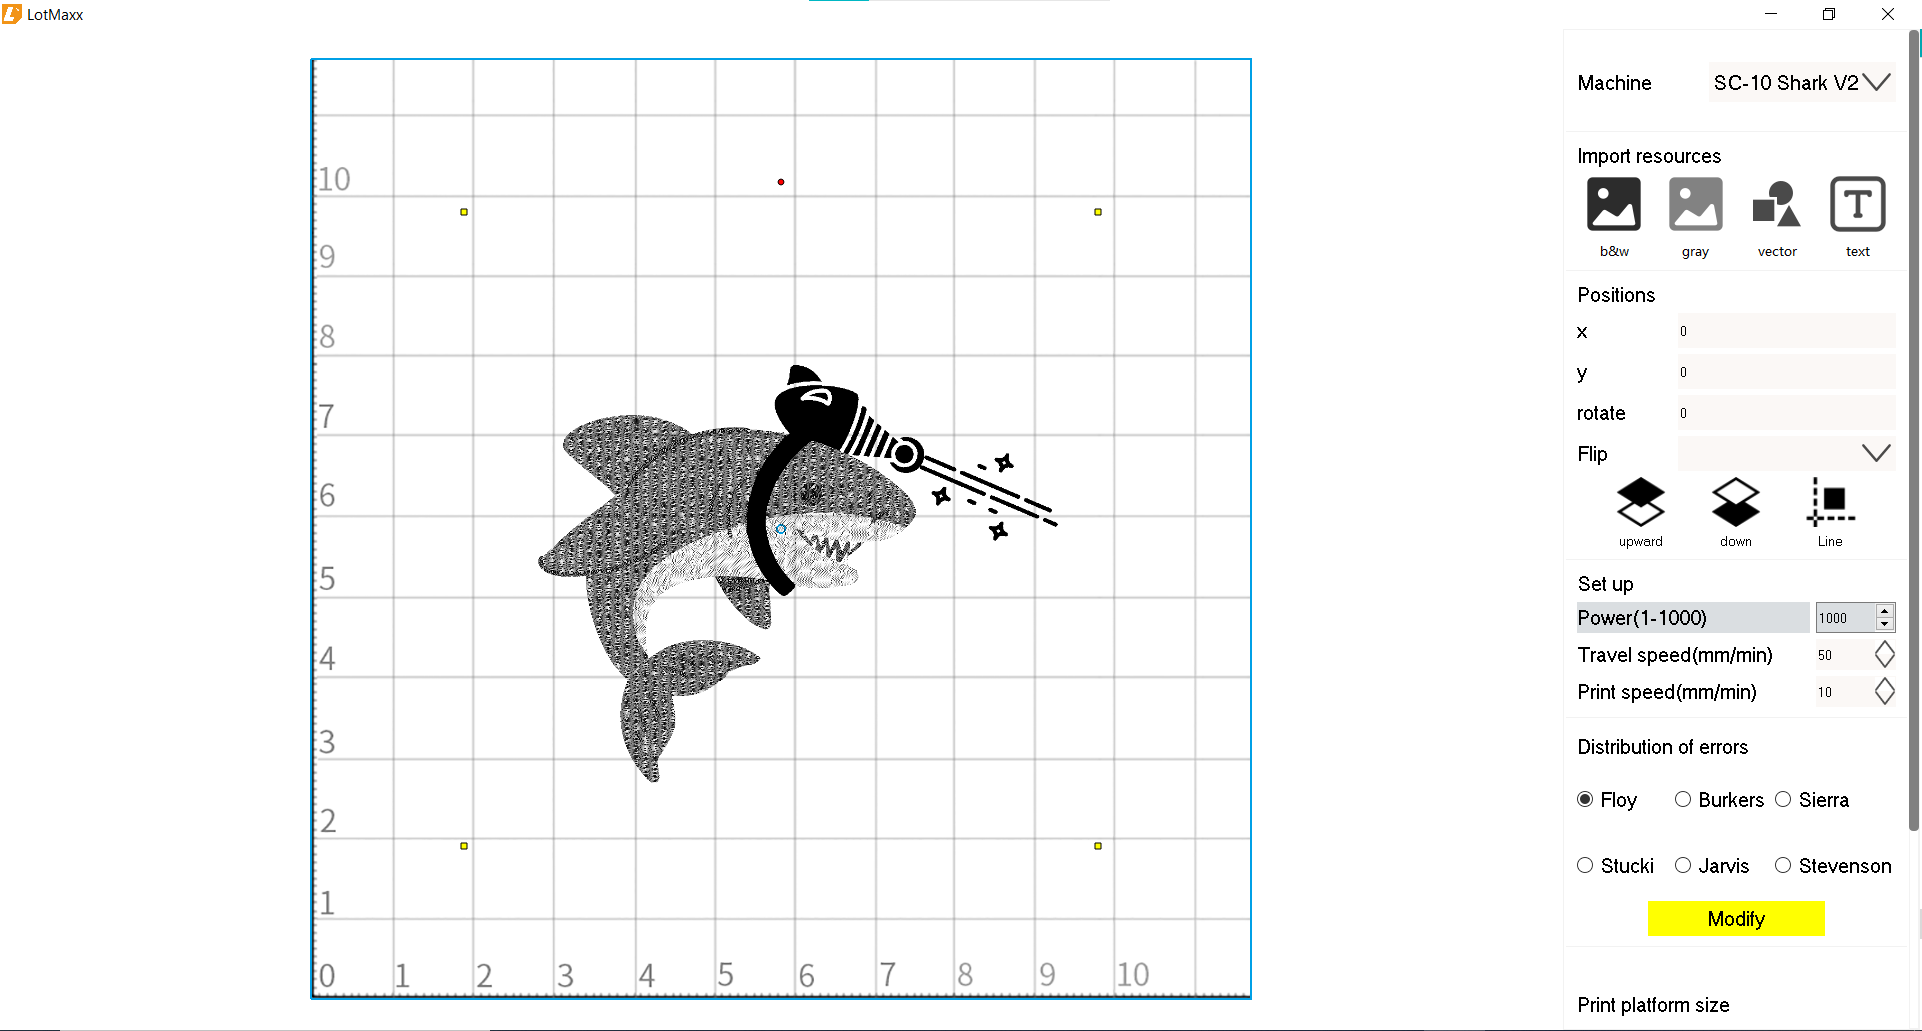
The software that comes with the Shark V3 is very basic, and sadly doesn’t have any directions. It can import graphics, size them, flip them and add text. The grid is misleading as it’s just dividing the space into 10.7 squares, which come out to be 22.8 mm each. Go figure.
You can import image files (jpg, png and bmp) as either gray scale, black and white or vector. Vector in this case means “outline.” The default power settings barely made a mark on the sample of pine that came with the machine, so I pushed it to full power (1000) and slowed it to 10 mm a minute.
I decided not to run the pre-sliced samples since I had no idea how long they would take. Instead, I attempted to slice the provided black and white shark graphic myself. I was able to get a 10 x 10 mm image in about 40 minutes.
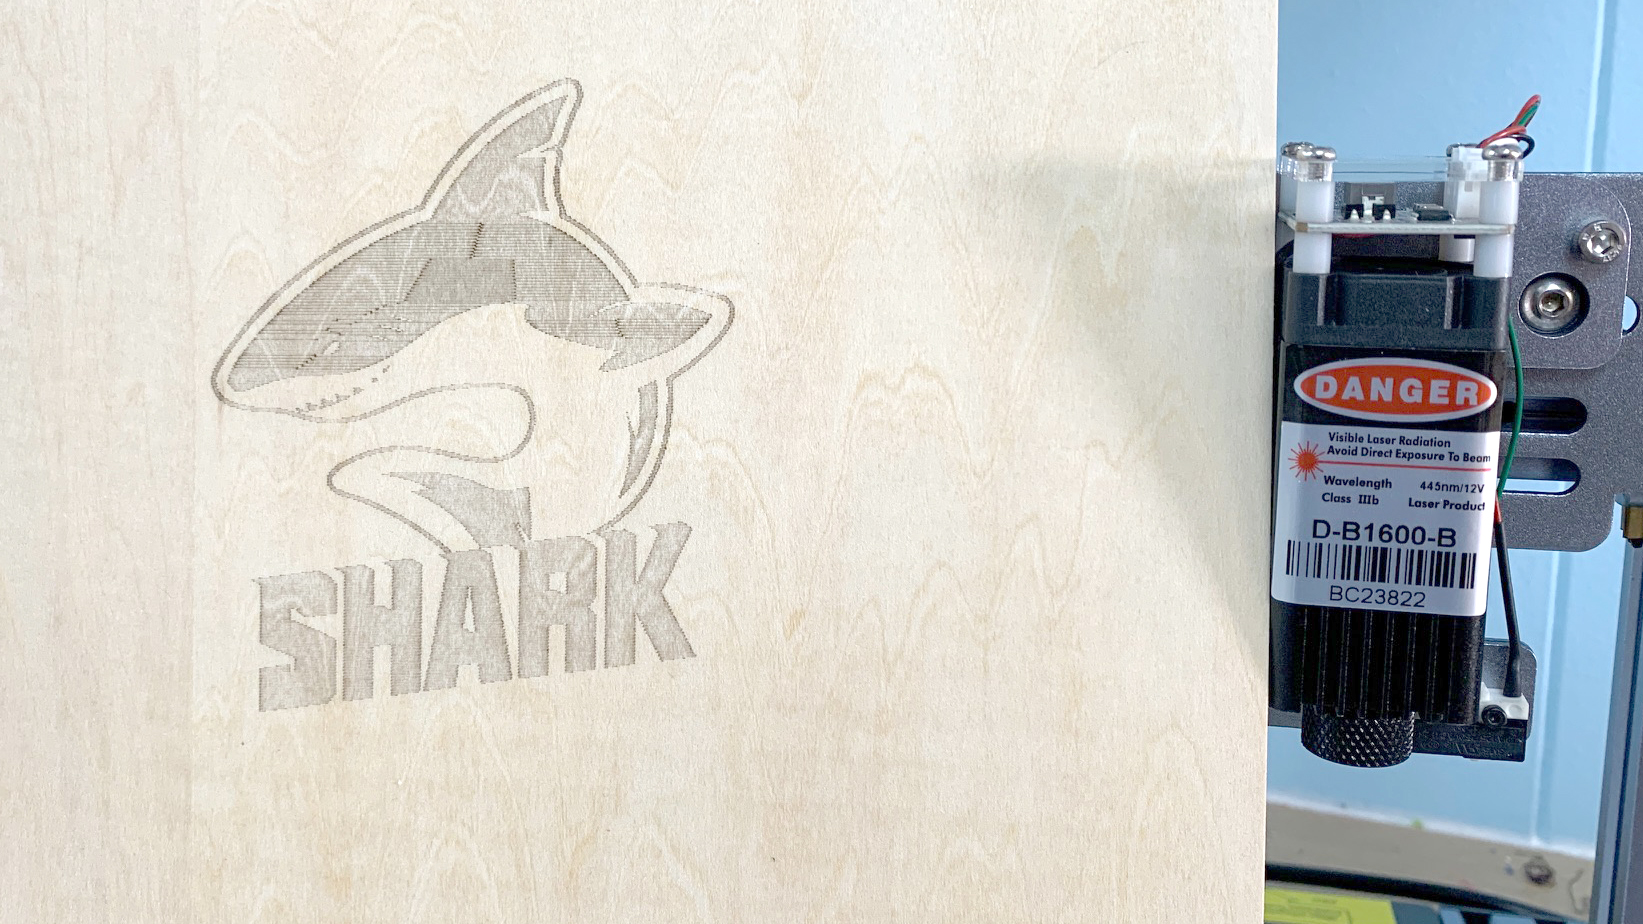
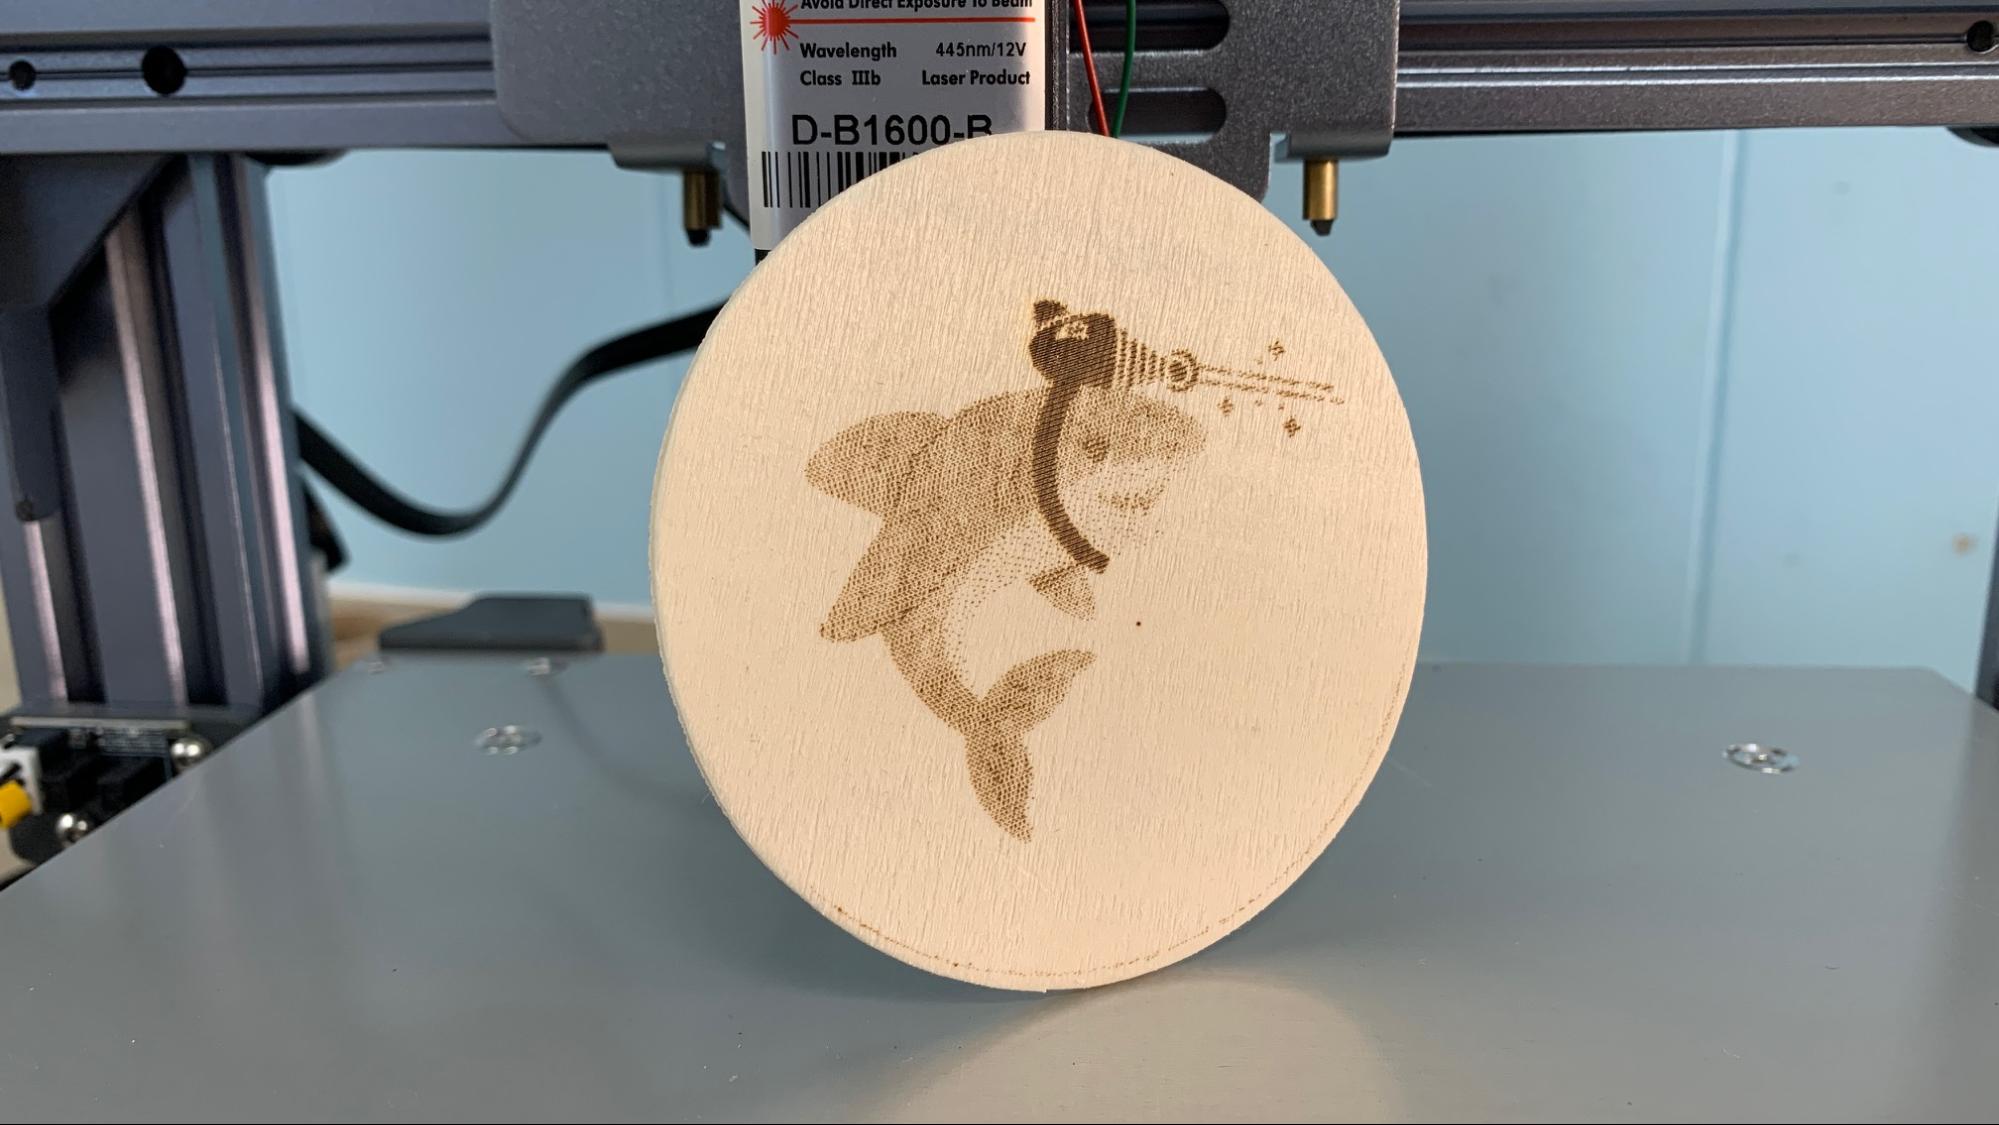
I loaded an image I made from Canva clip art and lasered it onto a precut circle I bought from Walmart’s craft department. The circle is 8mm in diameter. To get the image in the correct place, I first lasered a 8mm circle into a piece of scrap wood clipped to the bed. I then placed my wooden circle on top of the laser outline. This “shark with a frickin’ laser” took two passes at full power and 40 minutes total time to burn.
Last, I tried out a piece of scratch art paper. I enlarged the shark to 9 x 9mm and kept the power on full send. This took about 40 minutes and a single pass.

I could get better results by using darker clip art, slowing the machine further or using more passes. All in all, the laser works, but it’s slow. I would not get this machine just for the laser, but it’s an interesting way to experiment with the technology without getting a separate machine.
Bottom Line
The LotMaxx Shark V3 is a solid dual color 3D printer with very decent print quality and auto bed leveling – always a plus in my book. It does require a little tuning to achieve clean two color prints, but the process is more intuitive than setting up the multicolor unit on Bambu Lab’s P1P. The 2 to 1 dual color nozzle is definitely a plus as it requires no extra calibration to bring it into alignment like an IDEX.
The glass bed is hard to manage – I will always prefer a flexible build plate, and the laser is quite slow and unshielded. I’m not a fan of open lasers and must caution you to take the utmost care in using this in laser mode. It might have a hard time burning wood, but your eyeballs are much more delicate.
The Shark V3 would still be a fun second machine even if you never unbox the laser module. I am disappointed that it can’t use Prusa Slicer’s paintable MMU colors, but if you know how to design your own files this may not be a big problem. Hopefully LotMaxx can add this capability in the future.
If you want a safer, faster, more powerful 3 in 1 machine, check out the Snapmaker Artisan. At $2899 it’s a hefty chunk of change, but it comes with a deluxe enclosure and gigantic build volume. If lasers are all you’re after, the Creality Laser Falcon has a more useful 5 watts of power for $332.
MORE: Best 3D Printers
MORE: Best Resin 3D Printers