Learning how to wax a snowboard at home is a great idea. After all, nothing beats cruising a powder day on a freshly-tuned ride. Not only is the process simple, but after a modest initial investment in tools, it's also cost-effective.
You could shell out anywhere from $25 to $50 for a standard snowboard tune-up, which, depending on how often you ride, may be needed seasonally or several times a winter. Or you could pick up a basic waxing kit for as little as $75 and take the DIY approach. Beyond self-satisfaction, the process is nothing short of cathartic. It's also a great upper-arm workout.
Below, you'll find a list of items needed to complete the process — some of which you likely already have — along with step-by-step instructions on how to wax a snowboard at home. With just seven simple steps to follow, you'll be making fresh turns on a super-fast board in no time.
How to wax a snowboard: what you'll need
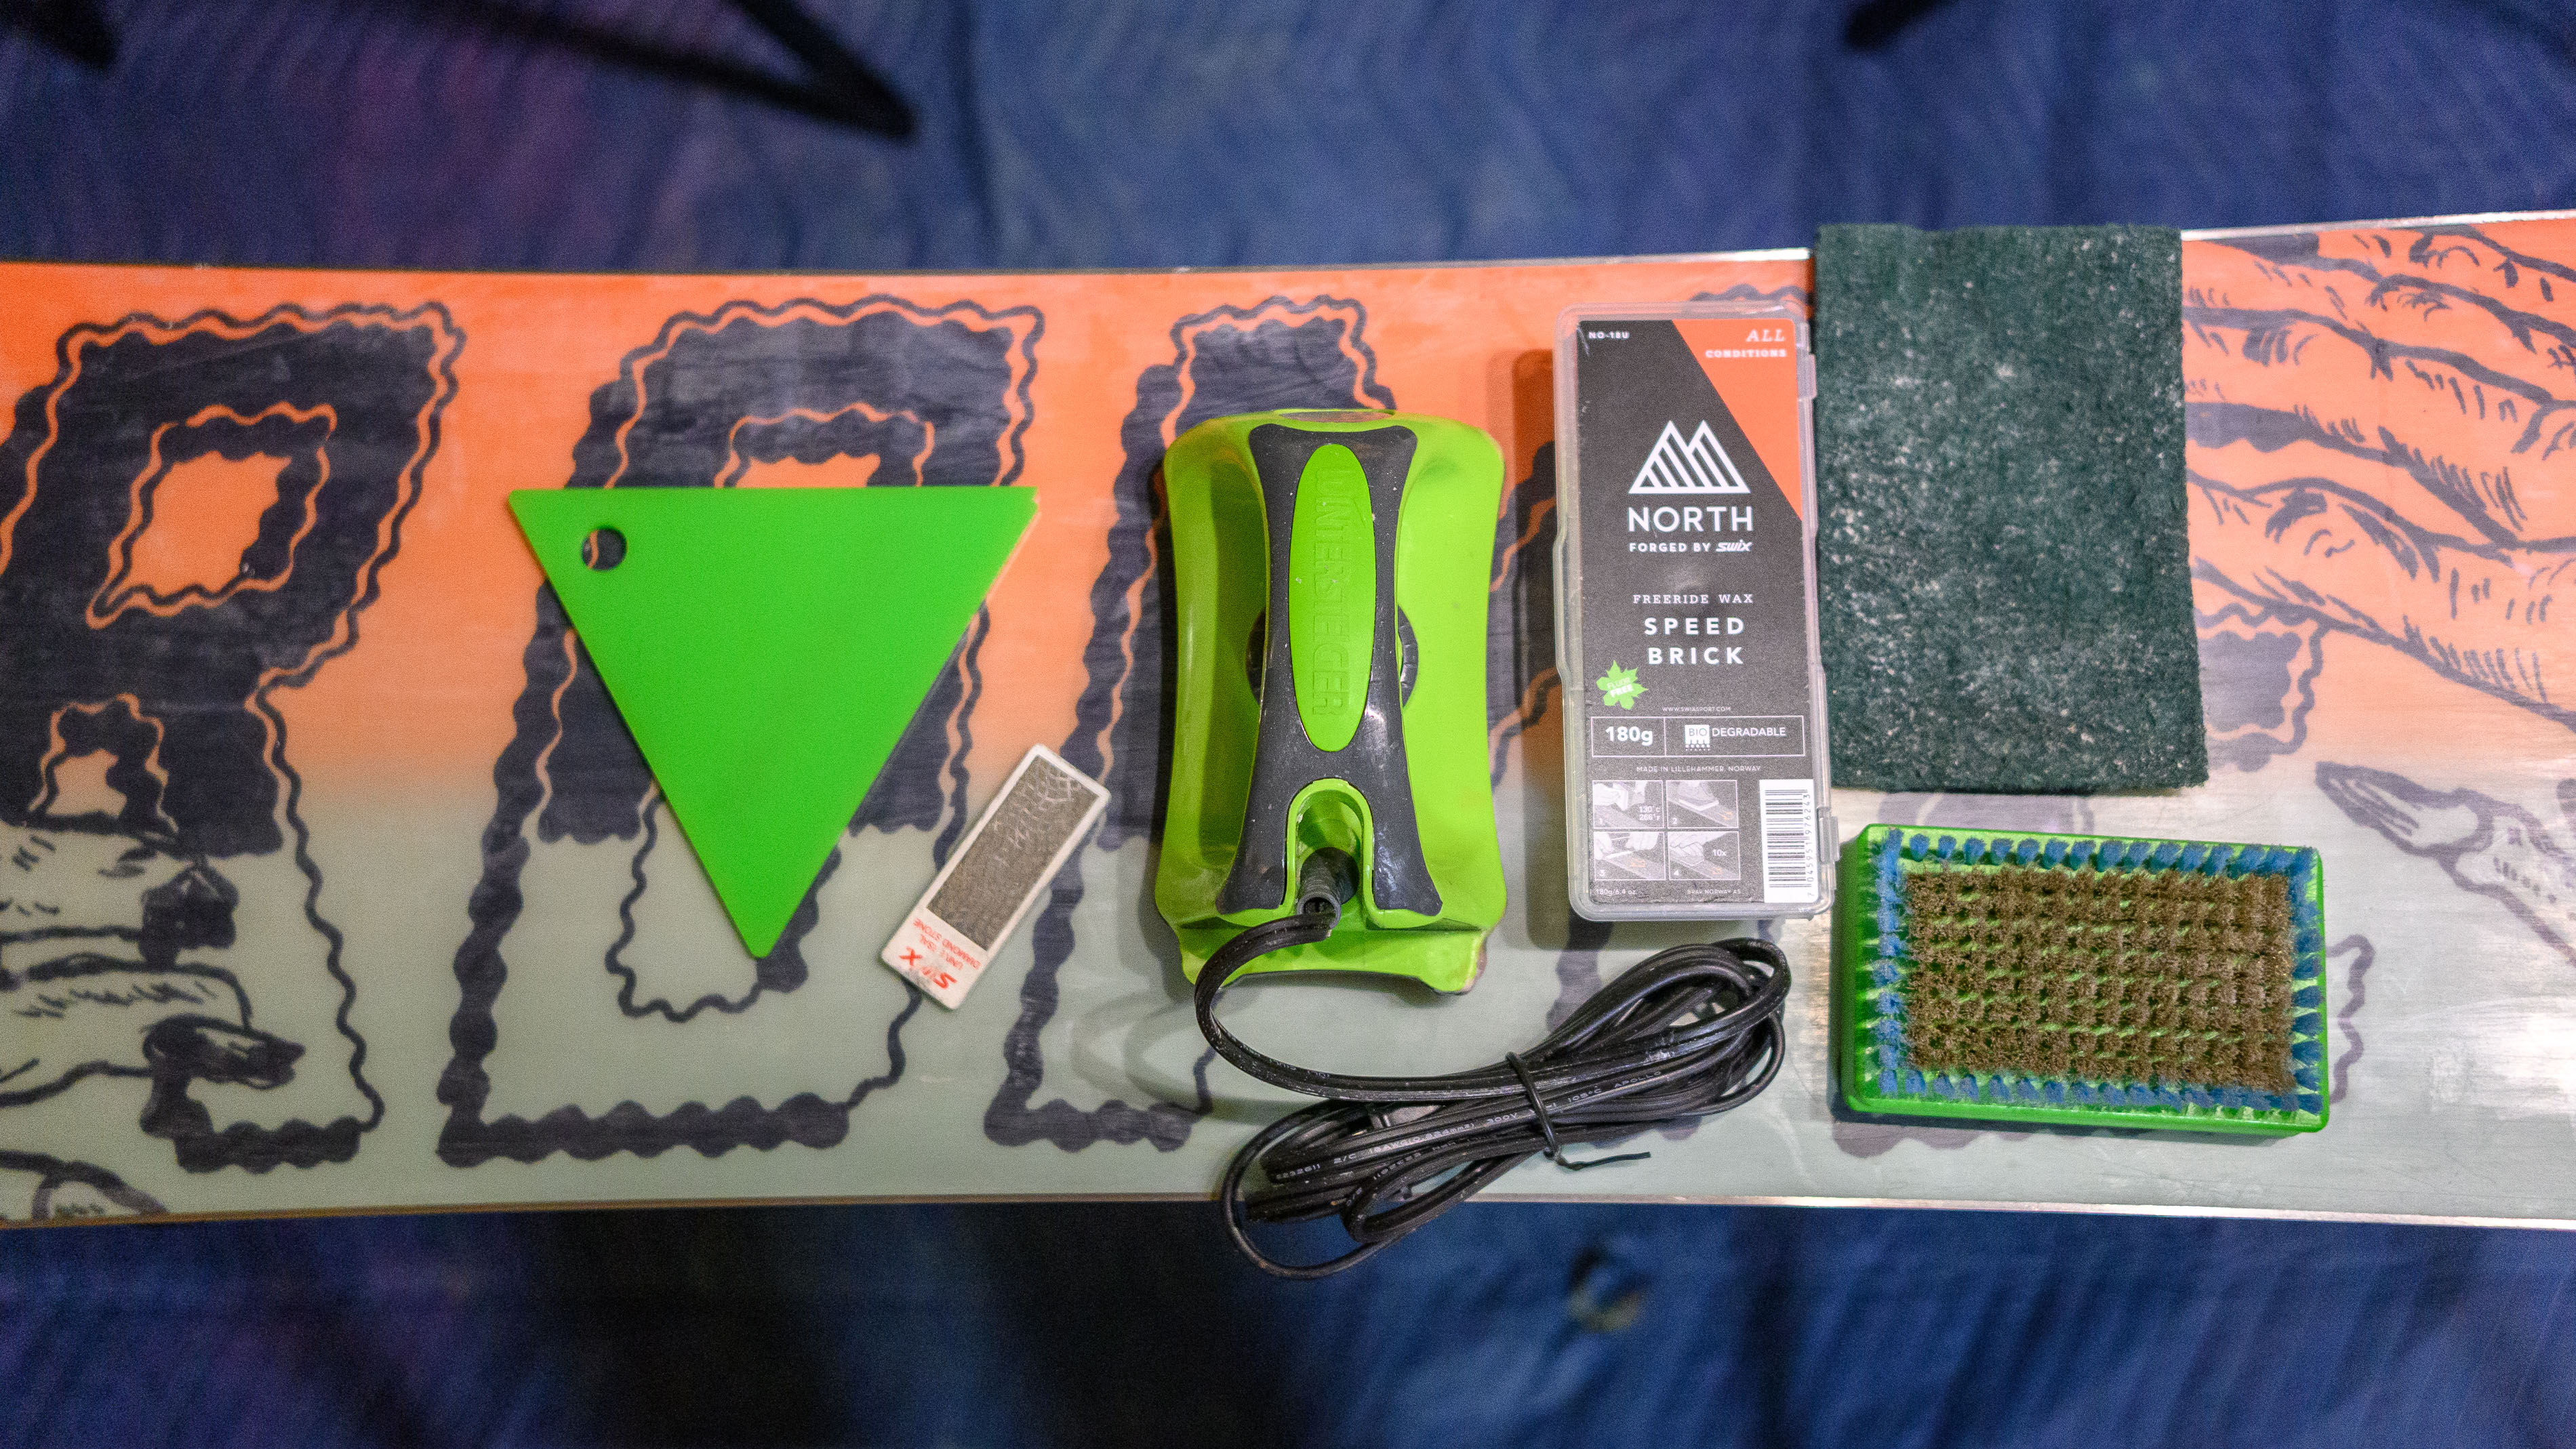
Before jumping into how to wax a snowboard, there are several items you'll need to gather/buy. Starting with the priciest, you'll want to purchase a decent waxing iron, like the Swix T77.
These devices are identical for skis and snowboards, so an iron advertised for either will do. You can expect to pay around $50 for an entry-level model, which is all you need. Note: Never — I mean, never — attempt to use a normal clothing iron to wax a snowboard.
Next, you'll want to pick out some wax. Ski and snowboard wax comes in a variety of formulas developed for different snow conditions. Generally speaking, there are three types: warm-weather, cold-weather and all-season wax. The latter is the most versatile and your best bet. Expect to pay between $15 and $25 for a quality brick of ski wax, which should last you quite a while.
Other tools include a plastic wax scraper (~$10), a basic diamond stone file ($15+) and a waxing brush or brush set ($20 to $35). Beyond that, a Phillips head screwdriver, a scouring pad or two, some paper towels and citrus-based cleaner (or rubbing alcohol) are all you need to get the job done.
How to wax a snowboard
- Clean the board's base
- Loosen the bindings
- Check your edges for burrs
- Heat up the waxing iron and get dripping
- Iron the base and let it cool
- Scrape the wax from tip to tail
- Structure and finish the wax job
Read on to see full illustrated instructions for each step.
1. Clean the board's base
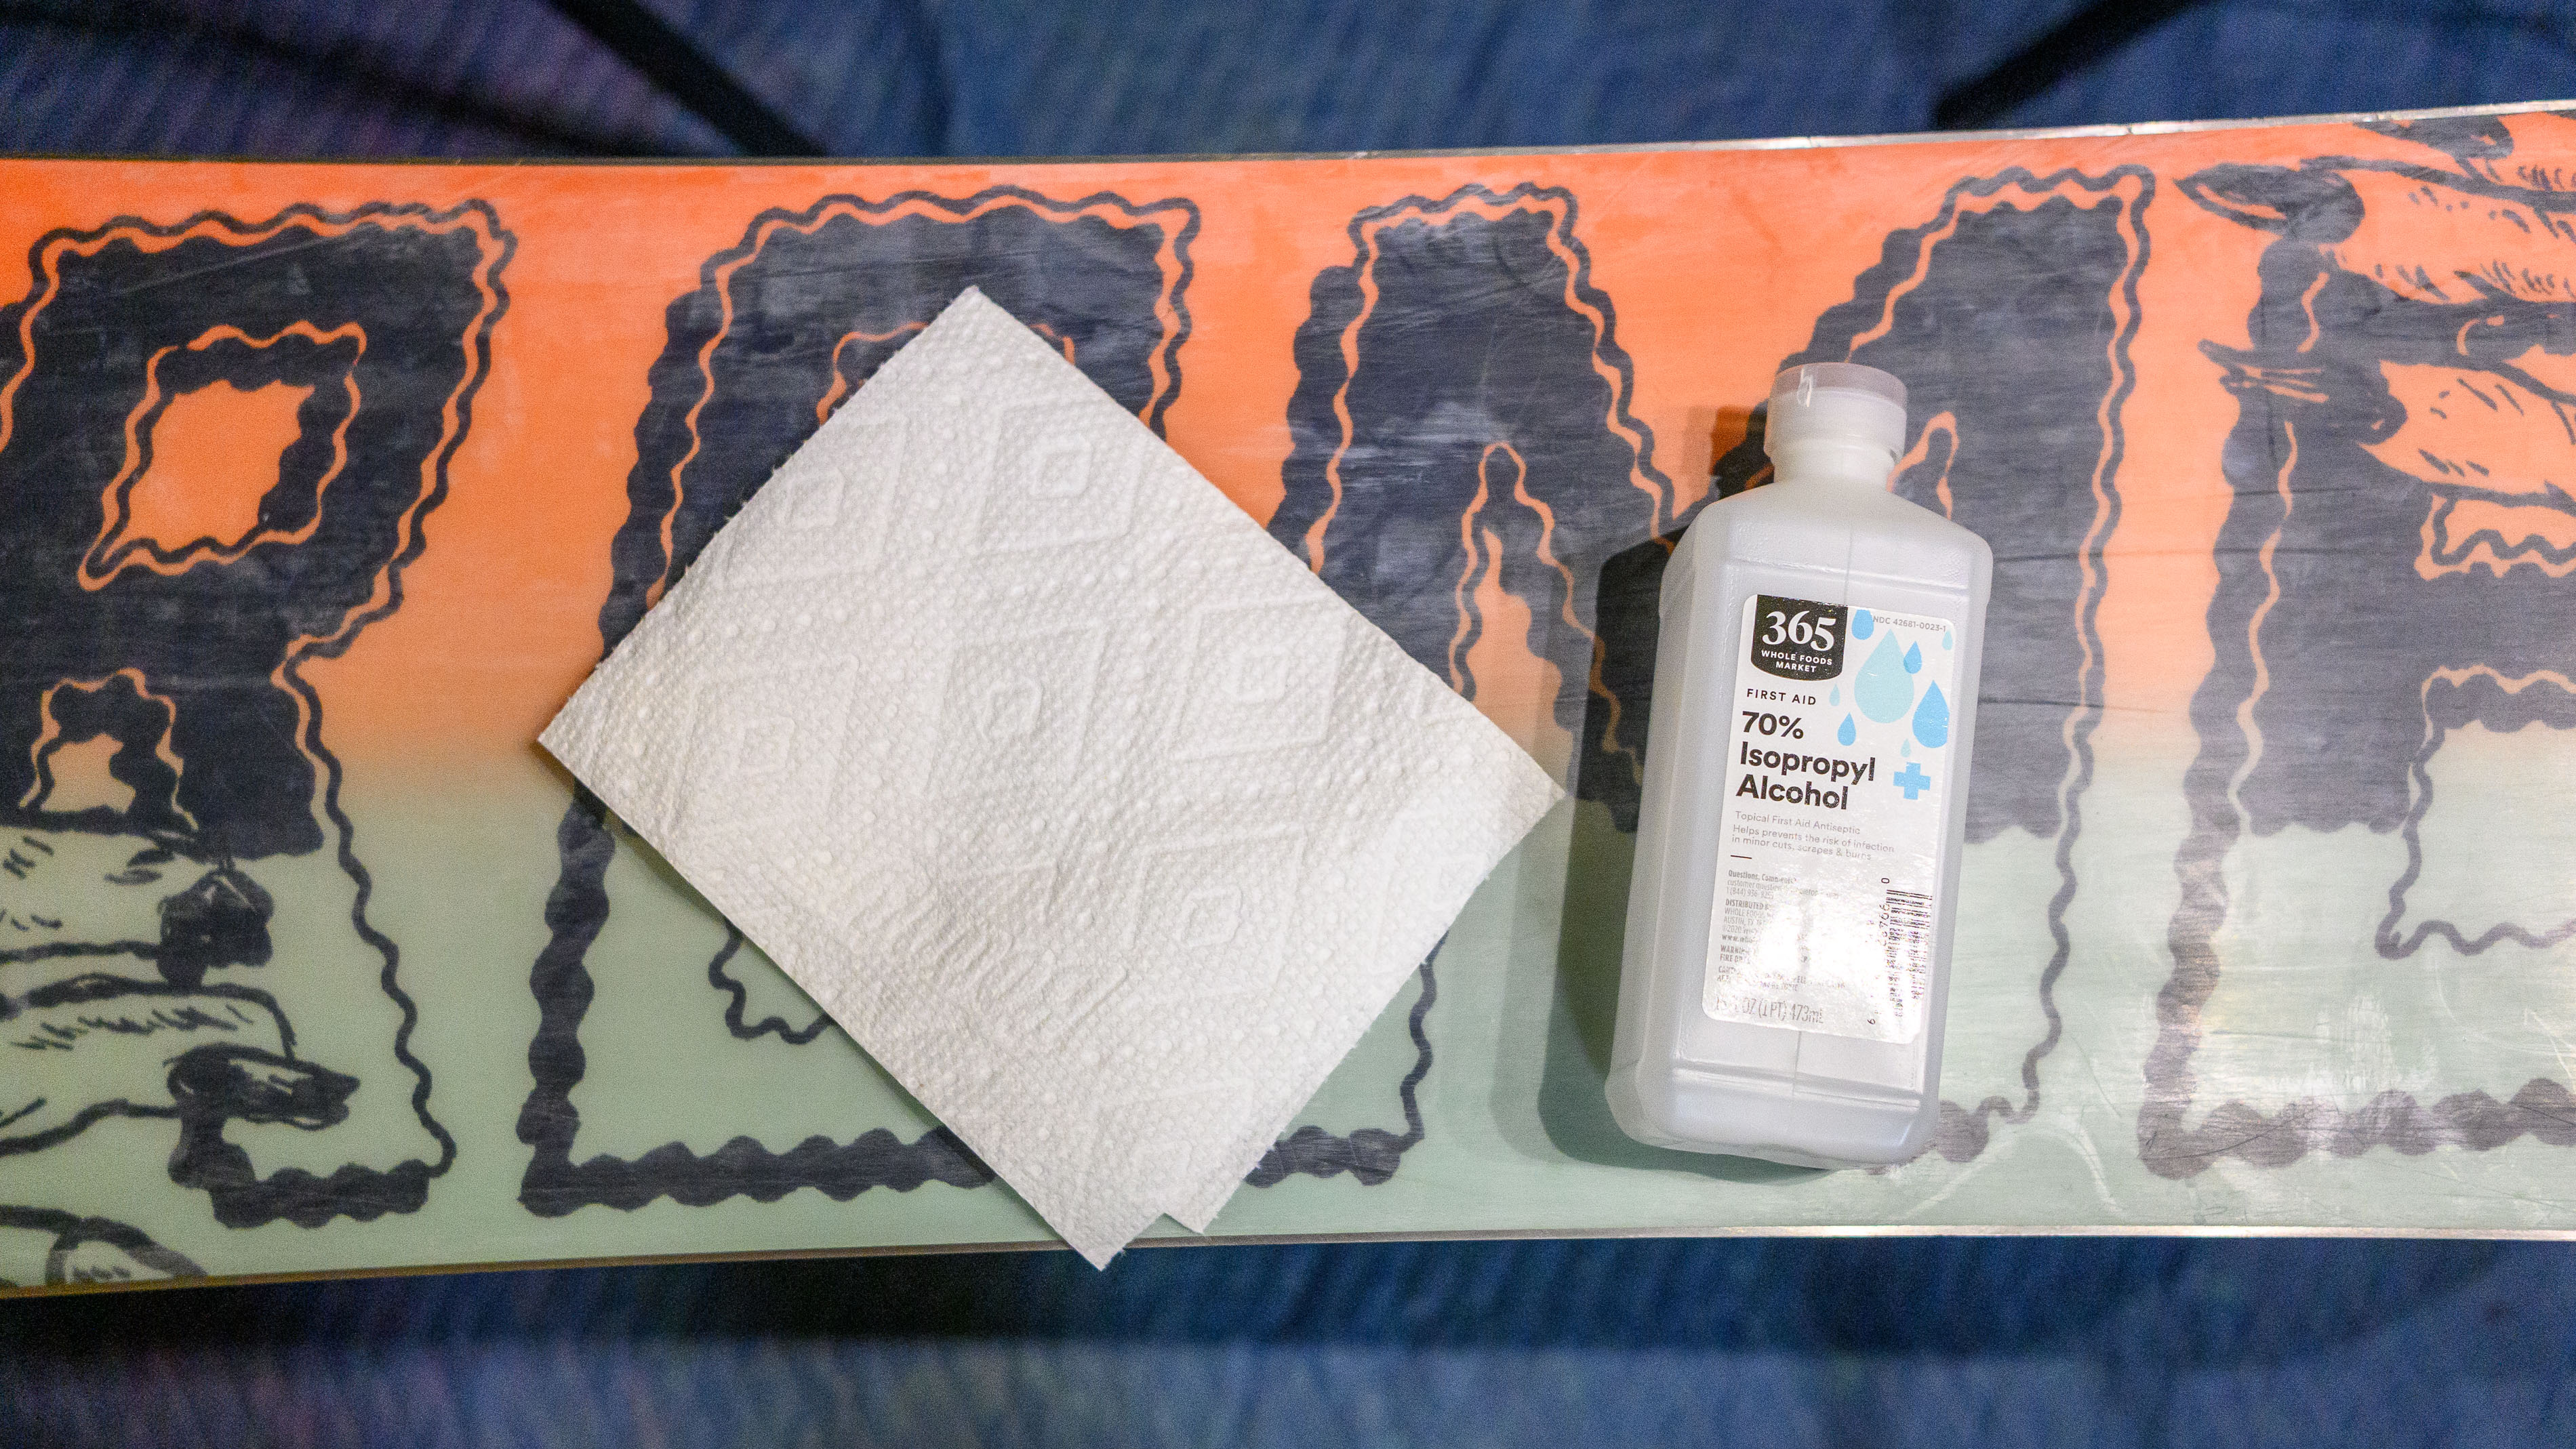
To get started, clean the base (bottom) of the snowboard. You don't need any fancy cleaner to do this. A paper towel and some rubbing alcohol will do just fine — citrus-based cleaners are also a safe bet. The idea here is to remove any grime or gunk from the board before waxing. Impurities like tree sap and soil are the enemy of a finely waxed board.
Some other tips: a little cleaner goes a long way, work from tip to tail, and ensure all residue is off before moving on to the waxing process.
2. Loosen the bindings
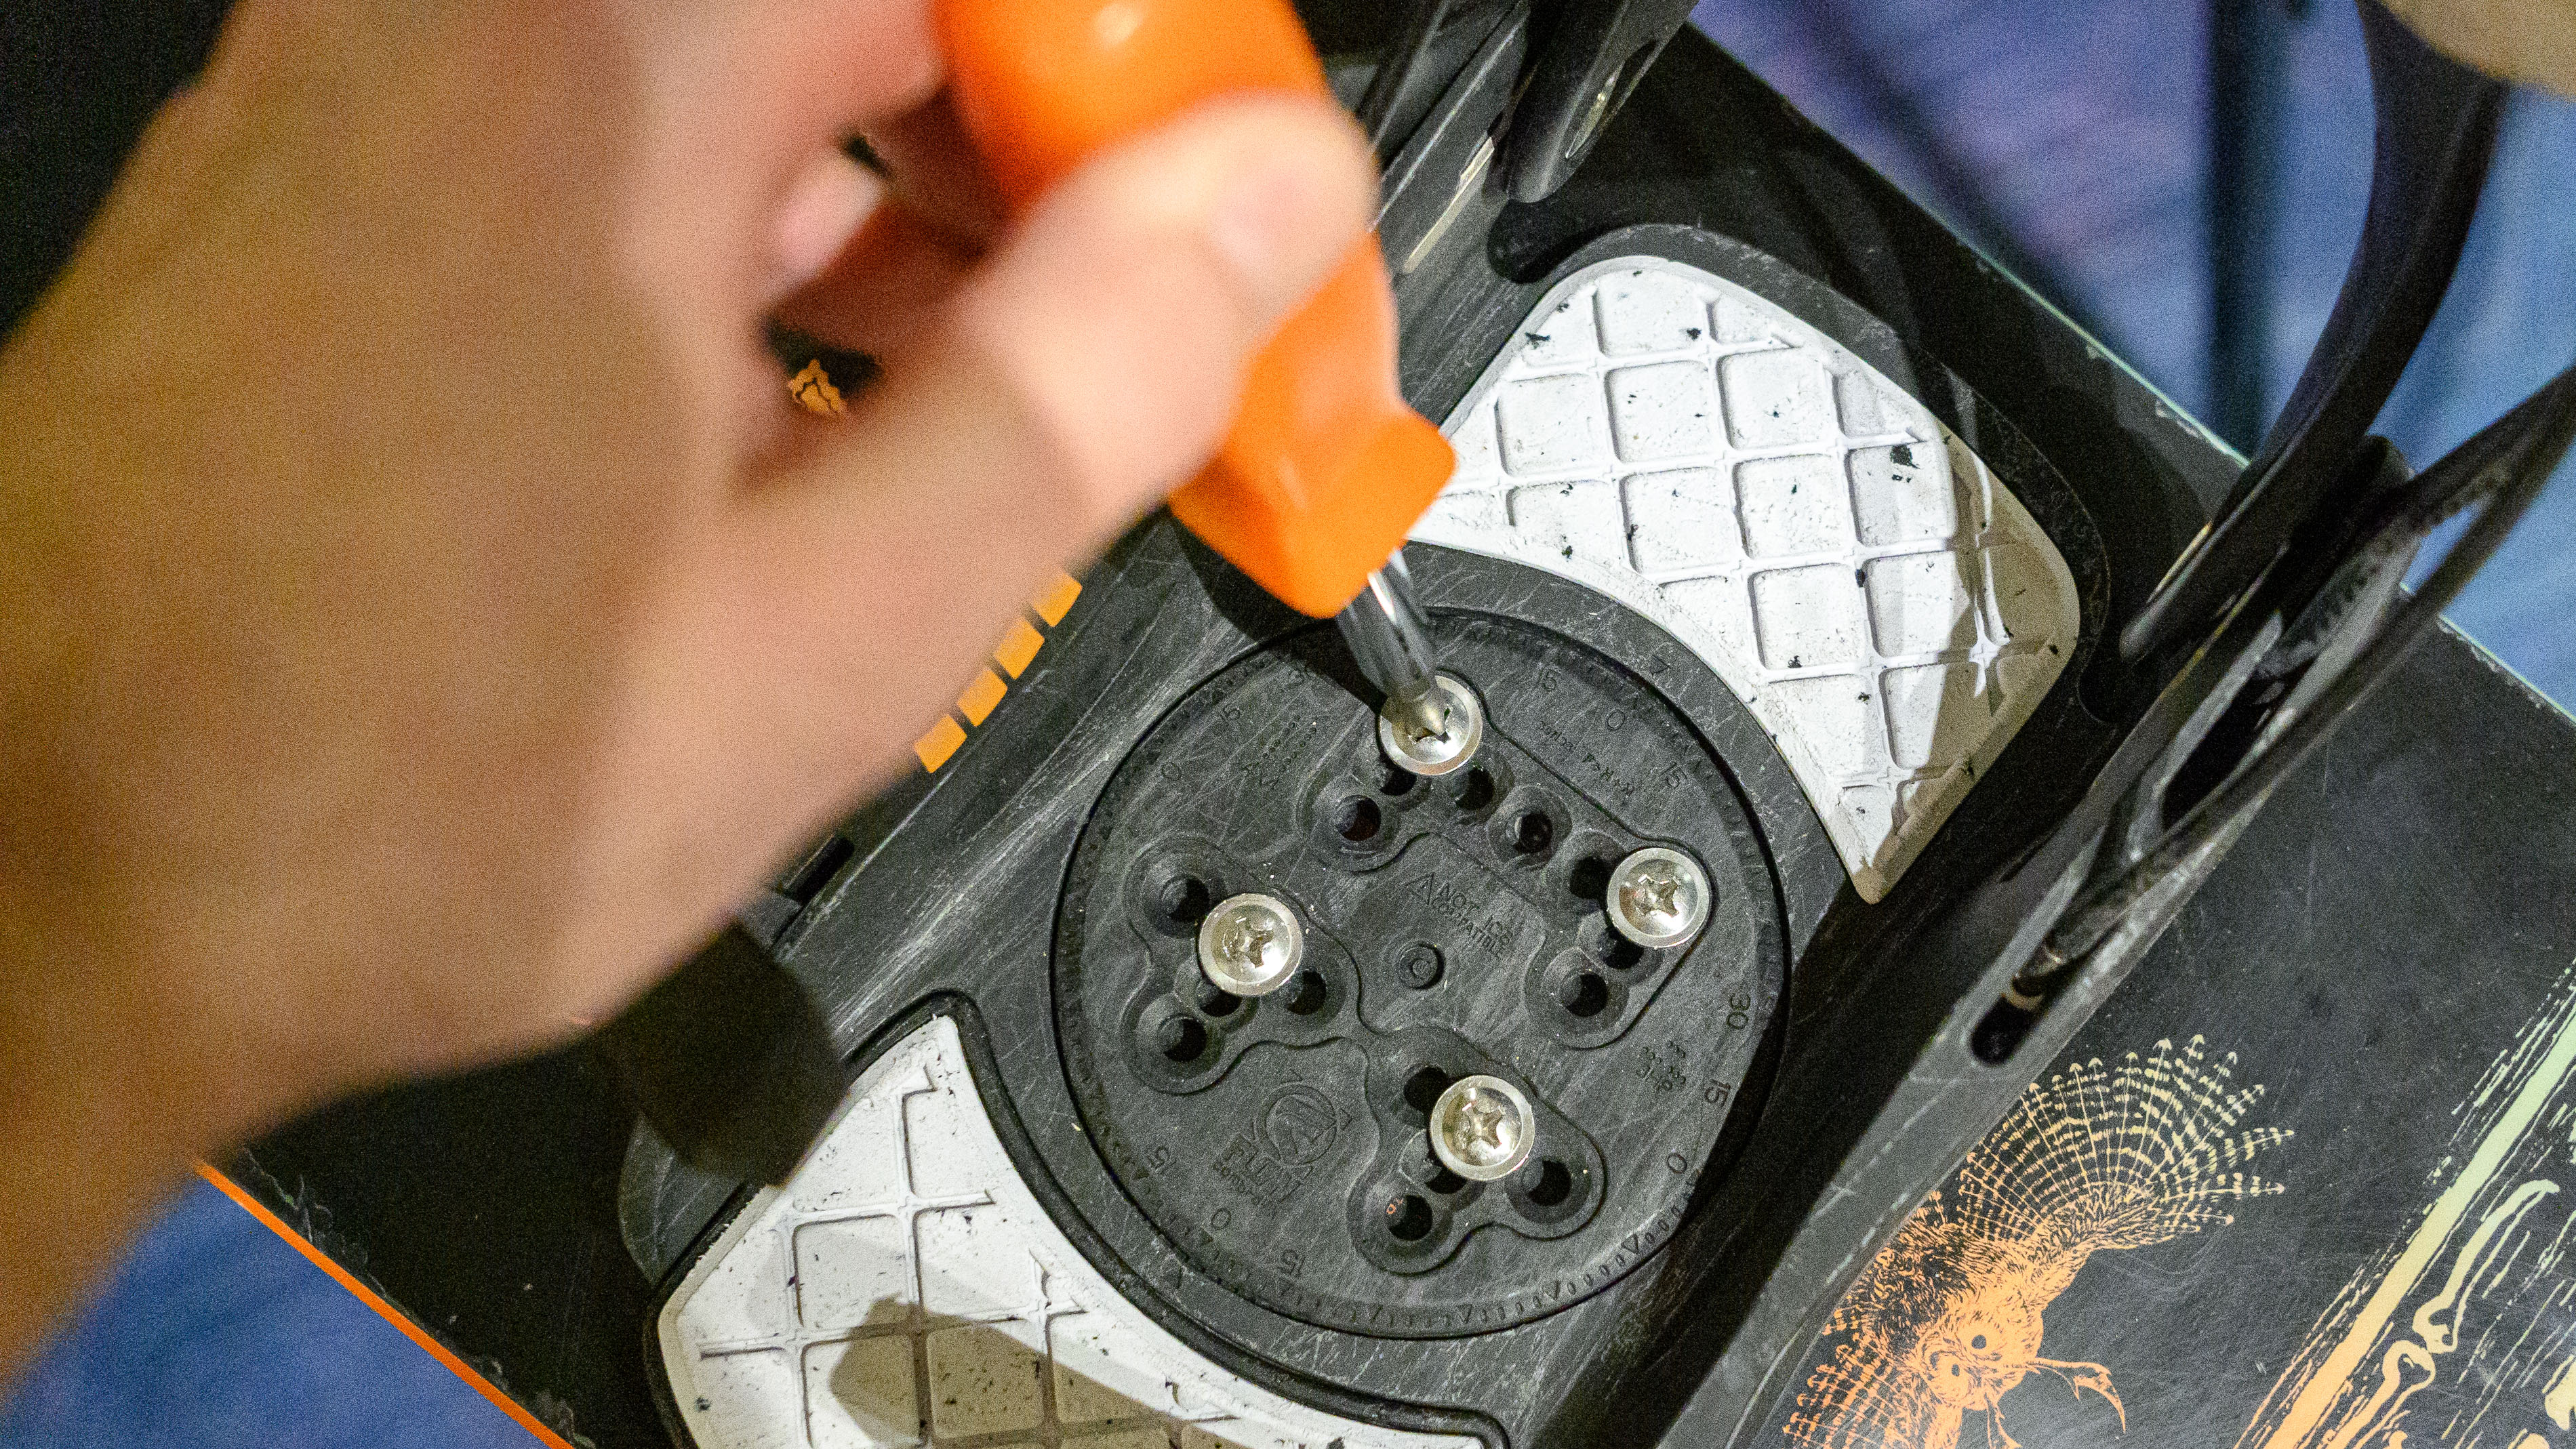
With the board base clean, flip it back over and bust out the Phillips head screwdriver — it's time to loosen your bindings. Before doing so, it's not a bad idea to snap a photo of the mounting position of each, in case you need a reference in the future.
Loosen each screw three or four turns — there's no need to completely remove them. What's the point? Waxing irons get as hot as 140 degrees Fahrenheit — fully-tightened screws risk conducting heat from the iron, which can damage your board.
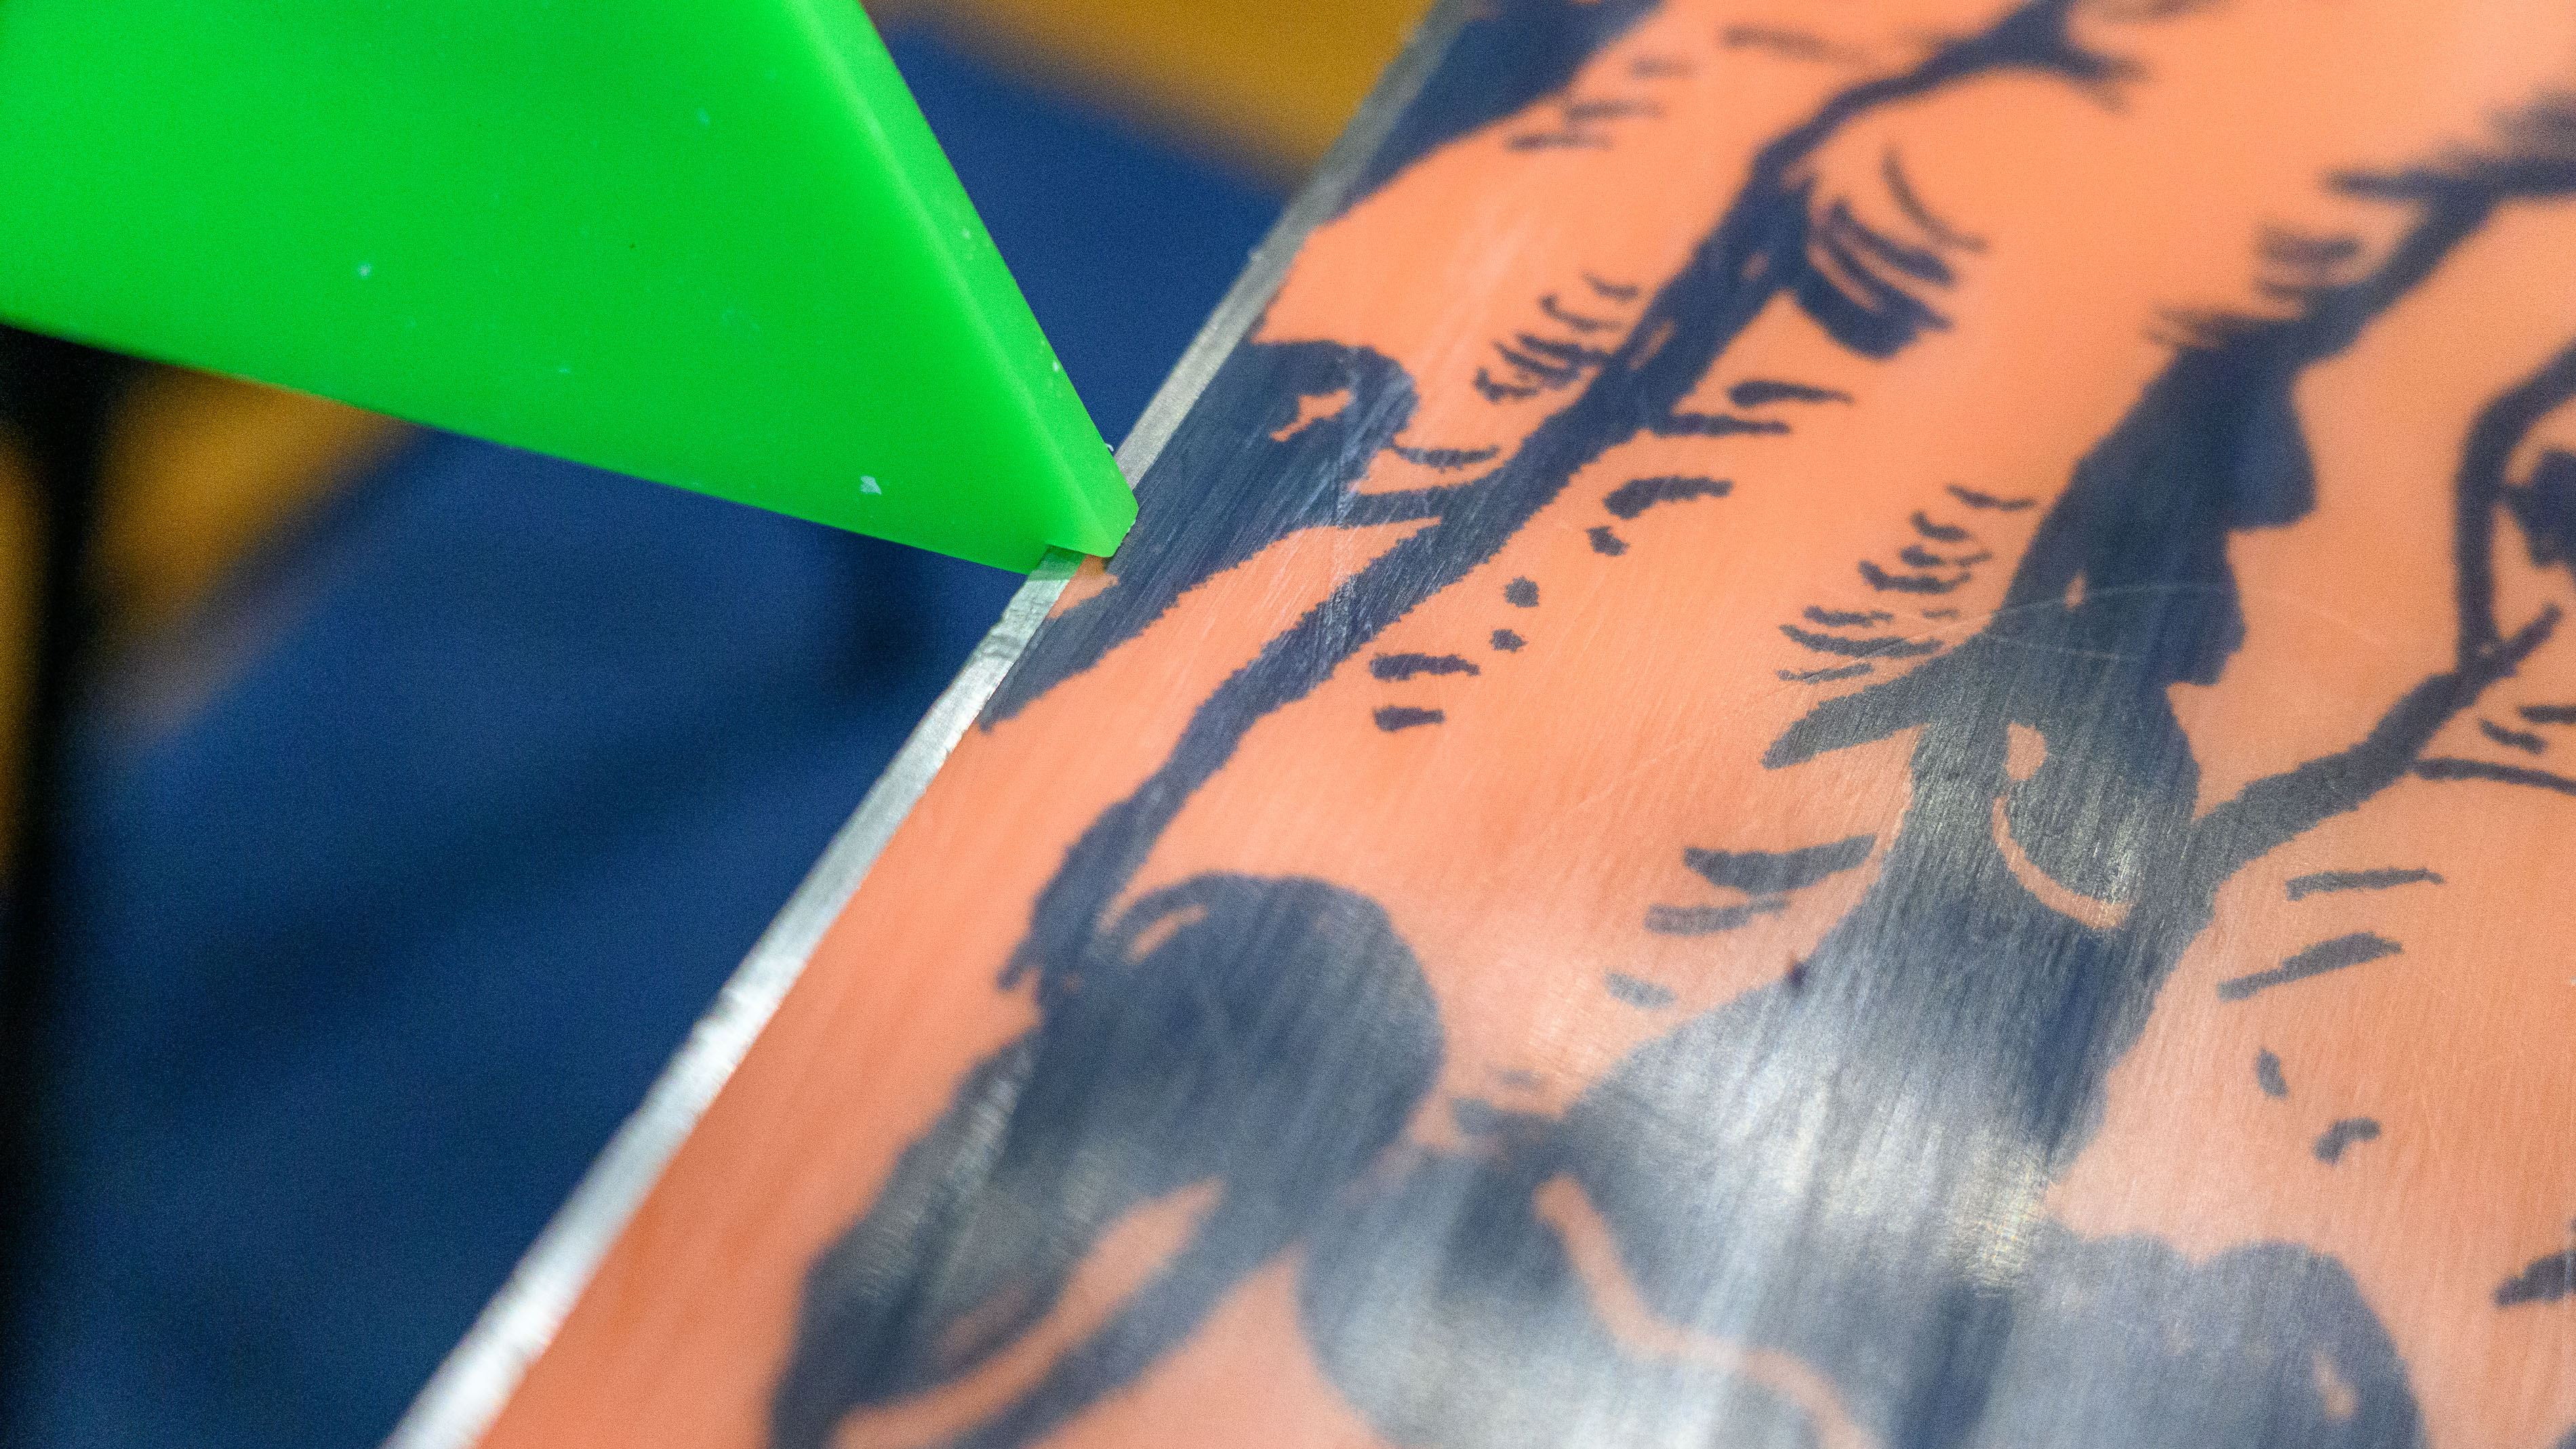
3. Check your edges for burrs
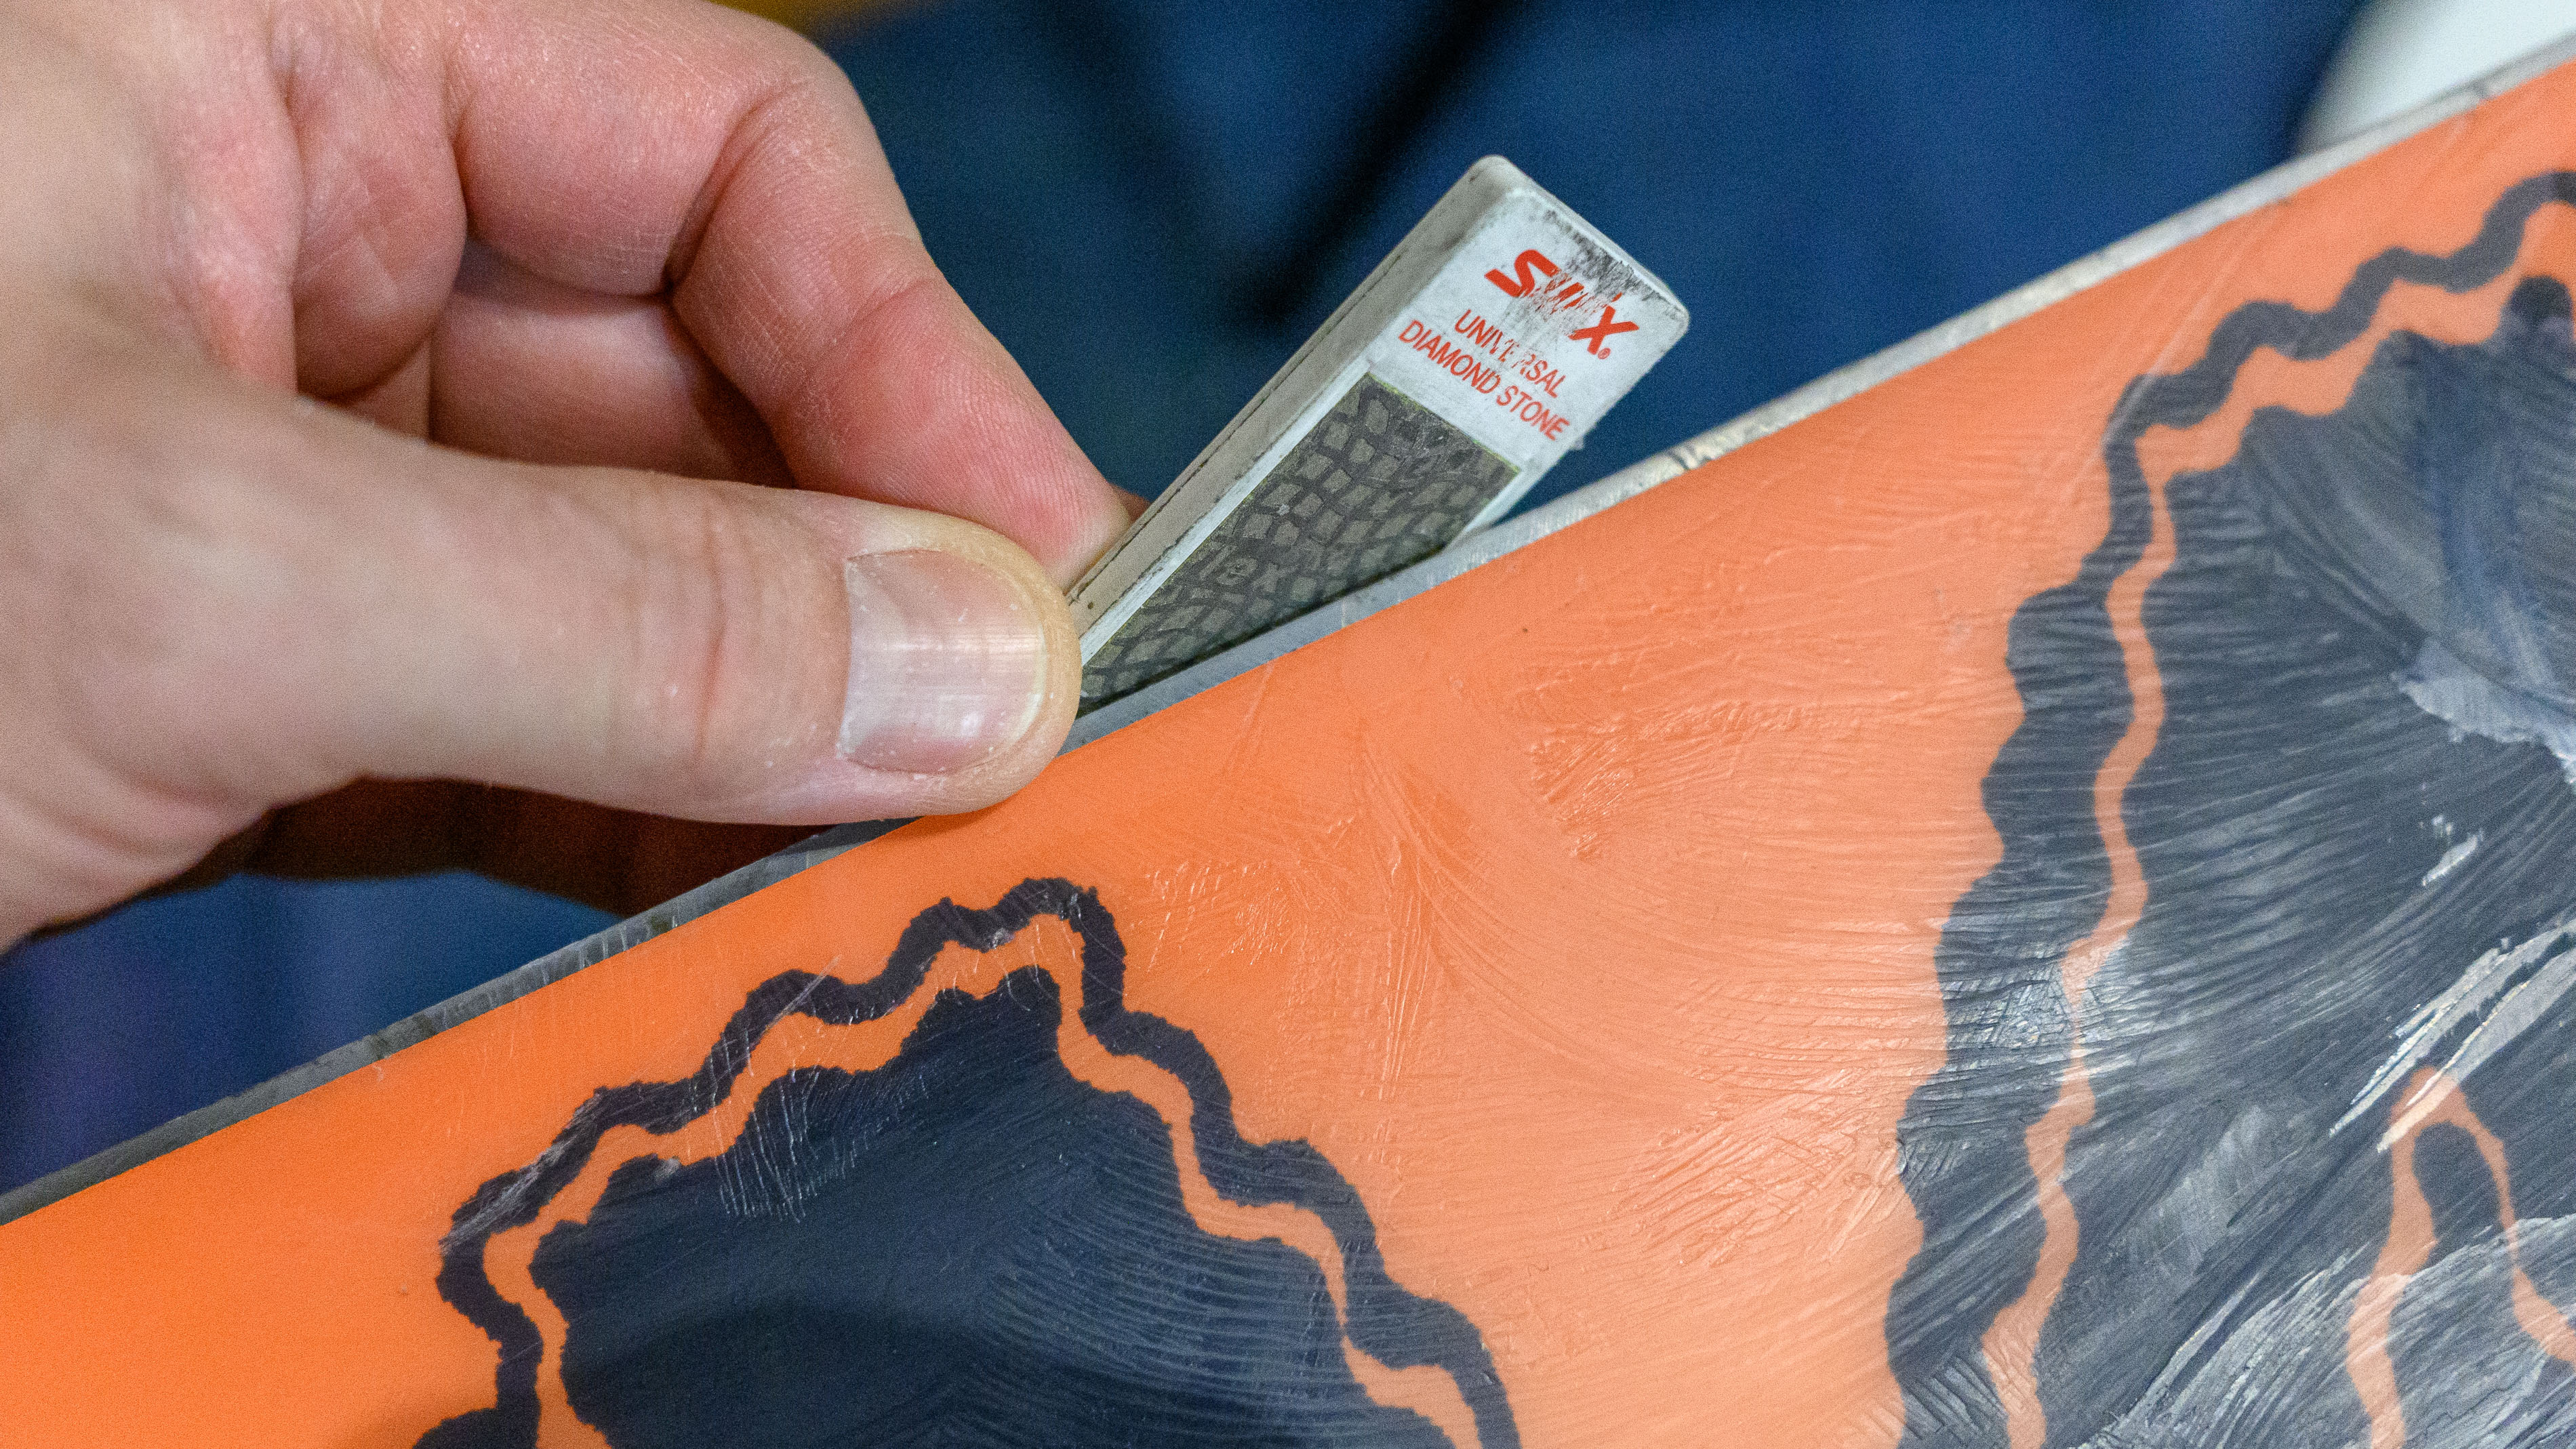
This step is easy to miss, but doing it ensures the lifespan of your newly purchased waxing tools. Even small burrs or dings along the board's edge can scratch or chip your iron and/or scraper. To avoid this, slowly work your way around the board, gently scraping away any burrs you encounter, but be careful not to scrape against the edge itself. Additionally, pay attention to the angle of the edge and do your best to maintain it while deburring.
4. Heat up the waxing iron and get dripping
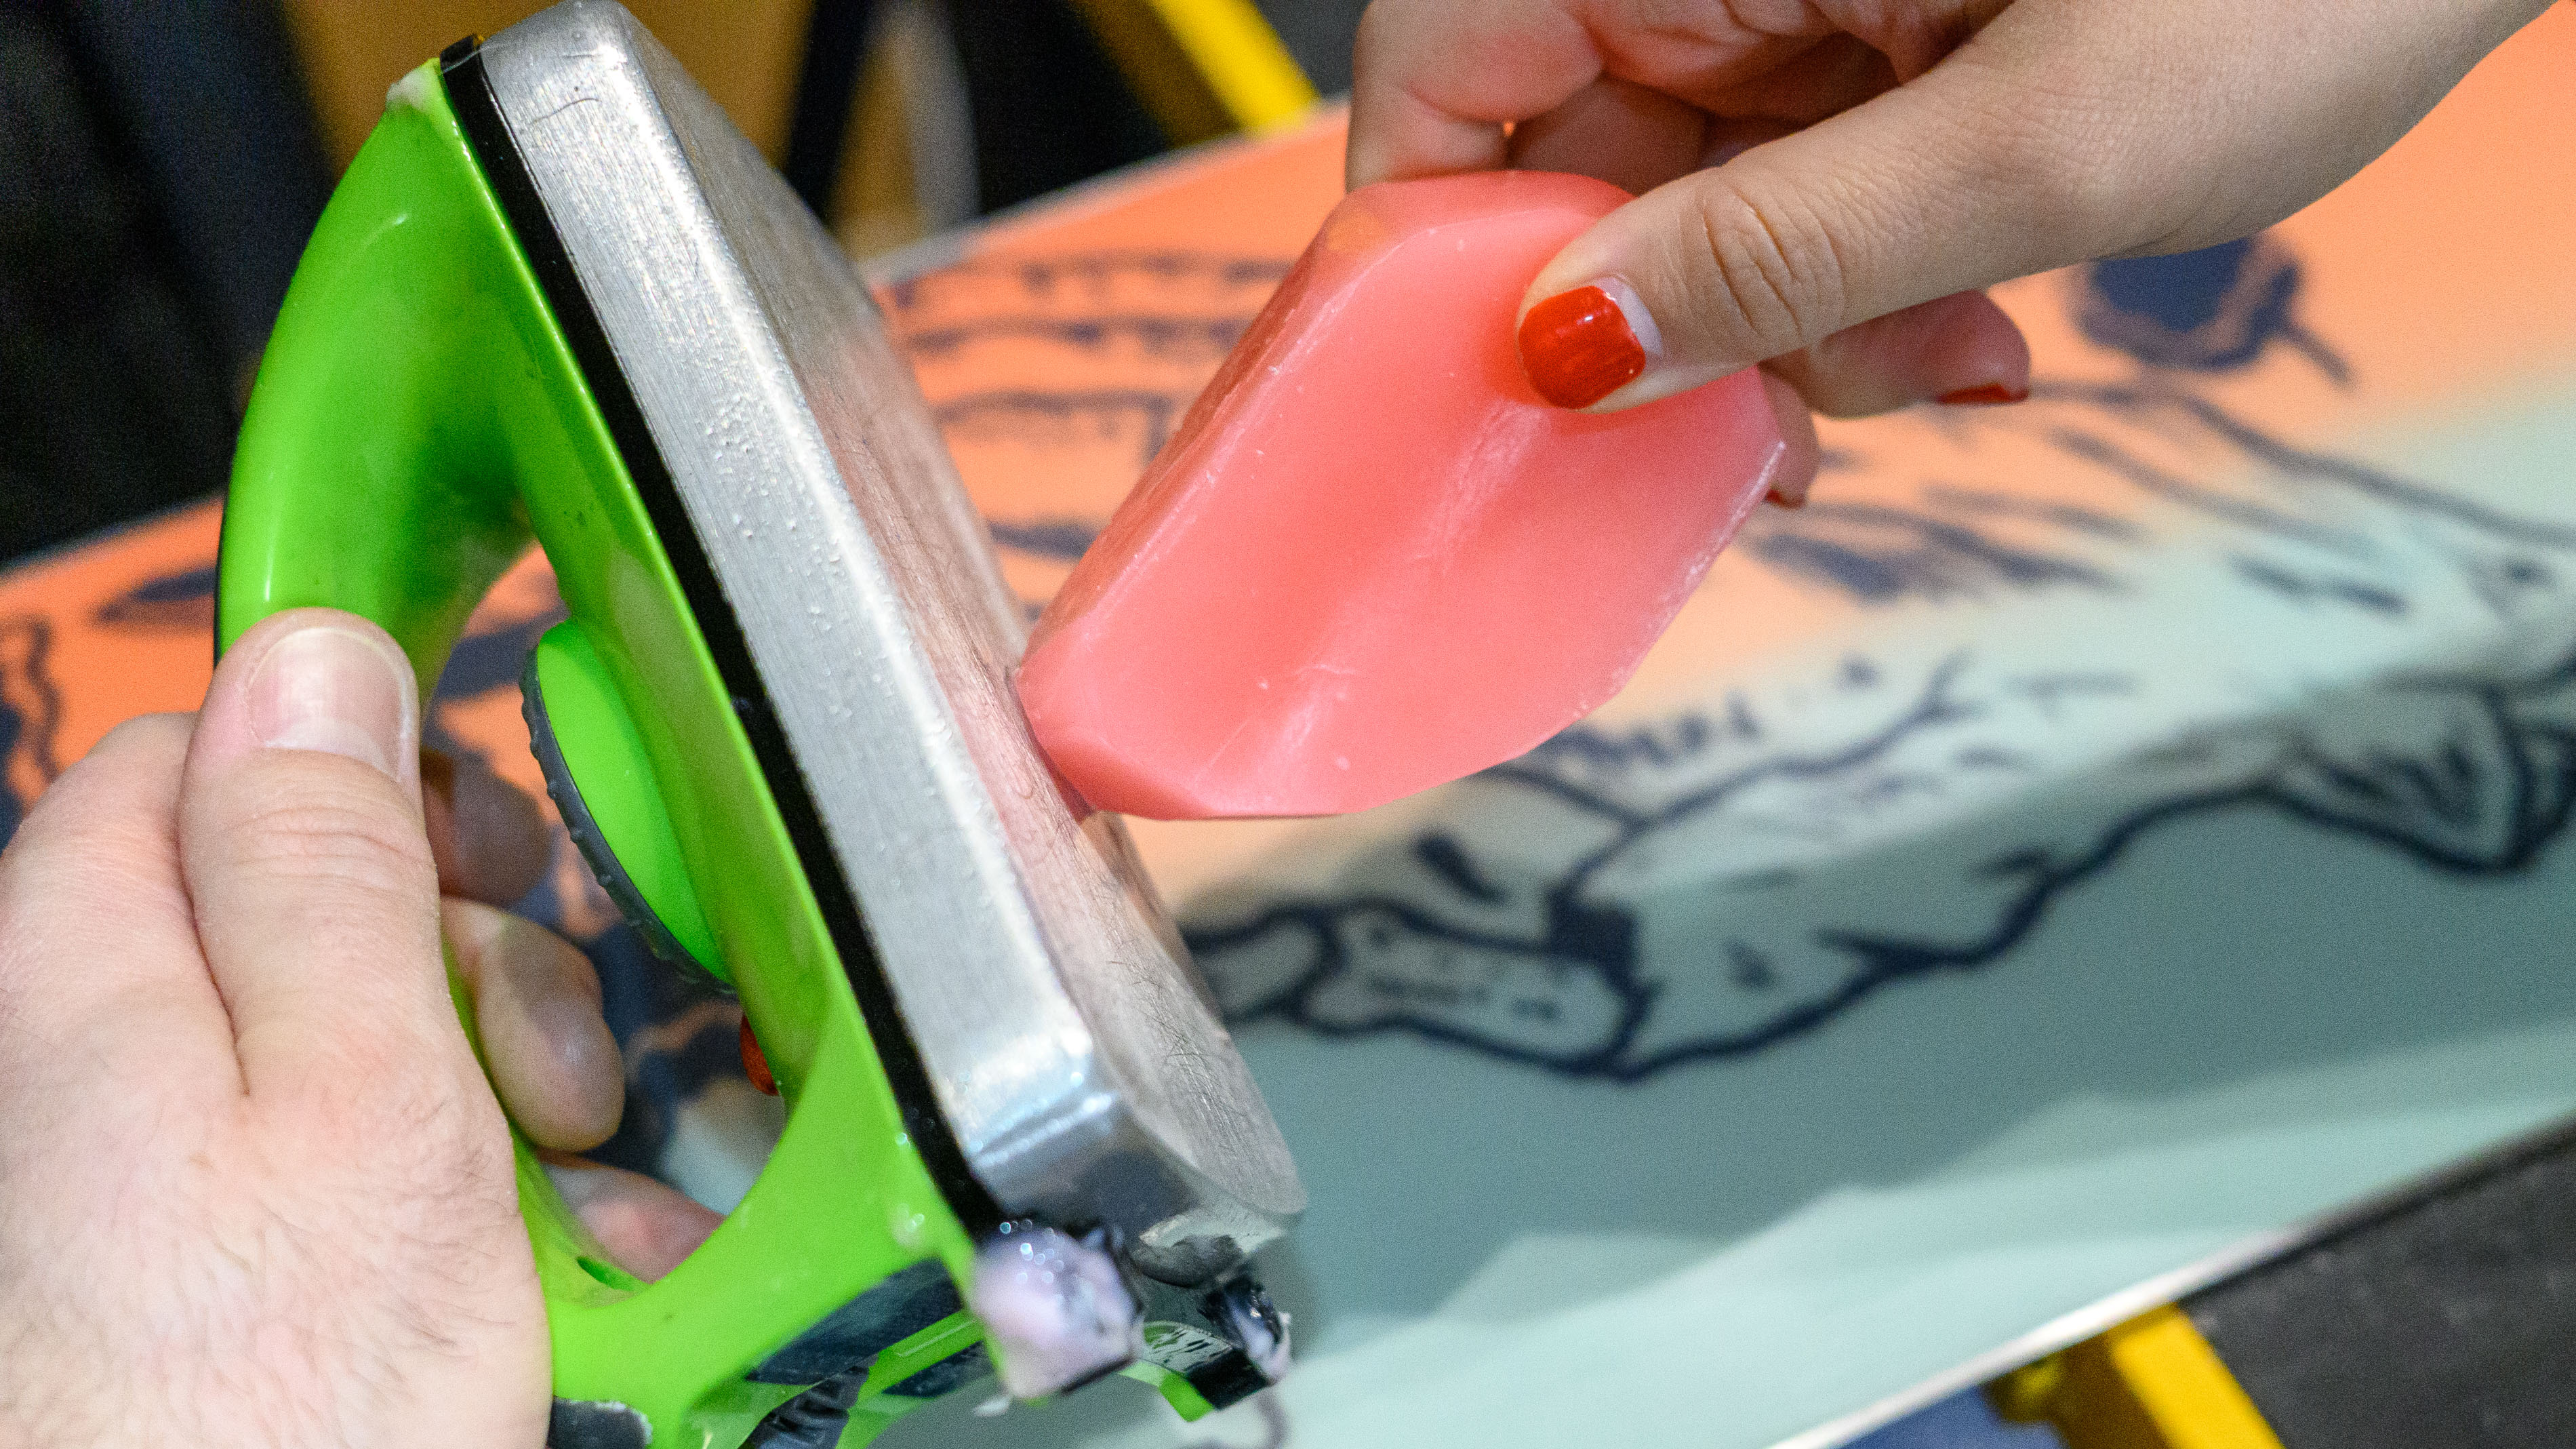
This is where the fun begins. With your board positioned at waist height and in such a way that it won't move around on you — I place it on two sawhorses, but some folks like to use a vice or clamps — plug your iron in and turn it to medium heat (between 120 and 140 degrees).
Once hot, hold your wax brick to the iron and begin dripping 1-inch-sized wax droplets every 3 or 4 inches on the surface. The edges, in particular, will likely need the most wax, but be sure no portion goes without some droplets.
A few words of caution: If the iron starts smoking, your temperature setting is too high. Also, it's a good idea to move the operation outdoors at this point if you haven't already. The wax may ruin your floors. Alternatively, throw down a drop cloth or tarp for easy indoor cleanup later.
5. Iron the base and let it cool
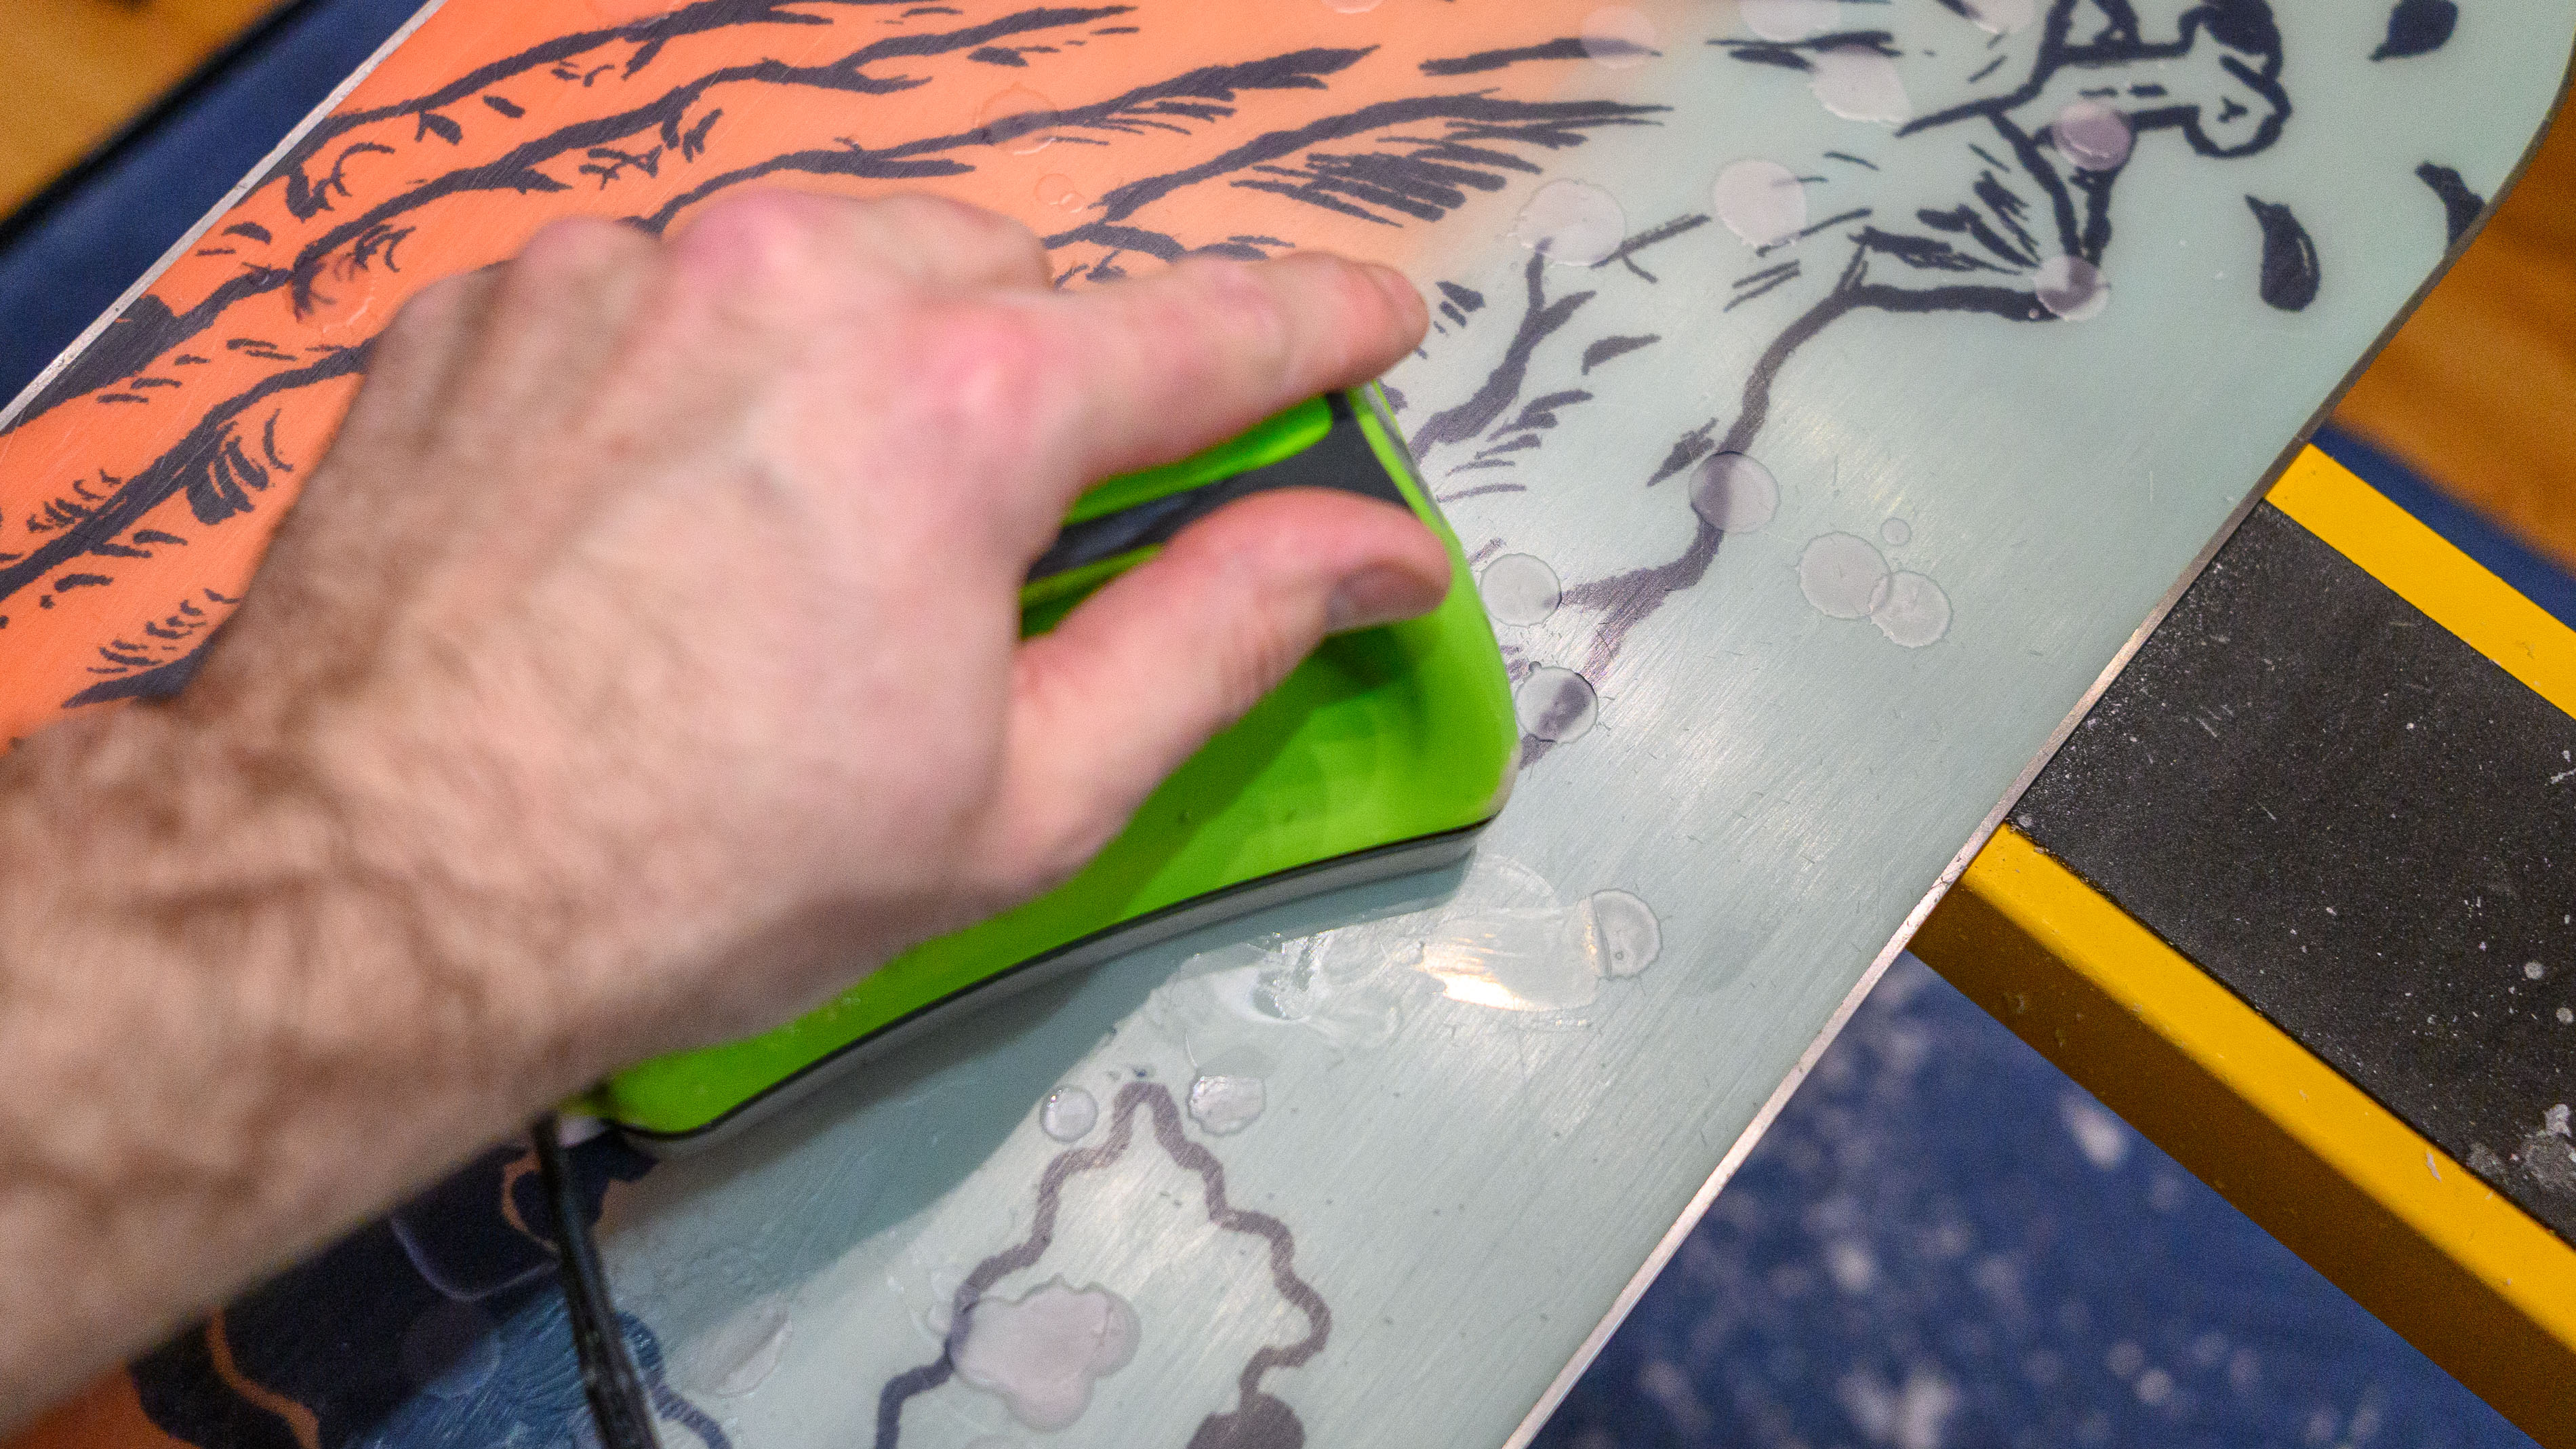
With wax blobs covering the entire board surface, it's time to iron. The technique is simple: Move the iron around in a circular pattern, ensuring all areas receive an even, smoothish layer of wax. Never leave the iron in one location for too long, and, again, if things start smoking, turn the iron temperature down.
Once satisfied with your coating, like a freshly baked apple pie, it's time to let things cool. Set a timer for 30 minutes, turn on your favorite snowboard flick — I recommend 2011's The Art of Flight — and take a break. You'll need all your strength for the final two steps.
6. Scrape the wax from tip to tail
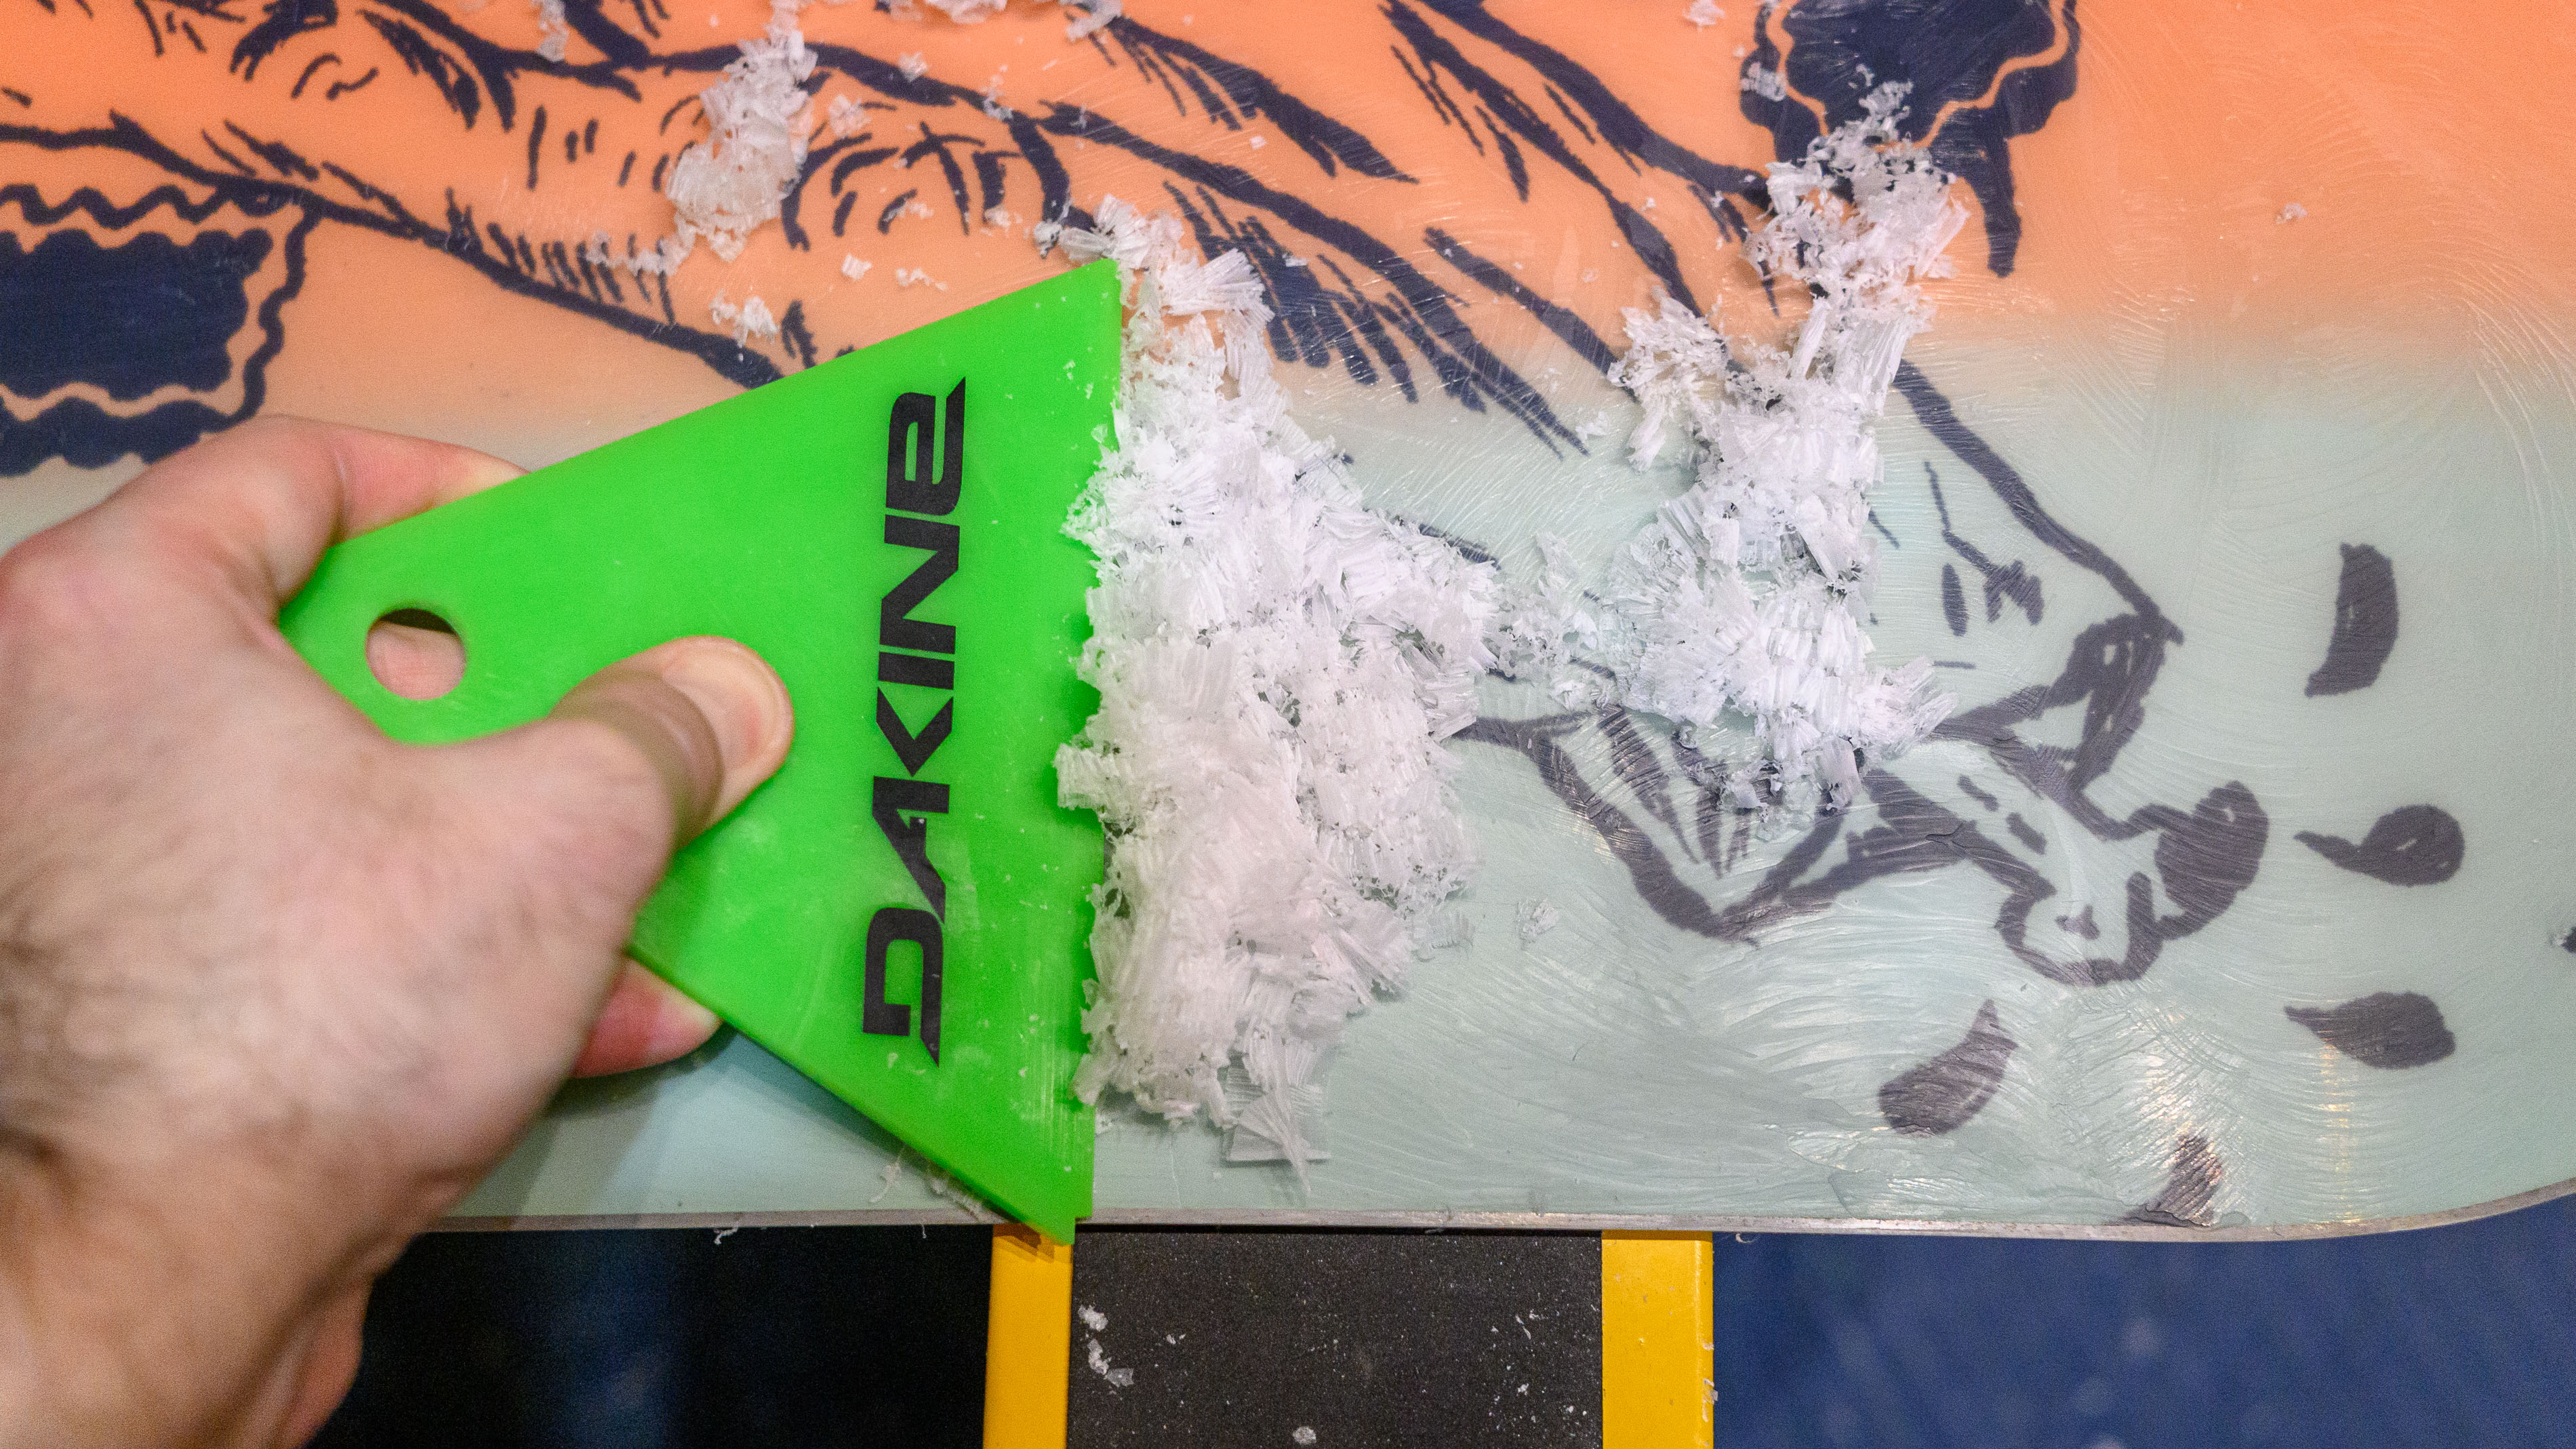
Repeat after me, "I will always scrape from tip to tail." Why is this so important? For maximum speed — who doesn't like going "zoom?" — your scraping and brushing strokes need to match the direction that the board will be moving down the mountain.
With the scraper positioned at a 45-degree angle, work your way from the board's nose to its tail, removing as much excess wax as possible. To avoid creating divots or uneven scrape marks, do your best to make as long scraping strokes as you can. That said, it's okay to start with short ones and work up to longer strokes as the board gets smoother.
The goal is to remove as much wax as possible. It may seem counterintuitive, given how much attention we paid to dripping the wax on, but the less wax and smoother the board surface, the better it will ride.
7. Structure and finish the wax job

Last but not least, with the wax job smoothed to your liking, you're ready to finish the job. Again, working from tip to tail, brush the board's surface with long, even strokes using a soft brush, ideal nylon. This removes excess wax while adding tiny grooves in the wax job, which can help further reduce friction.
After that, take your wax scraper and locate the small right-angle cutout. This is used to remove excess wax from the board's edge without impacting the base wax job you just finished. Gently make your way around the edge, and voila, you're done.
And there you have it, a freshly waxed snowboard, ready for your next mountain mission. To ensure the longevity of your work, it's best to fully dry off your board in between riding days. And the occasional base cleaning can't hurt either.
When will it need a waxing next? That depends on many factors. But for optimal performance, every two to three riding days is best. A board in need of waxing has two tell-tale signs: it moves more slowly than normal, and/or the base wax is beginning to turn white.
Looking for more useful winter-time guides? Check out our guide to driving in the snow, top tips on training for cold-weather marathons and recommendations for safe and effective driveway ice removal.