Adobe has integrated a host of new features recently, mostly powered by AI. But the Subject Select tool is slightly different – it's not a massive AI upgrade but a genuinely useful addition that will save time and faff. It allows you to cut out elements of the photo automatically rather than manually.
This tool is not AI in the same sense as the Generative options (unlike the others, it can work offline), but has a similar effect on workflow. It is especially useful for cutting people out and creating headshots. It isn’t always successful in creating the same sharp lines you would get using the Pen tool and sometimes has trouble with very busy backgrounds, but for most quick turnarounds it is more than capable.
For more tips see our guide to using Generative Expand and our Photoshop tutorial guide.
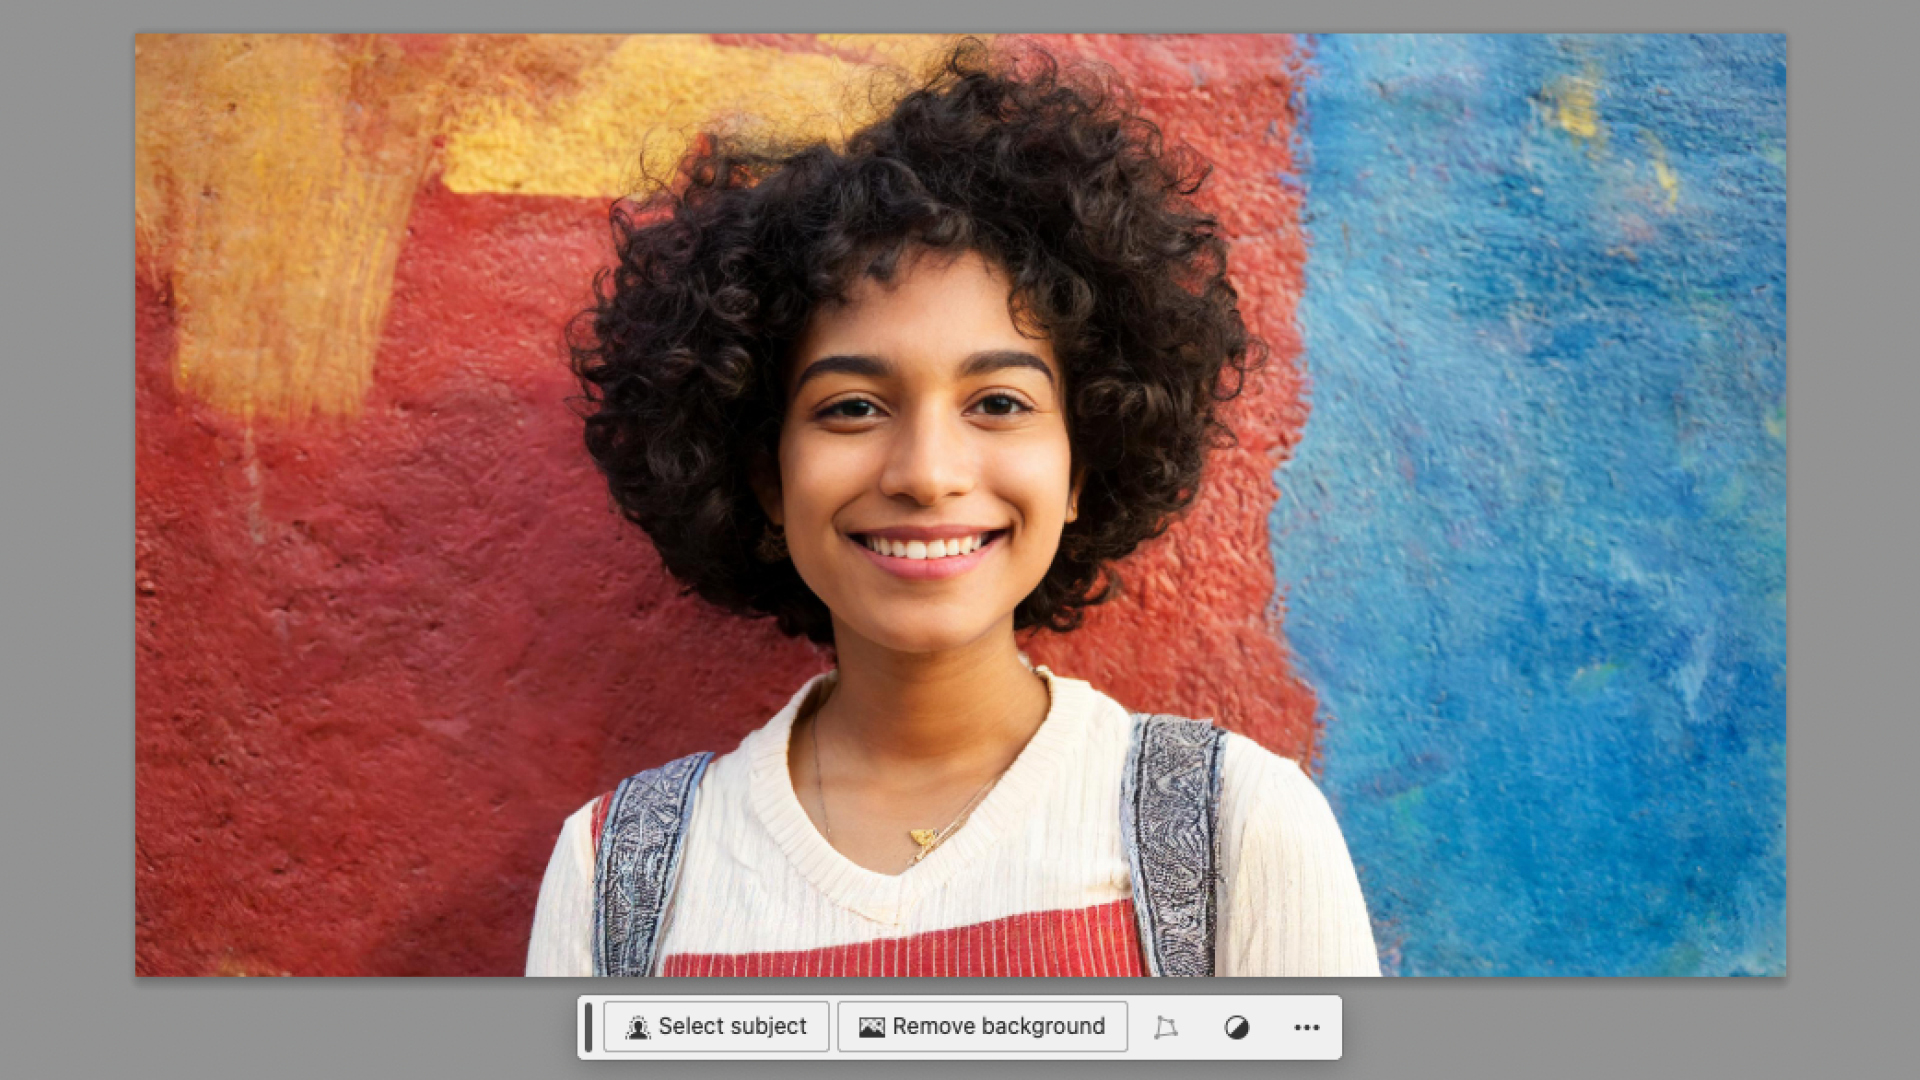
01. Open image
Open an image in Photoshop and the Contextual Task Bar will pop up. This tool is most effective with an obvious target object, such as a person or a car. Where the Select and Mask tool might have struggled with frizzy hair, this new Select Subject copes admirably.
02. Select subject
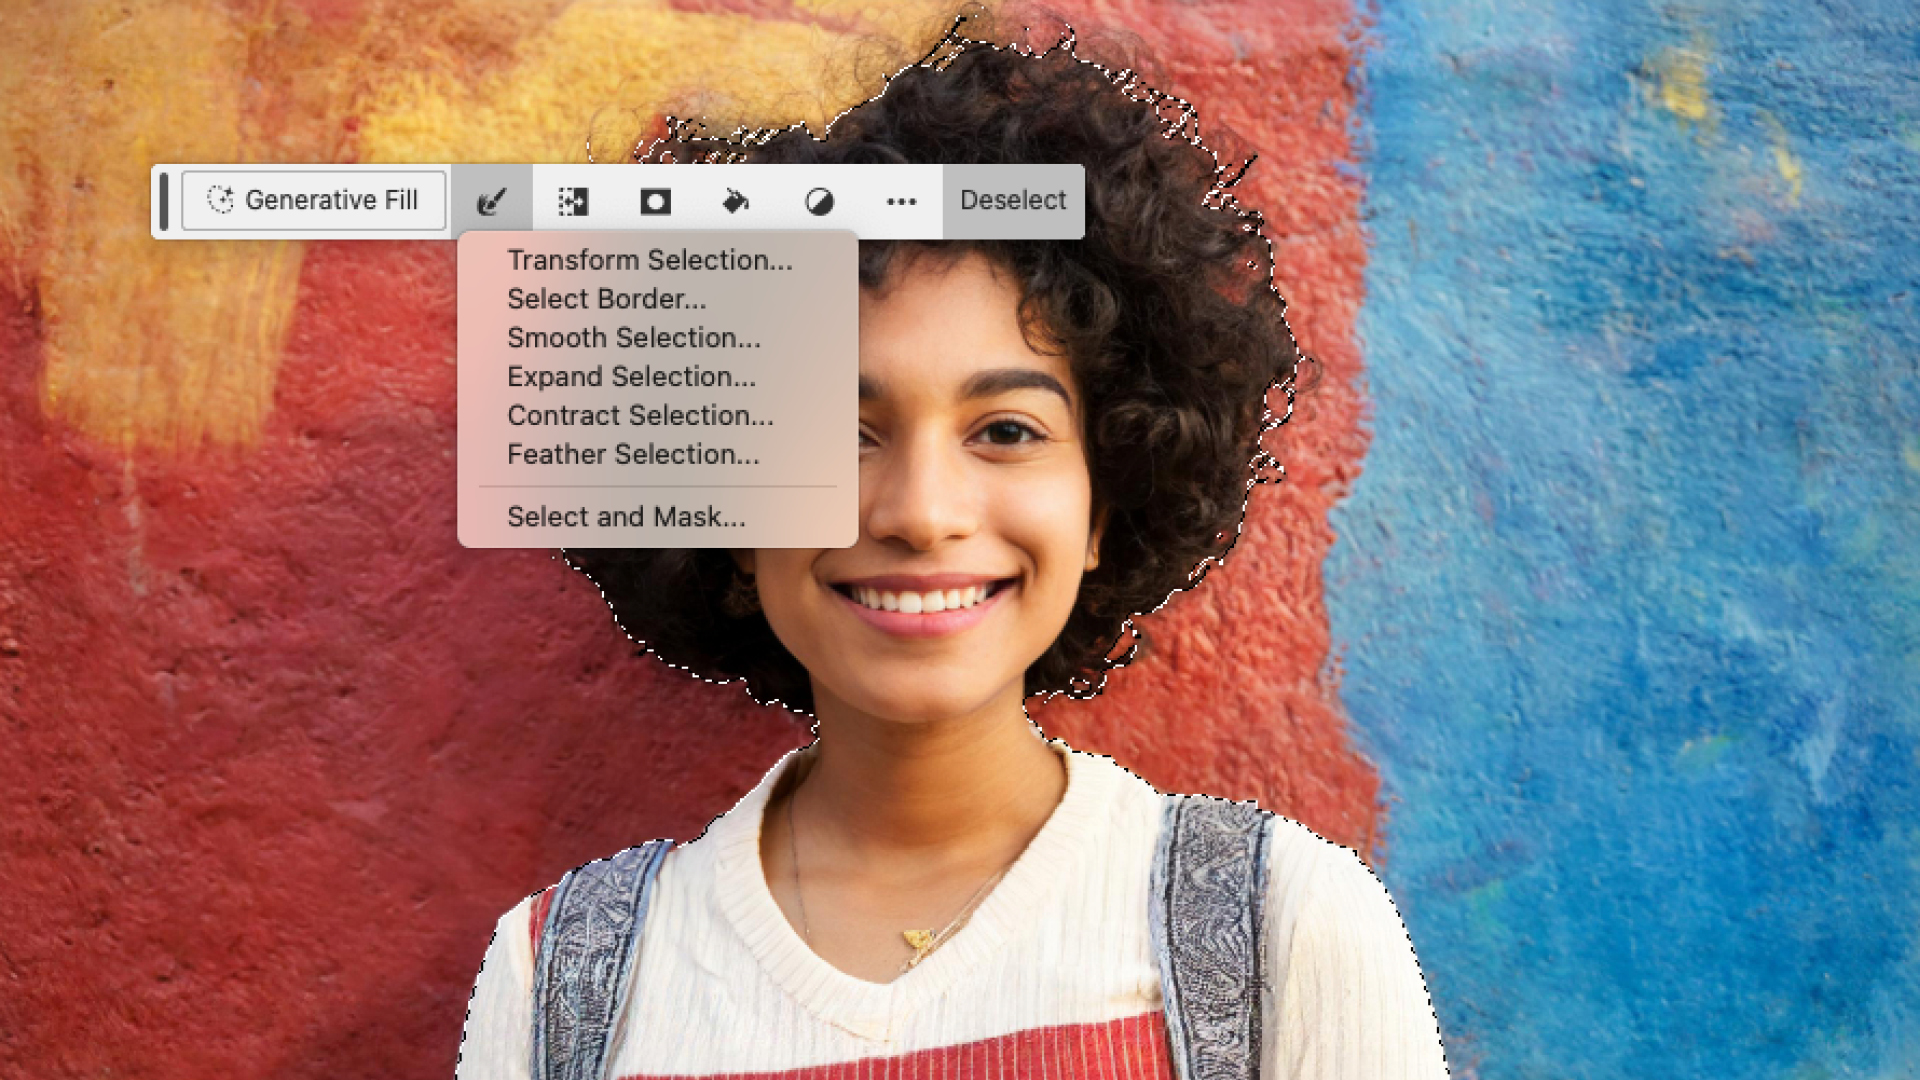
Press the Select Subject button in the Contextual Task Bar. This will automatically select your subject. You can use the Modify button to adjust your selection, such as feathering or expanding it.
Use the selection to mask out the background or duplicate the selection onto a new layer. Alternatively you can press Remove Background instead of Select Subject and you will achieve the same result.
03. Clean up the image

The selection isn't always perfect and you can end up with some ragged edges, so if you want to use this image at a high resolution, it can be beneficial to go in close and clean up the image. Finally save the image as a psd or another file type with transparency.
Need a new machine? See our best laptops for Photoshop guide.