Wondering how to set up a shadow catcher in Blender? Then you're in the right place. In this tutorial, I'll walk through the process step by step.
First, what is a shadow catcher? It's a technique that allows you to capture and display shadows cast by objects in a 3D scene, particularly when compositing over a 2D background.
Sometimes you want to produce an image with a transparent background, but you want to include the shadow the object casts. Maybe it’s for a website, or maybe you want to add a custom background later in different software. For example, you might want a flat colour background that you can easily change without needing to render the image again.
This is quite simple to achieve with a shadow catcher. We simply need a light shining on an object, and then we can proceed to set it up. Here's how to do it. For more tips, see our roundup of Blender tutorials.
When you render an image (by pressing F12 or choosing the first option under the Render menu, top left corner), you can save it as a PNG, and you have an image with shadows and a transparent background that’s ready to be used or edited in another software.
01. Choosing cycles
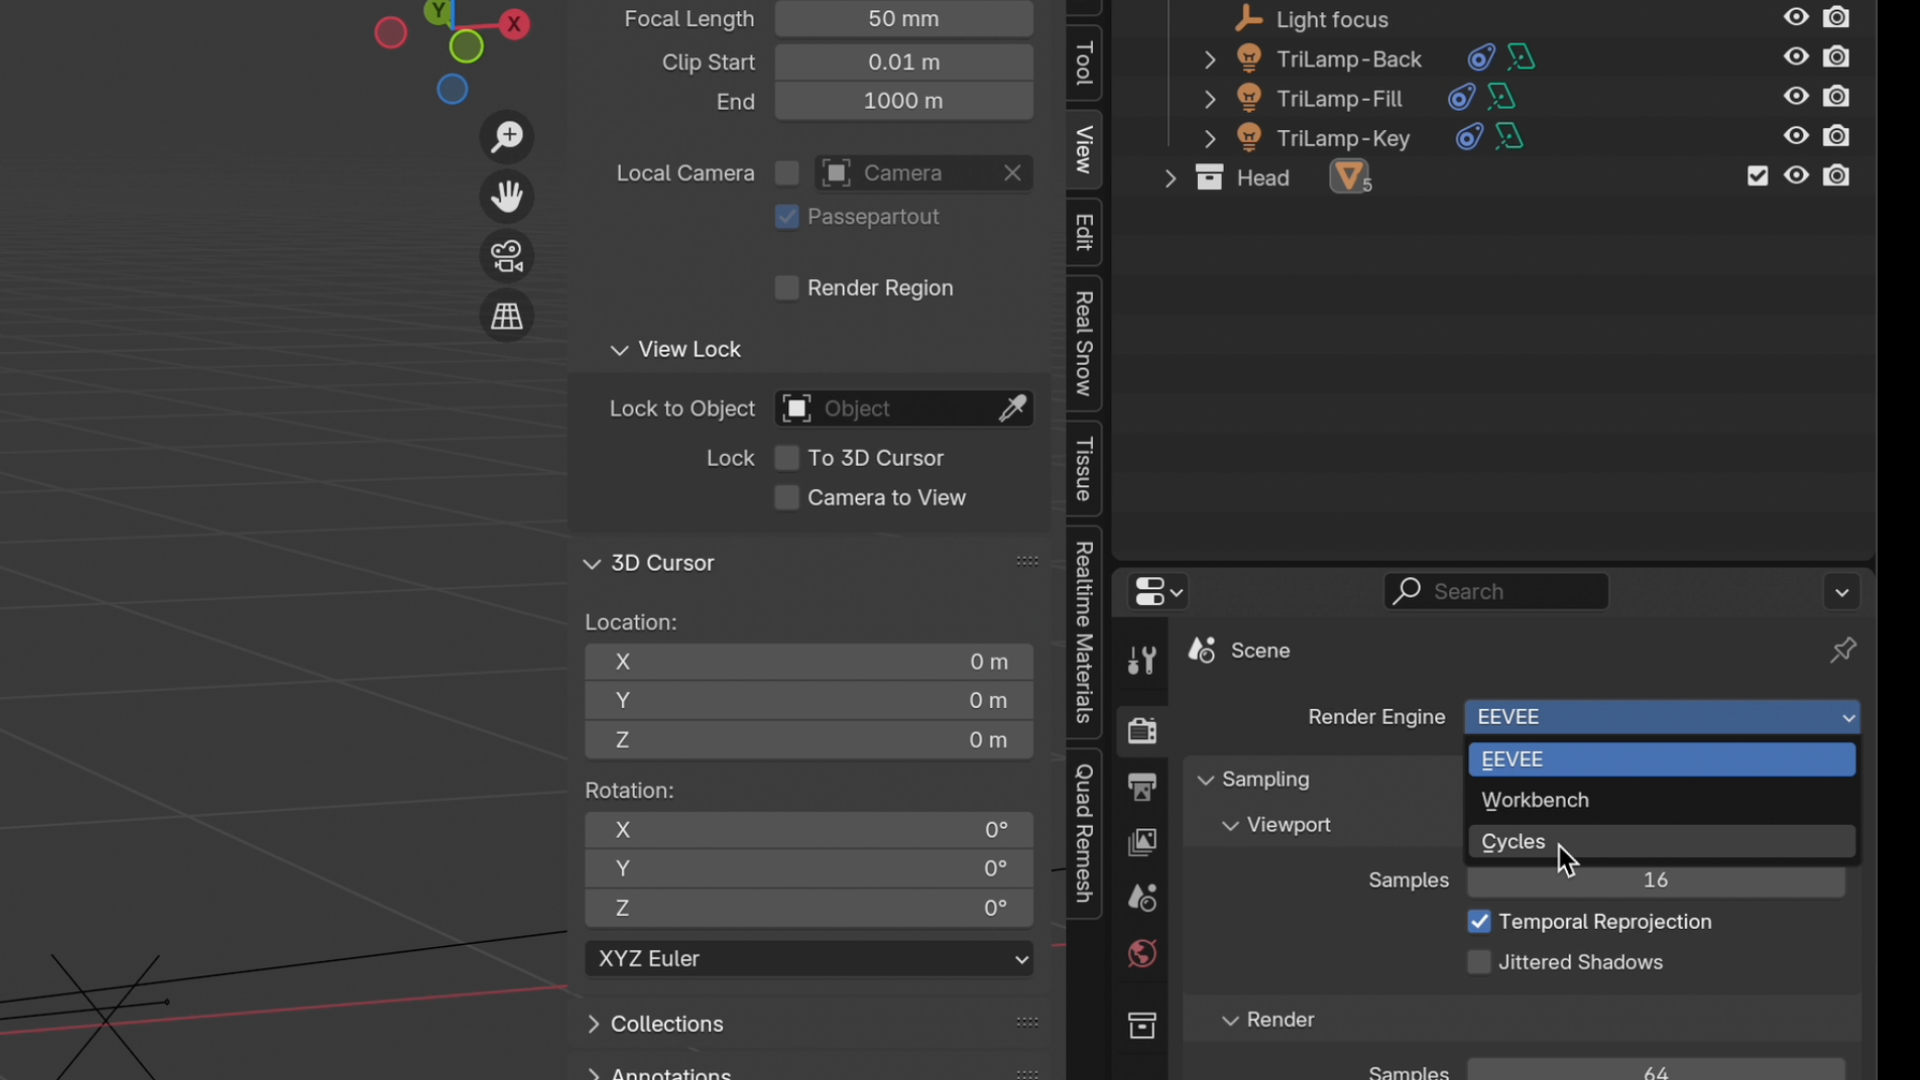
First, to have the option available, we must use the Cycles render engine. Let’s go to Render properties located on the upper side of the Properties panel on the right and set our Render Engine to Cycles
02. Making the film transparent

While we’re in Render properties, let’s also go to Film and select Transparent. Then we need to set up a simple background by pressing Shift+A and choosing Mesh, then Plane.
03. Creating background
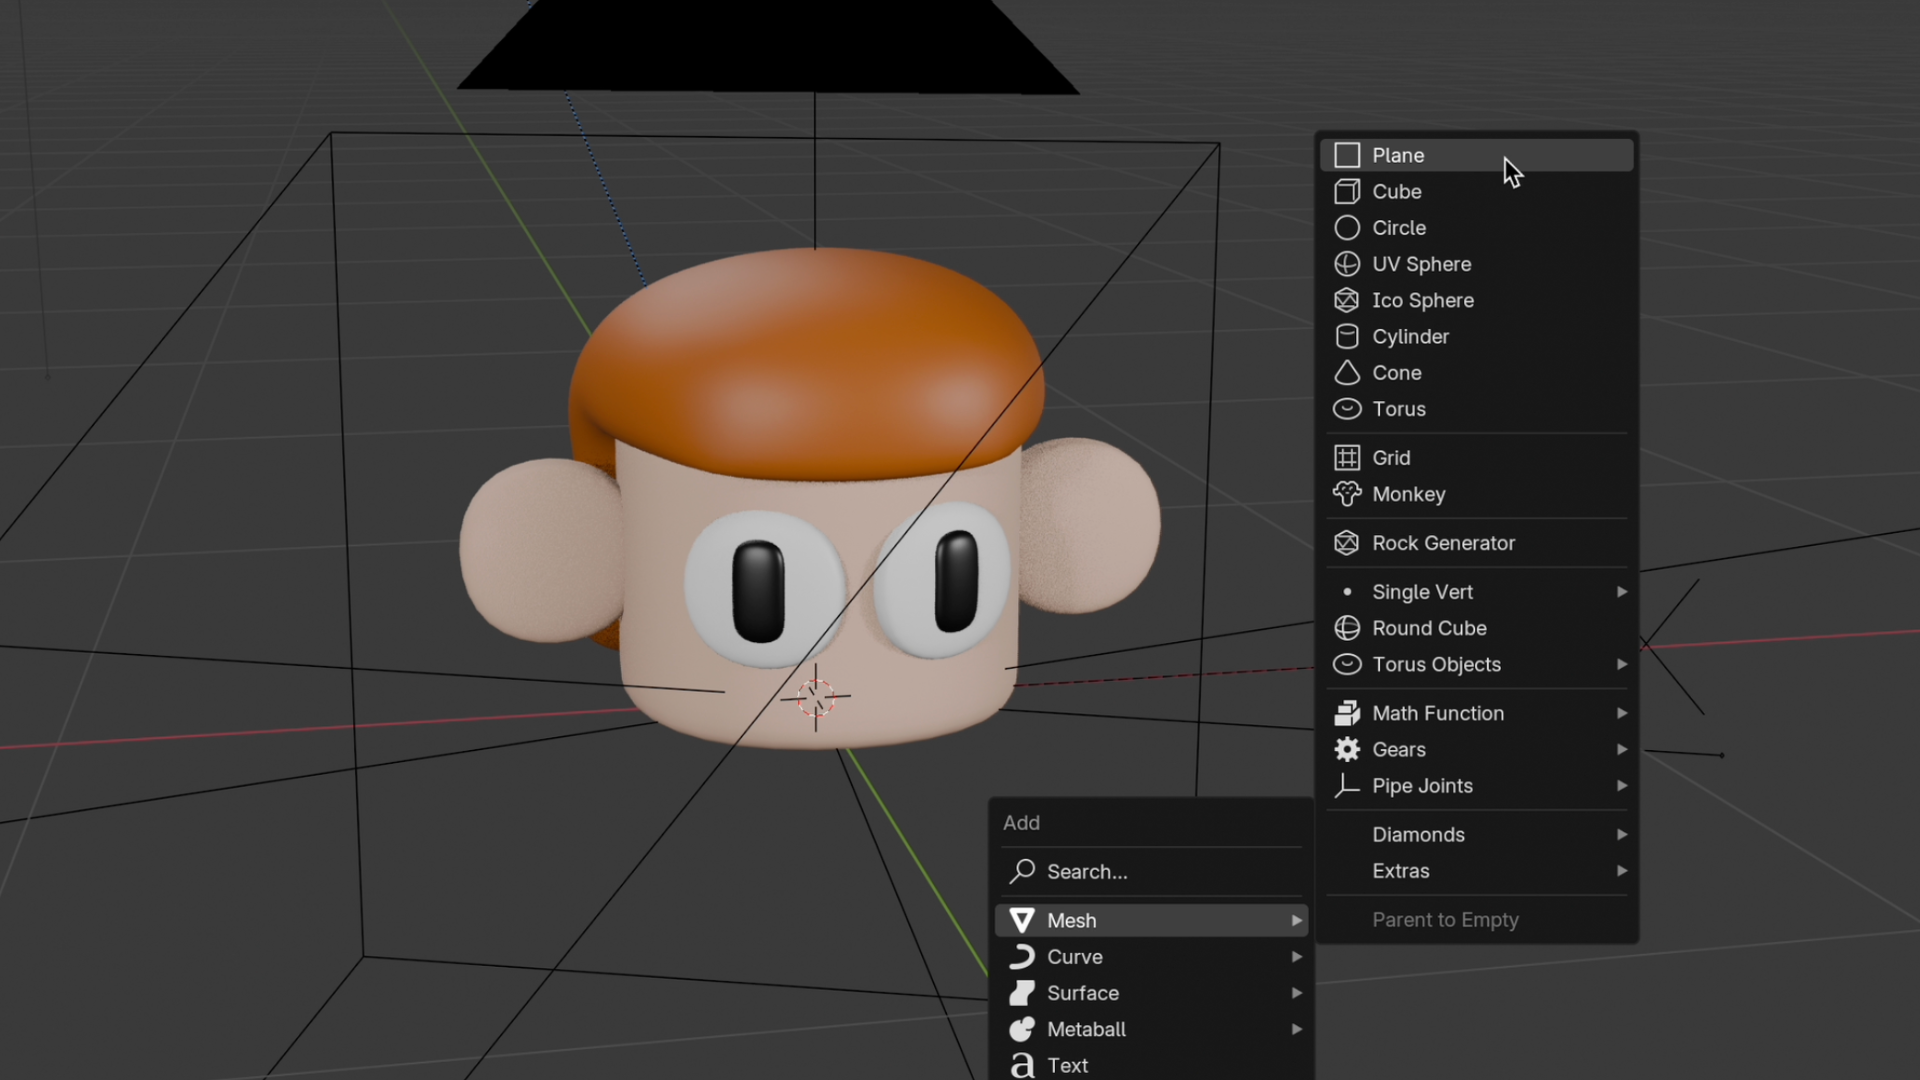
Then we need to set up a simple background by pressing Shift+A and choosing Mesh, then Plane.
04. Setting the background as a shadow catcher
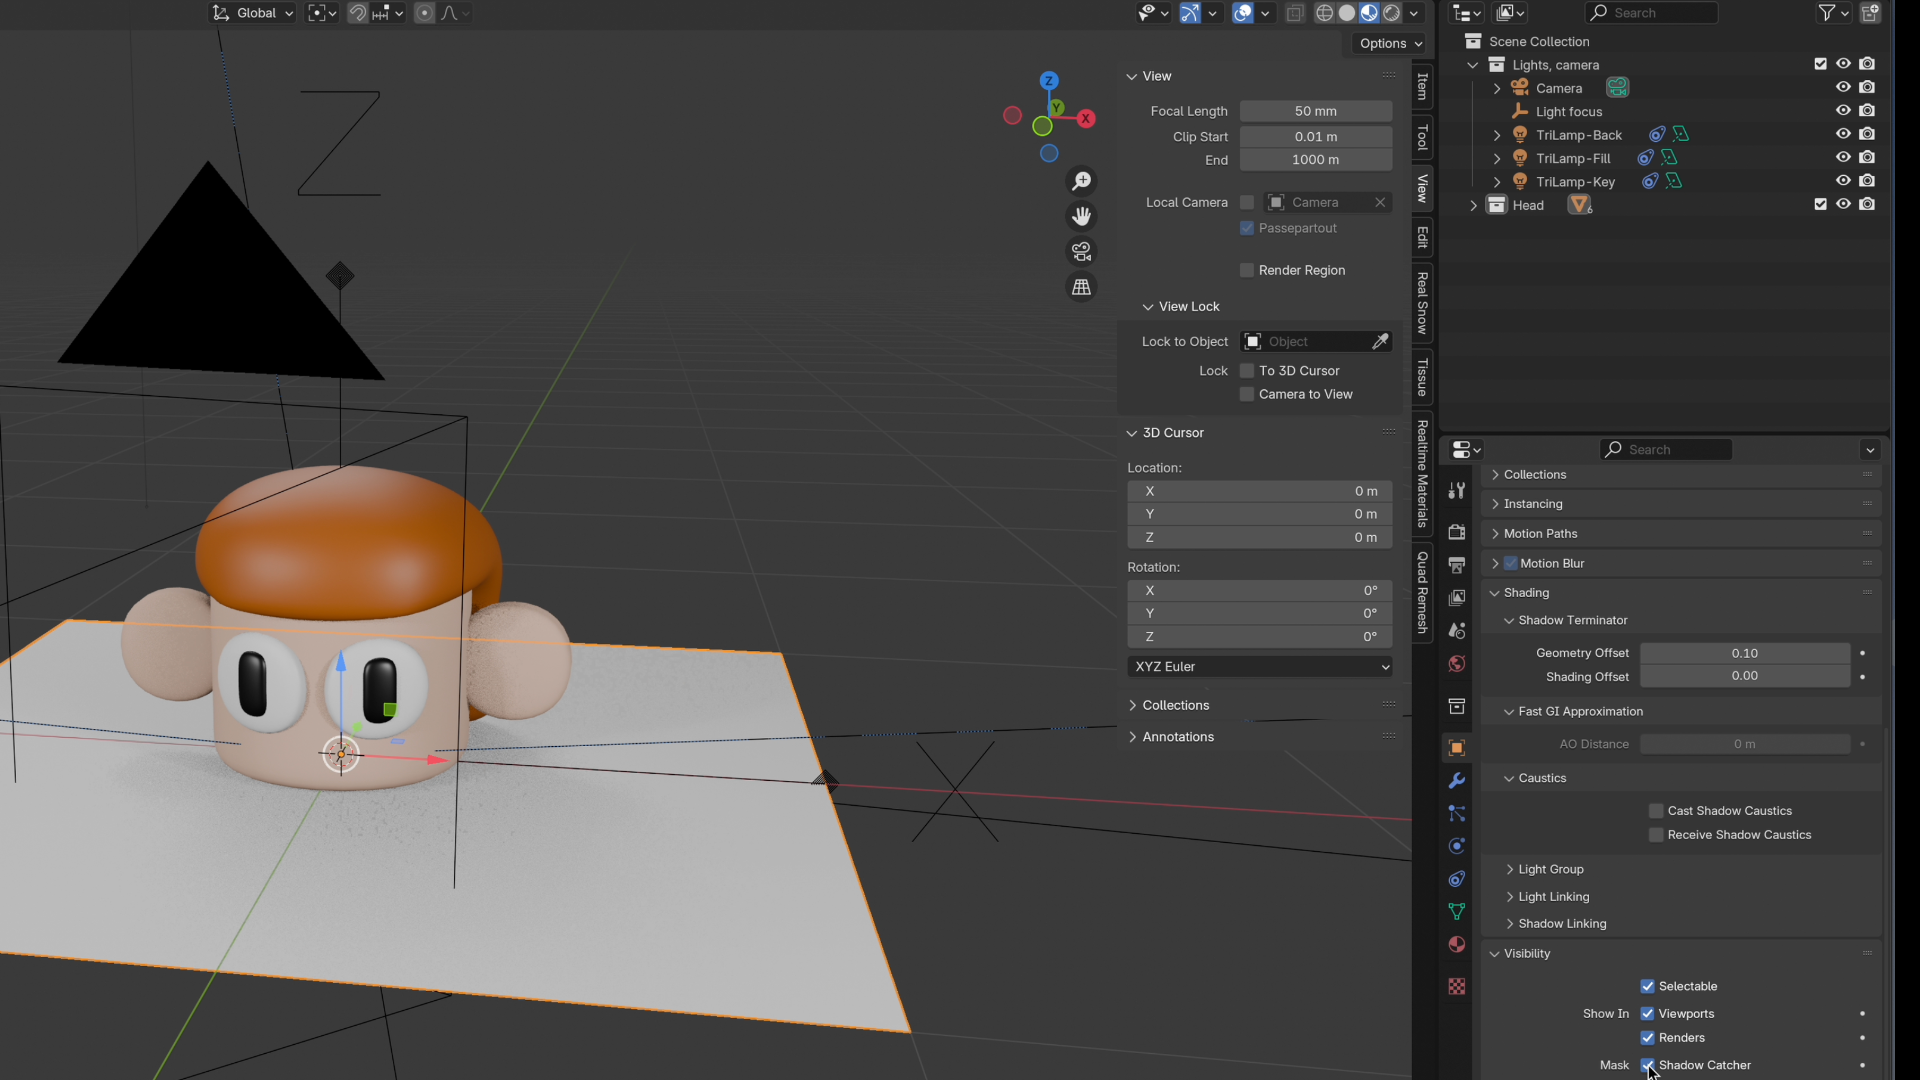
With our plane selected, click the Object properties on the right and under Visibility, select Shadow Catcher. Now when we go to Render view, we’ll see, or rather, we won’t see, our plane, but the shadows will be there.
When you render an image (by pressing F12 or choosing the first option under the Render menu, top left corner), you can save it as a PNG, and you have an image with shadows and a transparent background that’s ready to be used or edited in another software.
Tip: You don’t have to use a plain old Plane as a Shadow Catcher. You can also use a cube, a sphere or more complex mesh objects.
Also see my piece on what to do when things look wrong in Blender, where I offer some quick fixes for common Blender problems. If you've still not decided if Blender is for you, see our Blender review and our pick of the best 3D modelling software.