Whether you're prepping images for a presentation, optimizing them for web use, or just trying to save some disk space, resizing images is a fundamental skill that comes in handy. This guide will walk you through the simplest ways to resize images on Windows, macOS, and ChromeOS.
If you're a Linux user and want to resize images in the terminal, you'll need to install a software suite like ImageMagick. If you're using a Linux distro, like Ubuntu, there is a pre-installed image viewer, but this won't allow you to resize images, so you may want to install a third-party application to do this.
How to resize images using the Photos app in Windows
This method uses the Photos app built into Windows for a quick and straightforward way to resize images without needing additional software.
The steps below are for Windows 11, but earlier versions of Windows will work in a similar way.
1. Open the application
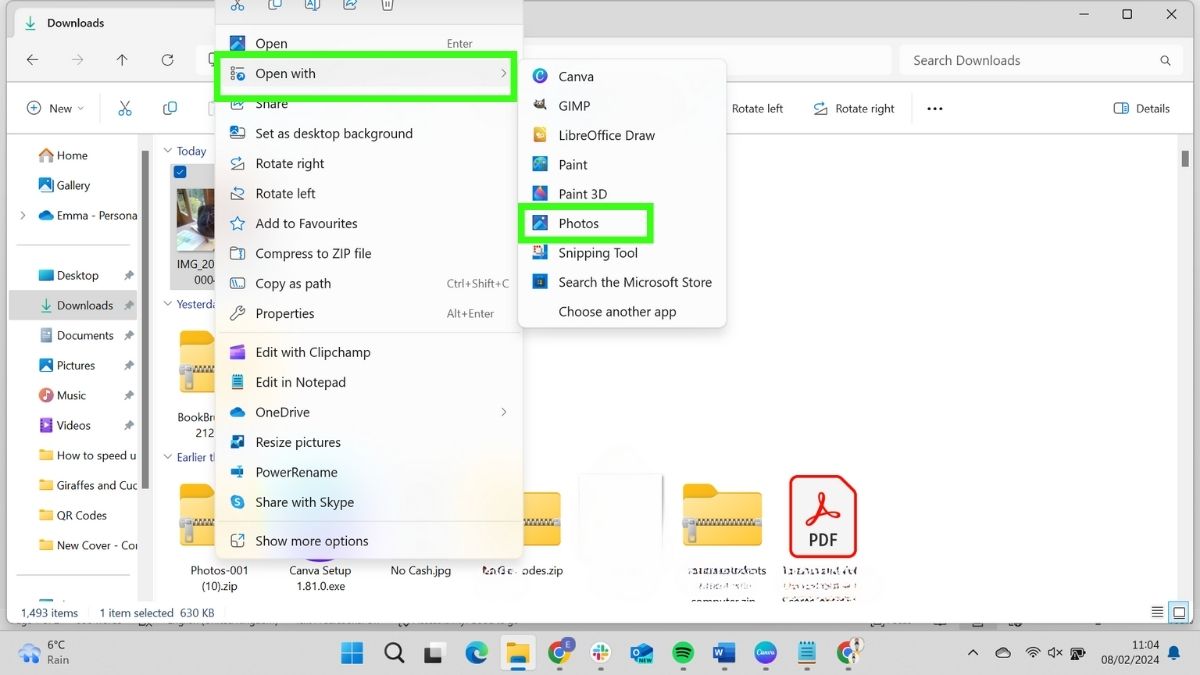
Select the image that you want to resize in File Explorer. Right-click and select Open with... Then select Photos from the drop-down list.
Note: if you have Photos set as your default images application in Default apps in your settings, you won't need to do these steps. You'll be able to double-click the file in the folder and go straight to Photos.
2. Select the menu
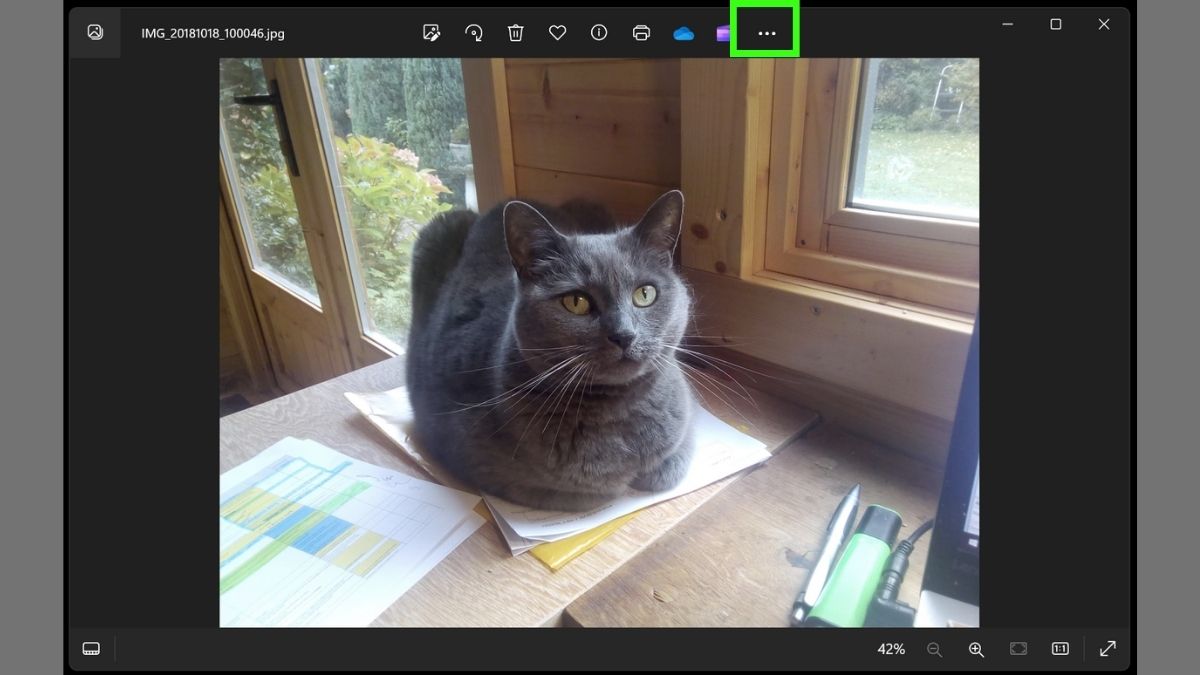
From the Photos screen, select the three dots at the top.
3. Select Resize image
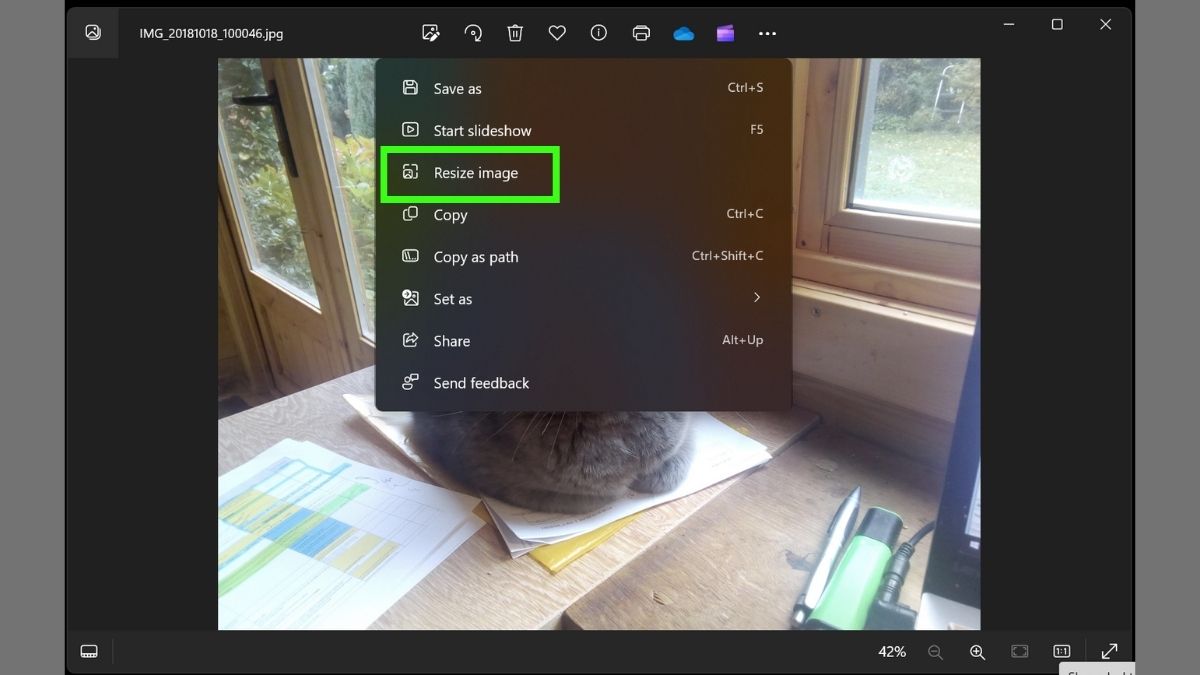
From the drop-down list, select Resize image.
4. Resize
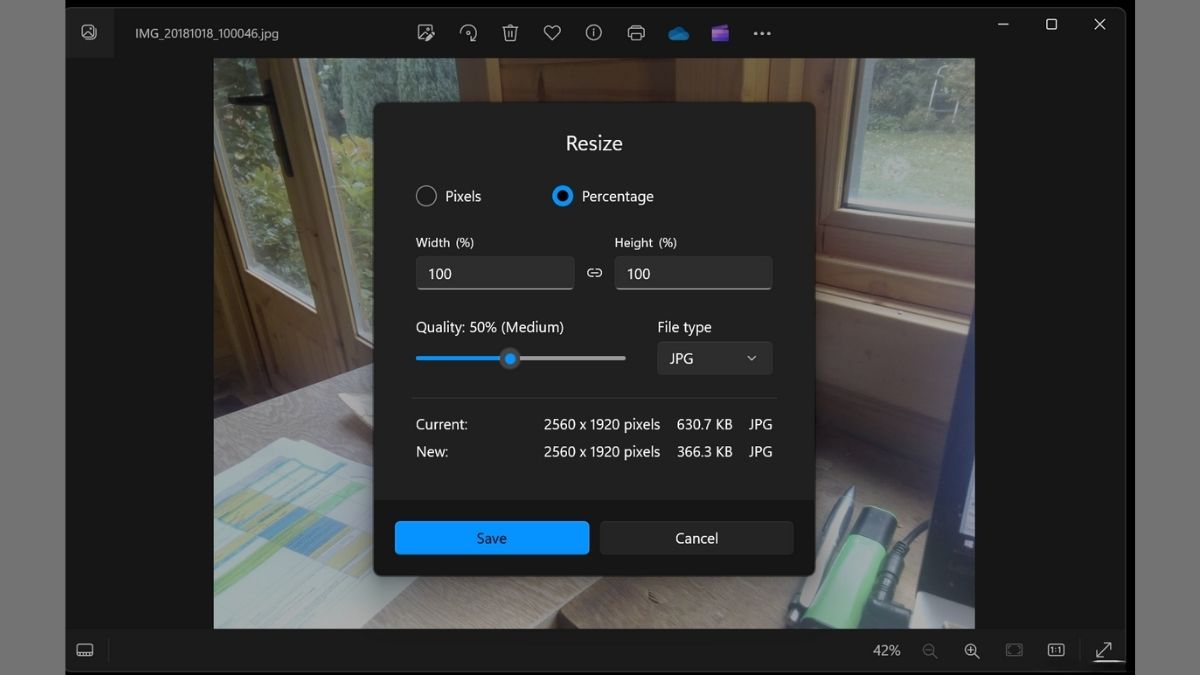
You will now see the Resize window, which provides several options for resizing your image.
Choose Resize Method: You can resize your image by Pixels or by Percentage.
If you choose Pixels, you can enter the exact width and height in pixels.
If you choose Percentage, you can scale the size up or down based on the image's current dimensions. For instance, typing 50 in both Width and Height fields under Percentage will resize the image to half its original size.
Adjust Quality: There's a slider for Quality below the dimensions. Moving this slider left will decrease the image's quality and file size, while moving it right will increase the quality and file size. Adjust this according to your needs.
Choose File Type: You can select the desired file type for your resized image from the File type drop-down menu, such as JPG, PNG, etc.
Preview Size: As you make changes, the Current and New fields at the bottom of the Resize pane will update to show the original and new dimensions and file sizes, allowing you to preview the result before saving.
Save the Image: Once you're satisfied with the new size and quality, click the Save button to apply the changes. You may be prompted to choose a location to save the resized image.
How to resize images using Gallery in ChromeOS
If you're operating on a Chromebook or any ChromeOS device, you can use its built-in Gallery app to edit, crop, and resize your images.
1. Open in Gallery and select Rescale icon
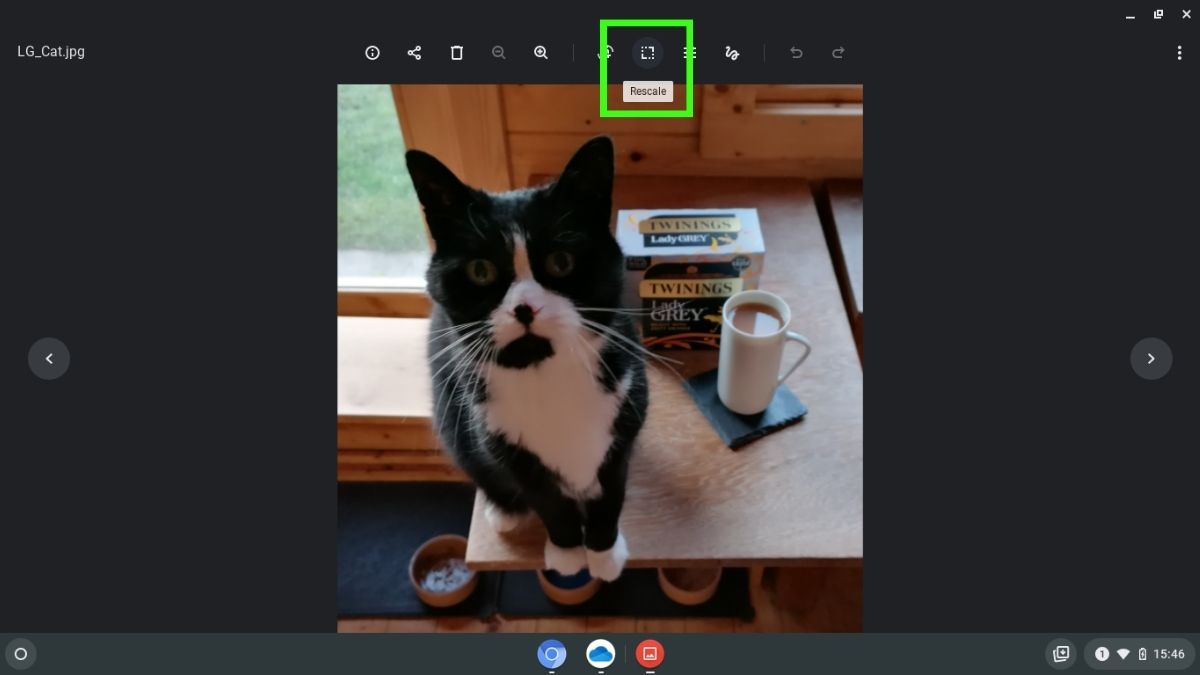
Open your image so that it displays in Chrome's Gallery application. From the row of icons at the top, select the Rescale icon. This is a square with rows of dots in two of the corners.
2. Enter new width or height
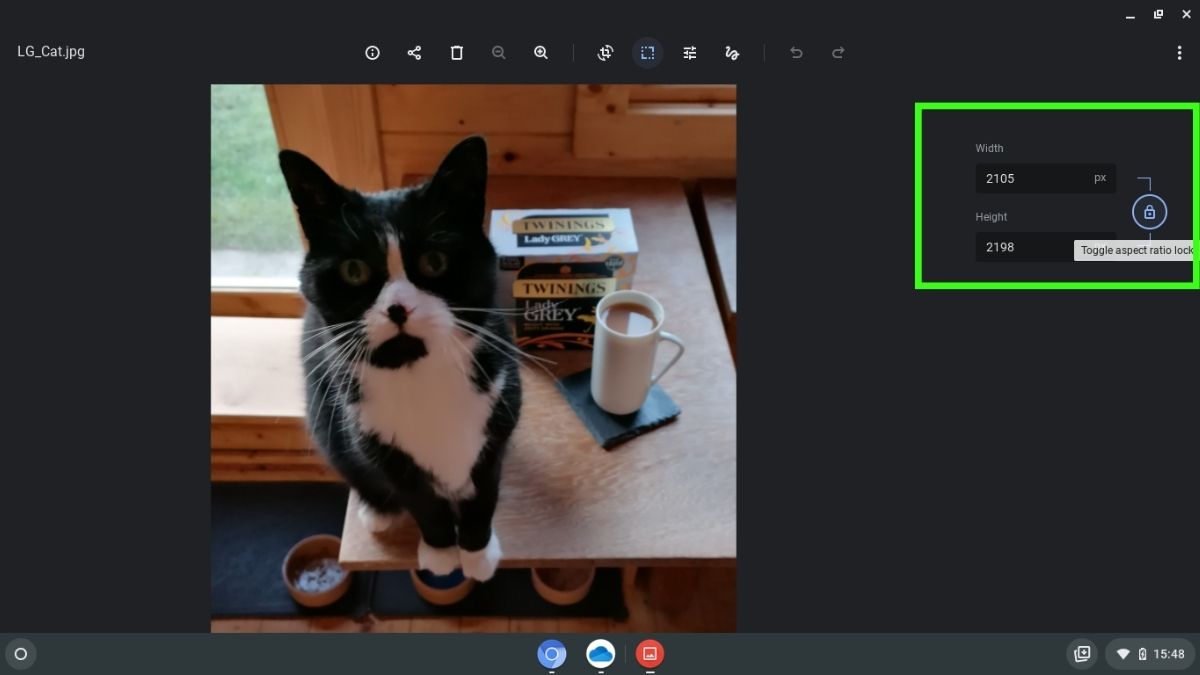
Once you have selected Rescale, you will see the resizing options panel. This displays the width and height of your image in pixels. There is also a padlock icon, which is the aspect ratio lock.
To change the size of your image, adjust its height or width. If the aspect ratio lock is toggled on, it will adjust the other number automatically. To turn aspect ratio off, click the padlock icon. It will now display as an open padlock.
3. Save your resized image
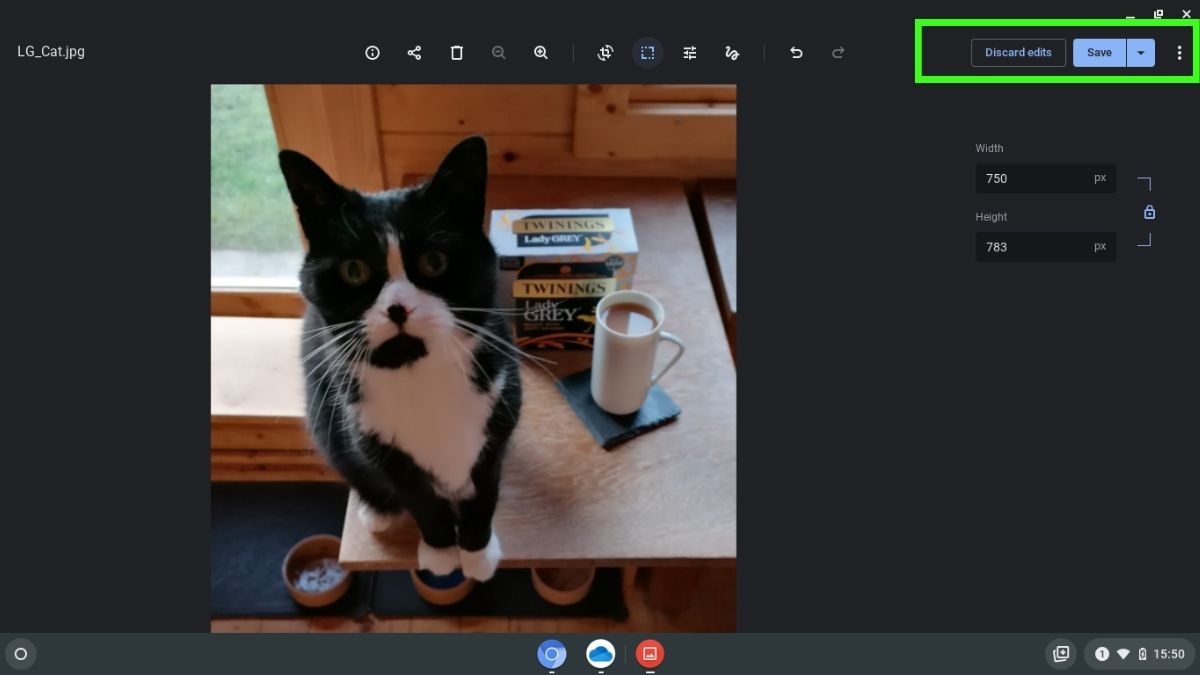
To save your image, click the Save button at the top right of the window. You can overwrite your original image or save as a new file.
If you want to exit without saving, select Discard edits.
How to resize images using Preview on macOS
MacOS devices come with a handy tool called Preview that lets you view images and PDFs and perform basic editing tasks like resizing.
1. Open image in Preview
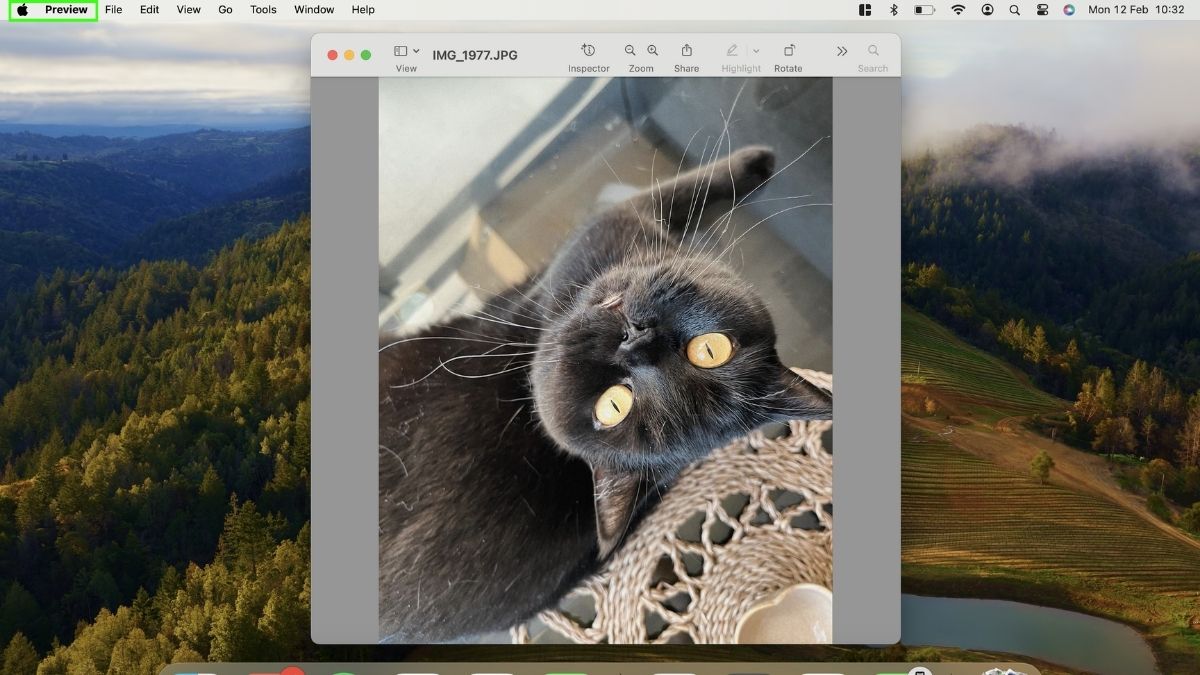
Find the image you want to resize, right-click on it, and choose Open With > Preview.
2. Select Tools > Adjust Size
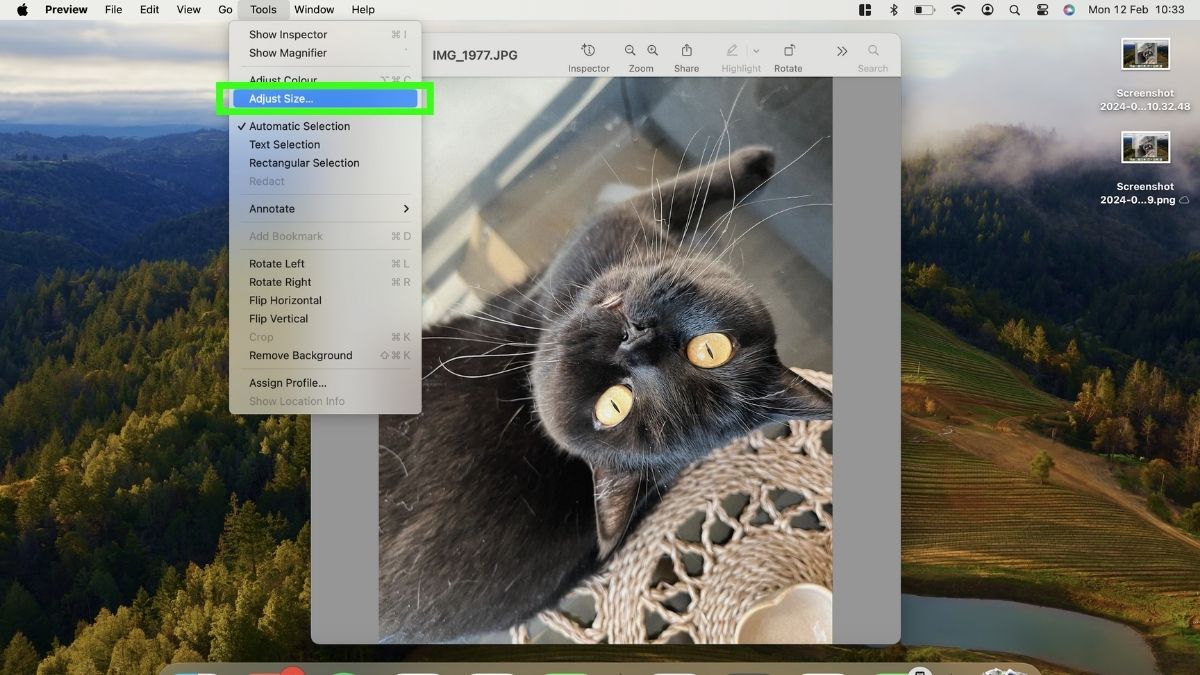
In Preview, click on Tools in the menu bar and select Adjust Size.
3. Adjust Width or Height
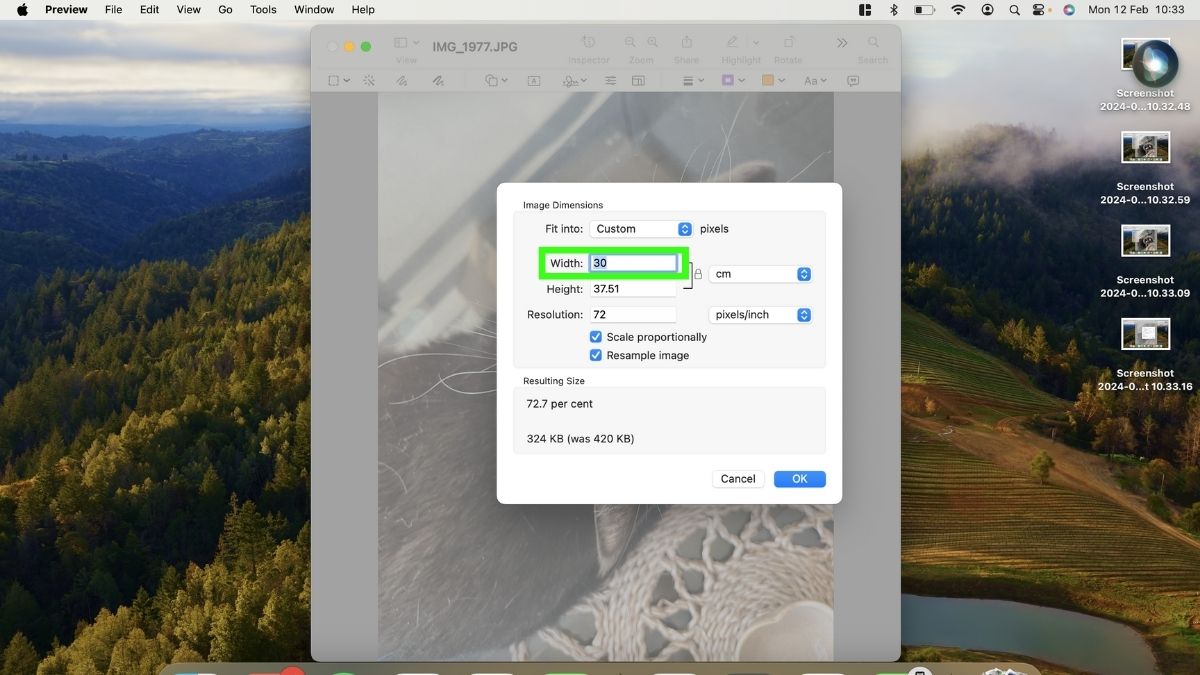
You can now resize your image. Change the image dimensions using pixels, centimeters, millimeters, points, or inches. Ensure Scale proportionally is checked to keep your image from becoming distorted.
4. Save resized image
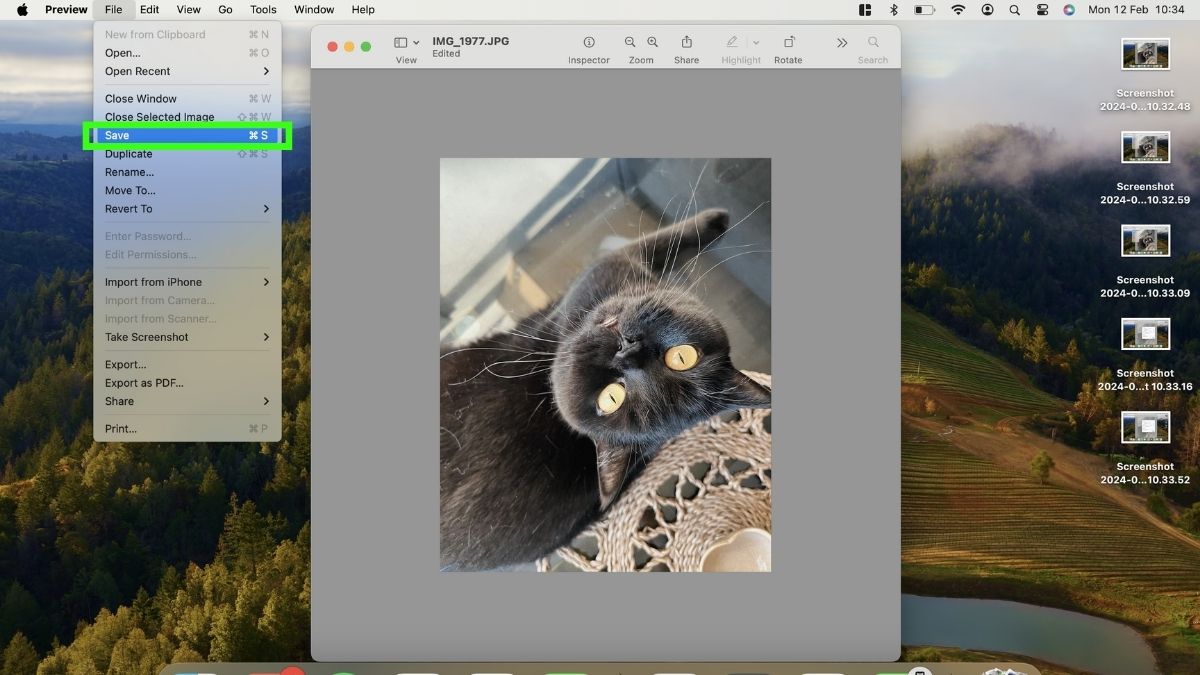
Save your image by selecting Save from the File menu. If you want to save it under a different format or name, then select Export.
Final thoughts
With built-in tools on Windows, macOS, and ChromeOS, you can easily resize images, whether you're looking to shrink photos to save space or enlarge them for a project.
If you want to do more advanced image editing, there are many third-party image editing applications available, including Pixlr X, Canva, Photoshop, and GIMP. Some are free or have free basic versions, and others you will need to pay for.
But for basic image changes, like making images larger or smaller, free pre-installed applications like Photos, Gallery, or Preview will handle the job just fine.