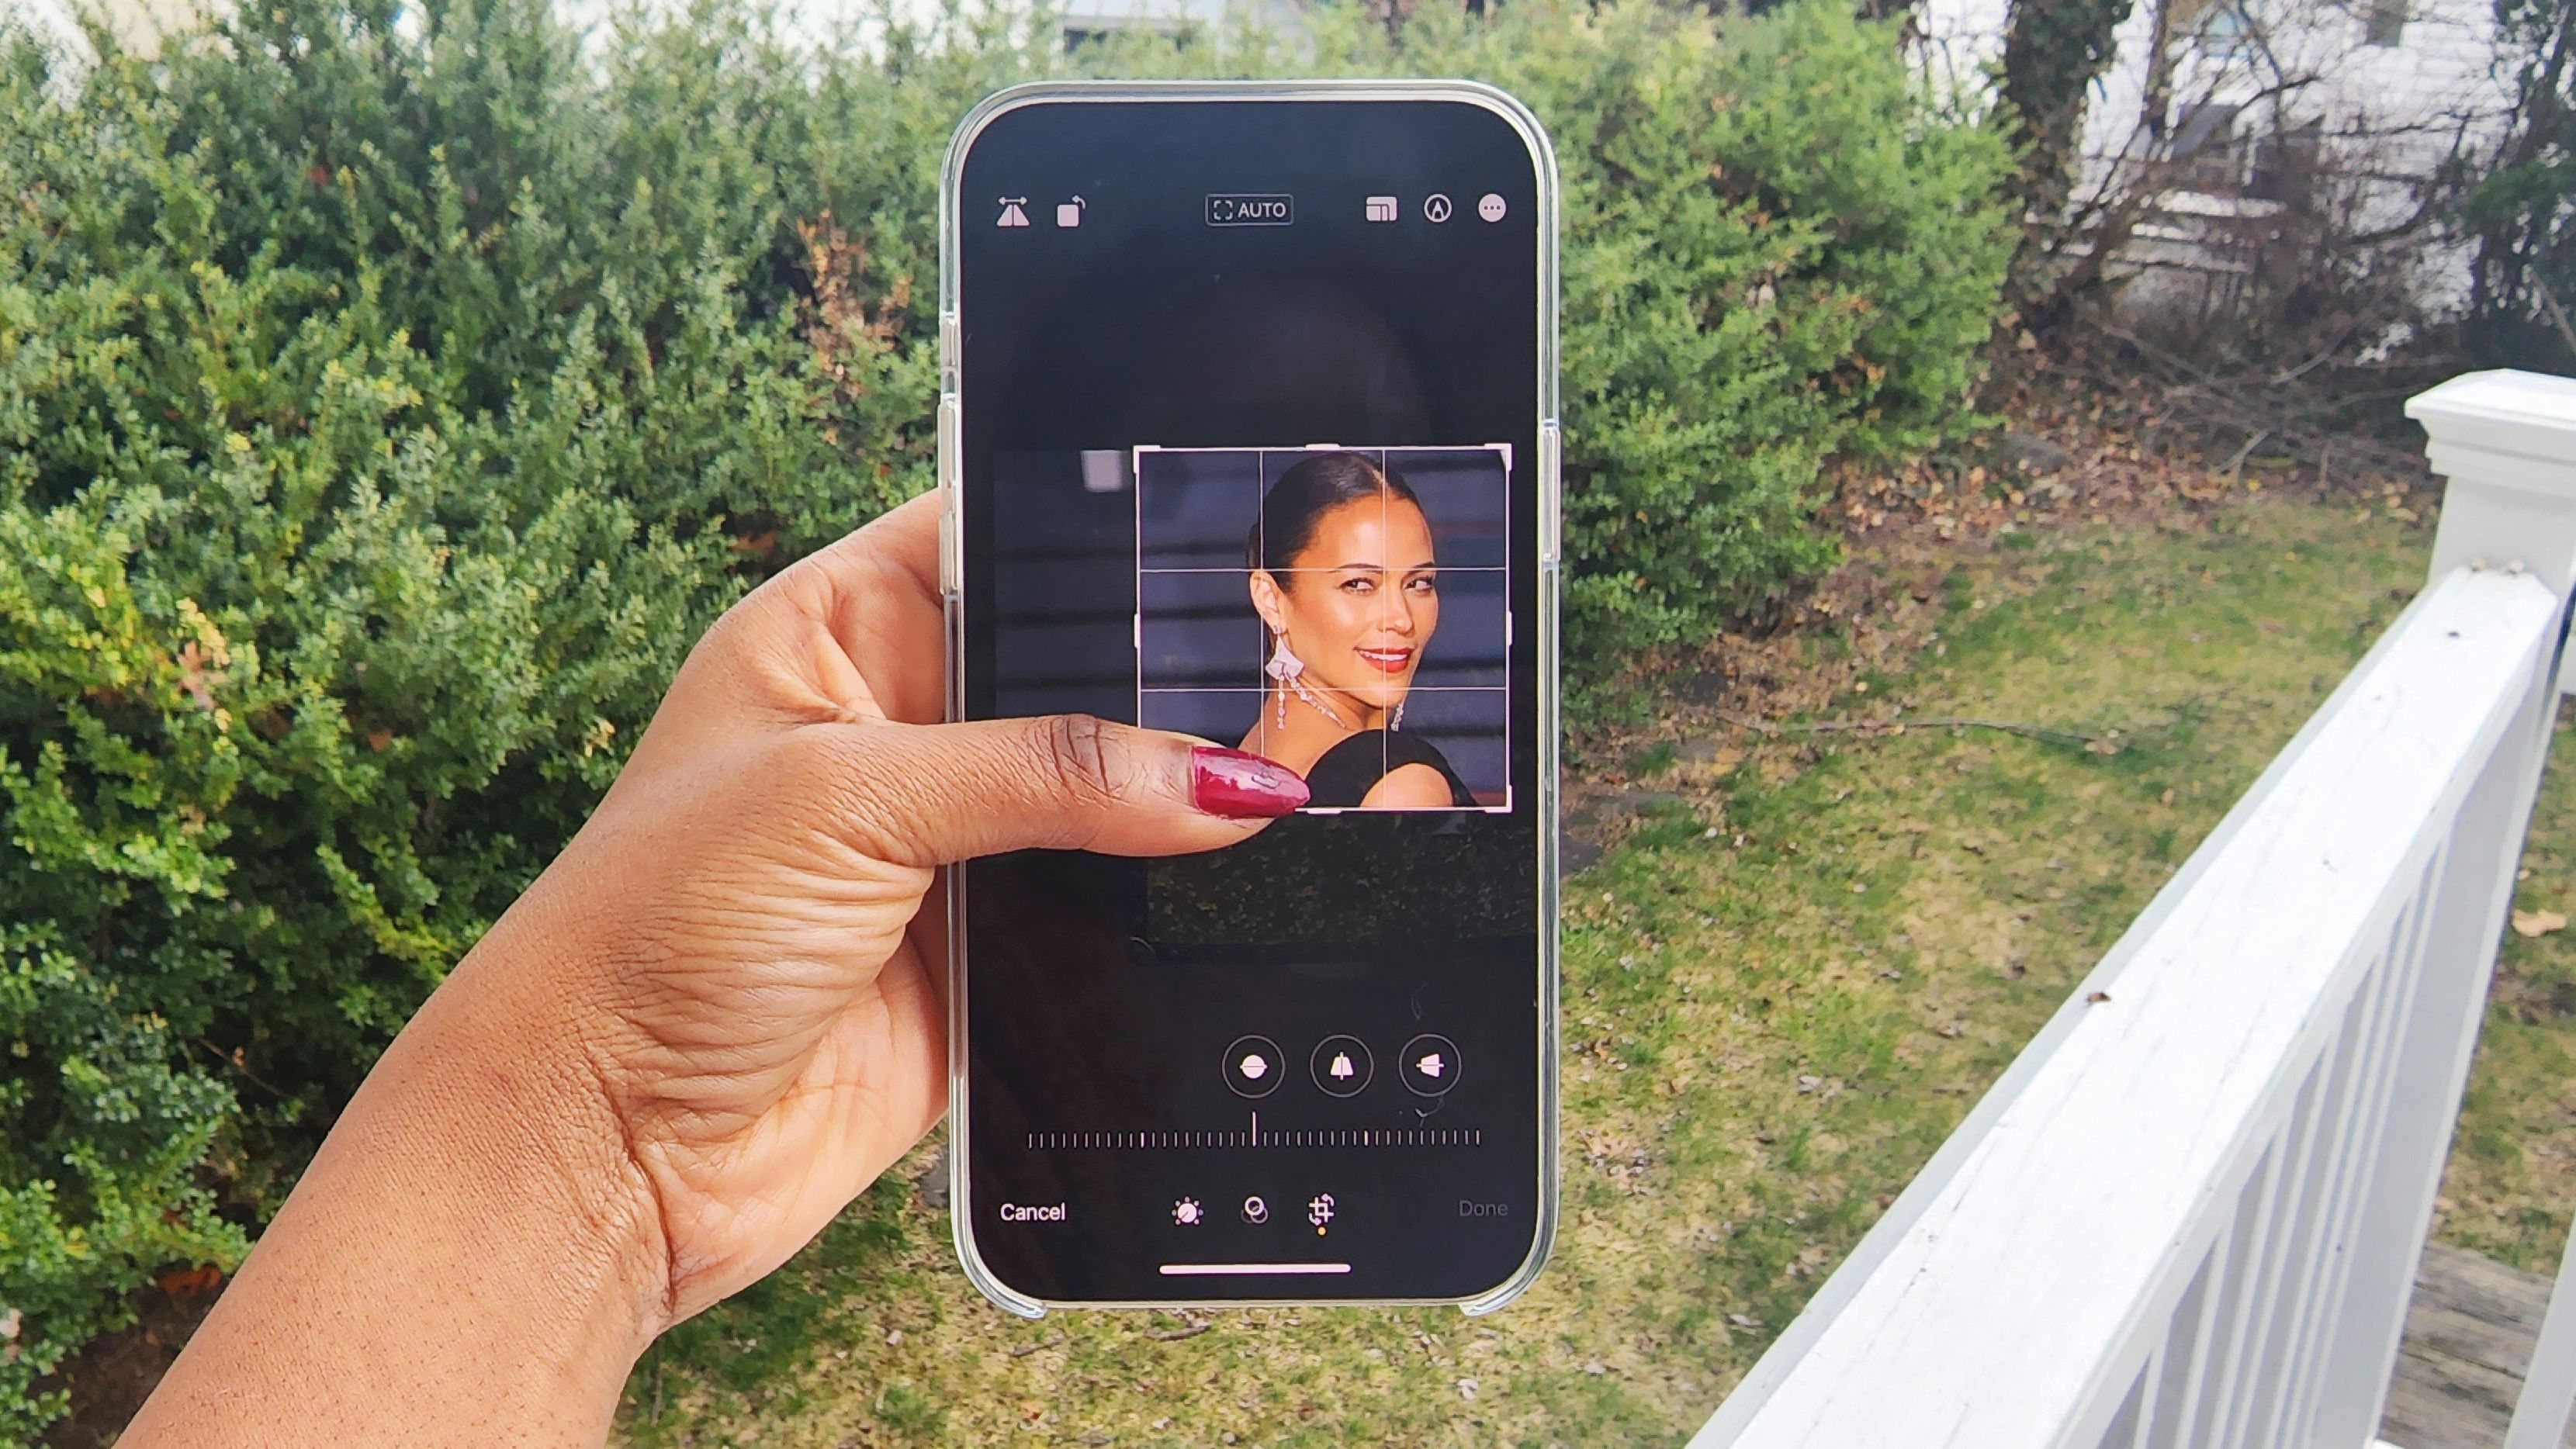
"How to crop photos on iPhone" is a search query that's climbing in popularity among users with iOS devices. Truth be told, the pathway to cropping on iPhone isn't immediately obvious, so the sudden spike in users seeking guidance on how to do it isn't surprising.
Fortunately, although the cropping tool isn't easy to find, it's intuitive to use. Plus, if you make a mistake or you change your mind about cropping the photo, you can always go back and revert the image back to its original state.
Read on to check out our easy, step-by-step guide on how to crop photos on iPhone.
How to crop photos on iPhone
1. Find the image you'd like to crop in the Photos app.
2. Tap on Edit located on the top-right corner.

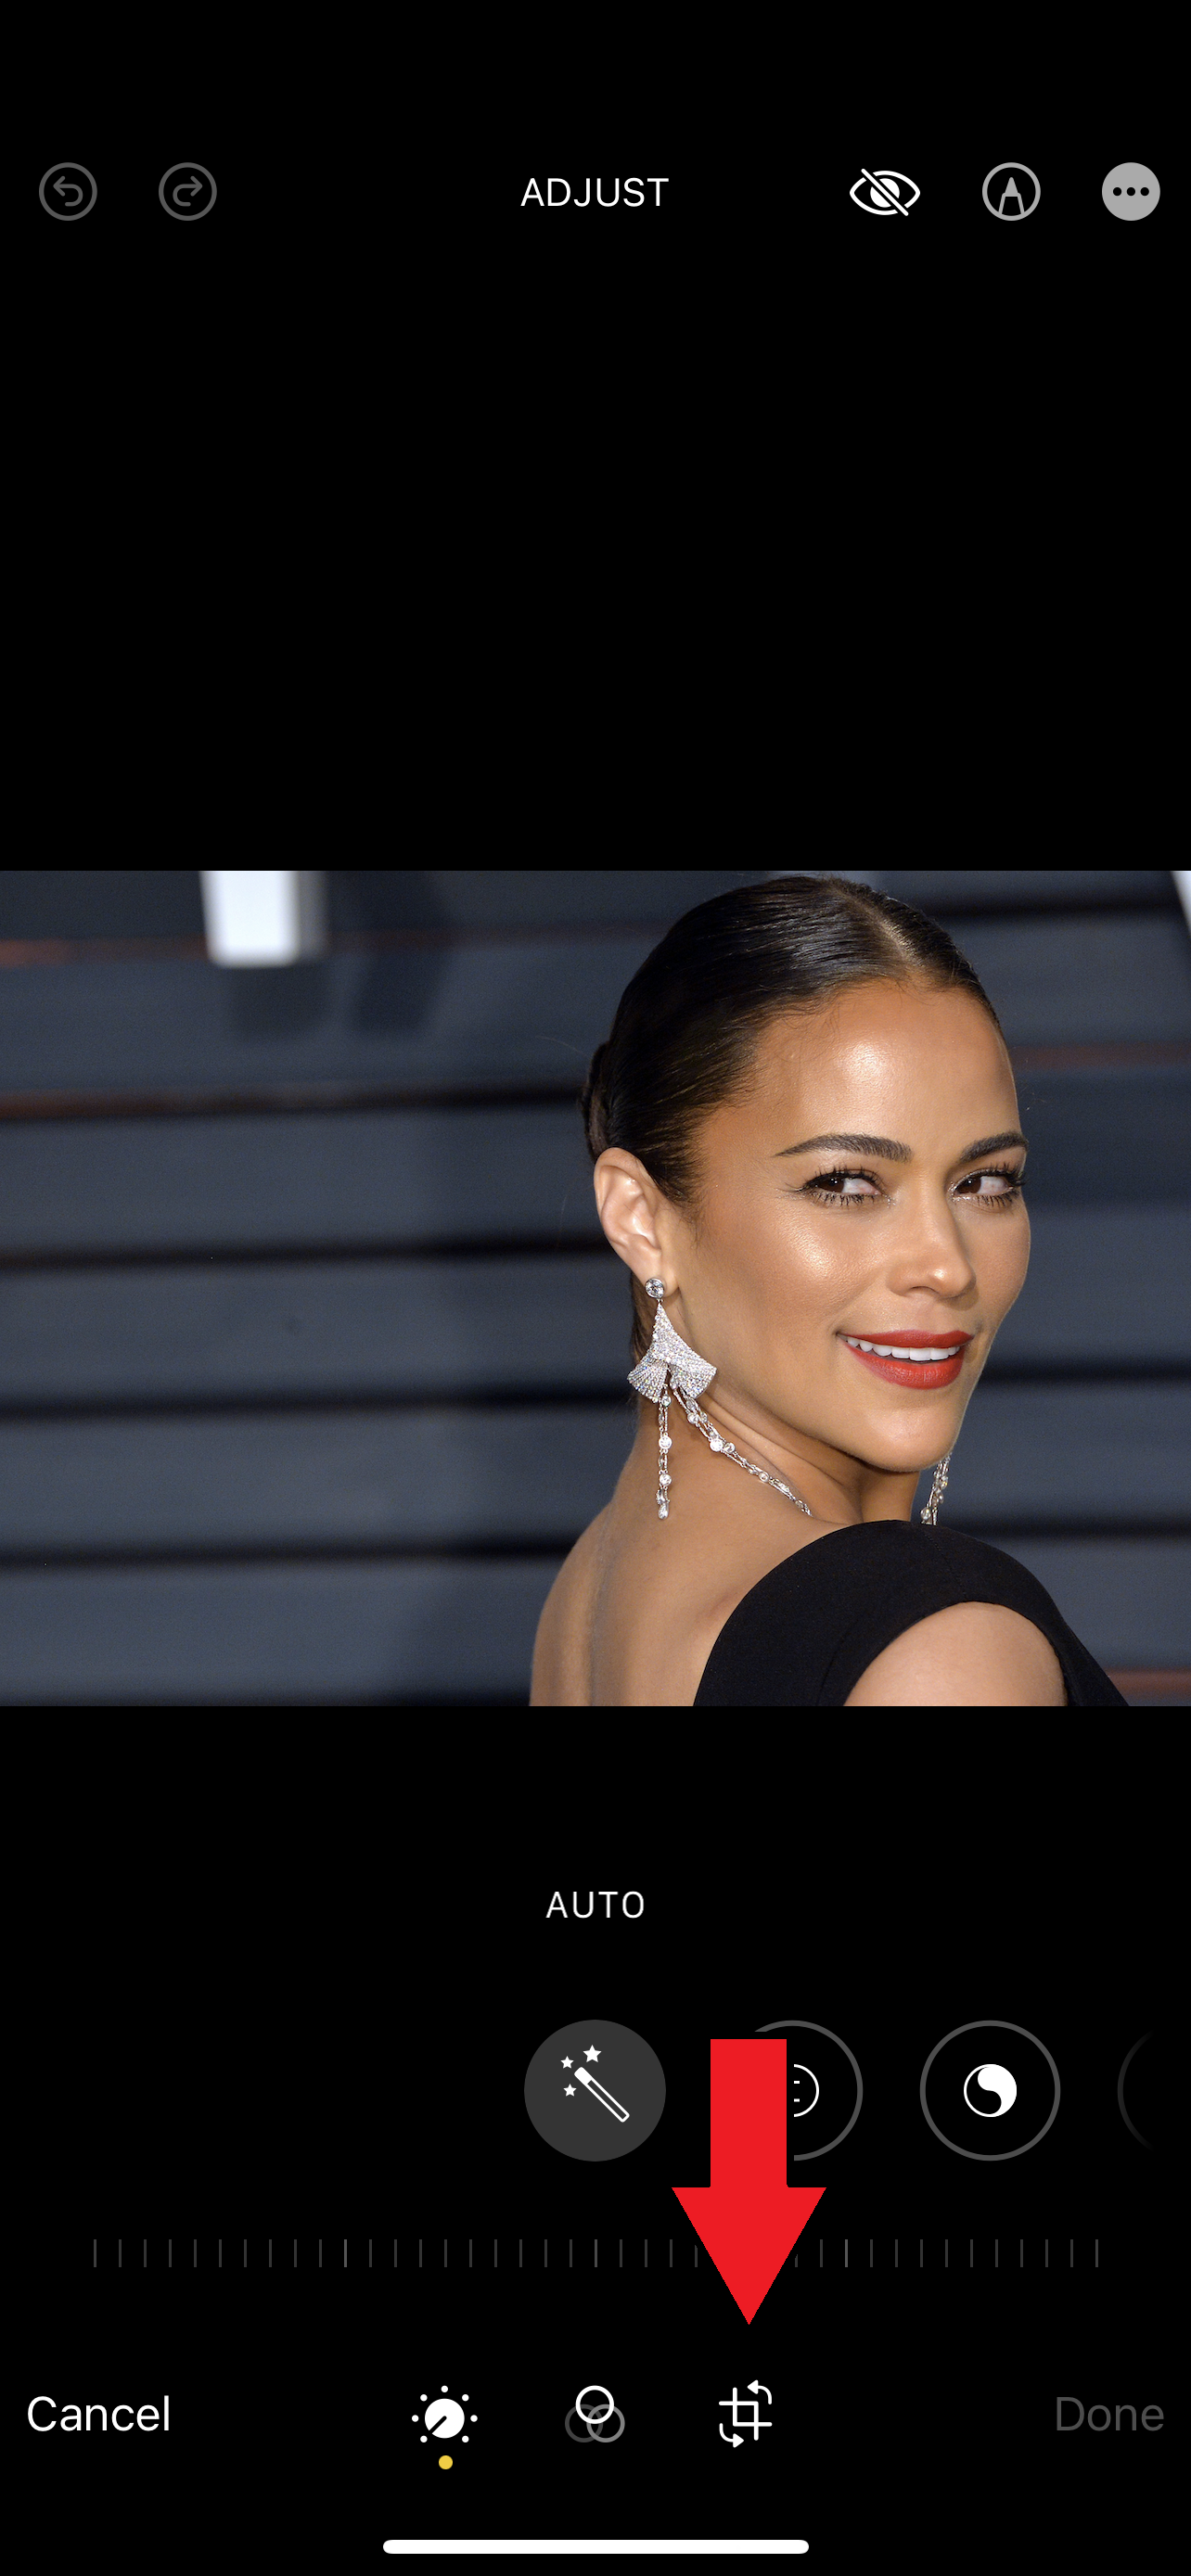
3. Next, tap on the Crop Tool located on the bottom of the screen.

4. A white border will appear around your image. Drag it to frame the picture to your liking.

5. Once you're satisfied with the framing, hit Done.

If you don't like how you cropped the photo, don't panic. You can always revert the image back to its original state by clicking on Edit > Revert > Revert to Original.


