On Windows 11, creating a full backup is one of the most effective ways to safeguard your system and personal files from unexpected disasters. Whether it’s a hardware failure, system upgrade issue, malware attack, or file corruption, a full backup ensures you can quickly recover without losing important data or spending hours reconfiguring your device.
If you don't have a proper backup, you're at risk of losing irreplaceable content, such as family photos, work documents, and custom system settings you've spent time perfecting.
While the web offers countless third-party solutions for backing up files, either online or to an external drive, Windows 11 still includes a built-in feature called "Backup and Restore (Windows 7)". This feature allows you to create a system image and store it on a USB external drive.
A system image is essentially a complete snapshot of your computer. It includes an exact copy of your current Windows installation, along with system settings, installed applications, and most importantly, your personal files. This type of backup is particularly valuable when:
- Upgrading to a new version of the operating system and needing a fallback option.
- Replacing or upgrading your hard drive.
- Recovering from a major system failure or malware infection.
Unlike file-only backups, a full system image enables you to restore your entire computer environment exactly as it was, minimizing downtime.
In this how-to guide, I'll outline the steps to create a full backup with your custom settings, apps, files, and Windows 11 setup files.
Important: Microsoft no longer maintains the backup feature, but you can still use it to create a temporary full backup while it's still available.
How to create backup on Windows 11
The Backup and Restore feature lets you create a system image of the entire system and files to an external hard drive or network folder location. However, this guide will look at the steps to create a backup to a USB storage (with enough space) since it's the most convenient process for most users.
To create a full backup on Windows 11, use these steps:
- Open Start.
- Search for Control Panel and click the top result to open the app.
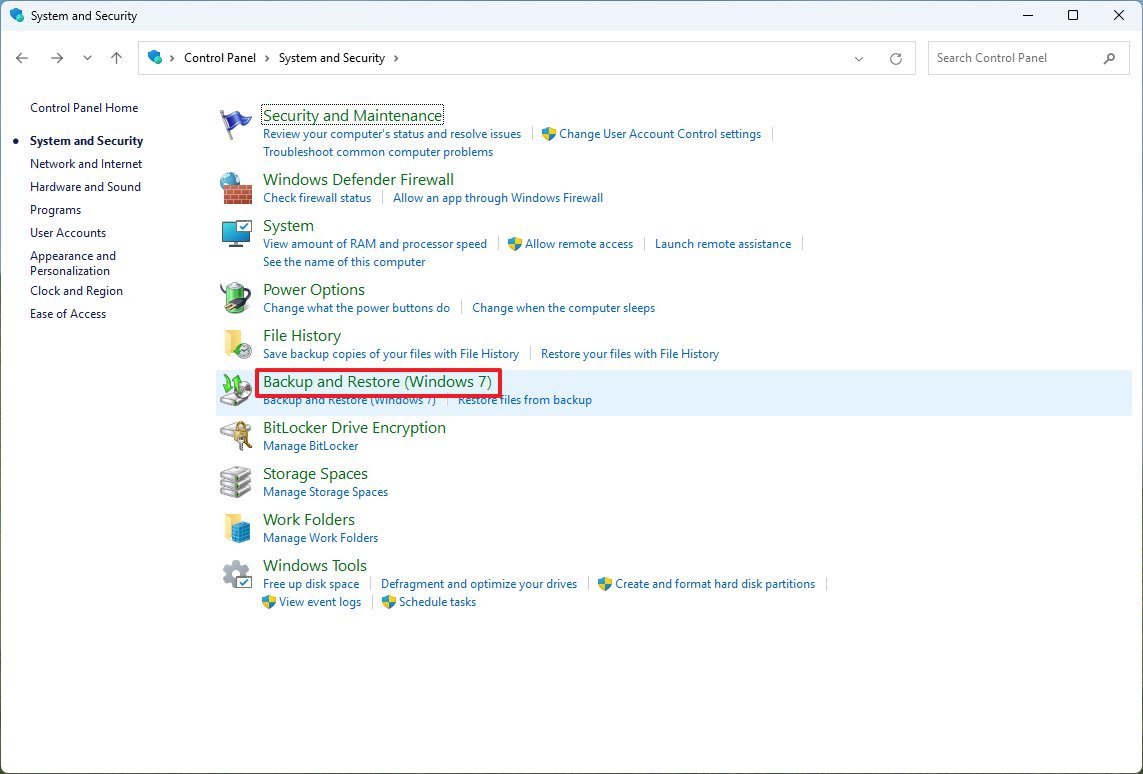
- Click on System and Security.
- Click the "Backup and Restore" setting.
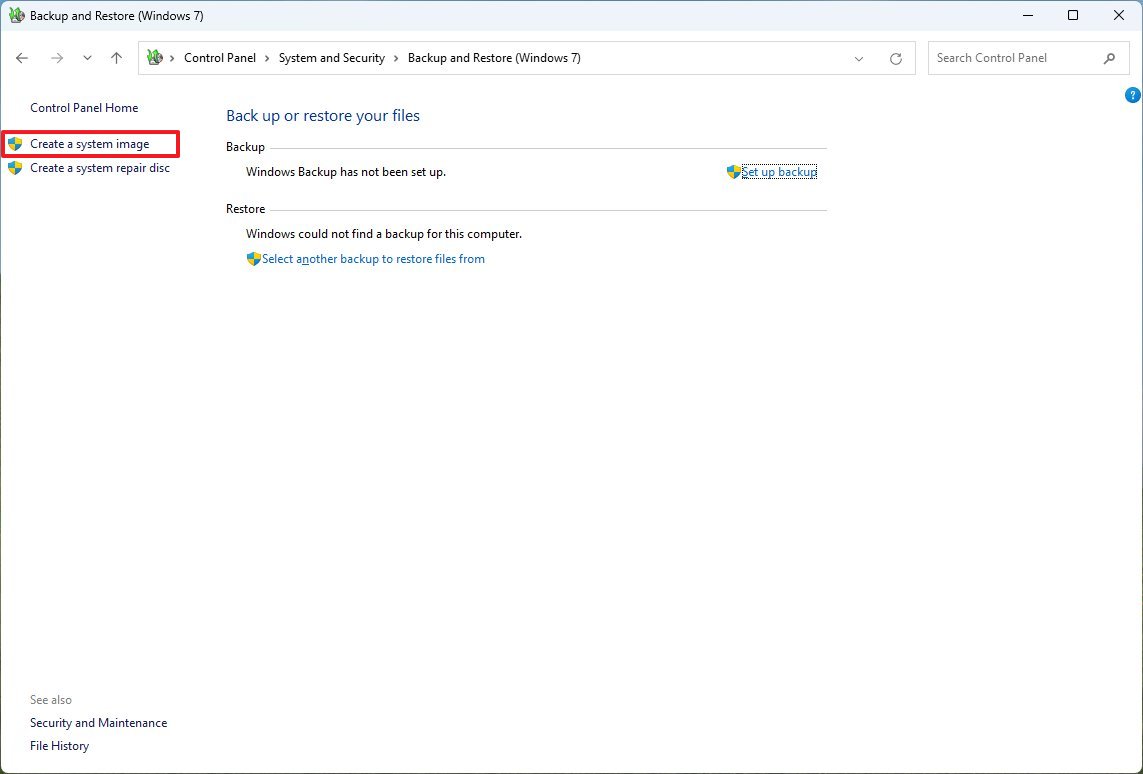
- Click the "System Image Backup" option from the bottom-left corner.
- Select the "On a hard disk" option.
- Use the "On a hard disk" drop-down menu and select the Windows 11 full backup destination.
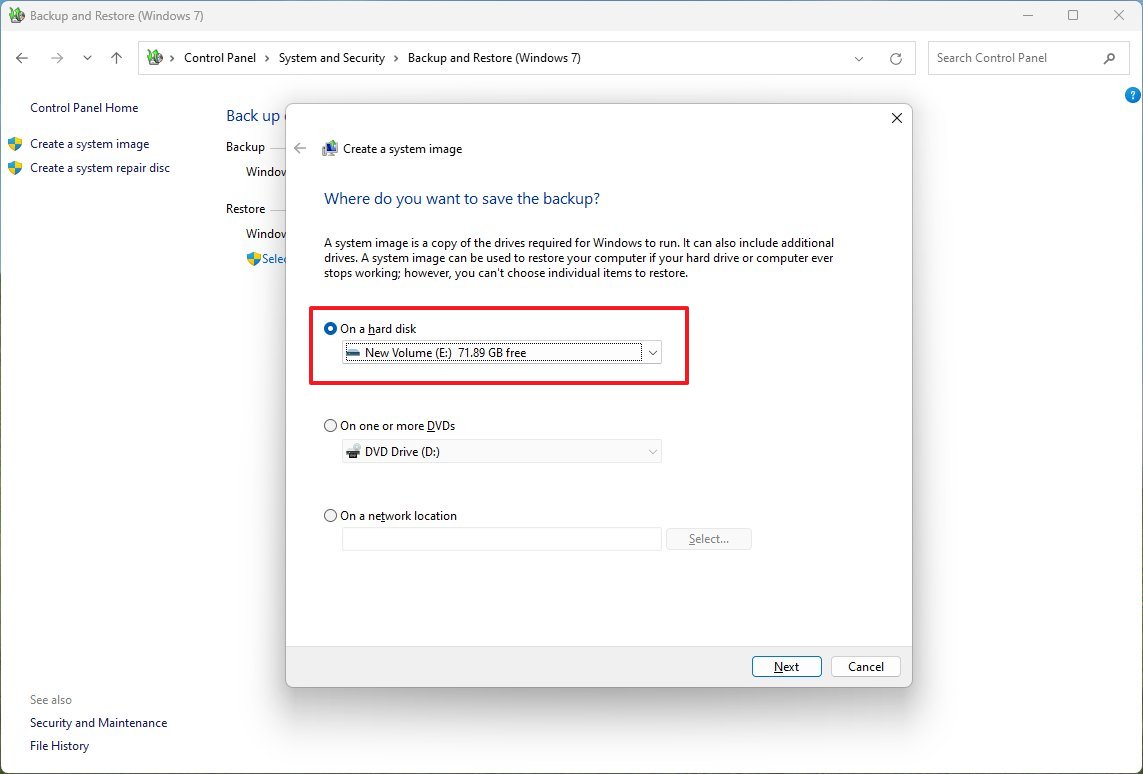
- Click the Next button.
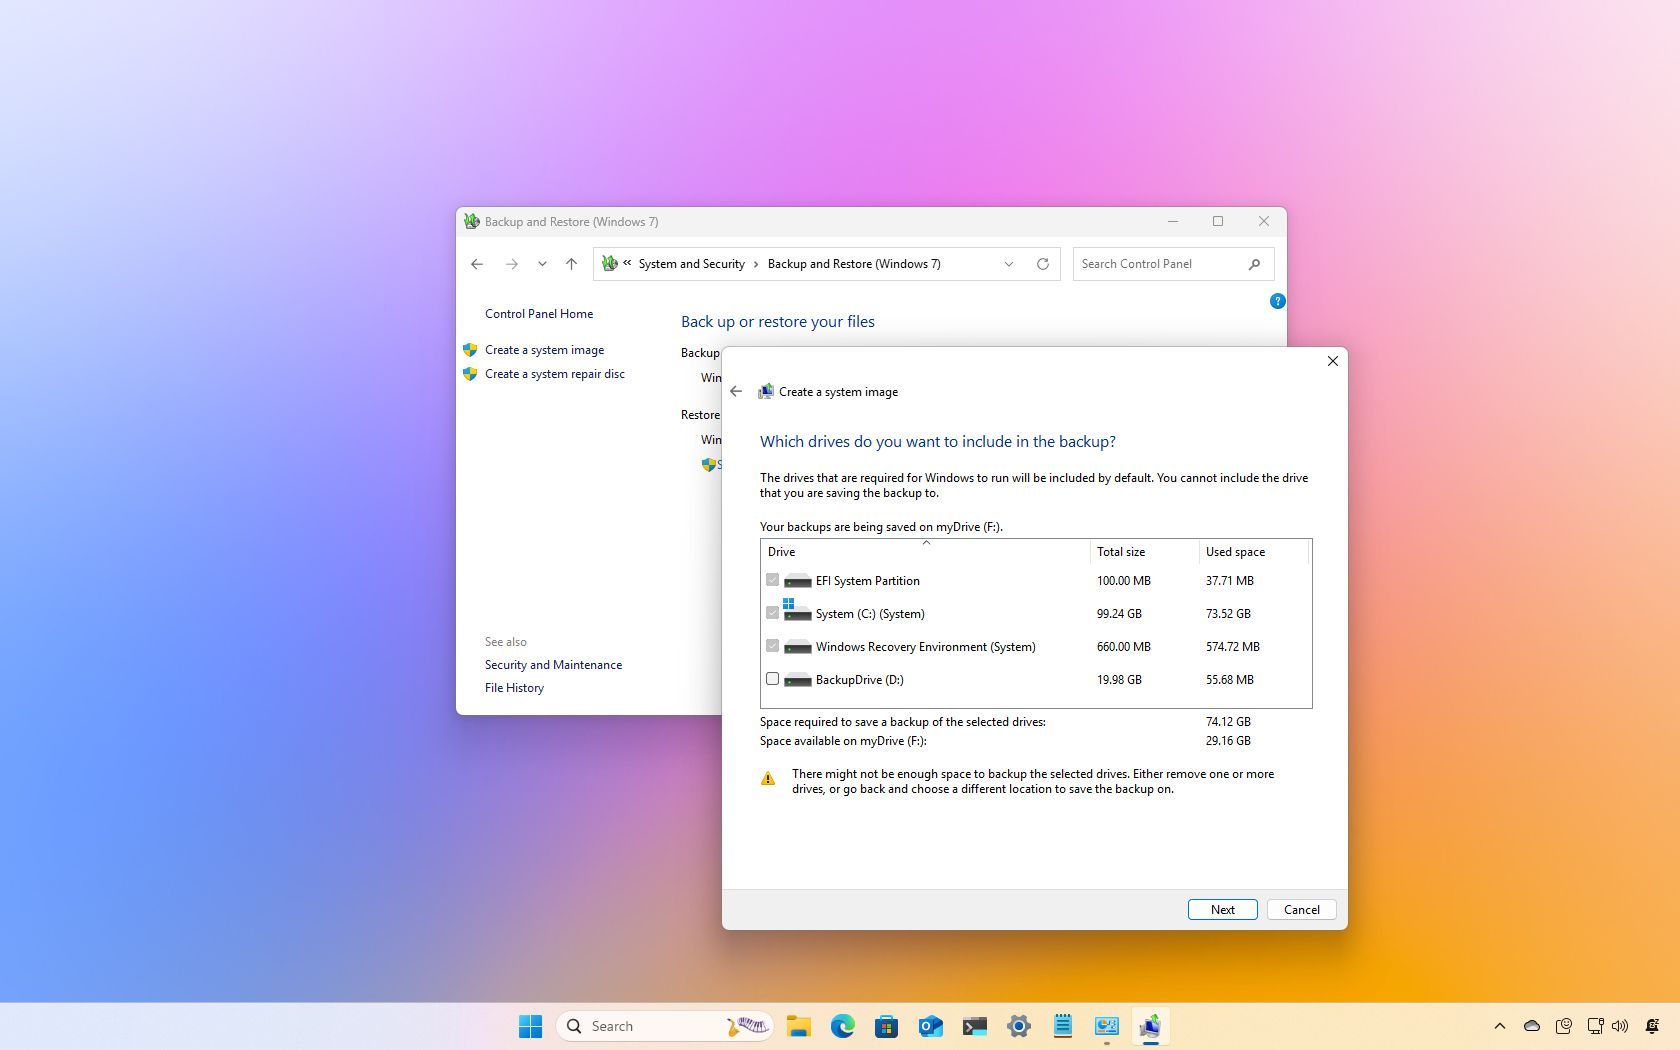
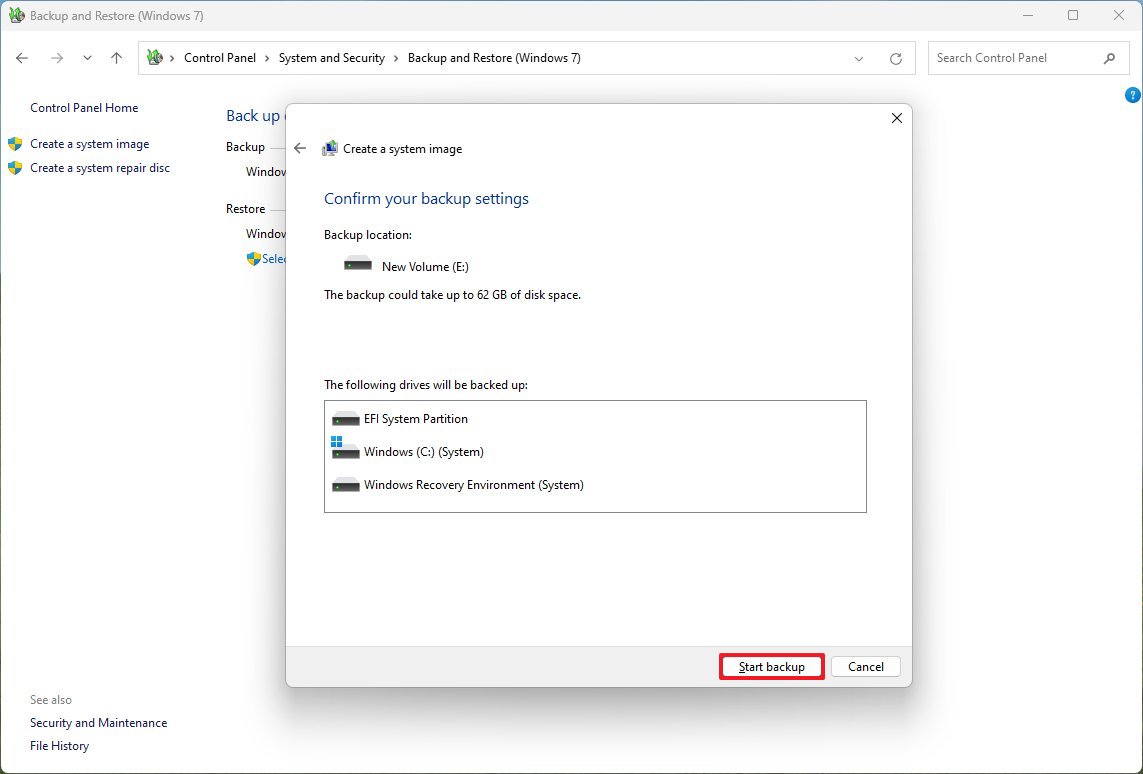
- (Optional) Select any additional drives to include in the backup.
- Click the Next button.
- Click the Start backup button.
- Click the No button.
- Quick note: You'll also receive a prompt to create a system repair disc, but you can skip it. If you need to roll back to a previous installation, you can use a USB installation media to access the recovery settings.
- Click the Close button.
Once you complete the steps, a backup of the entire system will be created with everything on the primary hard drive and other drives you may have selected.
The tool uses the "Shadow Copy" feature to back up files even if they are open and apps are running, which means you can continue working during this process. After the backup is complete, disconnect and store the drive safely.
How to restore backup on Windows 11
In case of a hardware failure or upgrading the system drive, you can use a previous backup to restore the device installation.
Whenever you restore a backup, avoid interrupting the process, as it will cause the backup to fail, and the computer will no longer boot. If you want to avoid problems, it's recommended to maintain the laptop connected to a power source and a desktop connected to an uninterruptible power supply (UPS).
To restore a Windows 11 backup, connect the drive with the backup and a Windows 11 bootable USB flash drive, and use these steps:
- Start the computer.
- On the USB bootable drive startup prompt, press any key to continue.
- Quick tip: If the computer doesn't start in the Windows Setup wizard, you'll need to access the Unified Extensible Firmware Interface (UEFI) to change the boot order settings. However, since these steps vary by manufacturer and device model, it's recommended to check your manufacturer's support website for more specific details.
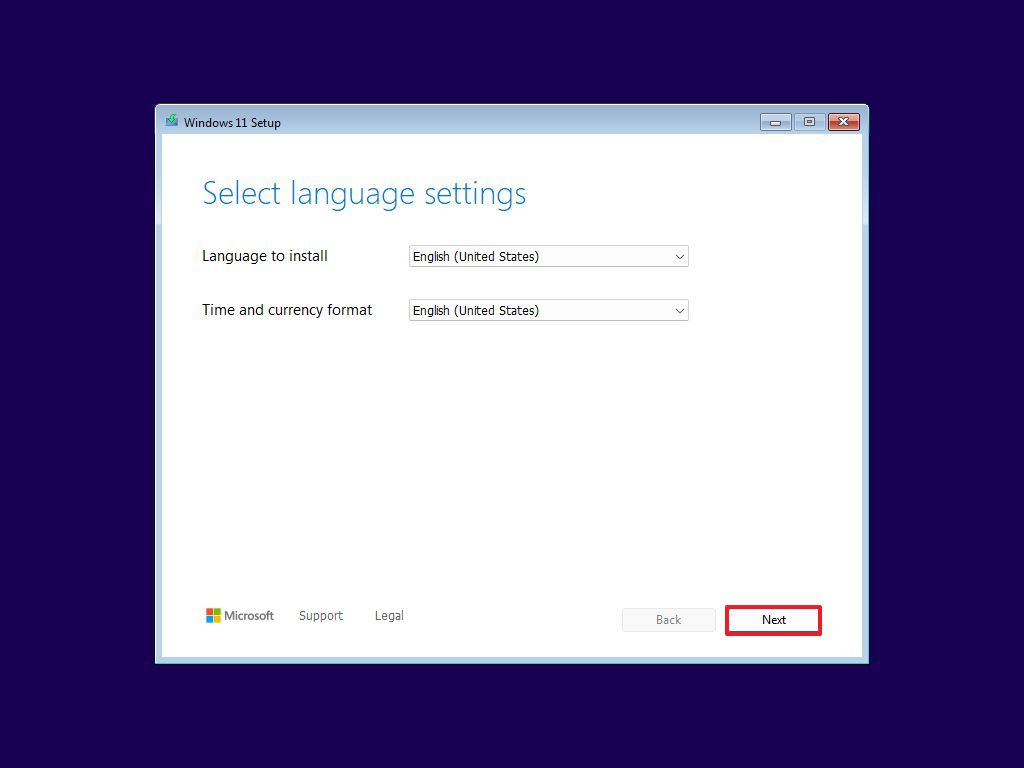
- On the "Windows Setup" page, click the Next button.
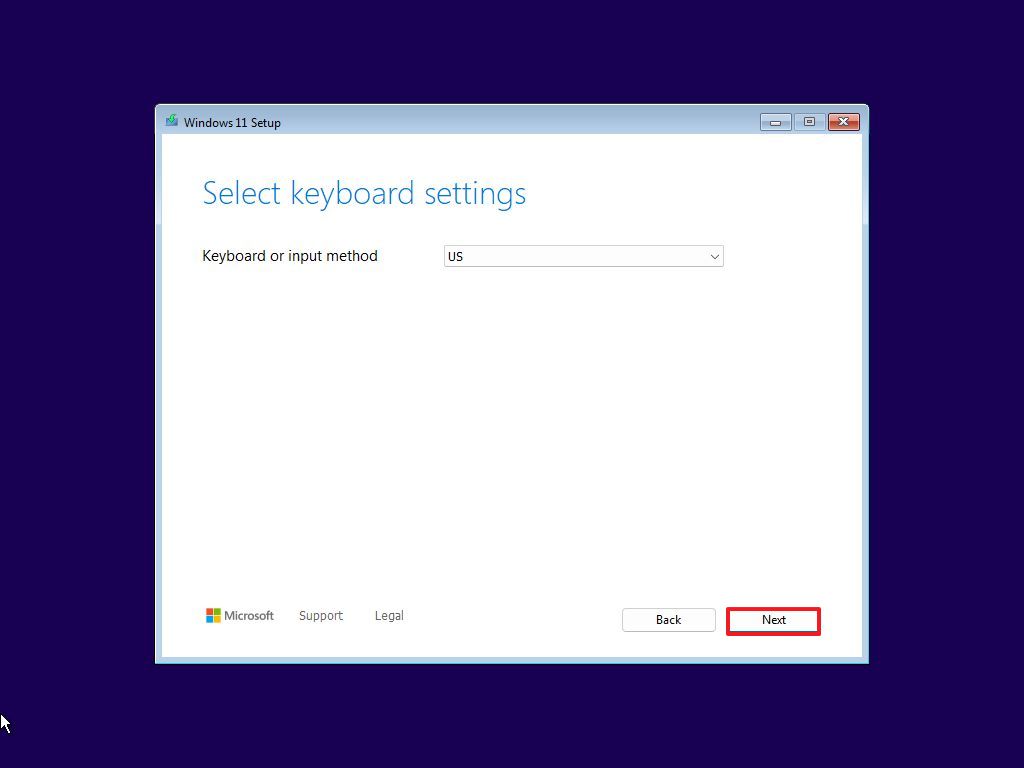
- Click the Next button again.
- Click the "Repair my PC" option.
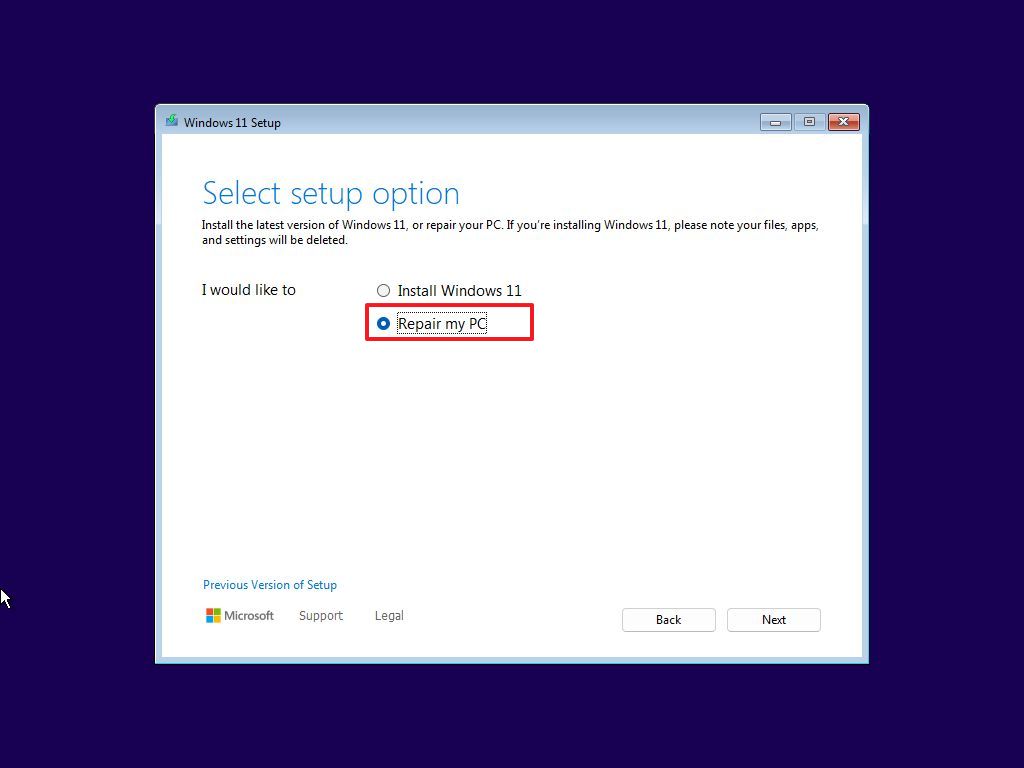
- Click the Next button.
- Select the keyboard layout to continue.
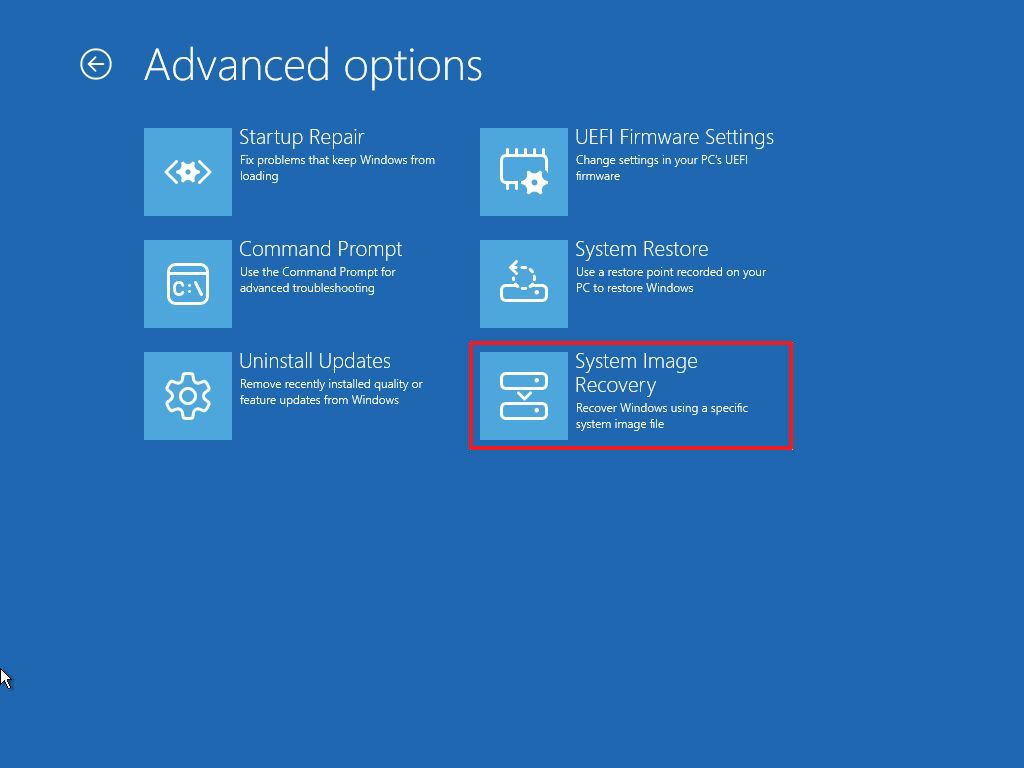
- Click the Troubleshoot option.
- Click the "System Image Recovery" option.
- Confirm the BitLocker recovery key to access the encrypted (if applicable).
- Click the Continue button.
- Select the Windows 11 option.
- On the "Re-image your computer" page, select the "Use the latest available system image" option.
- Quick tip: Use the "Select a system image" option to restore an older version of the setup (if applicable).
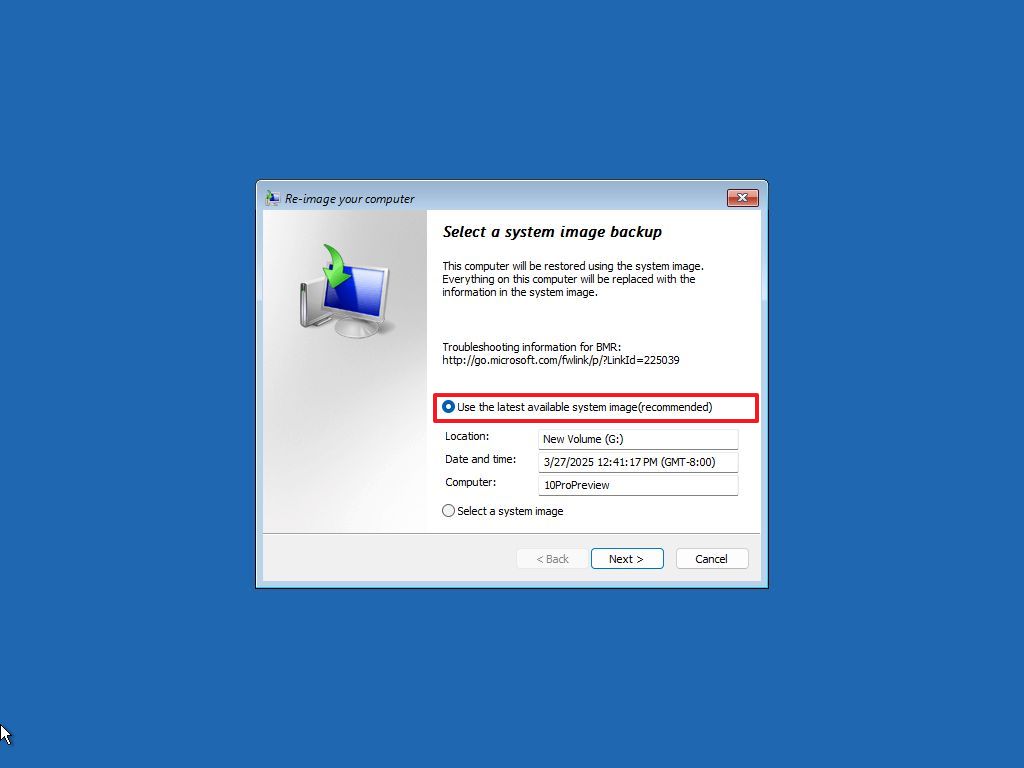
- Click the Next button.
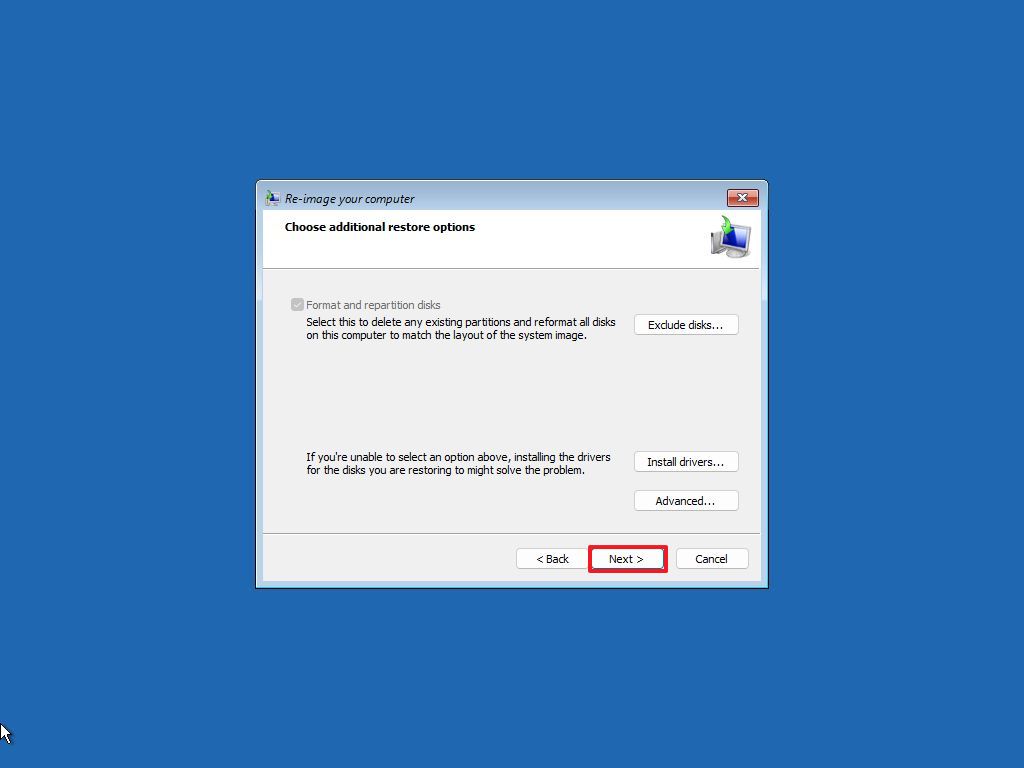
- (Optional) Select the "Format and repartition disks" option before restoring the backup.
- Quick tip: If you choose this option, use the "Exclude disks" option to prevent formatting the secondary drives that may contain data. Usually, you only want to use this option on new drives.
- (Optional) Check the "Only restore system drivers" option.
- Click the Next button.
- Click the Finish button.
- Click the Yes button.
After completing the steps, the system will begin the recovery process. The time it takes to restore your system depends on the size of the backup and your device’s hardware configuration.
Once the restoration is complete, your system may be missing recent updates. To ensure everything is up to date, go to Settings > Windows Update and click “Check for updates” to install the latest patches and drivers.
While there are many third-party backup tools available, the built-in System Image Backup feature on Windows 11 (and 10) still offers distinct advantages. For example:
- Before upgrading to a new version of Windows 11, creating a system image gives you a reliable rollback point.
- If you're making significant system changes, a backup lets you quickly revert to a known-good state.
- When replacing your hard drive, a system image allows you to transfer the full installation, including apps and files, without a clean reinstall.
In general, it's a smart practice to regularly create full backups. A recent backup can be a lifesaver if your system fails, falls victim to malware or ransomware, or becomes compromised by a malicious individual.
However, it's important to understand the limitations. For example, the System Image Backup feature is designed to restore the entire system, not individual files. If you only want to protect personal files and documents, consider using OneDrive or File History instead.
Lastly, keep in mind that a backup only includes the data that was on your system at the time the backup was made. Any files or changes added afterward won’t be saved. That’s why it’s important to back up your computer regularly to avoid losing anything important.
More Windows resources
For more helpful articles, coverage, and answers to common questions about Windows 10 and Windows 11, visit the following resources: