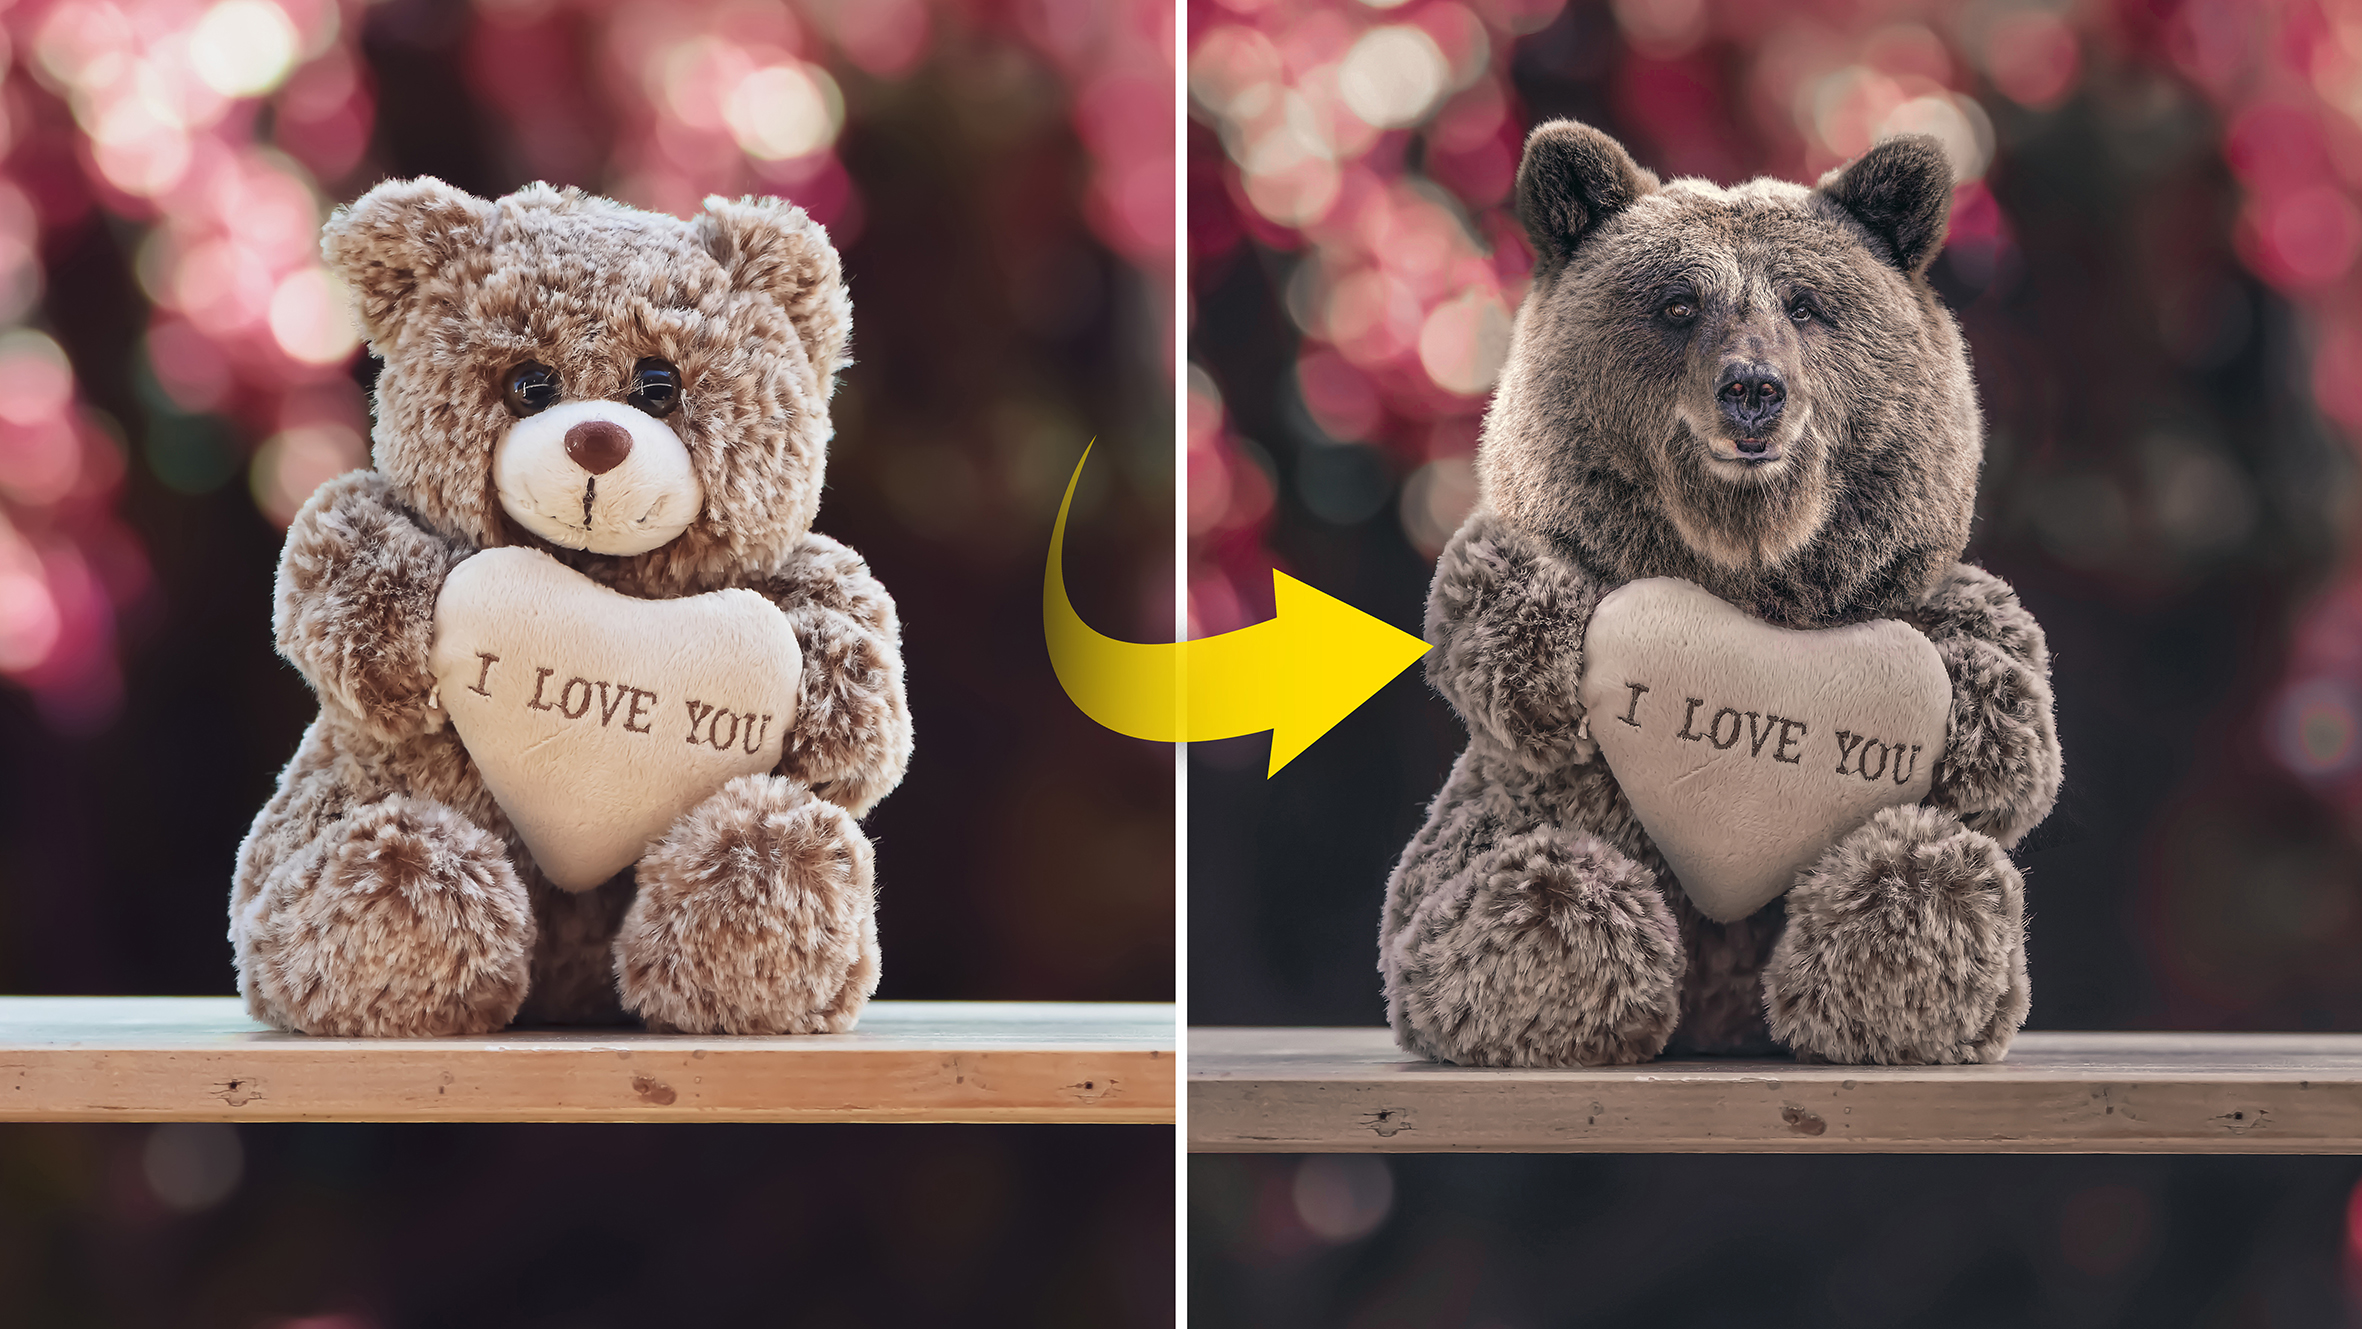
Watch video (above): Make a composite image in Affinity Photo
One of the best features of Affinity Photo is the layers option. They’re helpful for all kinds of image-editing tasks, from retouching to making tonal changes with adjustment layers. Best of all, we can use layers to bring different images together for all kinds of creative results.
This is easier than it looks. All we need to do is copy one image on top of another, so that they each occupy a different layer, then we can position the top layer so that it works in harmony with the layer below, and add a layer mask to hide the parts of the layer we don’t want, thereby creating a seamless blend between the two images.
The key to success is in knowing how layer masks work. They perform a simple yet highly useful function by allowing us to hide parts of our layer, which in turn reveals parts of the layer below. To hide areas, we can either paint them black, or we can first make a selection then transfer the selection into a mask.
The great thing is, the hidden parts are not gone for good, we can reveal them again at any point. This is just one example of the non-linear, non-destructive workflow when using layers.
We’ll walk you through the process here by creating our nightmarish teddy bear composite with two images you can download for free from Pixabay. Once you know how layers and masks work, you can let your imagination run wild.
1. Select your images
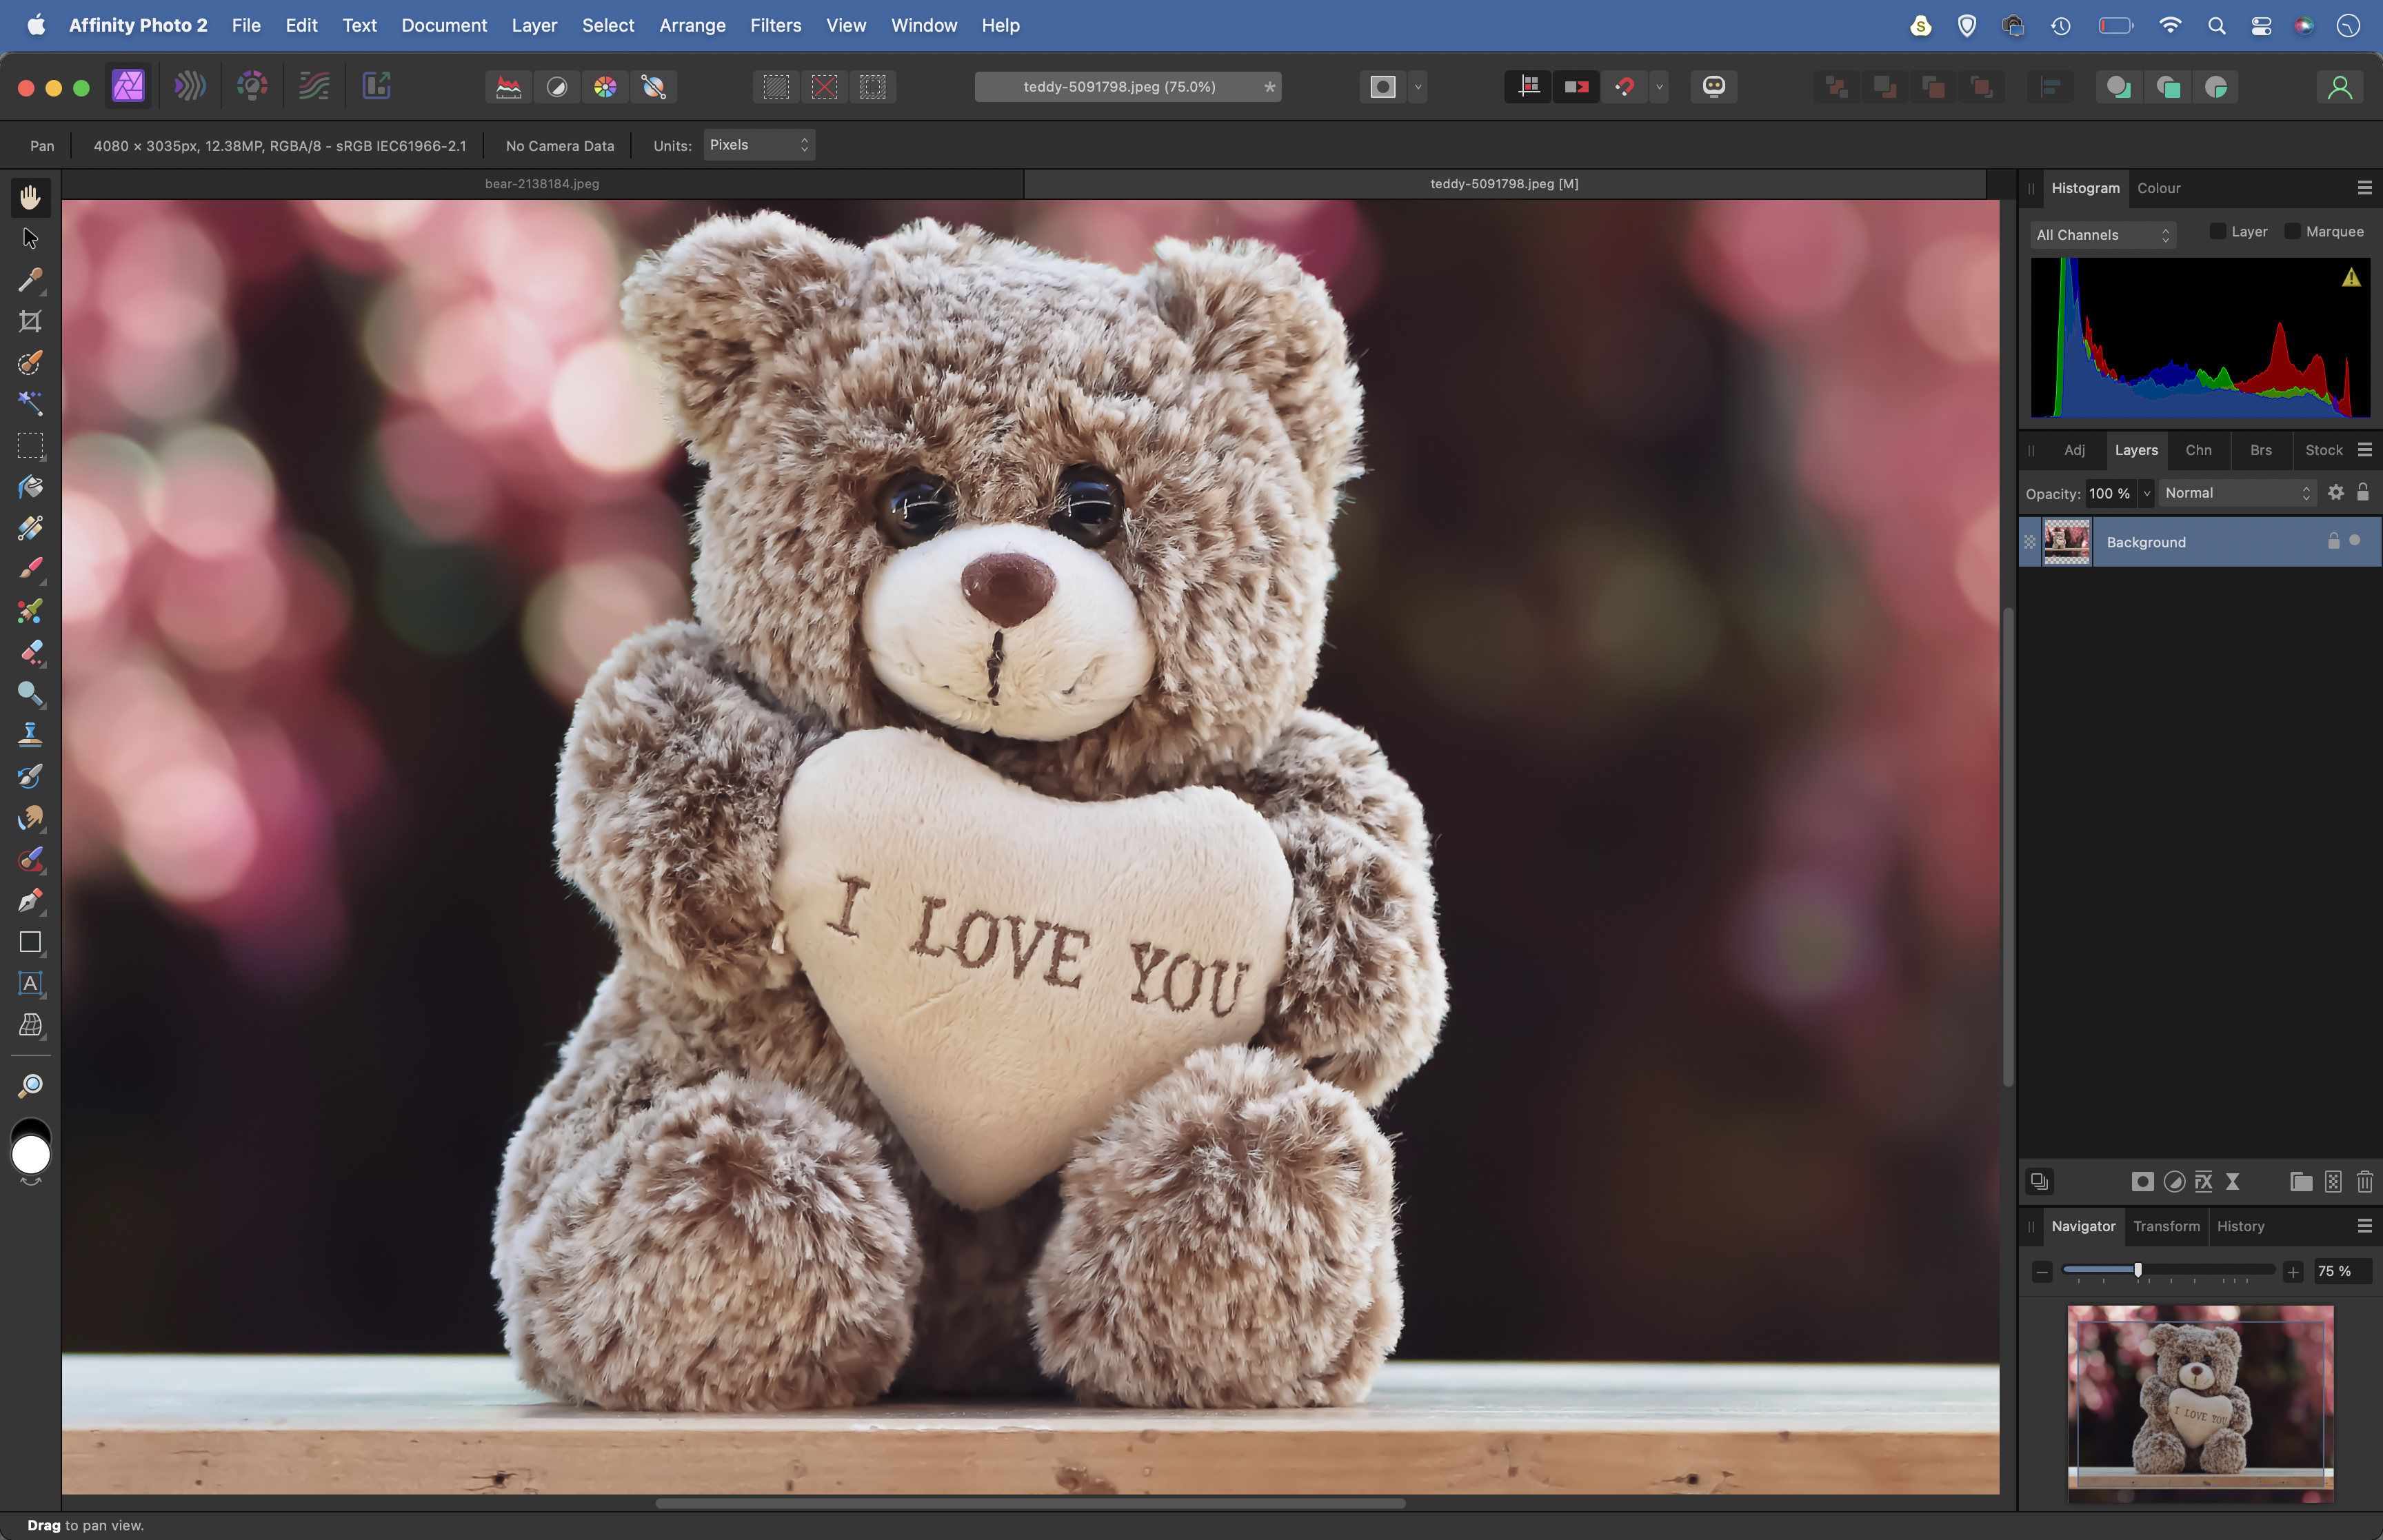
Open the two images you want to blend into Affinity Photo (we used two free images from pixabay.com, search for image numbers 5091798 and 2138184). It helps enormously if the lighting in the two images roughly matches, Here both bears are gently backlit.
2. Isolate the bear
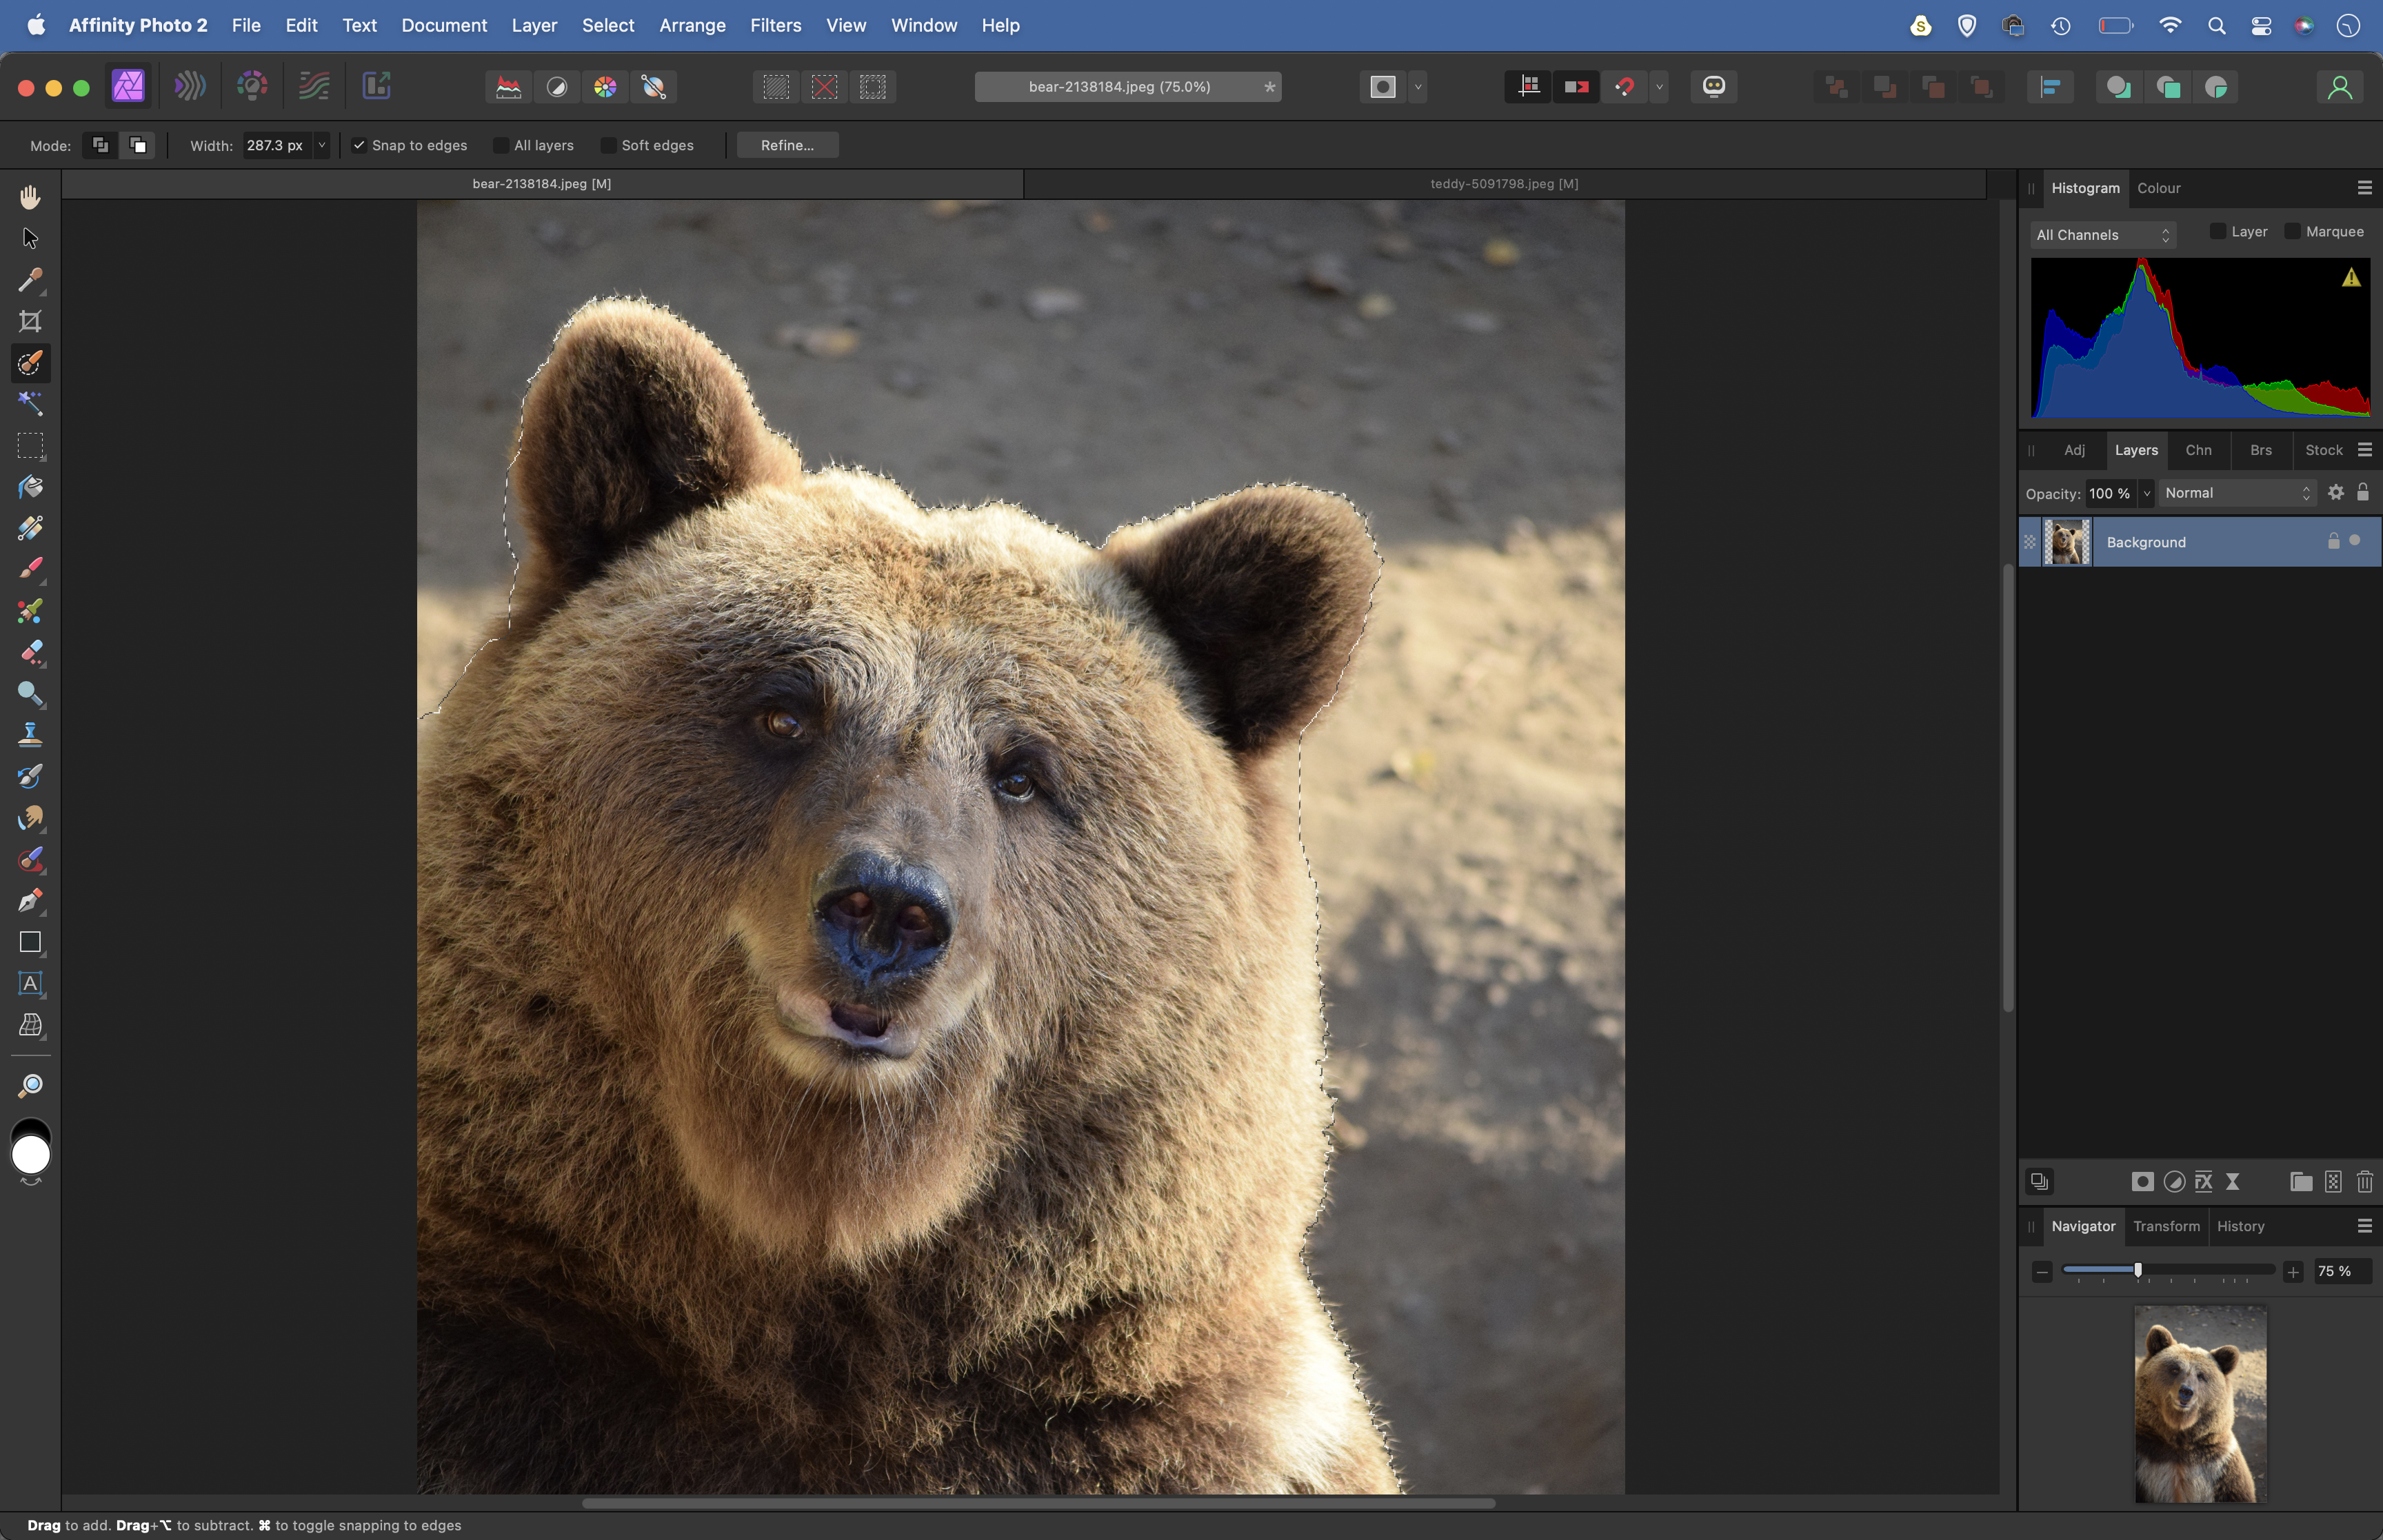
Go to the brown bear image. Grab the Selection Brush from the toolbar then check the ‘Snap to Edges’ box at the top. Paint over the bear to select it, and hold Alt to subtract if the tool picks up parts of the background. Once done, click the Refine button at the top.
3. Improve the cutout
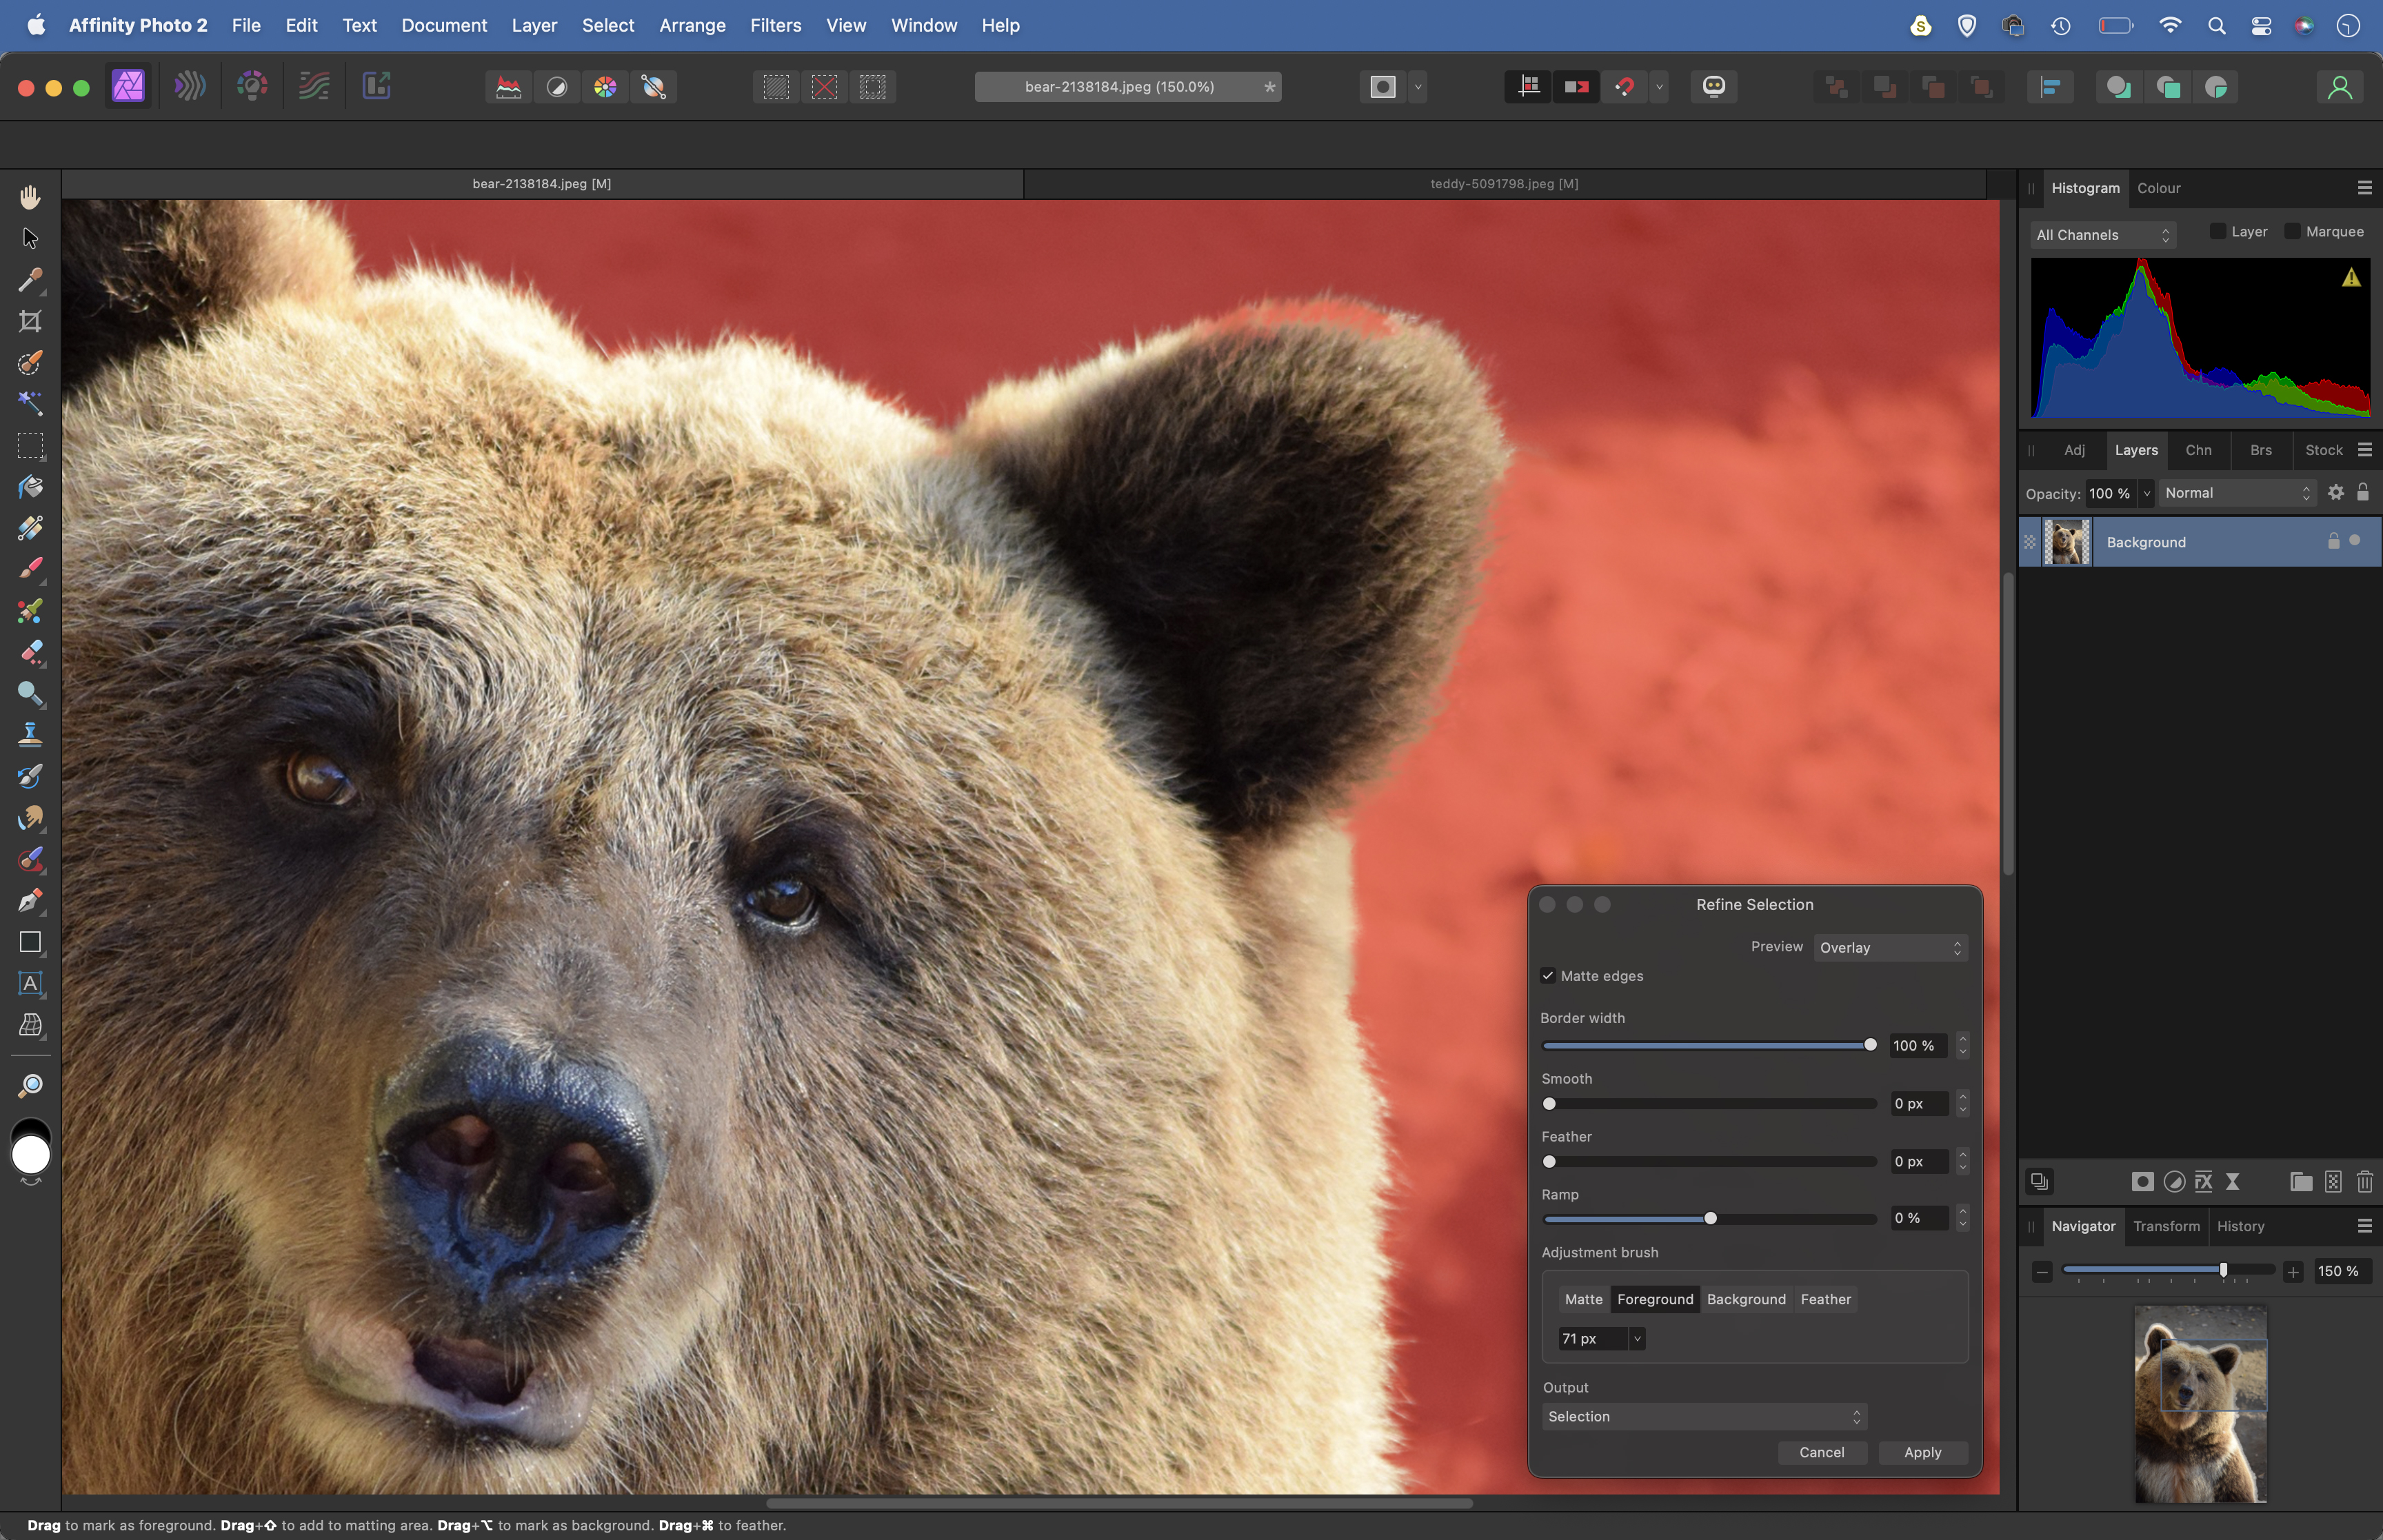
Increase the Border Width slider until it covers the fur around the edges. This lets us create a selection that picks up all those fine hairs. If parts of the bear are missed, click on the Foreground button and paint to add them. Use Background for the opposite.
4. Paste and place
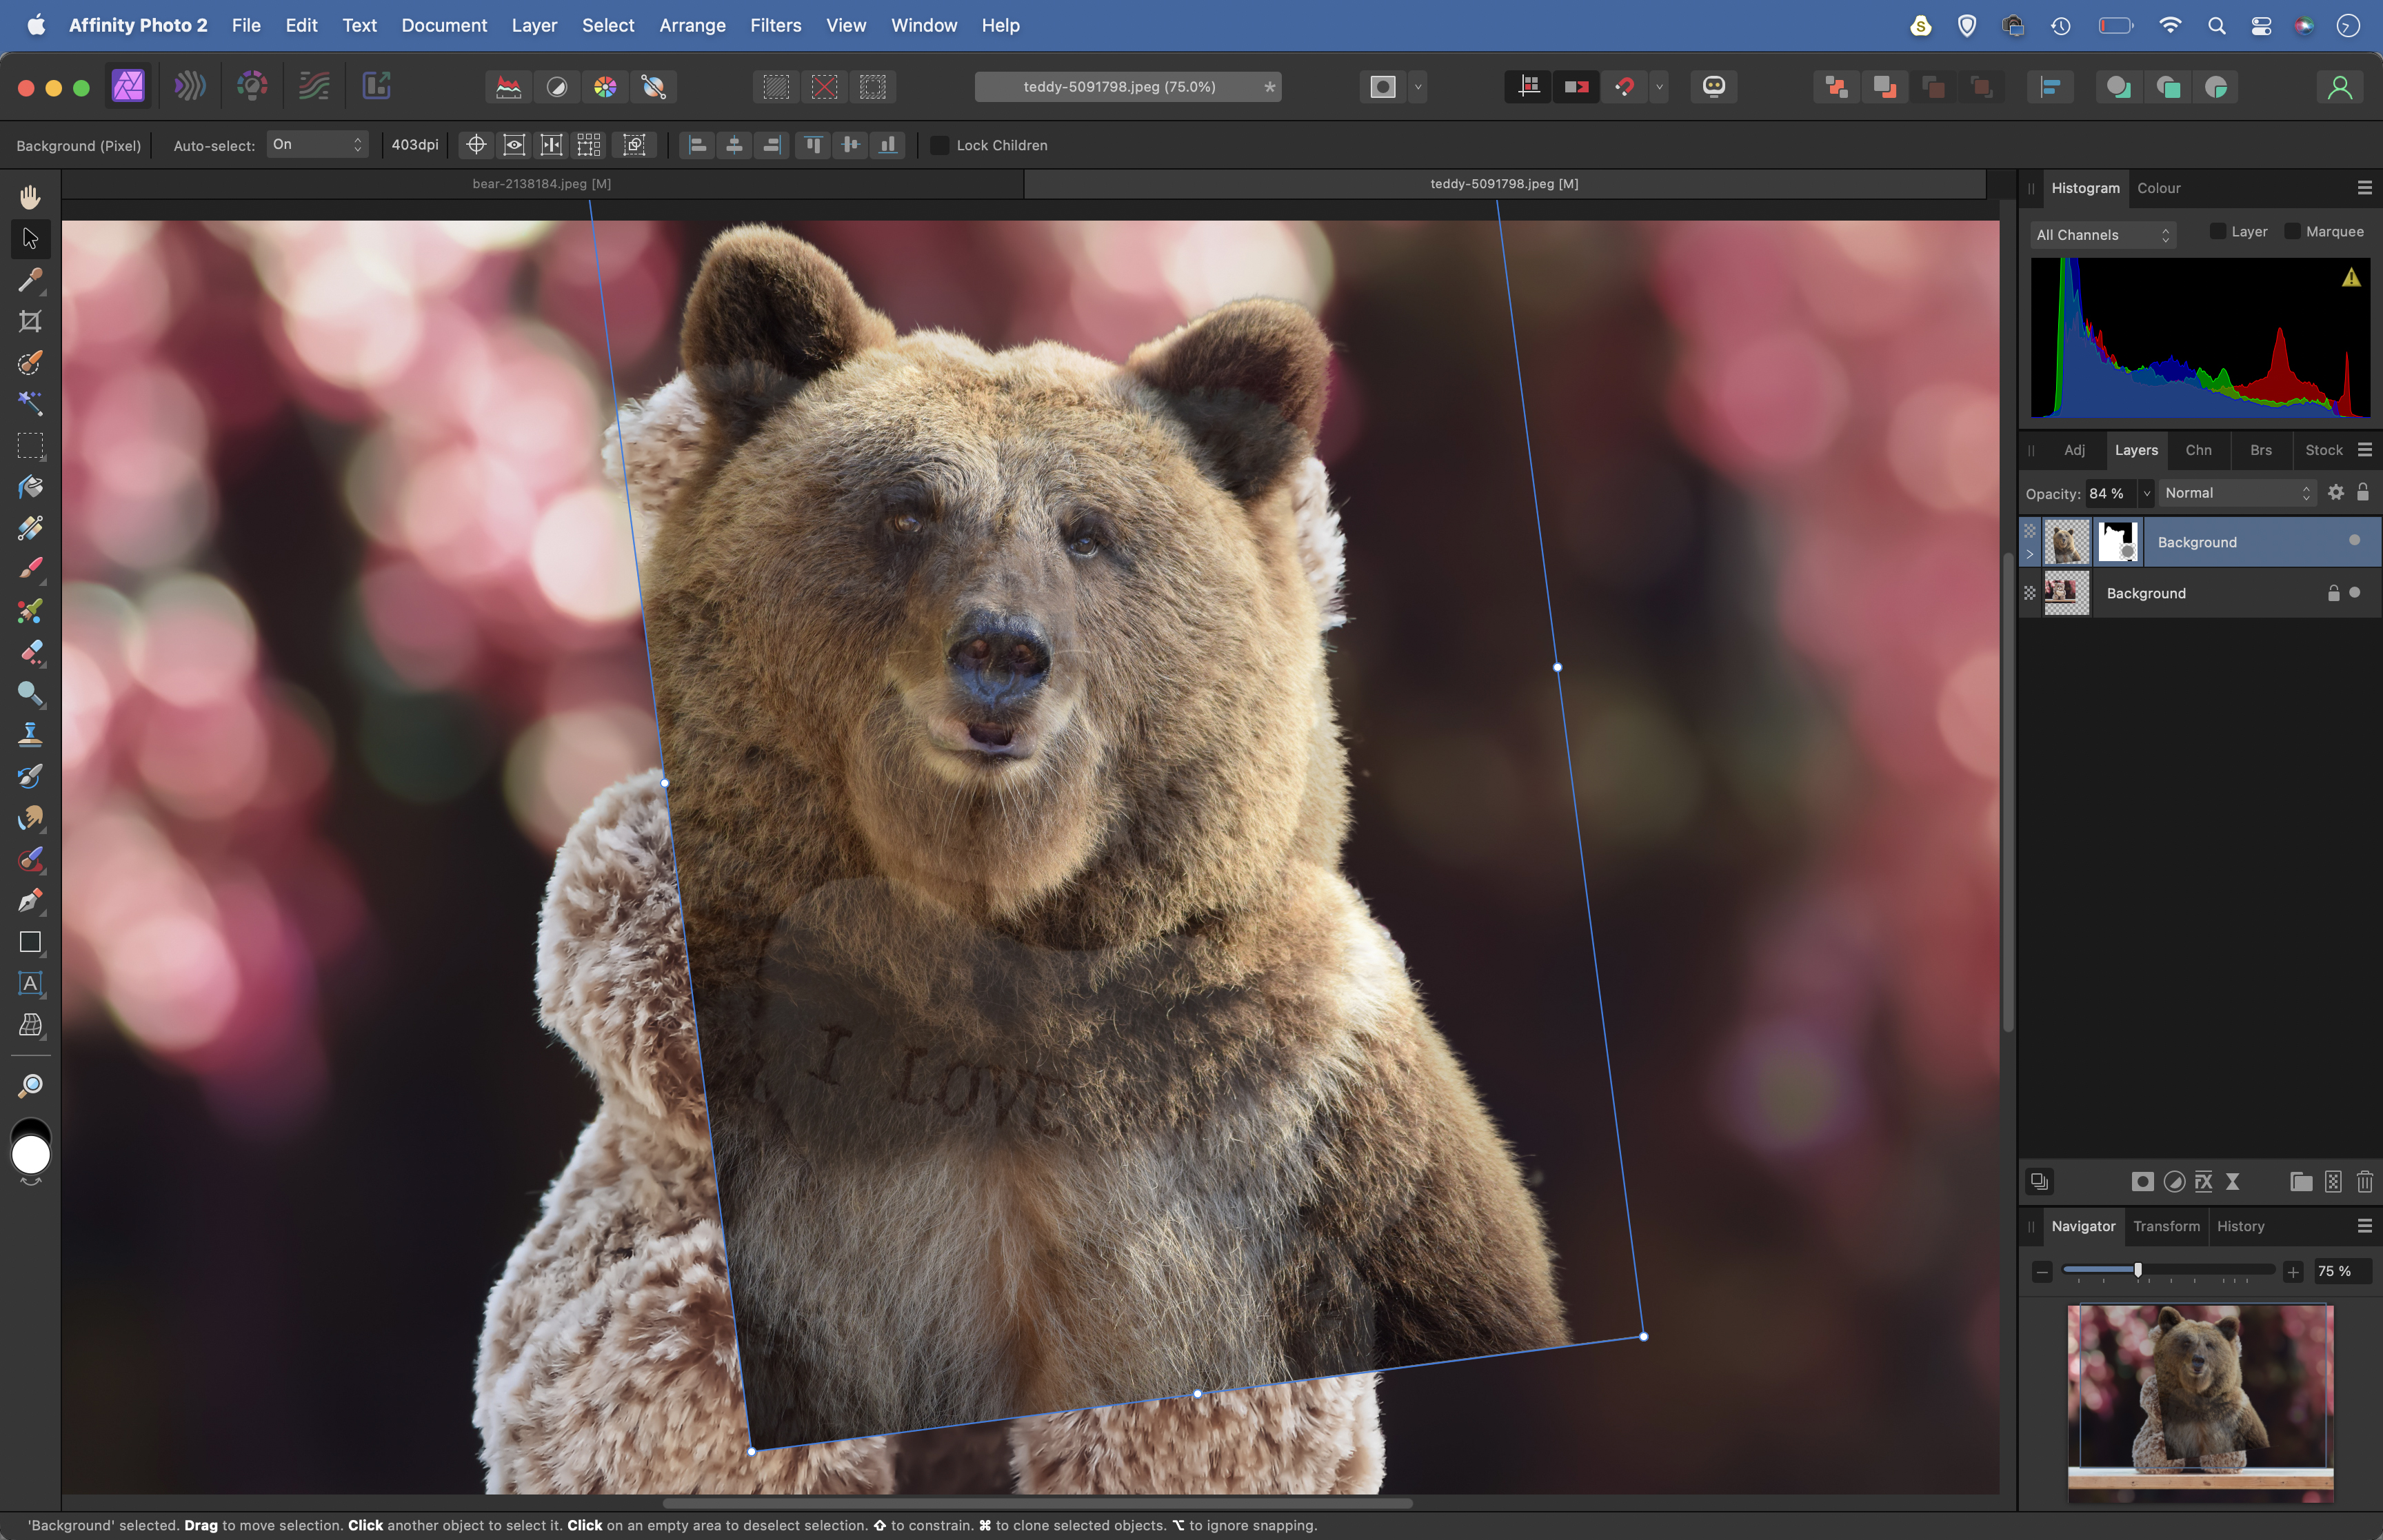
In the Refine box choose Output: Mask and hit Apply. The background will be behind a mask. Press Cmd/Ctrl+C to copy then go to the other image and hit Cmd/Ctrl+V to paste. Reduce the opacity to see both images. Grab the Move tool and position the layer.
5. Paint a mask
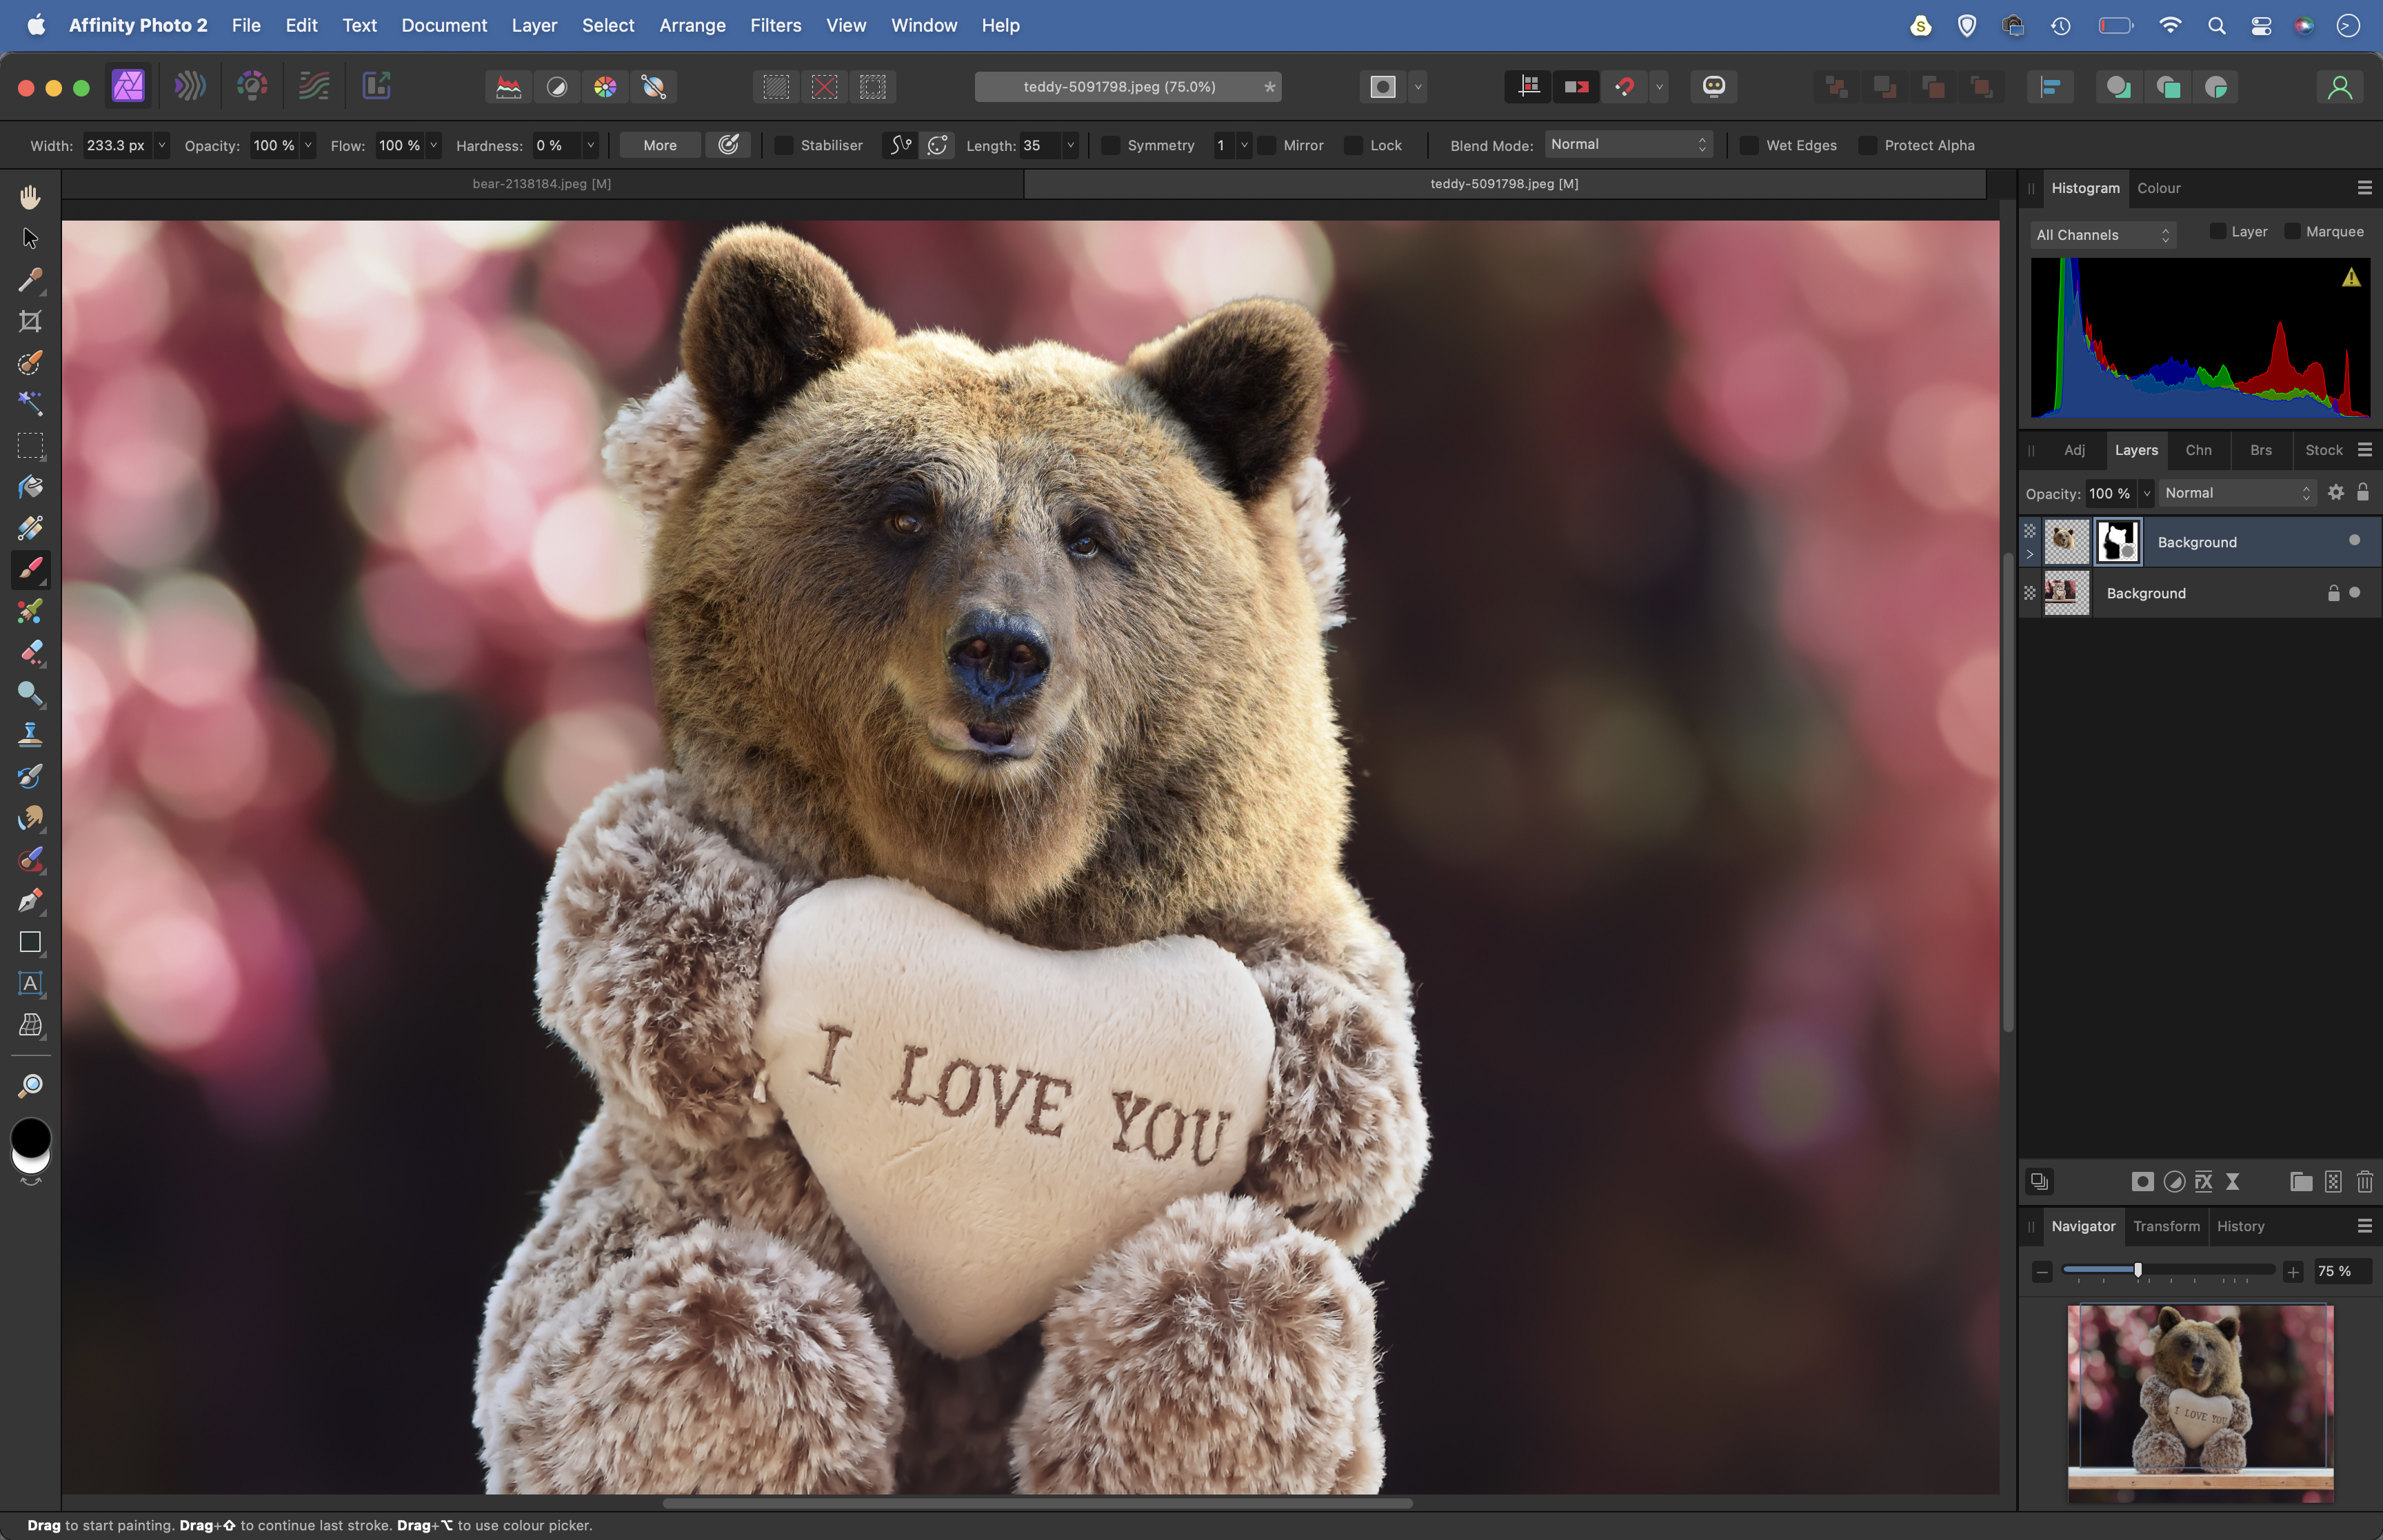
Bring the layer opacity back to 100% then highlight the mask part of the layer in the Layers Panel. Grab the brush tool, set colour to black and paint to hide the parts we don’t want to see, creating a seamless blend. If you need to reveal areas again, hit X and paint white.
6. Tidy up
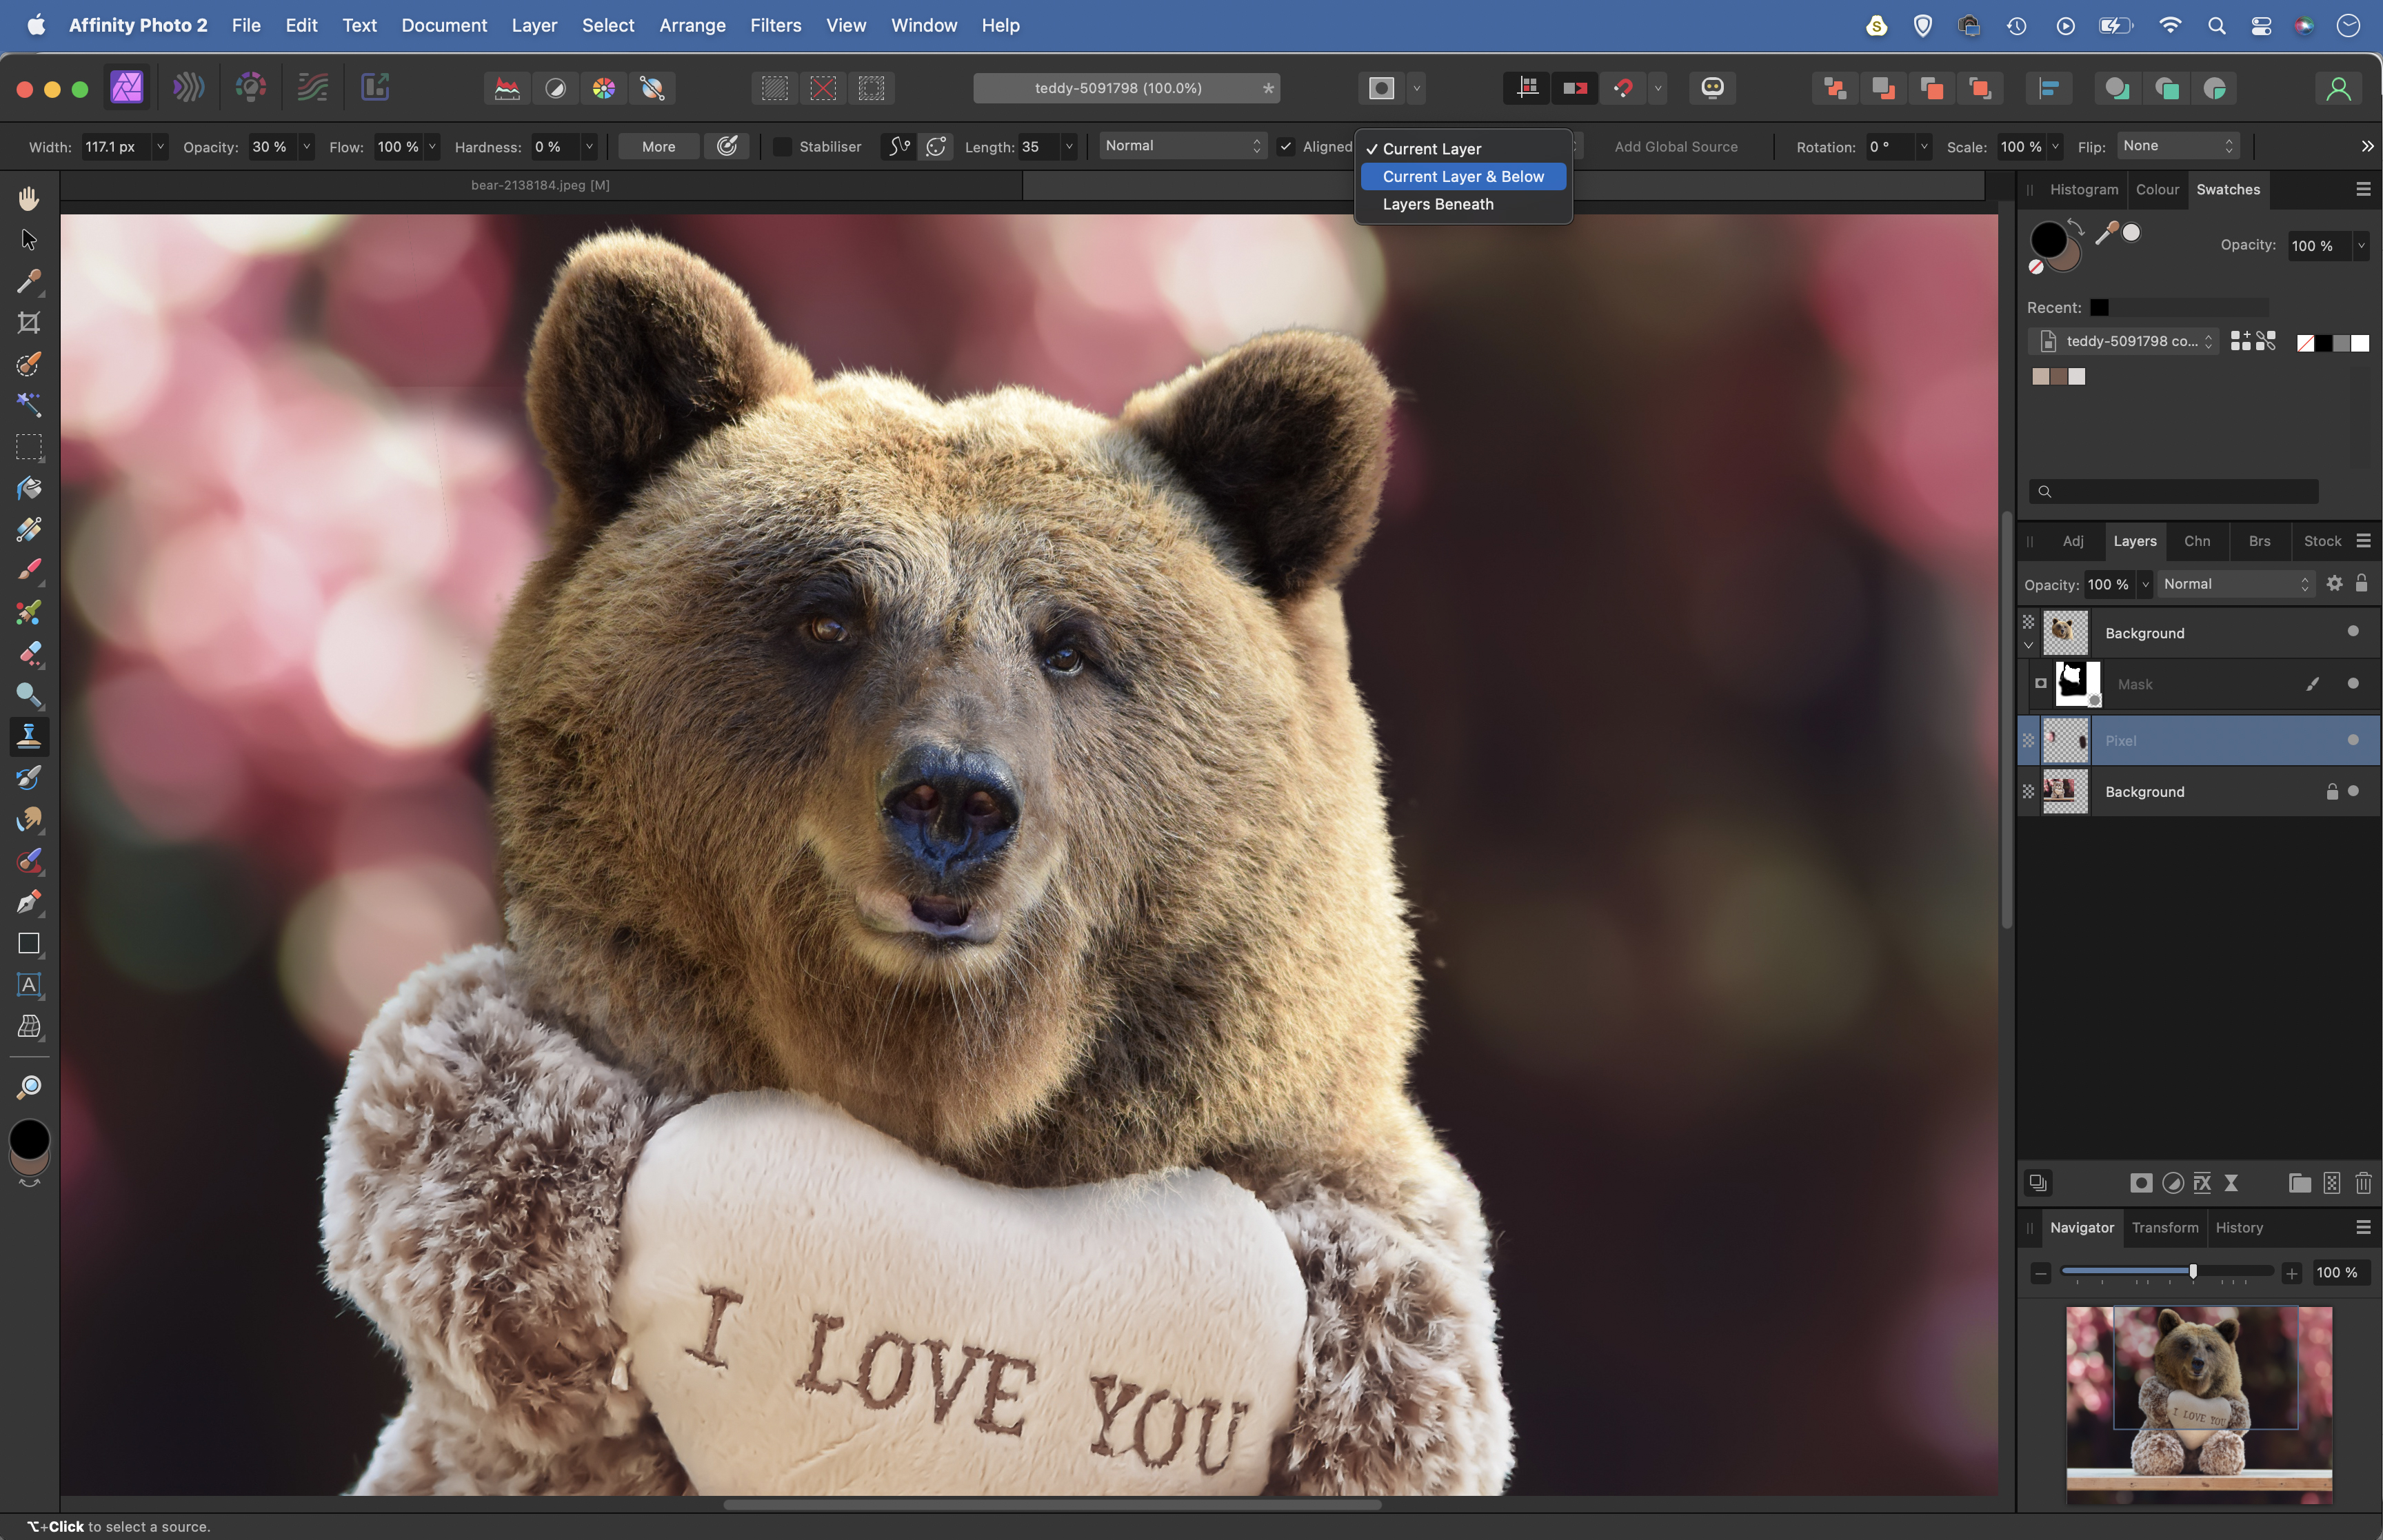
Highlight the bottom layer and click the new pixel layer icon. Grab the Clone tool and set ‘Current Layer & Below’. Hold Alt and click to sample part of the background, then paint to clone out the edges of the teddy bear. Use Adjustments to tweak the colours.
If you enjoyed this tutorial but want a bit more power from your laptop, why not look at the best photo-editing laptops? If you're really keen to improve your skills further then online photography courses could be the way to go.
