Ableton has just announced Live 12, and users can sign up to be part of the public beta now via the Ableton website
Live 12 brings some exciting new features including a great new synth called Meld, Roar – a multistage distortion effect – and an update to the popular Max For Live device Granulator.
While a lot about Live 12 will be familiar to existing users, there are a few significant workflow tweaks that could mean big changes, even for regular users. Here are five important things you need to know to get the most of Live 12.
1. The new browser requires some prep work
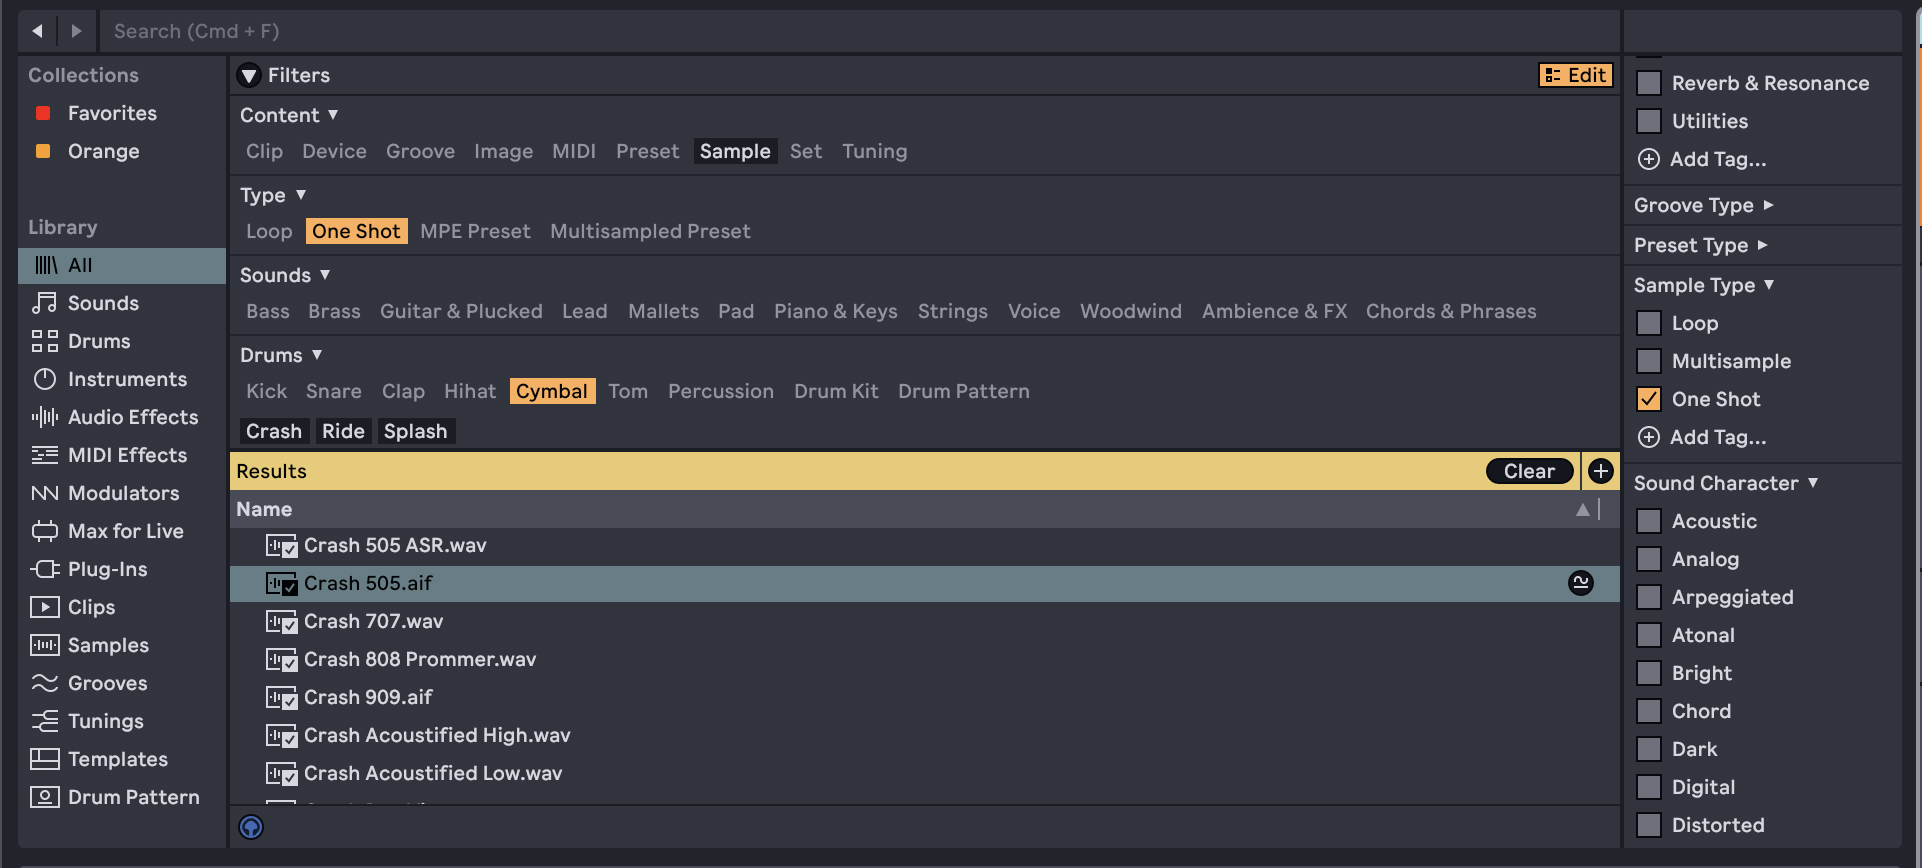
Upon opening Live 12, one of the most obvious changes is the redesigned browser. Gone are the old folders within each category – which broke, for example, Audio Effects down into Delays, Dynamics, EQ, etc – now replaced by a system of filters that aims to help you find sounds or devices by type or characteristics.
As well as searching by name, each browser window now has a Filters section at the top, which lets users refine the list based on things such as sound type, format and characteristics. Clicking the Edit tab next to these filters enables you to assign tags to anything in the browser, either using the pre-existing list and categories, or ones you create yourself.
It’s worth making use of these tags. While the new browser works nicely for Live’s stock content and official Packs from Ableton, it has little to help you navigate your own library of sounds and third-party plugins – at least not without a little prep work first. The first thing we’d recommend doing is adding ‘type’ tags to your plugins – eg ‘synth’, ‘delay’ ‘EQ’ etc – to help you quickly find groups of similar tools.
After this, it’s worth turning to your most commonly used sample packs and assigning any tags you think could be relevant, such as sound type – eg ‘loop’, ‘one shot’, ‘drum’, ‘bass’, ‘lead’ – as well as potentially tagging sound by characteristics such as musical key or general tone descriptions. While doing so requires a fair commitment of admin time, it will really help you get the most out of Live’s new browser.
With sounds tagged up, it’s also possible to save browser filter combinations to the library sidebar to create automatically updating groups of sounds, devices or plugins. For example, under the All tab, filter sounds by ‘Loop’ and ‘Drum Pattern’, then hit the ‘+’ icon above the list of results to create a new sidebar shortcut. This will list anything tagged with these two characteristics, whether it’s part of Live’s stock library, a Pack or your own folders (assuming you’ve added tags). The list will automatically update as new sounds are tagged with these characteristics.
One final sound-finding feature worth investigating early on is Live’s new Similar Sample tool. This can be accessed in the browser or directly via some instruments such as Drum Rack. It lets users browse through a list of ‘similar’ samples that Live generates based on the qualities of the audio files, and isn’t bound entirely by tags. It works particularly well with drum sounds, enabling users to quickly swap out single elements or entire kits to see how it affects that beat.
2. In Live 12 you can access the mixer from anywhere
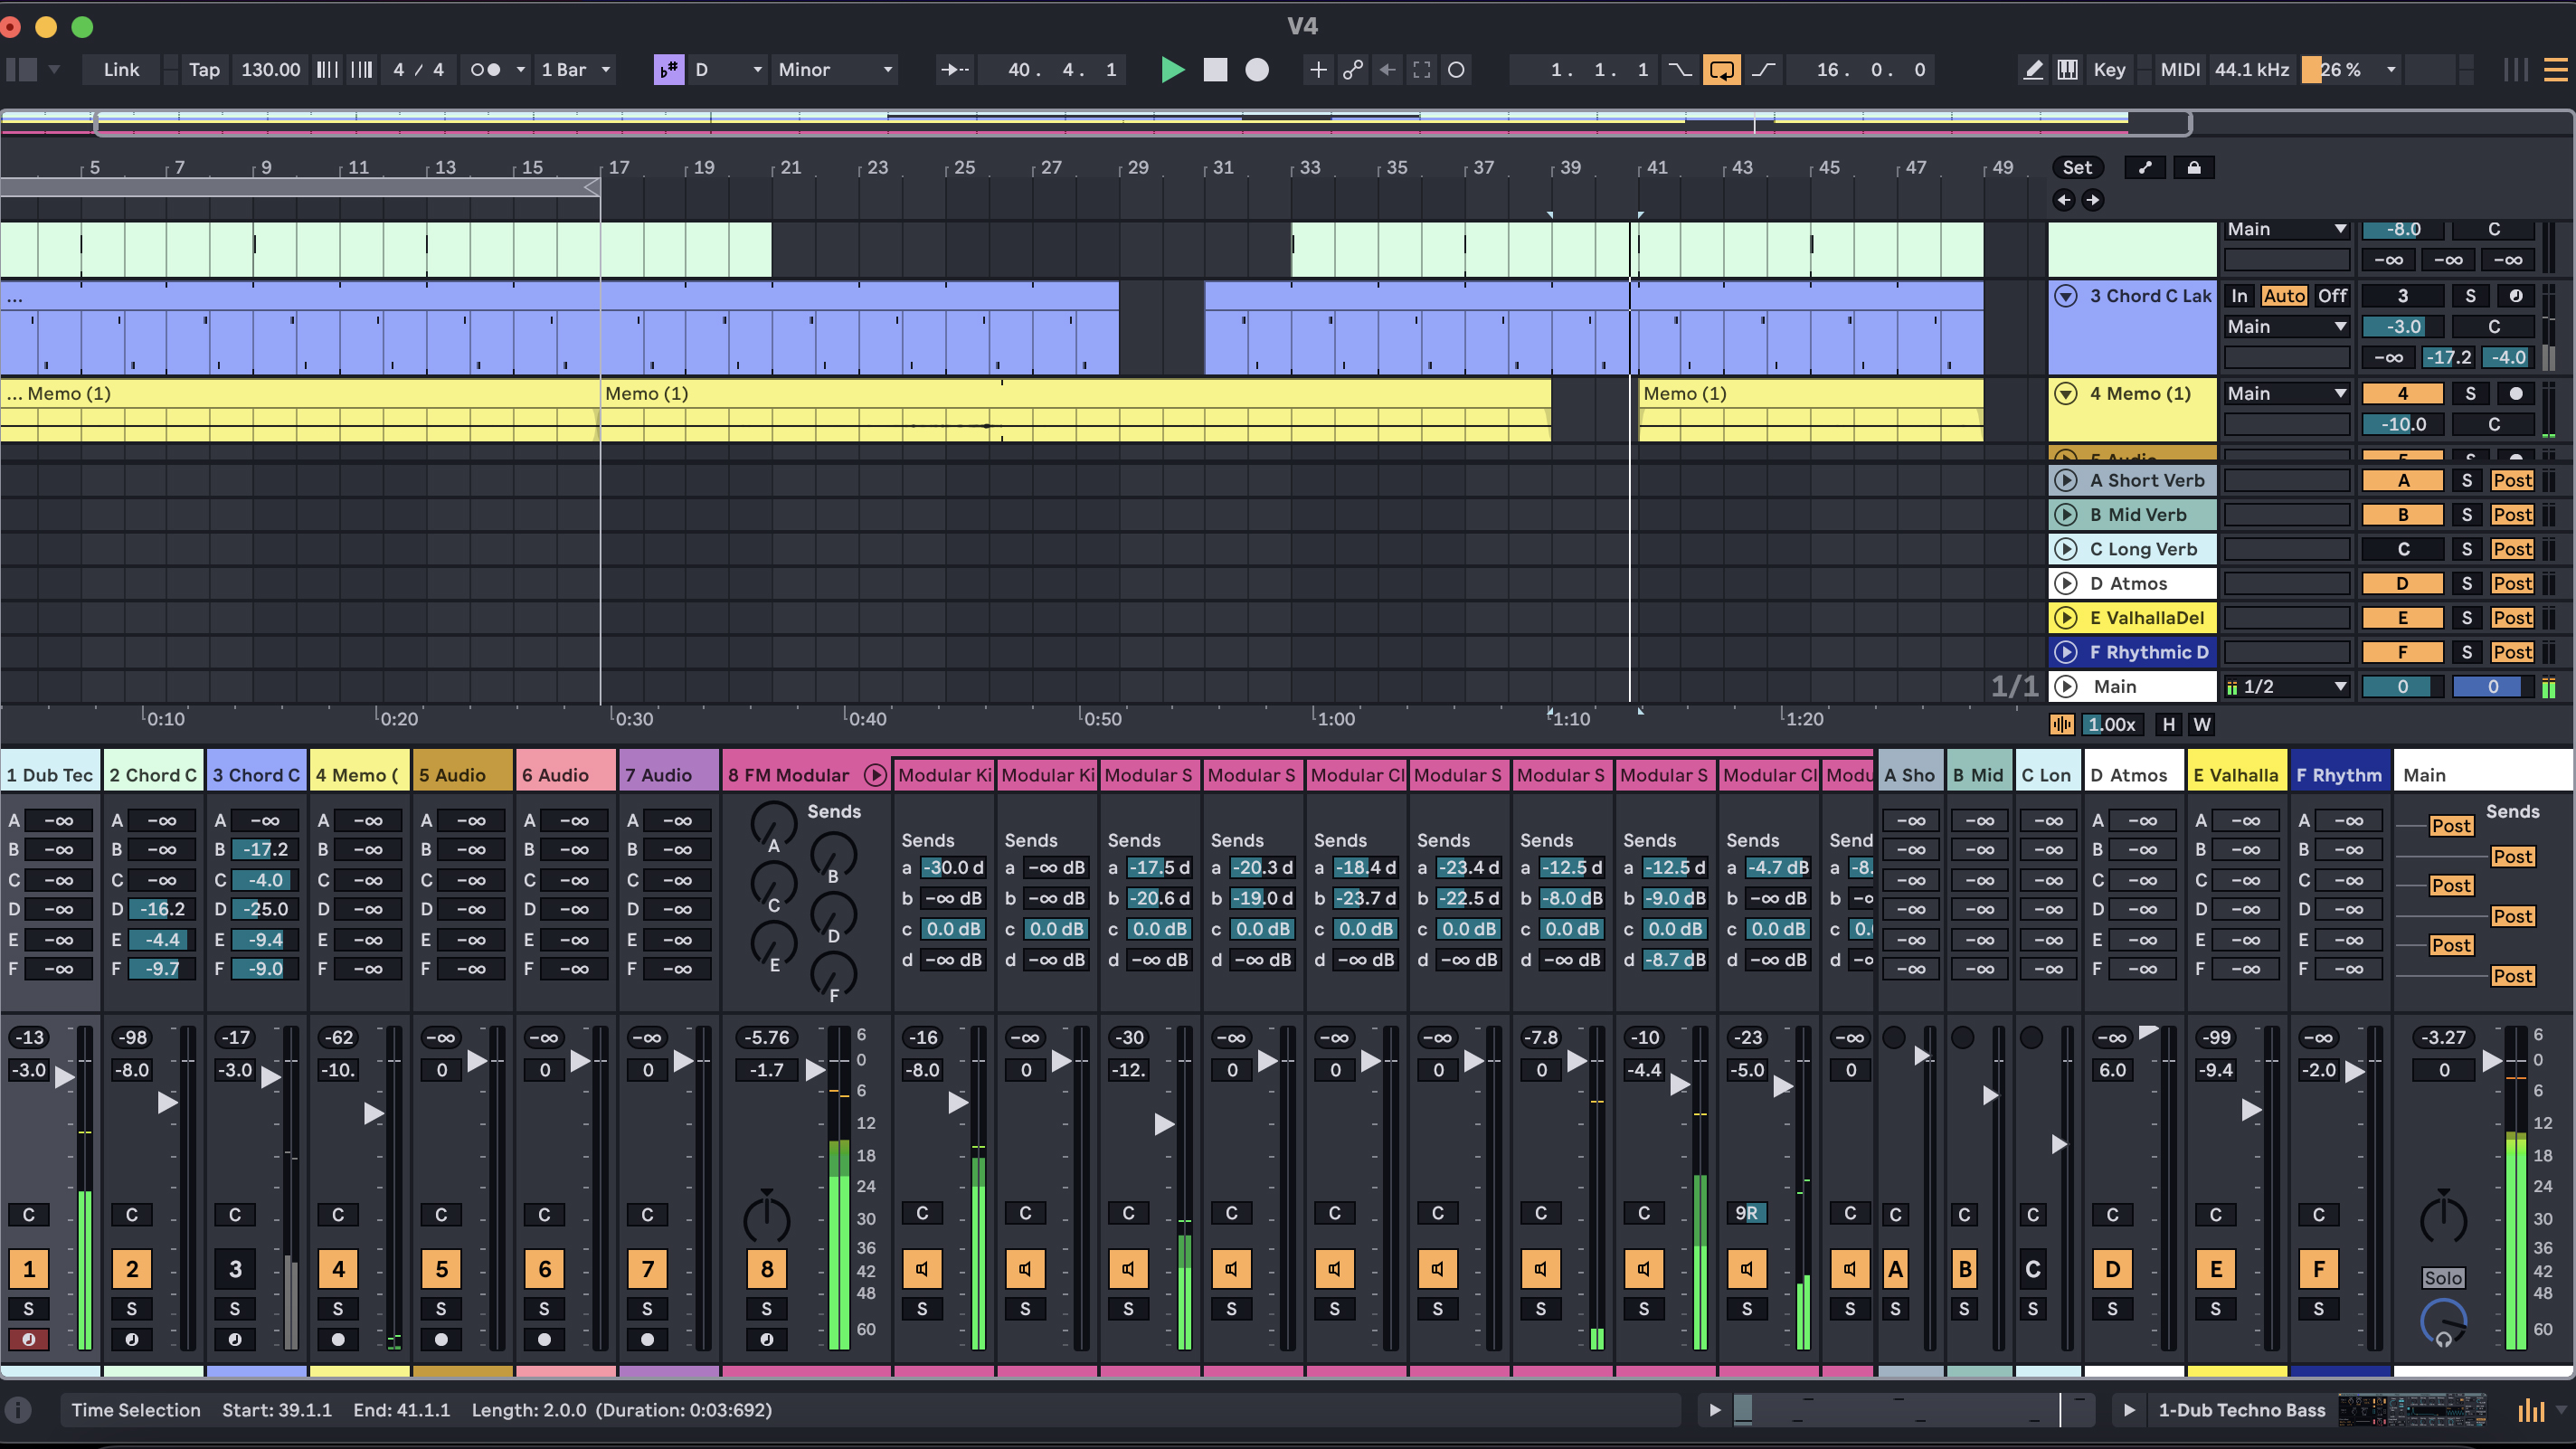
One small but significant change to Live’s workflow for v12 is that the mixer can now be accessed in either of Live’s views – Session and Arrangement. The keyboard shortcut to show/hide the mixer (CMD + Option + M on Mac, or CTRL + Alt + M on Windows) enables you to pull up the mixer as needed, wherever you’re currently working.
3. Scales are far more important now
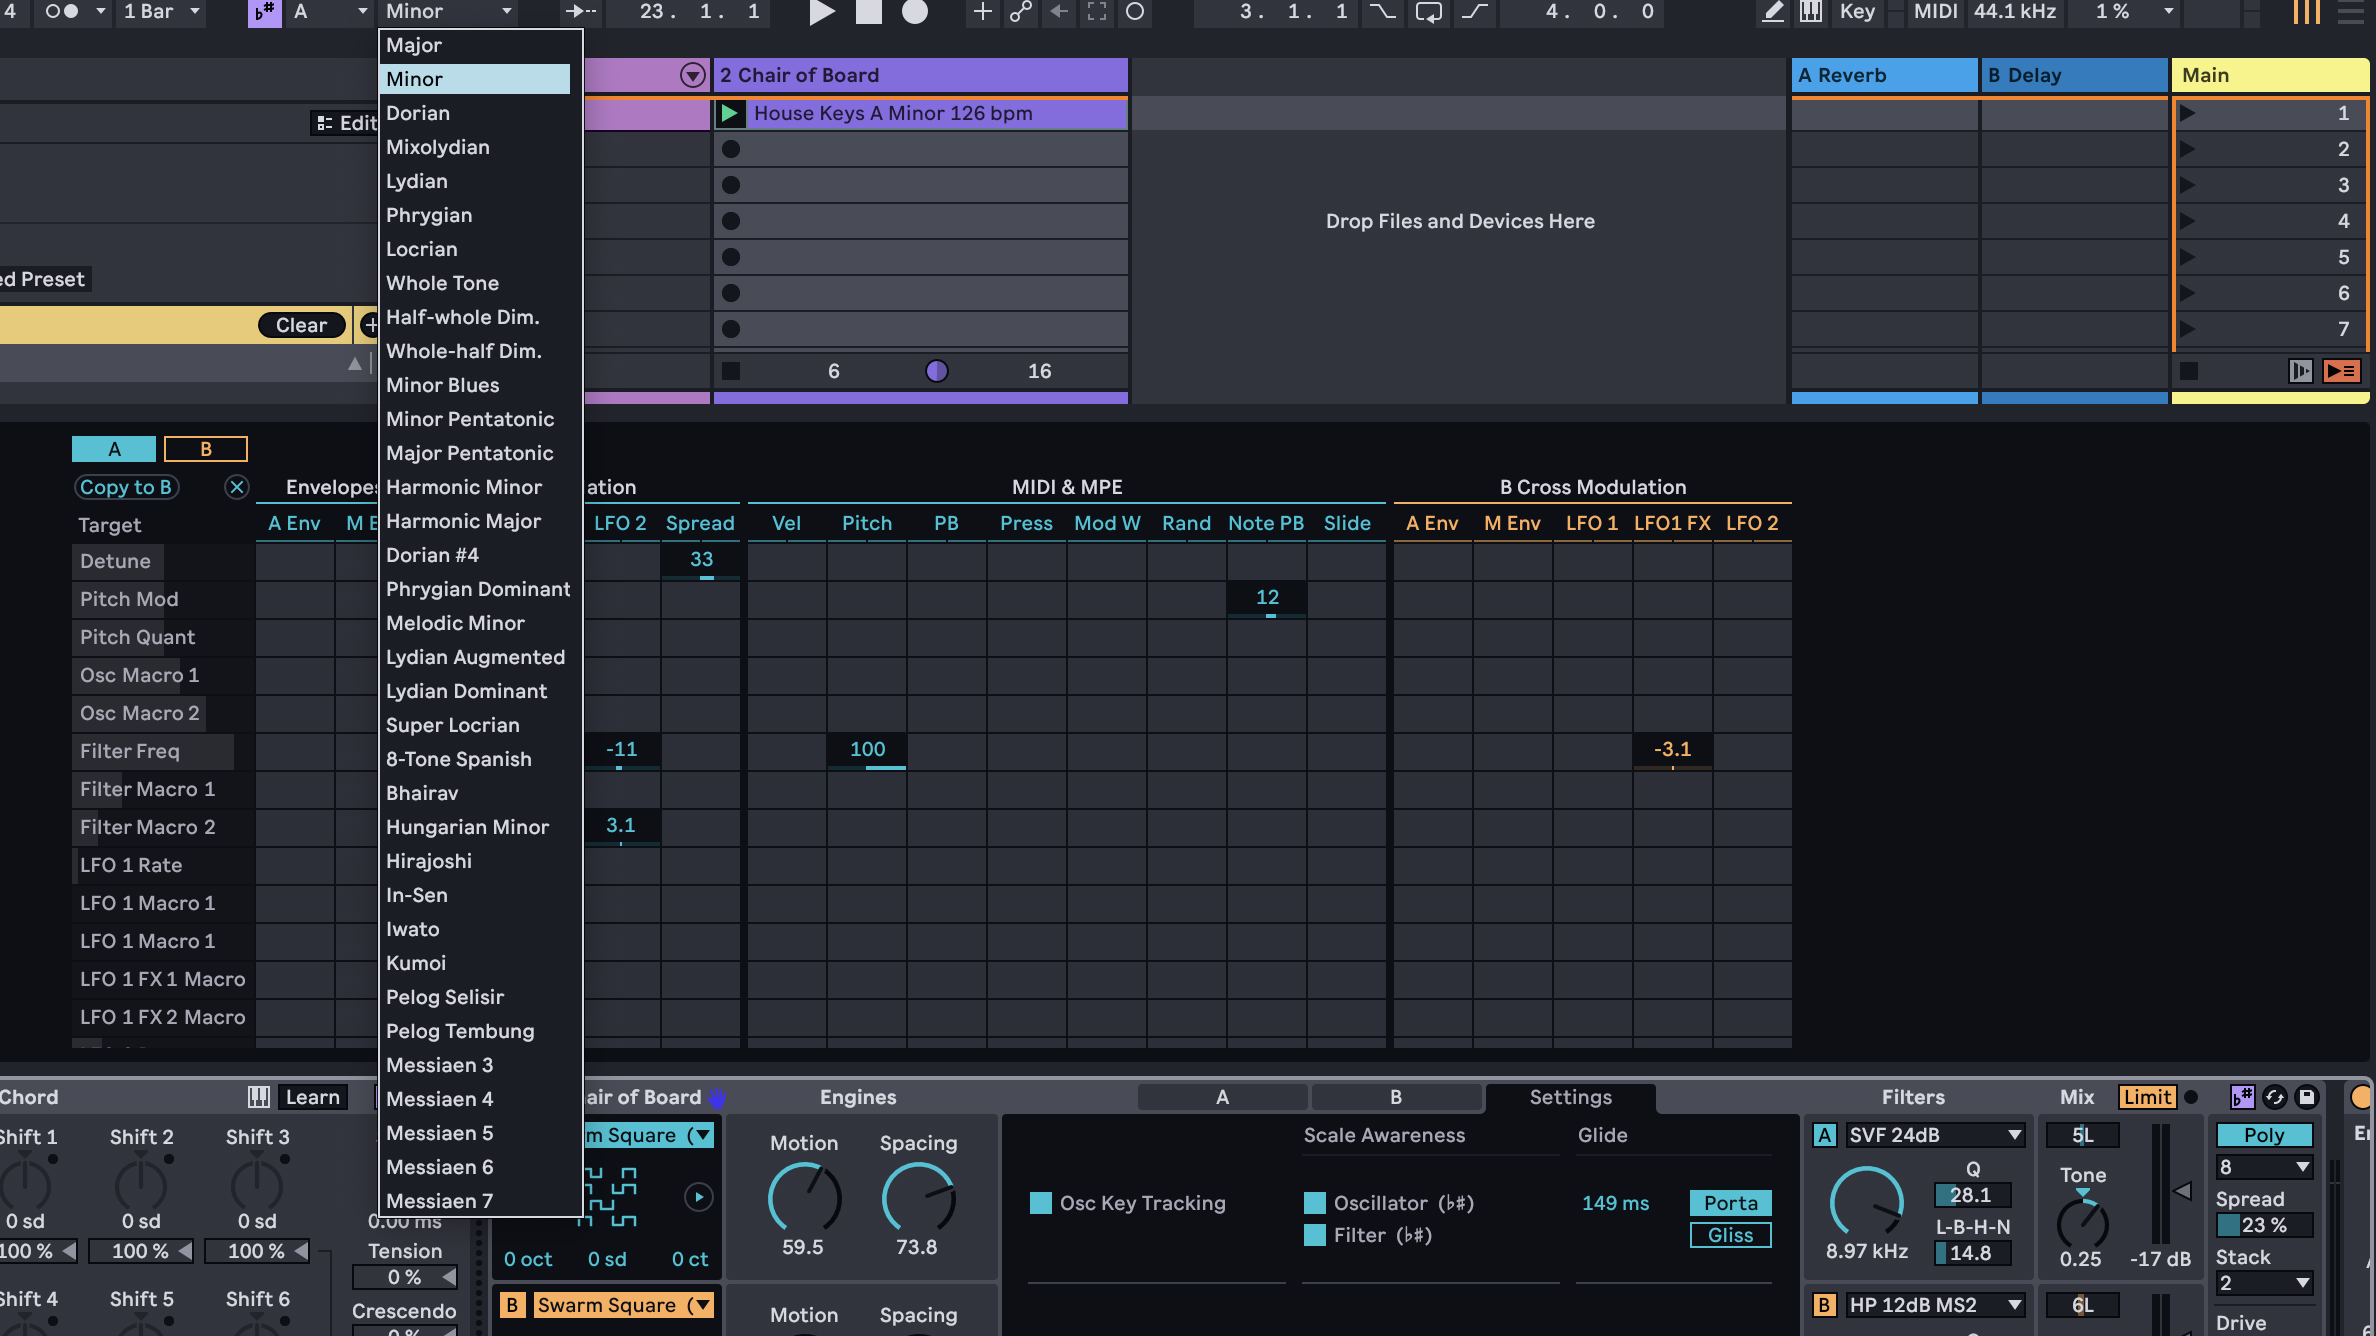
You could already make use of predefined scales in Live 11, but they’ve become far more flexible and important in Live 12. There are now two places in the DAW where a scale can be defined. The first is the global scale setting, found in the transport bar next to BPM. This defines the overall scale for a project, and will dictate the scale automatically assigned to any new MIDI clips.
Scales can also be set for individual clips in their respective menus, however, making it possible to change the playback scale within a single track or composition.
These scales are now considerably more important to Live’s workflow, too. As with previous versions, setting a scale for a MIDI clip can help when programming notes on the piano roll or playing an instrument using a MIDI controller. However, Live 12 also adds a ‘scale awareness’ function to a number of its devices. What this does is lock the harmonic output of various tools to generate only notes or overtones that fit the scale of the MIDI clip in use. Tools that feature this function include not only the MIDI effects, such as the arpeggiator, but also instrument devices such as the new synth, Meld, where some oscillator and filter modes can be set to be ‘scale aware’.
Some functions in Live, such as oscillator tuning and the new generative MIDI tools, will operate in ‘scale degrees’ rather than semitones once a scale has been assigned. This means that the tuning of notes will move up and down by intervals in a scale rather than one note at a time.
This all means that, by assigning different scales to different MIDI clips, it’s possible to make scale or key changes within a performance or project, and have any relevant MIDI effects or other scale aware devices change to match the new clip. You can also use a MIDI Clip’s ‘fit to scale’ function to quickly try existing Clips or Patterns in new scales or keys.
4. You can now generate ideas directly within MIDI clips
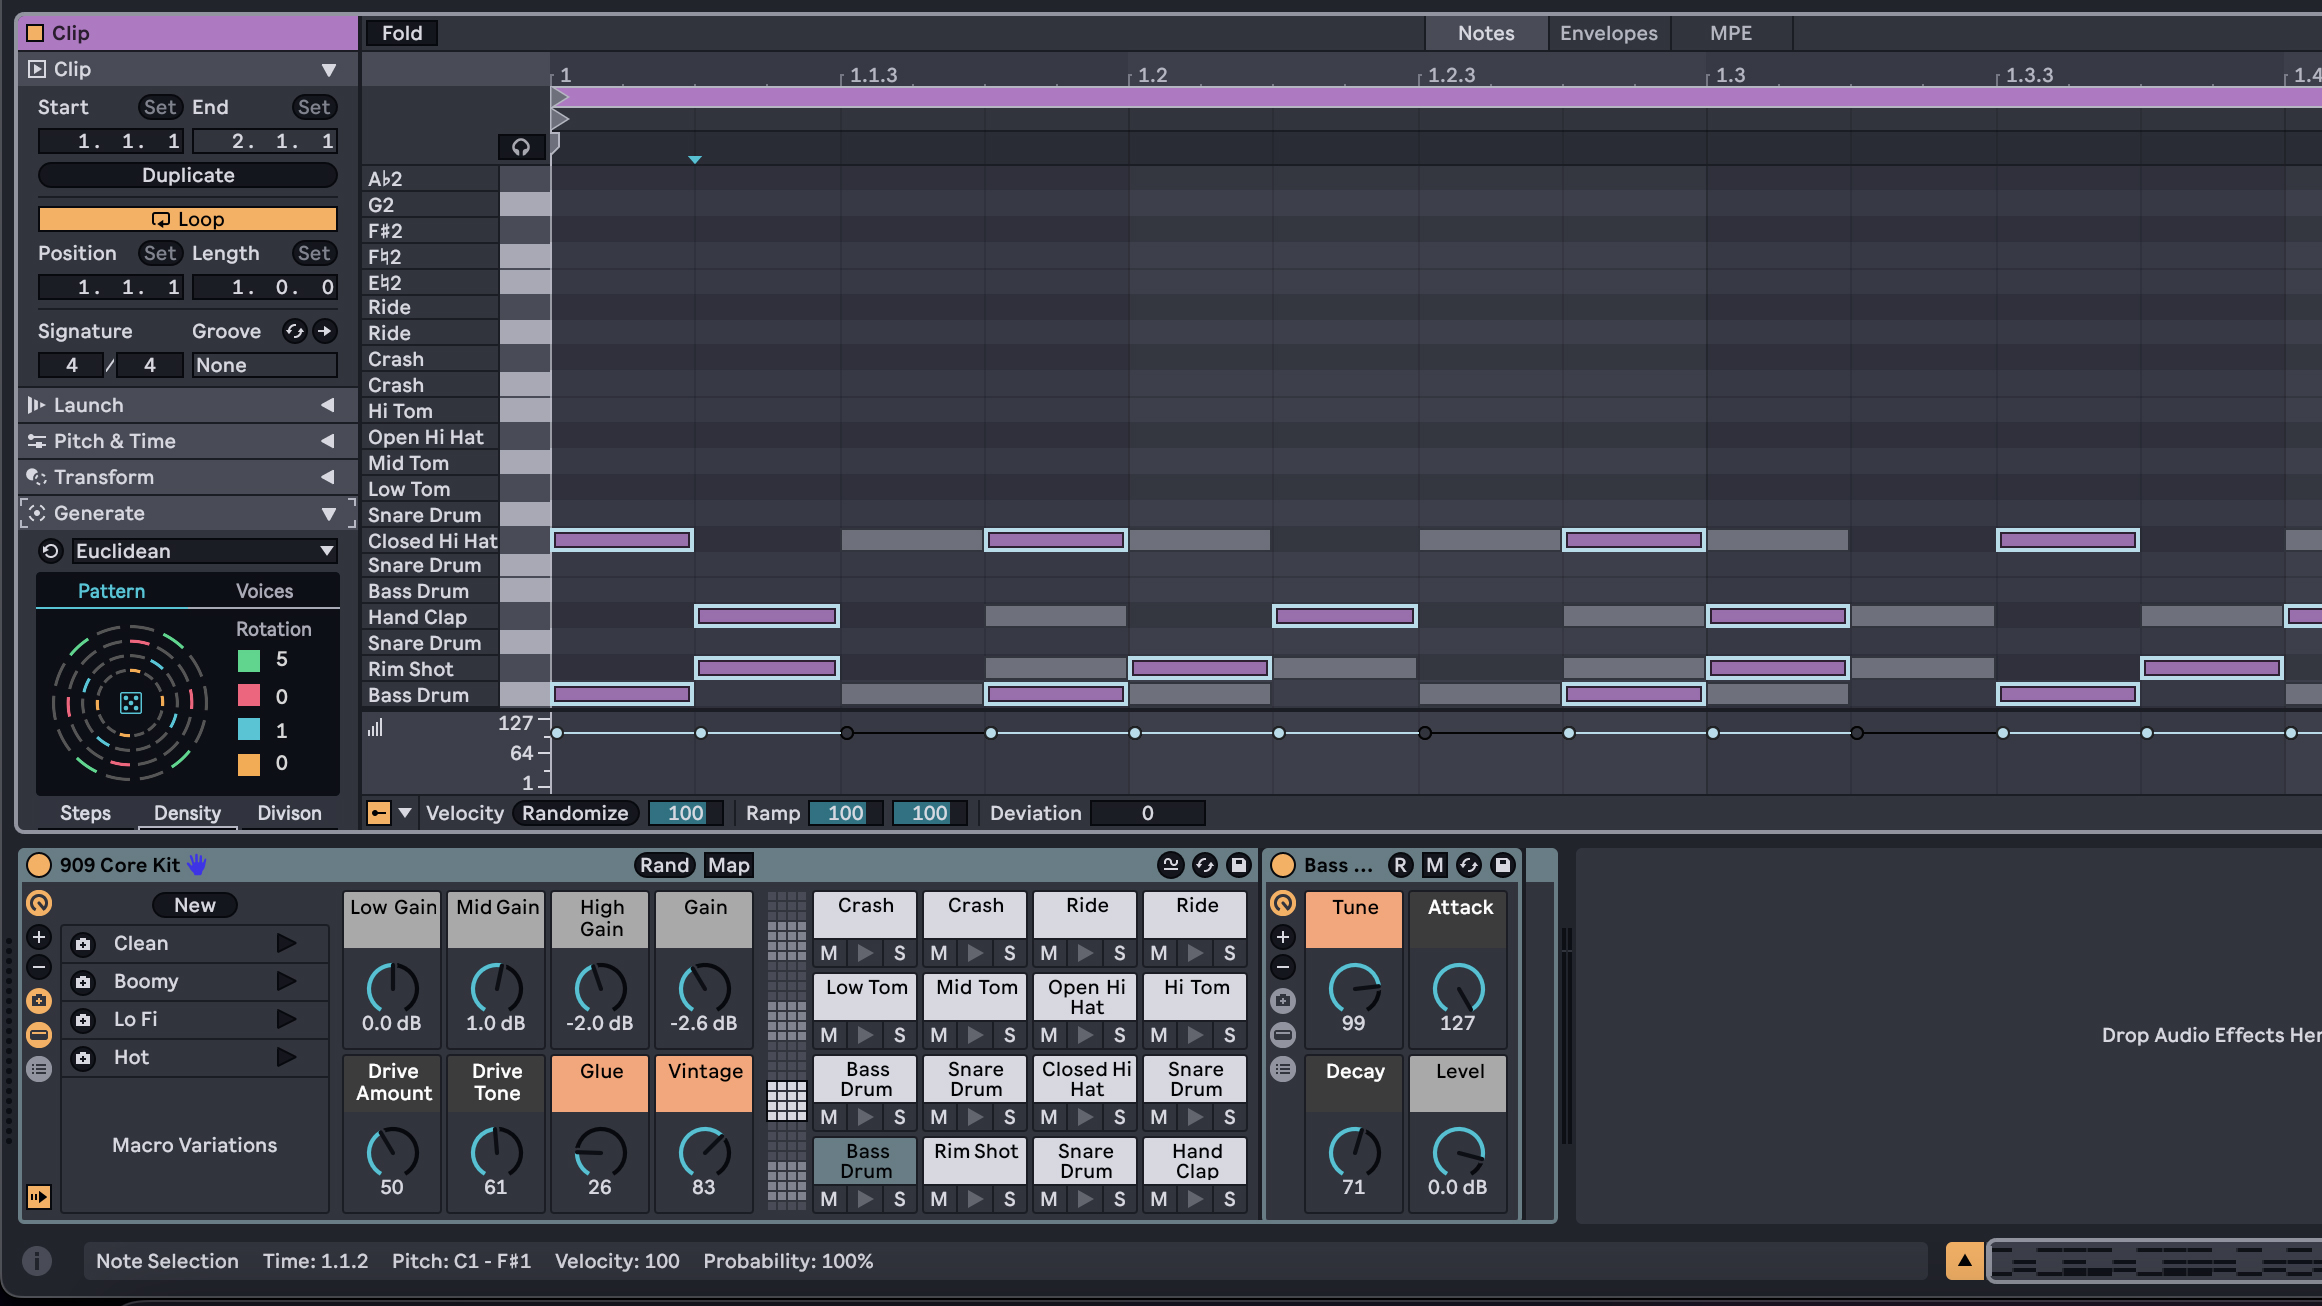
Live’s MIDI clips have been massively enhanced with a set of new creative tools that can generate and transform patterns. These fall under two new tabs found within the MIDI clips themselves. The first of these offers a suite of generative tools that can create MIDI patterns in completely empty clips.
Broadly speaking, these each have intended uses, but can be manipulated to perform multiple functions. Rhythm is a pattern-focused generator ideally suited to creating drum sequences. Seed is a randomised pattern generator best for melodic lines. Shape is a monophonic generator which will create riffs based around a user-defined shape, and is a great tool for lead and basslines. Stacks is a chord generator that will fill a MIDI clip with a variable set of chord shapes.
The second tab focuses on transformation tools, which will elaborate on or alter your existing MIDI. These cover a variety of creative functions that will shift the arrangement, pitch, timing and expression of MIDI notes. It’s worth noting that, by selecting individual notes in a MIDI clip, it’s possible to transform only selected parts, rather than the entire clip.
Suite owners will also find that some Max For Live tools – notably the Euclidean rhythm generator and Velocity Shaper – can now be accessed directly inside MIDI clips.
The Pitch and Time Utilities menu has had some enhancements, too, our favourite being the new ‘Add Interval’ function, which can be used to generate harmonies and chords from existing MIDI notes.
5. Live 12 now has a tuning pool… which shouldn’t be confused with Scales
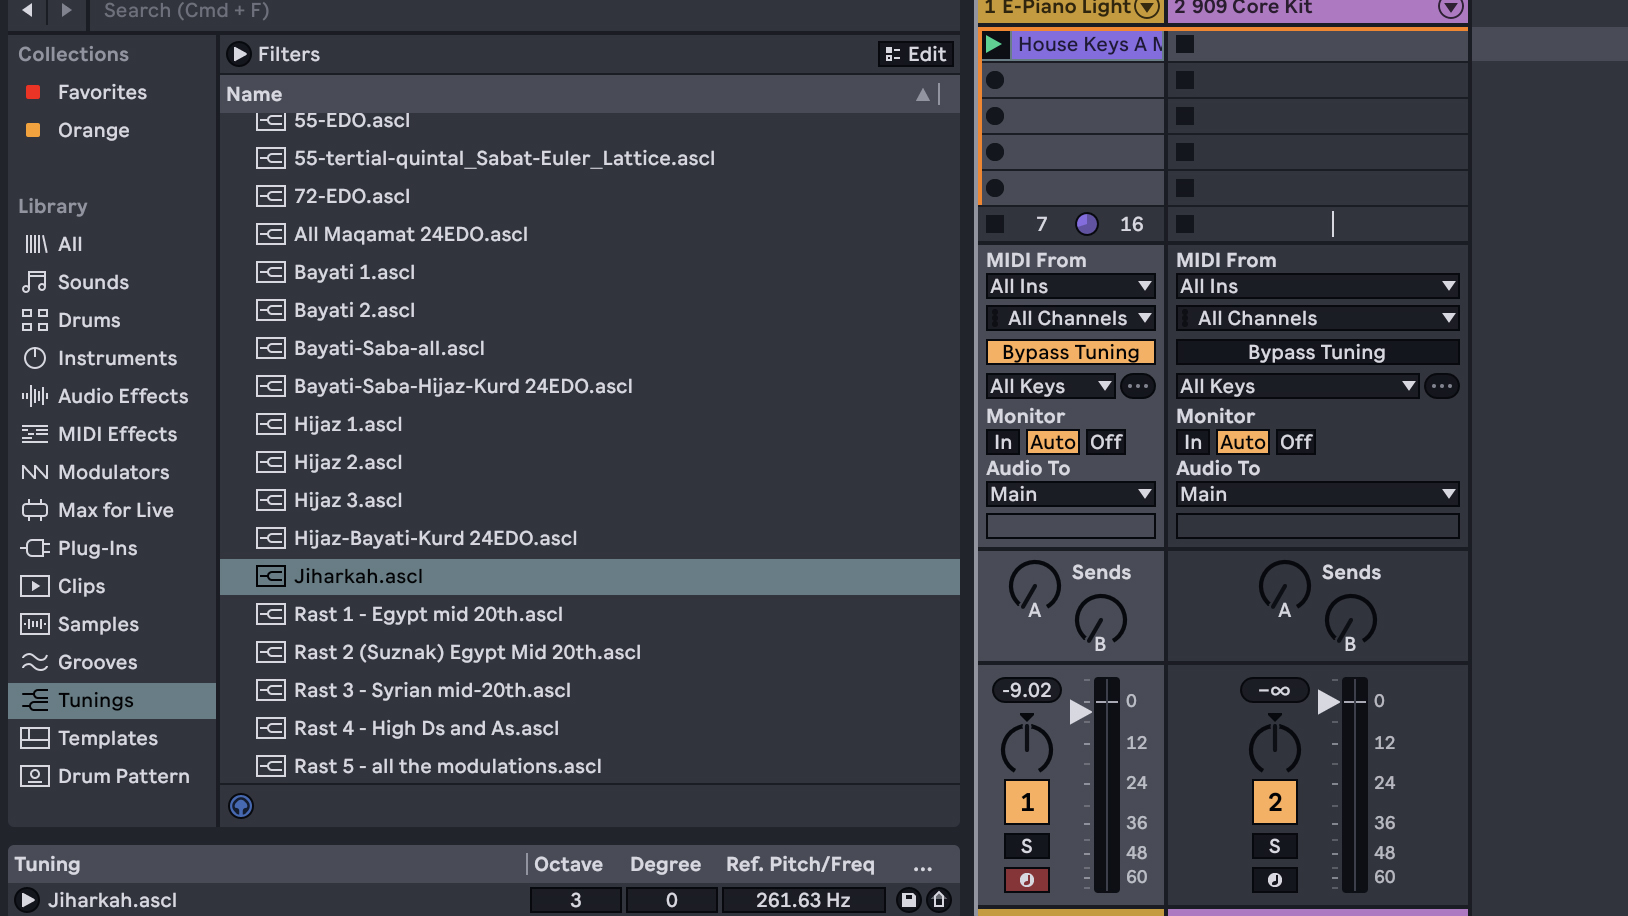
Live 12 has added a lot of enhancements that open up its accessibility and broaden what can be done with the DAW. One notable change is the ability to work with non-western and non-traditional tunings – something that has been notably absent compared with some other applications. These are accessed via a tuning pool, which looks and acts like the existing Groove Pool. Here, users can drag and drop a variety of non-traditional tunings onto a project which will affect all clips and devices. It’s also possible to edit and import tunings yourself.
What’s important to note is that tunings and scales are not the same thing. Scales in Live are based on the twelve notes in equal temperament, the most common tuning in Western music. While applying a scale can lock out some of those notes, you’re still working within the same twelve pitched notes.
Applying a tuning will change the frequency and relationship between notes themselves, meaning you’re no longer working with those same twelve pitches. Applying a tuning will also lock off the scale function, which helps to avoid confusion.