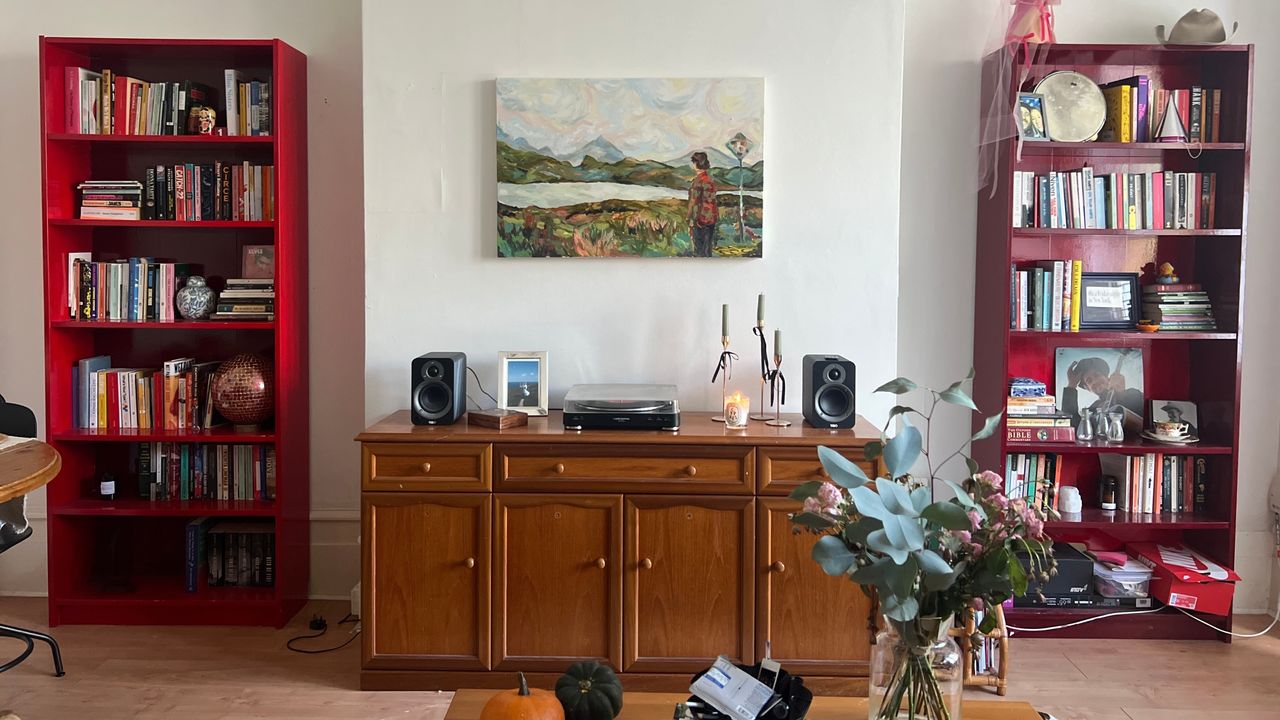
Moving house presents an exciting blank canvas and an opportunity to try something different. When I moved flats in London, our new space had high ceilings and large blank walls. Suddenly, with all my books, knick-knacks, mementos, and treasures with nowhere to go, I knew that something different was going to be an IKEA Billy bookcase hack.
If you've spent any time scrolling Instagram reels for DIY inspiration, you'll quickly find that IKEA's BILLY bookcases are a very popular base piece for crafty ideas. But I'm certainly no pro-builder, so instead of pulling out a drill, I reached for the tool I'm much better with: a paint brush.
Now coated in a bright 'look-at-me' fire engine red paint (Little Greene's 'Baked Cherry' to be specific), do I love the way my bookcases look? Absolutely. But no IKEA hack comes without a little trial and error, and here are three things I wish I'd have known before I started.
1. Paint the Furniture Once Assembled
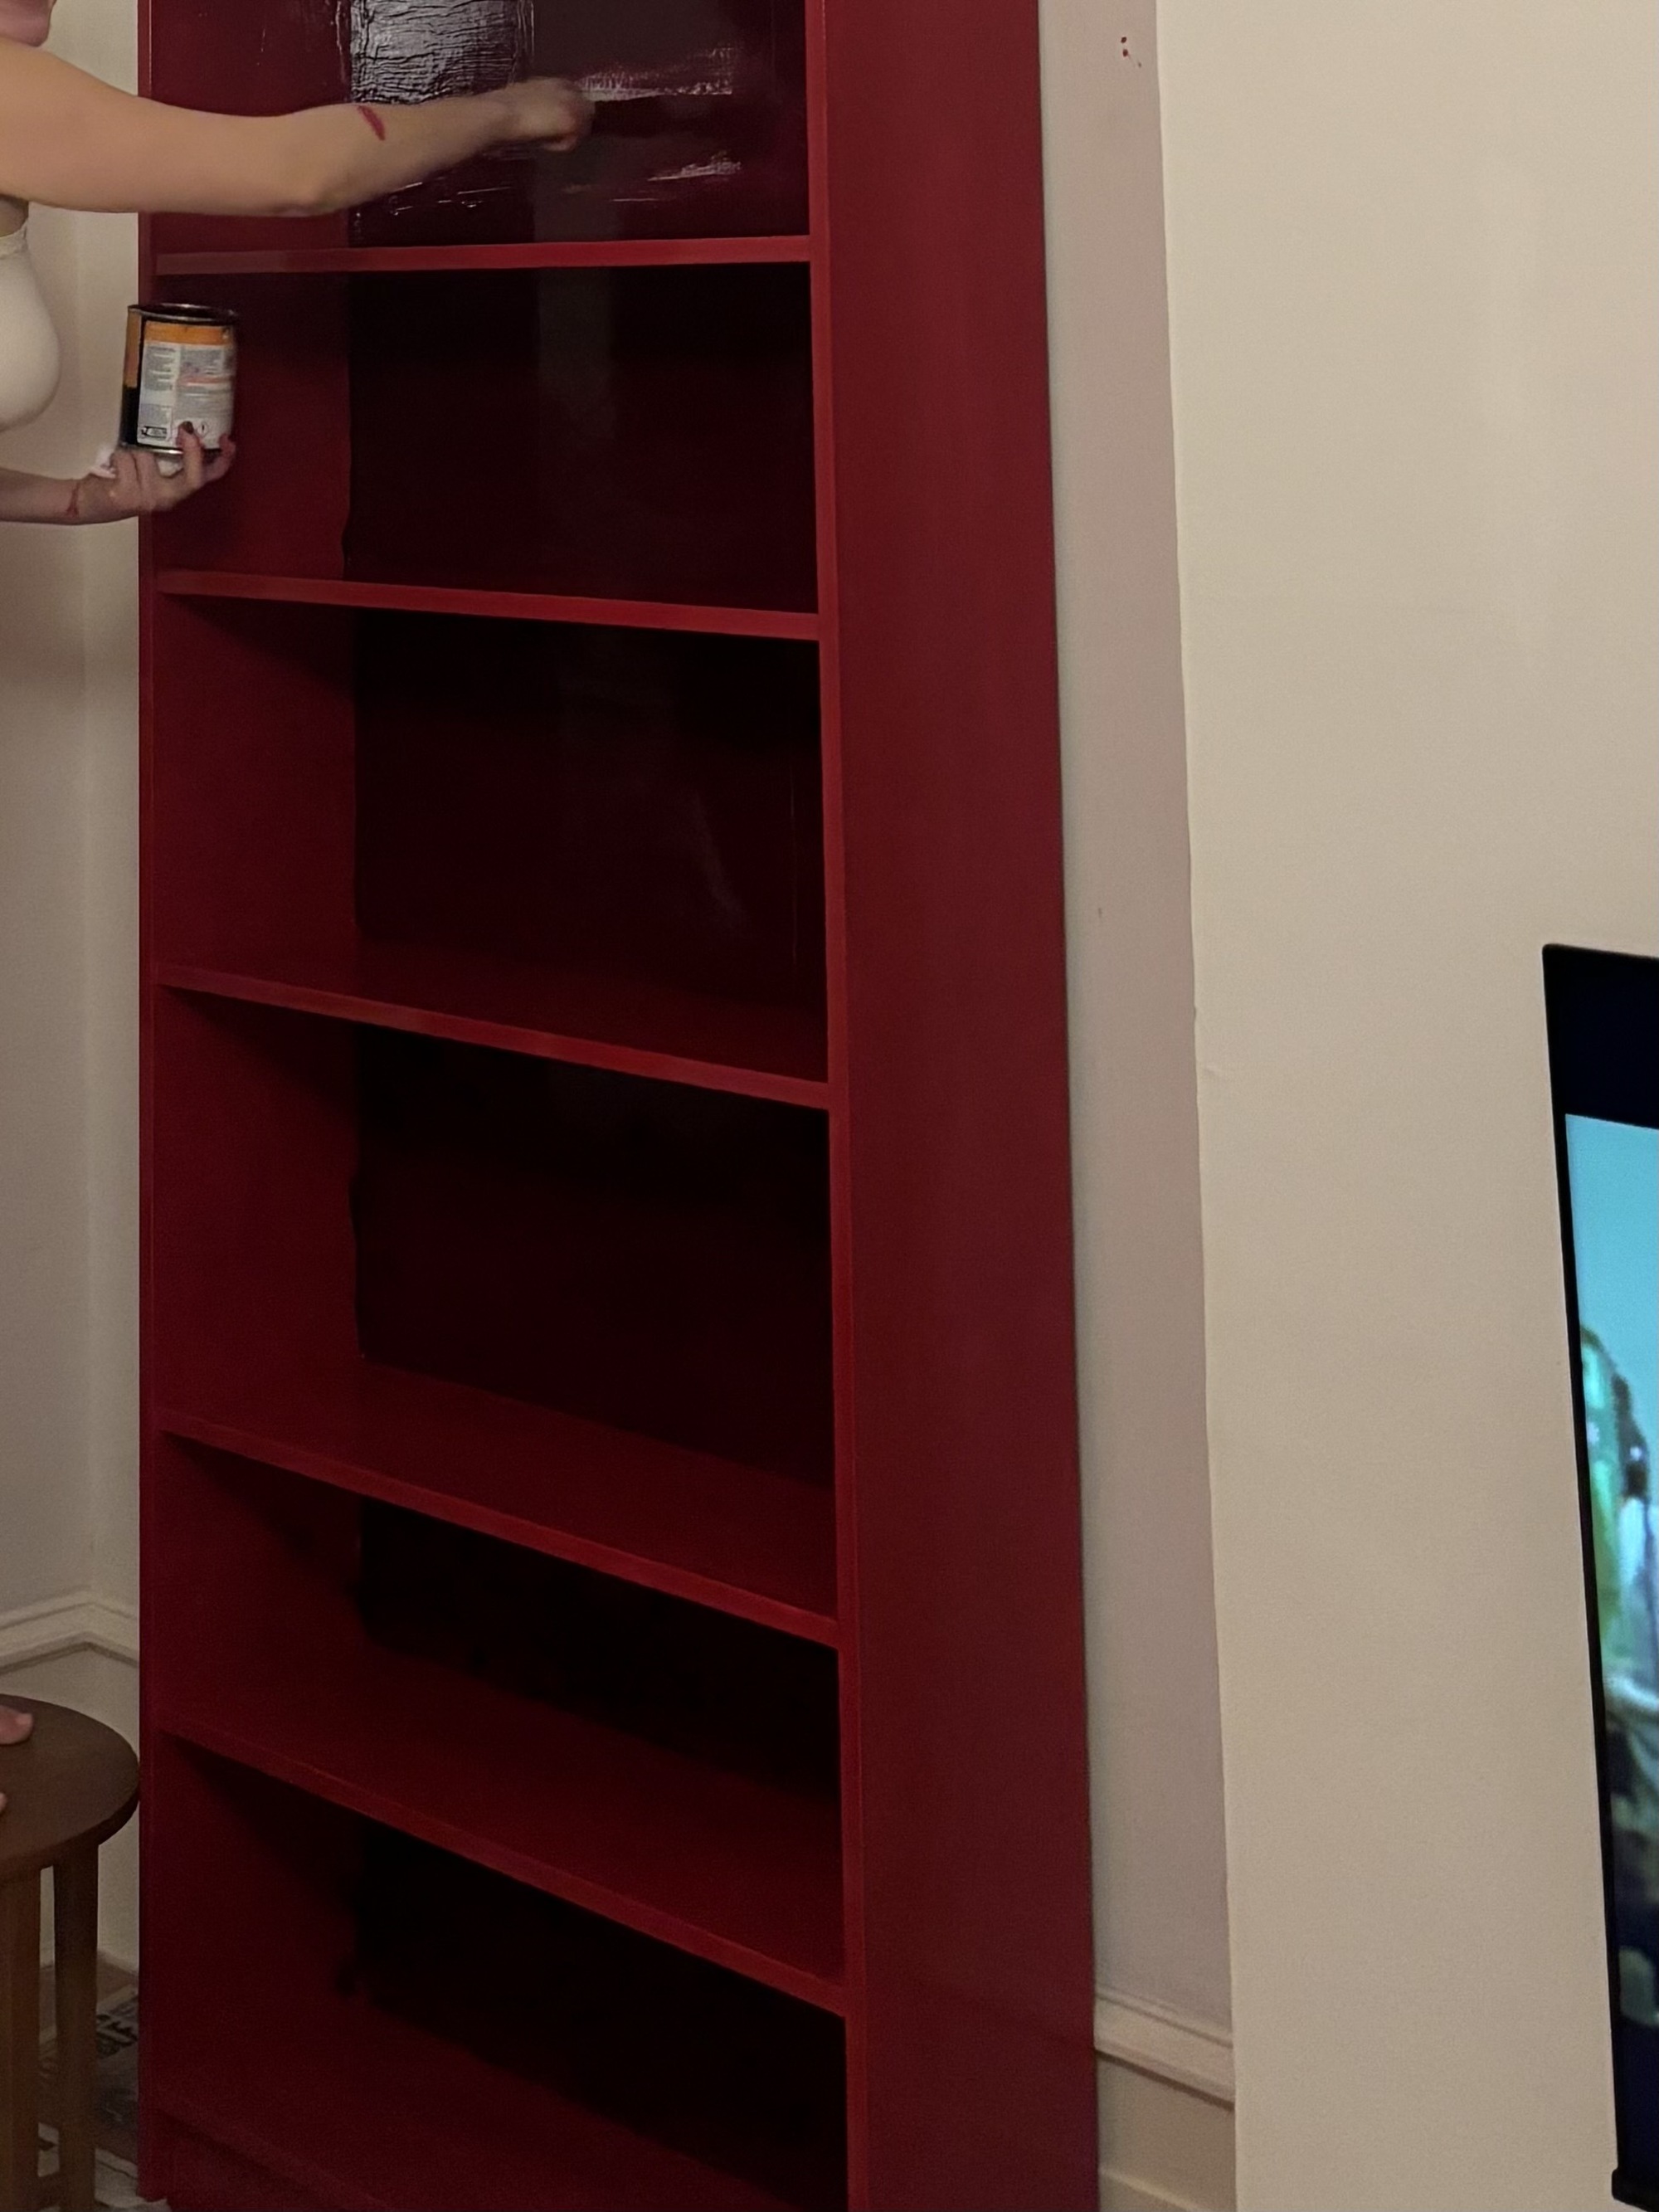
Should you paint the individual pieces first or assemble the bookcase and then paint? This was the biggest question I grappled with for this DIY. It felt more logical to assemble and then paint, but I'd read that painting the pieces individually before building allowed for a more even coating and finish.
After a few attempts and some deliberation, I'd recommend assembling first — especially if you're living in a small space or an apartment that lacks an outdoor area. Without a dedicated space to dry each piece, painting before assembly quickly becomes quite overwhelming (something I learned the hard way).
"I've done it both ways," interior stylist and experienced IKEA hacker Luke Arthur Wells tells me, "and honestly, there's not enough of a benefit of painting the furniture before building it to make it worth your while, especially if you don't have a huge space to work on it."
Plus, you're more likely to scratch your paint job when assembling it afterwards.
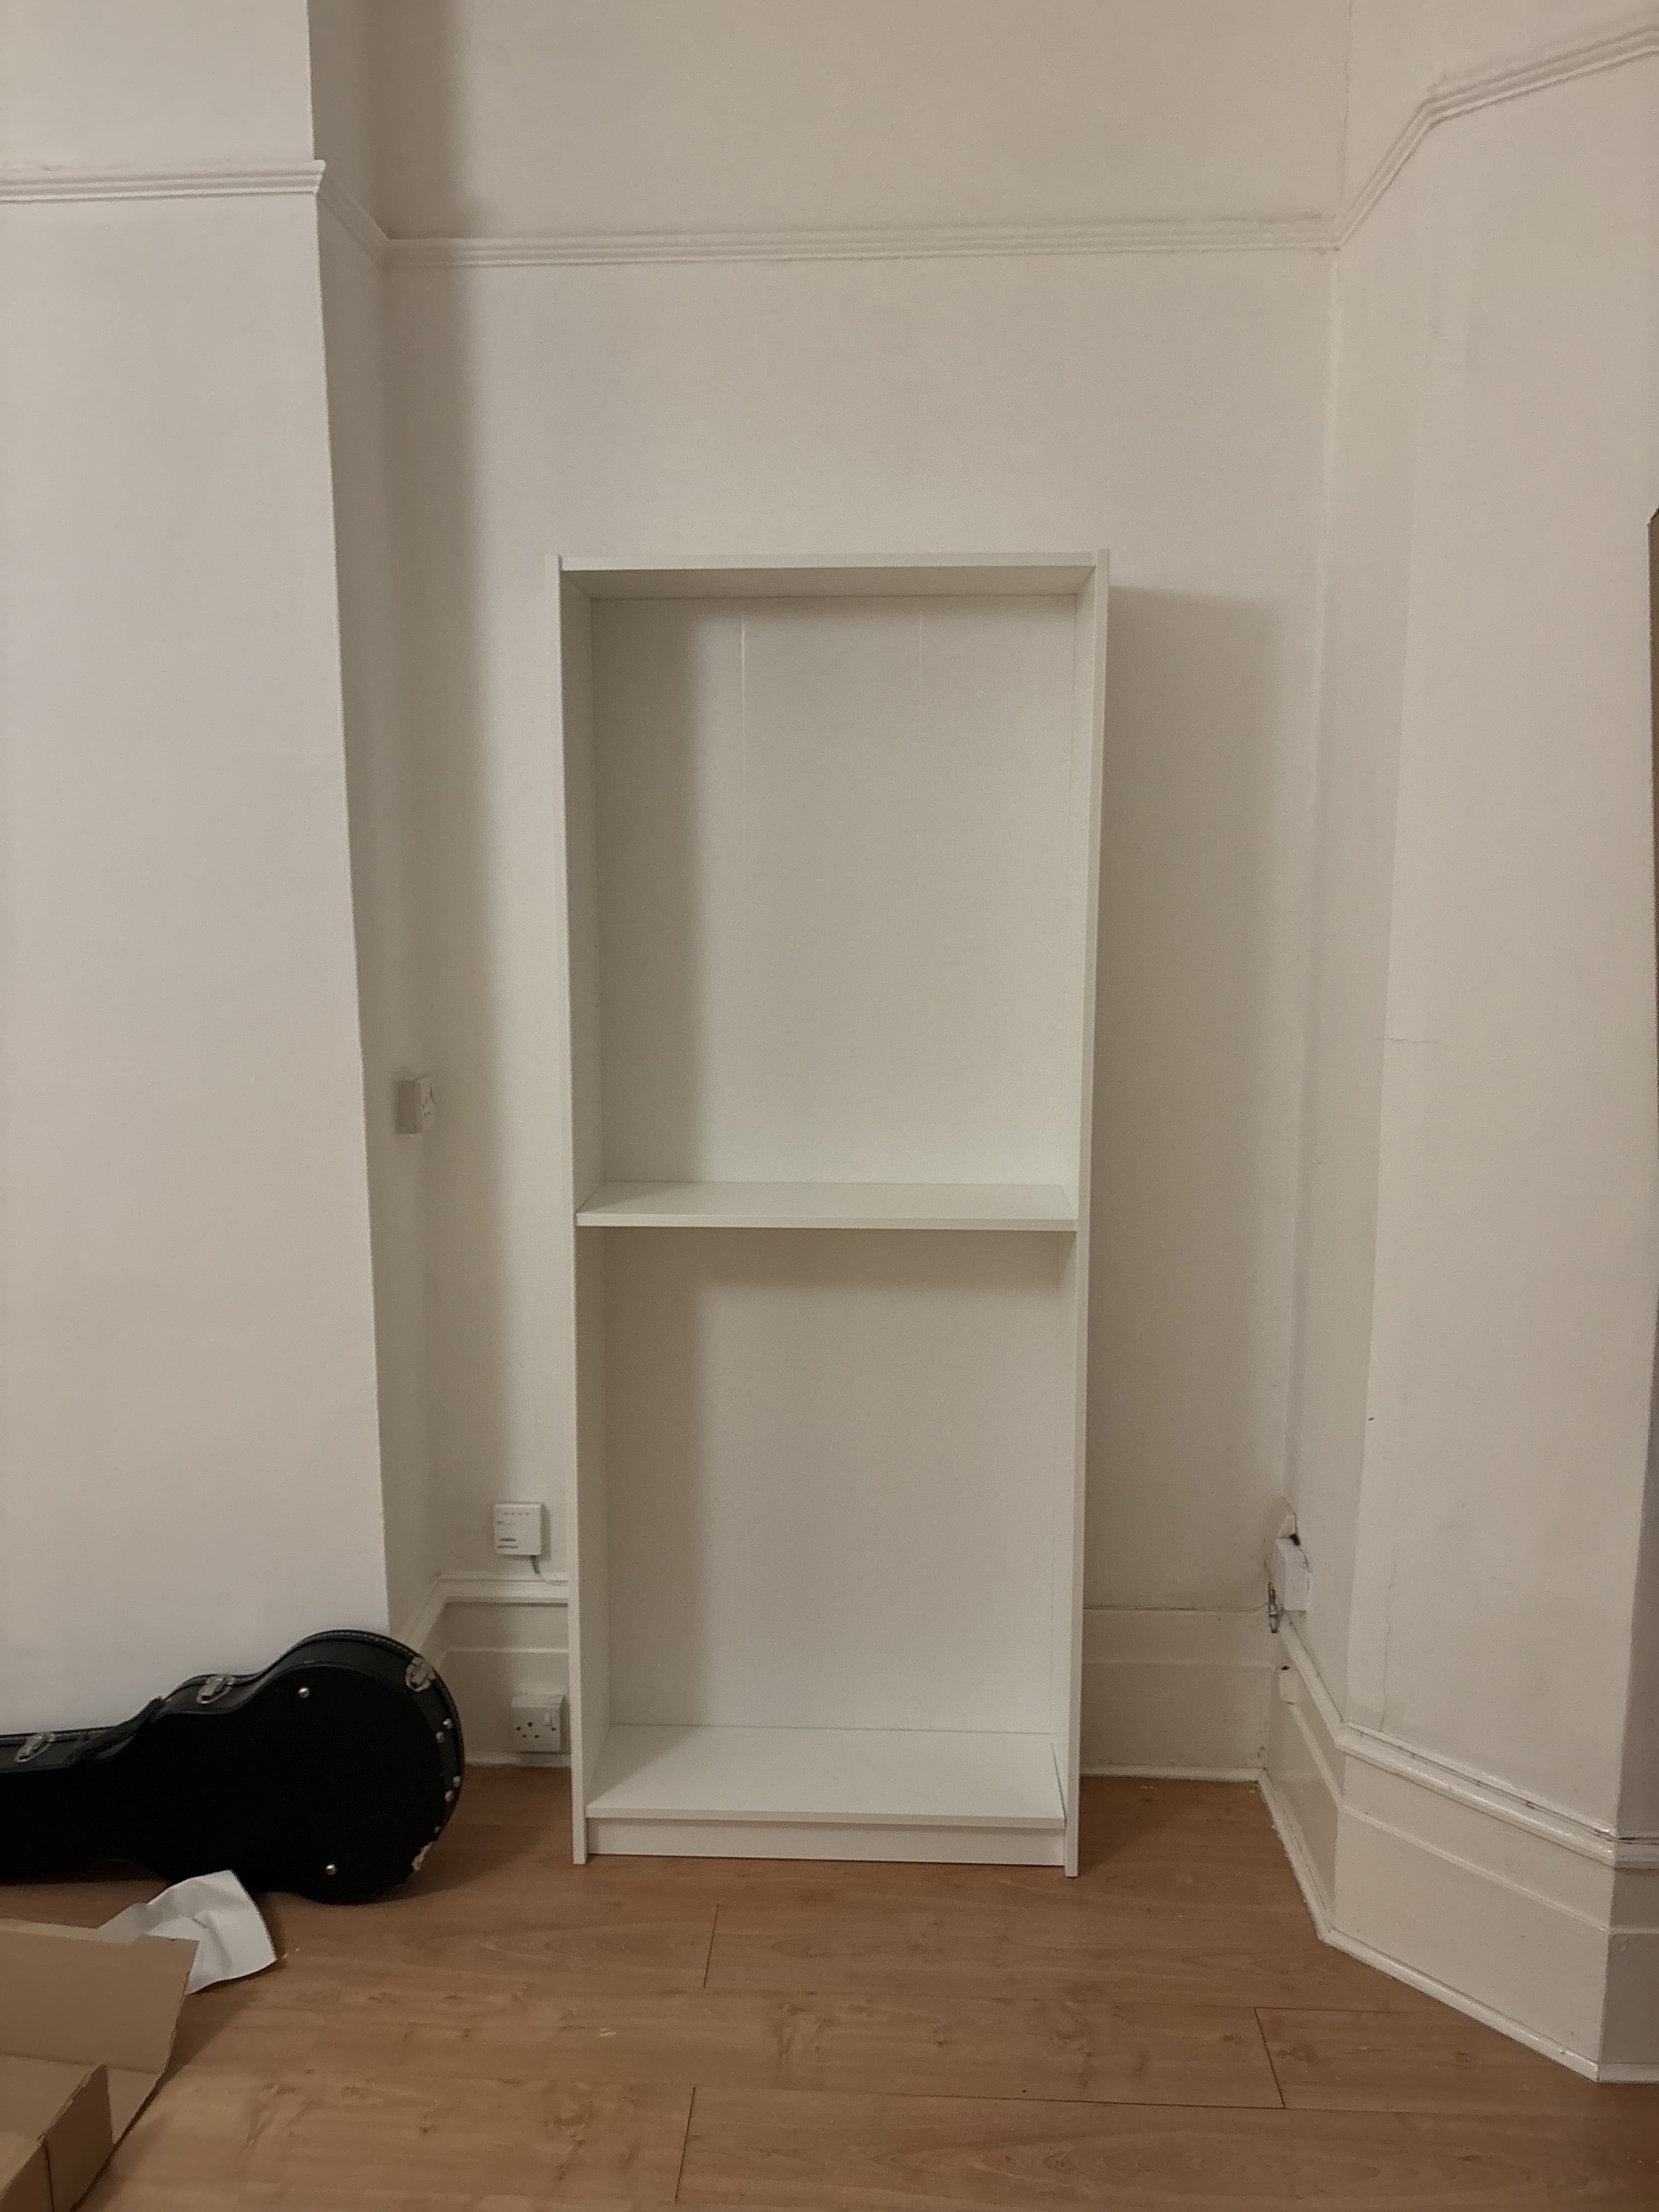
There are several variations of the Billy unit on the IKEA site, but this style is the most popular and the one that I used. If you don't have an IKEA near you, you can also shop for IKEA Billy bookcase alternatives.
2. Invest in the Right Type of Paint
If you take anything from this piece, let it be that investing in quality paint from the best paint brands is crucial for the best (and most lasting) finish.
The BILLY bookcase is made from particle board and has a smooth laminate finish. If you are well-versed in DIY projects, you can sand the surface (by hand is easiest, as all you really need is a touch more grip) before beginning; however, this isn't necessary.
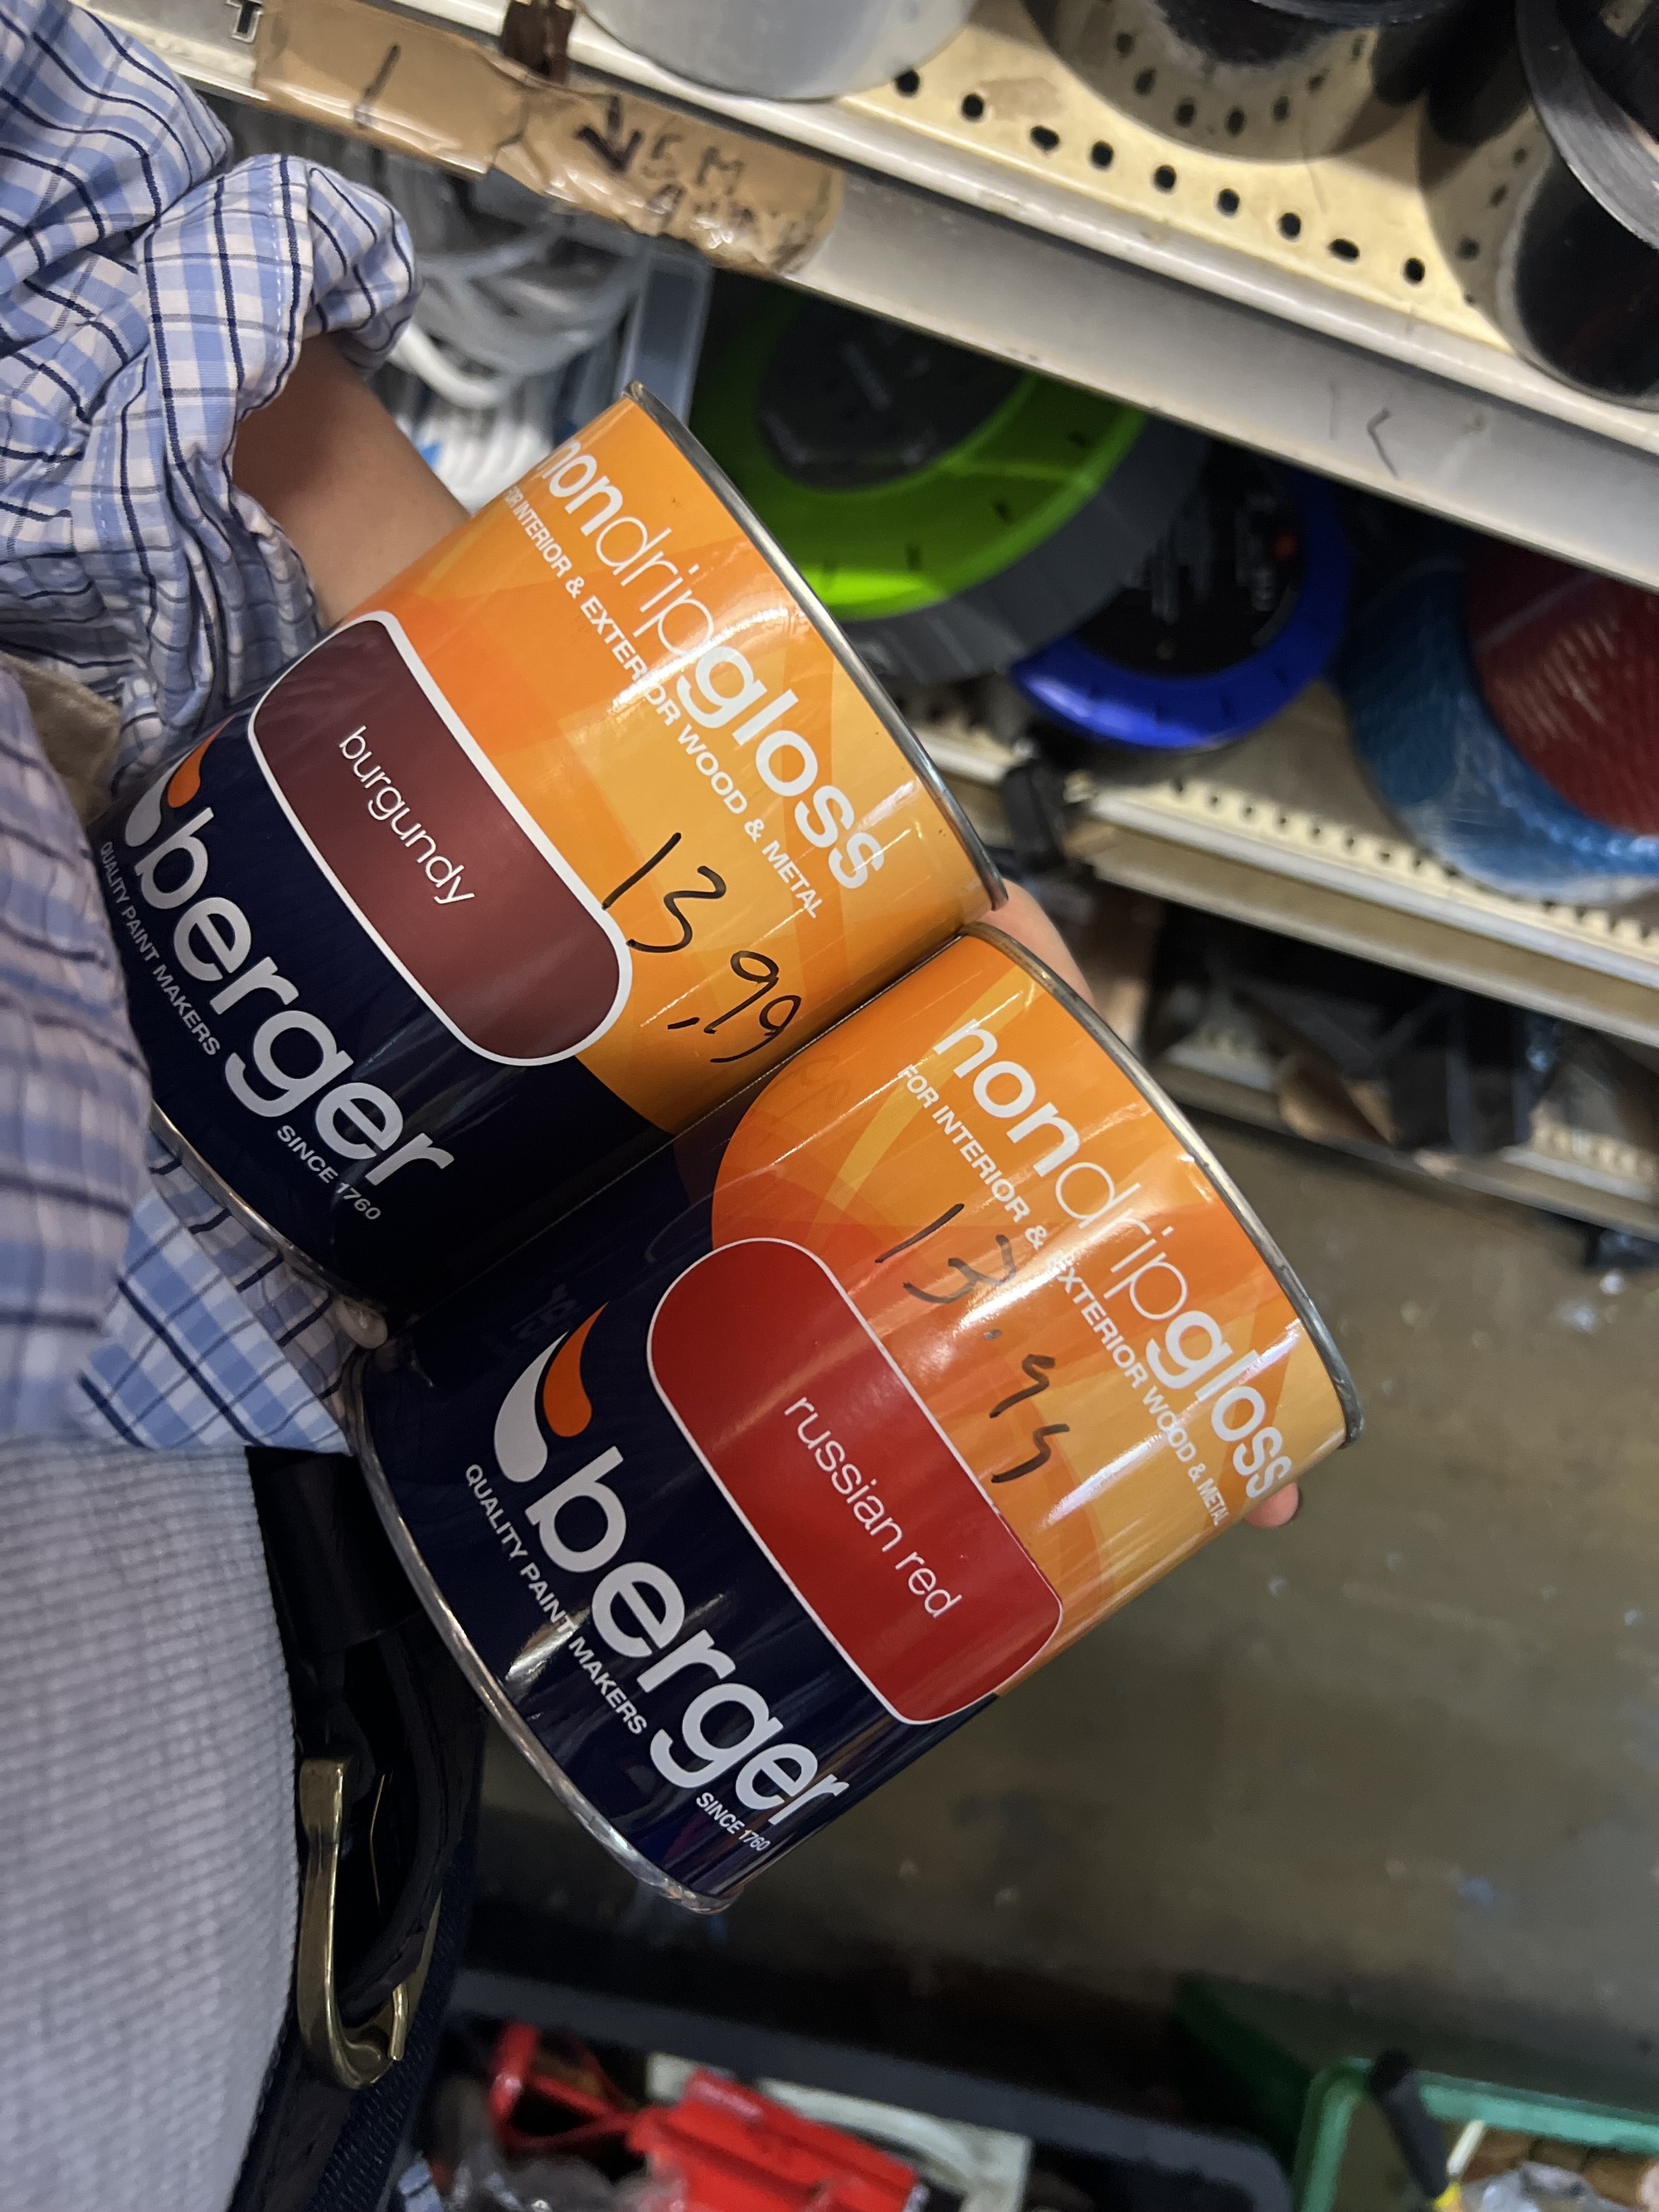
My first mistake was prioritizing convenience over quality. I went to a local hardware store to save money on bright red and burgundy paint. When I came home to paint the swatches, the fumes were strong, the paint was thick and sticky, and it scratched easily when I tried to assemble the pieces. All of that to say, don't cut corners when it comes to quality paint. Since you will be sliding books on and off and moving around decor, choosing a durable paint finish is essential.
Luke says he'll always paint in a matte eggshell finish for DIYs. And, "While it's pretty durable, I always finish with this particular Polyvine Protective Decorators Varnish Dead Flat Finish from Amazon," he adds. "It goes on super matte and will help your paint job last way longer."
I used Little Greene's Baked Cherry in a gloss finish for the outer part of the bookshelves, and I absolutely loved how it turned out. My living room has lots of natural light, and the gloss allows for the shelves to catch that light more easily.
Graham & Brown's color of the year for 2026 would make the perfect pop of burgundy. Plus, you can use the leftover paint to accent other details in the room, like trims or a side table that needs a refresh.
If decorating with red is not your speed, I totally understand. Another shade that would work well on bookcases is this deep navy blue. Not to mention, it will help hide any potential mistakes.
3. Prep Before Paint
More than anything, don't rush. Admittedly, I am not the most patient person, and once I started painting, I got so excited to see it done that I, regrettably, did not take the right preparation steps.
Part of the trouble came from assembling the shelving unit before painting — you end up with more nooks and crannies that you'll need to be careful to coat. I also chose to paint the back of my bookshelves a darker red than the shelves and sides. I love the result, but doing a tonal color-blocking technique requires more precision. Here is how I'd recommend doing it in hindsight:
- Lay down a canvas, newspaper, or tarp on the ground, and keep the bookcase pulled away from the wall. This way, you will avoid making any painting mistakes that result in wet paint on your floors or walls.
- If you are working with two colors, place painter's tape (like this three-pack from Amazon) along any lines you want to have straight edges. It takes more time, but having clean lines will be incredibly worth it in the end.
- And lastly, Luke adds: "I'm not always a primer sort of person, but when painting laminate IKEA furniture, I'd recommend it. It's designed to have better adhesion than standard paint, so it'll cling better to give a better base for your topcoat, and likely mean that the finished paint is less likely to chip and flake." His gold standard for primer? Zinsser Bullseye 1-2-3, which you can buy from Amazon, too.

Ready for a more challenging IKEA renovation? Don't skip Livingetc's guide on the things we wish we knew before DIYing the IKEA Pax wardrobes.