If you're keen on doing a spot of decorating at home, then it's likely you'll have a stash of masking tape at home to ensure you get crisp straight lines (and protect any sockets and switches from stray drips of paint).
But it turns out this handy (and inexpensive) product can also be an essential part of a renovator's toolkit too. After my friend, who is currently renovating her house, told me delicate masking tape had been an absolute gamechanger during her renovation, it got me thinking about the clever tips for using masking tape that I've picked up over the years.
And there are three simple but effective tips that I think are particularly useful for renovators and DIYers alike, as they all apply when using a drill.
1. Prevent paint chipping
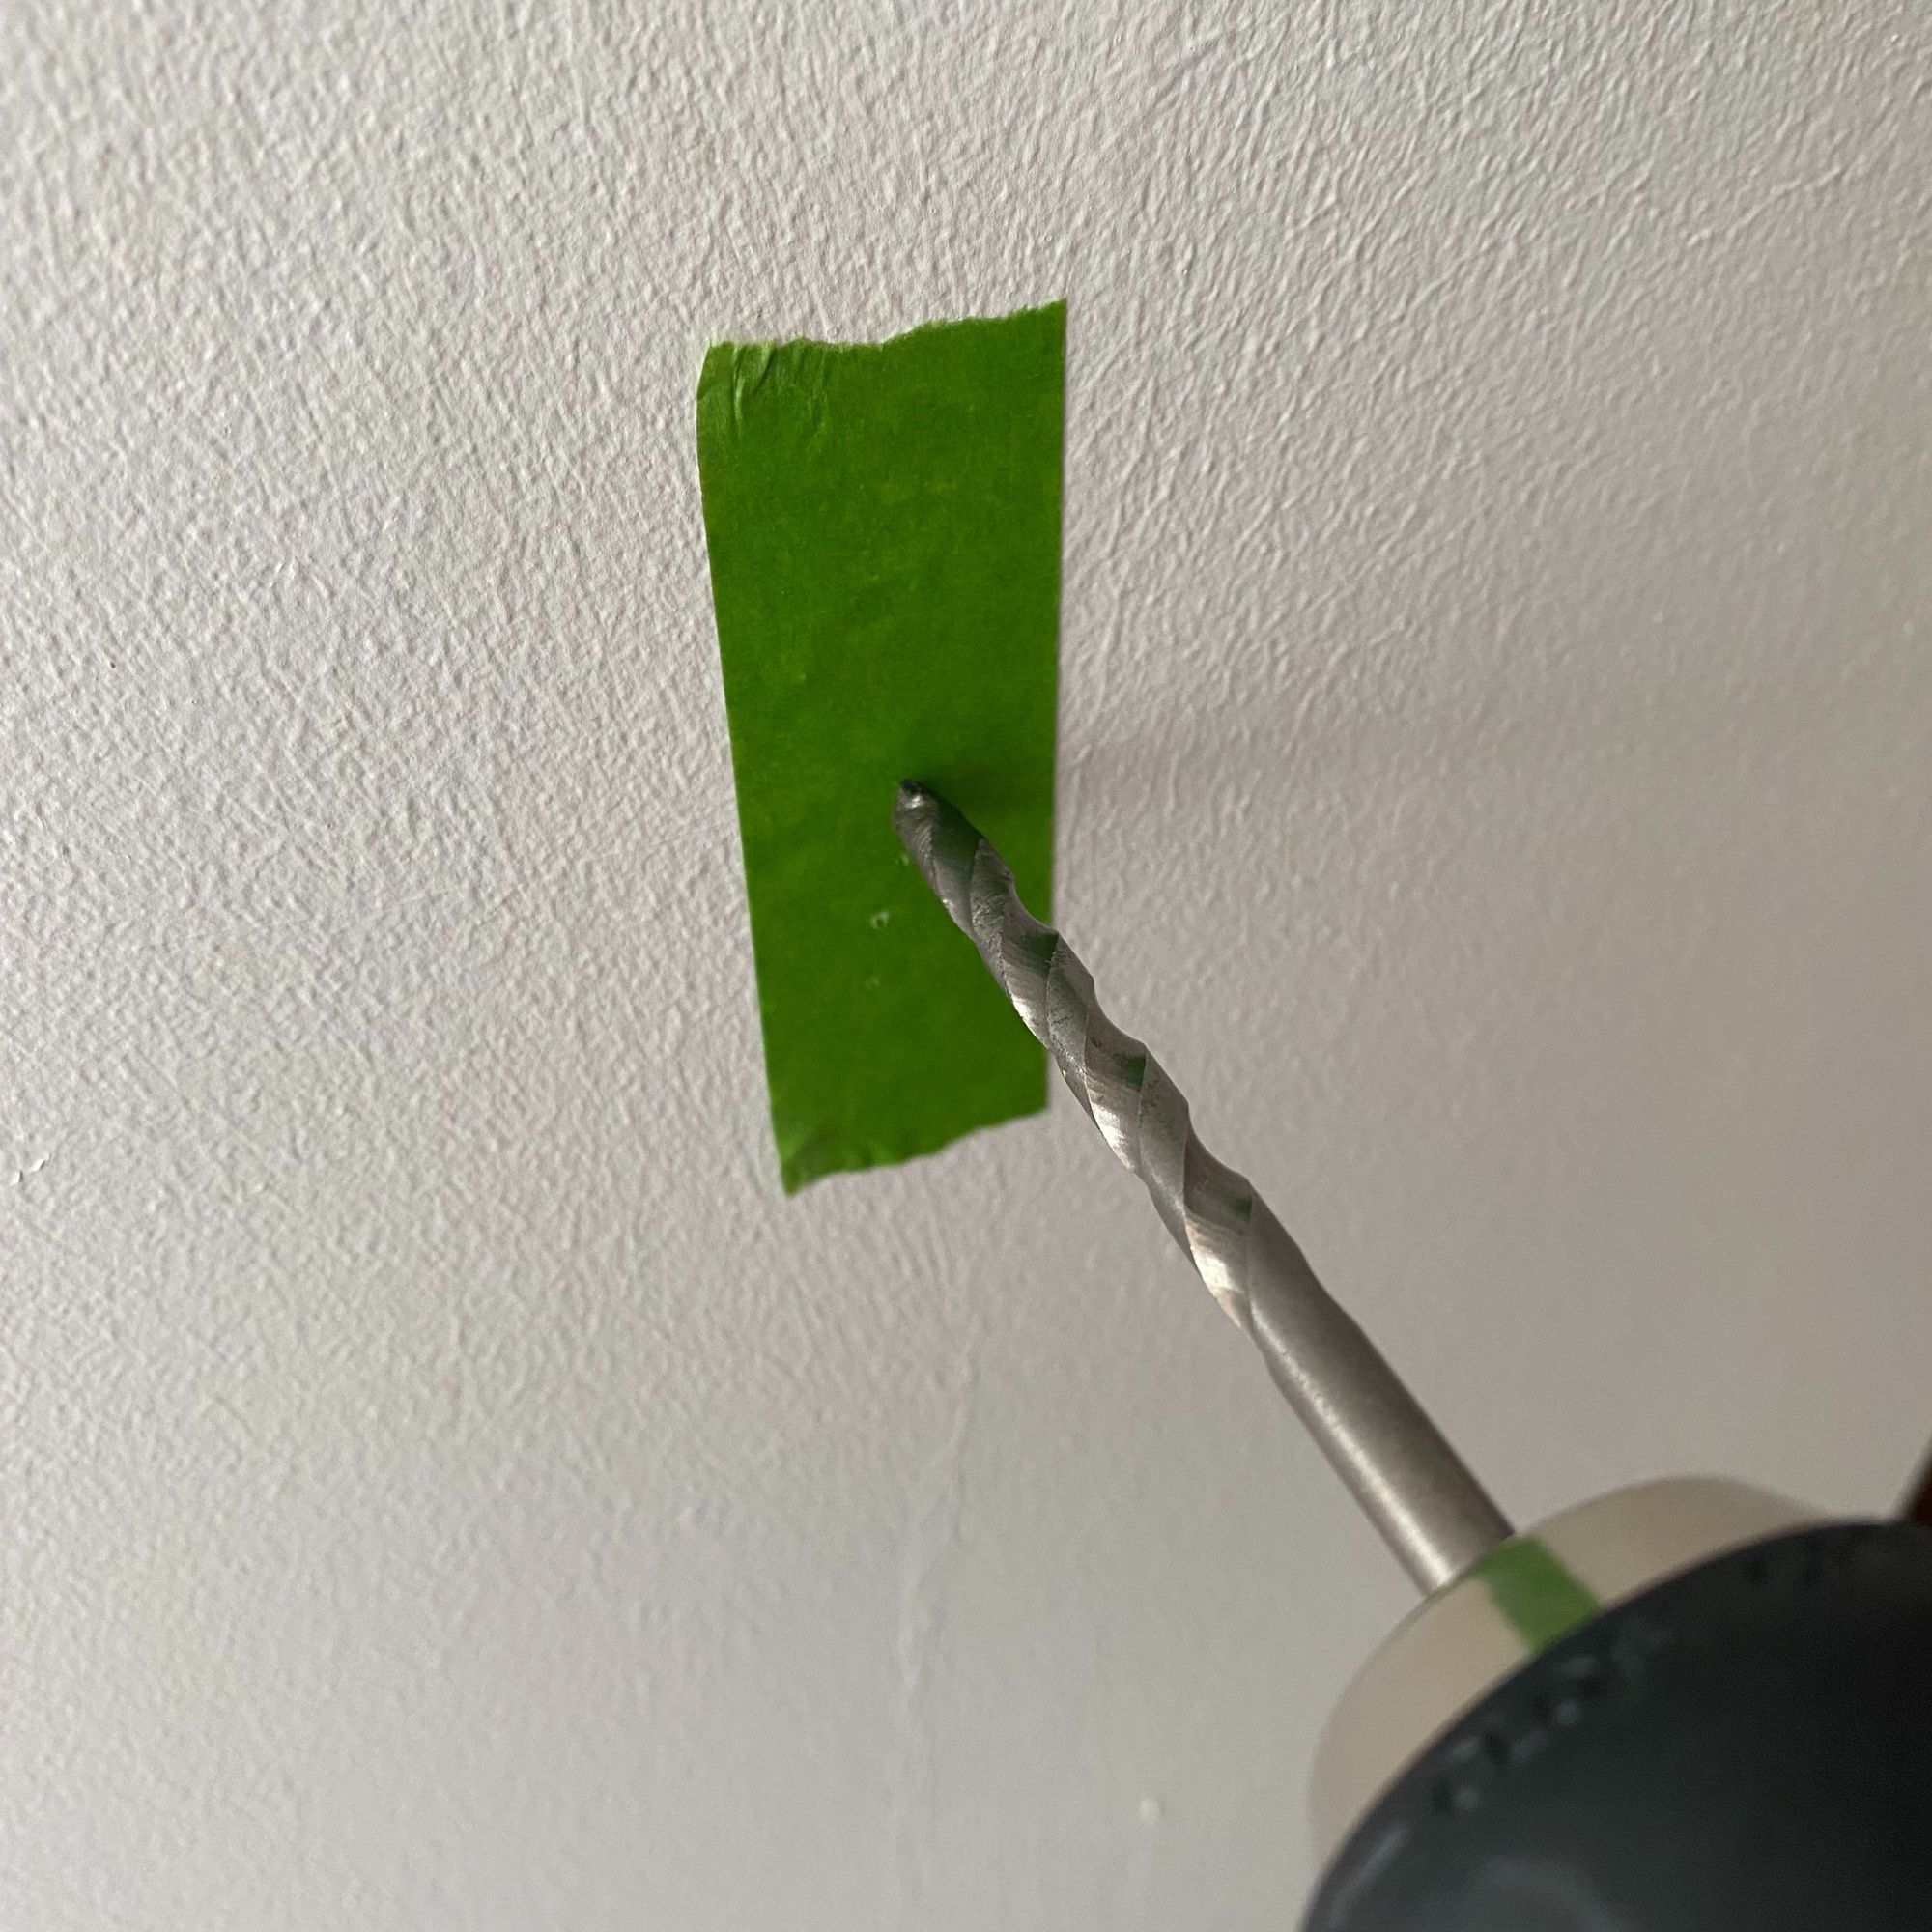
Have you ever had to drill a hole in a recently decorated room (or one that you're not planning on decorating anytime soon) only for the paint to crack and chip off around the hole? Not ideal at all.
Fortunately, a little bit of masking tape can help. Just pop a piece of tape over where you want to drill and drill through it, and then remove the tape to reveal a clean hole and your paint intact.
If the room is newly painted, it's best to wait until at least 24 hours after application to make sure your masking tape doesn't pull off any of the paint when it's removed, and if you are drilling into a surface with a particularly fragile finish, then use delicate masking tape, which has a lower tack level than standard tape.
Delicate masking tape is made with a lower-tack adhesive, which means it's ideal for use on fragile surfaces.
2. Collect dust
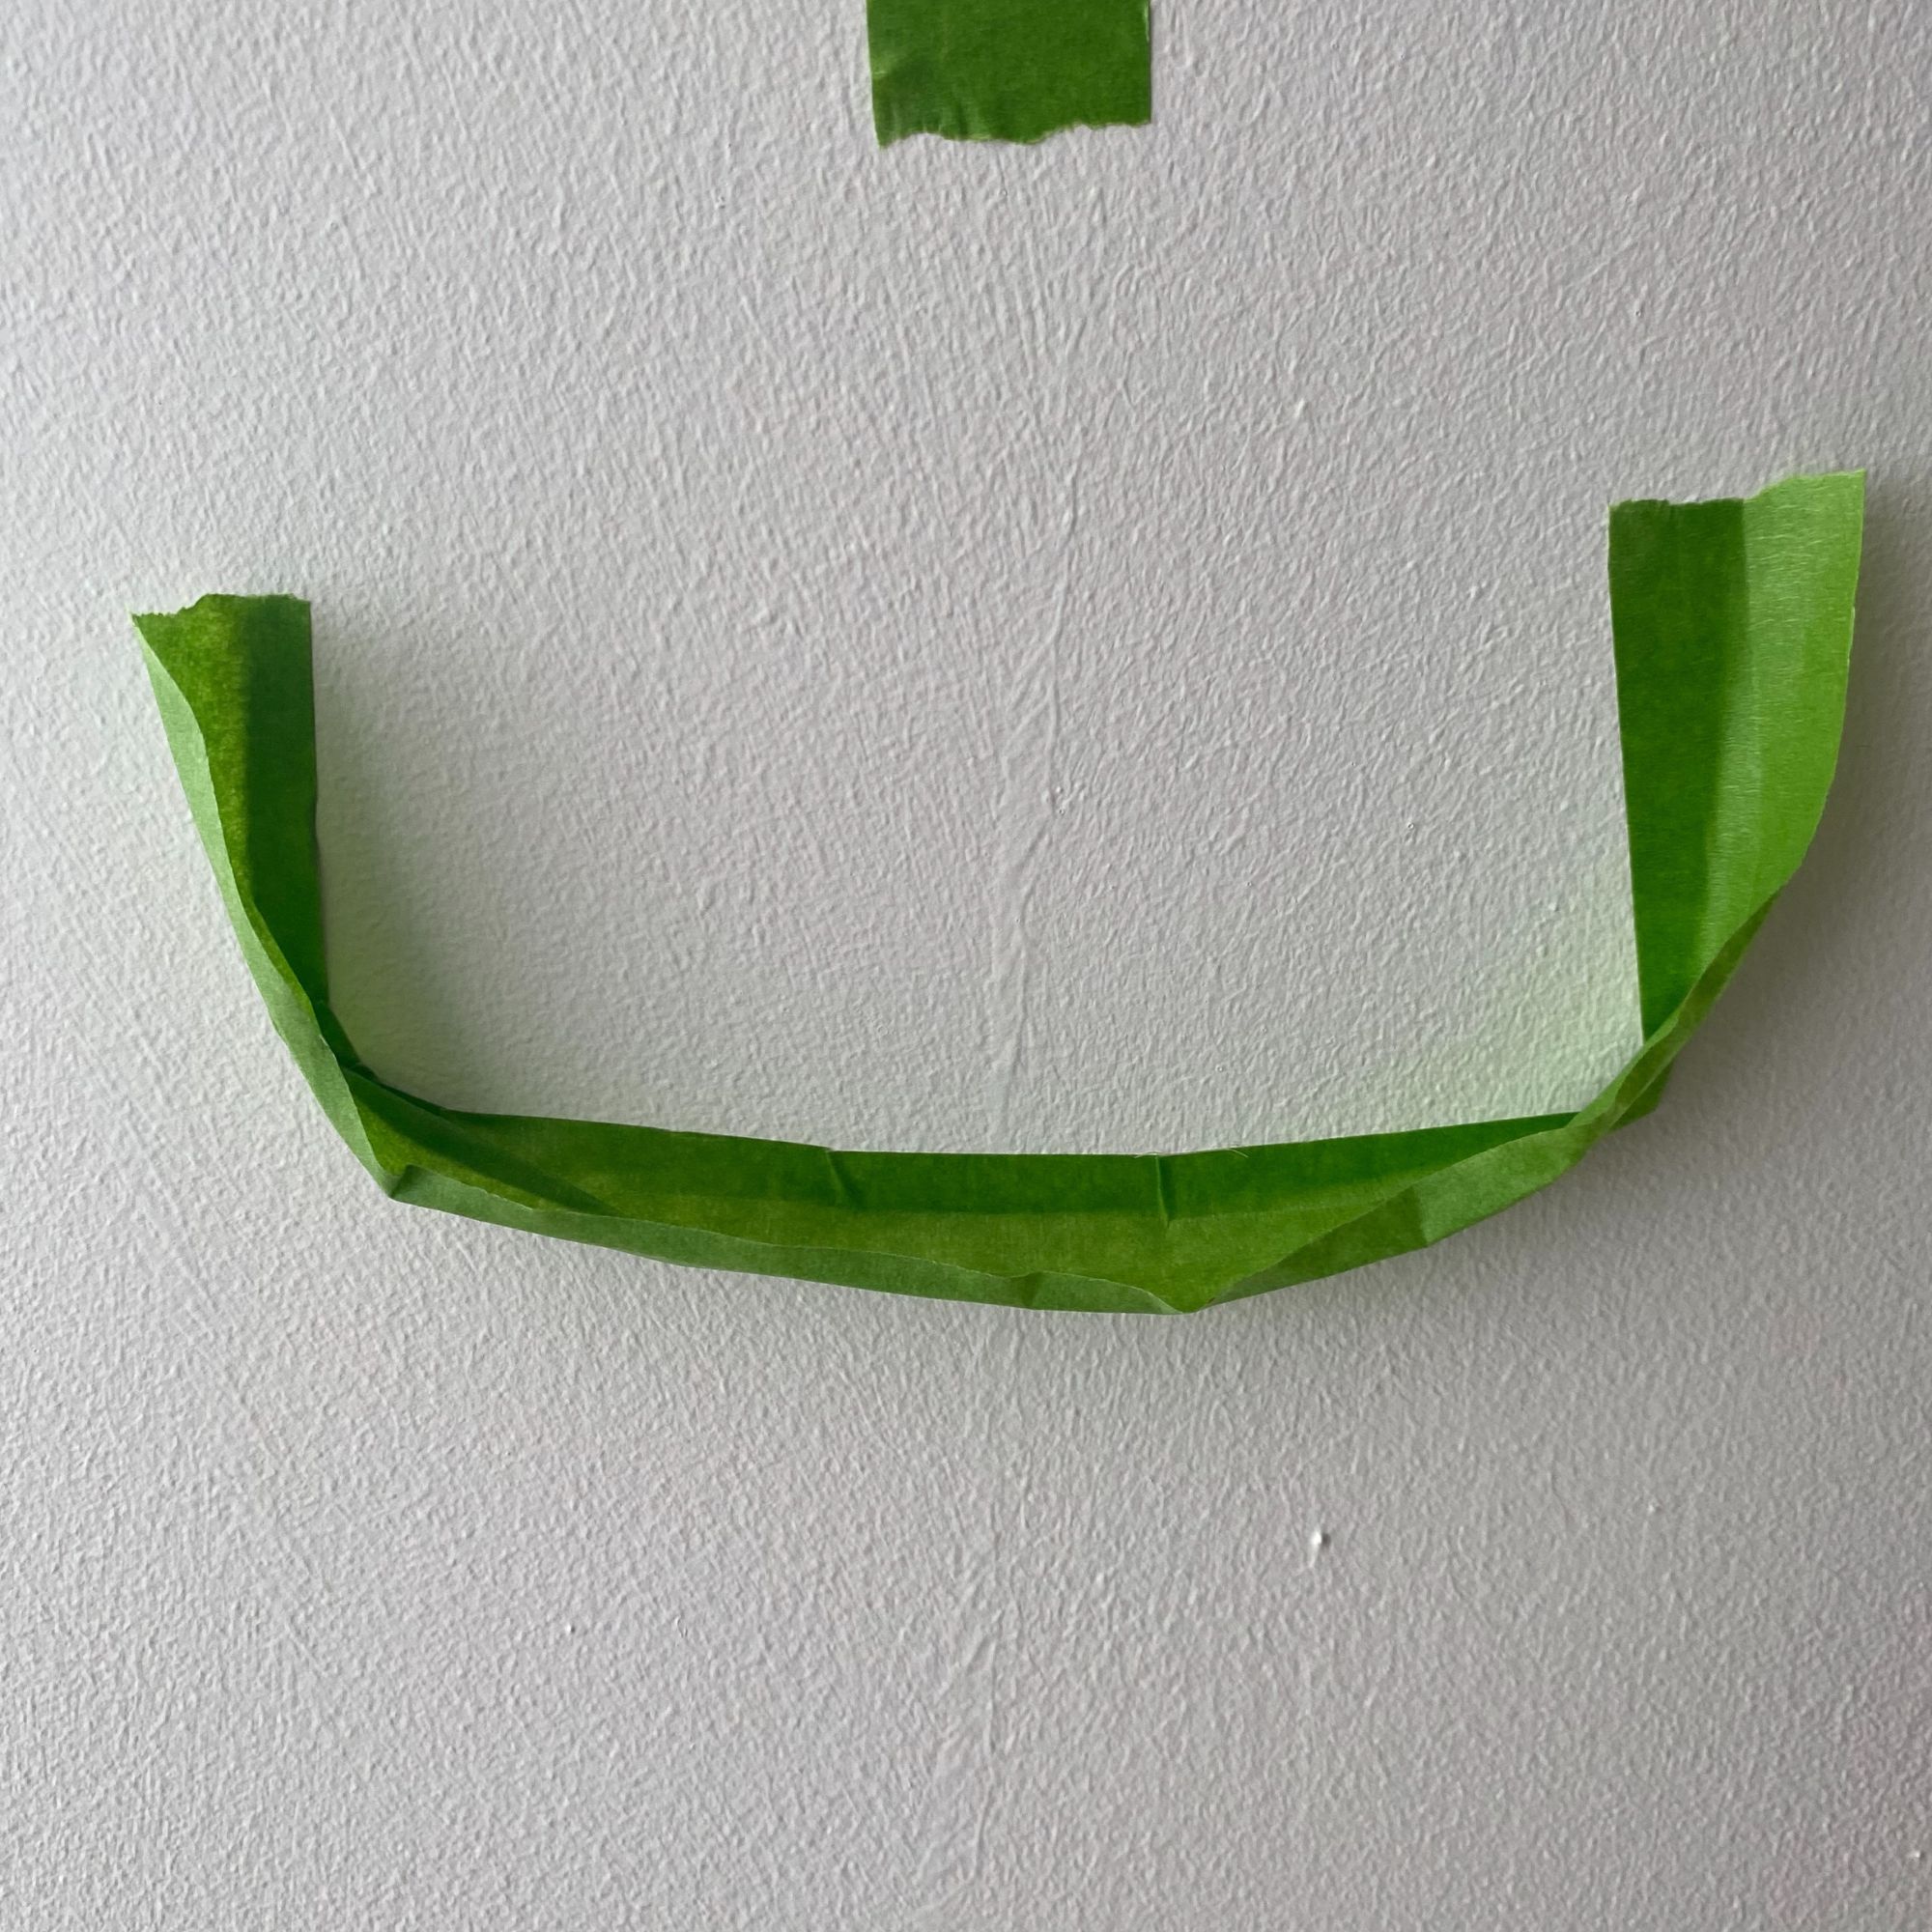
If you just need to drill one hole, and want to keep mess to a minimum, then making a little masking tape hammock below where you plan to drill can help.
I cut about a 25cm length of masking tape, and fold it lengthways into three equal sections. Then stick it to the wall beneath where you want to drill in a rough U-shape, using one third, then turn the third furthest away from the wall upwards to create a little trough to catch the dust.
Do it sticky side up and any dust and debris will stick to it, which makes clean up a doddle. But if not, you can either run your vacuum's crevice nozzle over the masking tape before you remove it, or roll the tape up as you remove it to keep the debris inside.
I find this particularly handy when my curious dog Blossom likes to come and sniff around what I'm doing — it keeps the debris far from her inquisitive snout.
I'm a big fan of the multi-surface green Frog Tape for both decorating and DIY. There's also a yellow one in the range for delicate surfaces, and an orange one for gloss and satin paint.
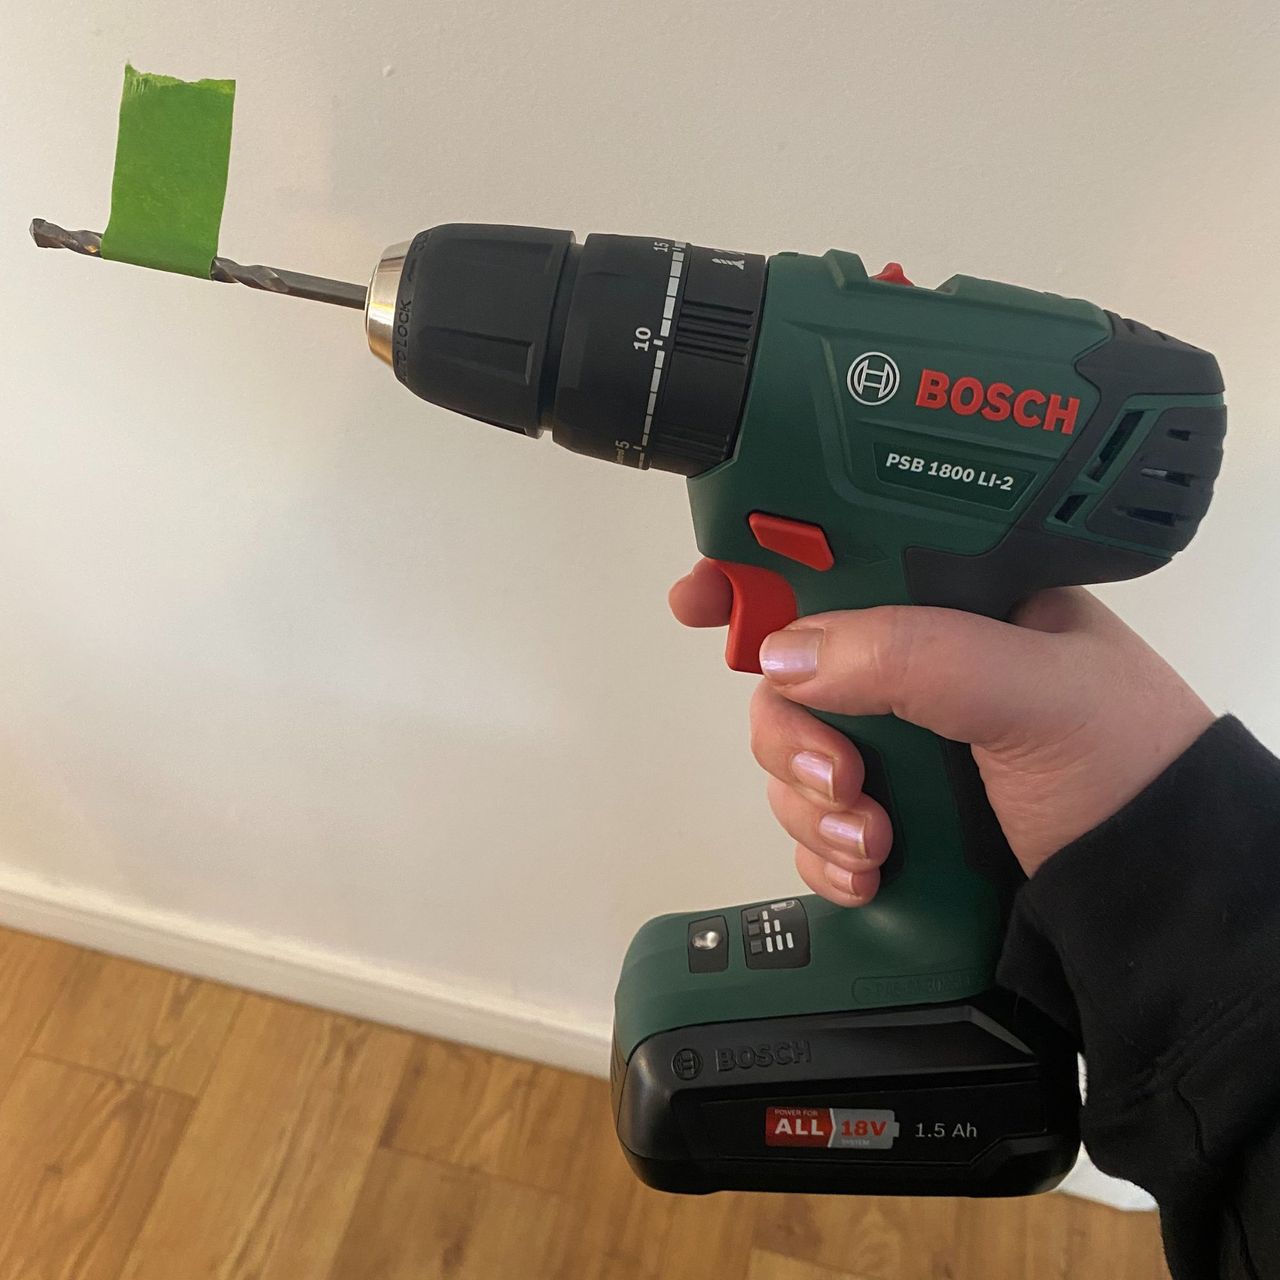
3. Ensure you only drill to a certain depth

If you need to ensure you only drill to a certain depth, or want to ensure multiple holes are drilled to a specific depth, it can feel impossible to do it with any accuracy.
This is where masking tape can come in useful. Simply measure your required depth on your drill bit, and then wrap a piece of masking tape around it at that point (I like to make a little masking tape flag for really clear visibility). You then drill through your surface until the edge of the masking tape touches it.
That way you have a really clear visual marker, and ensure uniform hole depths whenever you need.
Plus, it removes easily and leaves no sticky residue on your drill bit.
If you want to build up your DIY confidence, try these easy DIY projects that will give you lots of opportunity to practise.