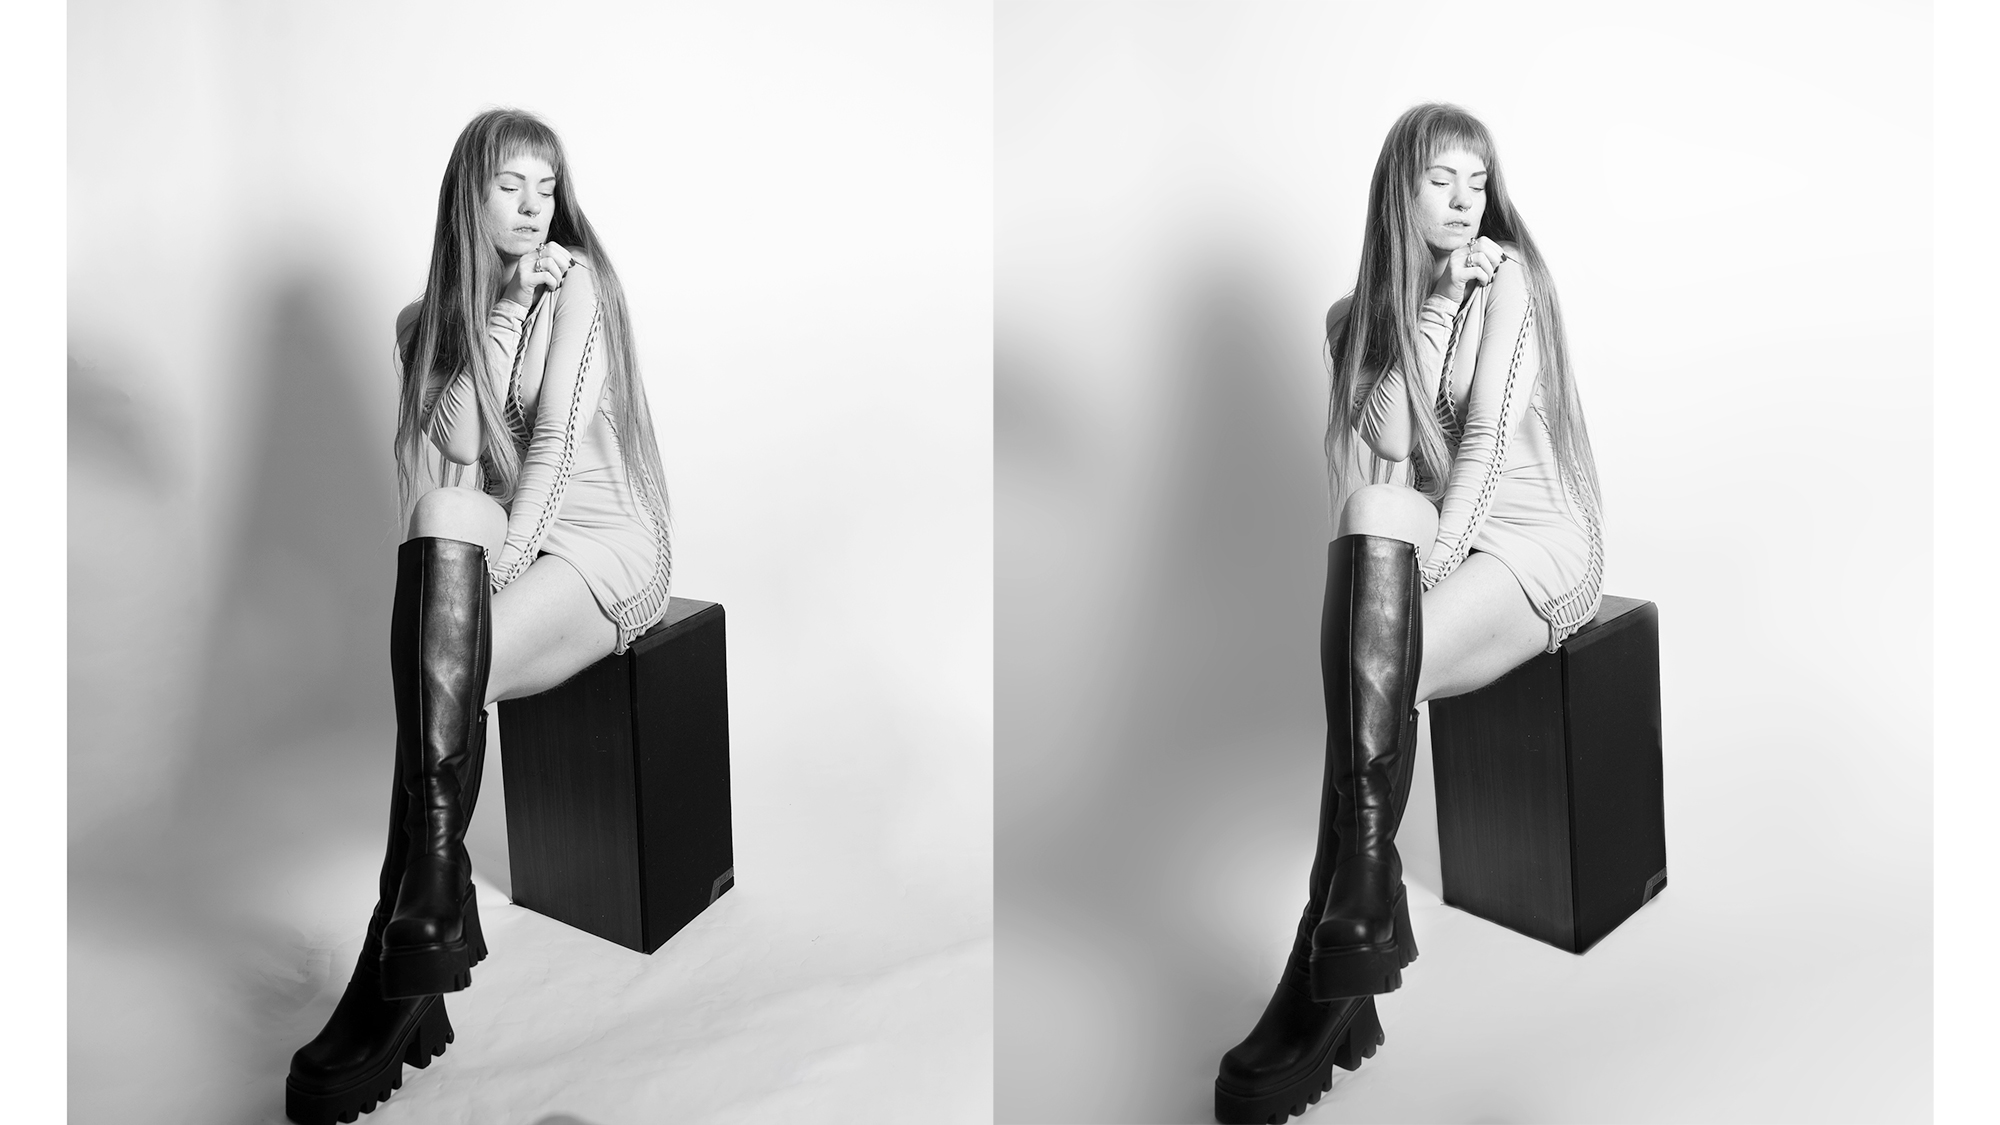
Unless you have a pop-up backdrop, you would almost certainly have battled to keep your background looking smooth and wrinkle-free. It doesn't matter whether you're shooting with paper background rolls or colored fabric, wrinkles are almost impossible to remove entirely – but luckily there is a way you can smooth a background in Photoshop.
I don't want to think how many hours I've spent steaming, ironing or unrolling new sections of backdrop, only for them to crease again straight away. Unless you use one of the best collapsible backdrops for photography, which are naturally taught, you are bound to get the odd wrinkle. But rather than stress about it on the day and let it detract from the shoot, there is a simple and effective way you can remove unwanted wrinkles in post-production.
• Transform your shooting space with the best backdrops for photography
The phrase "there is more than one way to skin a cat" applies here – I'm sure there are lots of ways you can do this, it just so happens this is the way I find easiest and fastest. This is a particularly useful trick to use alongside our expand a background in Photoshop tutorial, which you can do in just five clicks.
1. Open your image and duplicate
Start by opening your image and in the Layers section, duplicate your image by either right-clicking and selecting 'duplicate layer' or by hitting ctrl / command + J. Make sure you are working on the duplicated layer.
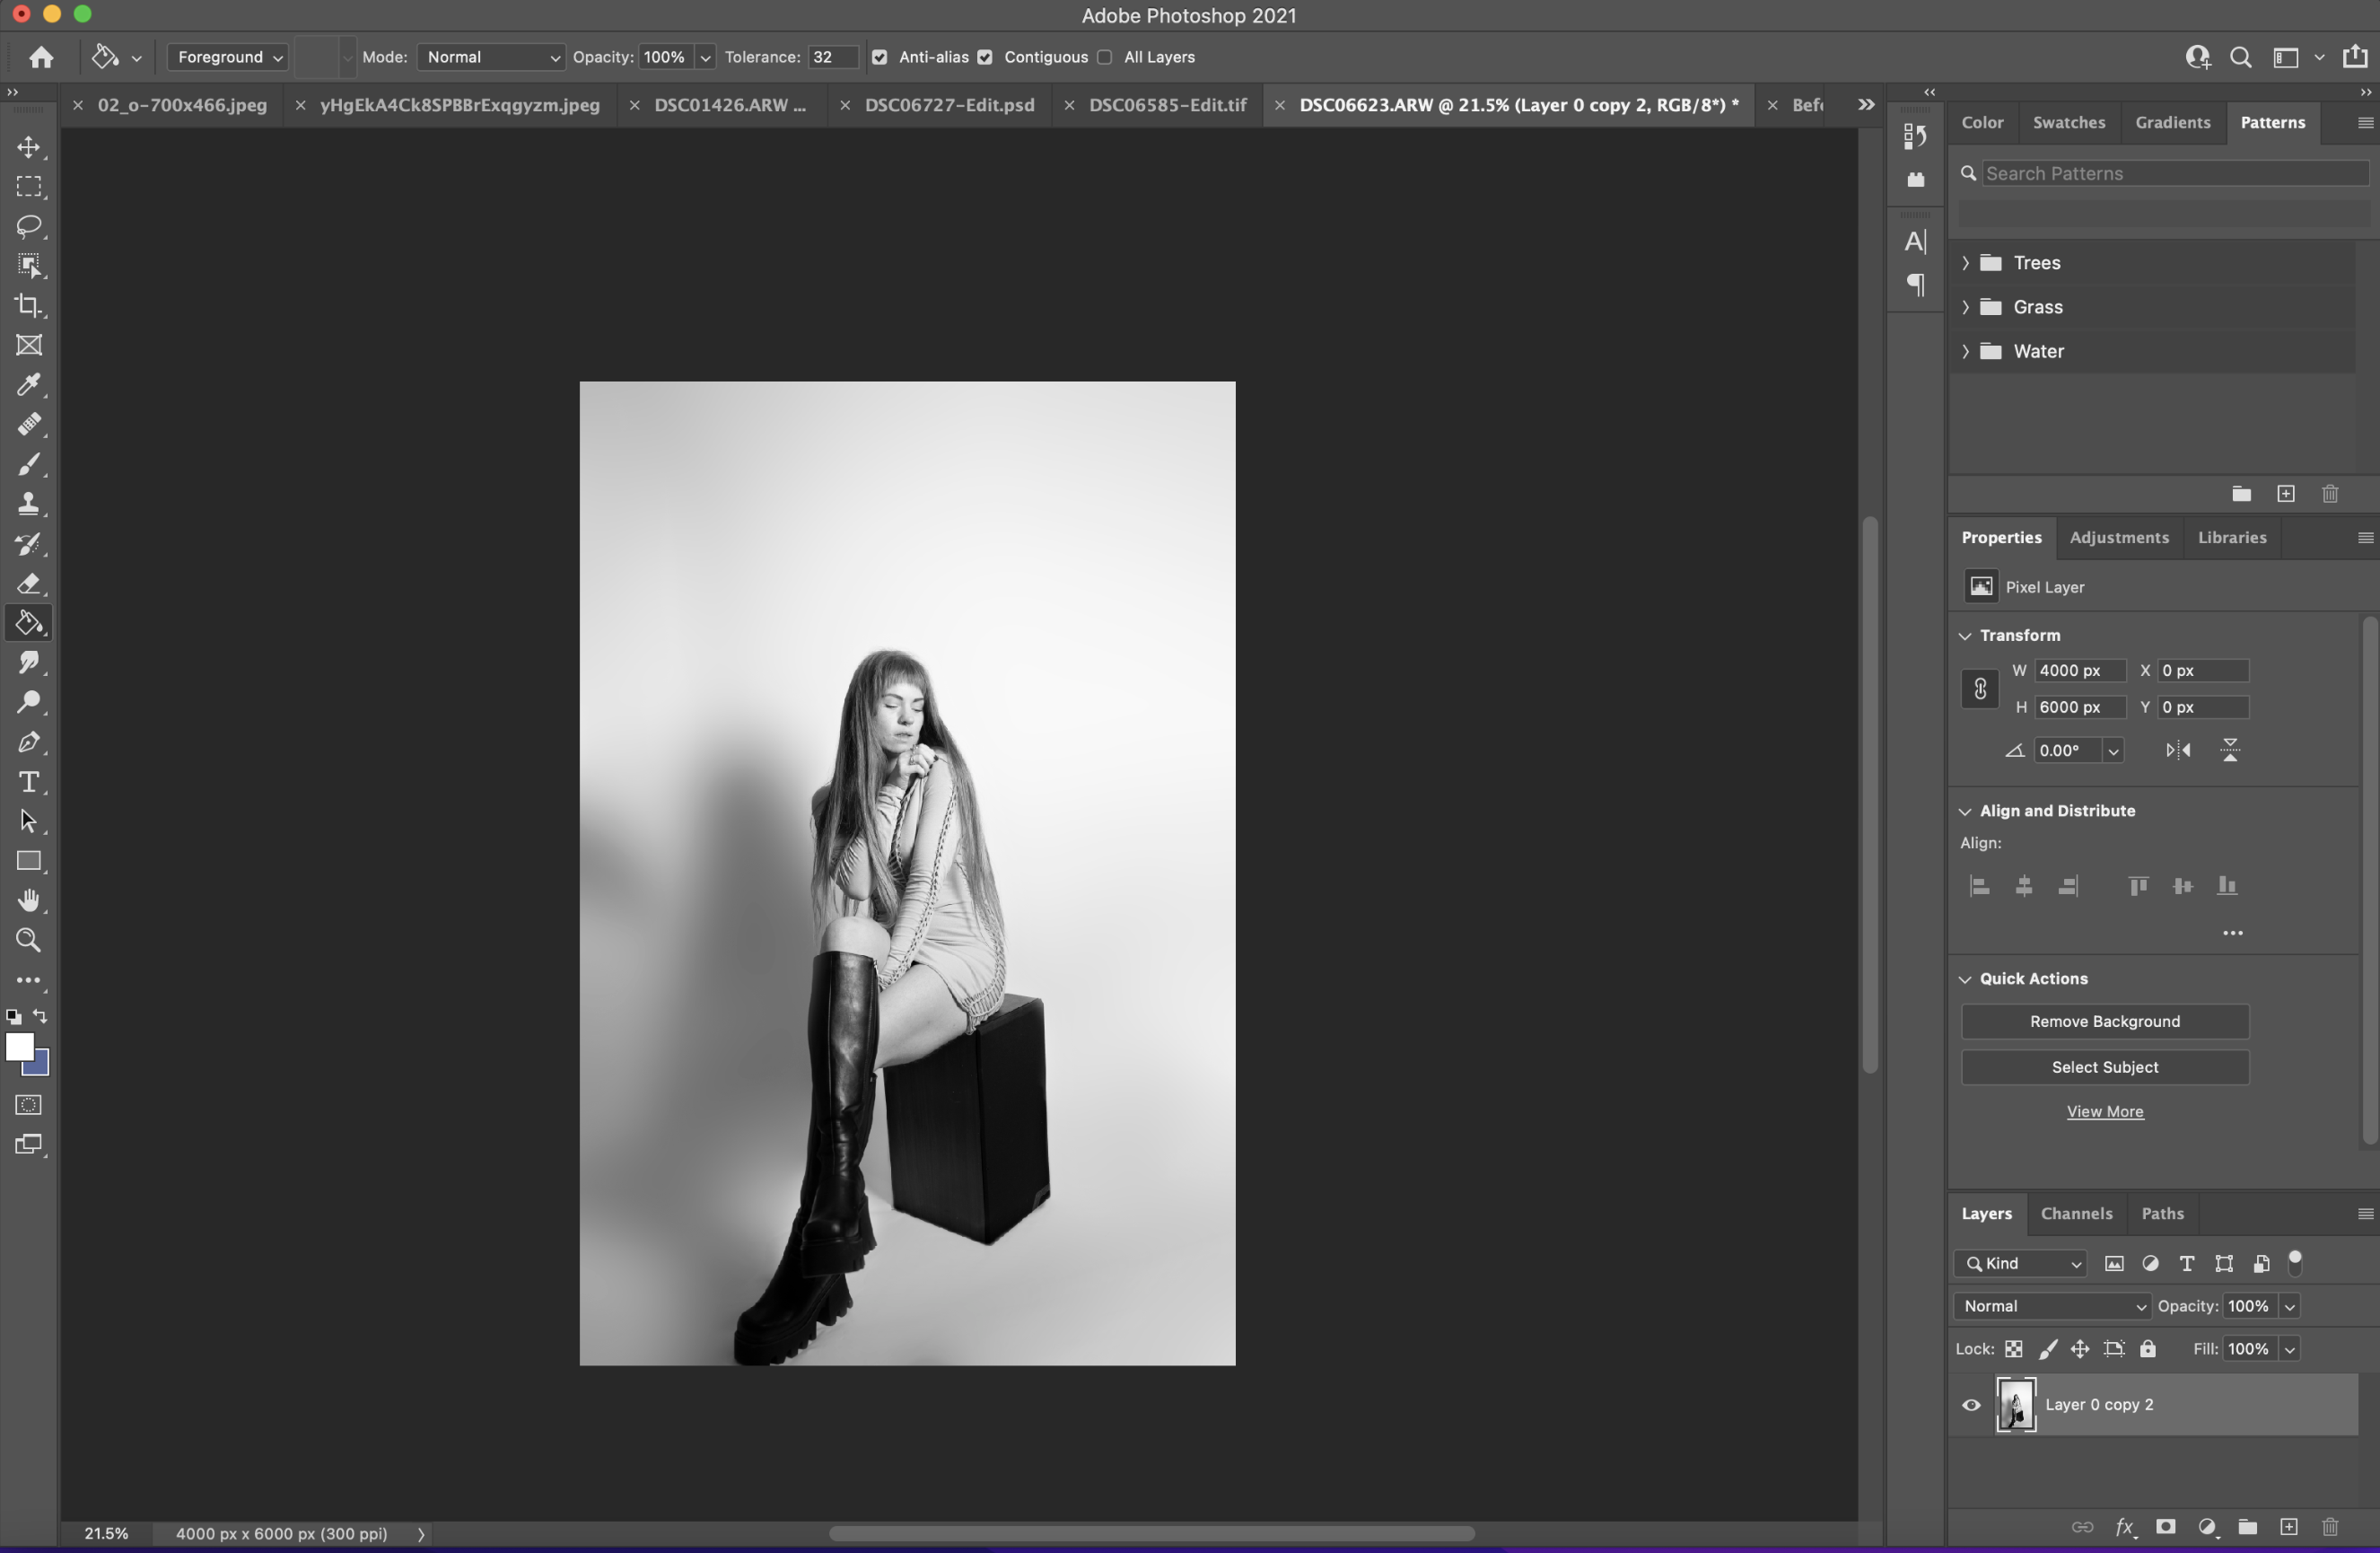
2. Draw around your subject with the lasso tool
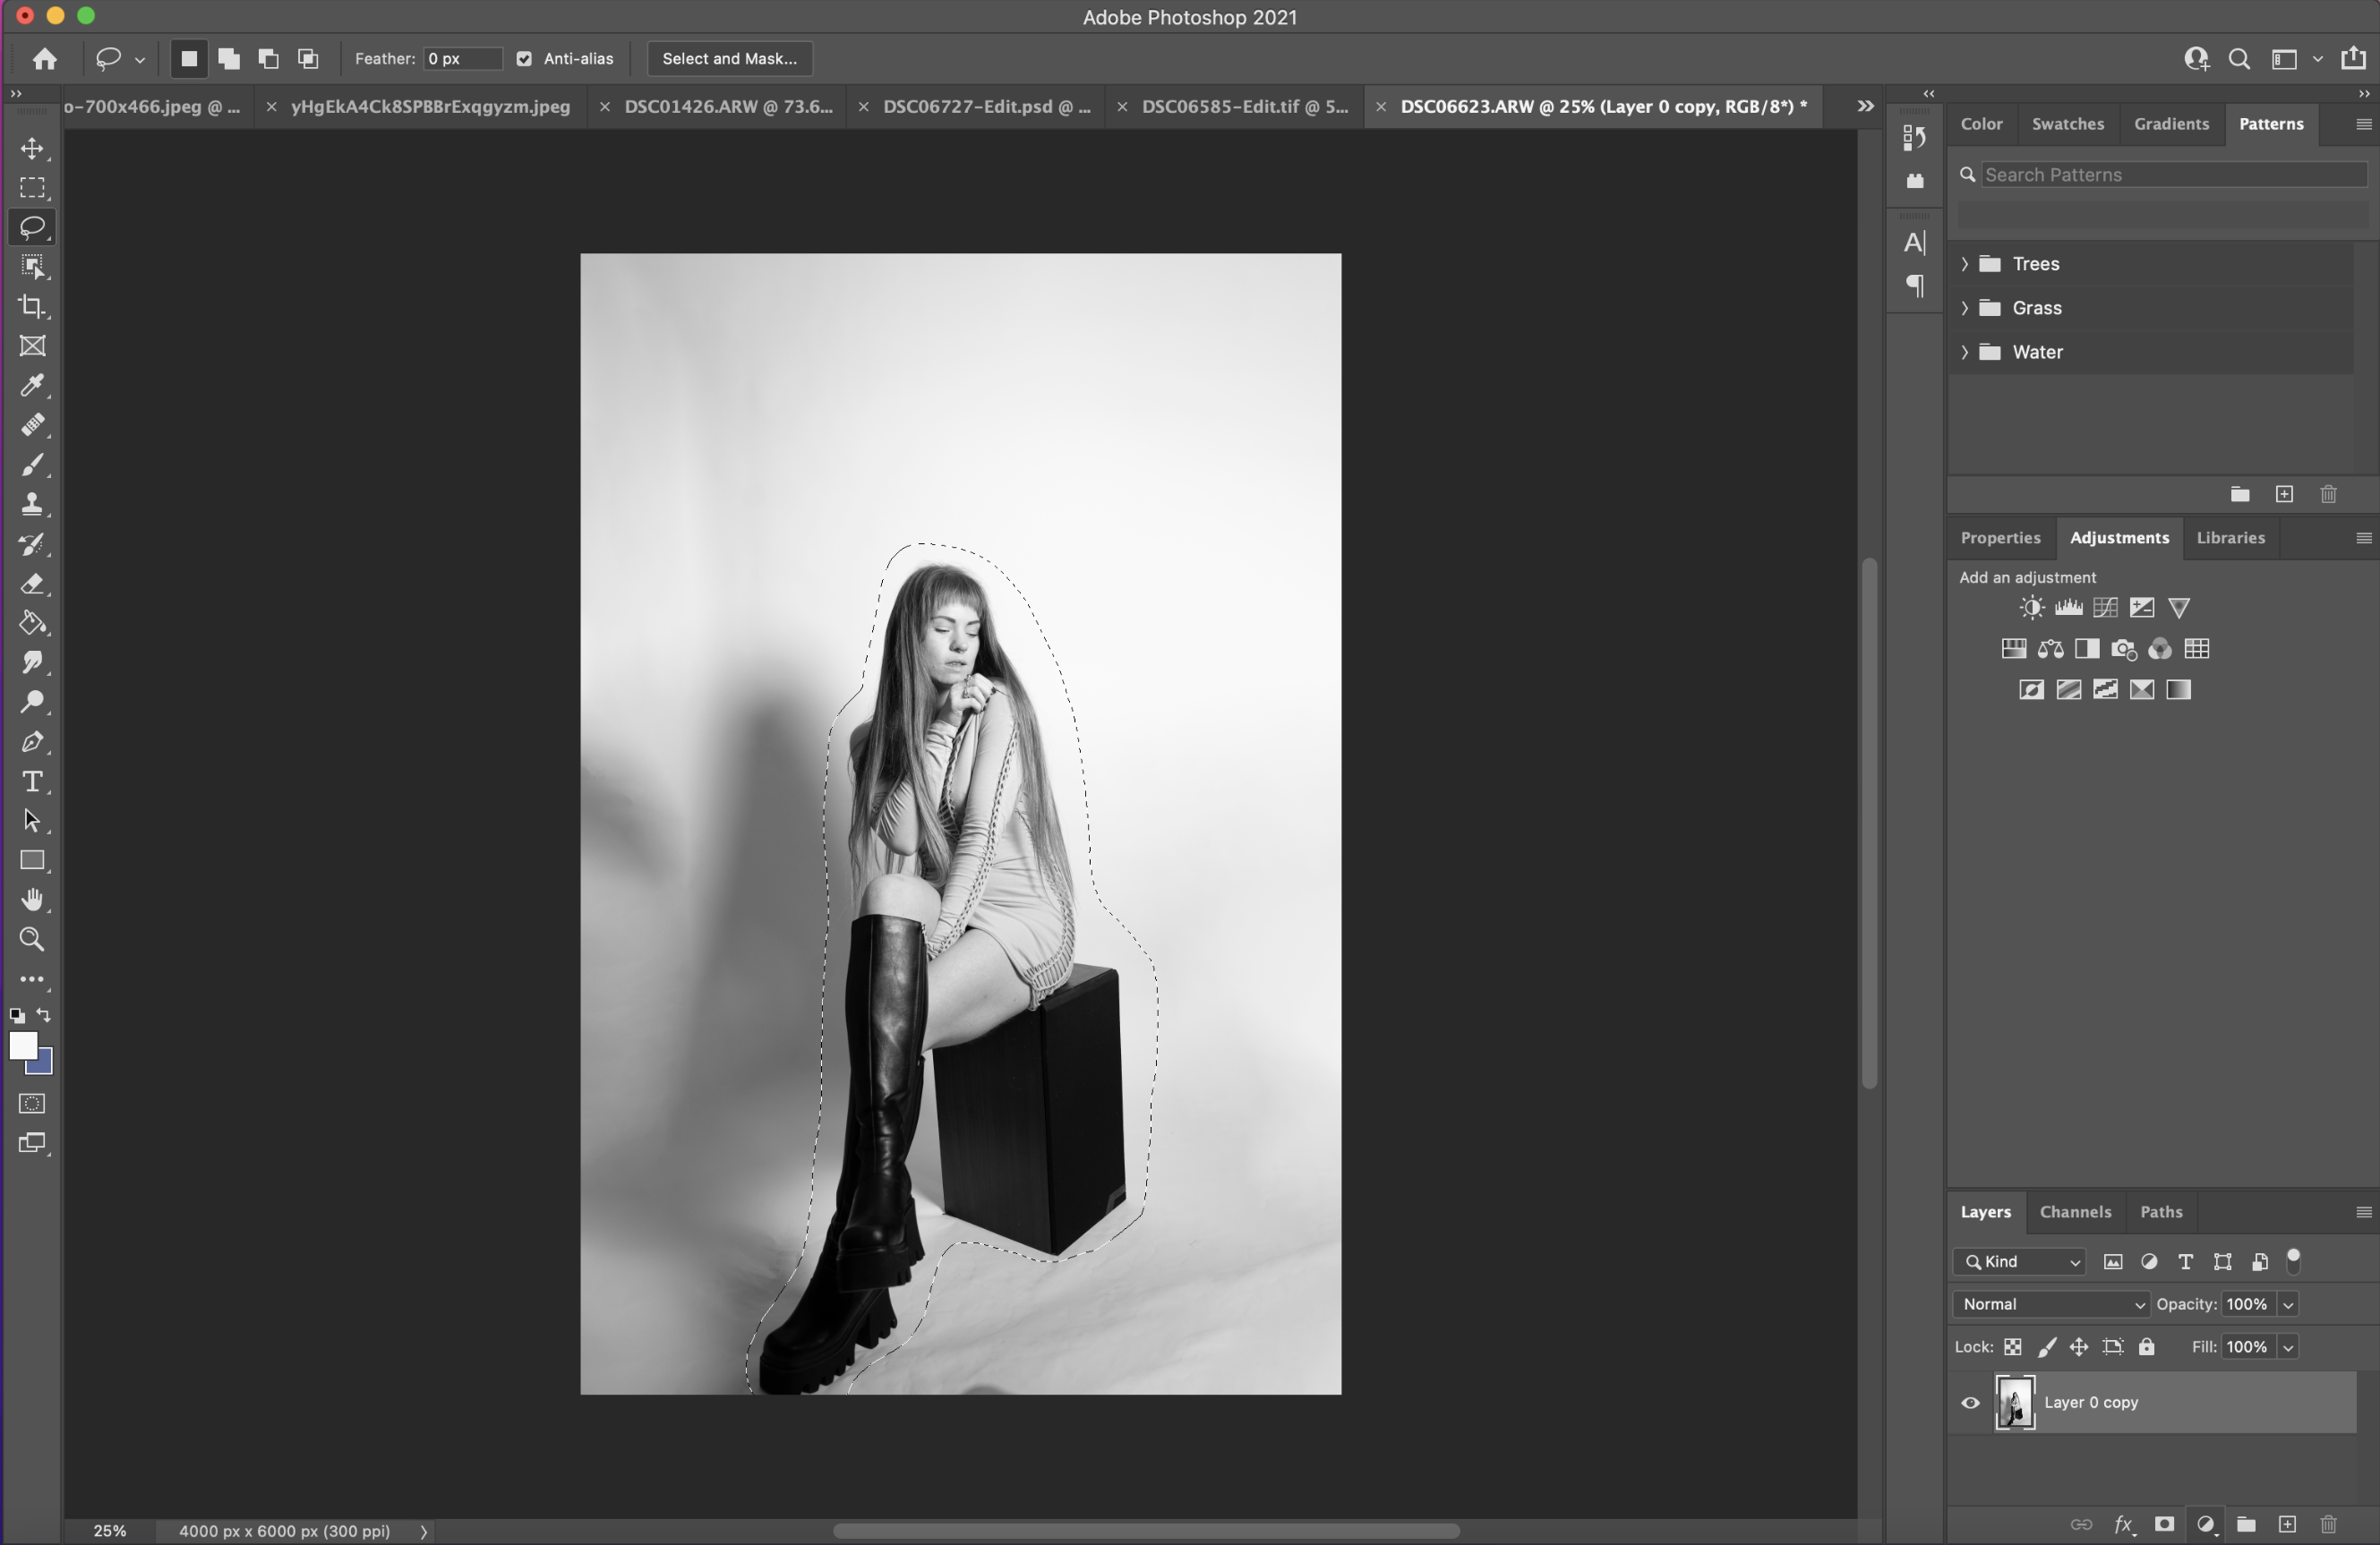
Using the Lasso Tool found in the sidebar on the right, draw around the edge of your subject – it doesn't have to be particularly accurate, just make sure that your entire subject is selected. The selection will automatically connect when you get back to your starting point.
3. Right-click and select fill
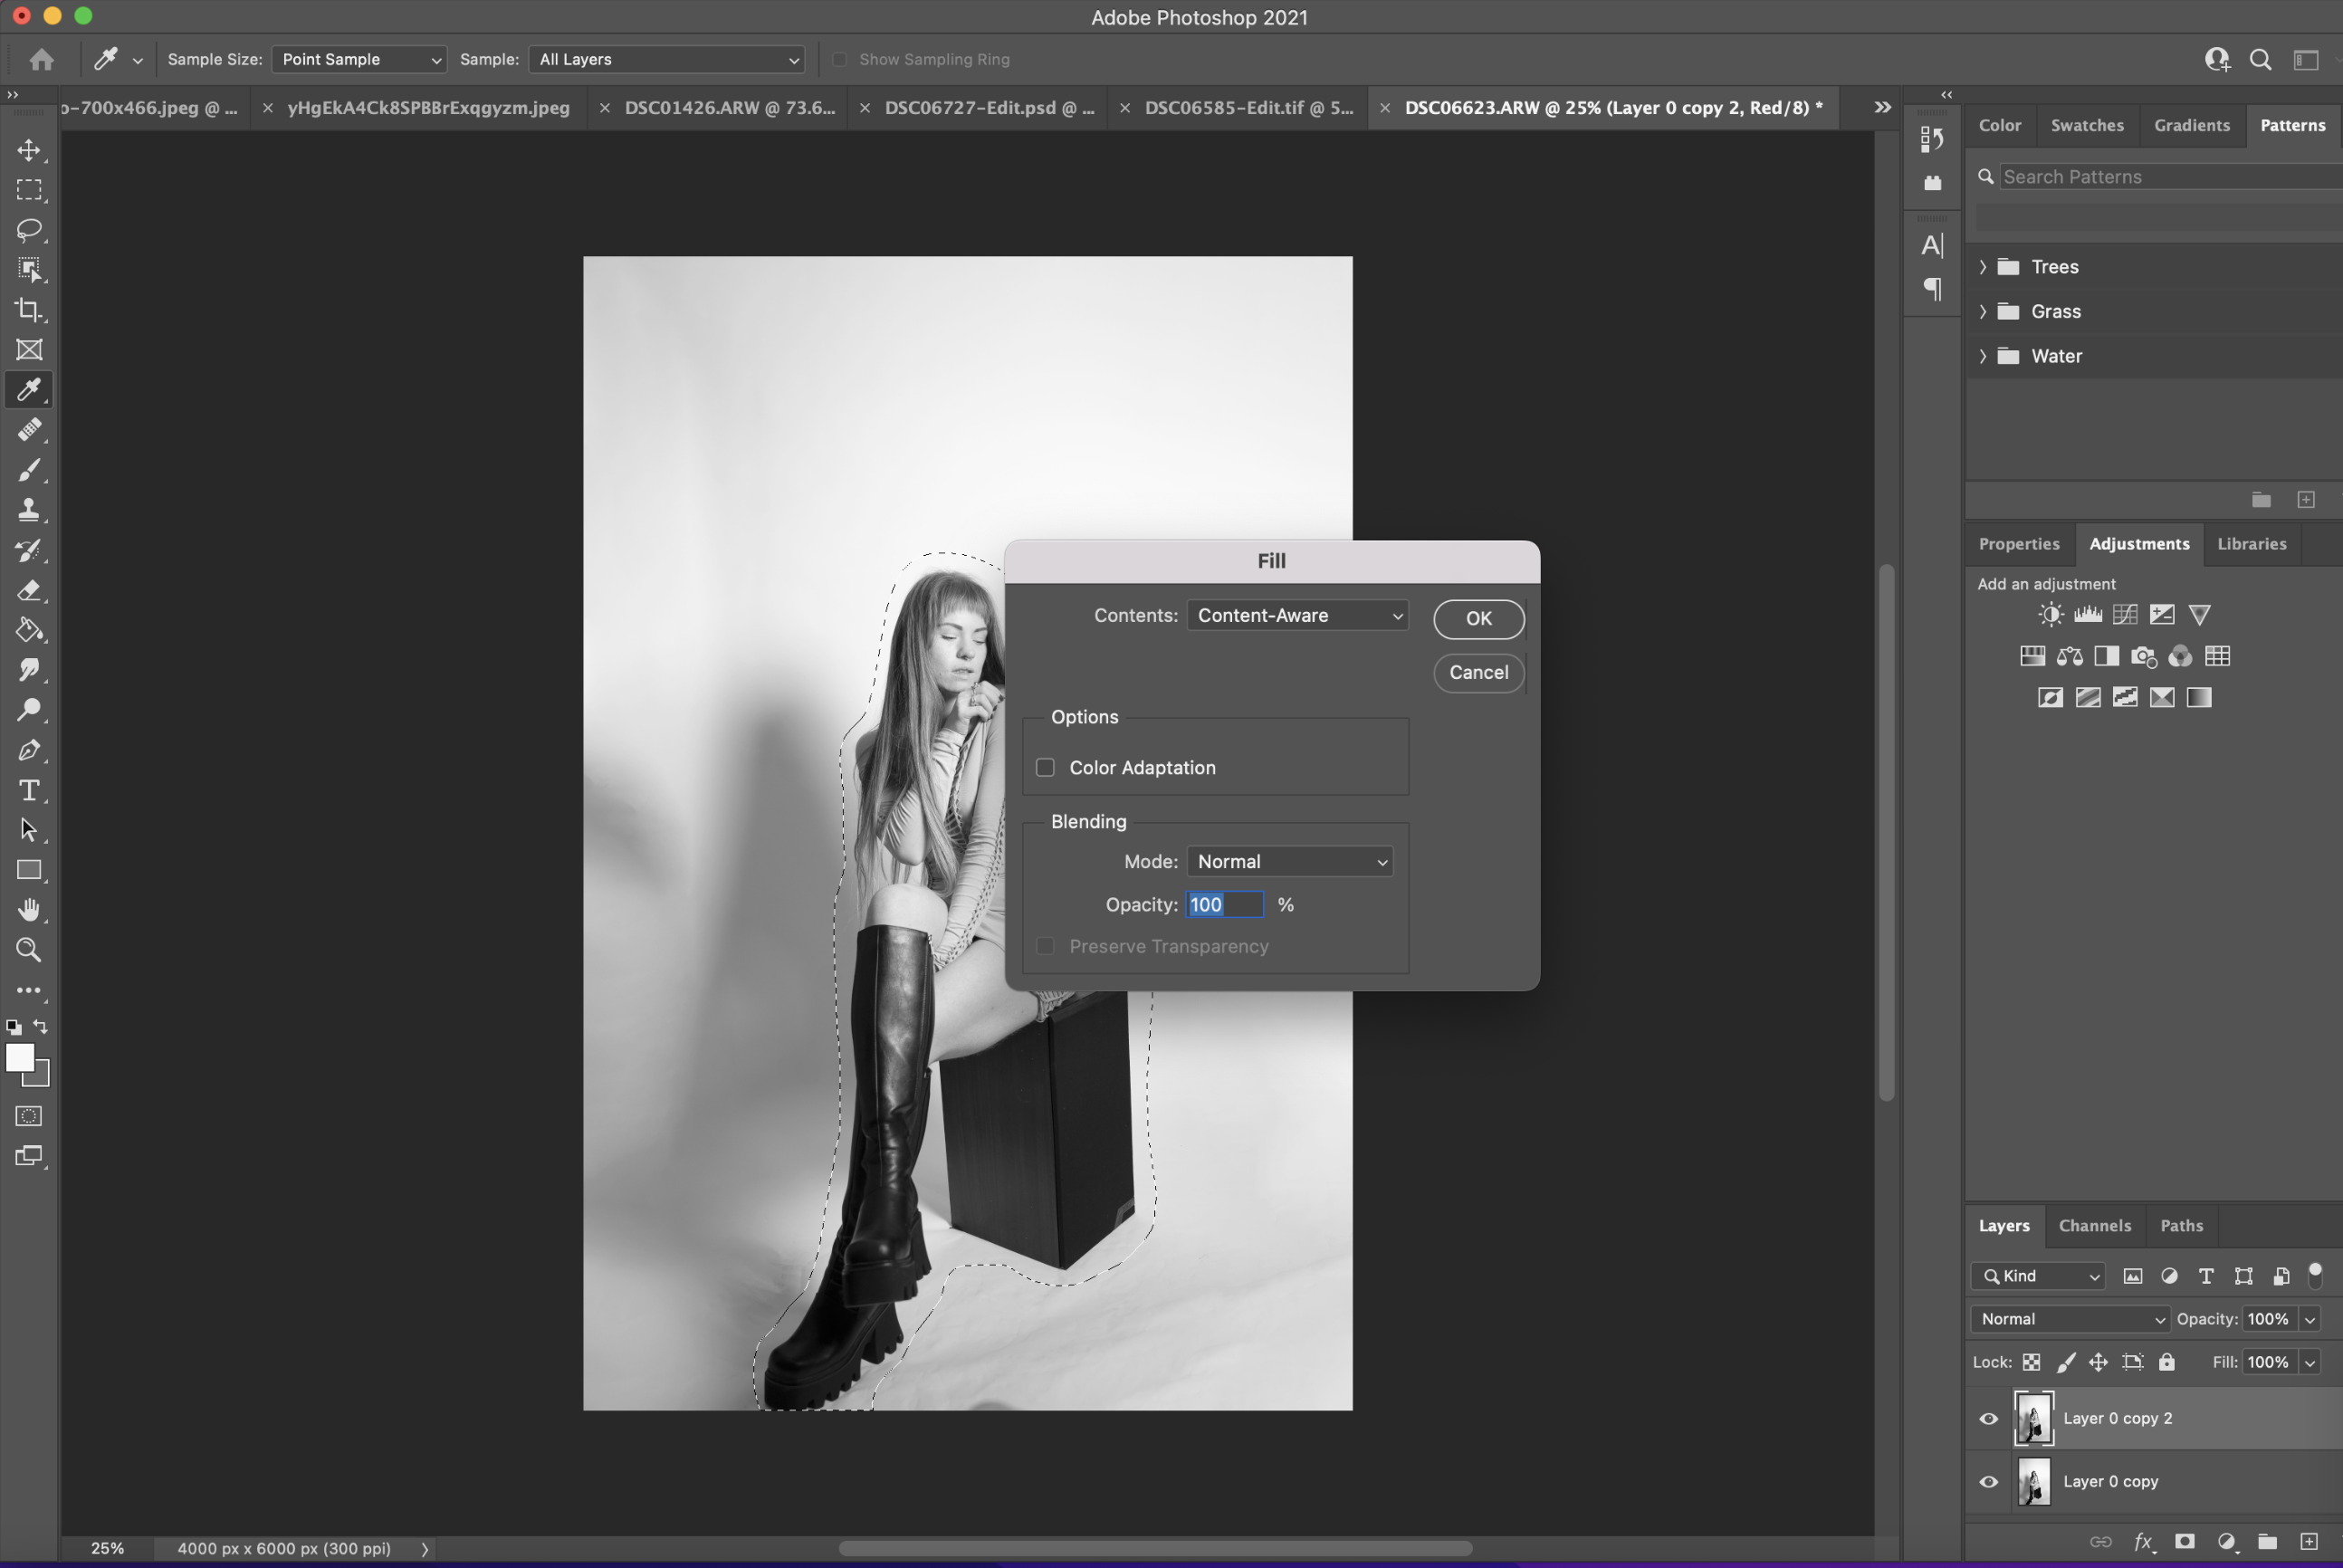
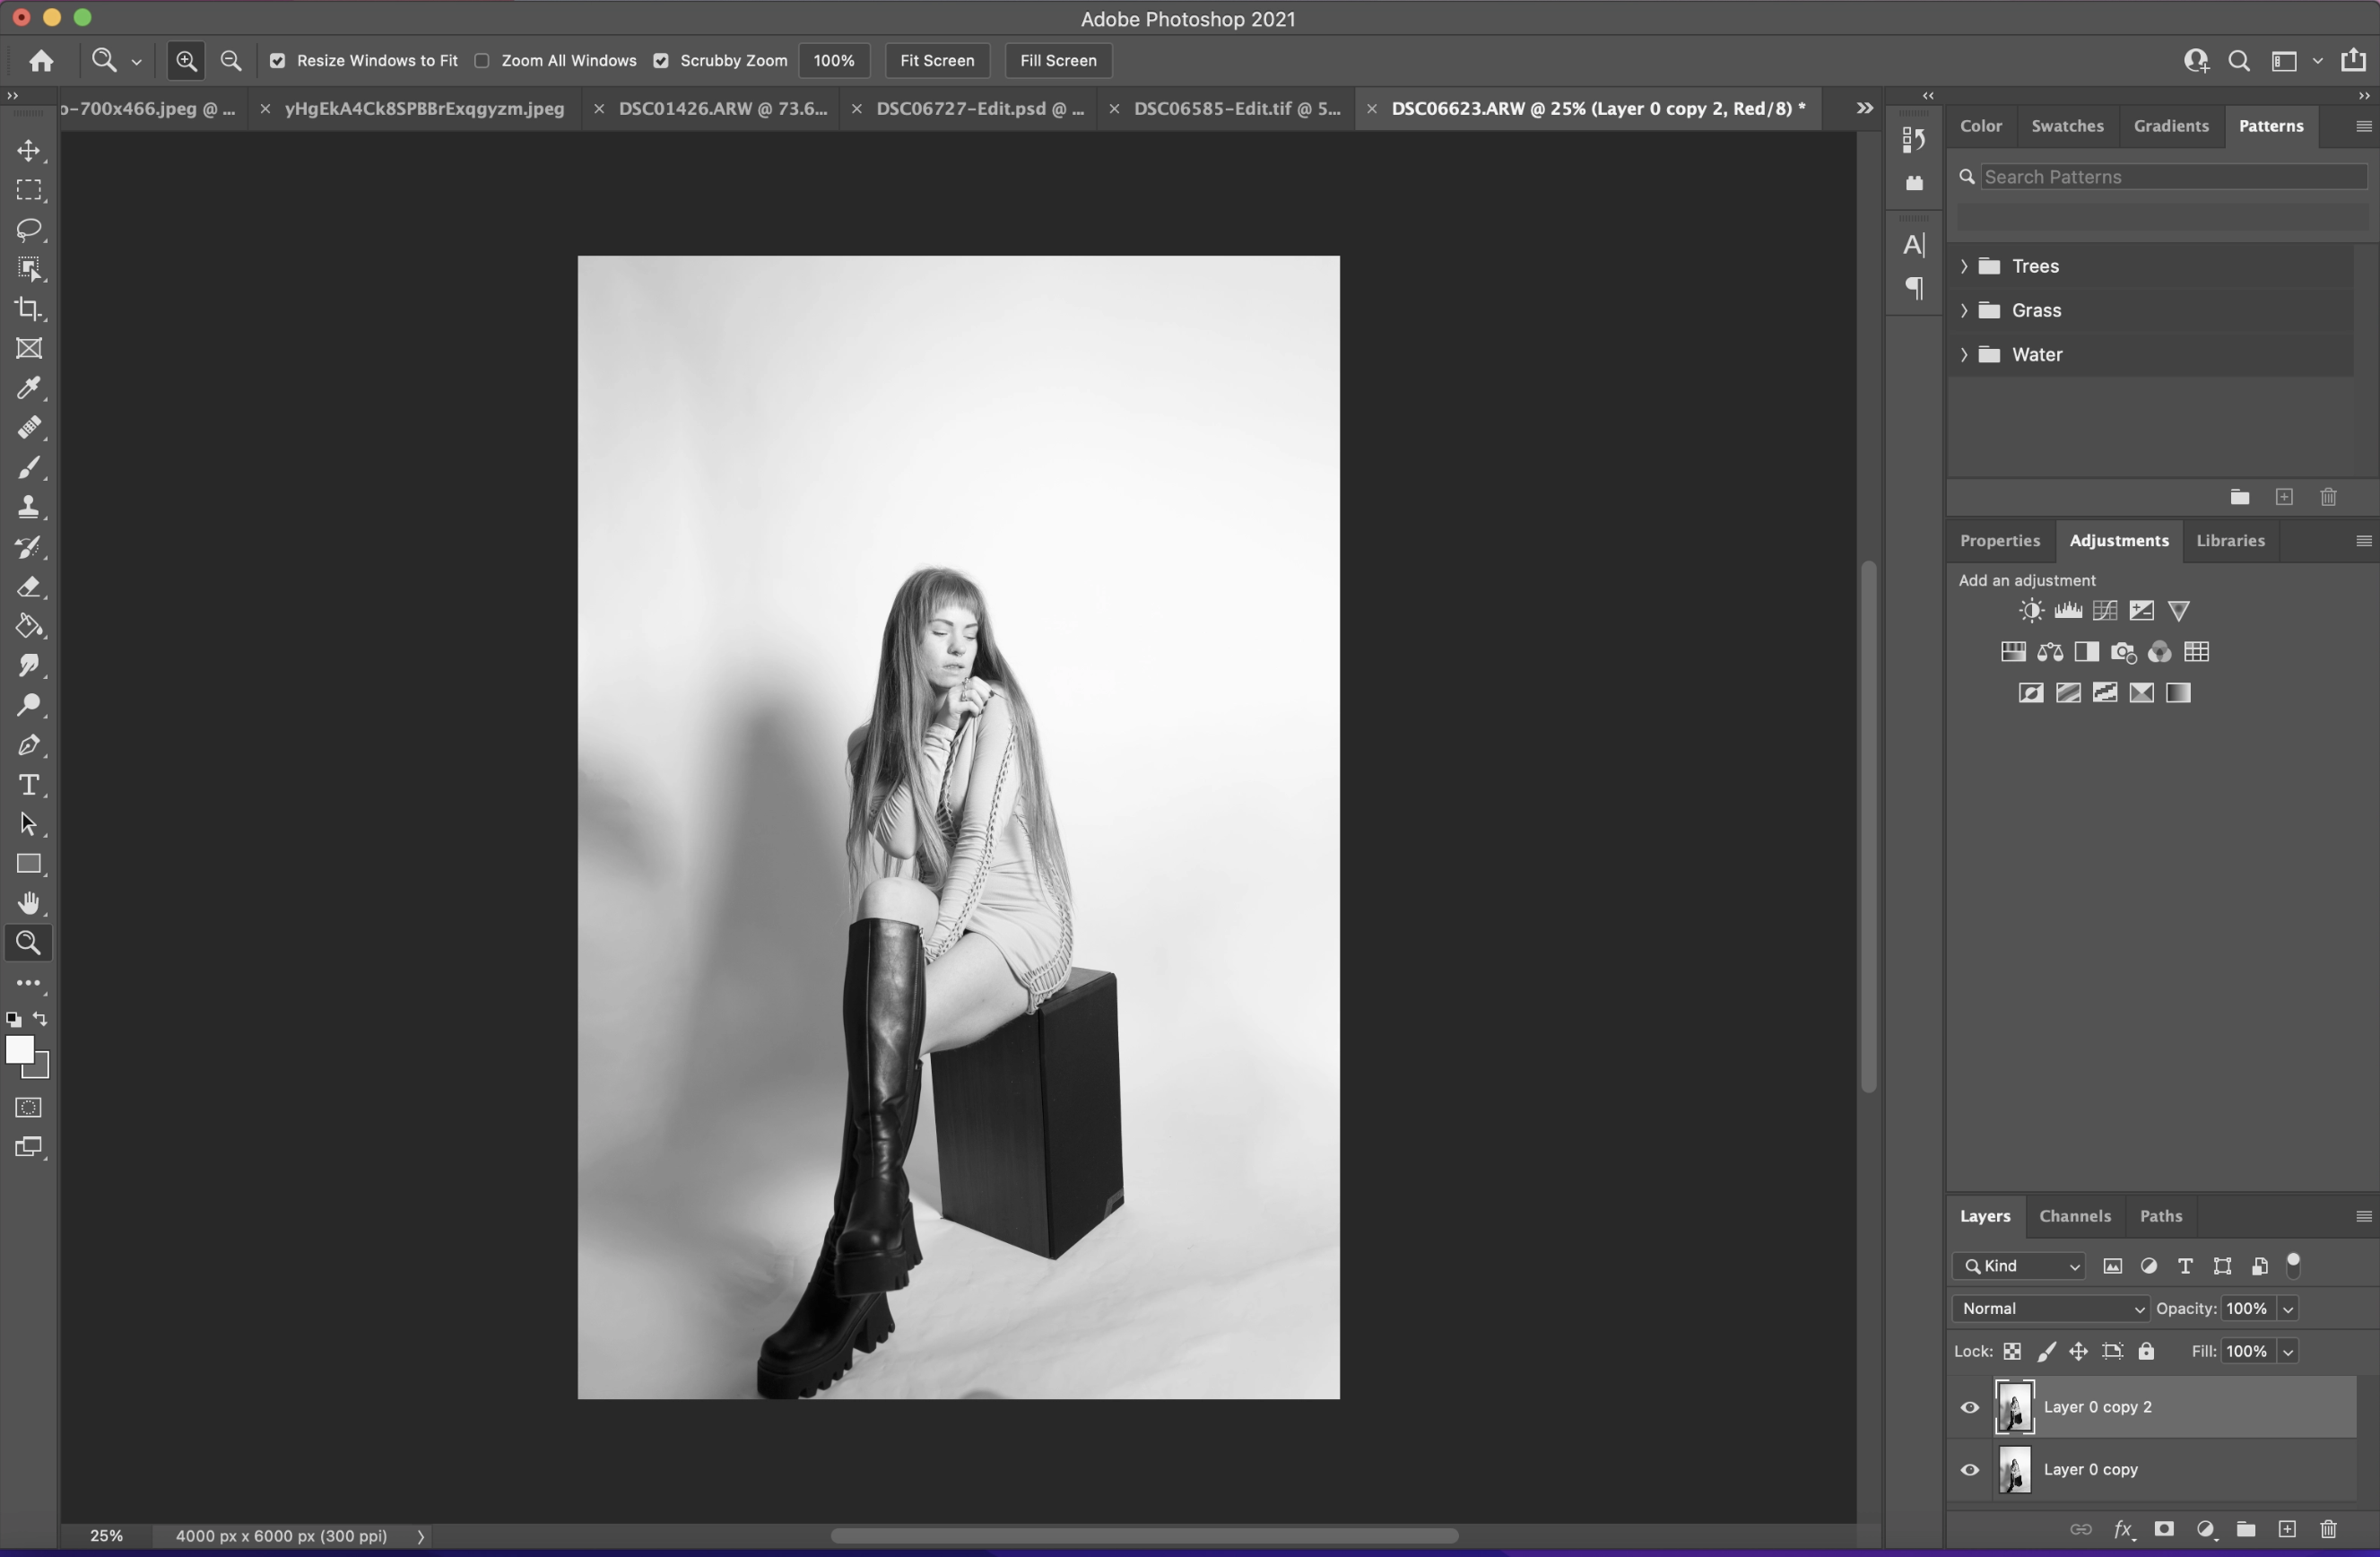
Make sure that the 'Content-aware' option is selected, and both 'Color Adaption' and 'Preserve Transparency' are selected. Click OK and your subject will disappear, but don't be alarmed – it will all make sense…
4. Go to Filters and select Gaussian Blur
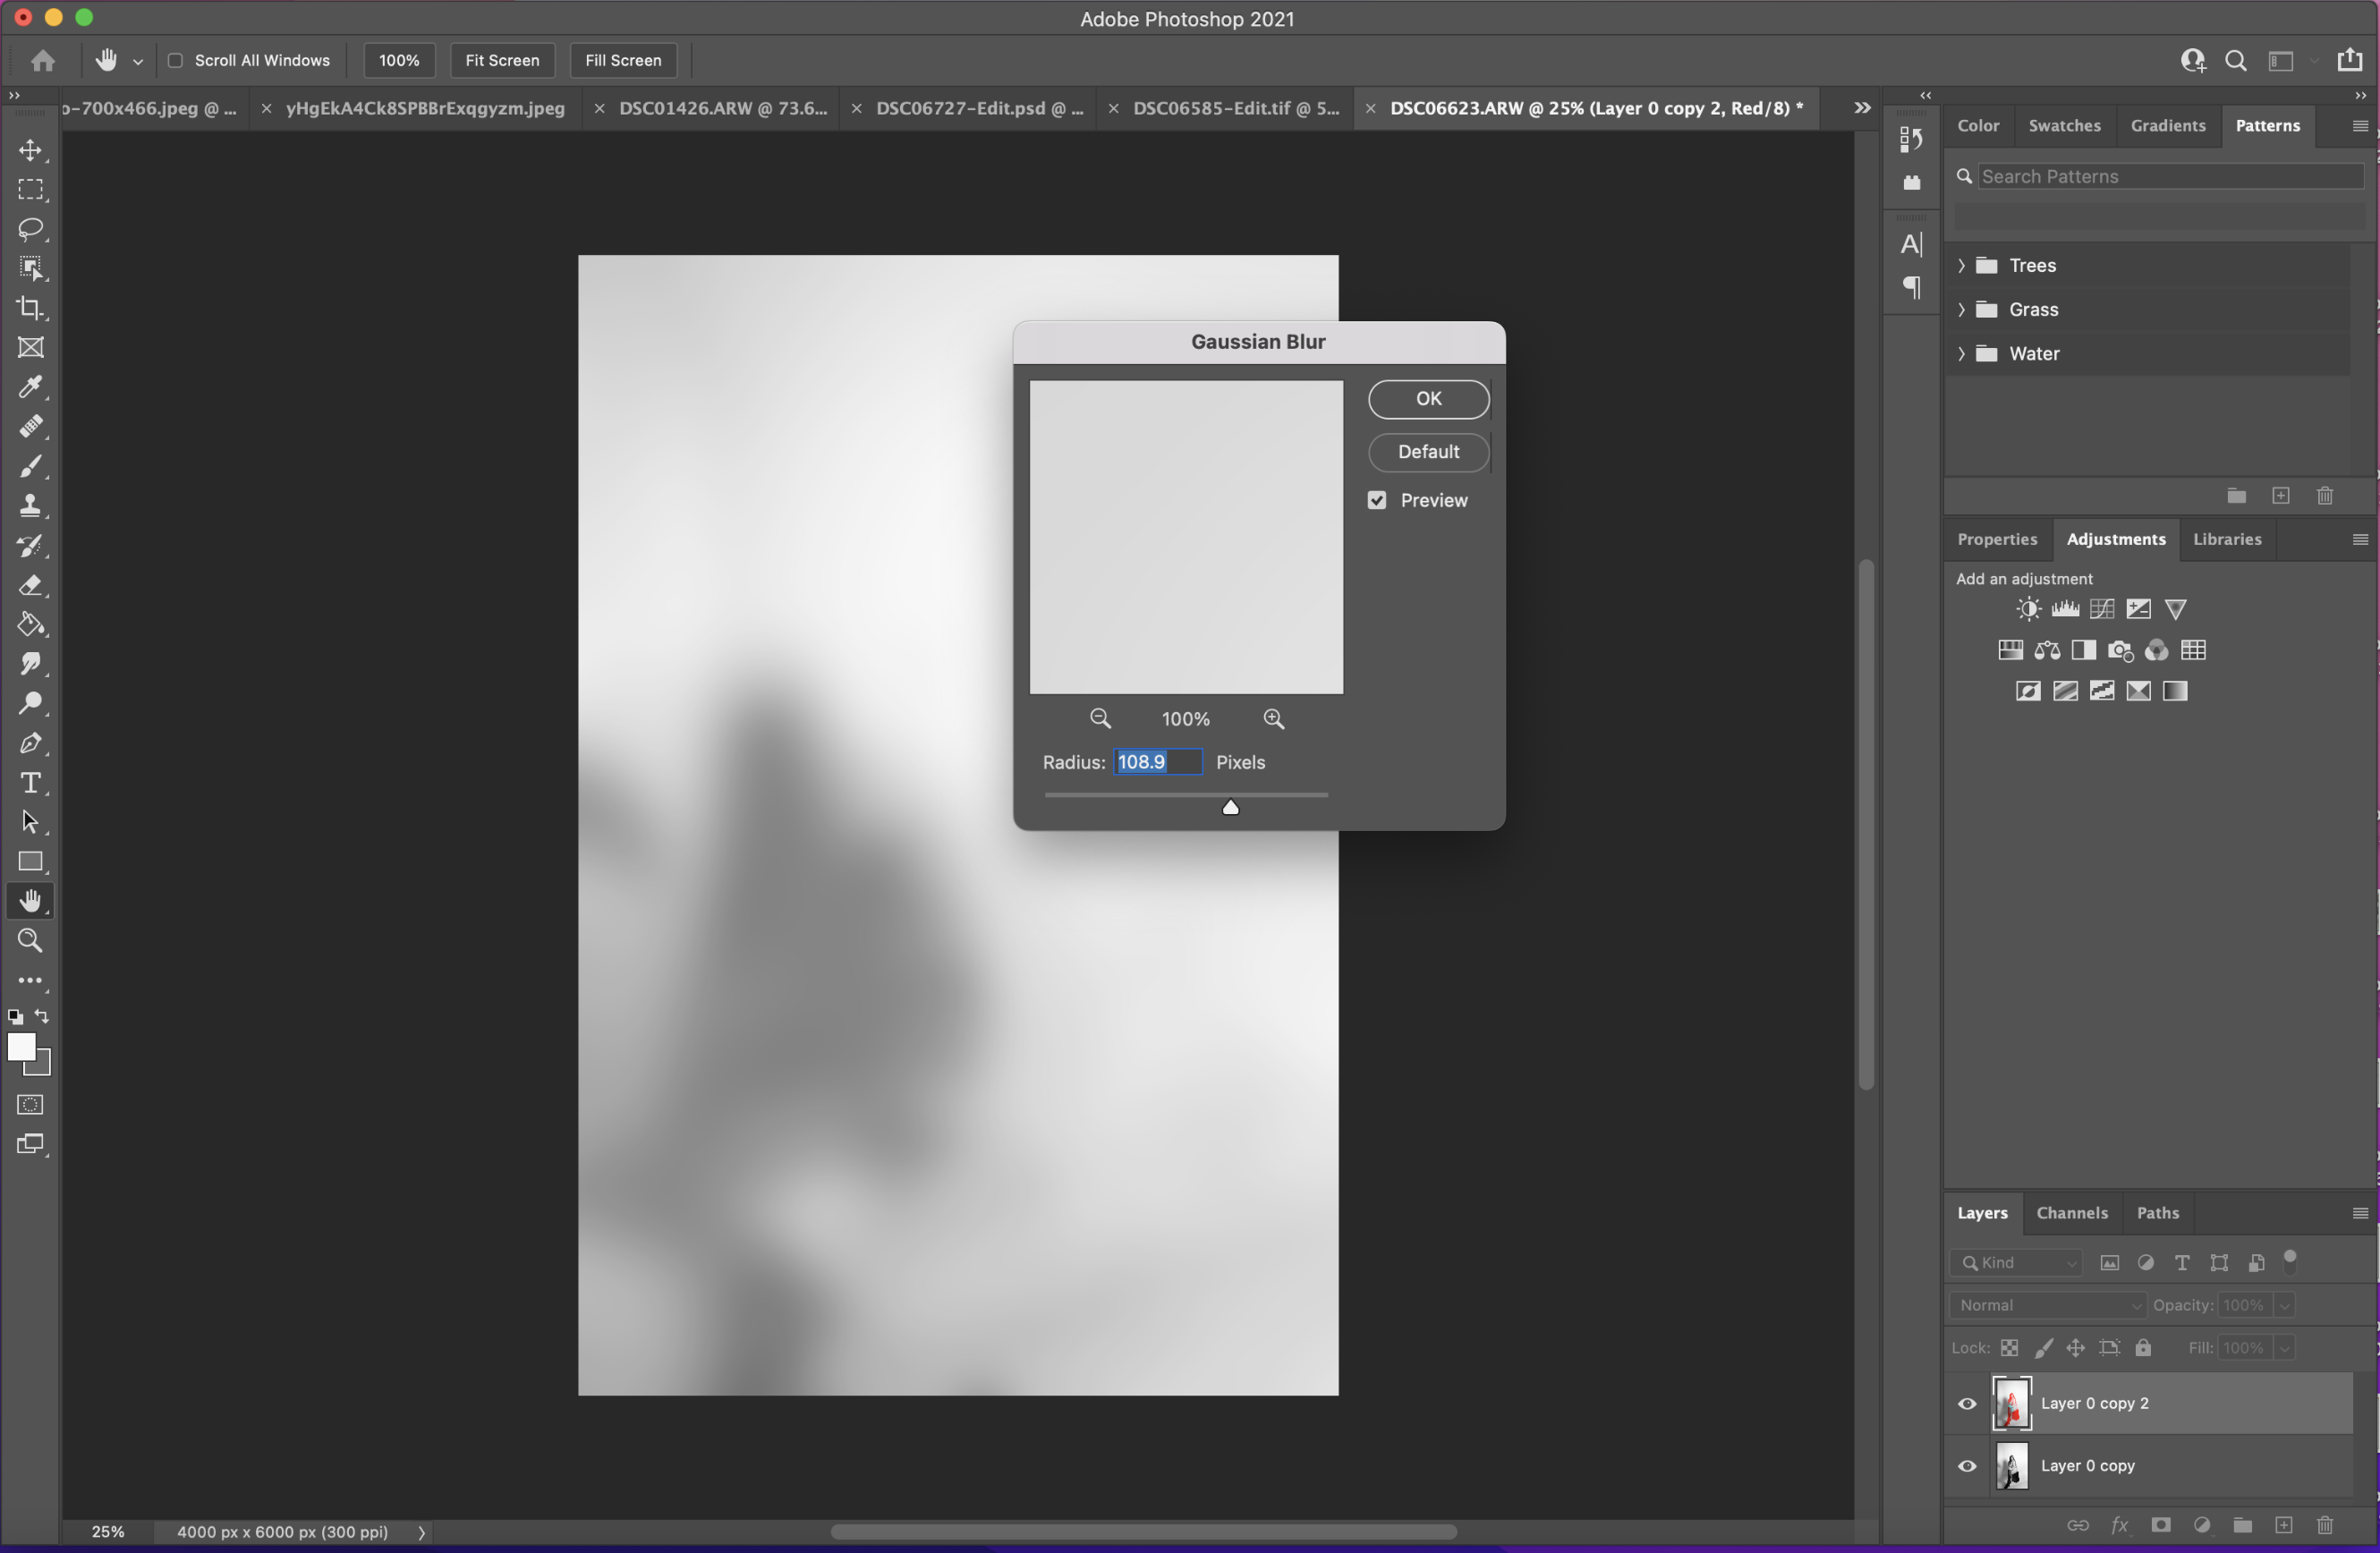
In the top tool bar go to Filter > Blur > Gaussian Blur and set the radius to around 109, or until you can no longer see any wrinkles. Click OK.
5. Mask your layer

Make sure that you're still working on your duplicated layer, and click the Mask icon in the bottom right-hand corner (it's a white rectangle with a grey circle in the middle). This will bring up a white box next to your layer; make sure this is selected.
6. Reduce layer opacity and unmask your selection
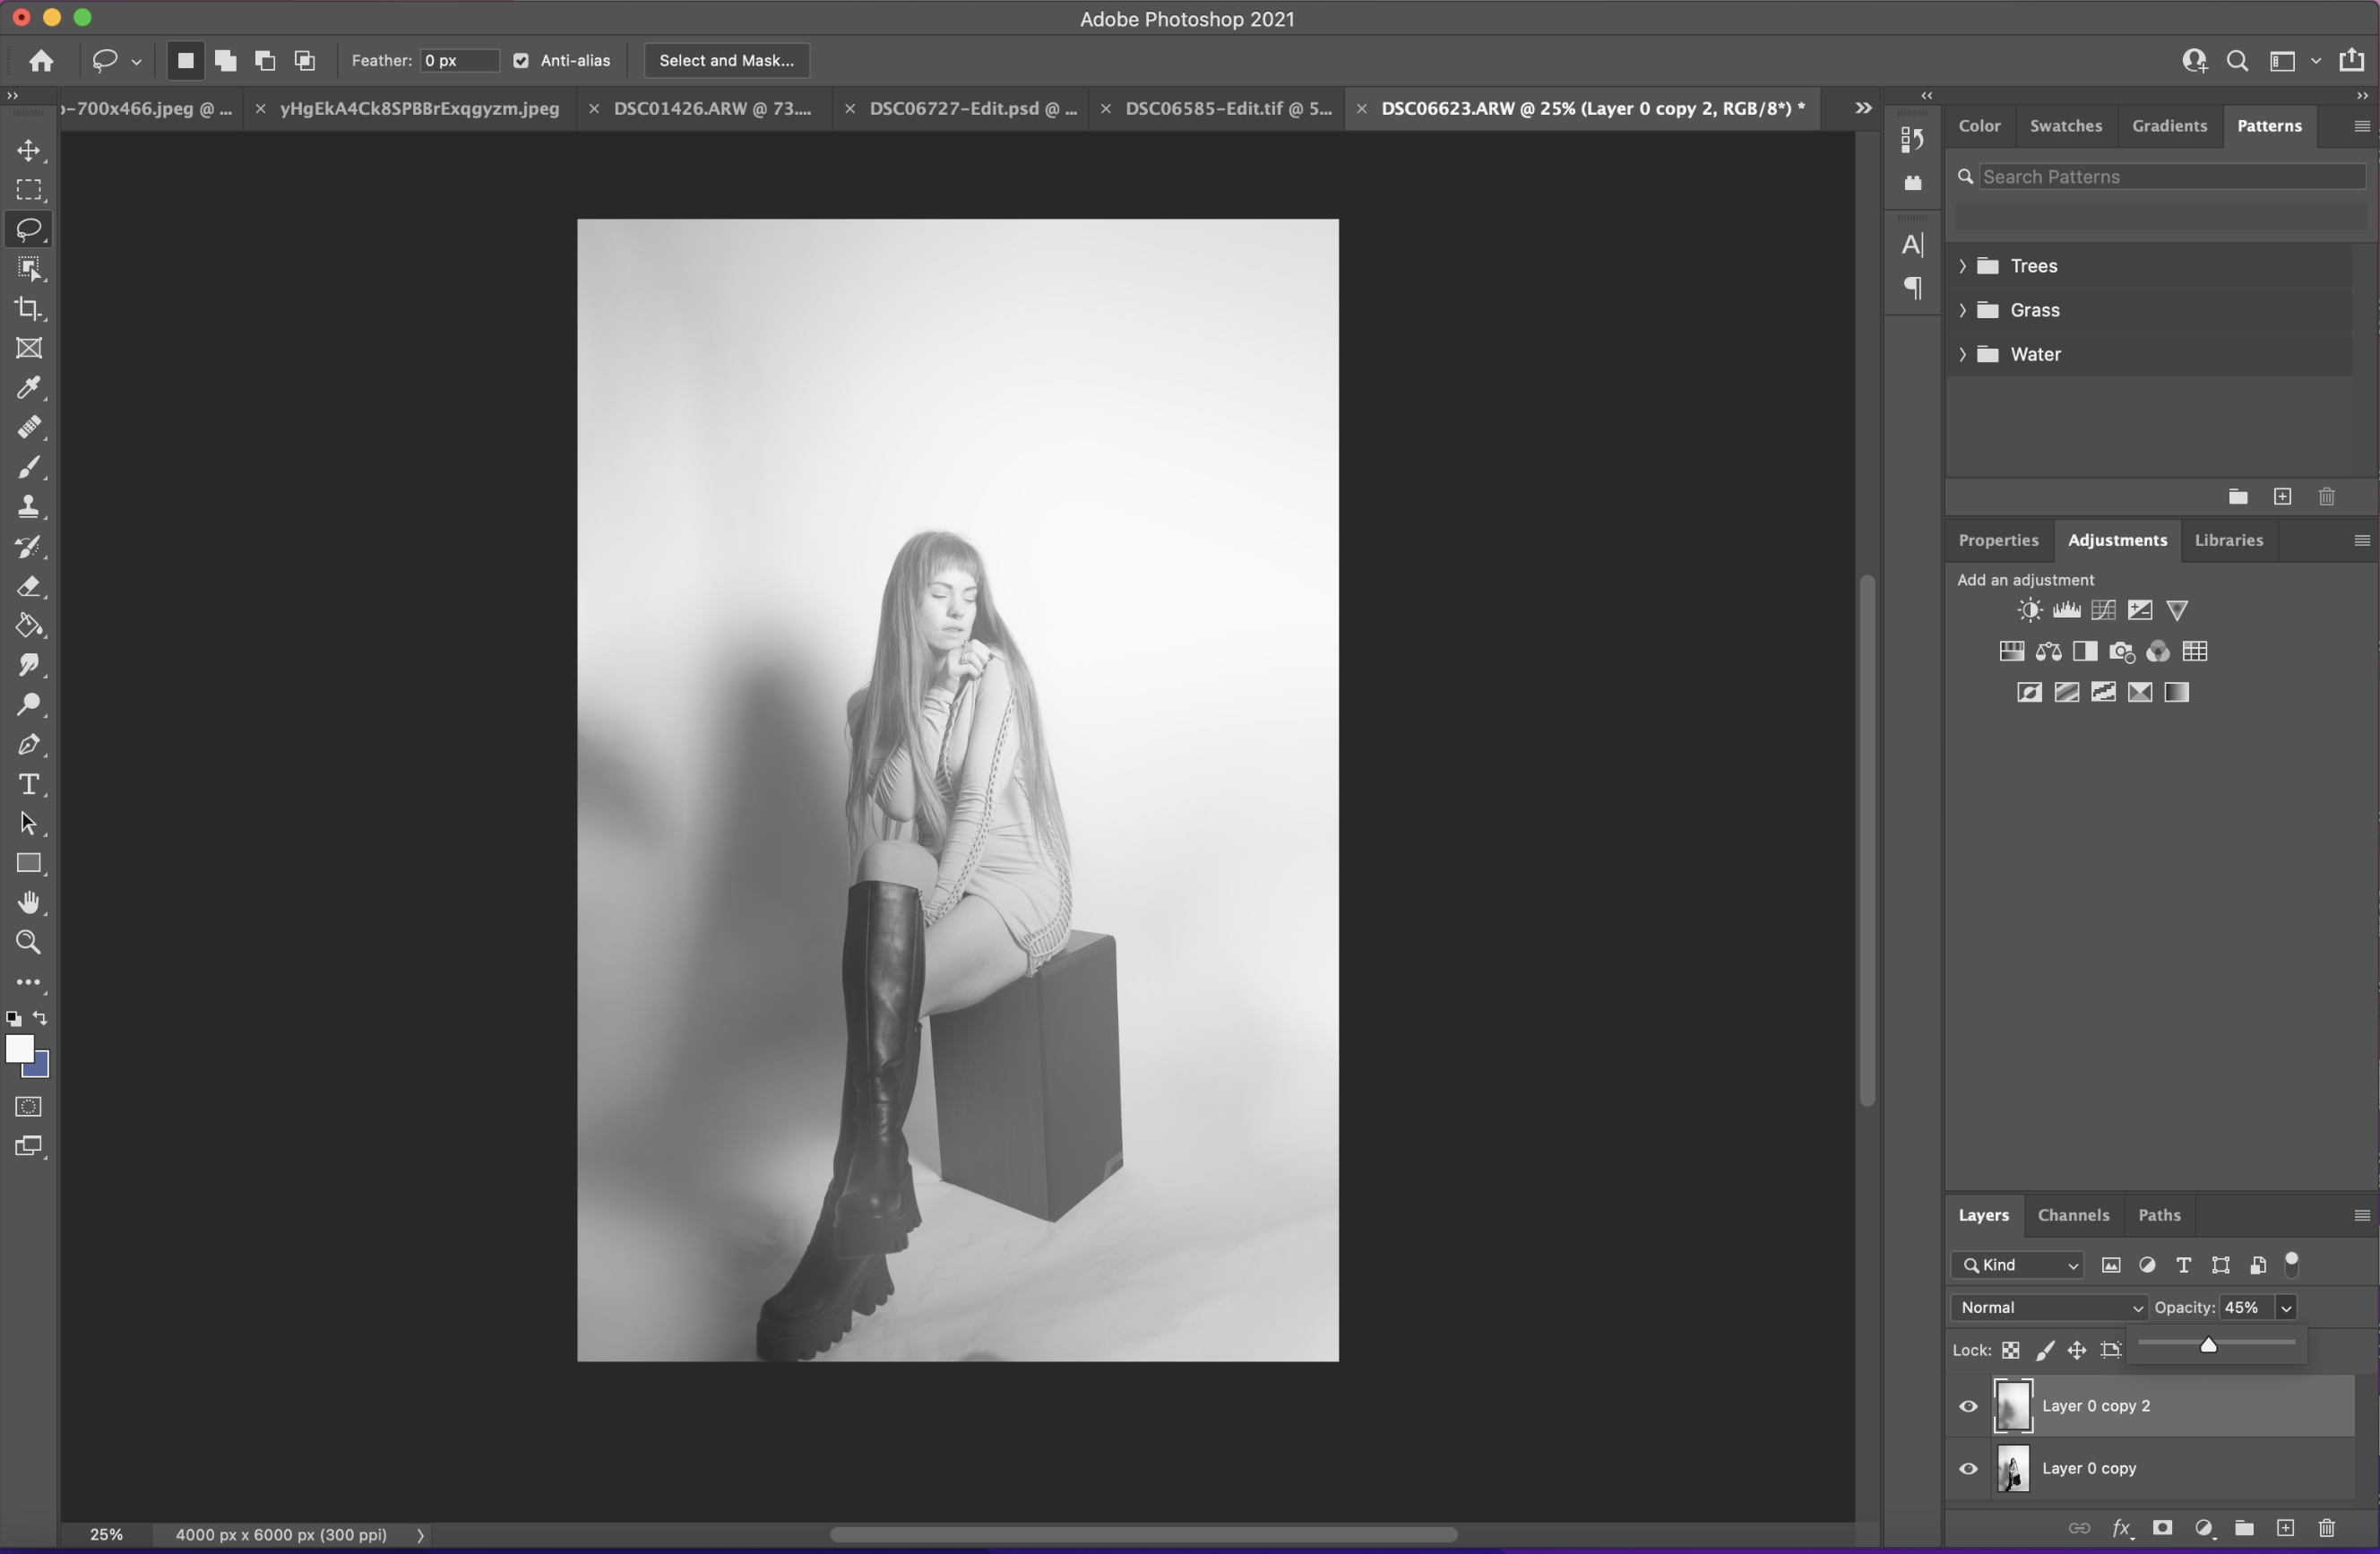
To make sure that you only unmask your subject, and not the background (which you want to keep smooth), set your layer opacity to around 50%. Then, select the Brush Tool either in the sidebar or by using the shortcut key (mine is set to B) and make sure you've selected a black, round soft brush and a hardness of around 12%. You'll need to increase the brush hardness when unmasking more defined areas, such as edges and corners.
7. Paint over your subject
Start painting over your subject to reveal the layer underneath. Once you're finished you can set the layer opacity back to 100%, and you will be left with a smooth background but a perfectly defined subject.
8. Merge layers, et voila
Once you're happy with your image and the background looks smooth, select all your layers, right-click and scroll down to merge. To save go to File > Export > Export as. You will then have the option to save as a JPEG, PNG or GIF.
If you enjoyed this article, take a look at the best photo editing software and the best free photo editing software. And why not check out the best monitor for photo editing and the best monitor calibrators, so you can be sure that your edits always look as they should.