Using a digital SLR, like the Canon EOS 100D, offers a lot of creativity when it comes to low-light and night-time shooting. However it's the area in which most people seem to come unstuck. There are a number of basics to understand that, once learned, will greatly increase your success rate, whether that be shooting a static city scene at the dead of night, indoors where the use of a bright flash might interrupt a special moment, or capturing the mood, atmosphere and energy at a festival in low evening light.
[x head] How your camera responds to light
Firstly it's worth understanding the basics. Cameras don't see in the same way a human eye does. Often when people try to take pictures of night scenes they get frustrated that the image comes out too dark or too blurry. To let enough light into the camera so that it can produce what the human eye sees, you need to adjust one of the following settings:
• ISO: To help get the photos you want in low light, you need to adjust the camera's sensitivity to light. You can do this by adjusting the ISO, or sensitivity of the camera's sensor. ISO used to refer to the film "speed": how sensitive the film was to light. The higher the ISO, the more sensitive the film. Very sensitive film meant a larger grain in the film; if you look at old black and white film images from rock concerts in the 1970s, they all tend to be very grainy. Nowadays the ISO merely adjusts the digital sensor, but it still produces effects that are now referred to as "noise", rather than grain. For this reason you need to decide when you are happy to make this sacrifice. Sometimes there is no choice, but as we'll see later, when using a tripod and a slow shutter speed, there are ways around it.
• Aperture: As we've touched on before [link to BASICS article], the aperture is the hole in the lens which lets the light in. To get more light, you need a large hole. The lower the number, the larger the aperture, so an aperture f/2.8 will let in more light than an aperture of f/11. Of course, a large aperture also leads to a narrow depth of field (where less of the image is in focus) so you have to make sure that our focus is spot-on.
Different lenses have different maximum aperture sizes; a lens that has a particularly large aperture is known as a "fast lens". One of my favourite lenses is the
Canon EF 35mm f/1.4L USM
. Its large aperture means I can open the aperture right up and capture images in low light.
• Shutter speed: Large apertures may be OK for capturing people or objects where the depth of field can be shallow, but when you want to capture a scene or landscape in low light, you may want to have a large depth of field and also as little "noise" as possible. In order to do this you have to compensate by knocking the shutter speed right down. As soon as you go below around 1/60th second, however, you risk getting camera shake – the phenomenon where movement from the user translates on to the image and creates blur. For some night-time landscapes shots, you might be looking at an exposure of seconds or even minutes. For that reason you need to use a tripod and also a shutter release.
The tripod stops the camera moving and prevents you from having to hold the camera during the exposure. The cable release fires the shutter through a wire to prevent you from shaking the camera accidently when pressing the shutter. (If you don't have a cable release, then one trick is to set the camera's self-timer to two seconds and take the image using this. By the time the shutter fires, any internal movement from pressing the shutter button has usually dissipated.)
Long exposure times, of course, can add interesting side-effects to images. Any lights that are moving (such as car headlights) leave trails across our image. These images are no longer capturing a split second in time, but rather a segment of time – this allows plenty of room for interesting experimentation.
• Flash: If you want to really freeze a moment in time, then aside from increasing the ISO or using a large aperture, then you can try using flash. Flash momentarily brightens things in front of the camera, and that split second of light freezes them on to the image.
Obviously its effect is limited to what it can reach and how much light it can output – flash is redundant when trying to use it to shoot a landscape or landmark at night; an on-camera flash is only really going to capture those things a few metres in front of it.
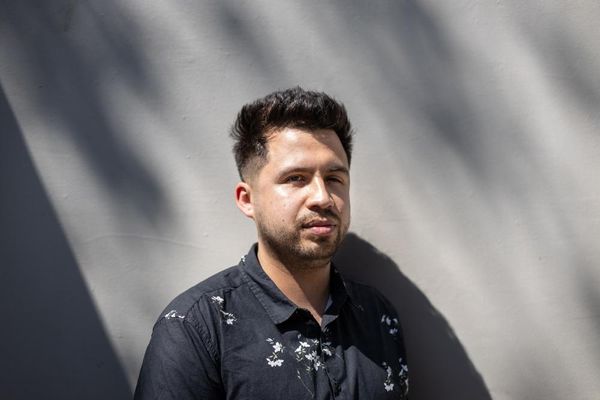
Once again, however, it does give scope for experimentation. Using a low shutter speed with flash can freeze some elements of the frame, while letting other areas leave light trails on the image. This can be good for portraits at night or at parties; the people directly in front of the camera get caught by the flash whilst the surrounding elements are caught by the slow shutter speed. Experimenting with this, you can learn to balance the flash and ambient light.
[x head] This week's assignment
For this week's challenge, photograph different low-light scenes. Try photographing a landscape at night using a tripod, picking a subject with moving elements. Experiment with flash and slow shutter speeds on a night out with friends, and try photographing the same scenes without flash but using a high ISO and a large aperture.