Updated on August 8, 2025: New tier list! Ranked all Full Res and Segunda Etapa.
If you've seen our Type Soul Shikai and Bankai tier list you'll notice a similar pattern here for Arrancar/Hollow Partial and Full Resurrection where Commons and Rares have become quite strong due to the re-release buffs and nerfs. Now with only 1 Partial Res move and the Arrancar Cero Oscuras cooldown resent it's more important than ever to choose the best Partial Res to start your build and then move onto Full and Segunda. Here's my Type Soul Resurrection and Segunda Etapa tier list and guide.
Table of contents
Type Soul Arrancar Partial Res Tier List

When it comes to the best Type Soul Partial Res for Arrancar/Hollow now it's important to note that Hollows/Arrancars have been reduced back to only 1 Partial move. This makes picking the best moves a highly important consideration when picking a Partial Res. This is essentially how I'll rank them as in which ones have the best move to base your build around since you can now reset Partial CD if you land Cero Oscuras (Partial Essence new effect). Let's dive into all Partial Res options below and analyze them individually.
Partial Res Rankings: S-Tiers usually have powerful true comboes, OP moves or exploit the new low Reiatsu nerf with Rei steals like Vampire/Phoenix. A are great Partial Res options for raw damage but are just less flexible than S. B-Tiers are also good but are slightly weaker than S and A and C-Tier are underpowered options that you should re-roll.
Related: Type Soul Clan Tier List & Schrift Tier List
S-Tier Partial Res
| S-Tier Partial Res | Notes & Best Move |
|---|---|
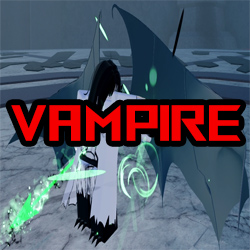 Vampire Legendary |
• What makes Vampire one of the best Partial Res in Type Soul right now are the re-release Reiatsu changes where every race has less rei and there's no rei regen accessories • That's a long way of saying the X move is really strong since it steals Rei as well as HP further reducing your opponent's Rei options • C is also S-Tier since it also steals HP and applies antiheal but you have to connect an M1 to steal HP • Z is a decent move as a combo extender into Time Cut/Fast Fang • Overall Vampire might be the strongest Partial Res right now Best Move: X or C |
 Shark Rare |
• X is easily one of the best Partial Res moves in the game because it gets you out of danger, gives you iFrames and guarantees a guardbreak hit if you touch your opponent • Z is a bit weird since while it comboes well when close range, I wouldn't use it as a ranged projectile since the trajectory is always a bit weird and random • C is a bit easy to counter like Wolves from Starrk so if you can bait out counters this can do good damage Best Move: X |
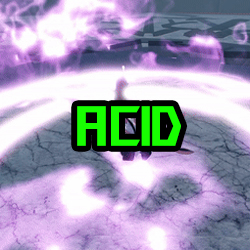 Acid Common |
• Z is amazing on acid since it's really easy to hit due to the AOE, deals good damage with the DOT and true combos into powerful moves like Cero Grab, Fast Fang, critical or even Rising Swallow if they're close enough • X isn't the best so I would skip it • C is a decent defensive alternative to Z because it's sort of like a counter but the retaliation is a fast moving damage orb that guardbreaks • Overall for a Common Acid is a really good combo Partial that sets up powerful attacks with its Z Best Move: Z |
 Light Mythic |
• Unlike Snake, Light is still an amazing Mythic in the re-release • Z is a great spam-able poke or combo extender that's great for a Kido build • X is one of the best Partial Res mobility moves to close distance (Hold space for a faster version) • C is amazing damage with guardbreak that's good for any build but I like it on Hakuda since the playstyle encourages getting in close and pressuring opponents Best Move: All are good and it depends on if you're going Kido/Kendo/Hakuda |
 Bone Common |
• A lot of people like Bone due to the Z move which autotracks if you hit but while it's powerful note that counters destroy it • X is good with Speed for comboing from X into a lot of good fast melee moves • C is amazing because it's easy to hit due to the double-hit AOE, interrupts some attacks and true combos into Sonata Flow, Rising Swallow if you're close or just M1 combos Best Move: C |
 Phoenix Rare |
• Similar to Vampire, Phoenix is much better now due to the Rei nerfs since it steals Reiatsu with its Seared effect applied from each move • Z has a lot of stun and posture damage so it's a good combo into faster moves like Fast Fang or jump crit • X is kind of like Panthera's Z where it's a good standalone move but it doesn't really synergize well with anything to combo with • C is powerful damage if you track their flashstep to hit them after it since it guardbreaks (be careful since you can get punished if you miss) Best Move: Z |
A-Tier Partial Res
| A-Tier Partial Res | Notes & Best Move |
|---|---|
 Slash Common |
• Overall a high damage Partial if you can reliably proc the Bleed • Z isn't the best nor worst move here since the Meta edges towards up-close melee fights but it's pretty good if you need a projectile, zone or interupt tool • I would avoid X since Slash isn't about hyperarmor charges even though it's a decent move if you need a combo opener/distance closer • We're here for the C move which is a fast high damage combo extender that's good after anything like a parry, dodge, stun move, etc. Best Move: C |
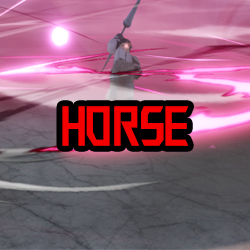 Horse Legendary |
• Best used with Ground Hakuda to stay close to the enemy and keep applying pressure • X is objectively the best damage, AOE, high posture stun and true comboes into G. Hakuda moves like Confliction/Earth Shatter and a ton of other moves • C deals a lot of damage and is hard to parry because it's a multi-hit move so if you aim it right to predict dodges you can deal a lot of damage • Avoid Z due to the long windup and having to take a sec to aim • Might be S-Tier due to the Ground Hakuda true comboes but I have to play it a bit more Best Move: X in most cases, especially with Ground Hakuda but C can also be great |
 Storm Common |
• Storm is a perfect A-Tier that's a good aggression Partial to take along with Speed moves to combo and pressure opponents and pretty much any move here is good but nothing broken • Z is a faster autotrack teleport with less range and C is the opposite with longer range but you have to aim it and both combo well into further fast melee attacks • X is for AOE guardbreaking and combos decently into strong close-range moves like Rising Swallow or a quick feint into a critical Best Move: All are decent depending on what you need |
 Starrk Legendary |
• Starrk still has a lot of mobility and pressure options with Z's flashstep cero that chains really well into Cero Oscuras for a CD reset, raw damage/posture (Use the Starrk clan for more Cero scaling) • X is bad since it's not hard to dodge and easy to punish (Only really good with Kido skills that can guarantee a hit) • C is a powerful move but it's really easy to counter and most good Shikai/Schrift have counters so you'd have to bait those out first • Overall Starrk is good for a build around Z so while powerful for A-Tier it's not the most flexibile for S-Tier Best Move: Z |
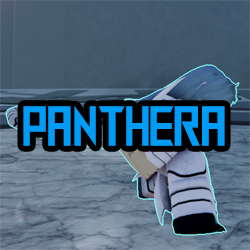 Panthera Rare |
• X is the best move for dodging and comboing into other fast melee moves like Rising Swallow or Feint into any guardbreak move • Only do C if your build lacks a projectile move since it's pretty fast, deals decent damage and has a wide hitbox • Z is a weird standalone move that doesn't really combo well from anything or into anything so I would avoid it Best Move: X |
B-Tier Partial Res
| B-Tier Partial Res | Notes & Best Move |
|---|---|
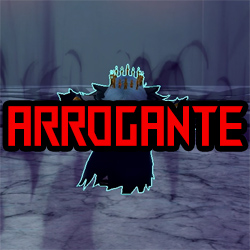 Arrogante Legendary |
• Z is a decent counter that ragdolls but it's not a true combo into anything so you can try to use as a combo extender with some moves • X is a great hyperarmor attack that randomly disables flashstep (leg effect) or applies a lesser damage debuff (hand effect) but it's only good if you get the flashstep effect • C is just good damage but the mini-stun effect is so short it doesn't really combo into anything • Overall no hard true combo and the good move is sometimes useful with flashstep debuff and sometimes just okay with the damage debuff Best Move: X due to the flashstep disable |
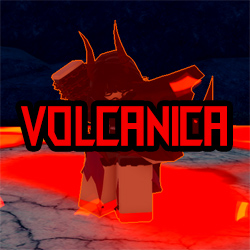 Volcanica Legendary |
• Z is an amazing move that both gives you mobility, has slight hyper armor and guardbreaks dealing good damage with the burn effect (Slam happens regardless of the dash hit) • X is also a guardbreak but not as versatile • While C doesn't stun for as long as before you can still combo off of it but I don't like the long windup and would prefer Z or X • While Z is a good move it's not anything comparable to A-Tiers in power and the other moves are situational Best Move: Z in most cases and sometimes X |
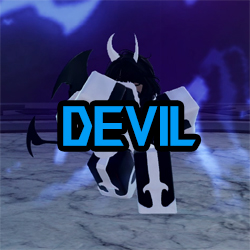 Devil Rare |
• Best combined with Air Hakuda or Speed depending on which move you're going for • Z has good mobility and posture damage and is best with Speed for pressure like Flash Cut into Z or with Flash Fakeout • XM2 is for Air Hakuda builds to keep enemies in the air and guardbreak/stun combo them • Ground C is good with Speed since it has high posture damage and is fast comboing well into Flash Cut/Flash Fakeout/Fast Fang • Overall there's no true combo here and you have to work really hard to be competitive but it has potential for A Best Move: X with Air Hakuda or Z/C with Speed |
C-Tier Partial Res
| C-Tier Partial Res | Notes & Best Move |
|---|---|
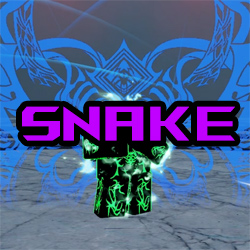 Snake Mythic |
• Snake got a lot of nerfs which made it not as dominant as before and dropped it from A-Tier for me to C-Tier (Check the nerfs in Update-Logs on Discord) • Still the Z move can be used as a decent combo extender into Mortal Ties/Time Cut • X has hyperarmor on frame 1 so you can use it defensively and XM2 is a great combo starter into Rising Swallow or any stun combo move • C is terrible due to its easy-to-parry/dodge attack with no guardbreak • Snake can still be decent with Hakuda or Kendo builds but it's definitely not what it used to be • Note that the Full Res and Segunda drastically change this to S-Tier (See below) Best Move: X and sometimes Z |
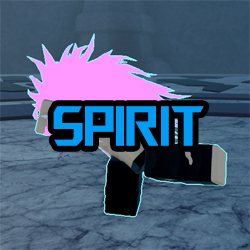 Spirit Rare |
• Overall I wouldn't bother with Spirit since it's currently the weakest Partial Res in the game • Z is the best move since it can't get punished melee due to the AOE hit • X and C aren't good |
Type Soul Full Res and Segunda Etapa Tier List
As for the best Hollow and Arrancar Full Resurrection and Segunda Etapa in Type Soul I'll be combining them since the Full Res boosts base moves and Segunda gives you new ones. You'll see some drastic changes from the Partial Res tier list with Snake moving from C to S and in general a lot of movement for better or worse. Some reach full potential with just the Full Res while some are only good with Segunda and so on. Below I'll analyze each Full Res and Segunda in Type Soul individually.
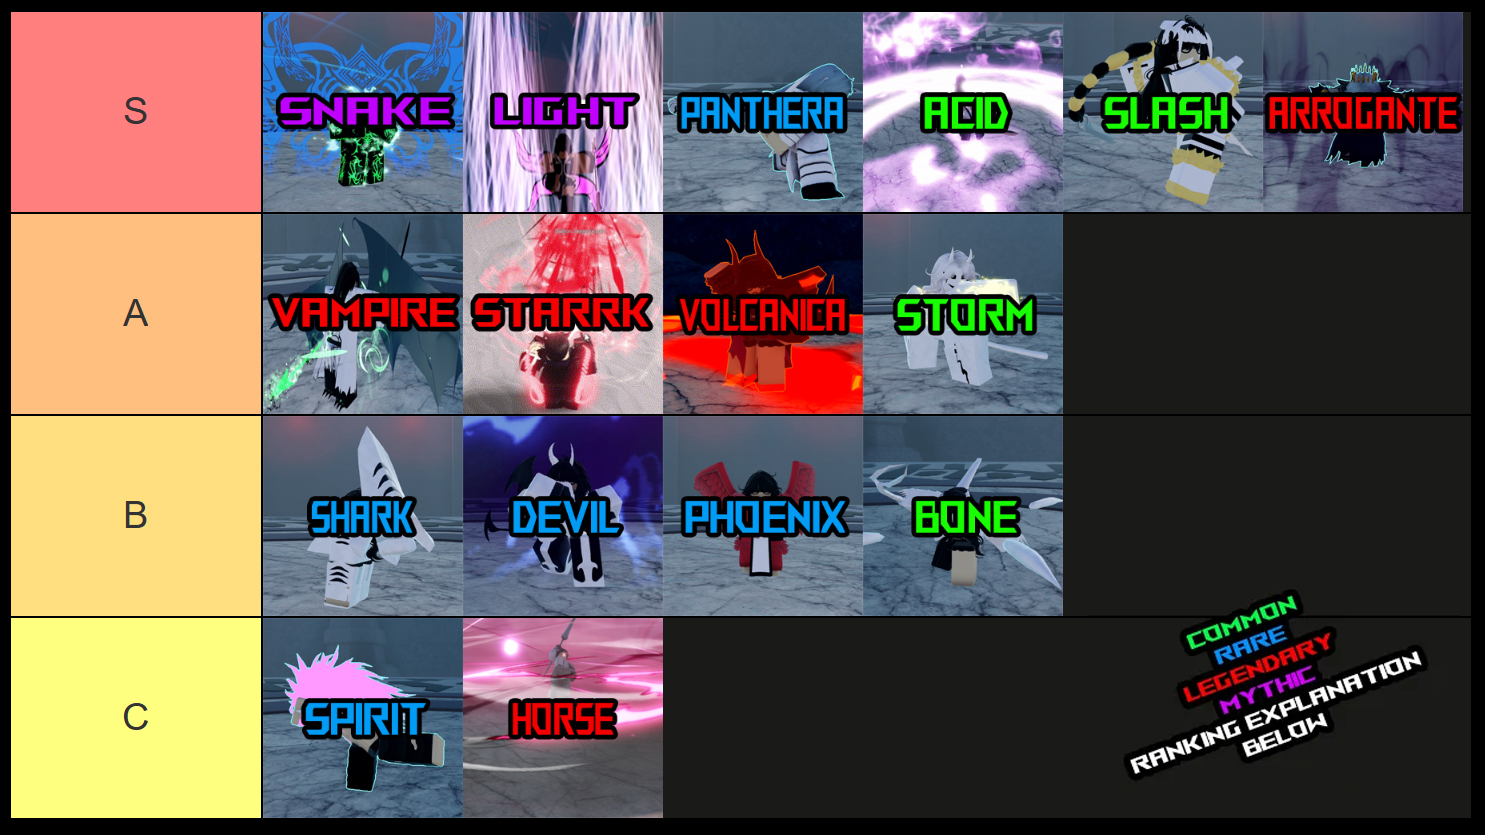
S-Tier Full Res and Segunda Etapa
| S-Tier | Notes |
|---|---|
|
Snake |
• Snake is arguably the most powerful Full Res/Segunda in Type Soul due to its true combos but you have to think of it like Creation for Shikai where you need to practice the combos • The main idea is going into Overdrive where you have no flashstep cooldown, enhanced moves, enhanced criticals where Crit (Hold W) is a lunge and Crit (Hold S) is a counter where both stun allowing you to true combo into other moves • Overall most moves in Overdrive stun for enough time to true combo into other moves • Then for Segunda you have Basilisk's Seal which is your bread and butter combo start with a ton of ragdoll into C, Z, Crit W, etc. (In Overdrive it steals their Bankai/Vollstandig/Segunda bar and turns into your Segunda bar) • Overall, you need to practice the timings and variations of all moves to learn the best combos for yourself and Snake will dominate the ladder for you |
|
Light |
• Where Snake is better for 1v1s, Light is the king of bossraiding and teamfights due to its massive AOE attacks and area damage • The full Res gives you AOE M1s and crits and boosts your moves, especially X that becomes a really fast annoying grab that deals a lot of damage and ragdolls enemies and C which is a HUGE OP AOE damage nuke (Resets on Segunda) • Segunda lowers your range on M1s and Crits but makes them do more damage and posture and the Crit guardbreaks for an amazing combo starter/extender into X • T is mostly for zoning and stalling for CDs but G can be broken since you disable flashsteps in an AOE and then nuke the area the zone expires • Go for Light to dominate teamfights, easy S-Tier |
|
Pantera |
• Panthera's Full Res is just a better 1v1 version of the base moveset where the Z deals more damage, more posture and guardbreaks which is one of the best moves • X deals tons of damage and ragdolls for a true combo into fast moves like Floating Strikes or Rising Swallow or C which deals a bunch of damage (Also a good combo starter) • That said, the Segunda takes 1v1s to a whole other level with its new Crit mainly because it ragdolls for a longtime allowing tons of true combos with your kit and Speed/Kendo/Hakuda skills • The Z stuns for a long time, X teleports you and true combos into the same stuff as above including the new T which does massive damage • Finally your G is basically the Vergil/Yamato Judgement Cut from DMC that deals some of the best damage I've seen Segunda moves do in addition to the T • Overall while Snake has more combo potential, Pantera definitely does more burst damage |
|
Arrogante |
• Starting off strong Arrogante gives you an incredible AOE crit with guardbreak for starting combos in Full Res • Z is similar and also guardbreaks and explodes a sec later to extend combos but I like starting with X since its a hyper armor dash that drastically slows enemies • Segunda just boosts everything with better moves, more M1 damage, better crits and T is massive AOE damage that stuns and true combos into other moves like the G slashes • The Full Res and Segunda really make Arrogante much stronger in terms of both damage, true combo potential and debuffs with X |
|
Acid |
• I like how the Common Full Res here with Acid is better than some Legendary Segundas • This is because the boosted divebomb move with Z deals a lot of AOE damage and stuns with back-up AOE damage from X and the C becomes an amazing i-Frame damage move that you can use to absorb other moves and deal more damage • Segunda cranks everything up to 11 with even more damage and AOE damage on base moves that now auto-track • Also, the T is great after you apply blight stacks from other abilities because it explodes the enemy and G is just a great grab damage move that has some utility to go invisible if you hold it • Overall this Common puts B-Tier Legendaries to shame |
|
Slash |
• Slash is another really powerful Common because the Full Res Z is really fast and true combos into Floating Strike, Rising Swallow, Fast Fang and other fast moves. • X becomes unblockable and C's damage and stun gets boosted for more true combo potential with C into Z/X or other moves • For Segunda you get a massive AOE Crit damage move • That said T is where it's at for a powerful one-time combo forward that then comboes into TM1, TM2 and then X that teleports to the opponent and deals massive damage if you can land all moves (Note that while T is unblockable it can be parried) • Also the G comboes well with the Crit and Z now sends you flying to perform the slashes which in my opinion is a bit worse for comboing • All in all this isn't the strongest S-Tier but it's S nonetheless due to the damage and true combos |
A-Tier Full Res and Segunda Etapa
| A-Tier | Notes |
|---|---|
|
Volcanica |
• Volcanica becomes an AOE beast with Full Res and Segunda with guardbreak and hyperarmor moves • For Full Res Z with hyperarmor goes further, faster and leaves a DOT pool while X and C are amazing burn AOEs for teamfights • For Segunda the T moves is great single target damage but the G is where it's at because it summons a volcano domain where your base moves get stronger • With G active holding G plus Z, X or C does new moves like the Z traps people inside unless they use mobility moves to escape and then G and C rain down heavy AOE damage upon them • Overall this is a high damage AOE moveset that doesn't have a lot of hyper aggressive combos for 1v1s but is all-around favored for small teamfights instead (Since they can escape your G+Z prison with Flash Fakeout, Blooming Cut and similar moves - Might deserve S but it's A for now) |
|
Vampire |
• Vampire is really good in Full Res giving you a fast attack spear and a special Cero crit that stuns and has a wide AOE • The Z and X moves get boosted with Z dealing great posture damage so a good combo after Crit and X heals you a lot • With Segunda the crit is an AOE stun scream that's a great starter and the new T is a great combo start tool • The G is just a massive damage nuke that deals continuous damage so it's a great tool to move stack other moves on top of it like T or the base ones • Overall a decent Full Res that's focused on the crit and a nice Segunda, but not as OP and oppressive as the S-Tiers |
|
Starrk |
• The Full Res works by alternating between gun moves and dual sword moves that you can switch from swords to guns with the X cero if you deal enough damage with it • I personally don't like the unreliable stance switching and the sword moves are not as good as the gun ones which is why Starrk is B for Full Res and A overall with Segunda • The Full Res can be good in gun mode because your main tool Z with guns now guardbreaks • The gun X is also a powerful one-time nuke that you can set up with Wolves to deal amazing damage • The Segunda makes this much more reliable with you always being in gun mode and your crit and T dealing amazing damage (T stunlocks so if you hit someone they're taking the whole thing) • Great stun-locking ranged option for zoning and ranged combos |
|
Storm |
• The Full Res moves for Storm don't change but they're better when you stack up orbs from C where for example your Z will hit an amount of times equal to the orbs you've stacked up • C's orbs also boost your speed and flashsteps the more you have and when you reach 6 you can do a high damage AOE move which is okay as a finisher • That said, the reason Storm is good and in A-Tier is that the Segunda gives you the T dash move that deals massive damage and ragdolls for 4 seconds allowing you to pull of any true combo you want • The Segunda G is just overall a decent AOE damage move |
B-Tier Full Res and Segunda Etapa
| B-Tier | Notes |
|---|---|
|
Shark |
• For Full Res here the broken Z move gets more OP where it's just free damage whenever you pop it and while C is underwhelimg the R Critical guardbreaks which is good for comboing • For Segunda the T does a lot of damage and stuns but you can get easily punished in teamfights which I don't like since you're just standing there • That said G is much better with a tsunami that hits everyone that is not in front of you so you want to turn to your side and summon it to cover a better area so it goes horizontal • Overall the Full Res and Segunda make the Z and Crit better while giving you the G move and that's it, a bit underwhelming compared to the others but still pretty good and definitely competitive |
|
Devil |
• Devil is a bit mid for Full Res because the Z just goes further, X is more AOE, and C guardbreaks which is arguably one of the better moves • For Segunda you're looking at more AOE damage which is pretty good and raises Devil from C-Tier to B-Tier but I still expected more here • Overall if you're going to play Devil the Segunda is what you want because the Full Res is underwhelming |
|
Phoenix |
• The Full Res could have been so good with the Z turret spawning if not for the fact of a loud sound effect that tells you exactly when you need to parry • But that's it for Full Res... I had so much hope for Phoenix due to its Rei debuffs • The Segunda expands the turret mechanic with more turrets but they're still easy to parry due to the sound • The T move is a decent damage grab and G is actually really good for AOE damage and pressure which saves the Res from C-Tier • You also get a one-time use lifesteal move with C so this is definitely not a C-Tier Res but I did expect a lot more playing around the Rei siphon mechanic from the base |
|
Bone |
• The Full Res for bone honestly makes it a bit worse because while the Z is better the C no longer stuns around you but goes from outward to inward which makes it harder to combo from • The segunda is hit or miss with the T charge being just a standalone move that doesn't combo and the G being a good AOE knockup that you can combo from with feints into the new critical • The new critical is pretty decent due to its speed and it does ragdoll so you can combo off of it too so Bone is perfect for B-Tier being saved from C by the Segunda |
C-Tier Full Res and Segunda Etapa
| C-Tier | Notes |
|---|---|
|
Spirit |
• Spirit's Full Res Z is actually pretty good because it true combos into Rising Swallow and Floating Strikes as you're falling • That said X and C don't improve much dealing a bit more damage and being just a bit more useful • The Segunda T is a pretty massive damage burst • The G is an AOE stun that's easily dodged and your base moves stay the same so overall you still have to work hard to land T so I'm not the biggest fan of Spirit having used it |
|
Horse |
• Horse is underwhelming and slightly underpowered compared to the others • For Full Res your basically get a slow wind-up crit that's horrible in 1v1s • You also get some utility moves to drag foes around and you can combo Z into C well but it just does horrible damage for Meta standards so I would skip Horse • The Seguna is also underwhelming overall because the base Z, X and C kit drags it down with low damage |
That's it for my Type Soul Resurrection and Segunda Etapa tier list and guide for Arrancar and Hollow. If you want to reroll you Res check out our Type Soul codes for rerolls.
The post Type Soul Resurrection and Segunda Etapa Tier List (August 2025) appeared first on Destructoid.