Learning how to read greens in golf is one of the most important lessons an amateur can learn, but some are oblivious to the key information that can be gathered on and around the putting surface.
When trying to improve their putting, using the best putting tips and drills, they often focus on other key areas like how to grip the putter or controlling speed on the greens - but at the expense of the crucial skill of green reading.
AimPoint helped me to reach my lowest ever handicap, and is therefore my preferred green reading method, but there are certain fundamentals that apply universally irrespective of your chosen process.
In this article, PGA Master Professional and Golf Monthly Top 50 Coach Anders Mankert shares four pivotal green reading clues that you need to pay attention to every time you putt... or you could be frittering away unnecessary shots!
Green Reading In Golf: 4 Clues To Find Every Time You Putt
Clue 1: High Point
Reading a green starts way before you reach the putting surface, as there is so much information you can take in from the walk towards your ball. In the image below, I am looking for a few things - but initially I want to find the high point.
Once I can see the highest point of the green, I should be able to work out the direction that water would run. Here, the water would drain from the top right to the bottom left, so I already have an idea as to which way my putt could break.

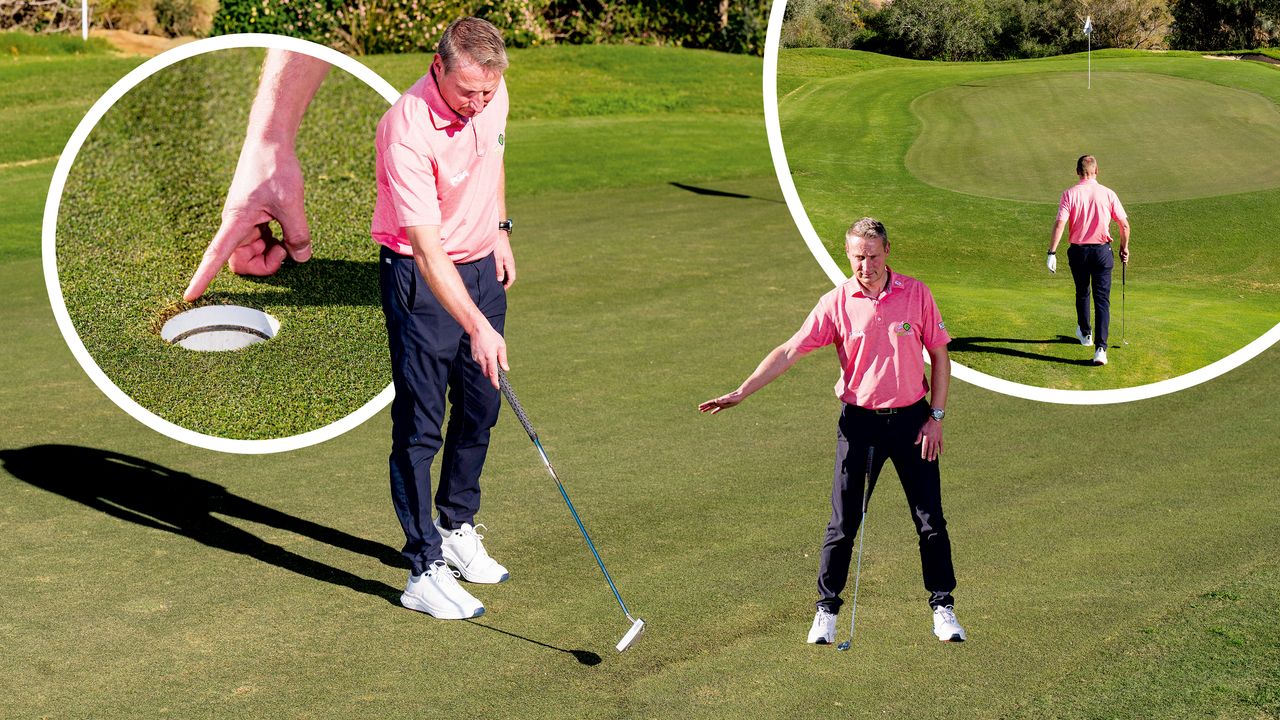
Clue 2: Grain Around The Hole
Analysing grain around the hole can provide key information. In the two images here, you can see one side of the hole has the grain towards it and the opposite side has the grain moving away from it.
A putt will always break more towards the ‘rough’ side of the hole, where the grain moves away from the cup – so factor that in when picking your line.

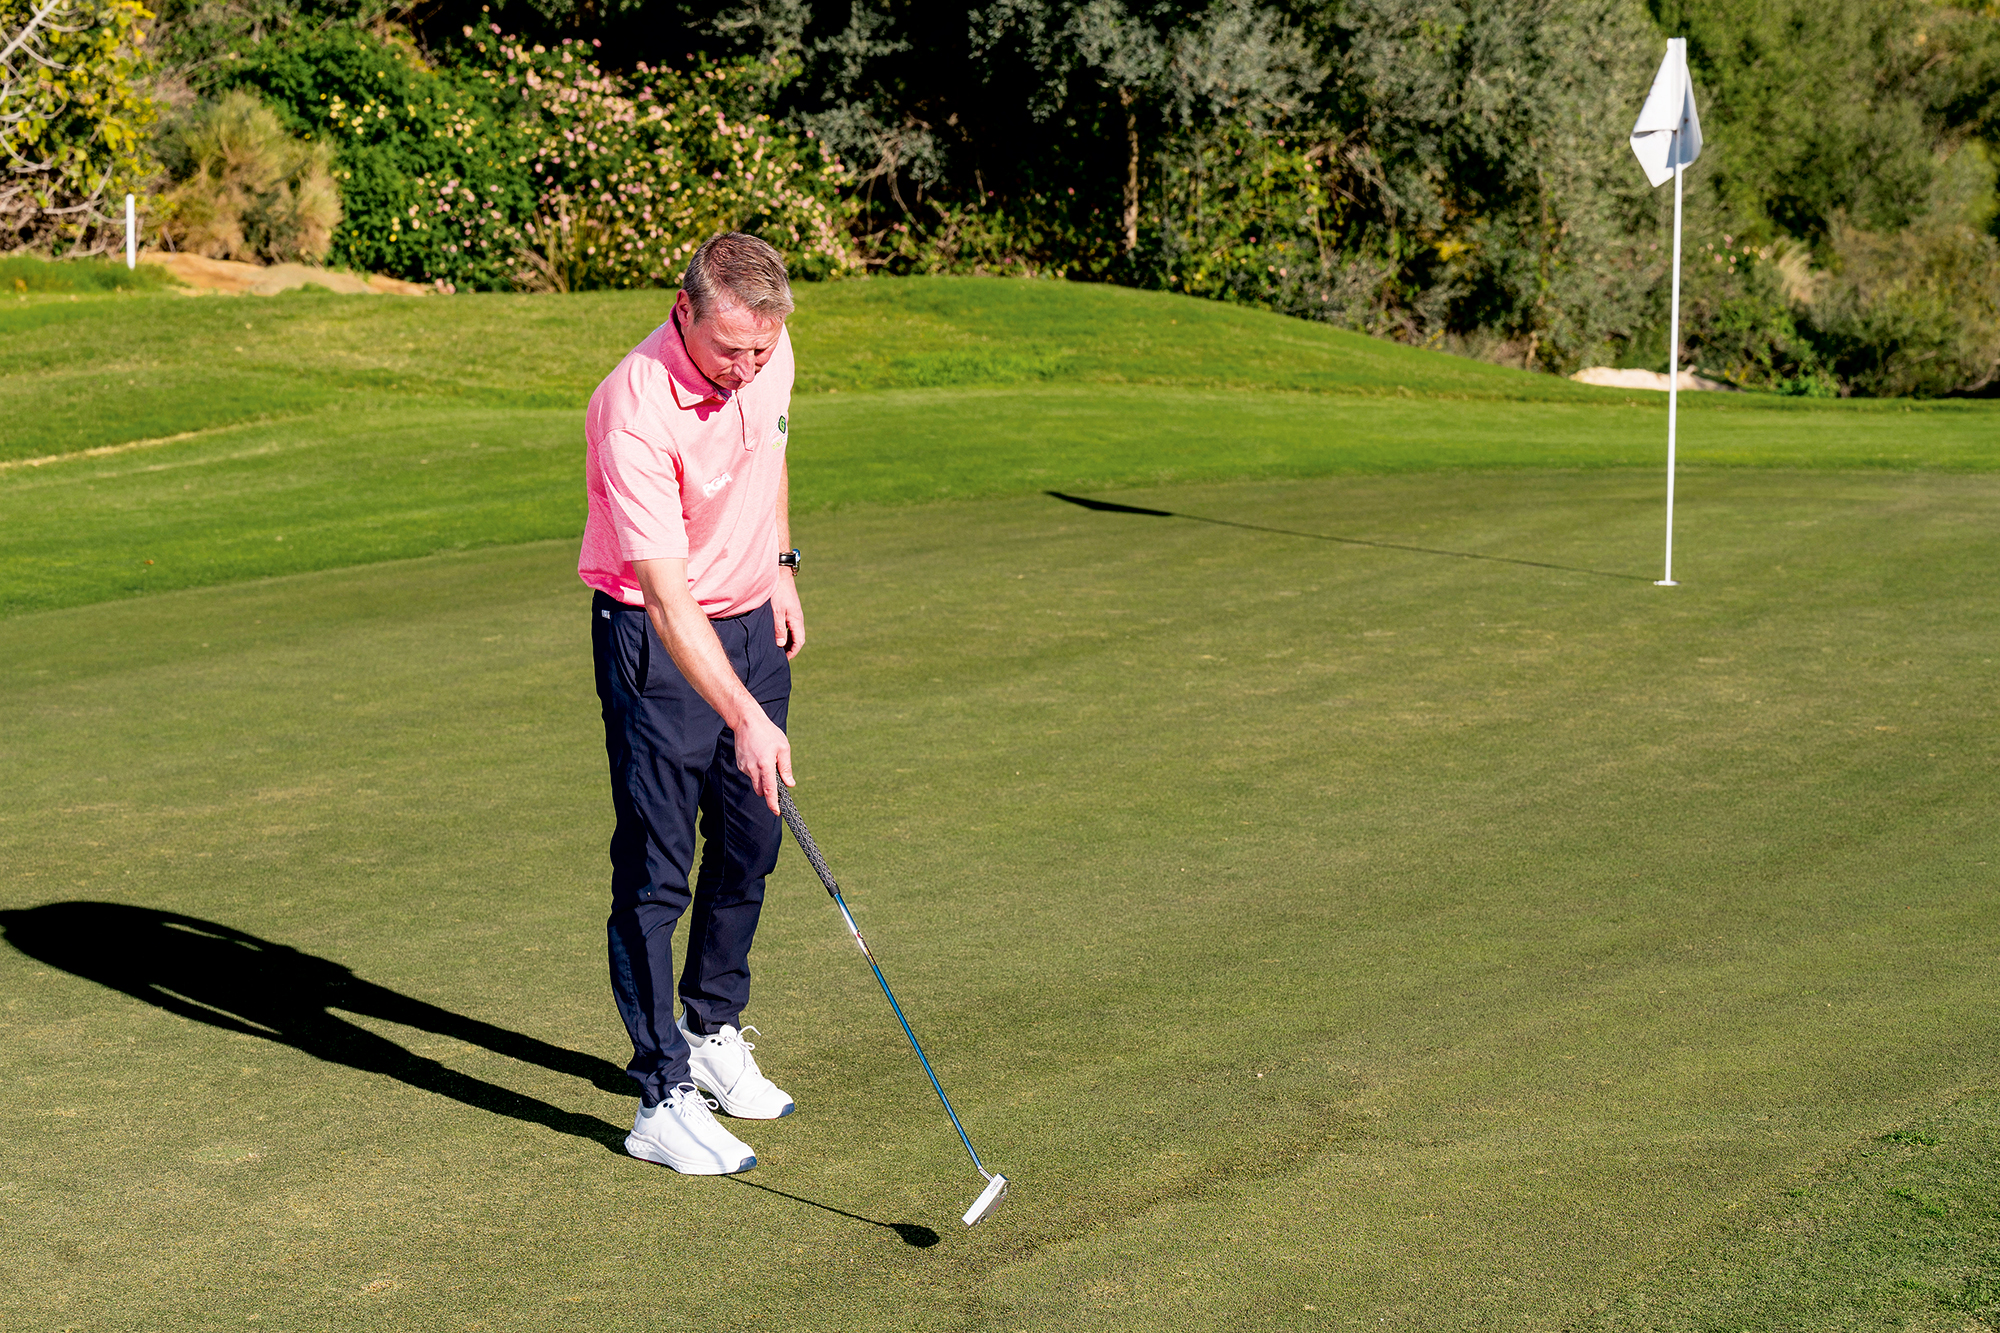
Clue 3: The 'Shiny' Side
When trying to read the green, it’s crucial to know whether you are putting into the grain or with it.
If the surface between your ball and the hole looks shiny, you’re putting with the grain, so the putt will be fast and speed control will be key. If the green looks darker, it’s likely that you’re putting into the grain, so your putt is likely to be slower.
Clue 4: Below The Hole
You can see and feel the read of a putt better from below the hole. In this image I am using my feet and my eyes to analyse the break of my putt by assessing the slope, which will quite clearly move the ball from left to right.
I like to eliminate one side of the hole, so in this instance I know that there is no way this putt moves to the left. Taking one side out of play helps you to simplify the equation, making reading the green that little bit easier.

If you pay attention to these four pivotal green reading clues, I am confident you will limit costly 3-putts, give yourself a much better run at birdie attempts and ultimately shave a few shots off your round by avoiding simple mistakes.
What Is The Best Grip To Use When Putting?
The answer to this question is very subjective, as it really is a matter of personal preference.
Golf Monthly instruction writer Baz Plummer recently did a putting experiment, where he hit 60 putts from six feet with three different grips to determine which was best for him.
The candidates were the claw grip for putting, the left hand low grip and the conventional method, with the latter emerging victorious in the test.
My advice would be to try each and see what feels most comfortable for you, but remember to practice before you try to make any changes to your putting grip on the course.