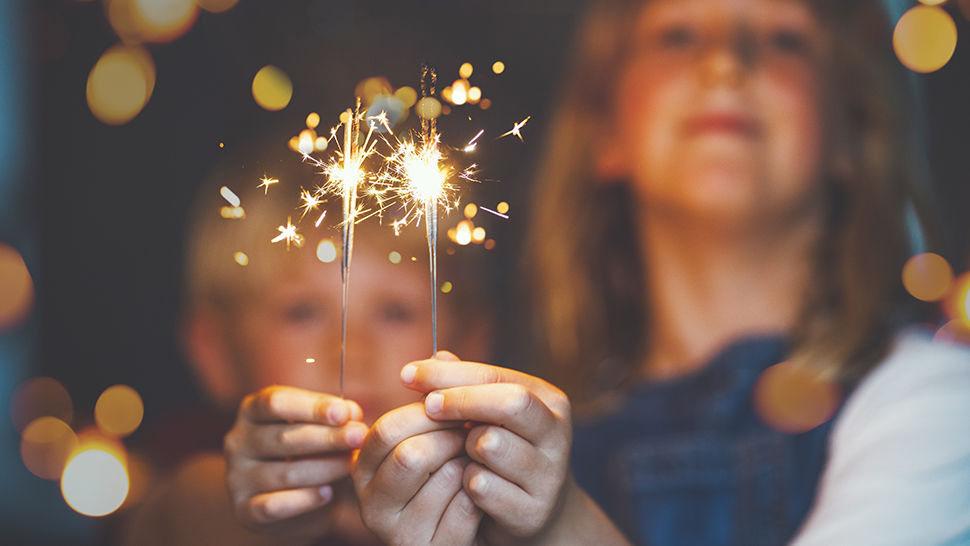
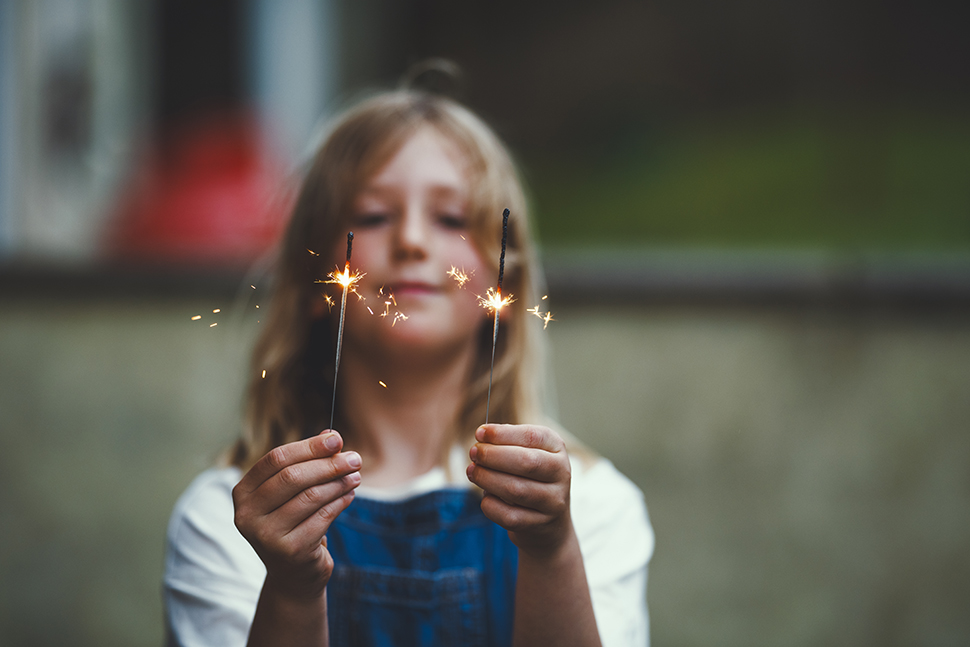
With daylight hours being short and the weather getting chilly, why not get creative and shoot some festive low-light images using some sparklers and a bokeh effect?
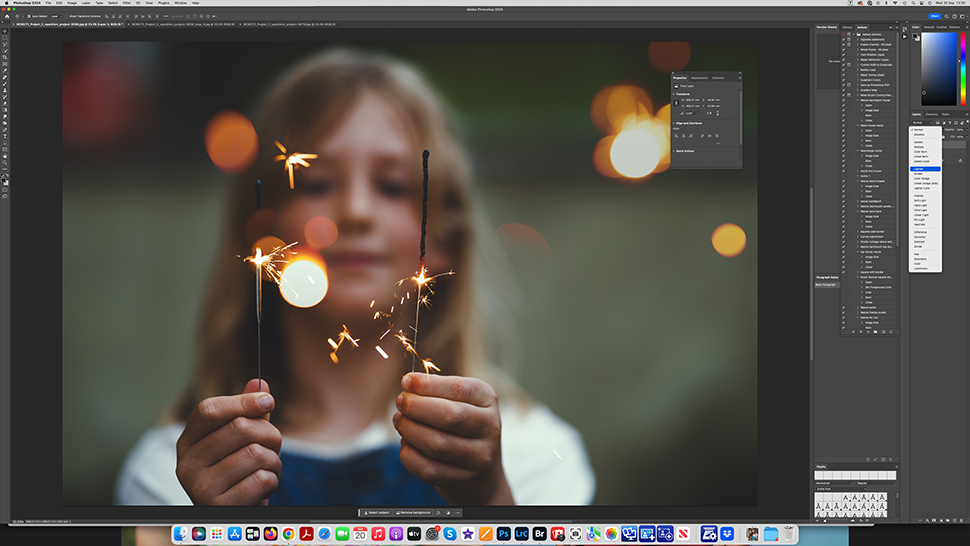
To create our final result above, I had to merge multiple images together as I couldn’t capture it all in one shot. The main image is of the subject holding the sparkler, and this has been layered with multiple bokeh images to create the final effect. Doing it this way meant I had complete artistic control over the final outcome, making it far easier to achieve results with plenty of impact.
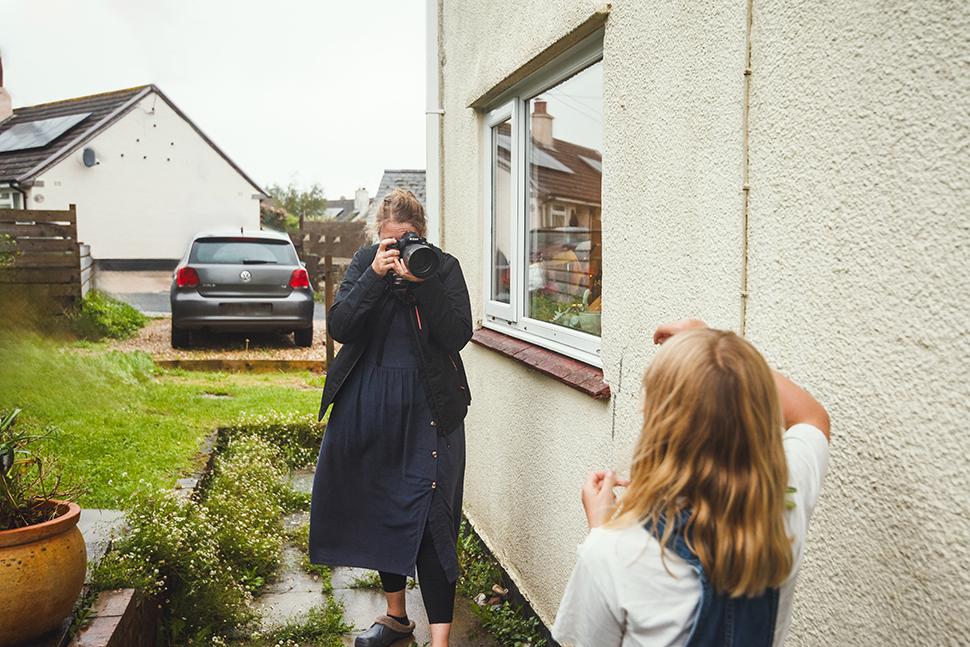
To give this project a go, you don’t need much in terms of kit. I had some indoor sparklers, a lighter, two small models as helpers (they can be any size or age), a camera (Nikon D850) and lens (Sigma 135mm f/1.8 DG HSM Art ) and, for editing, Lightroom (to tone and style our image) and Photoshop (to blend multiple images together).
As this is a trial-and-error type of project, I recommend you have some spare sparklers to hand. It’s amazing how quickly they burn through, so make sure you’re ready to shoot as soon as they are lit.
ADULT SUPERVISION
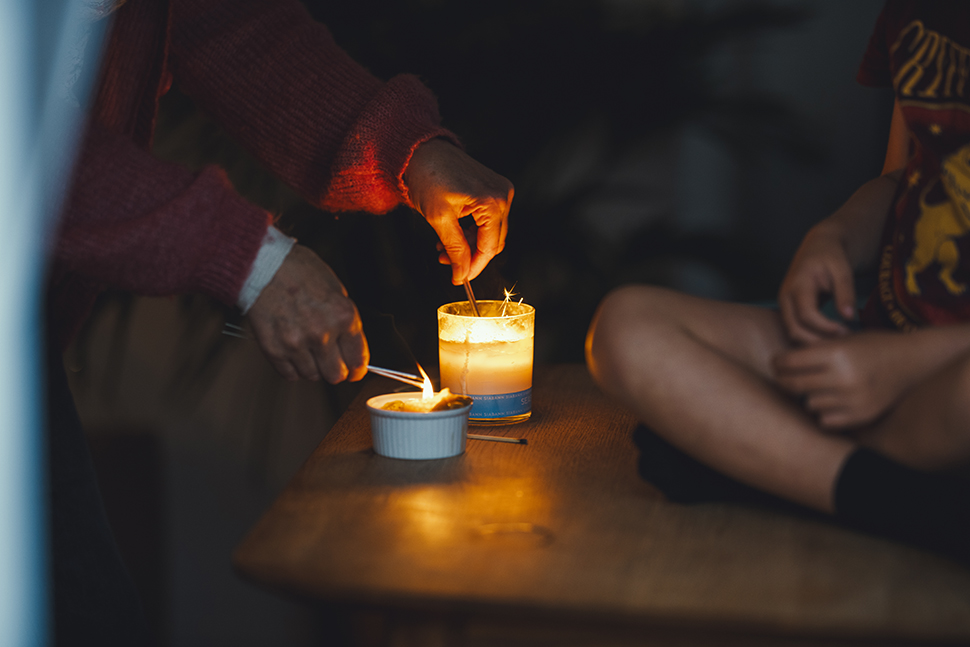
Always have an adult present while using sparklers to produce creative shots – and remember, children under the age of five are not allowed to handle sparklers in the UK. Check the guidelines in your region. Always hold the sparklers at arm’s length, away from the body, and have a bucket of water close to hand so you can put the hot end of the sparklers into it once they have been used.
Step by step: Shoot a creative sparkler photo
Find the right environment
This project can either be shot indoors or outdoors, depending on your preference. However, if you shoot indoors, make sure you use indoor sparklers. To create the perfect environment for our shoot, I waited until the light was low but not completely dark as a touch of natural light in the background works in your favour. Think about your background and how it will frame your subject – a plain background often works best.
Dial in your camera settings
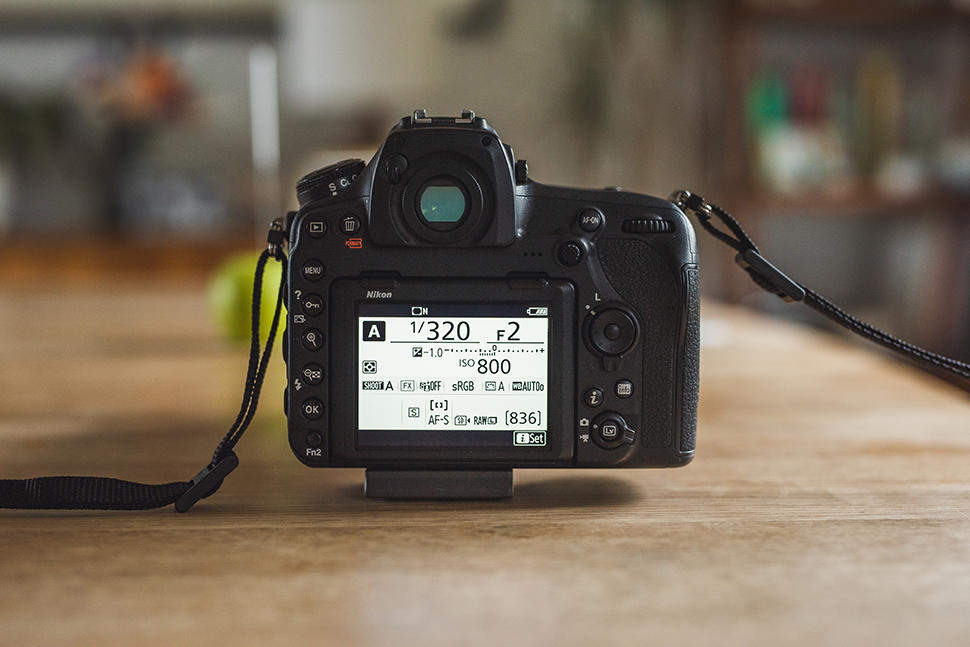
For this setup, the most important setting to take into account is the aperture of the lens. Put your camera into Aperture Priority mode; as a shallow depth of field is required, I set my aperture to f/2.
To ensure our shutter speed was reading fast enough (ideally over 1/200 sec), we set our ISO between 400 and 800. This is so you can hold your camera by hand, while keeping the sparks pleasingly sharp. You may need to do some light tests to determine the right camera settings for you.
It’s sparkle time!
Once you have your camera ready, get the sparklers out. As I had some little helpers to model for us on this shoot and they couldn’t light their own sparklers, I first had to light them and then move into a position to shoot.
Get your subject to hold the sparkler out at arm’s length, and slightly raised, to create the shallow depth of field effect. Do a practice run with no sparklers before you light anything, so that everybody knows what they are doing. Your focus point should be on the sparkler and the hand. Keep shooting as the sparkler burns down the stick.
Capture the bokeh image
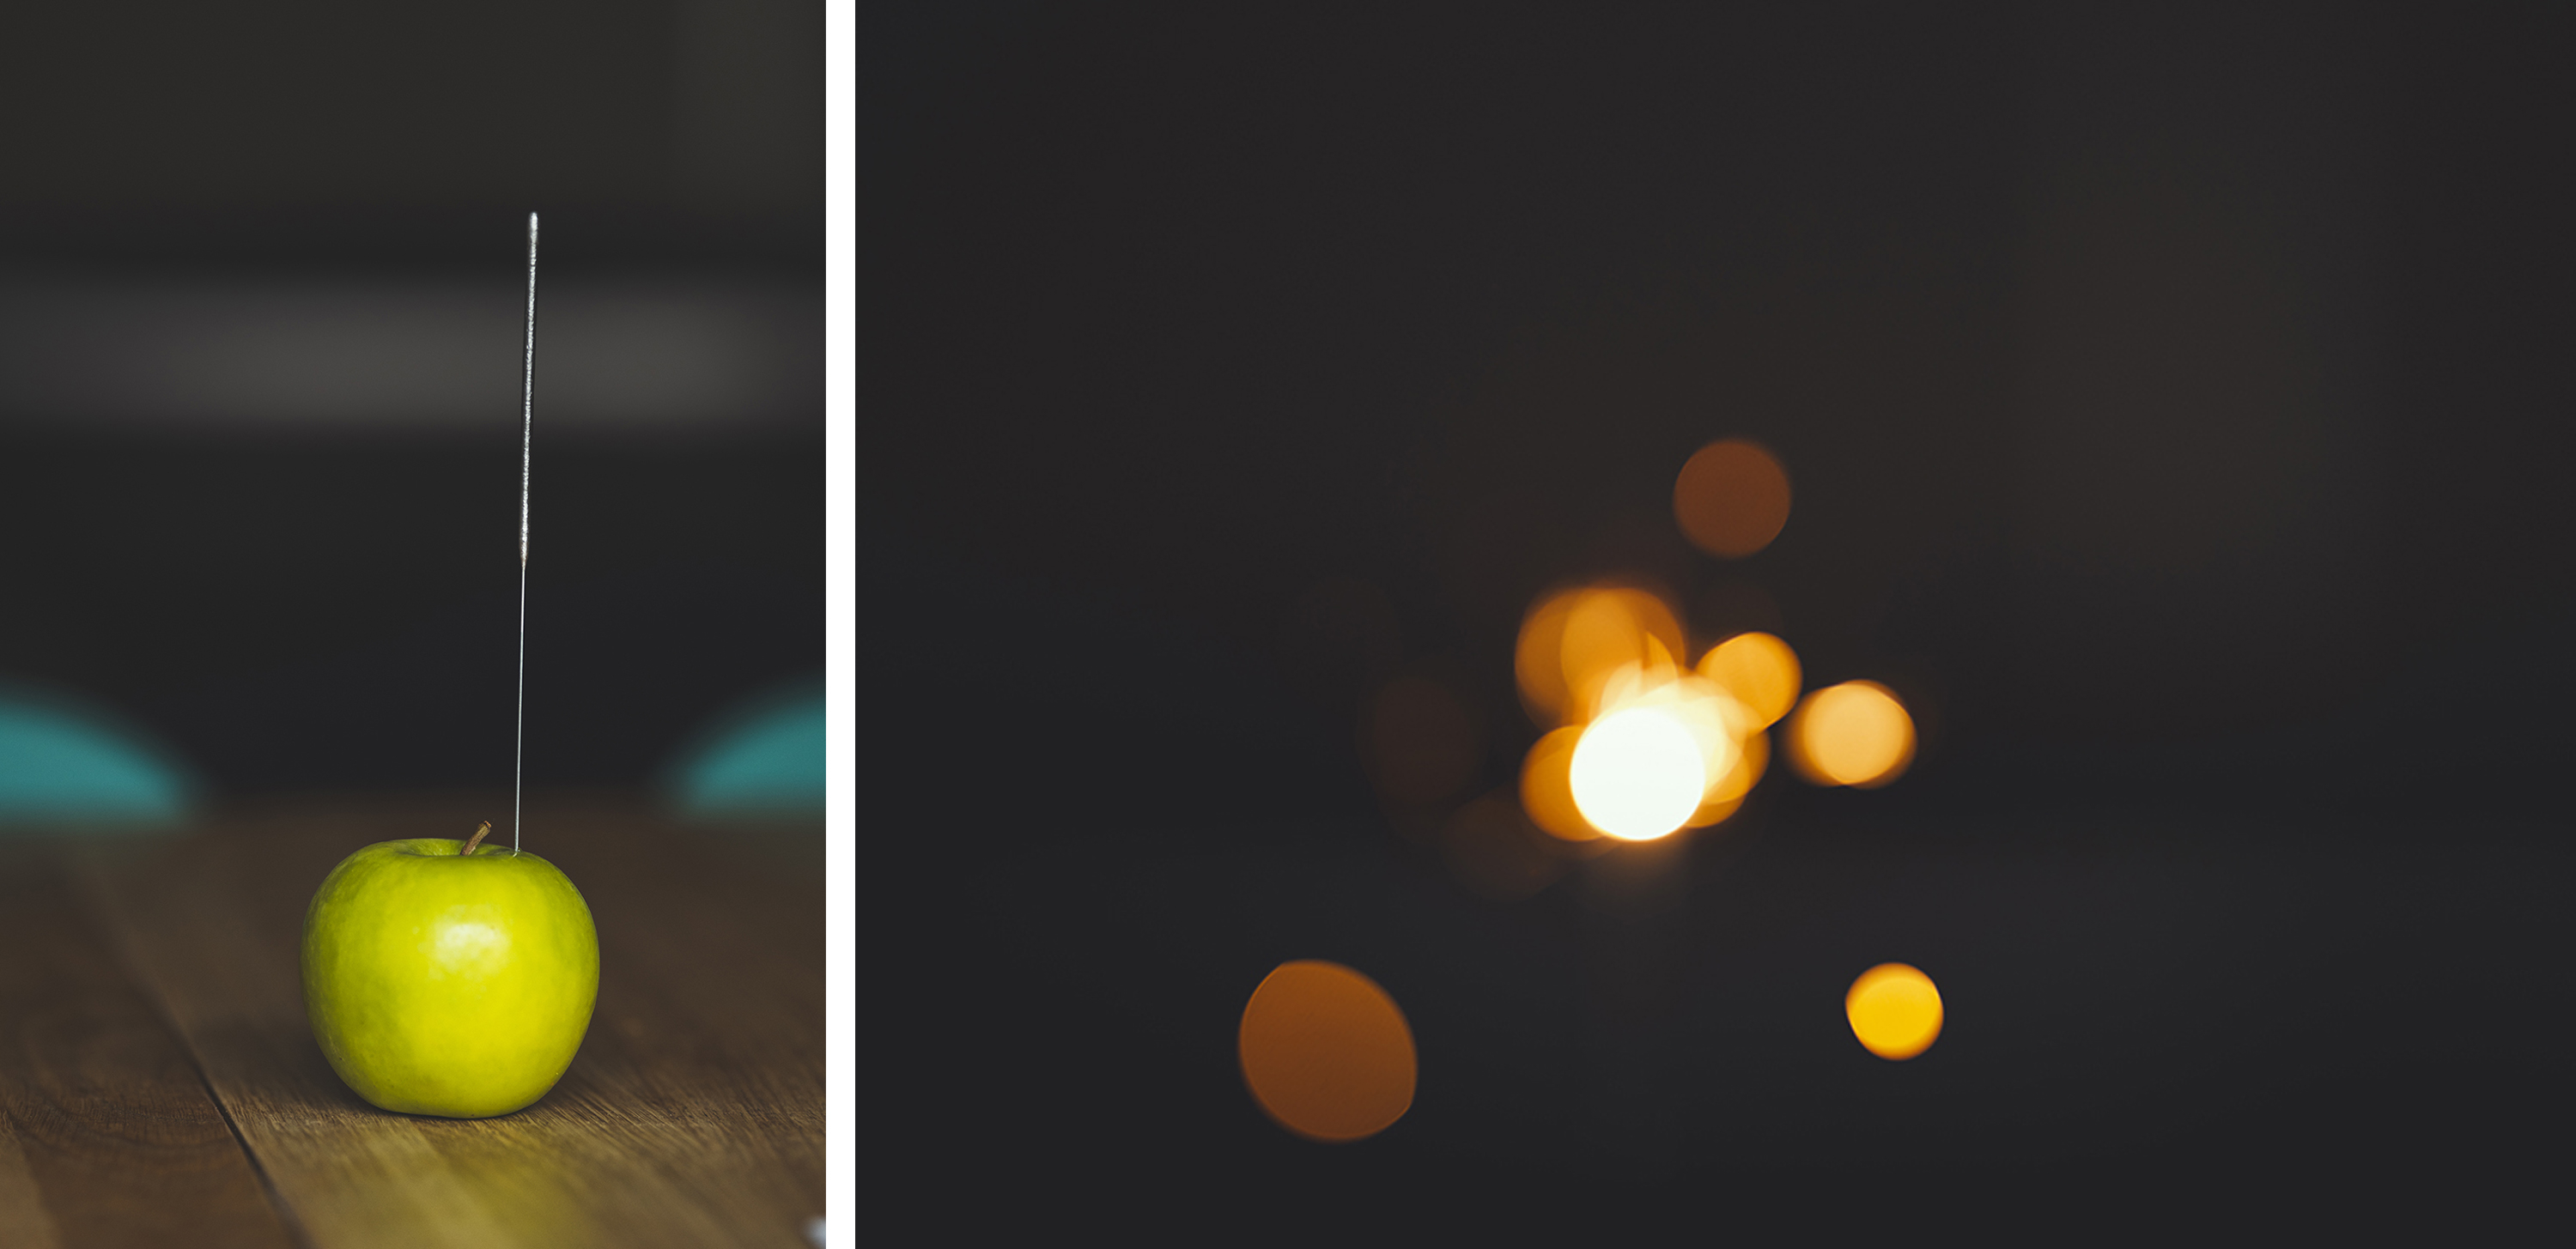
Next, you need to shoot your bokeh image. As our little helpers had already gone to bed, we shot the bokeh images separately using an apple to hold the sparkler in place. To take these images, keep the same camera settings as before, but instead of using AF, switch your lens to manual focus and knock the focus out to create those round bokeh dots. Shoot again from the start of the sparkler until the end to get a selection of images.
Style and combine the images
To create our final effect, I first toned and stylized our image in Lightroom. We kept our background cool, then used warmer tones for the bokeh and foreground so the two contrasted well against each other.
Once you’re happy with the style of your images, export these files into Photoshop. Now you will need to layer your bokeh images on top of your original. To do this, import each bokeh image one at a time into your original image and change the Blend Mode of the layer to Lighten. I also experimented with turning down the opacity of the bokeh layers.
Adjust the size and position of each bokeh image (for example, place some small bokeh effects around the sparkler and larger bokeh effects in the corners) to create a final look that you’re happy with.
Bonus tip
Lens choice
To create that gorgeous shallow depth of field that works so well for this type of image, I used a Sigma 135mm f/1.8 Art lens. A long lens compresses the scene, so you are left with a dreamy background, with just one area of the scene sharp.
This project can be shot with any type of lens, but we suggest you avoid wide-angle lenses, as the blur and bokeh effects are much harder to achieve. A prime is preferable as you can open the aperture to a wide setting, but if you are using something like a kit lens, position your subject further away from the background to increase the blur effect.
• Get more inspirational Home photography ideas