Why Most Smoky Eye Guides Fail Indian Eyes
The standard smoky eye tutorial places the darkest shadow in the outer V, blends upward toward the brow bone, and lines the waterline in black. On a deep-set Western eye with a visible lid, that formula reads as dramatic and defined. On a hooded Indian eye, the same steps disappear the moment the eye opens, the hood folds over the shadow, the liner vanishes, and what remains is a smudgy ring with no definition. The technique was not designed for the eye shapes that are most common across South Asia: the almond with a low crease, the monolid, the hooded lid with a heavy brow bone, and the wide-set eye with a flat orbital area. Each needs a different approach to placement, blending direction, and pigment intensity.
Identify Your Eye Shape Before You Pick Up a Brush
Stand in front of a well-lit mirror and look straight ahead. Three questions tell you what you are working with.
1. Can you see your crease when your eye is open? If no, you have a hooded or monolid eye. The crease is there anatomically, it just sits below the brow bone's overhang. Shadow placed in the crease will not be visible; you need to work above it.
2. Where does your iris sit relative to the whites of your eye? If you see white above the iris, your eyes are more prominent. If the brow bone casts a shadow over the top of the iris, the brow bone is heavy and the lid space is compressed.
3. Are your eyes closer together or farther apart than one eye-width? Measure roughly: the gap between your eyes should equal the width of one eye. Wider than that is wide-set. Narrower is close-set. This changes where you concentrate shadow and where you leave it light.
Shadow Placement by Indian Eye Shape
Hooded and low-crease eyes: Place the darkest shadow higher than feels natural, above where the crease actually sits, not in it. When the eye opens, the hood will push that color down to exactly where you want it. Blend upward and outward, stopping short of the brow bone. Avoid shimmer on the lid itself; it catches on the hood and creates a greasy look. Use matte shadow in medium and dark tones on the mobile lid, and reserve any highlight for the inner corner only.
Monolid eyes: The entire lid is your canvas. A gradient from light at the inner corner to dark at the outer corner creates the illusion of depth. A thin line of kohl along the upper lash line, smudged outward, anchors the look without closing the eye. Skip tight-lining the waterline, it makes a monolid eye appear smaller.
Almond eyes with visible crease: The classic smoky placement works here, but Indian almond eyes often have a lower crease than the tutorials assume. Place the outer V slightly lower than instructed, and blend toward the temple rather than straight up. This follows the natural line of the eye rather than fighting it.
Wide-set eyes: Concentrate the darkest shadow at the inner corner and blend outward, rather than the reverse. This pulls the eyes visually inward. Keep the outer corner lighter and avoid extending liner beyond the outer lash line.
Liner and Kohl: Getting the Pressure Right
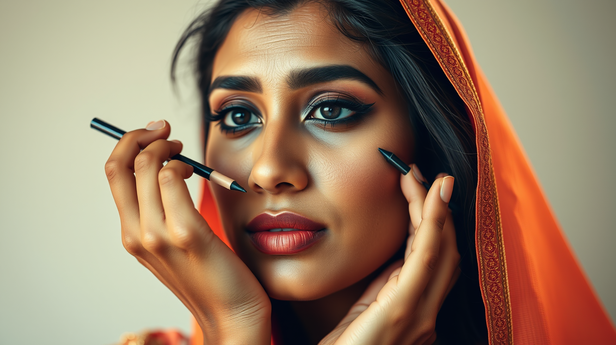
Kohl has been used across the subcontinent for centuries, kajal applied to the waterline is not a trend but a baseline for millions of Indian women. For a smoky eye, kohl on the waterline works best on prominent or almond eyes where the waterline is visible. On hooded eyes, tight-lining the upper waterline (the inner rim of the upper lid) gives definition without closing the eye down. Use a soft kohl pencil rather than a liquid liner for the smudged effect; liquid liner on a hooded lid creates a harsh line that disappears under the fold rather than blending.
For the lower lash line, a smudged kohl line placed just below the lashes, not on the waterline itself, keeps the lower definition visible on most Indian eye shapes. Draw it, then immediately smudge it upward with a small brush or your fingertip. The line should look like shadow, not a stripe.
Pigment Load: Why Indian Skin Tones Need More, Not Less
Deep and medium-deep Indian skin tones absorb color differently than the fair skin tones most shadow swatches are photographed against. A shadow that looks intensely pigmented in the pan or on a fair arm may read as a soft wash on deeper skin. This is not a flaw in the product, it is physics. Darker skin has more melanin, which means the contrast between skin and shadow is lower. To get the same visual impact, you need either a more pigmented shadow or more product.
Two practical fixes: First, apply a flat eyeshadow base or a thin layer of concealer on the lid before shadow. This creates a neutral surface and makes every color read truer. Second, pack shadow on with a flat brush rather than a fluffy one for the darkest areas. Blending comes after packing, not instead of it. For the smoky definition to read clearly on Indian skin, the darkest zone needs to be genuinely dark, not blended into a gradient before it has had the chance to build.
The smoky eye is not a single look with a single method. The placement, the liner pressure, and the pigment load that work on one eye shape actively undermine another. Once you know what your eye shape requires, the technique stops being a struggle and starts being a tool.