Watch video: Do the can-can
If you want to bring an extra level of dynamism to your still life or product photos, why not try playing with gravity and motion like this? With a combination of shooting skills, precise placement and a little Photoshop CC magic, images like this are within the reach of anyone with a camera. As for the lighting, we used three flashes to light our scene here, but if you want to keep things simple you could forego the flash altogether and use the ambient light from a window. In the steps below we’ll go behind the scenes to see how a gravity-defying still life can be achieved. From the lighting setup to the careful posing to the simple post-processing, we’ll look at each stage in the workflow, and explain key photography skills that can prove invaluable for all kinds of creative projects.
Our budget here didn’t stretch to 21 watering cans plus five assistants to pour the water, so instead we shot our set of just three watering cans in stages over several frames, using a tripod to keep the frames in alignment. This is one of the advantages of having control over the lighting, the positioning of the subjects, and the framing. It gives us the freedom to shoot our image in several stages, making sure one part of the frame is perfect before moving on to the next. Once the set of images are captured, it’s a fairly simple task to bring elements together in Photoshop.
1. Camera and lens
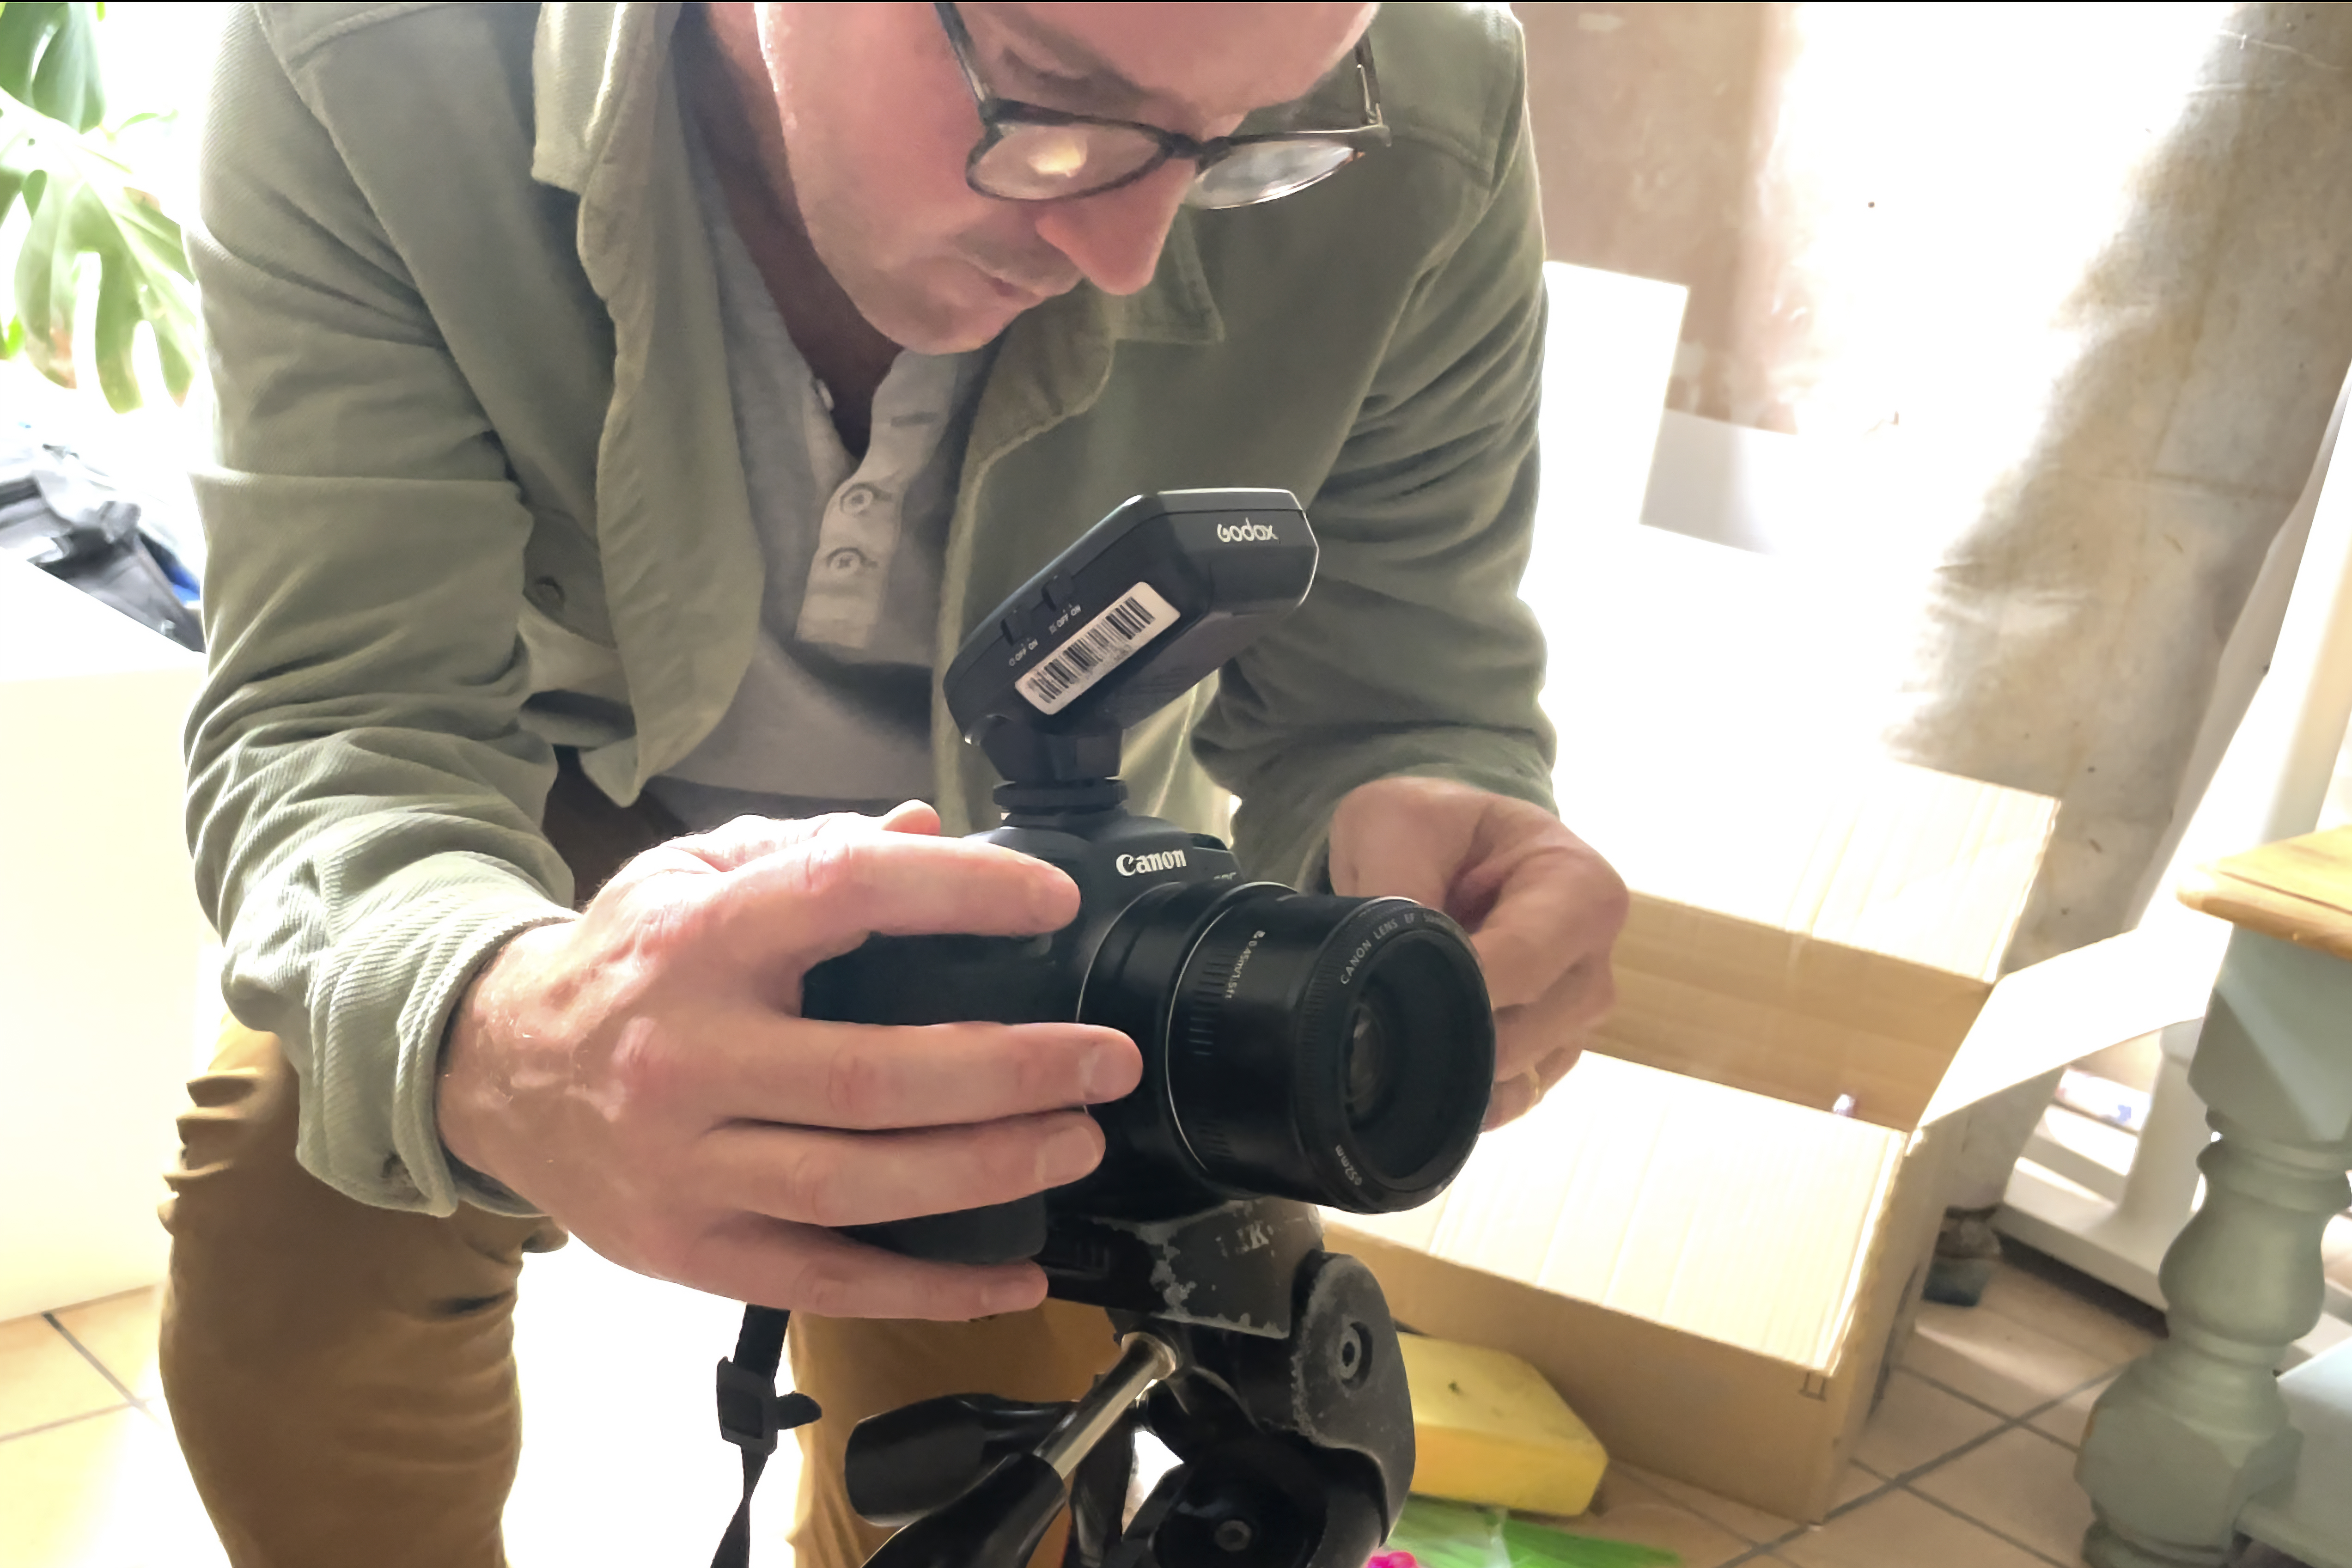
Prime lenses tend to be sharper than zooms (in the same price bracket), so they’re ideal for studio and product photography, where optimum sharpness and quality can make a huge difference. A nifty fifty like the Canon EF 50mm f/1.8 STM is ideal for studio work - a middle aperture value gives the sharpest results.
2. Watering cans
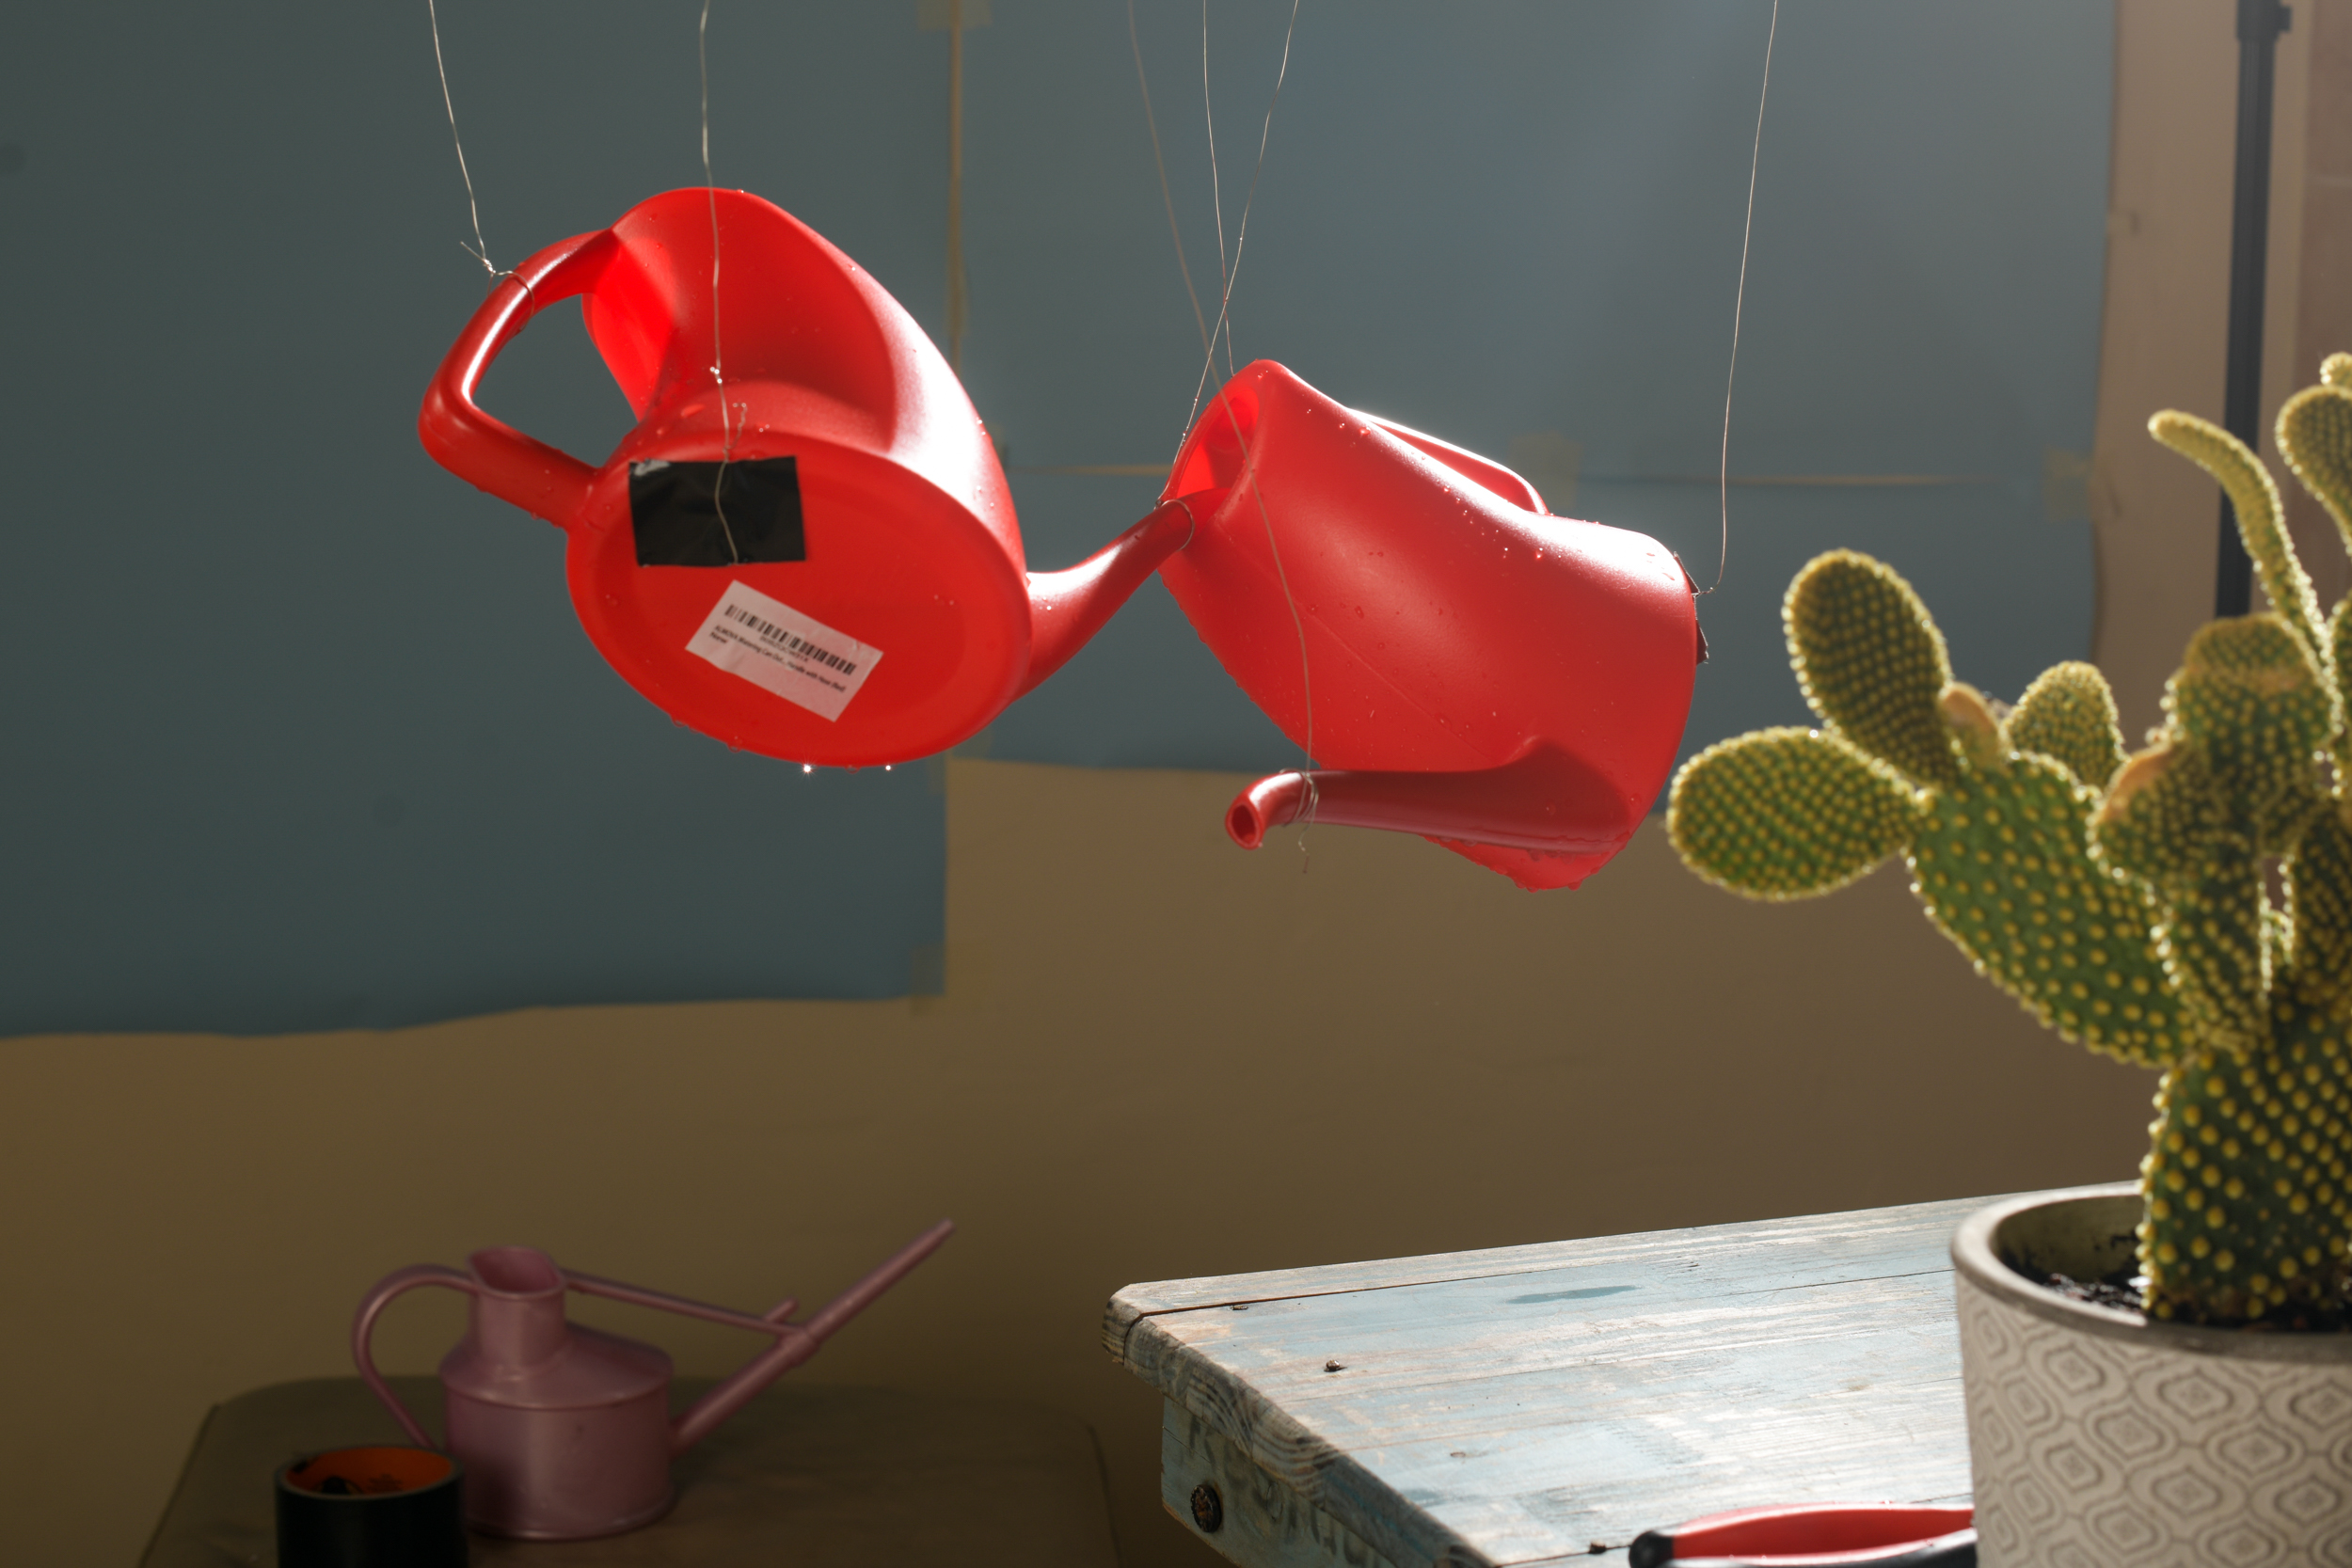
All sorts of objects could work for a creative still life. We had three red watering cans to work with, each suspended in the air with thin hanging wire and hooks. Gaffer tape also came in handy to attach the wires to parts where they could not be tied. The thinner the wire, the easier it is to remove later on in Photoshop.
3. Position the objects
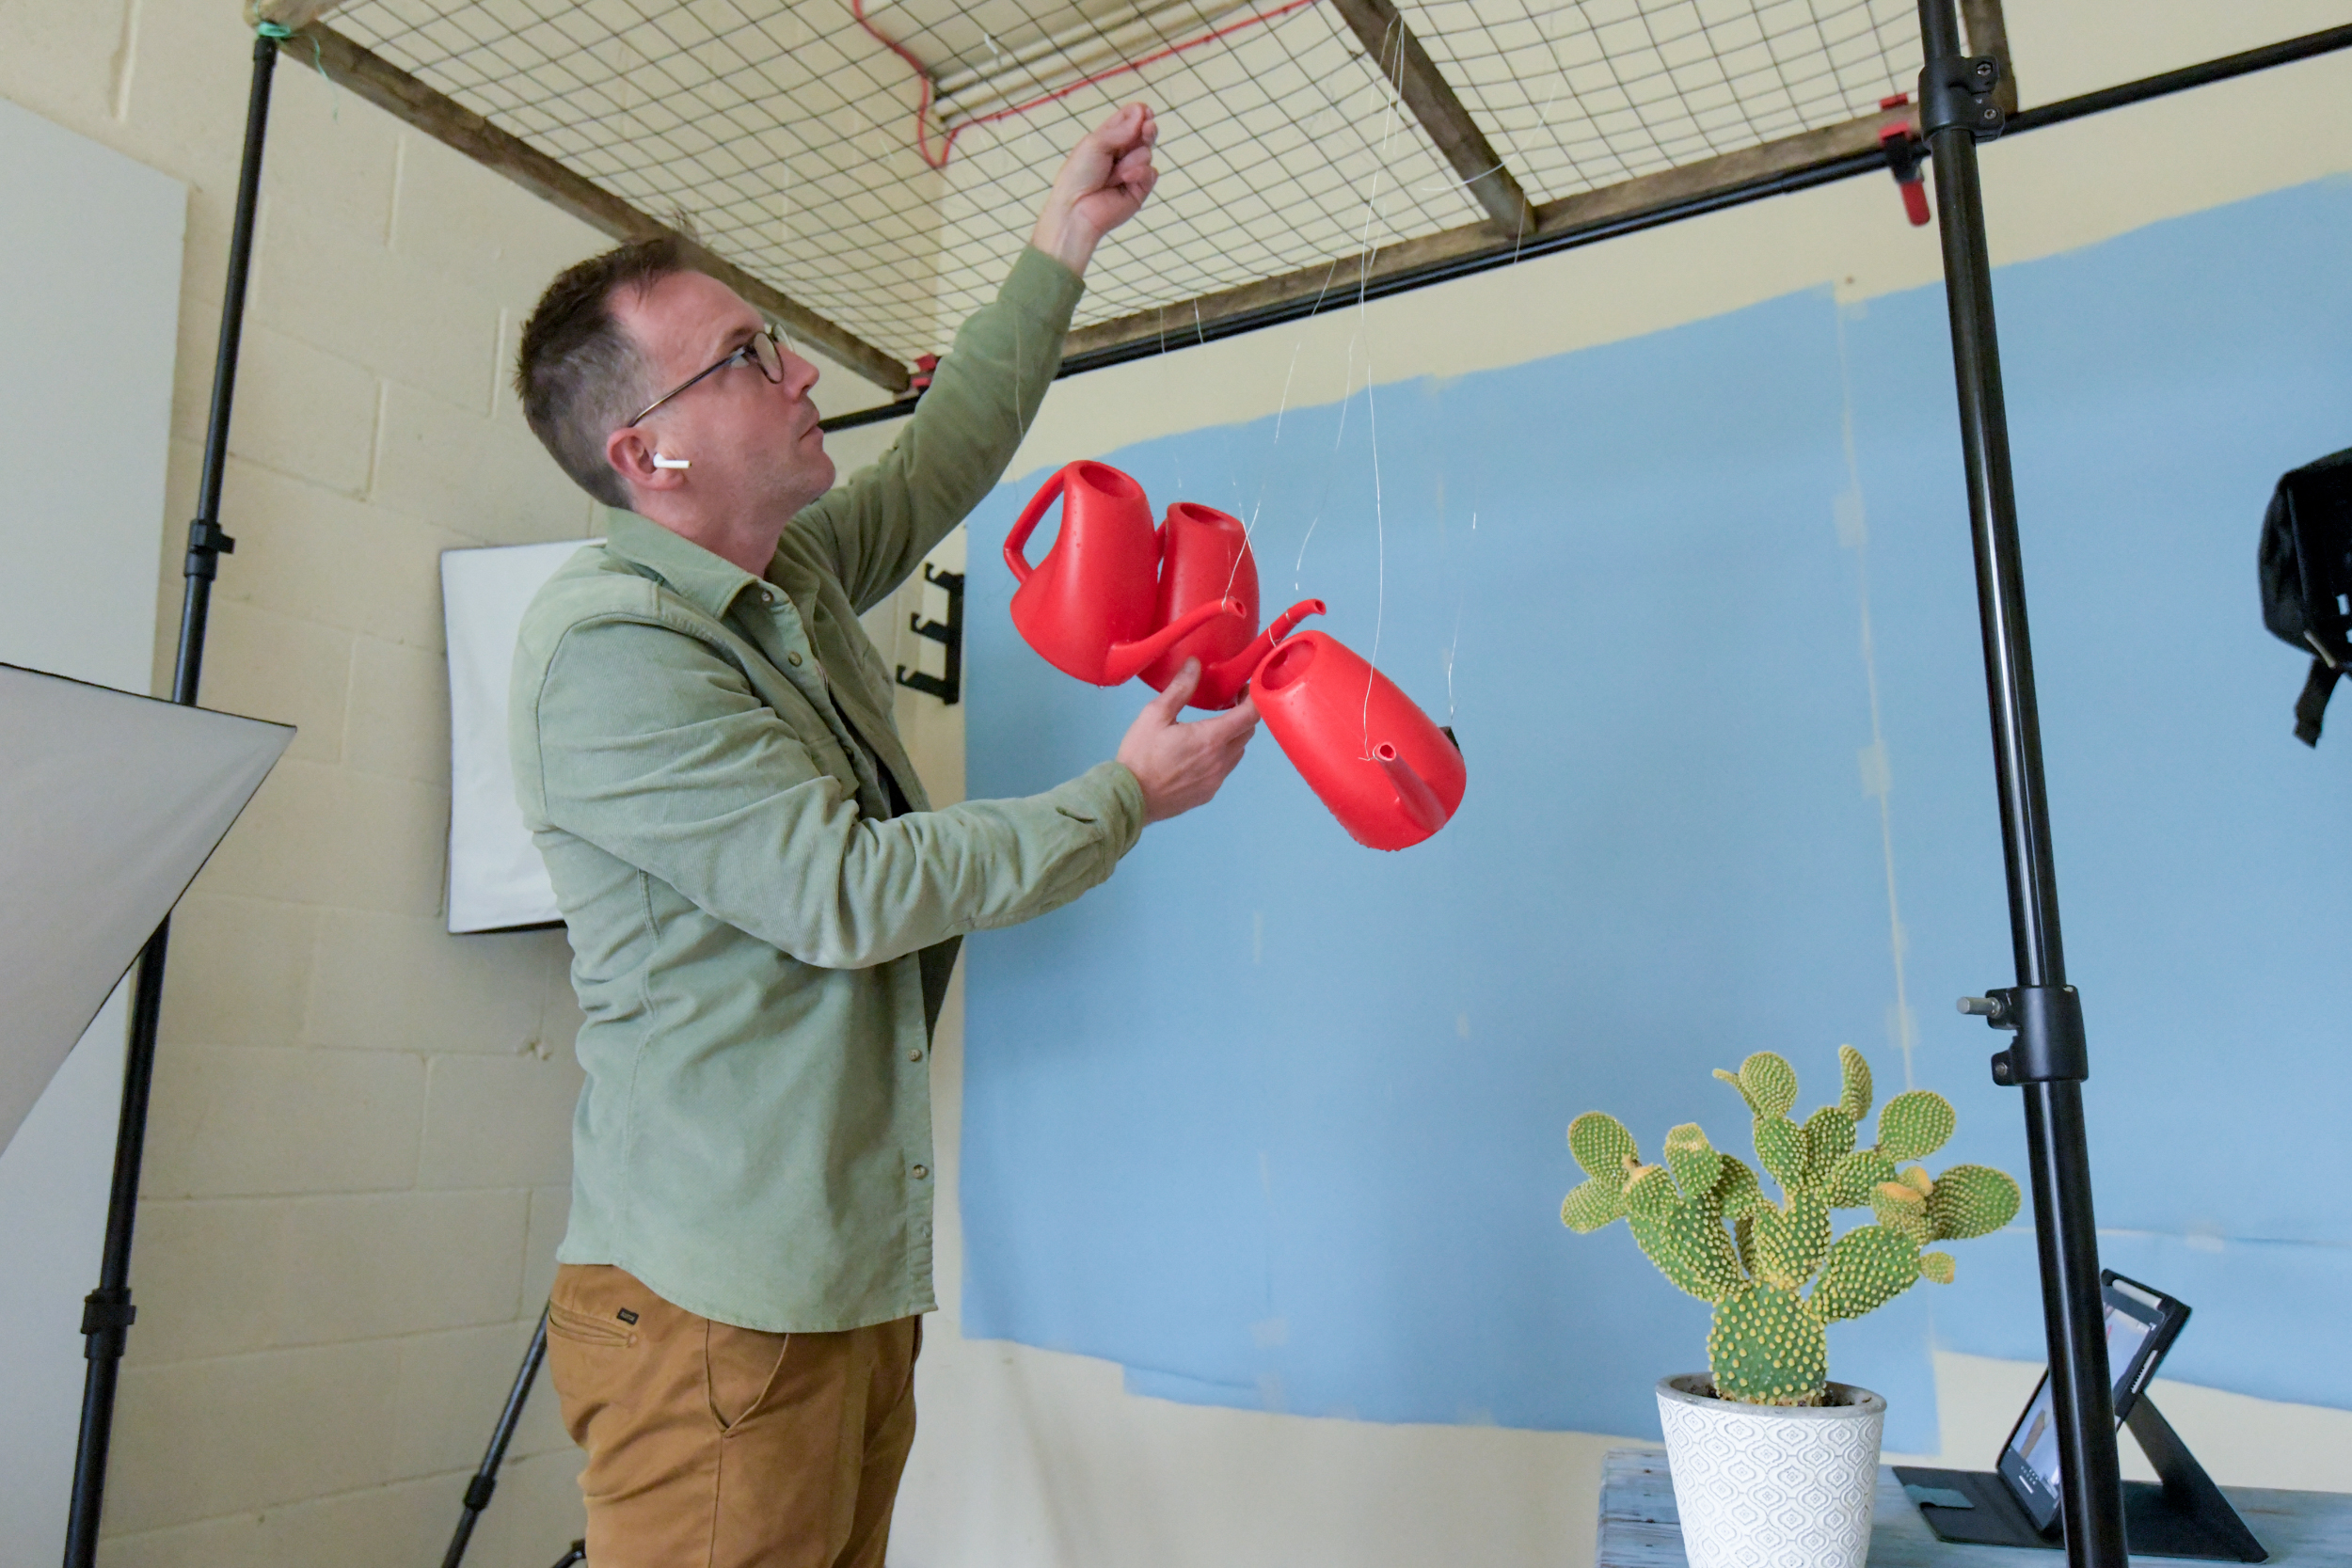
With all still-life work the key is in posing the objects in the most pleasing way. Here our positioning is a bit like a jigsaw puzzle. Each time we moved a can, we needed to ensure it’s position matched up with the previous arrangement. We moved two cans at a time, leaving the third in it’s previous position.
4. Use a tablet
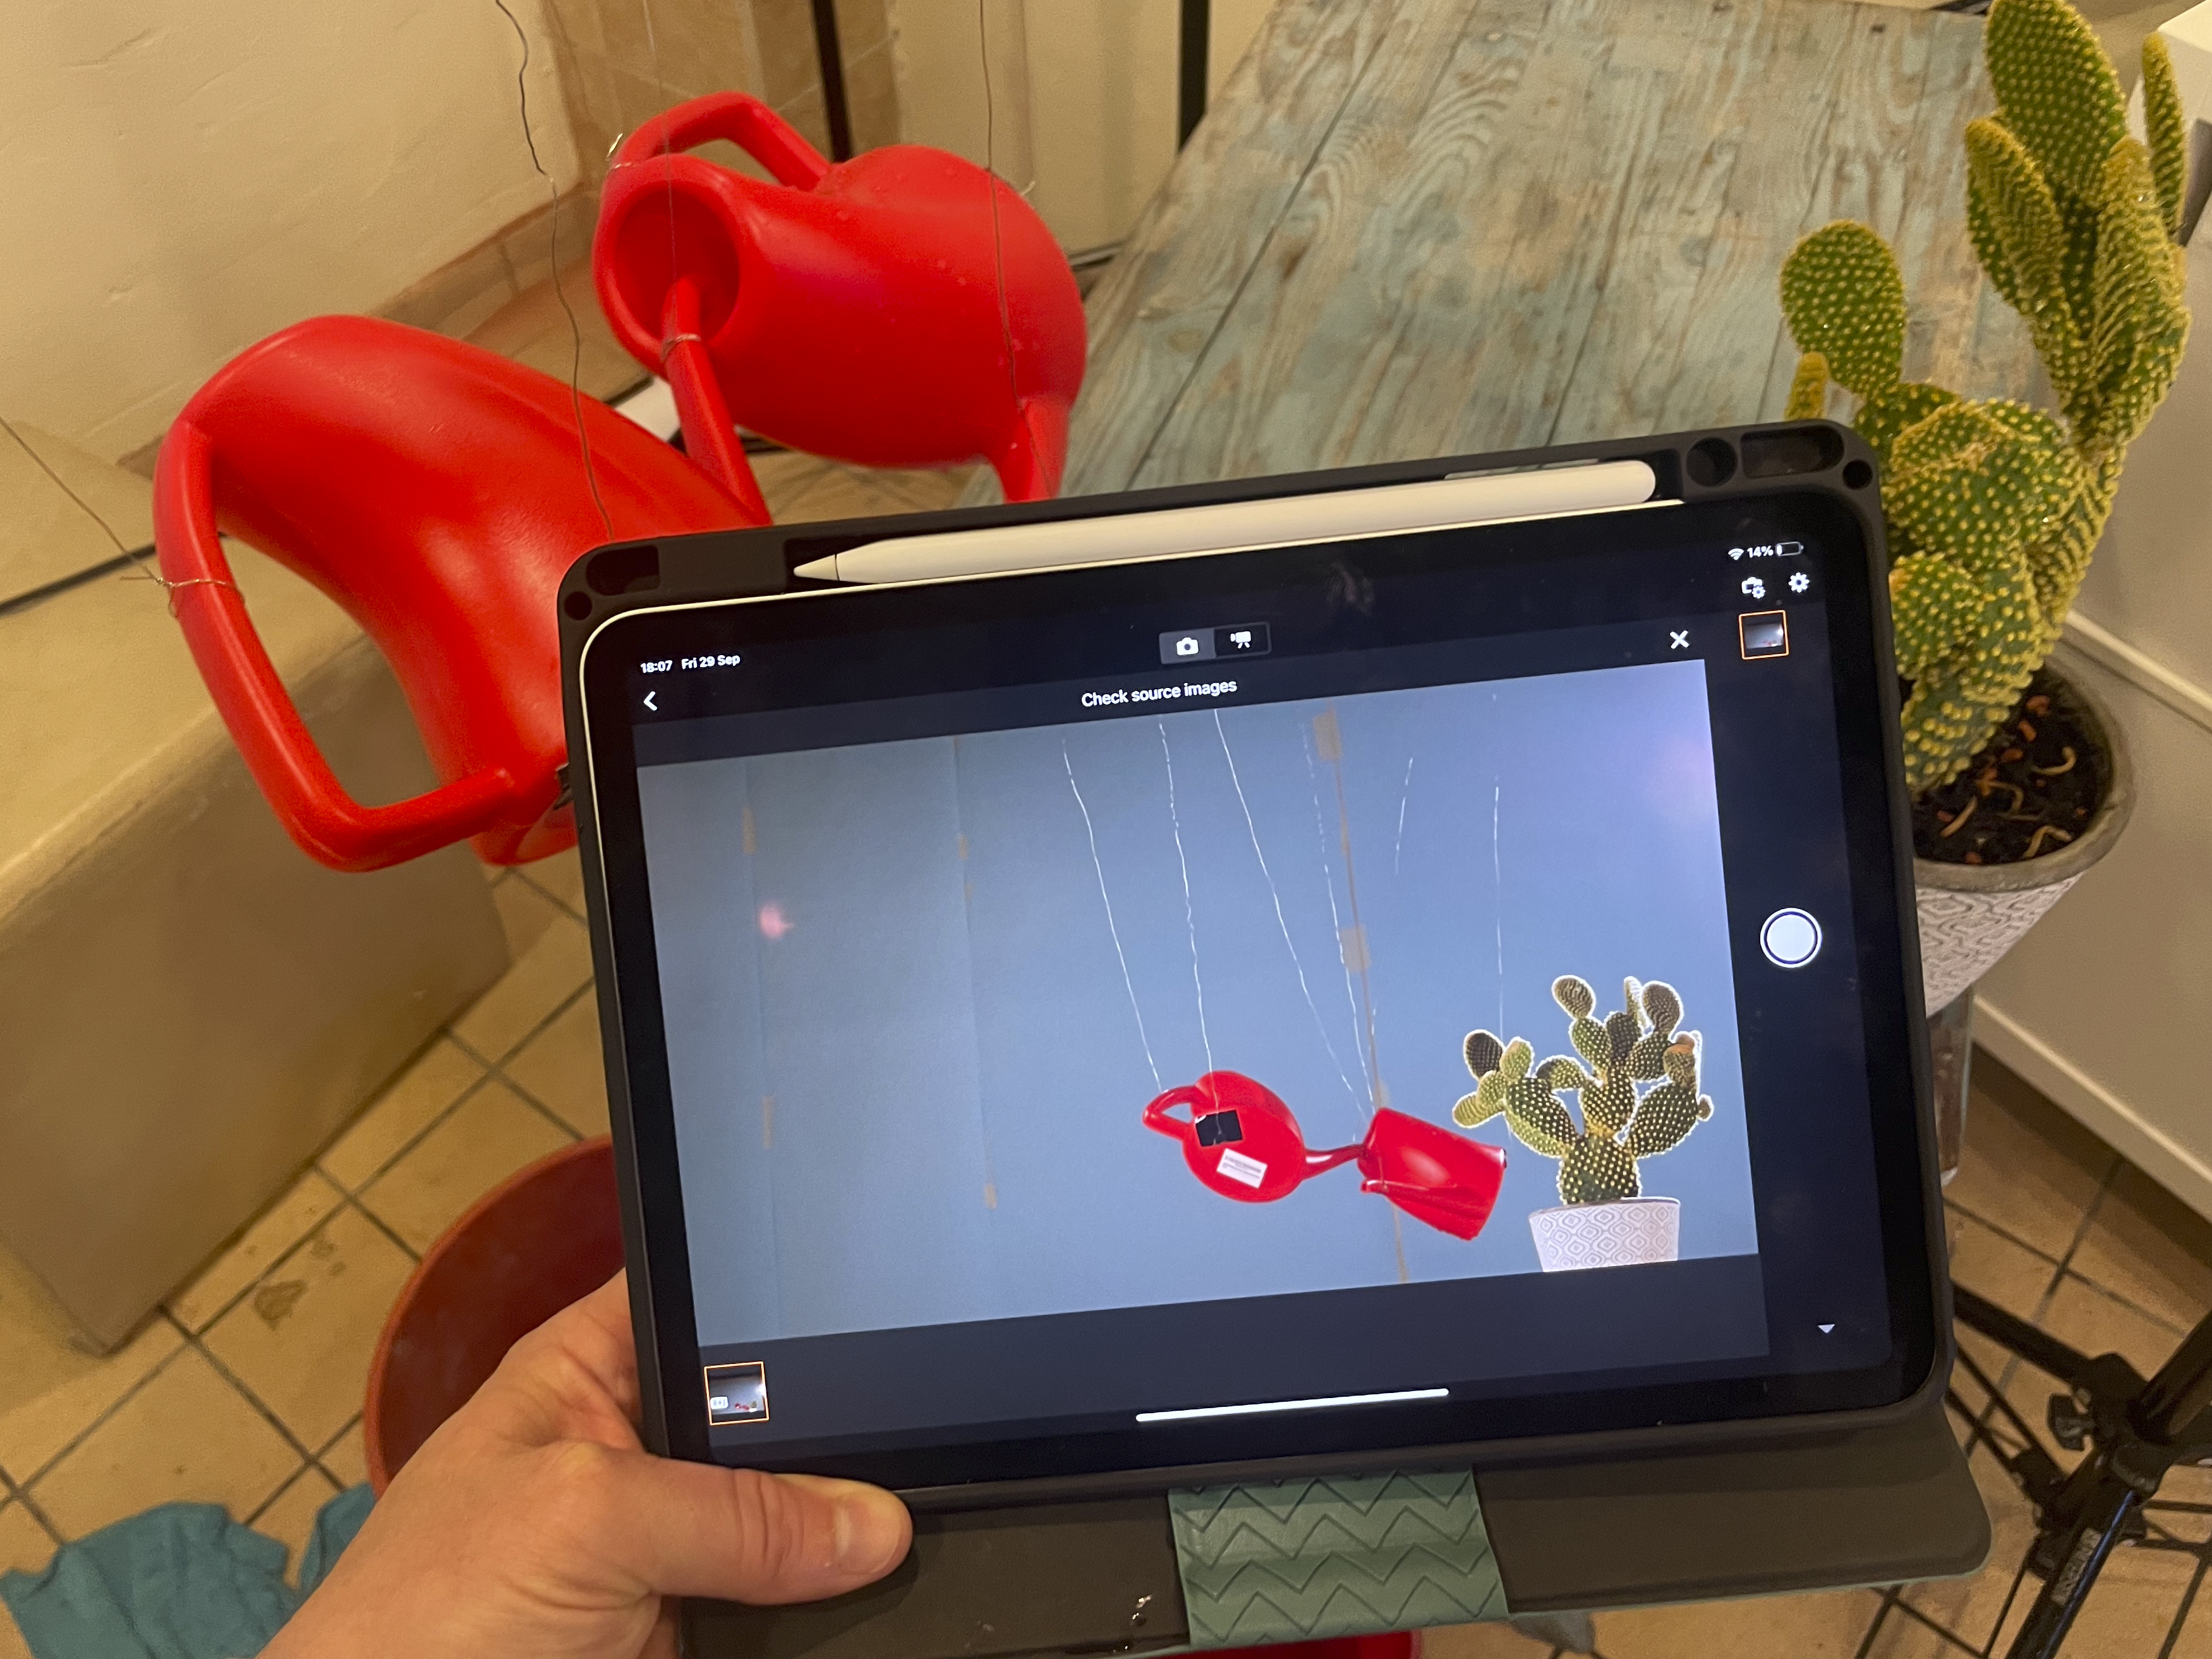
Connecting the camera to a tablet can be hugely useful both for arranging the still life and firing the shutter. A larger screen makes it easier to judge the composition and fix the lighting. We stuck bits of masking tape to the screen to plan out where the watering cans would go.
5. Backlight the water
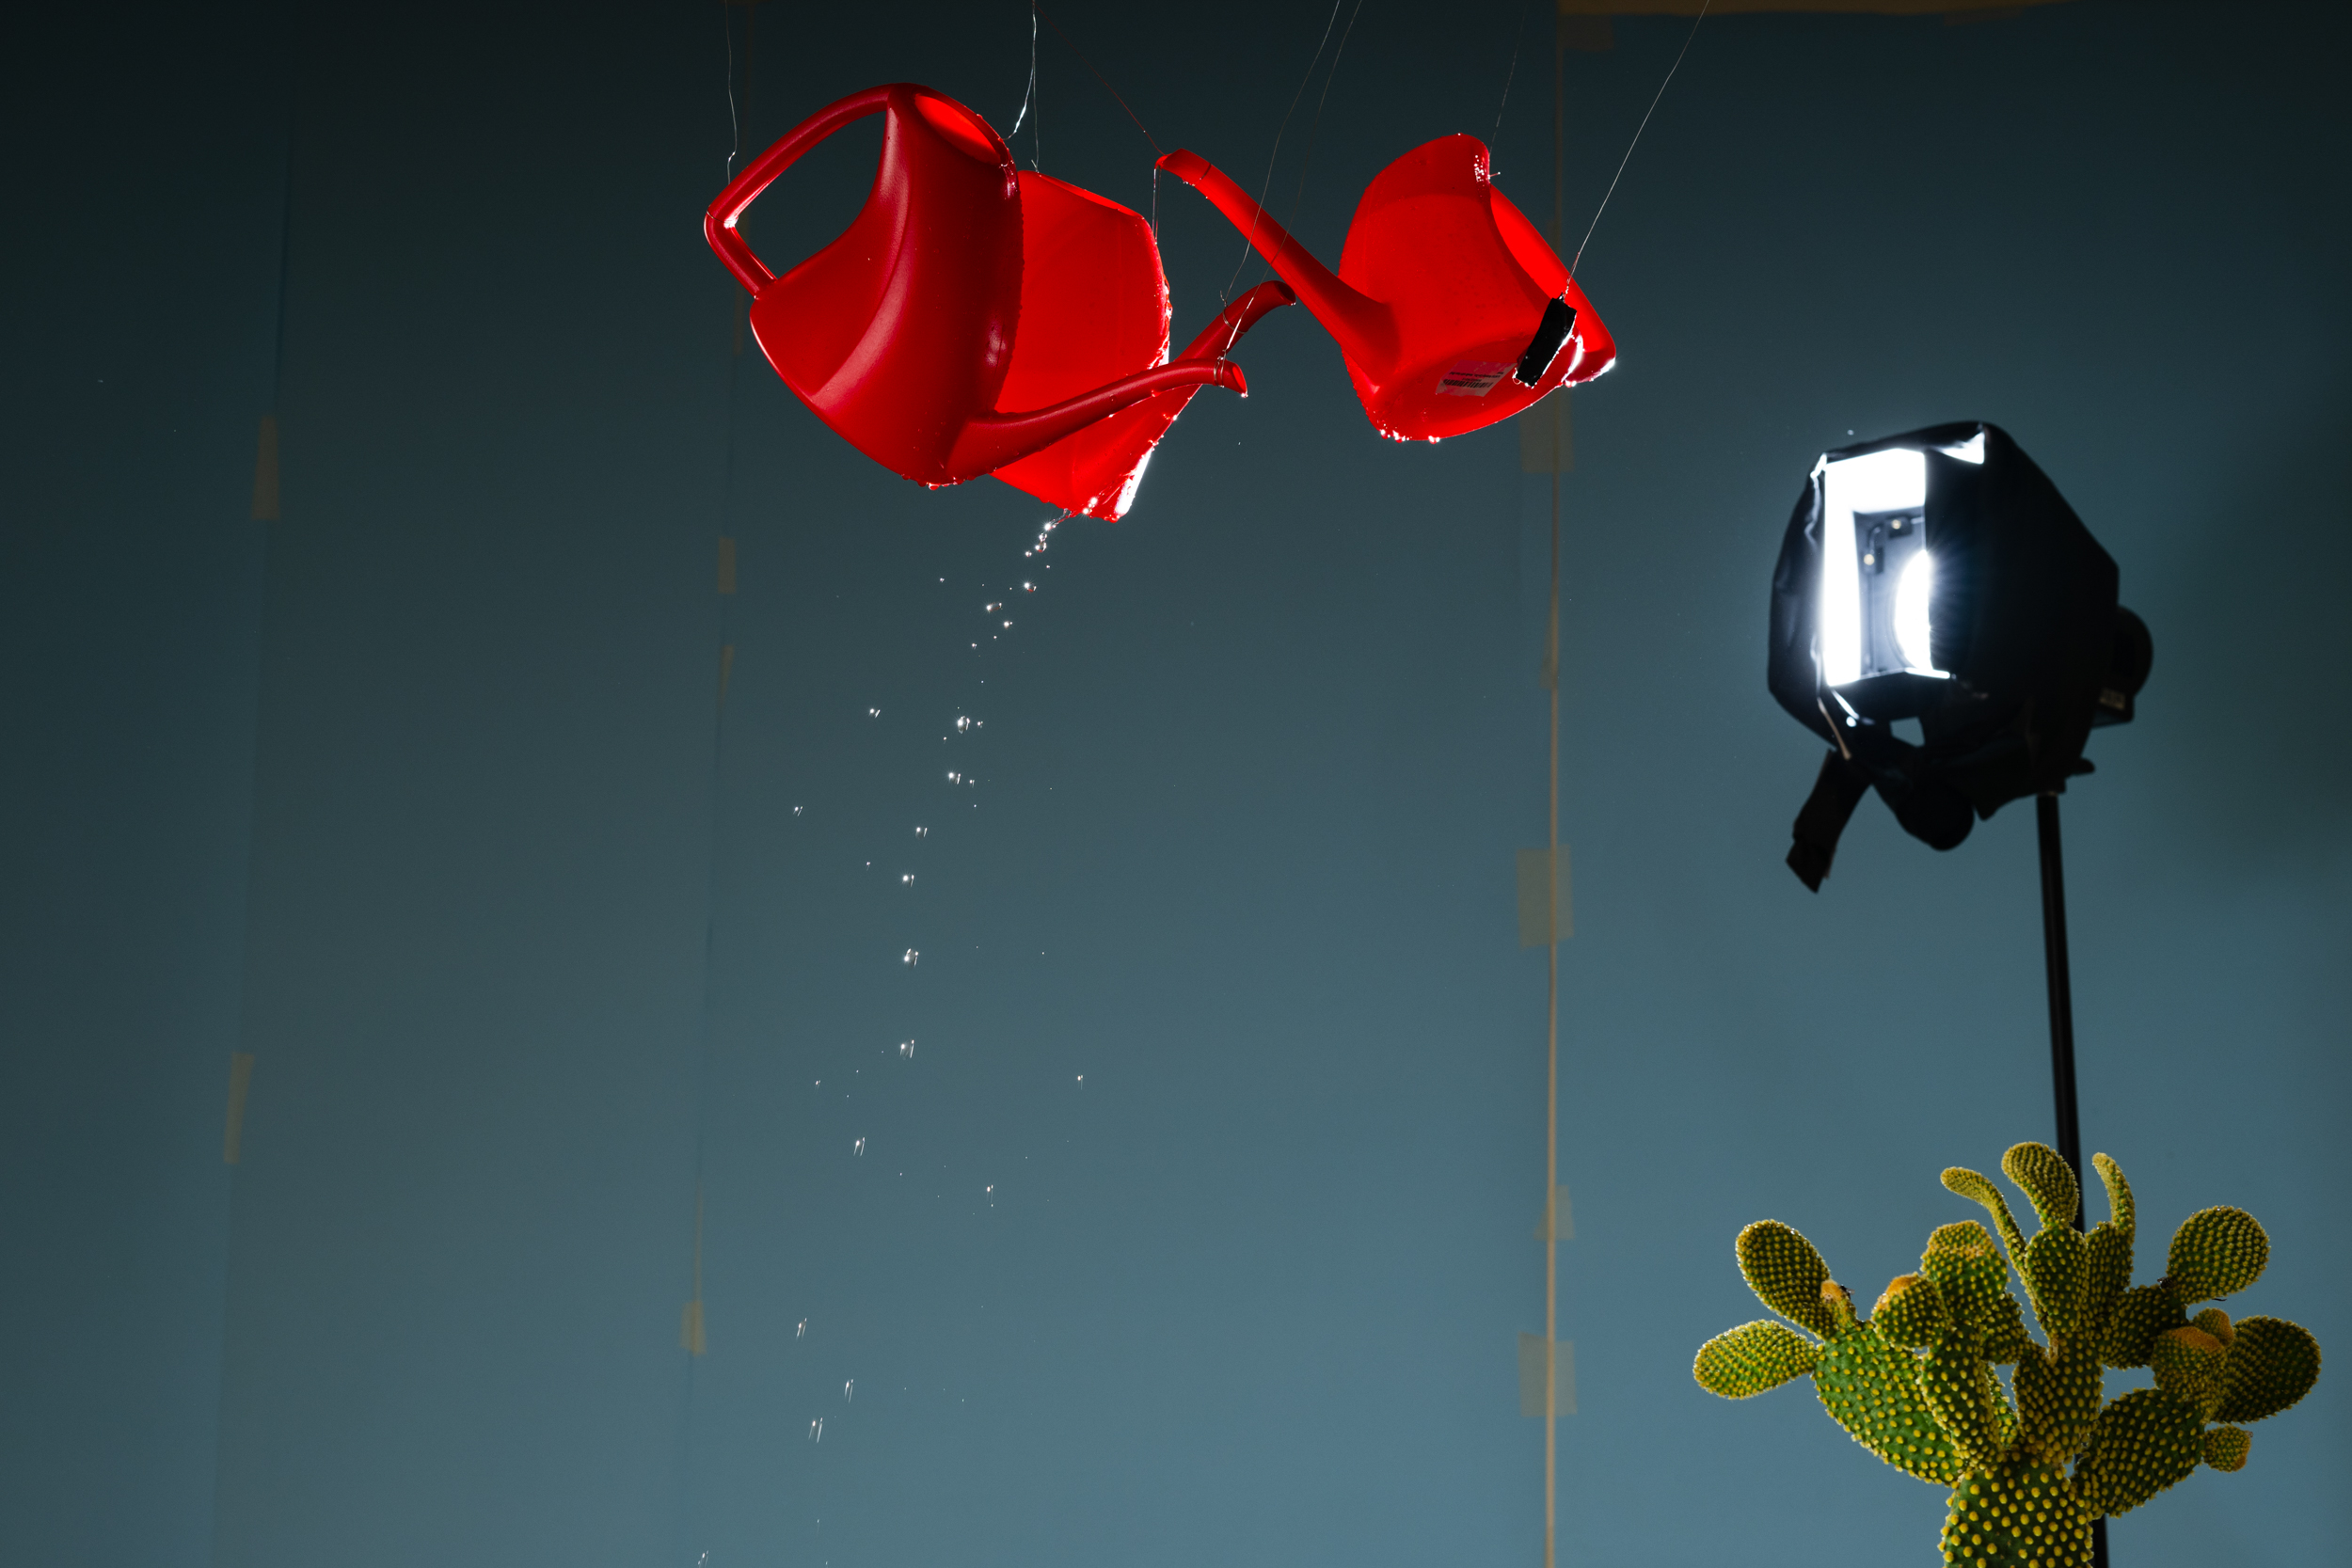
Water drops stand out best when they are backlit for an extra sparkle. Our bare flash placed behind and to the right here creates the backlit effect. It also creates an attractive halo around the edges of the cactus. When backlighting like this, be aware that lens flare may fog the image so keep the flash out of the frame.
6. Pouring the water

With everything set up we could pour water into one can then capture it trickling into the next. It’s impossible to keep out of the frame when doing so. So when we’re in the frame like this it’s important not to block the lights as this will alter the overall effect and make it harder to combine the shots in Photoshop.
7. Load your files into Photoshop layers
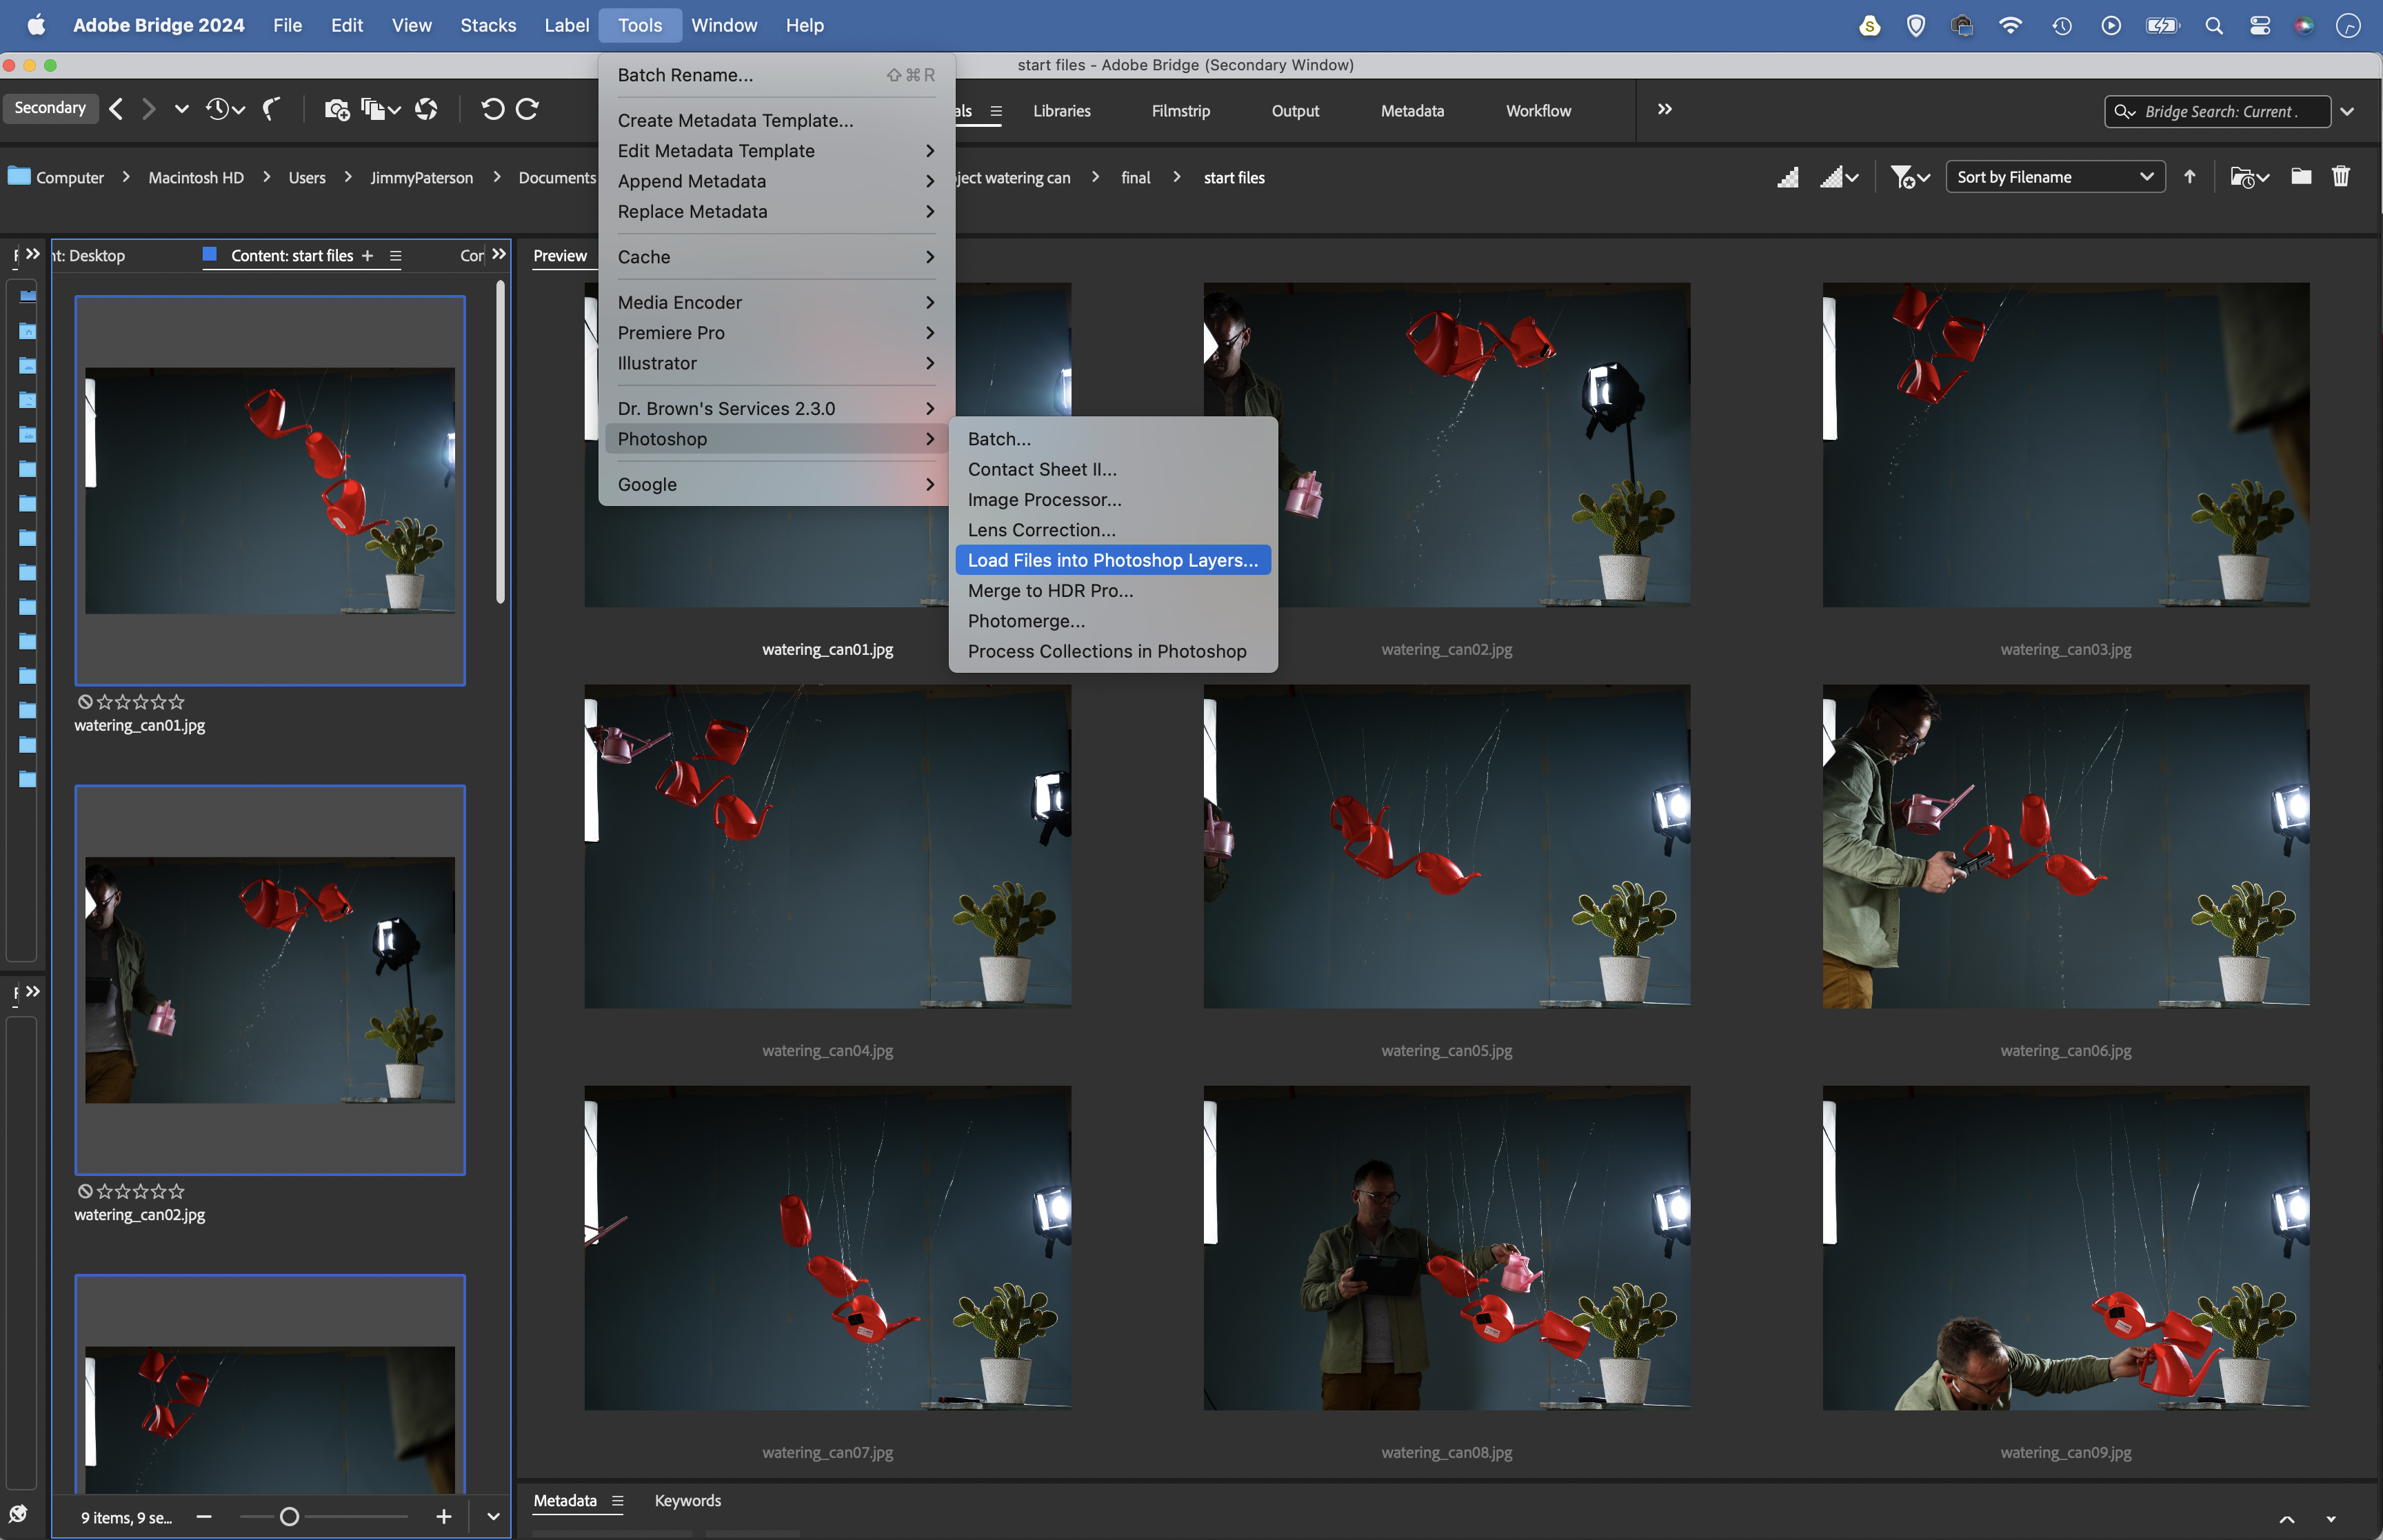
Open Adobe Bridge and Cmd/Ctrl+click to select all the images that you want to combine, then go to Tools>Photoshop> Load Files into Photoshop Layers. Once open, go to the Layers Panel and drag the layer you want to use as a base to the bottom. Alt-click the eye icon on this layer to hide all the others.
8. Paint on layer masks
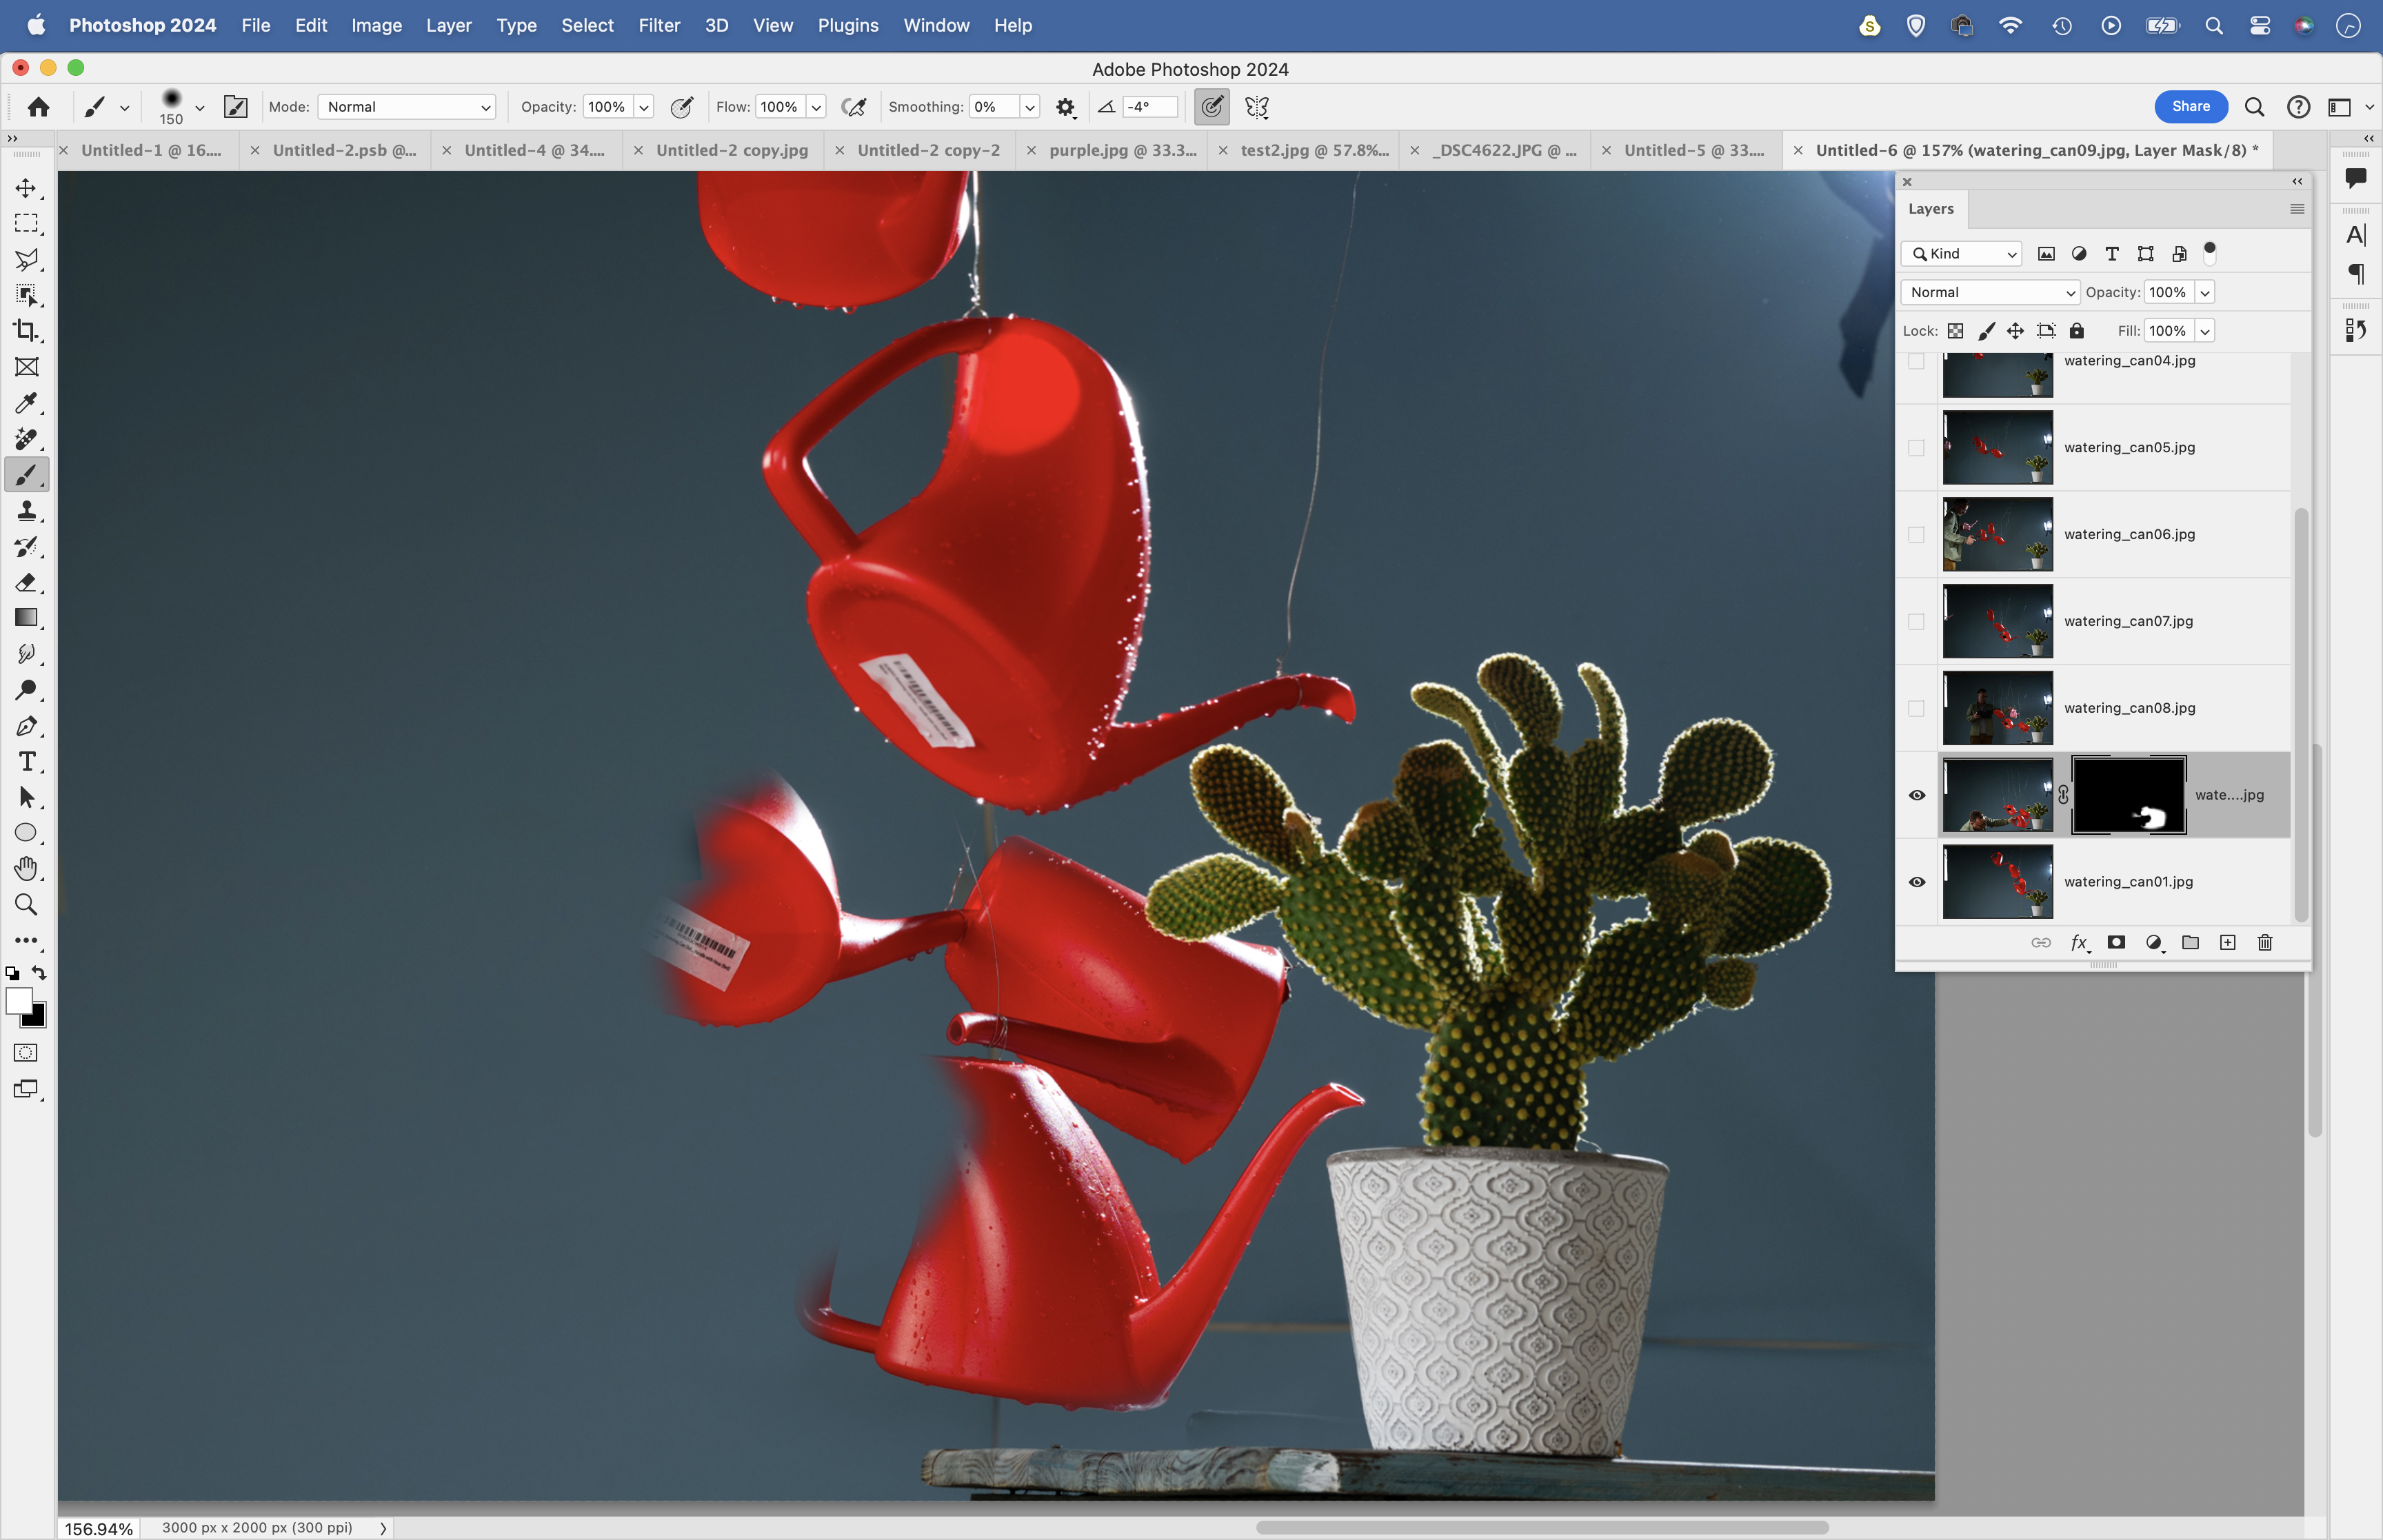
Highlight and reveal the layer above then hold Alt and click the Add Layer Mask icon to add a full black mask. Grab the Brush tool, hit D then paint with white over areas you want to be visible. If you need to hide any of the elements, hit X and paint with black. Continue revealing and masking the layers, one at a time.
9. Remove the wires
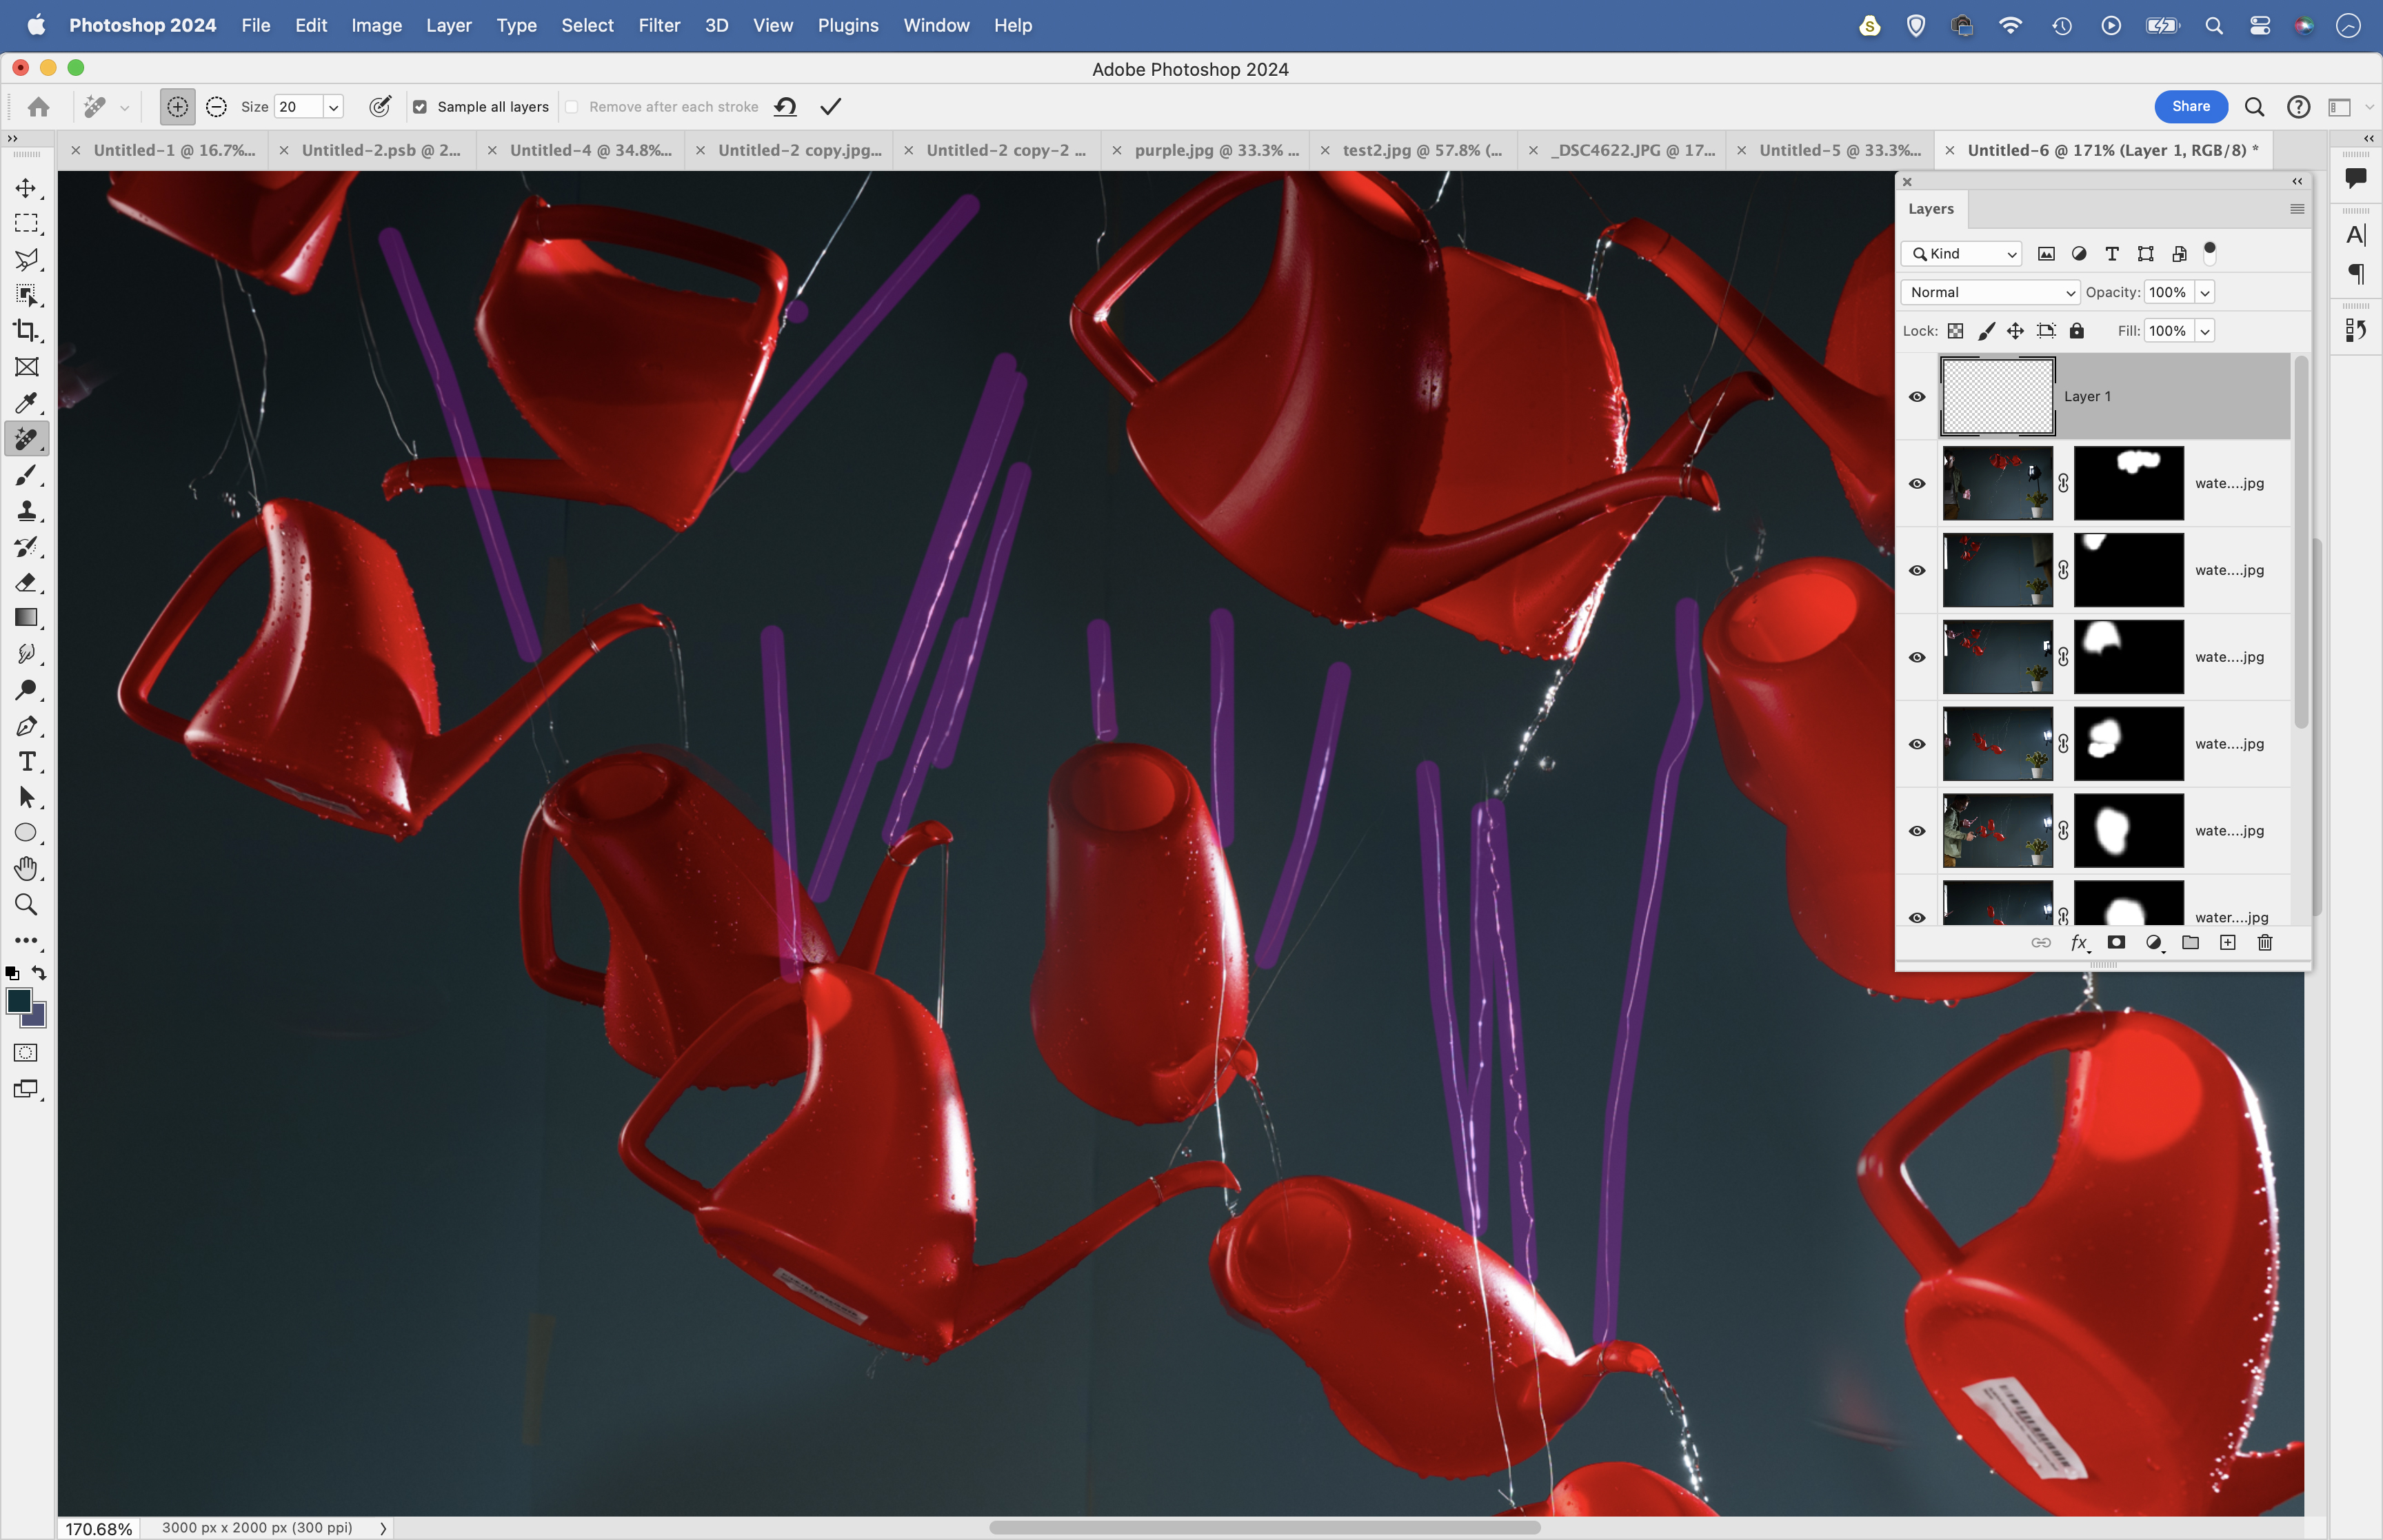
Make a new empty layer at the top of the layers stack. Click on the Remove tool from the Toolbox and check Sample All Layers in the tool options at the top, then paint to remove wires, tape and anything else until the image is totally clean. Click once, hold Shift and click again to make a straight line, useful for deleting wires.
If you're serious about scenery, take a look at the best cameras for landscape photography along with the best lenses for landscapes.