Product photography is a competitive game. It takes more than just a good camera and lens to make your shots stand out. Lighting plays a huge role, and while pros might invest in fancy light tents or full lighting kits, including diffusers, softboxes, and modifiers, those setups can get seriously expensive.
But the good news is that you don't need to spend a fortune to create pro-level images. In this step-by-step DIY tutorial, you'll learn how to make your own honeycomb flash modifier – using just a flashgun or studio lighting kit and a few simple materials.
- Black cardboard
- Black straws (inside and outside)
- Multi-purpose glue
- Sharp craft knife
- Rubber bands
- Ruler
A honeycomb grid is one of those secret weapons that can instantly upgrade your lighting game. It helps you control where the light hits, so you can spotlight your subject with precision. Think of it like adding a subtle vignette effect in camera, drawing the viewer's eye right where you want it – on your product.
By narrowing the beam of light, a honeycomb grid creates contrast between your subject and the background. The result is a dramatic, focused look that adds depth and makes your images pop. Whether you're working on clean product shots or creating moody portraits, a honeycomb grid works wonders.
In this tutorial, you'll find everything you need to know to build your own honeycomb grid from scratch. No fancy tools required. Once it's built, you'll have a lighting tool that lets you shape, direct, and experiment with light.
Before and after

Tutorial
1. Control spot light
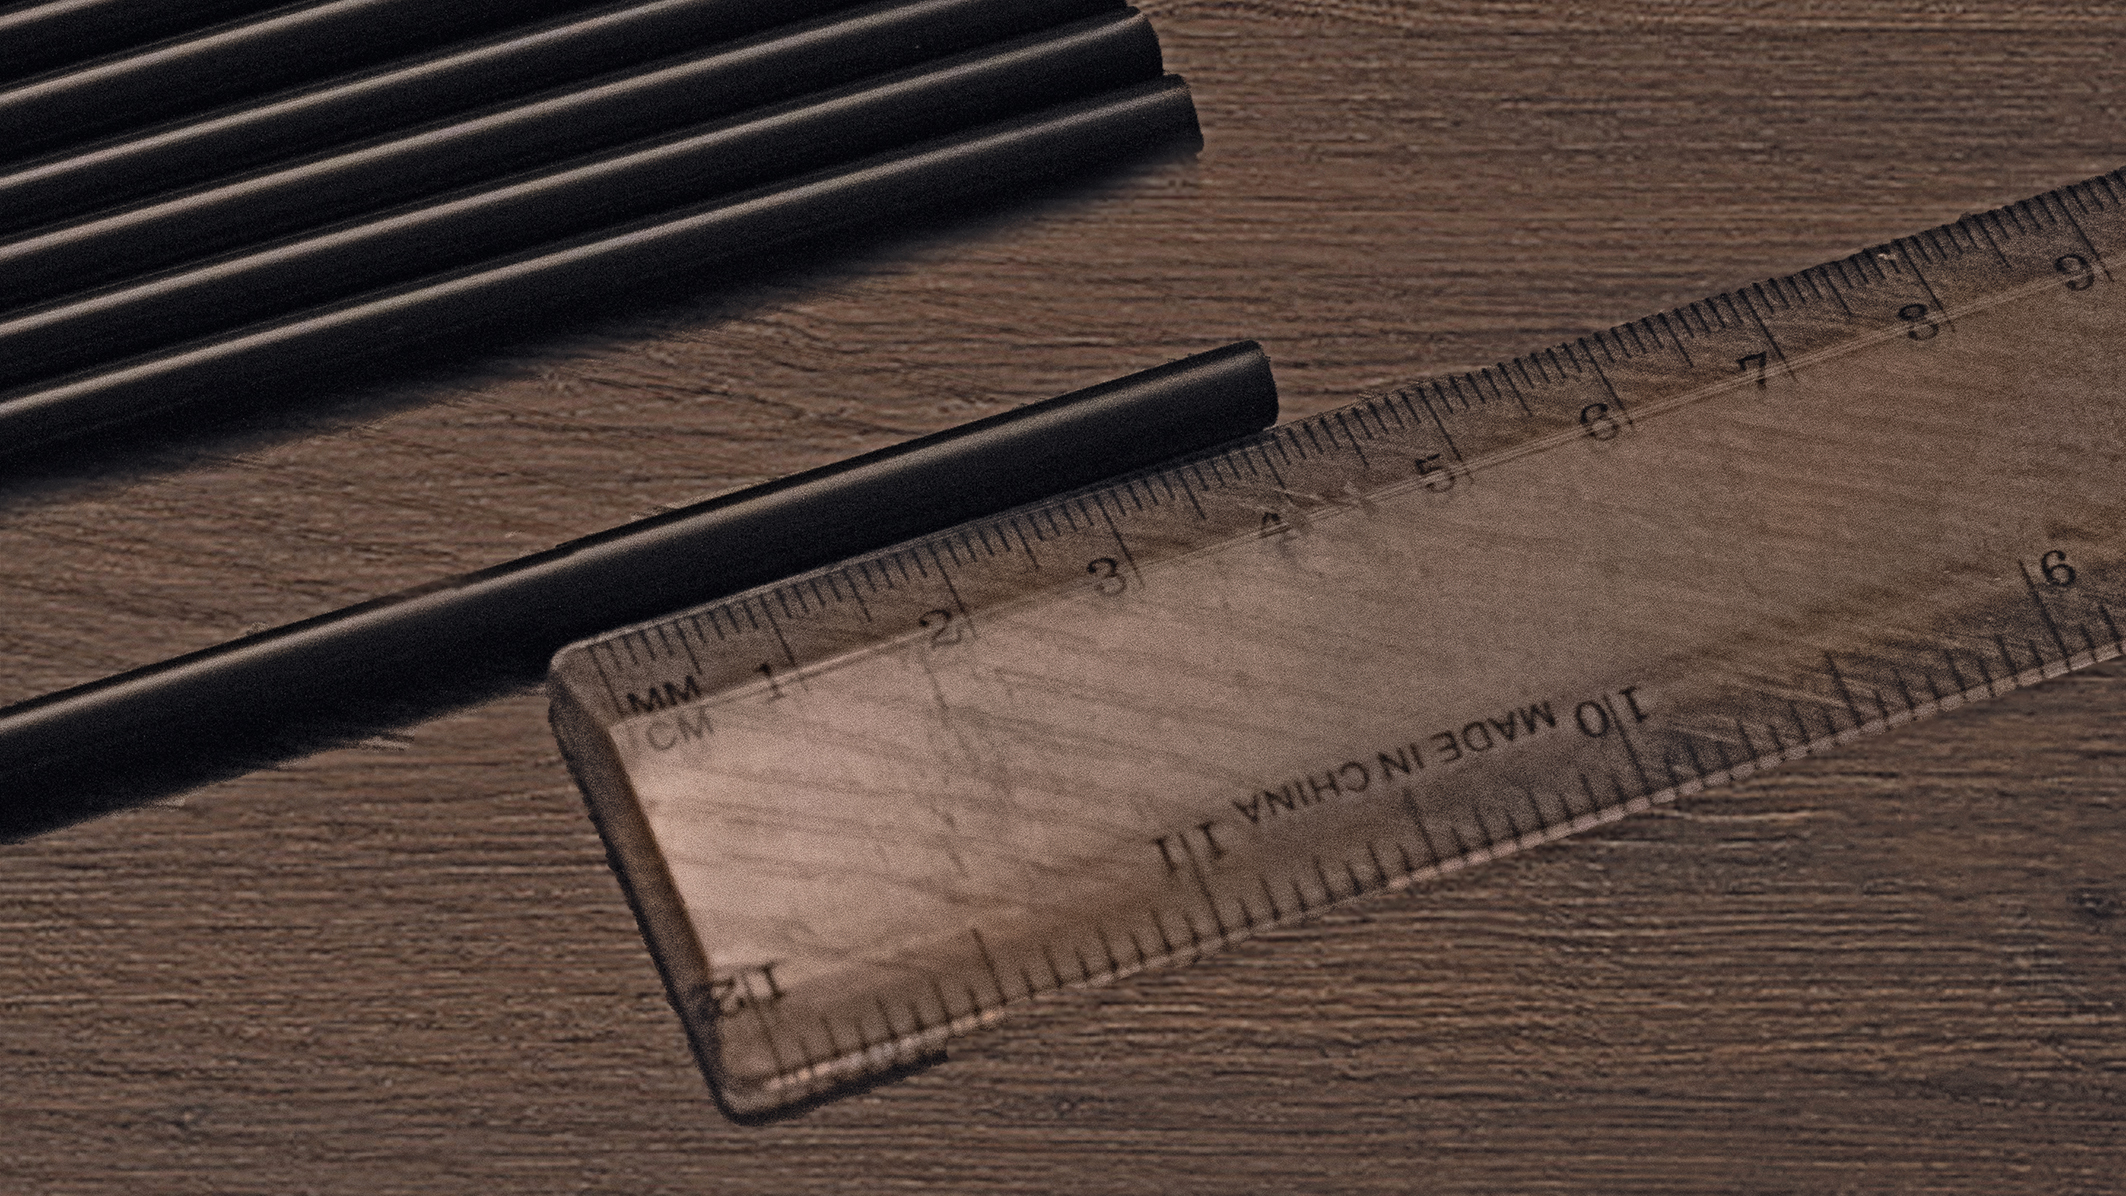
To create a camera flash grid that fits your device perfectly, you first need to determine the length of the straws. Keep in mind that the longer the straws, the narrower the spot of light will be. For this tutorial, we will be using straws that are 4cm long to achieve a noticeable effect.
2. Calculate dimensions
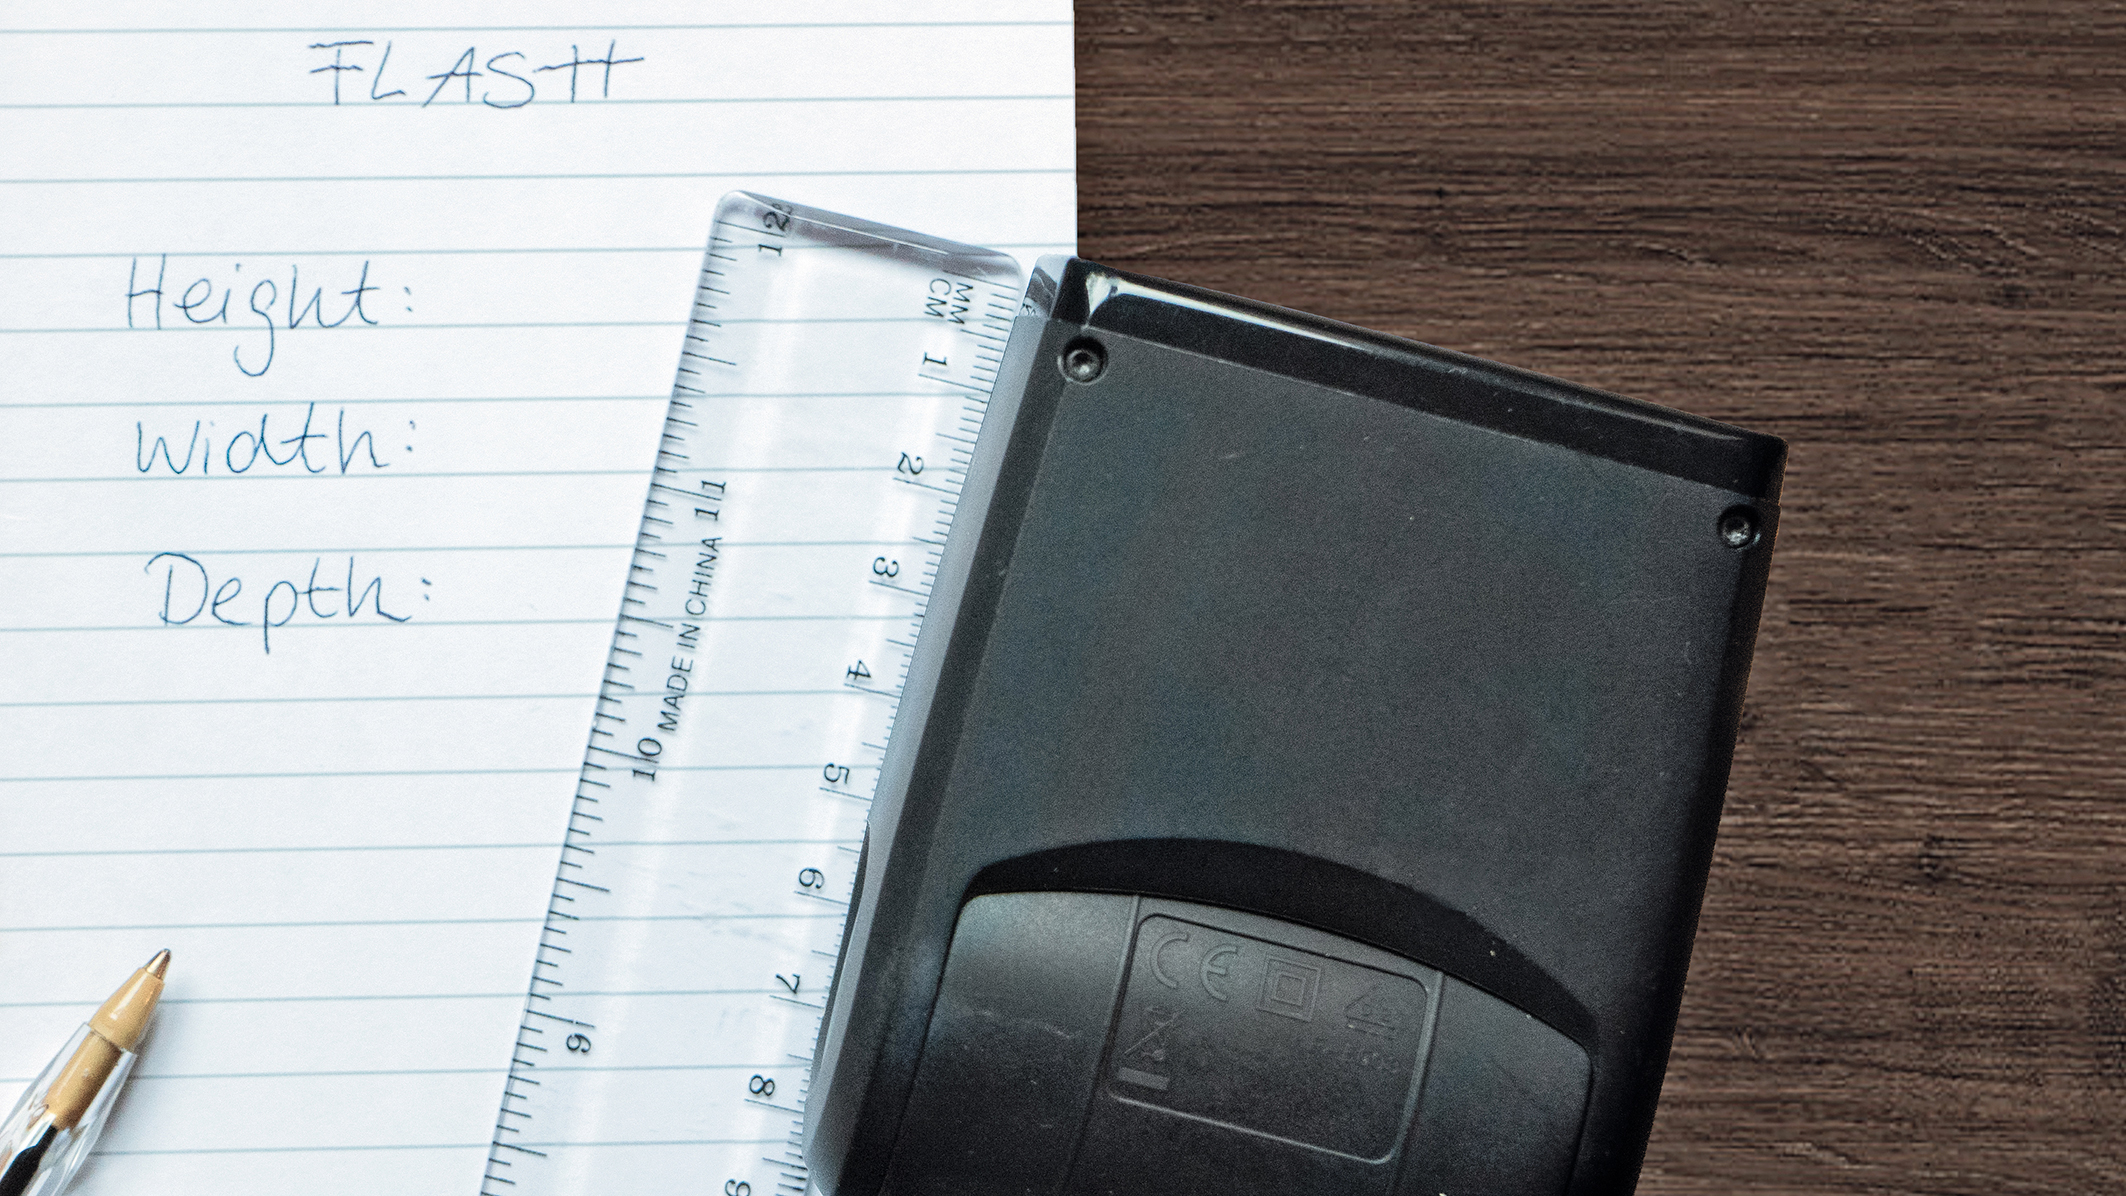
Next, you'll need to create a customized cardboard sleeve that can be attached to your flash device. For this, start by measuring the height (from the flash head down to the hinge), width, and depth. Then, add the length of the straws to the height measurement of your flash.
3. Draw a sleeve template
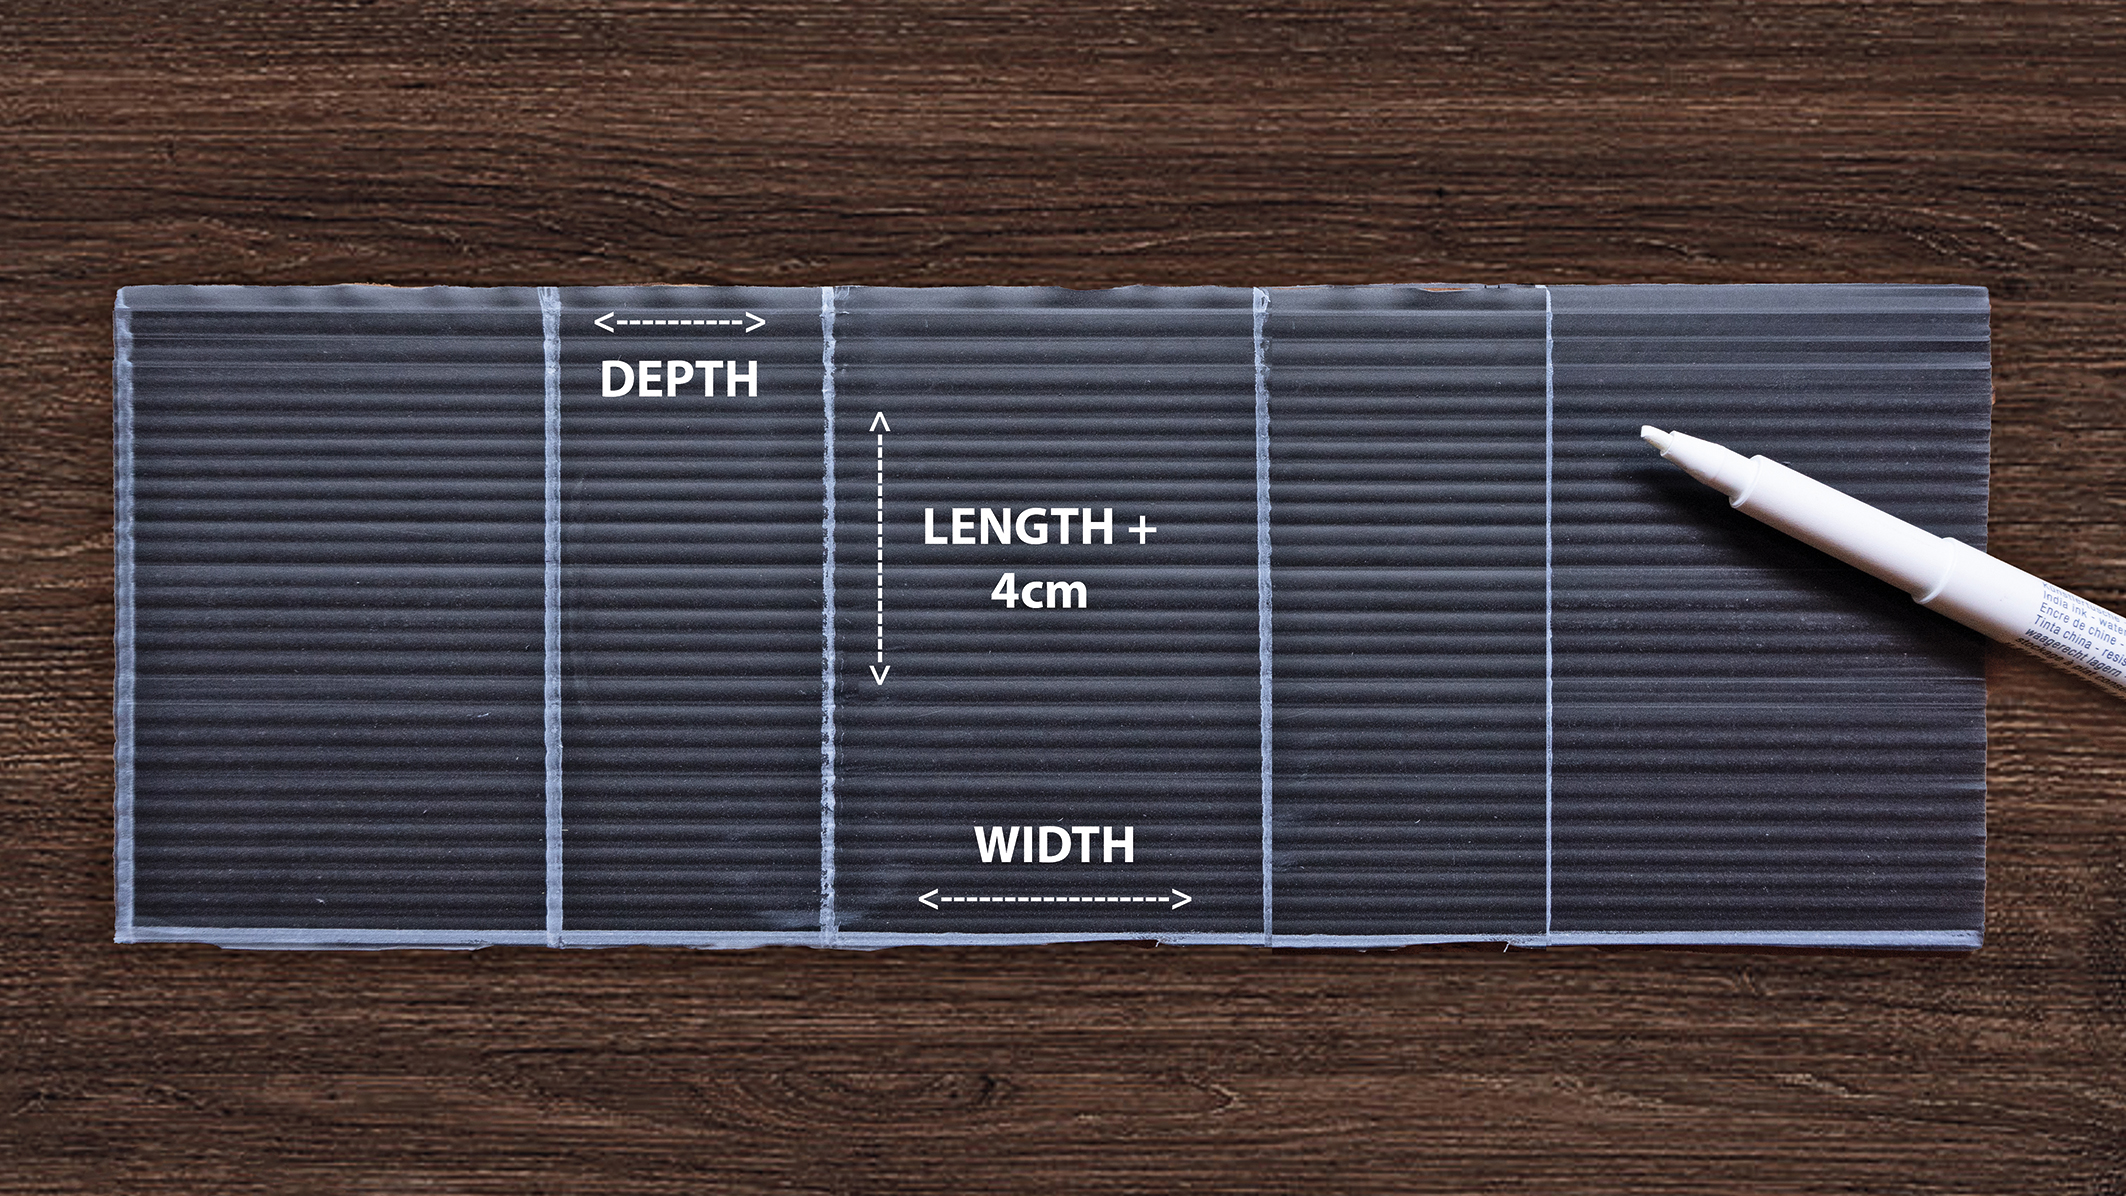
Mark the height of the flash on the cardboard, add the length of the straws, and then mark the width to create the first section. Add two sections to the left and right, starting with the flash depth, and mark the flash's width. Score the lines
and bend them to create clear sections.
4. Add a grid pattern
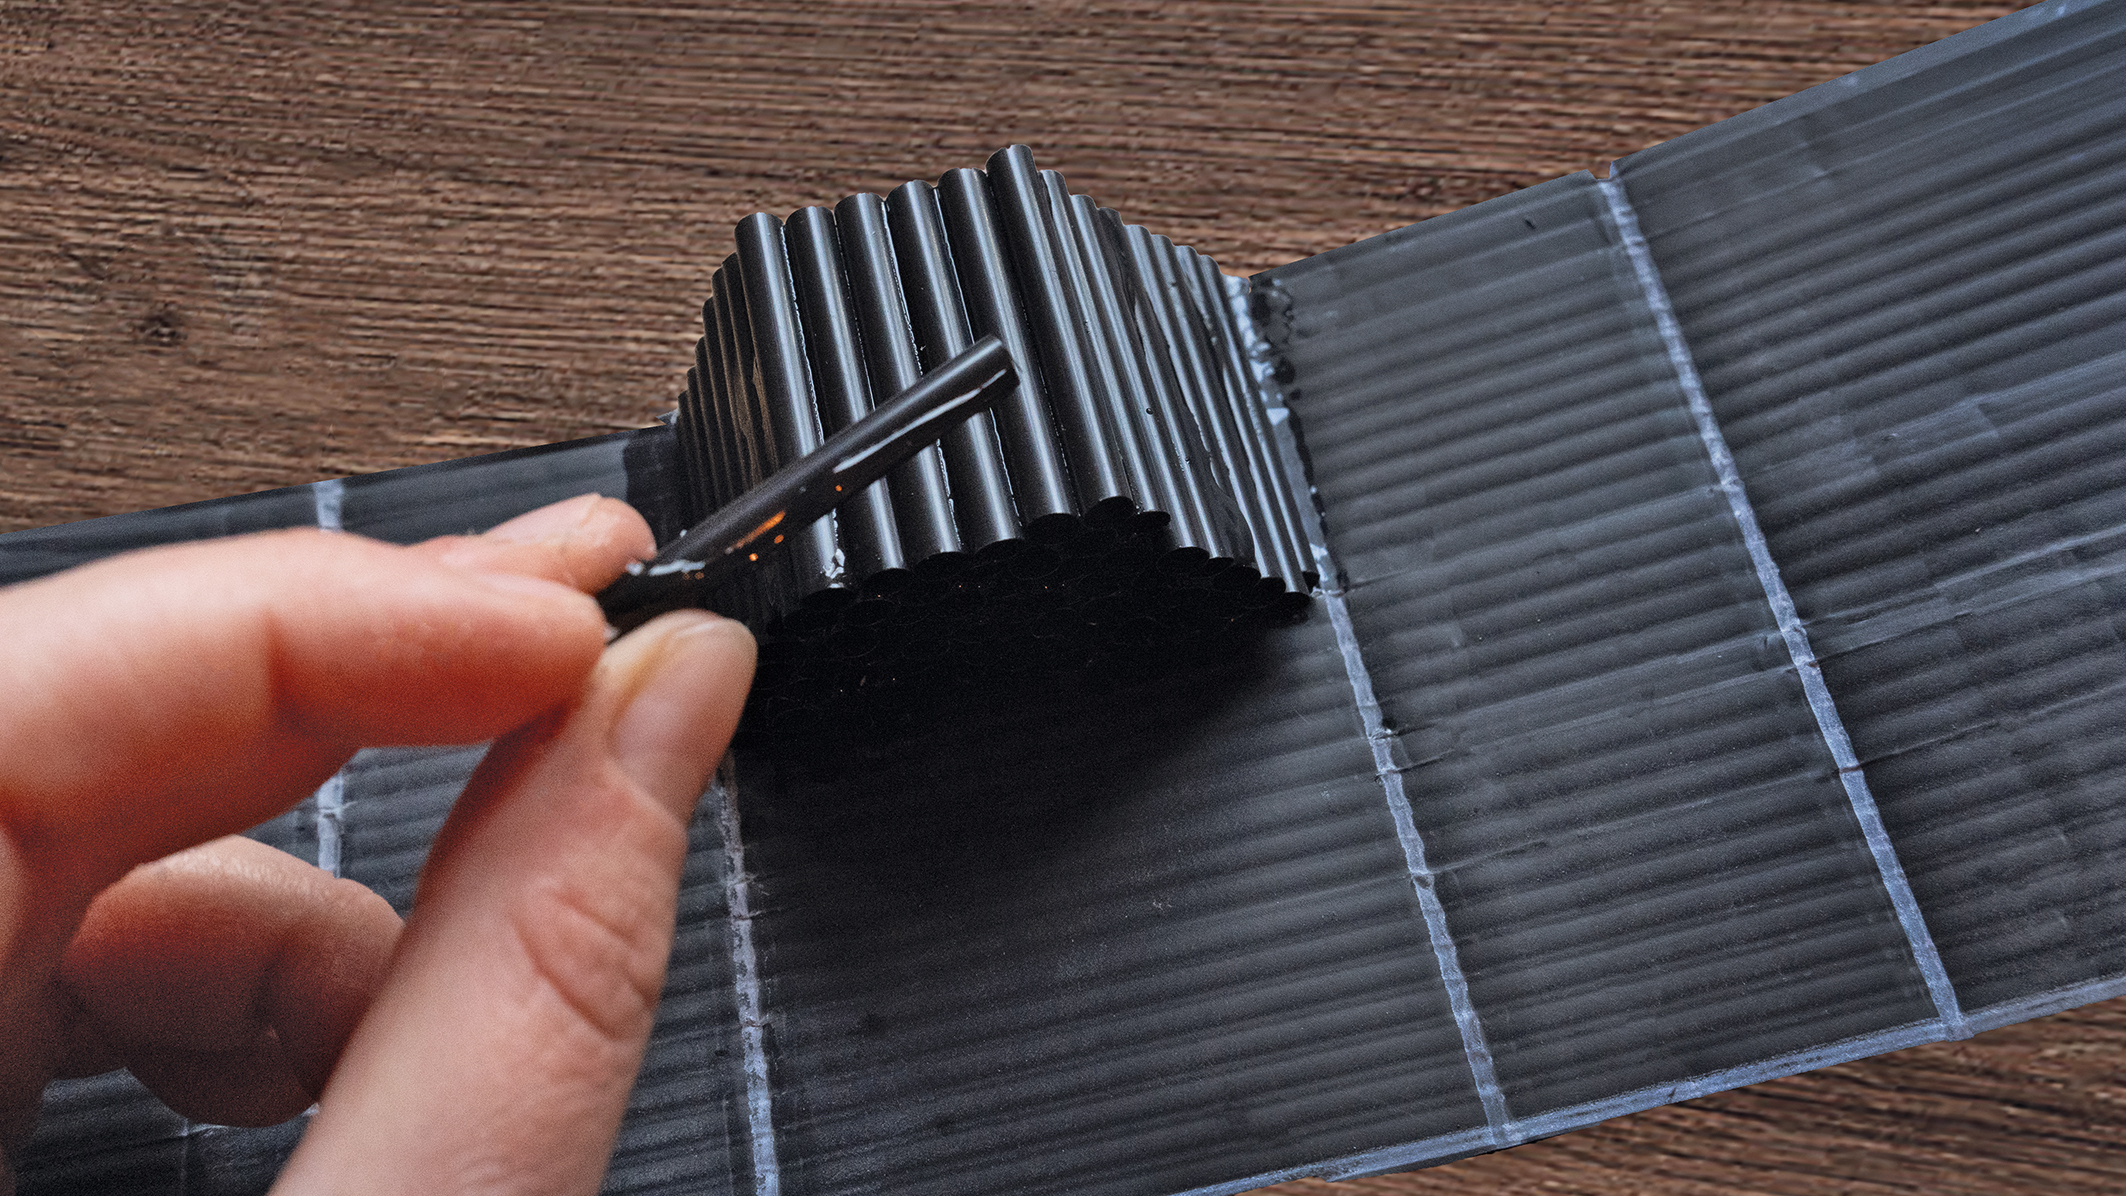
Begin gluing straws in the middle section of your template using liquid glue for the best results. Start with an entire row of straws, then continue adding straws on top until the height of the following section is the same as those to the left and right of the middle section. Let the glue dry.
5. Make it last
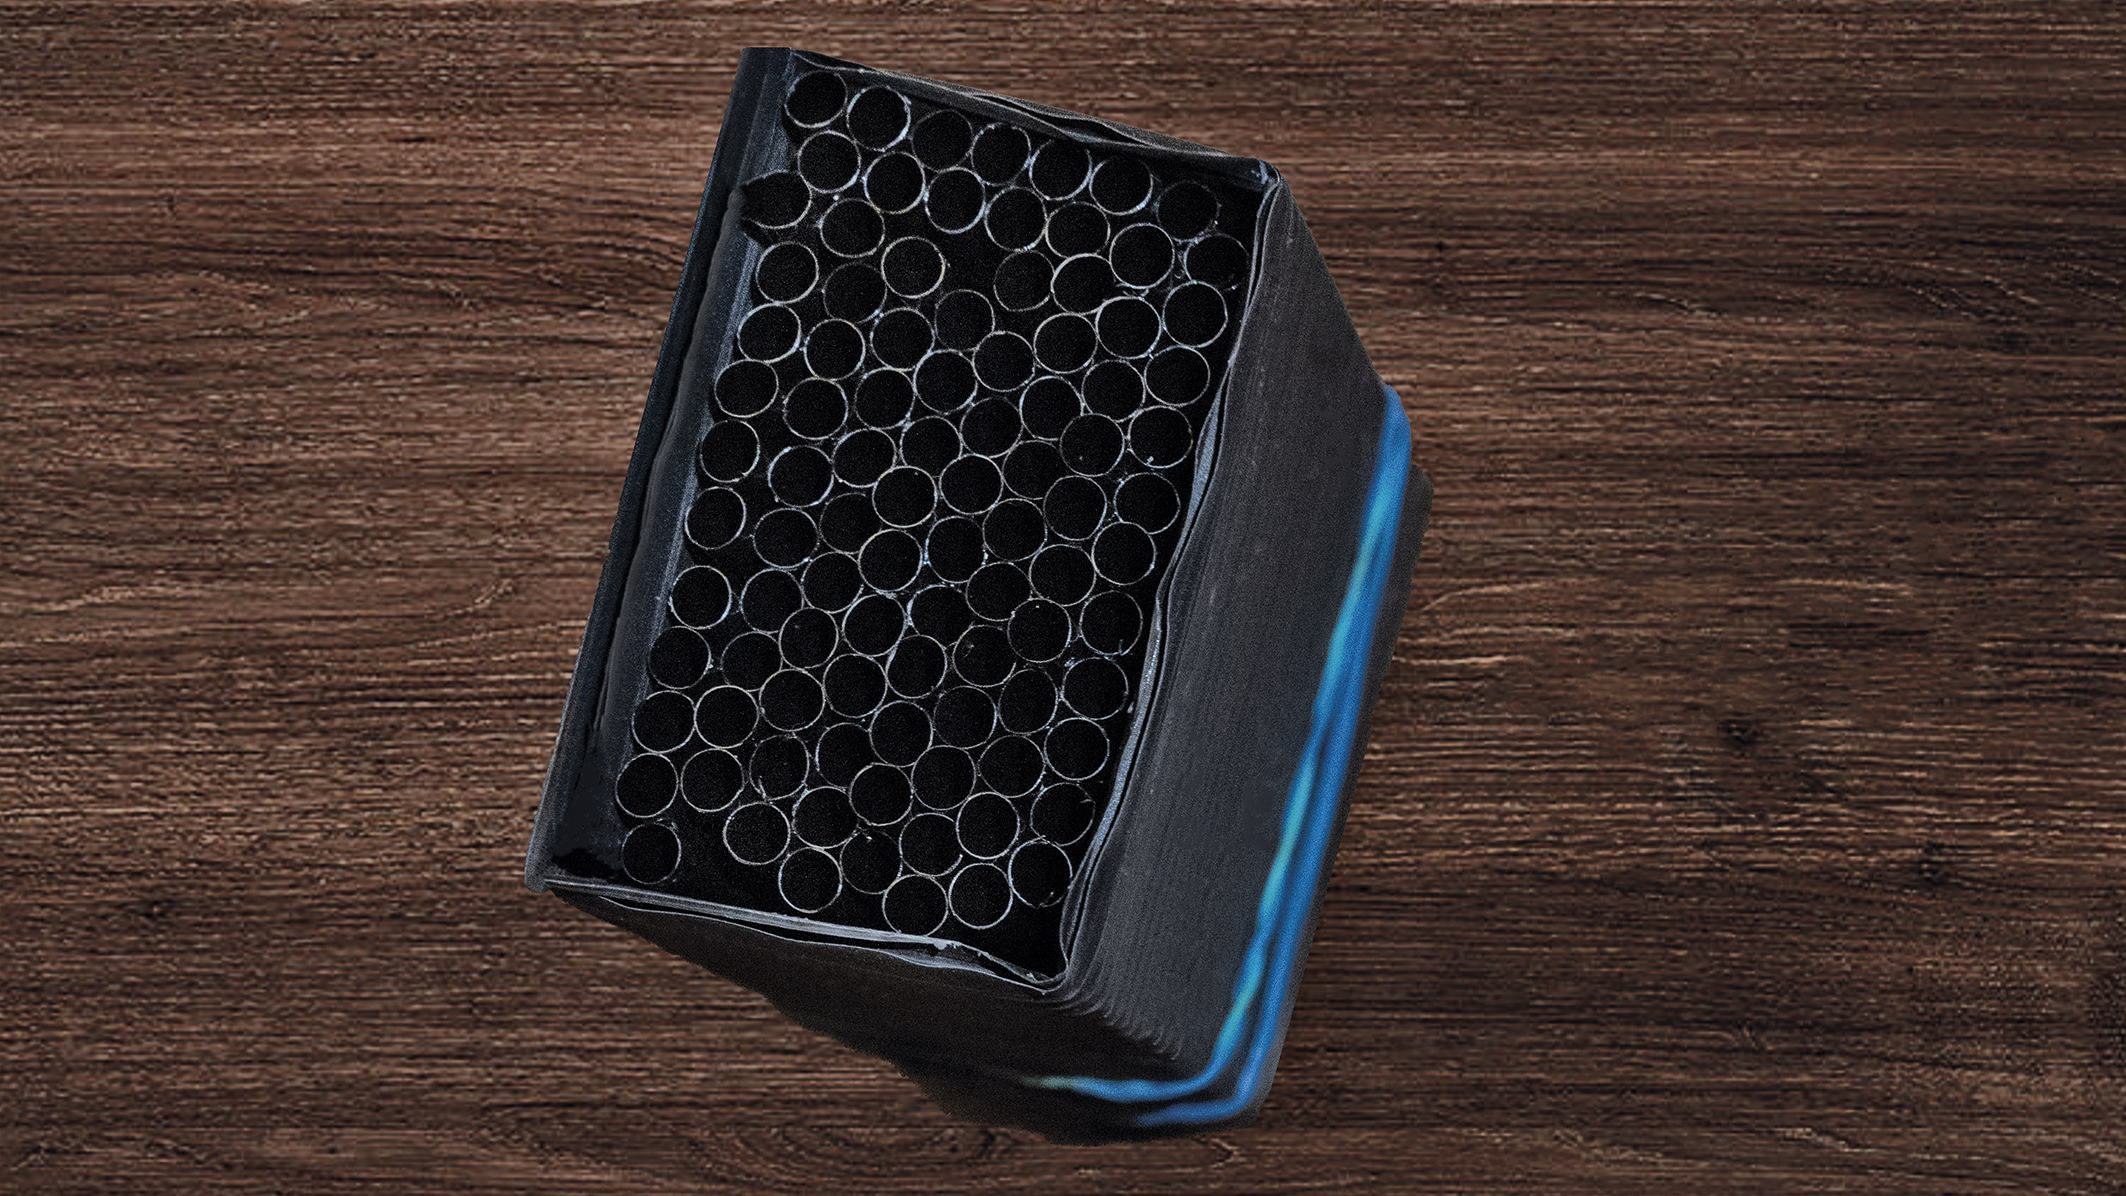
Now, carefully wrap the sleeve around your flash device, checking that it fits comfortably, then secure it with tape. For a more 'aesthetic' finish, you can also glue the upper parts together and wrap rubber bands around the sleeve. For maximum stability, let the glue dry overnight.
6. Understand the effect
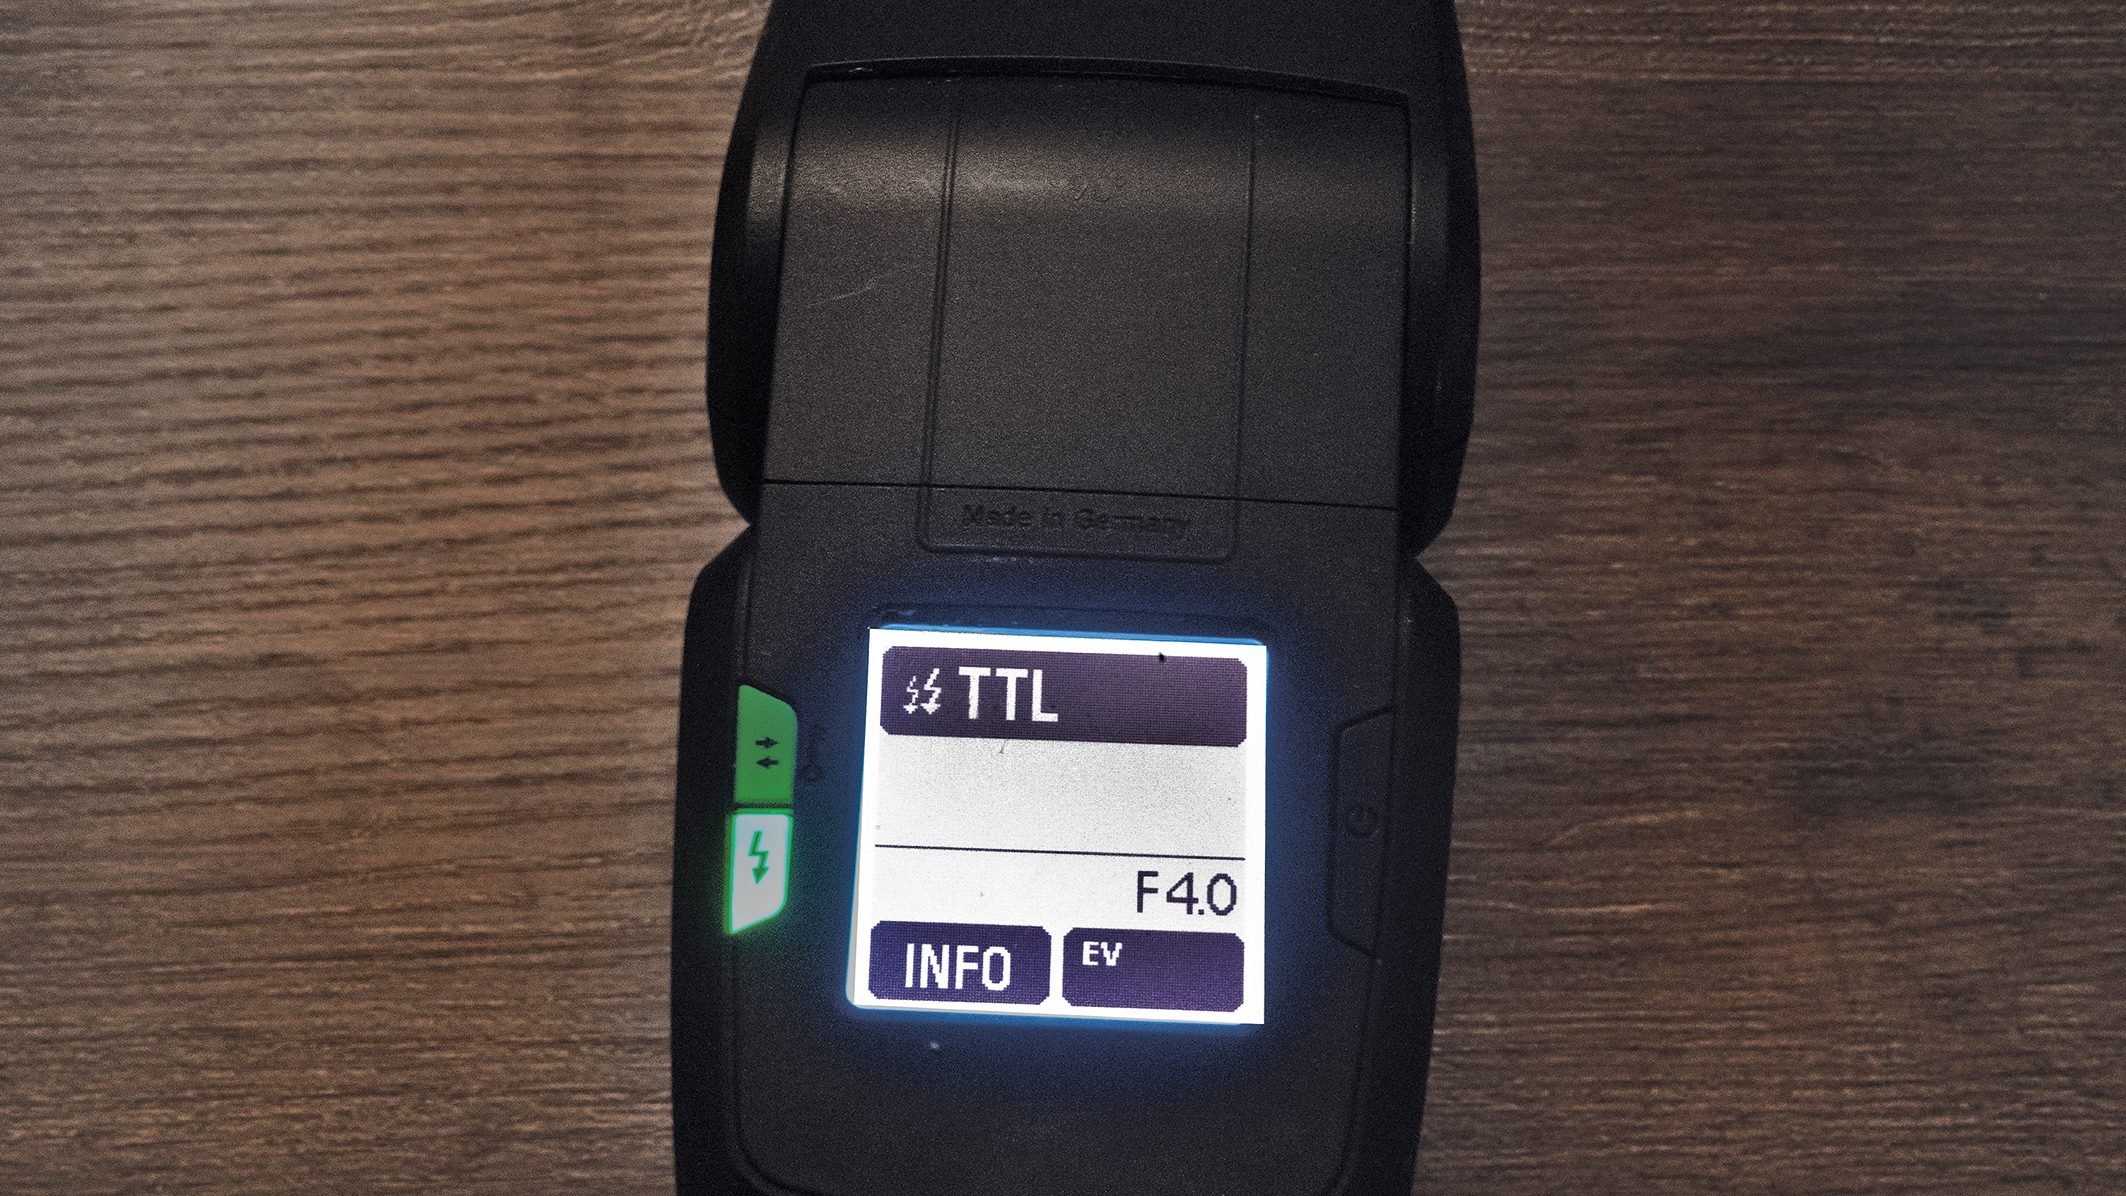
Finally, attach your DIY honeycomb grid to the flash. Set your flash to TTL mode (auto flash) or use manual flash mode for greater control. Test various settings to experiment with the effects of the flash grid and how the power and exposure settings can influence your scene.
You might like...
If you are interested in other photography tutorials that lead you step-by-step through the shooting process, check out more in our series:
- Create cool shadow art photography without pro studio lighting
- Create botanical photo art with microscopic insights
- Ditch your tripod – try handheld HDR instead!
- I created custom camera bokeh by shaping my lens aperture