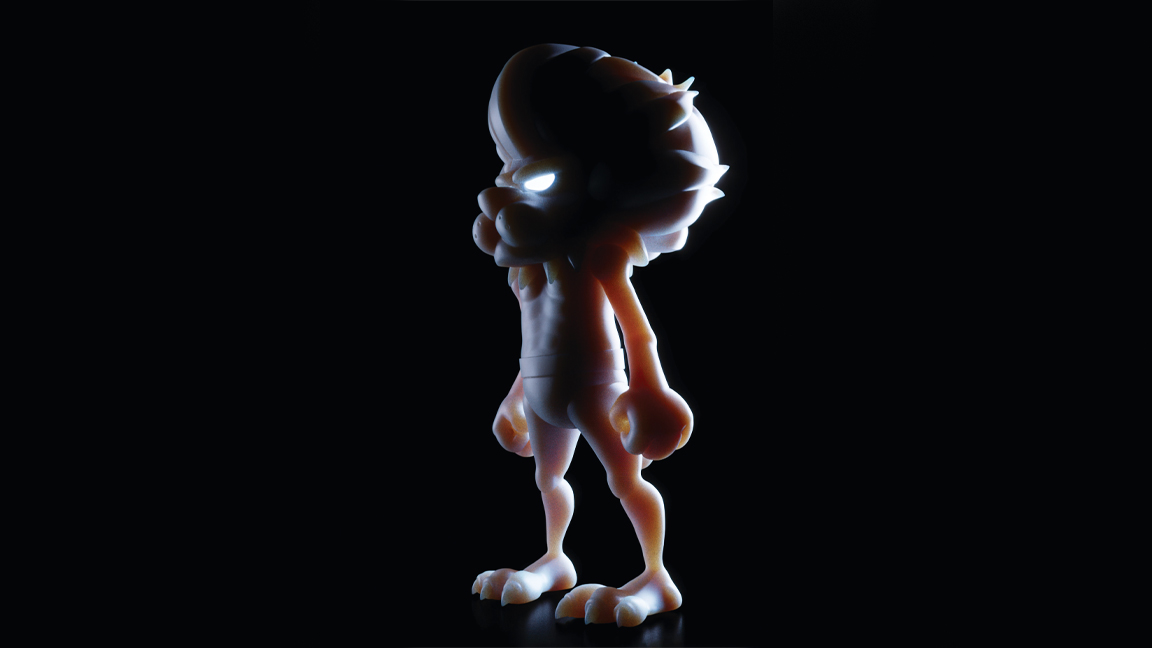
Since 2005 I’ve been using various modelling software, which has given me a wide view of the technology’s progress. Back then I remember using SketchUp, because it still performed well despite the fact my PC had no graphics card and very little RAM. I then changed over to Cinema 4D, which had something that SketchUp didn’t in V-Ray, meaning that I was able to start rendering. Years later I switched to the combination of 3ds Max 2025 with Chaos Corona for my render engine.
Throughout this time, my main job was focused in architectural visualisation, so most of the models I made weren’t overly complex. There were, however, times when I tried to model something different and step out of my comfort zone. I did some mech work, as I love all things mech related, and it went okay, but I also got into creating more organic shapes, which added another software skill set in ZBrush. It all started so casually with the typical sphere, plus a totally different interface.
As I got deeper into ZBrush, I discovered it has all I needed to make my ideas come to life. I’m still using 3ds Max for archviz, but when we talk about creating organics models, art toys and 3D-printable models, I choose ZBrush. In this article I’ll give you some useful tips focusing on the fastest workflows, so you can get creating in no time.
01. Place references within ZBrush
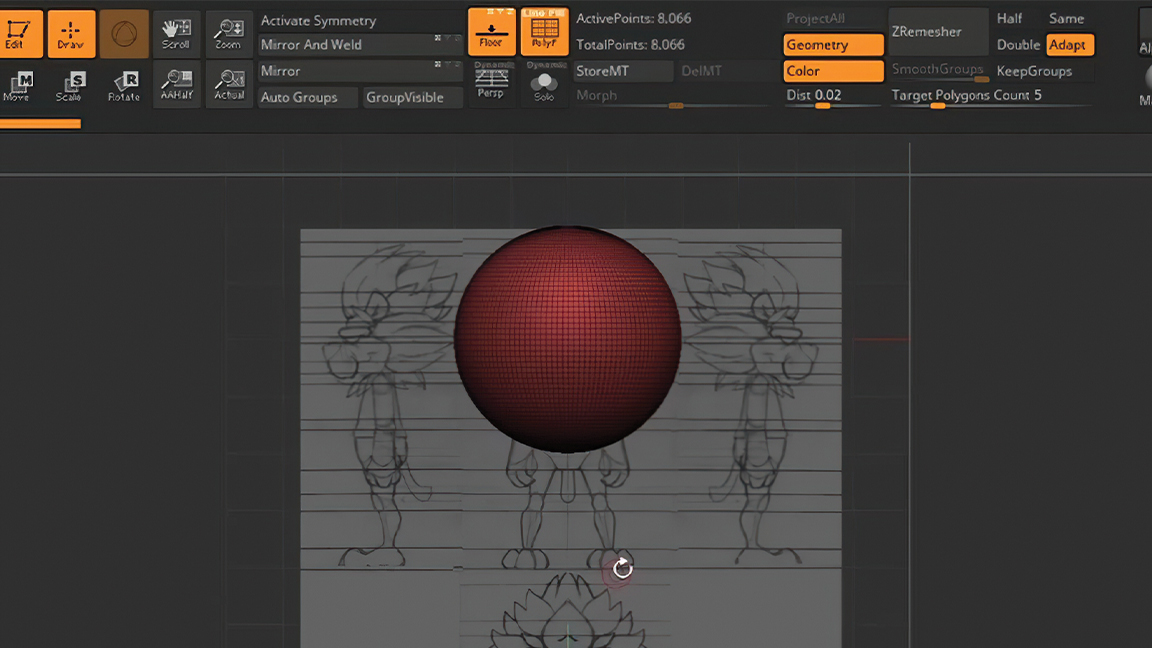
One of the most important aspects when modelling is having proper references, and working in ZBrush is no exception. With references, you’ll be able to model shapes the way you need.
To place a reference within ZBrush, first press Shift+P to see the floor, and then in the Draw tab under Front-Back, click Map1 and load the image you want to be your reference.
Once the image is loaded, you can adjust the size and position it to your needs. The same is also possible for the Left-Right views.
02. Edit opacity
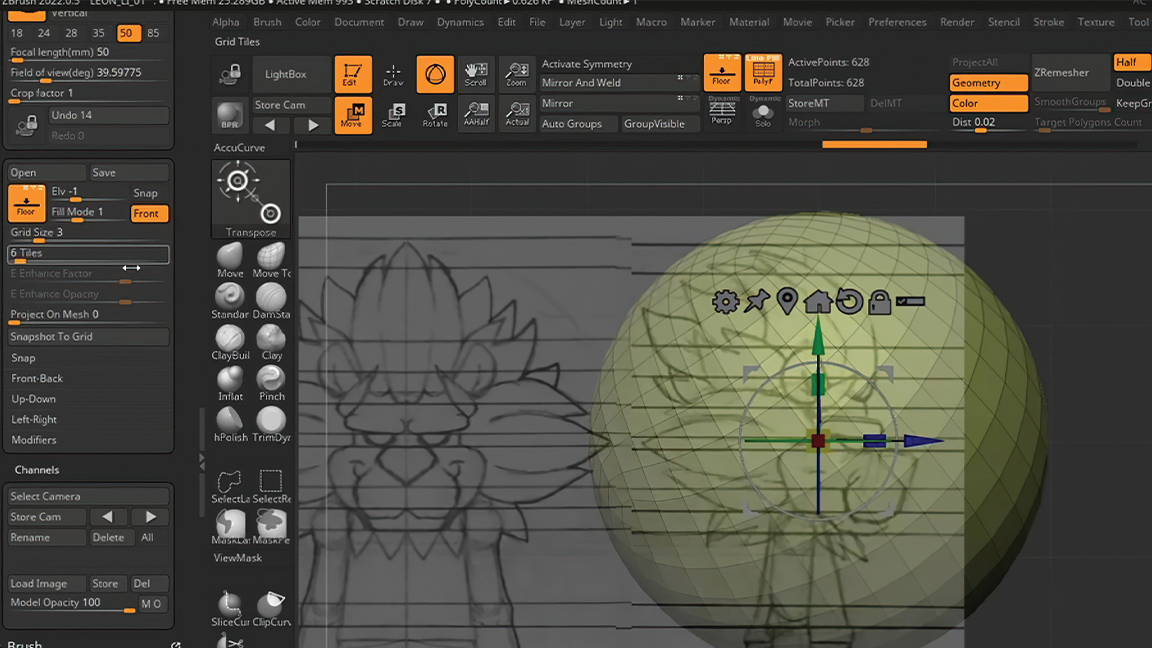
Once we have our references, it’s time to add polygons. A common problem I’ve seen is when artists can see through their shapes, making the experience a little difficult. What we need to do is head to the Draw tab and adjust the Fill Mode in the Floor section.
It will be set to 3 by default, but I always set it to 1, which gives me the perfect amount of transparency to work with. Once this is done, press the Front button and the model will have an opacity that will allow us to see through and adjust in a much simpler way.
03. Create shortcuts
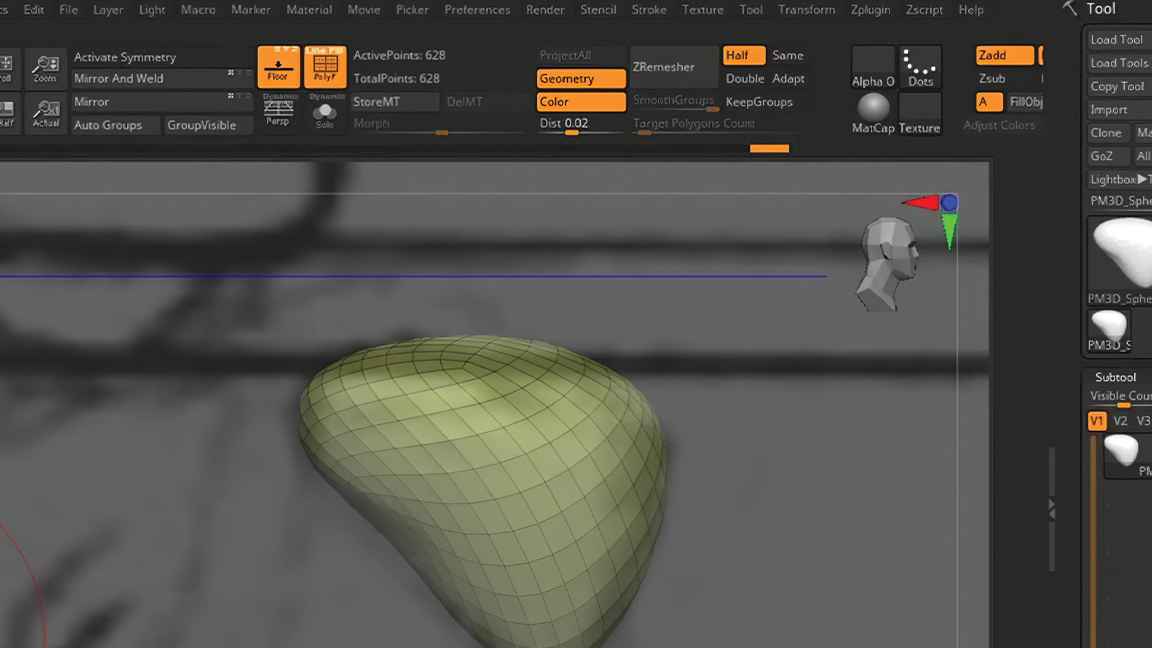
I have to say I love working with shortcuts, as they give me the chance to speed up my workflow in so many ways. This includes a number of my own custom shortcuts.
To create your own, the first job is to locate what we want to do; in this case it’ll be the Transparency for the polygon we’re working on. Press Ctrl+Alt and click, and you’ll be asked for a combination of keys.
In this case I’ll use Ctrl+4, which will now control the opacity. Don’t forget to store these shortcut combos in the Preferences tab so they’ll load each time you open ZBrush.
04. Set the scale correctly
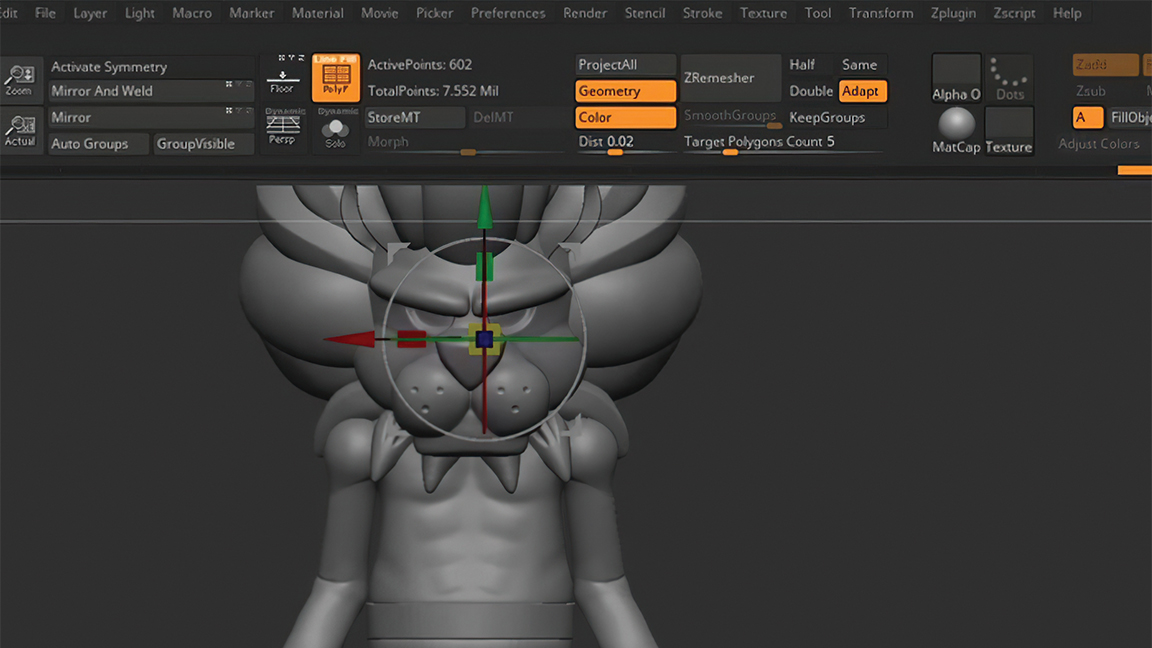
A common mistake when printing is not setting the model to the right size, which I always do when I have my model ready. To do this you need to add a cube, then go to Zplugin and in Scale Master set the X, Y and Z values to 10mm to create a 1cm cube.
Now press Resize Subtool, which will set the value of the cube in the correct scale. Let’s say you want the figure to be 6cm high, now you can copy and stack six cubes for a correctly sized piece.
05. Copy with click and drag
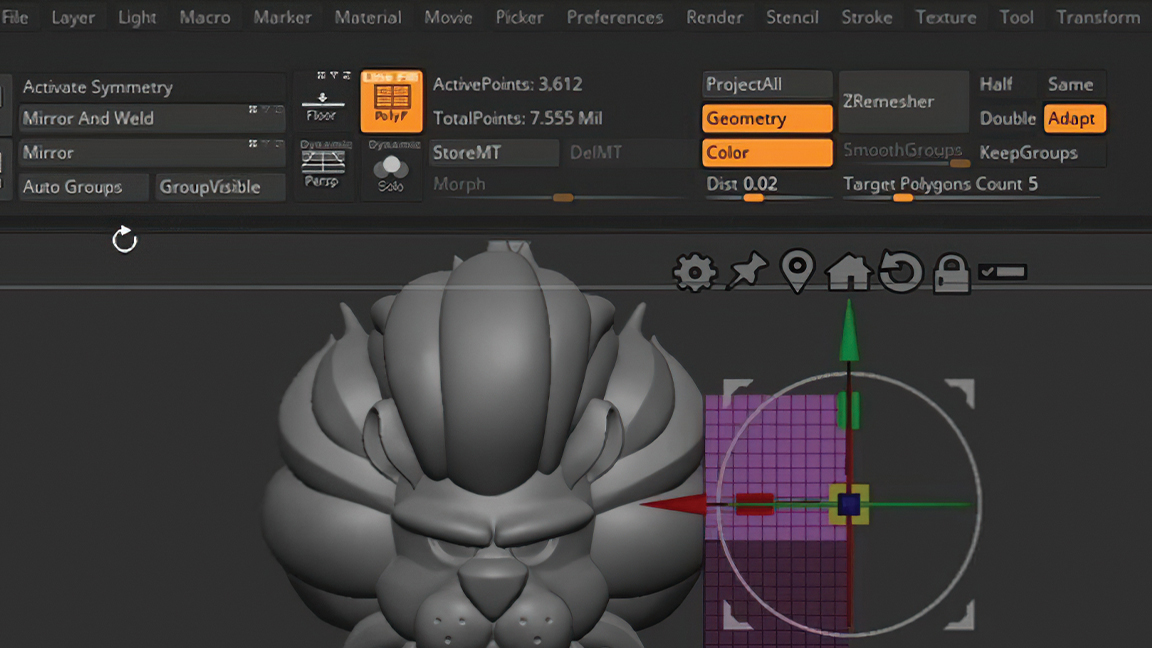
Here comes a nice trick about creating copies of a shape with the Widget. First select the shape you need, in this case I used a cube for the scale of the model, hit Alt to unlock the pivot modifications and set the pivot in the lower part of the cube.
Now click the Y vector of the shape and drag until the first cube ends. Once there, release Ctrl but keep dragging with the mouse on the Y axis and you’ll create as many copies as you need.
06. See your measurements
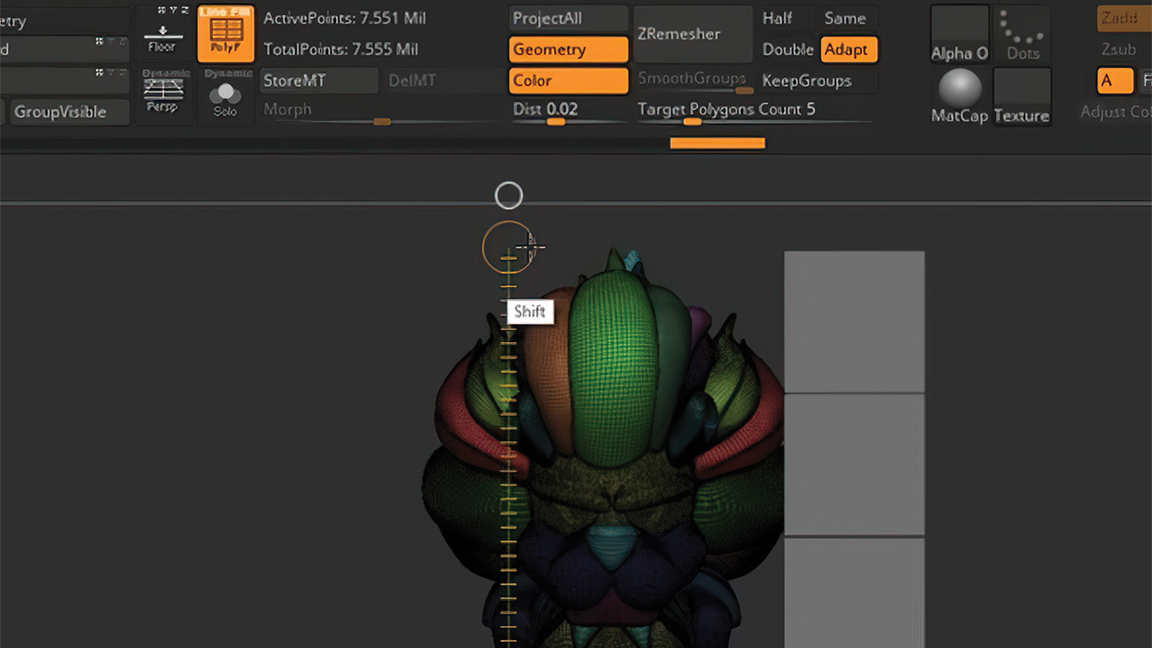
When I learned this in a YouTube video, it made everything so much simpler. Most of the time we see polygons and figures and think it’s okay, but a lot of 3D printers would disagree with smaller models. That’s because the modellers who’ve exported those figures didn’t care to set the correct measurements. Remember, this tip works across the board, but I mostly use it with the final model.
We have to select the model, then press ‘W’ to activate the Gizmo. Now hit ‘Y’, click in the lowest part of the figure and drag it up. You can press Shift to keep a steady direction. Once you’ve finished, in the top-left corner of ZBrush (under the Alpha tab) you’ll see the unit value. Remember it's in millimetres, so a 60mm piece would be 6cm.
07. Decimation master
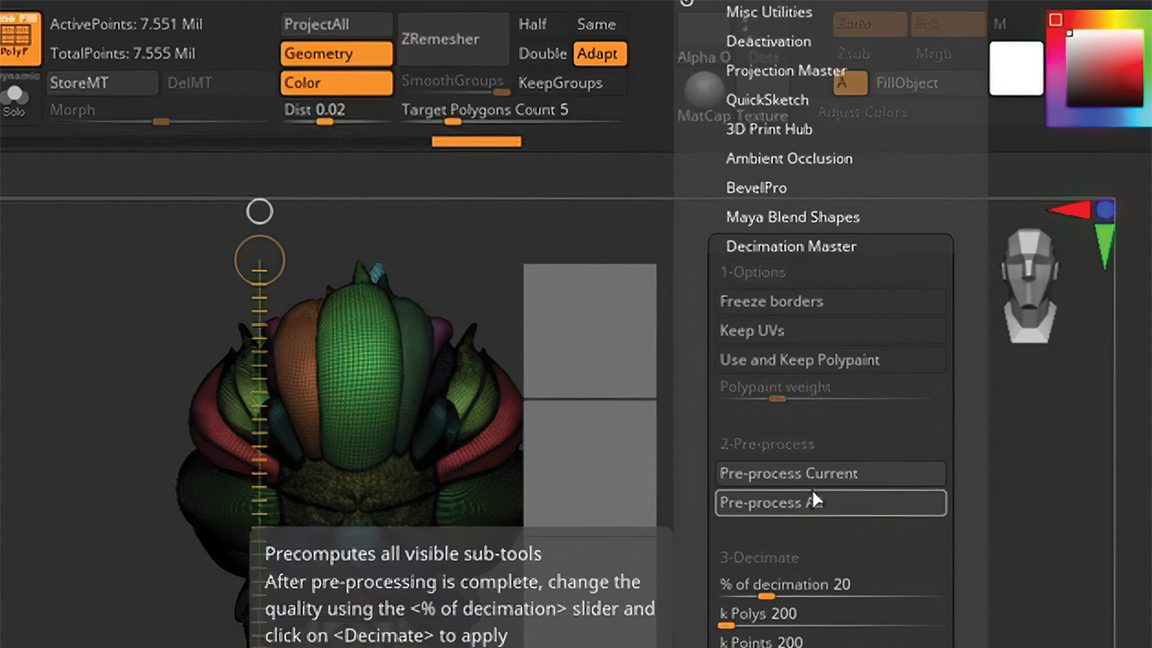
I’ve seen my fair share of models crash Chitubox. Not those that are RAM consuming, but those with a file size over 100MB. To solve this problem go to the Zplugin tab and Decimation Master. I always choose the 250k option to reduce the polygons, which in this case will drop the file size to around 23MB the majority of the time.
08. Export at the correct size
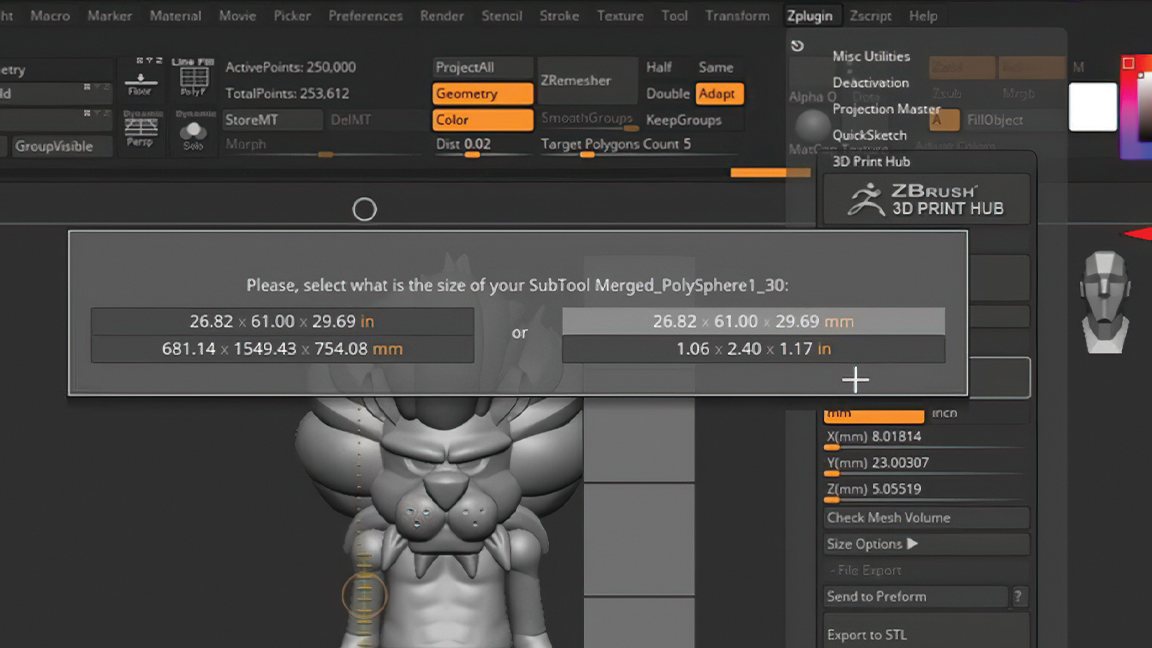
We have the model sized correctly and have decimated the file size, but before we can print there’s still another step: exporting at the correct size. It’s not difficult, but missing this out can result in errors.
We need to go to Zplugin’s 3D Print Hub and use the Update Size Ratio option. We’ll see a pop-up window with the size of the model, where I typically pick the top-right option. Once clicked, we can export an STL at the correct size.
09. Clip Curve
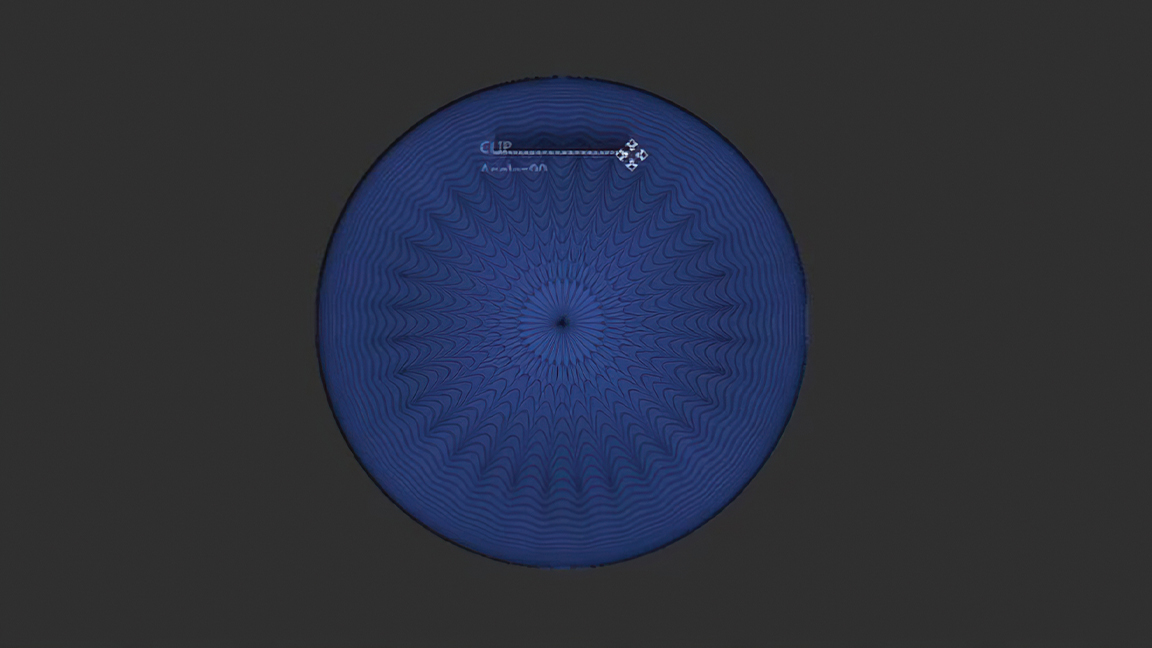
Clip Curve is mostly used to make straight cuts and does so well, but we can also change the way it cuts to help us get different shapes. First of all press Ctrl+Shift and select Clip Curve.
Now click and drag to make a line that fits inside the polygon of our choice. Once you make the Clip Curve work you’ll have a nice cut in the shape. Personally, I often use it to create mechanical pieces.
10. Logo using alphas
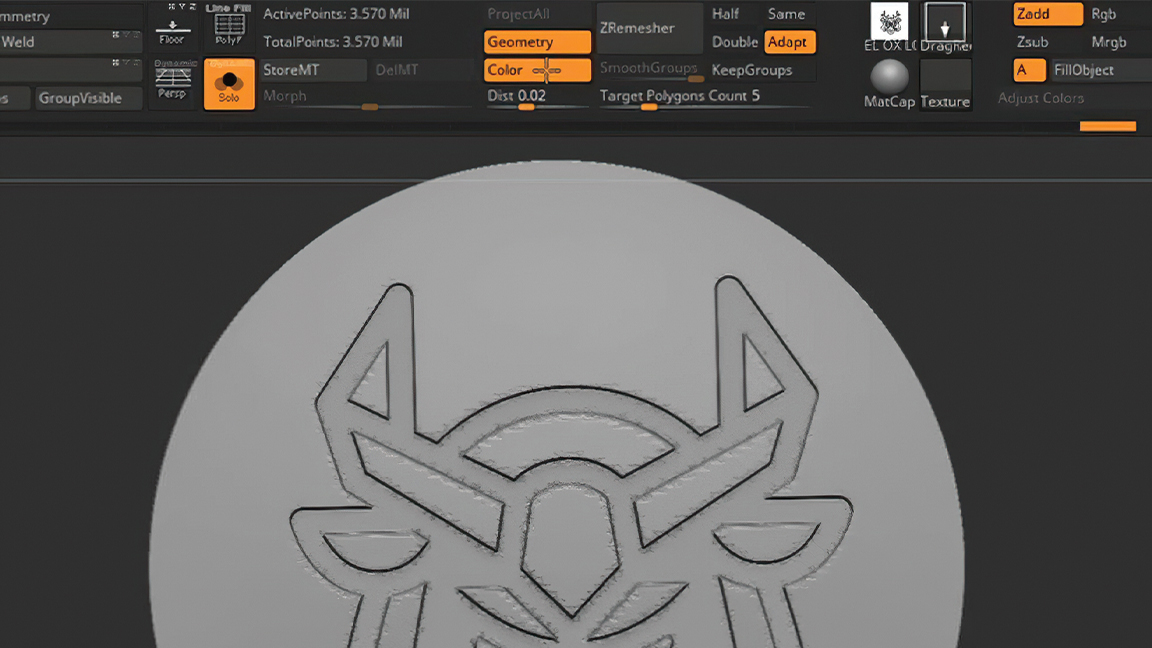
The model is ready, but we’re missing our brand logo. We’ll require two things here: the base model should have enough polys that the logo will look nice, and a Standard brush with a nice alpha.
Once we’ve created the piece for the logo’s placement, go to Alphas, then Import and place your logo alpha. Set the DragRect, go to Alpha Modifiers and activate Surface, which will make a calculation of how much depth the alpha should have. Now just click and drag, and the logo will be set.
11. Custom cam view
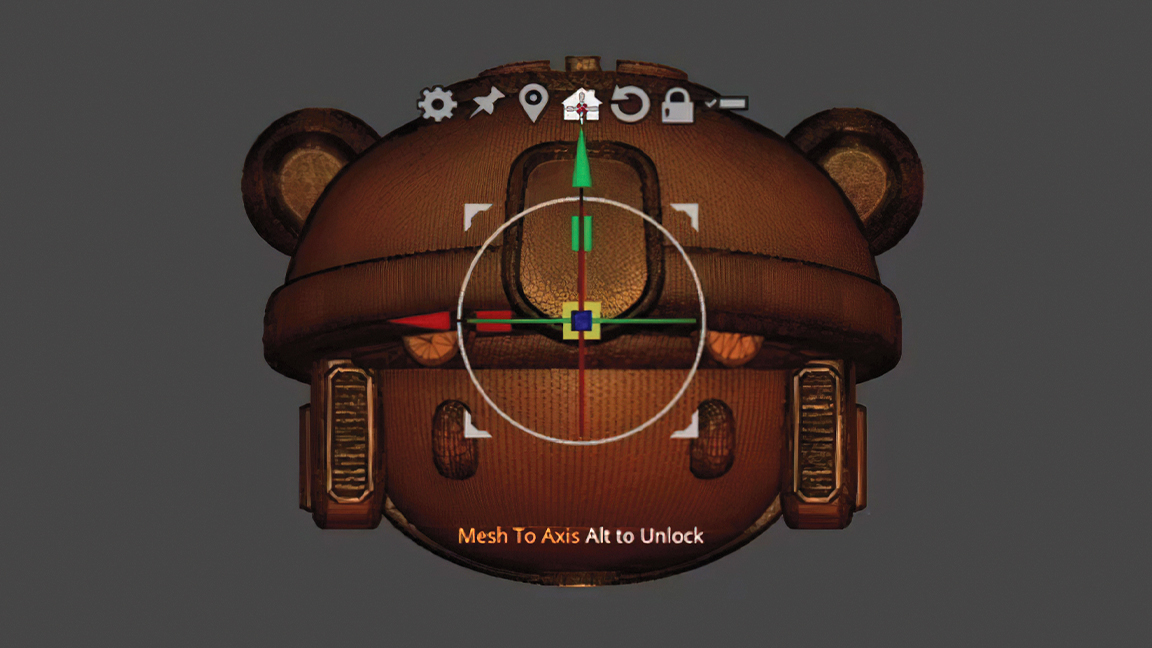
The CamView is the figure we see at the top-right of our viewport that shows which side of the model you’re looking at. But what if I told you that you can place any model you like there?
It’s simple! First select the object you want, centre it with the Gizmo, and click the little house icon. Now go to Preferences > CamView > Make CamView and it will replace the default head with your chosen model.
Select the Image and Export to save it in your ZBrush program folders under ZStartup > CamView, which will make it available when you reopen ZBrush in future. Go to Preferences > Config > Store Config to make it the default.
12. Radial symmetry
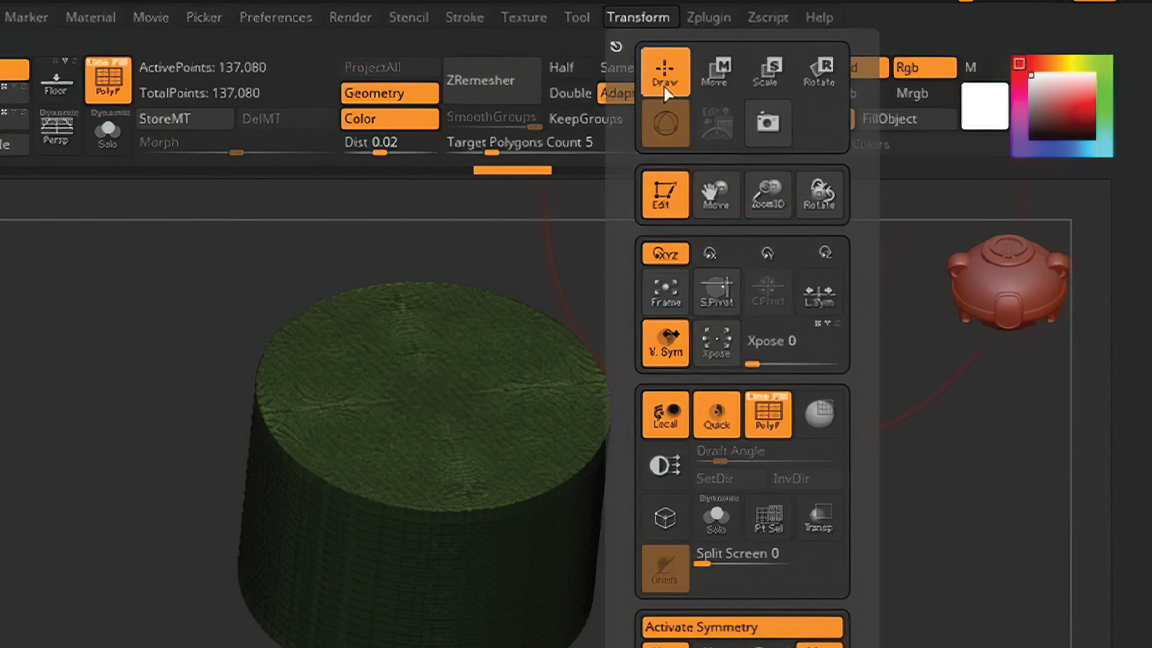
We all use symmetry, activated by pressing ‘X’, but the radial option is rarely used. I use it mostly when sketching mechanical parts. Turn it on in the Transform tab by selecting the ‘(R)’ option, and depending on the position of your polygon you might change its axis to any of X, Y or Z as per your needs.
Among its uses, you could set the Radial Count to 100 if you want to add a chamfer, or reduce it to 8 to make holes in a model. The result depends on the brush you use, so test out different ones and see what happens.
13. Flatten
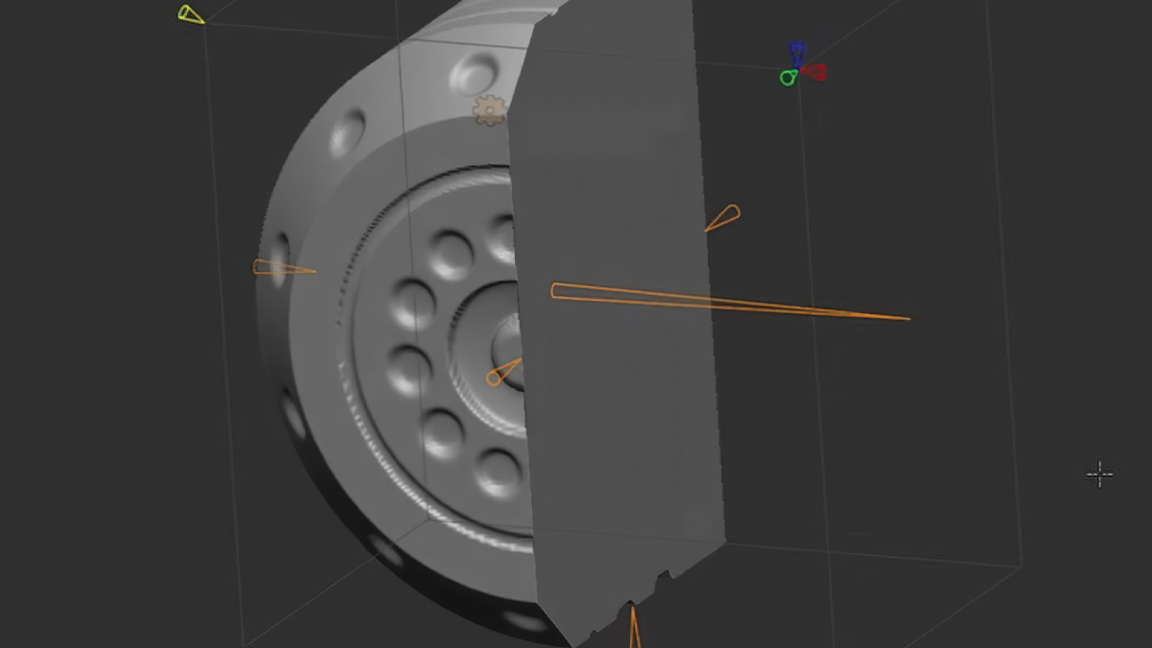
Cutting is one of the most-used actions in ZBrush and we have many ways to accomplish it, but a tool I use that most people don’t is called Flatten. It’s located in the Gizmo, so you need to select your model and then press ‘W’ (or ‘Y’ if you’re looking at the Transpose).
In the gear select Flatten, which will make several arrows appear. It’s an intuitive tool, so select one and drag it to see how it affects the model. Once you’re done, press Accept to apply the changes.
14. Extender
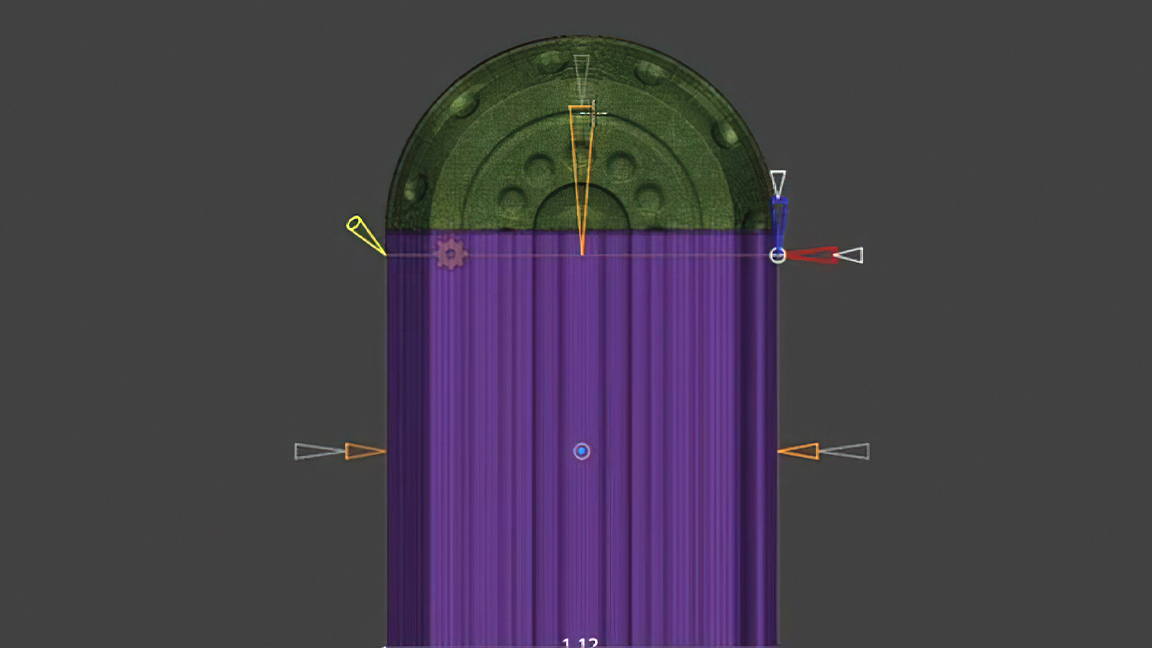
The Gizmo has so many cool tools we can use. Another useful one is Extender, which will extend shapes as its base function while also adjusting them to keep things tidy. To do this, open the Gizmo, click the gear icon and select Extender. Just like flatten, a number of arrows will appear that you can play around with, so pick an axis and drag.
This content originally appeared in 3D World magazine, the world's leading CG art magazine. Subscribe to 3D World at Magazines Direct.


