The time for pumpkin carving may be over for another year, but that doesn't mean you can't create a beautifully seasonal Thanksgiving display with this most iconic of fall fruits.
By using a hollowed out pumpkin as a vessel and carefully selecting the right flower, berry and foliage stems, you can craft an autumnal floral design for a porch or dining table that stylishly sums up the season and appears completely effortless.
In the Petals & Roots episode below, I demonstrate exactly how to create a stylish flower arrangement in a pumpkin – which lots of you loved. Here, I take you through my step-by-step in even more detail, and show you how to perfectly capture the season with this fun and sophisticated no-carve pumpkin design idea.
What you need to create a floral pumpkin

- A pumpkin
- A knife, such as this one from Amazon and tool to scrape out the center
- A small ceramic bowl or ramekin, just like these from Amazon, depending on the size of your pumpkin
- Floristry scissors; I use the Niwaki floral scissors, available from Anthropologie
- Chicken wire
- Floristry pot tape – my go-to is the clear pot tape, from Amazon
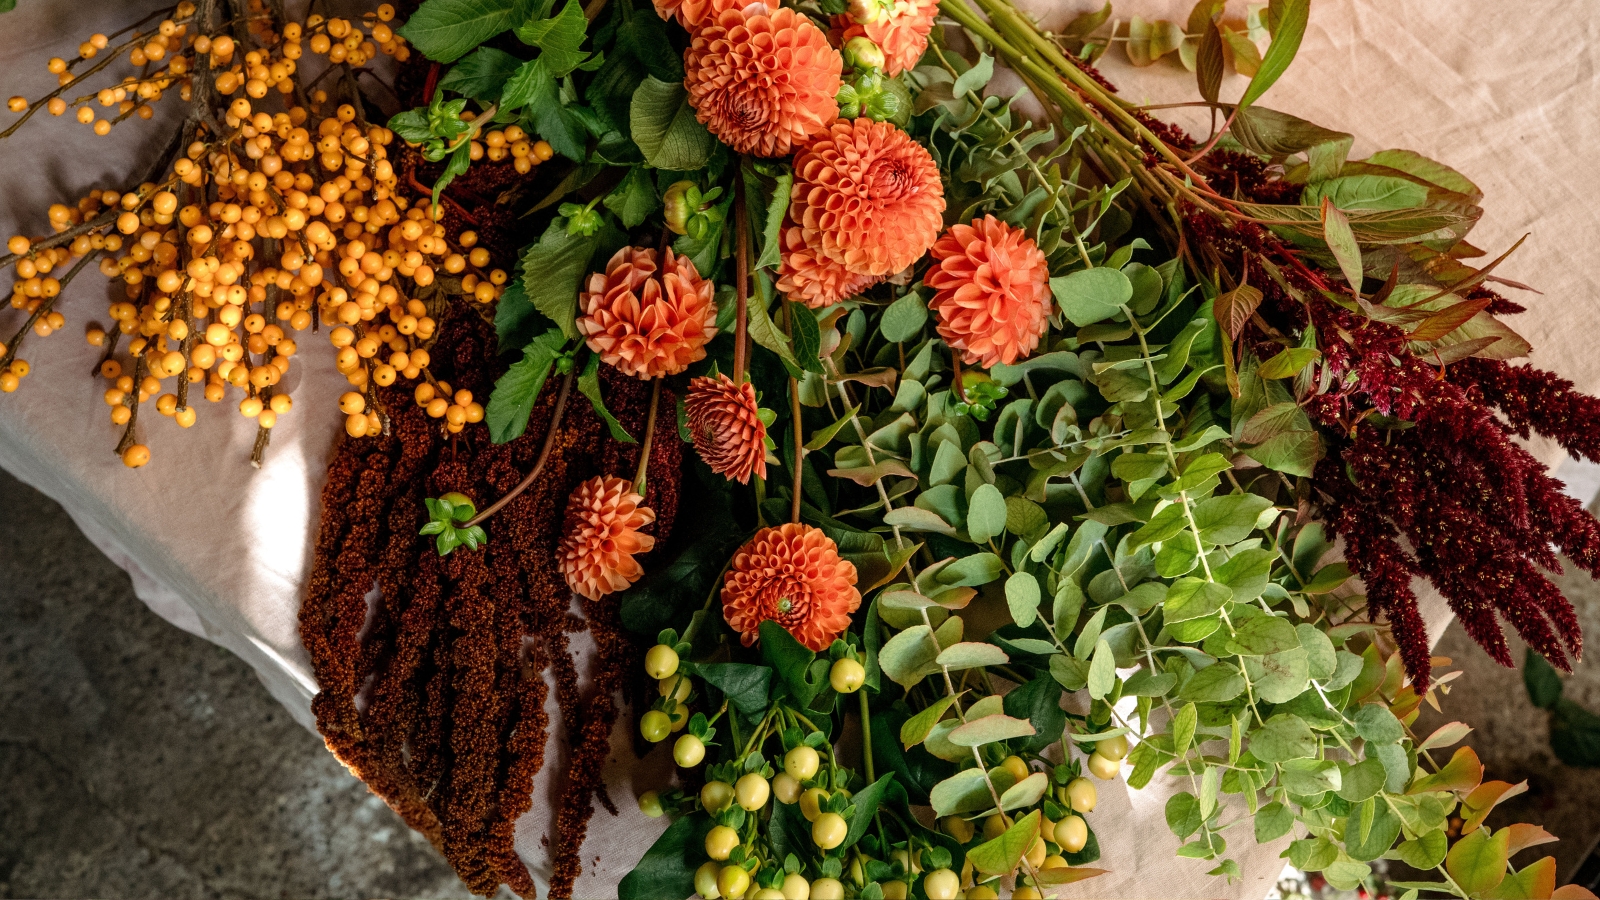
- A selection of fall flowers, foliage and berries. In my design I use:
- Bay
- Autumnal eucalyptus
- Orange ilex berries
- Cream hypericum berries
- Orange dahlias
- Pale peach stocks
- Burgundy amaranth
- Chocolate cosmos
Step 1: Add the mechanics to the inside of your pumpkin

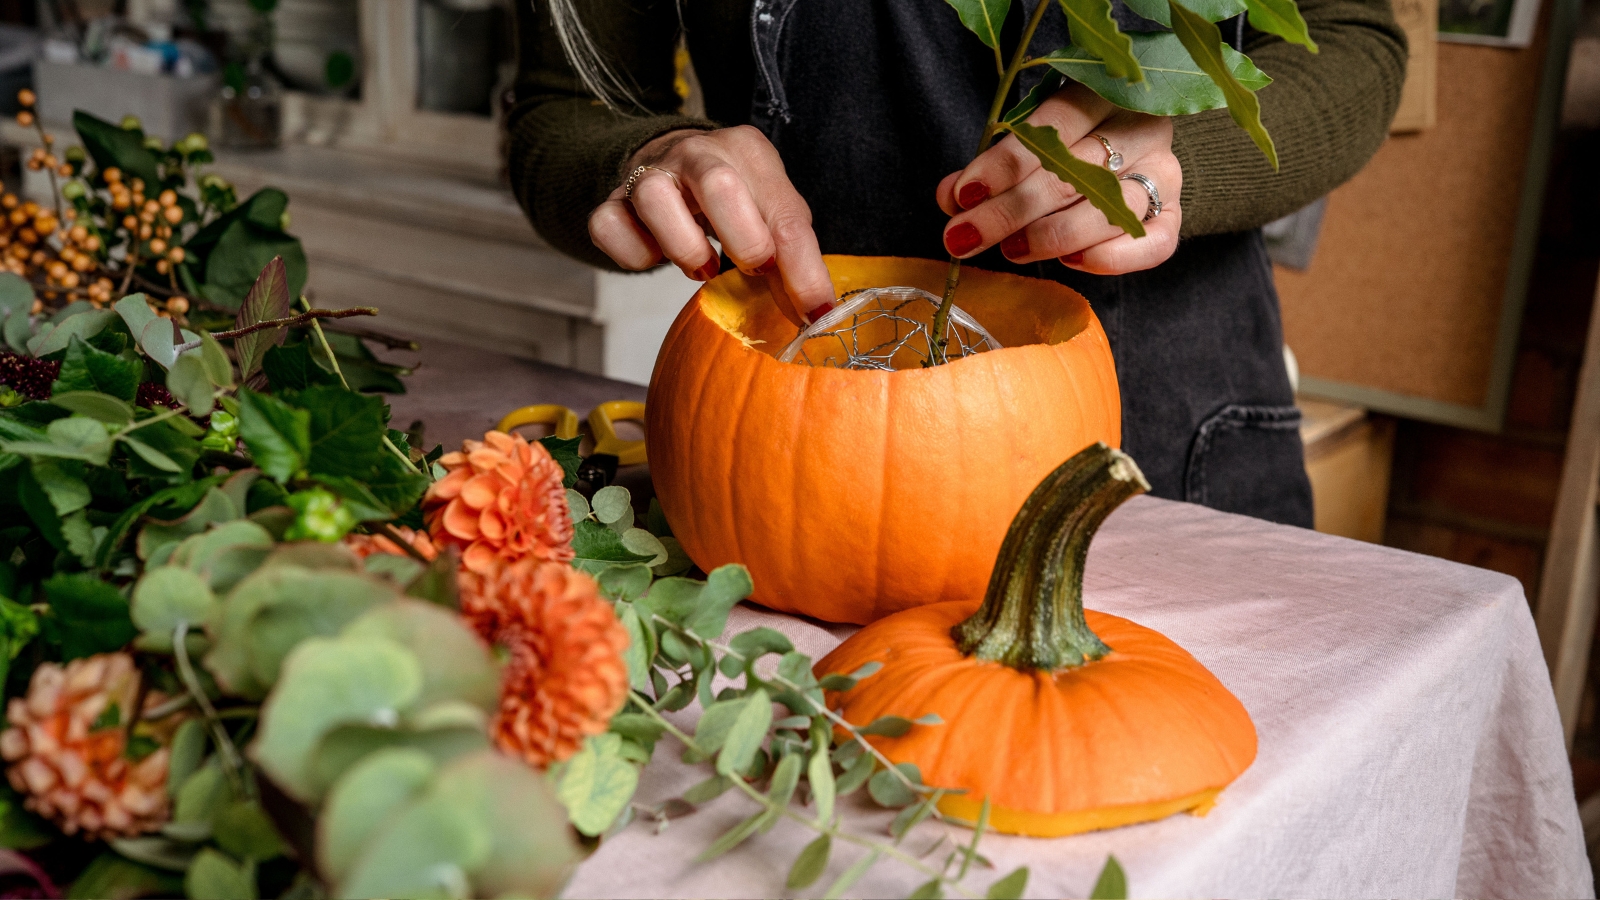
Once you have sliced the top off and hollowed out your chosen pumpkin, you can get the behind-the-scenes of your design ready.
This is such an important step, as without the right mechanics your design won't have any structure, and importantly, it won't last as long.
The first thing to do is carefully cut a small square of chicken wire and fold it into a pillow. I always use gardening gloves to do this to protect my hands.
Push the chicken wire into a ceramic or plastic bowl (so long as it's waterproof it'll be fine) and secure this with pot tape over the top. Then place this inside and fill with fresh water.
By containing the water in a vessel like this, it will stop the pumpkin from rotting more quickly, so your floral pumpkin will last longer.
Eco tip: Try not to be tempted to use floral foam for this design. It might be quicker, but using a bowl and chicken wire is a much more eco friendly floral foam alternative, and will mean you can simply remove and reuse when your display is finished, and place the pumpkin on the compost heap.
Step 2: Create a base with foliage and berries

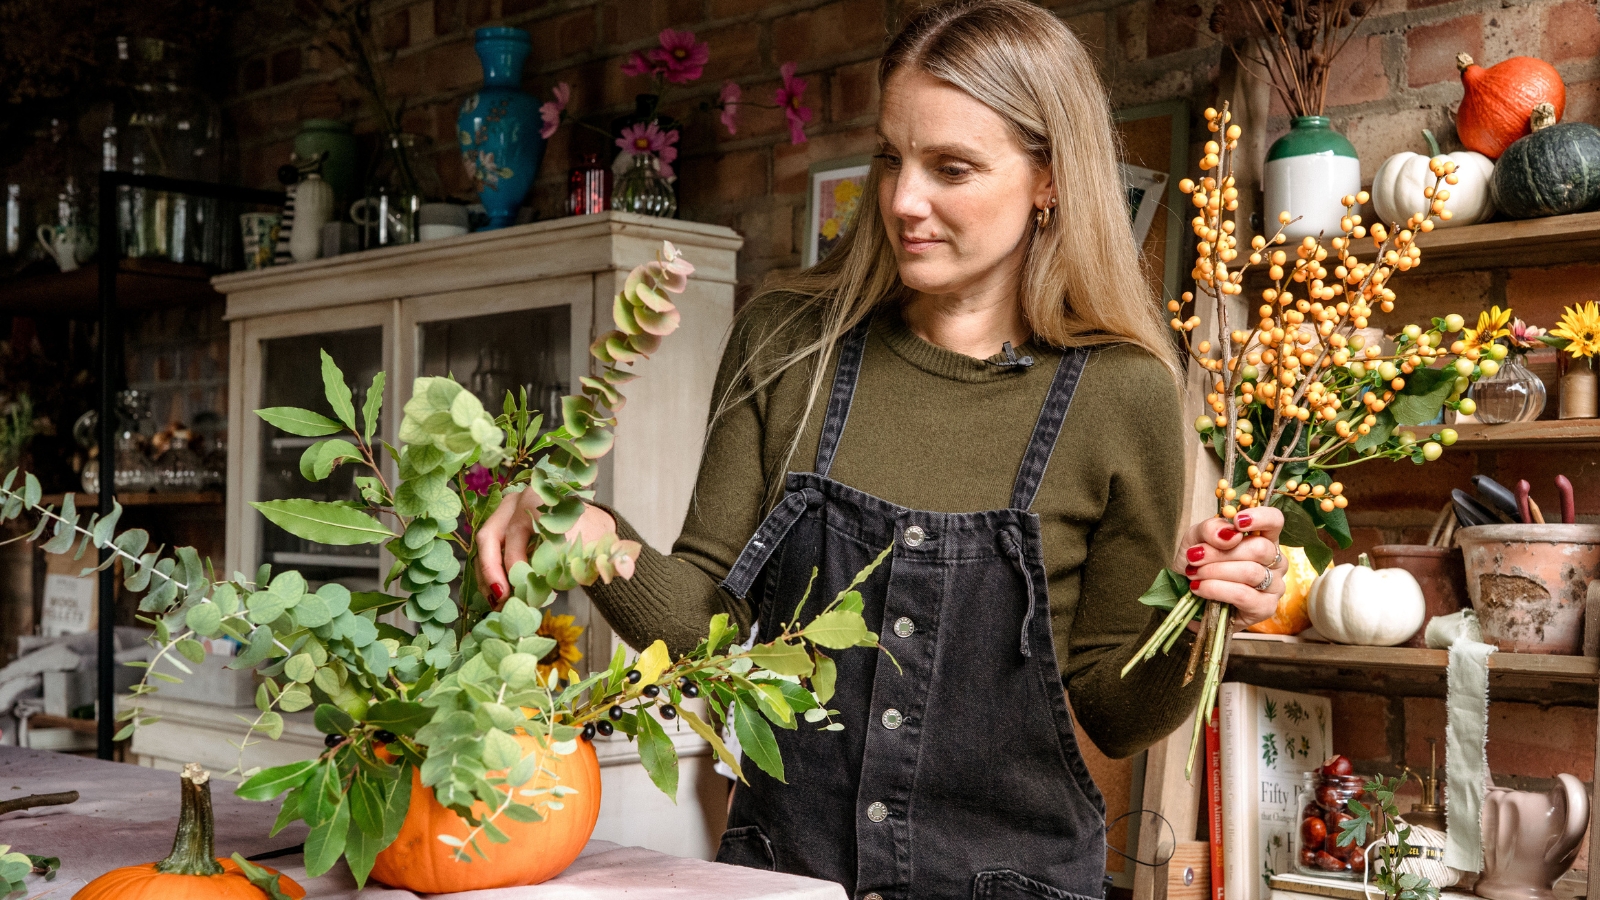
To create your shape and foundation, add your foliage stems first. I went in with a few bushy stems of bay, and followed this with some longer, curvaceous autumnal eucalyptus.
Both types of greenery are also strongly scented, making them ideal for an indoor arrangement.
Cut every stem at a 45 degree angle before adding into the water, to ensure everything is super hydrated and will stay fresh.
Once you have a fairly full coverage of foliage, start adding in your berries. I used pale orange ilex (deciduous holly), which are perfect for fall, followed by larger creamy hypericum berries. Both add a delicious texture, and can be shorter in length than the longer foliage stems to give the design more depth and help to fill large gaps.
Step 3: Add your fall flowers

Now it's time to add color! When you're ready to add your flowers, I start with the spire shapes and the focal blooms, followed by the more delicate details.
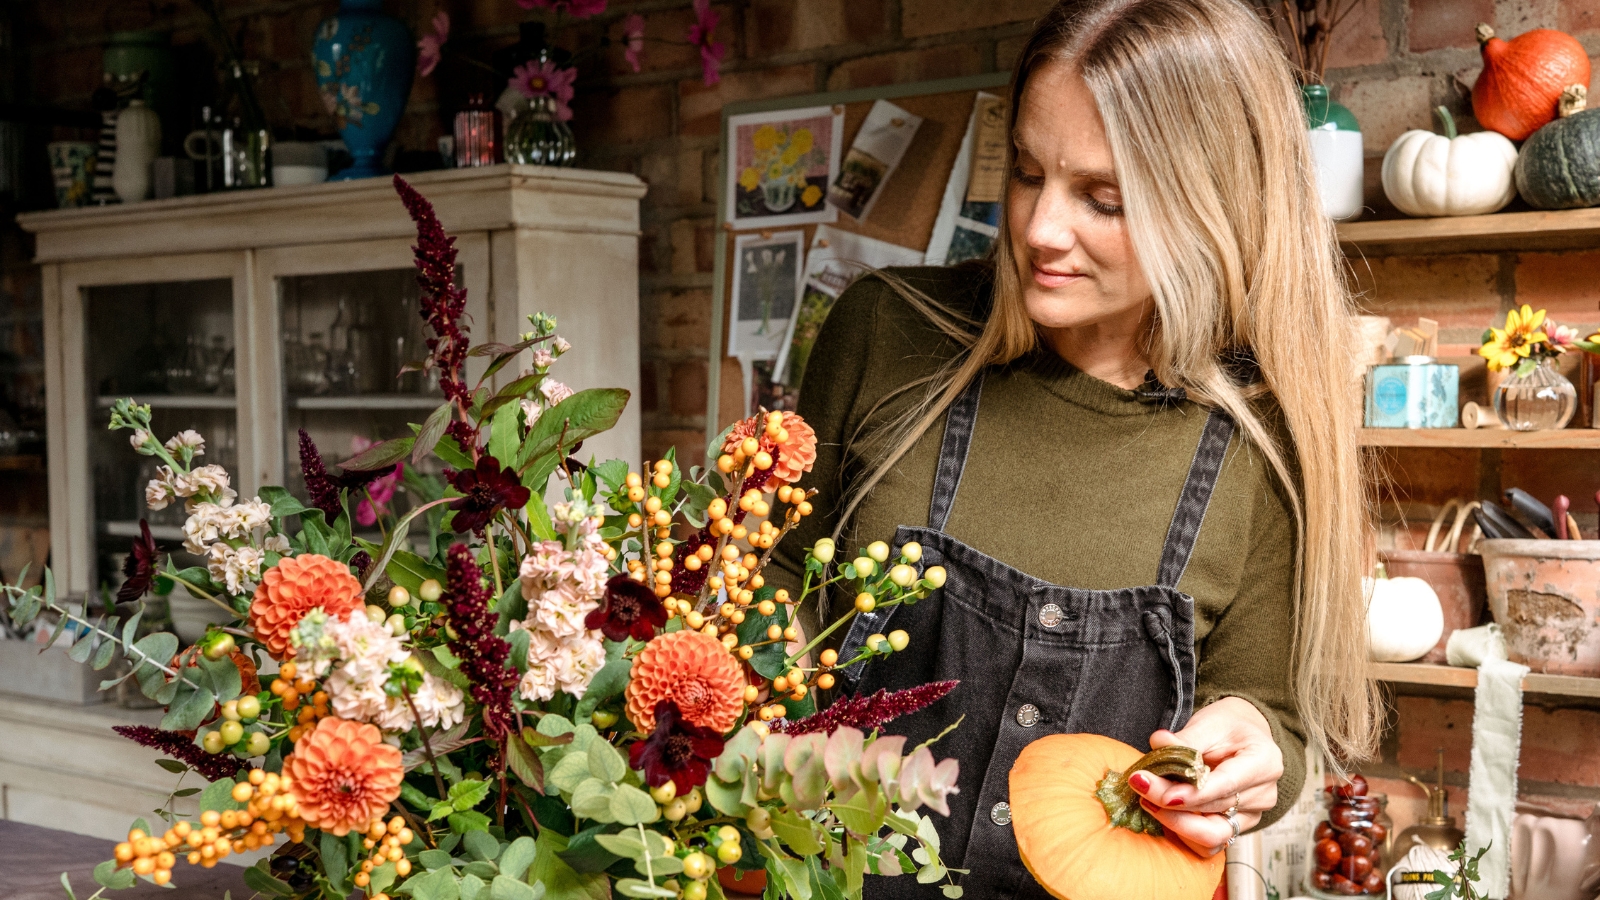
In this design, I added burgundy amaranth evenly throughout, varying the heights, followed by some delicious rusty orange dahlias – irresistible at this time of year.
Make sure you are placing each stem into the water. It's easy to miss the bowl once you have a lot of stems in your pumpkin.
Next I added pale peach stocks for a color contrast, and I finished with chocolate cosmos (my absolute favourite for their velvet petals and cocoa scent). Keep the stems of these flowers long so they can dance daintily over the larger blooms.
Once you're happy with the arrangement from every angle, check it for any gaps and make sure you can't see any of the chicken wire.
You can expect this design to last a week inside, and up to three weeks or more if you place it outside.
Your essential fall floristry kit
These floristry scissors are very similar to the ones I use every day. The ergonomic grip means no strain on my hand or wrist, and they are incredibly sharp.
Place real or fake white gourds around your floral pumpkin to build on the design. They would work beautifully on a front porch, or to add impact to a Thanksgiving tablescape.
A trusty hori hori knife is my go-to for hollowing out a pumpkin. It makes light work of slicing the top and the sharp blade will remove seeds and pulp speedily.
There are so many creative ways you can decorate with pumpkins this fall. You could even create floral crowns on smaller gourds and pumpkins by making small holes around the top of the fruits, and poking flowers and foliage into the holes. Try this with chrysanthemums and strawflowers as they will stay looking fresh for weeks, especially if kept outside.
Petals & Roots is a weekly video series fronted by me, Rachel Bull, Head of Gardens at Homes & Gardens. Every weekend on social, I share my seasonal gardening and flower arranging expertise and advice.


