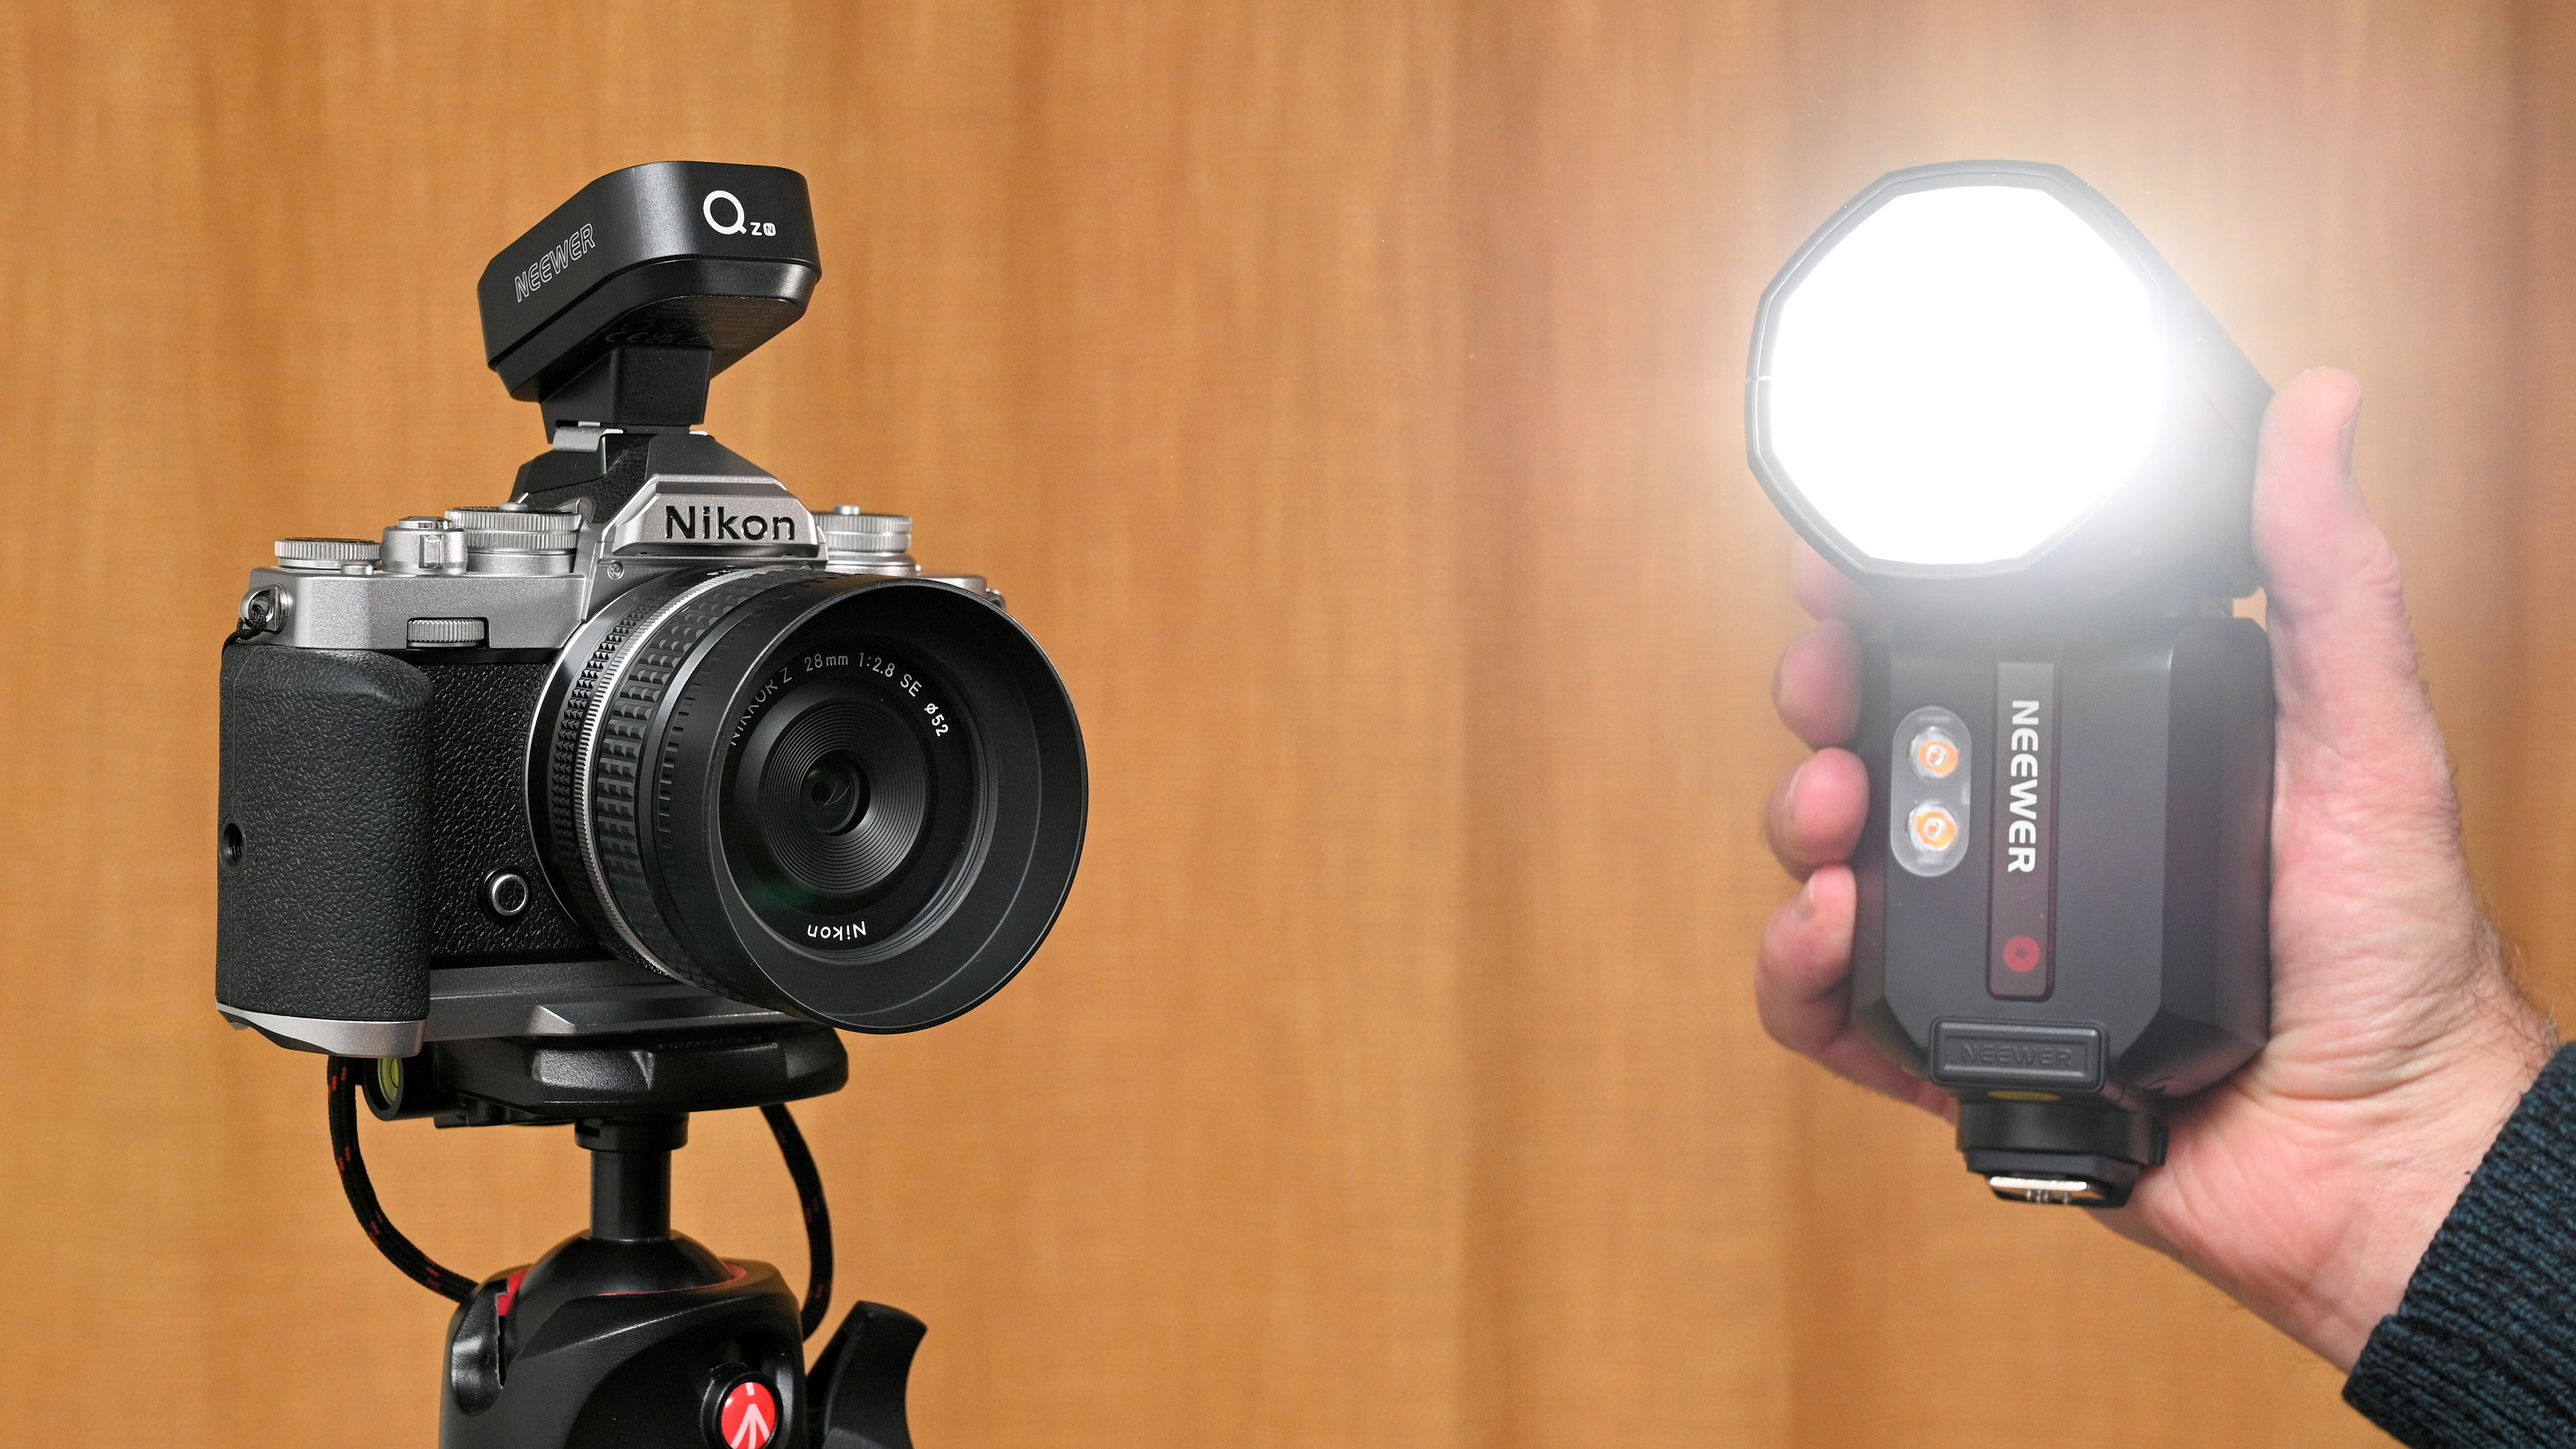
Using your flash off-camera enables a massively wider and better range of creative lighting effects. Historically, remote flash comes courtesy of a curly cable that runs between your camera’s hot-shoe and the flash itself. Obvious drawbacks are that the distance is very limited and the arrangement is quite cumbersome. Wireless flash triggers are a much more elegant solution, cutting the cord and extending the range. ‘Dedicated’ wireless flash triggers are even better, as they enable a full range of flash modes and functions for specific camera systems, typically including the likes of automatic TTL (Through The Lens) flash metering and high-speed sync.
This Neewer trigger offers a full range of features and functions, while also making them easily accessible and adjustable via a color touchscreen interface. It works seamlessly with Neewer flashes, including the Z2, Z2Pro, Z3, Z880, Q4, and Q6. You can also buy a companion Neewer QR Wireless Flash Receiver, so that you can use it with other brands of flashgun. However, the range of dedicated versions only stretches to Canon, Nikon, and Sony. Either way, the Neewer QZ aims to be one of the best wireless flash triggers that you can buy, if you use one of these camera systems.
Neewer QZ Touchscreen TTL Wireless Flash Trigger: Specifications
Dedication options |
Canon, Nikon, Sony |
Wireless range |
100m / 328ft |
Wireless TTL |
Yes |
Remote flash control |
Yes |
High-speed sync |
Yes |
Flash groups / channels |
5 / 32 |
Neewer QZ Touchscreen TTL Wireless Flash Trigger: Price
Flash triggers that I’ve used and come to rely on include the comparatively conventional pushbutton-controlled Godox XPro TTL/HSS, which is relatively inexpensive at $69 / £66 / AU$138, and the universal Elinchrom EL-Skyport Universal Plus Transmitter & Receiver Set, which doesn’t enable any dedicated functions but includes a receiver as well as a transmitter, and comes in at $140 / £142 / AU$260.
A more direct alternative to the Neewer is the Godox X3 (Xnano), which has a similar touchscreen interface and costs around $89 / £82 / AU$145. That makes the Neewer look a bit on the pricey side at $120 / £130 / AU$160, but it’s a really smart bit of kit and I think it’s well worth the money. Let’s take a closer look.
Neewer QZ Touchscreen TTL Wireless Flash Trigger: Design & Handling
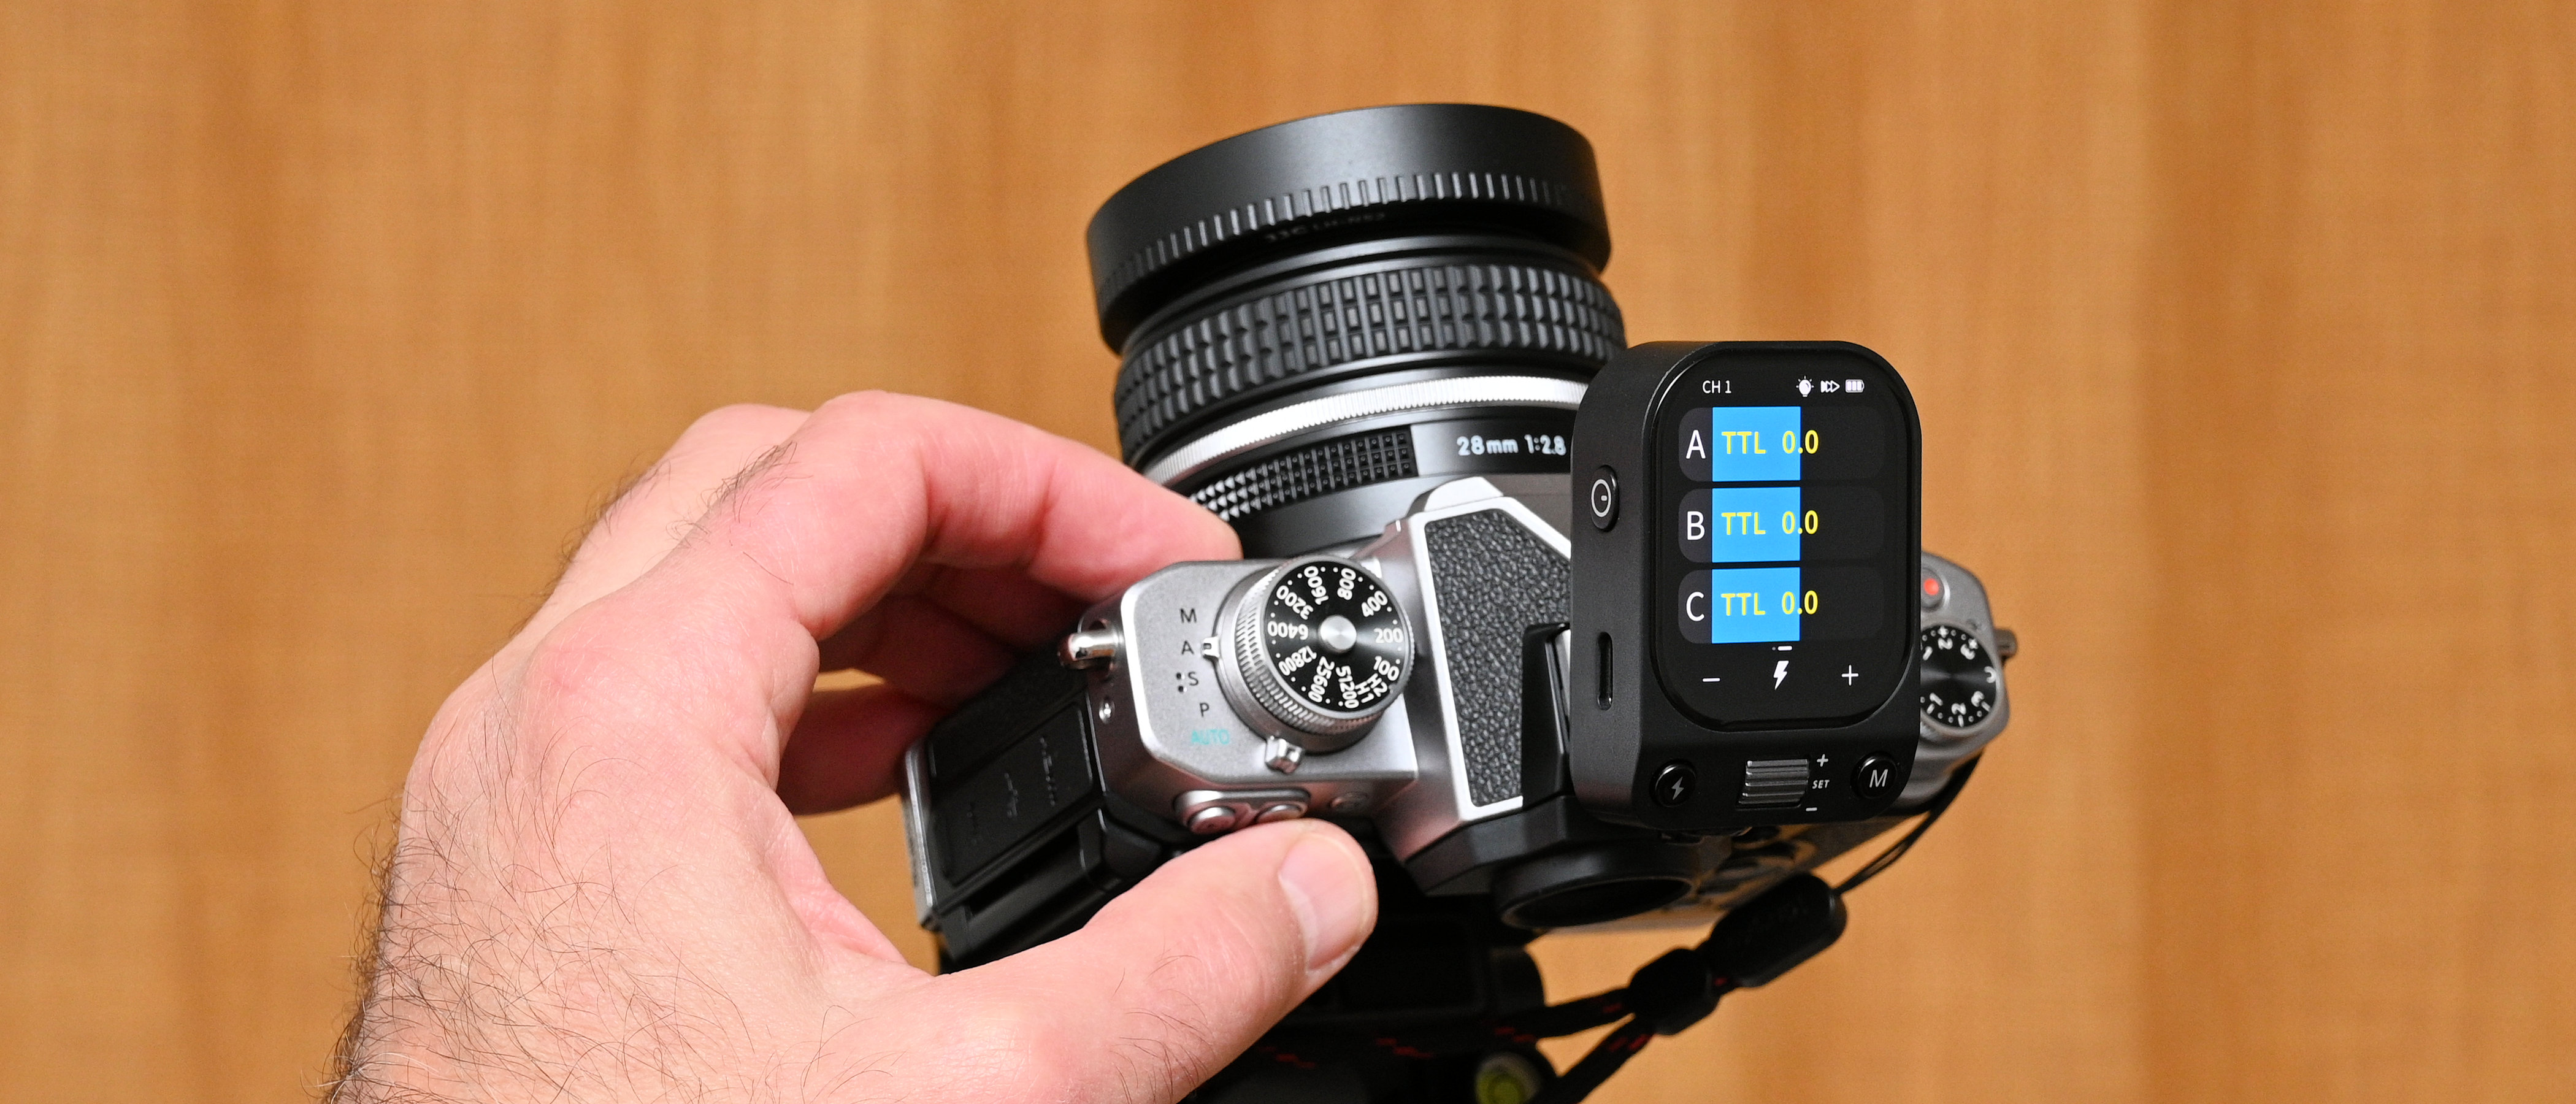
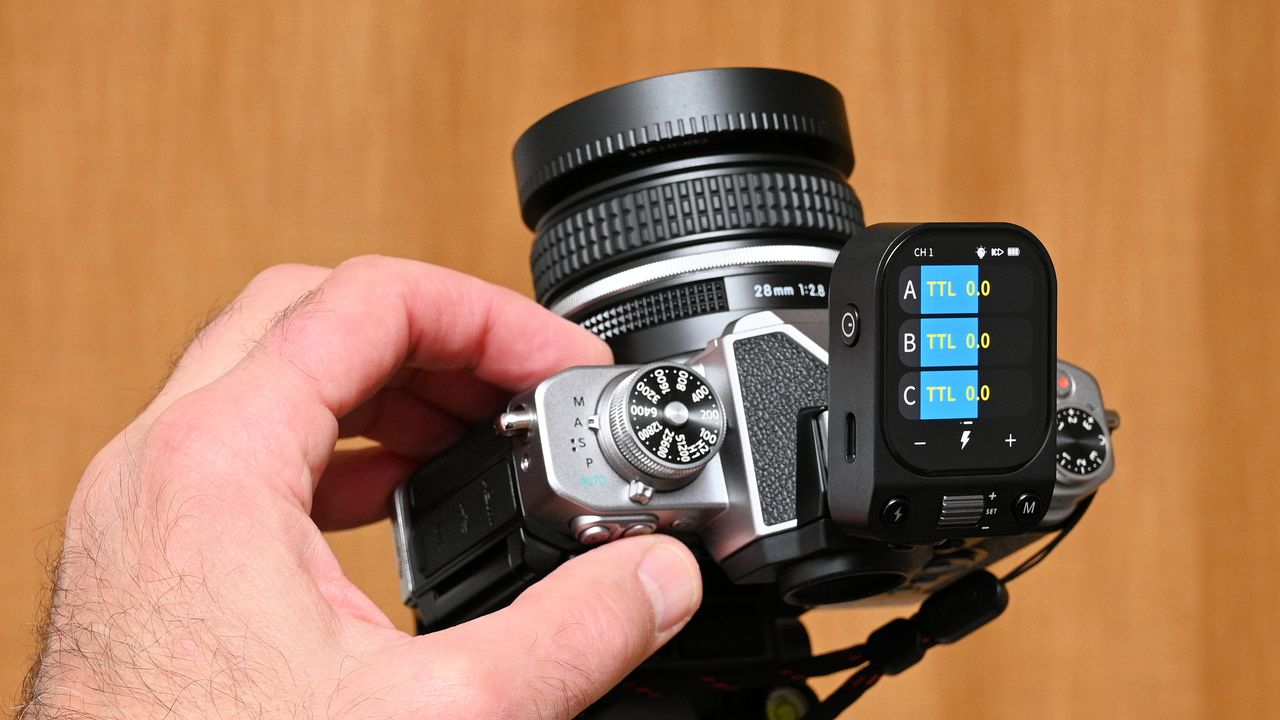
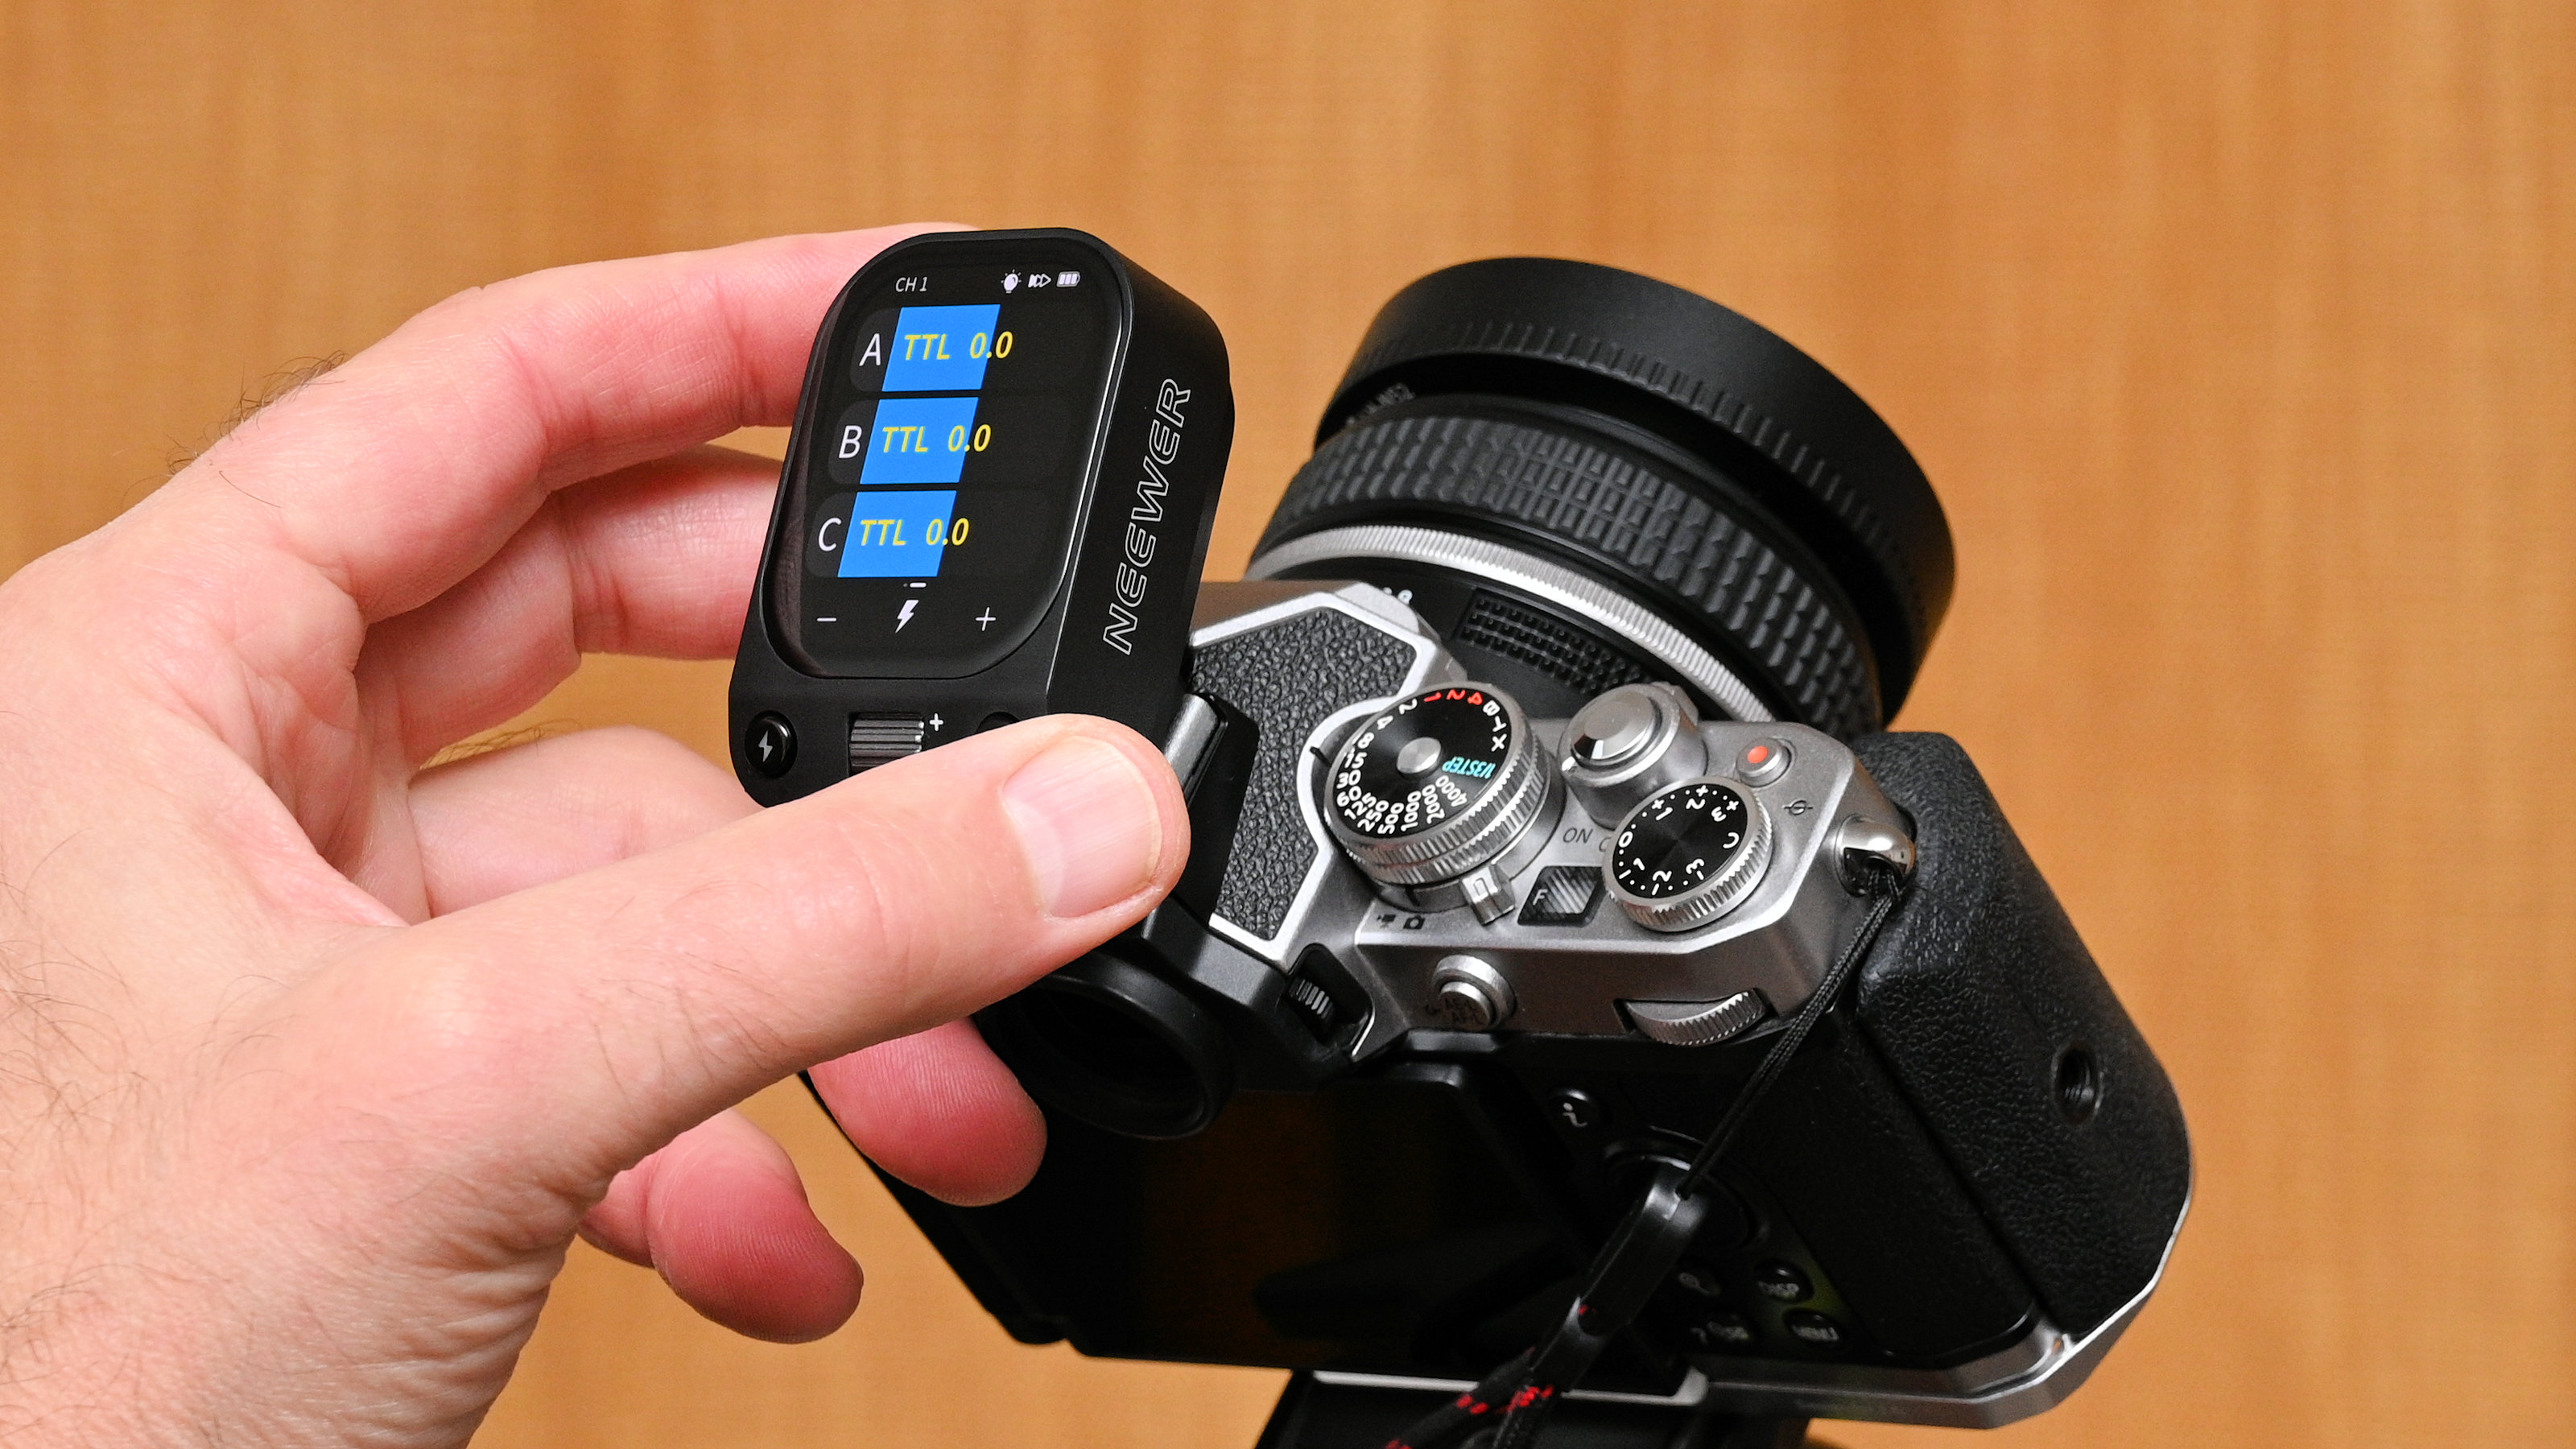
Front and center of the design and crucial to the handling of the Neewer trigger is its high-definition color OLED touchscreen. This measures about 5cm / 2in on the diagonal, is easy on the eye, and a pleasure to use. Anyone from the smartphone generation will instantly be able to glide around its interface with a tap here, a swipe there, and a general feel-good factor that puts a smile on your face.
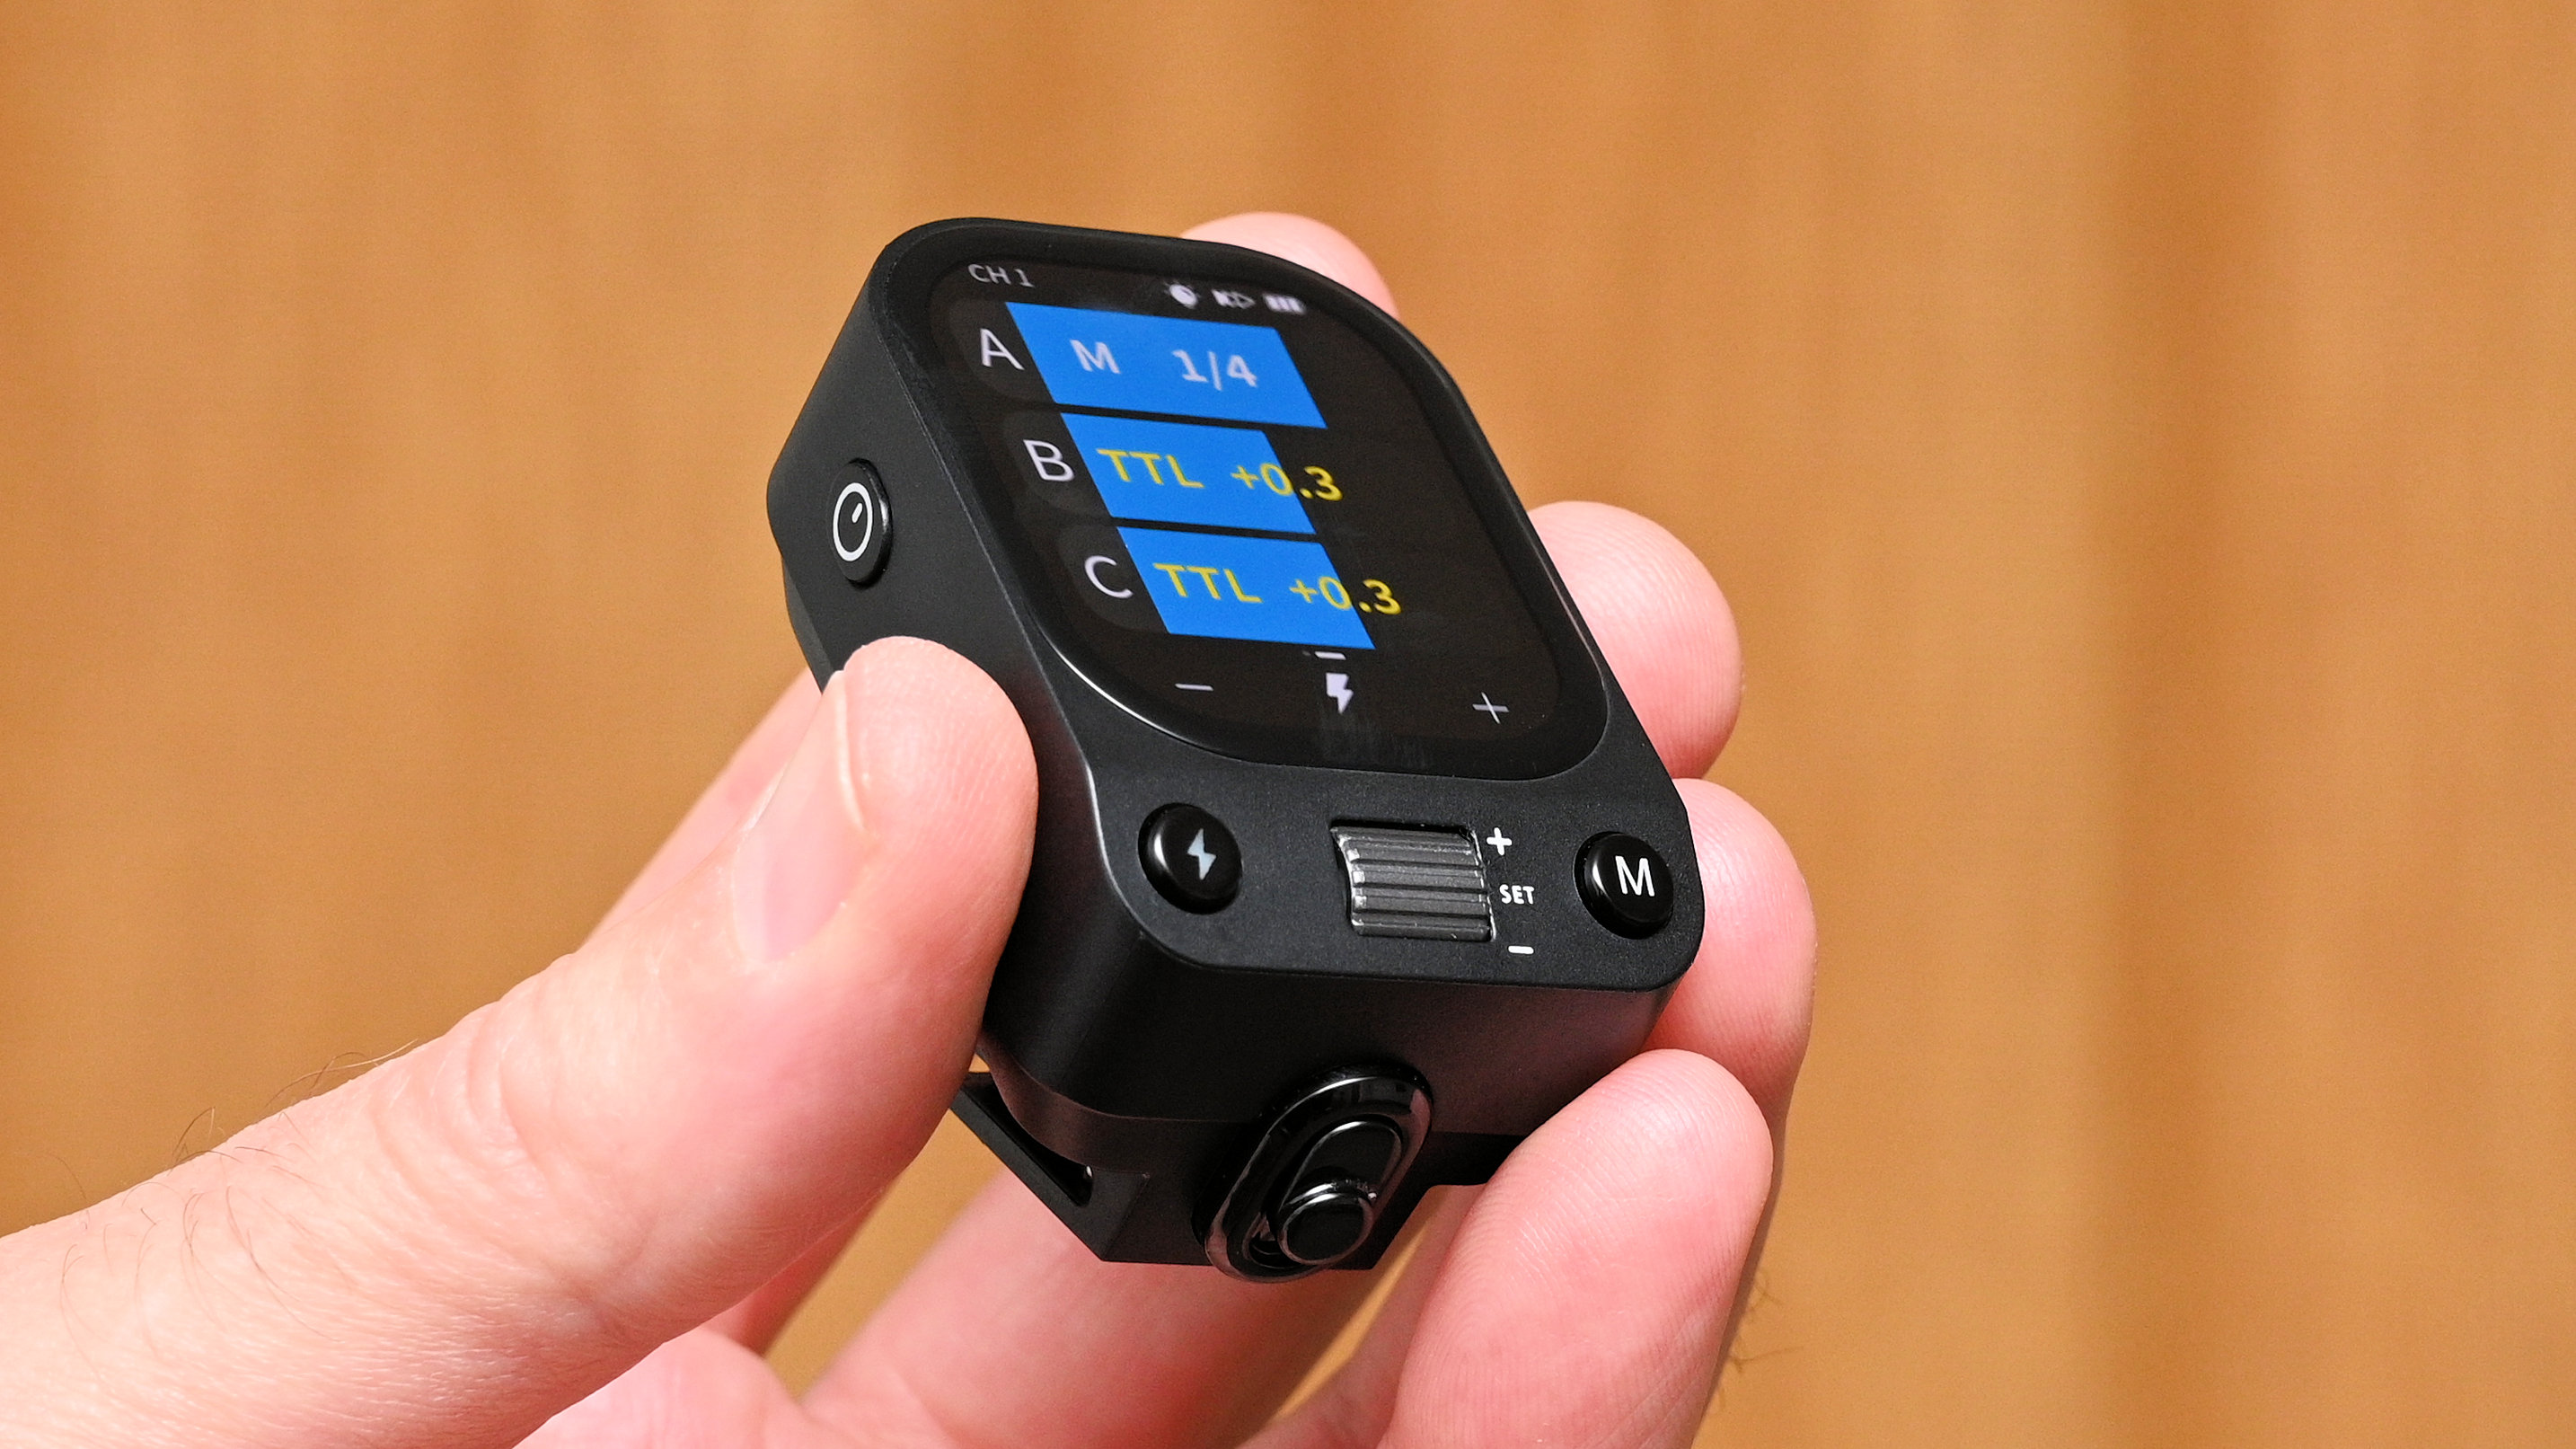
Let’s talk wireless. The trigger communicates with like-minded Neewer flashguns and studio/portable flash heads over a range of up to 100m / 328ft, or with other brands of flash slotted into optional Neewer QR Wireless Flash Receivers. Either way, you can configure these in up to five individual groups, labelled A through E, operating on any of 32 radio frequency channels and wireless IDs of 1-99. That should cover pretty much any eventuality.
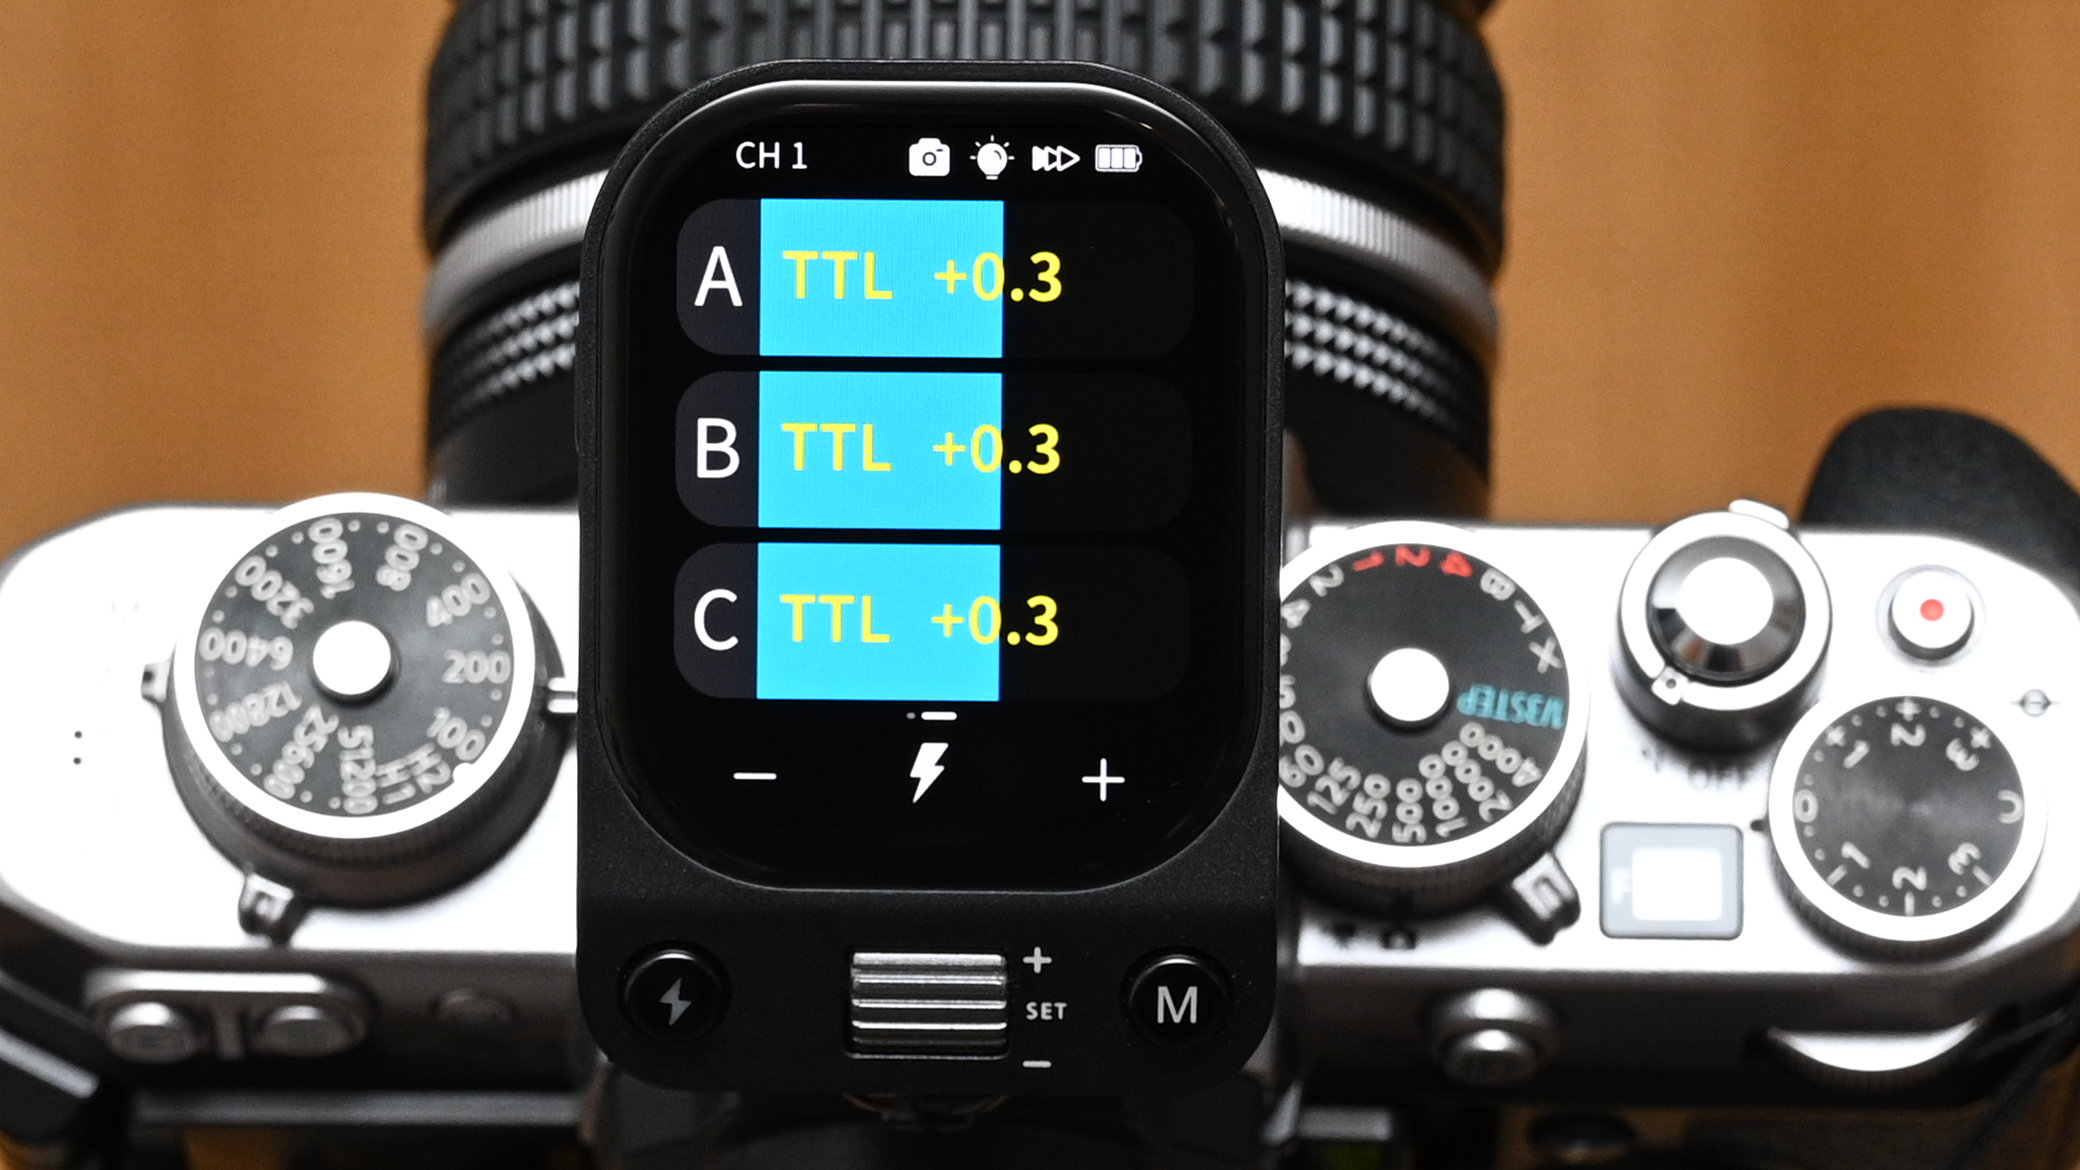
Switching on the trigger simply requires a long press of the on/off button, rather than any subsequent presses or swipes of the touchscreen. On startup, the touchscreen shows the setup for the first three of five groups, labelled A, B and C, with the status of each. You simply tap and group that you want to adjust, or swipe up for groups D and E. Typical adjustments include (but are not limited to) TTL/Manual power options, flash metering exposure compensation or manual power output, modelling lamp on/off and brightness, and zoom that often ranges from 20mm to 200mm.
Further flash modes include high-speed sync, first/rear curtain flash sync, and programmable repeat/stroboscopic modes, if and when available in wirelessly connected camera and flash modules. I have to confess that while I’m a fan of touchscreens, I’m not completely crazy about them in all respects. For adjusting the likes of power settings and similar functions, I sometimes prefer a simple scroll wheel rather than swiping left and right, or up and down. The Neewer obliges by making both options available, featuring a physical scroll wheel with a secondary pushbutton action, in addition to the main touchscreen interface.
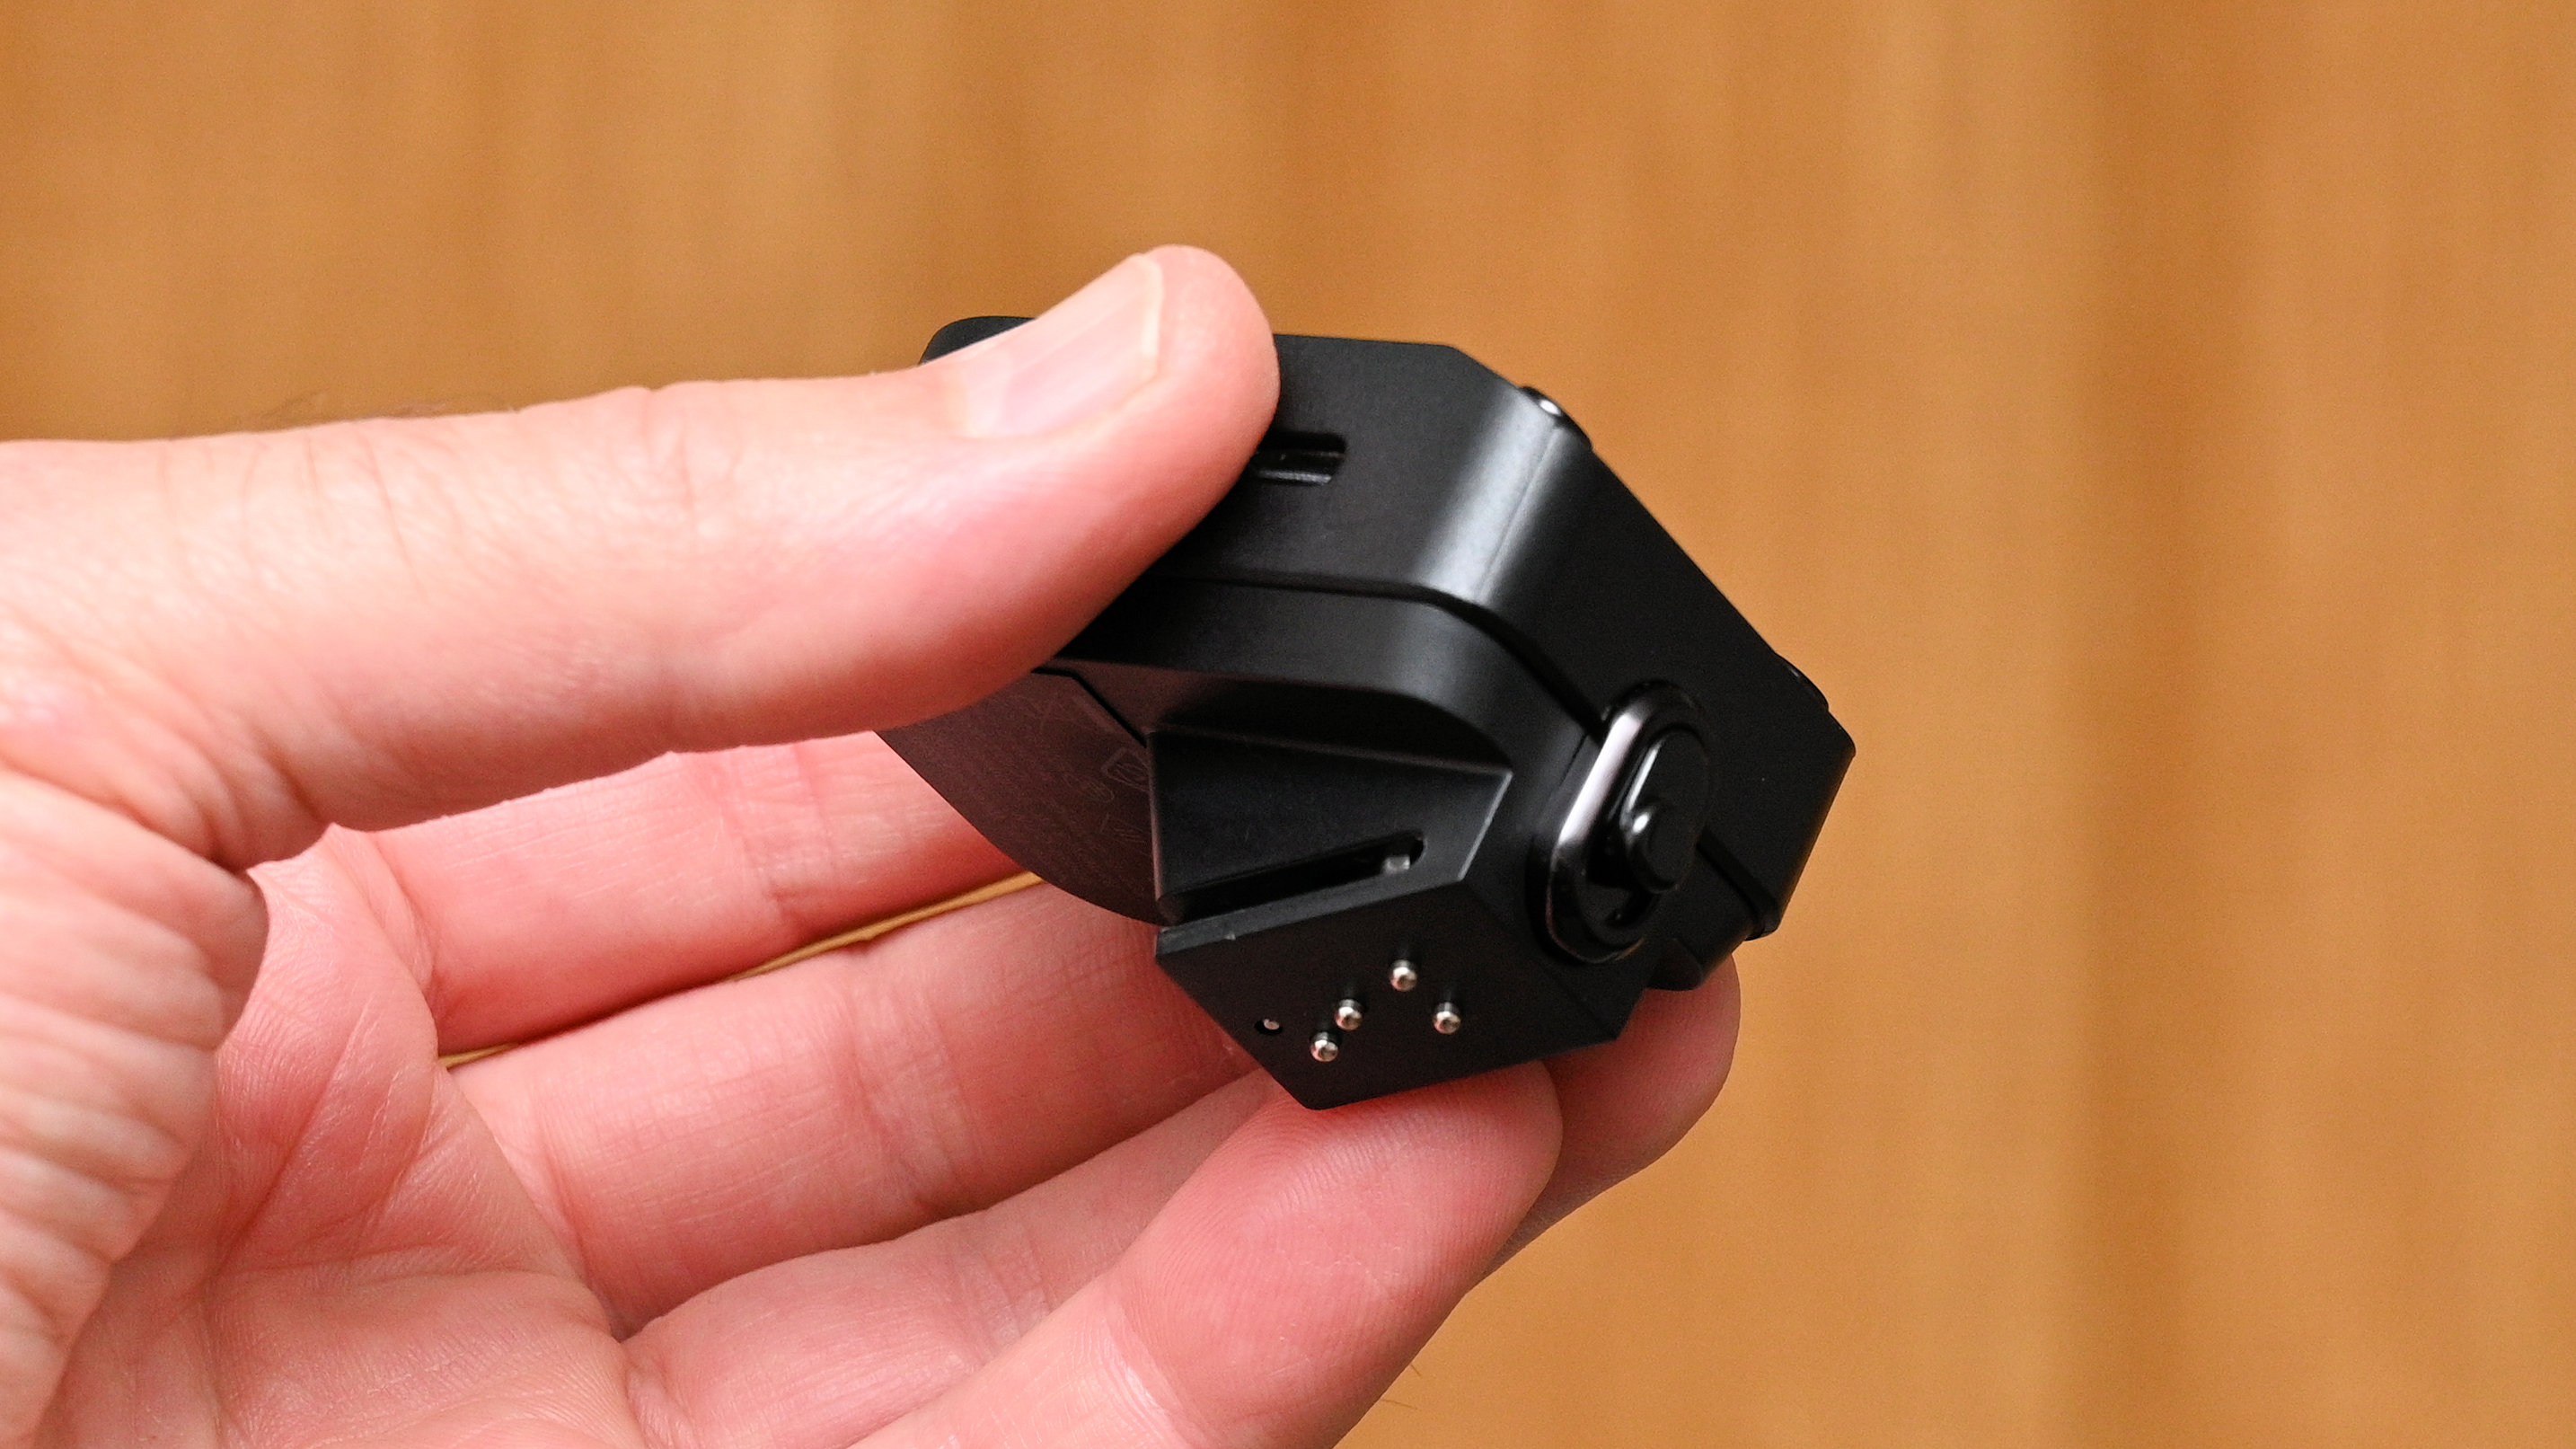
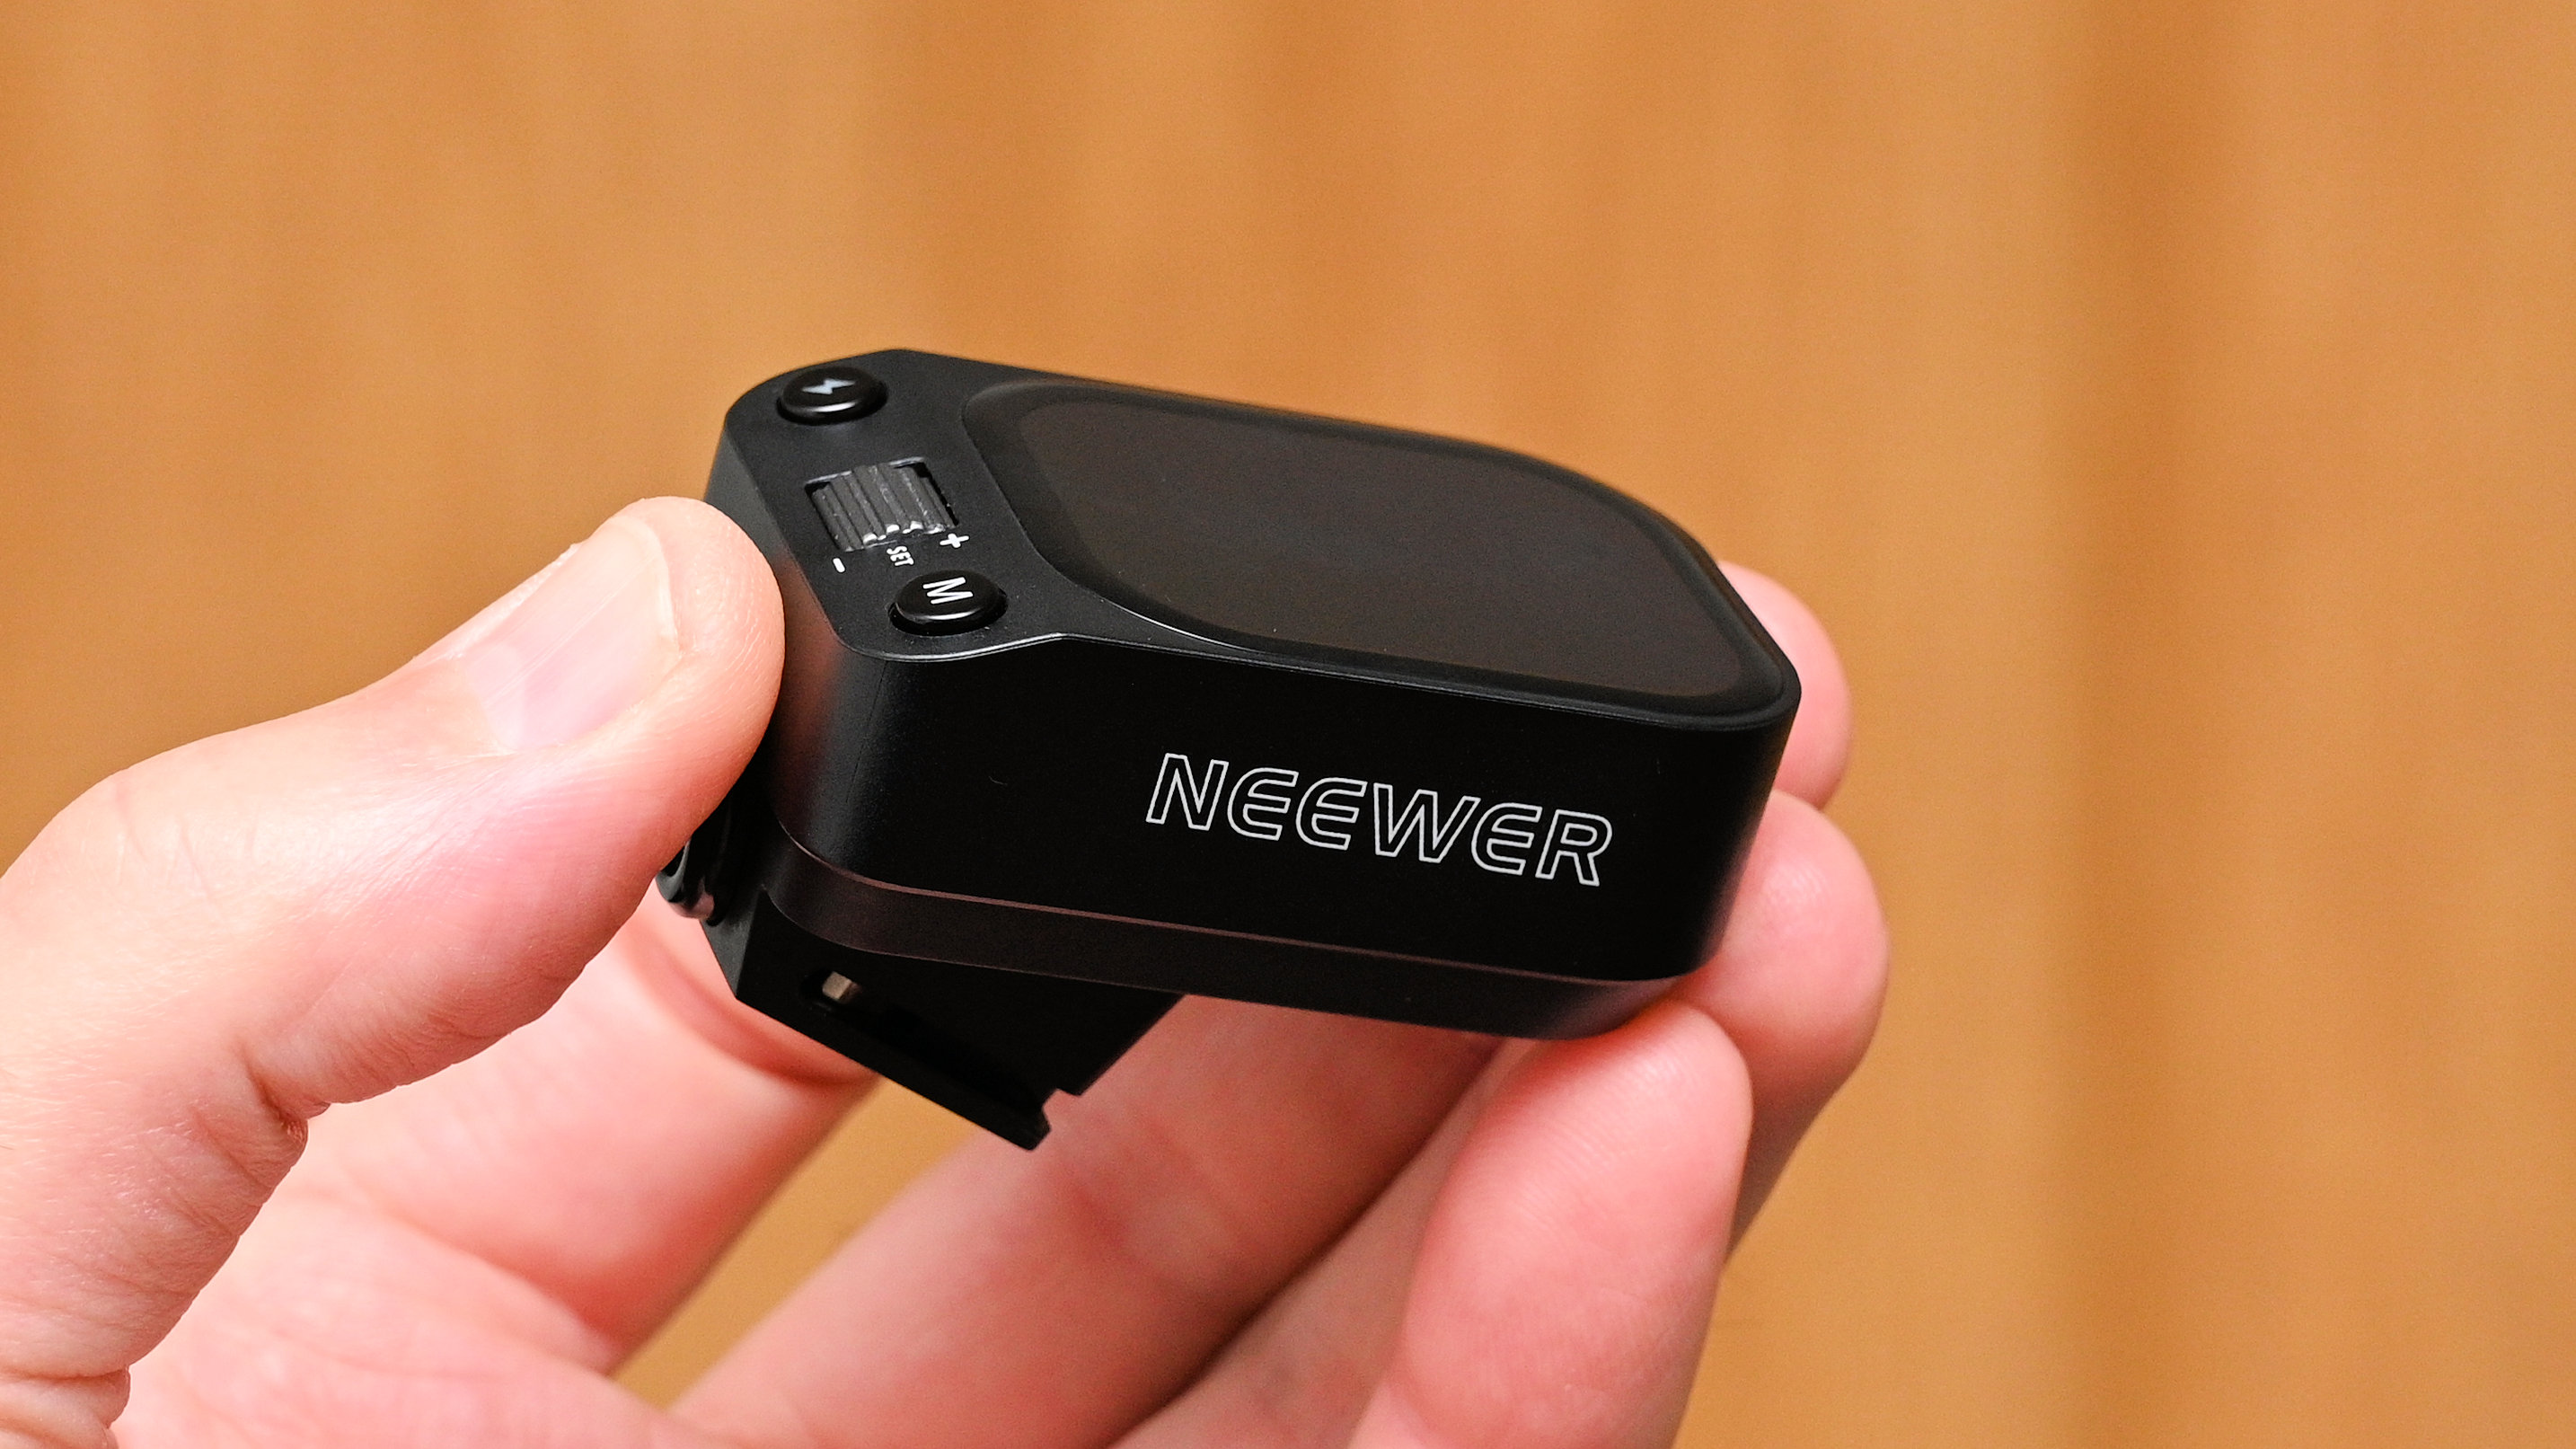
The slightly angled section of the top panel behind the touchscreen plays host to a test fire button and M (Menu) button, as well as the scroll wheel/pushbutton that I’ve just mentioned. Just behind this on the rear panel itself is a sliding button for locking the trigger into the hot-shoe of your camera. I think it’s particularly elegant and easy to use, compared with screw-action clamps and even locking levers.
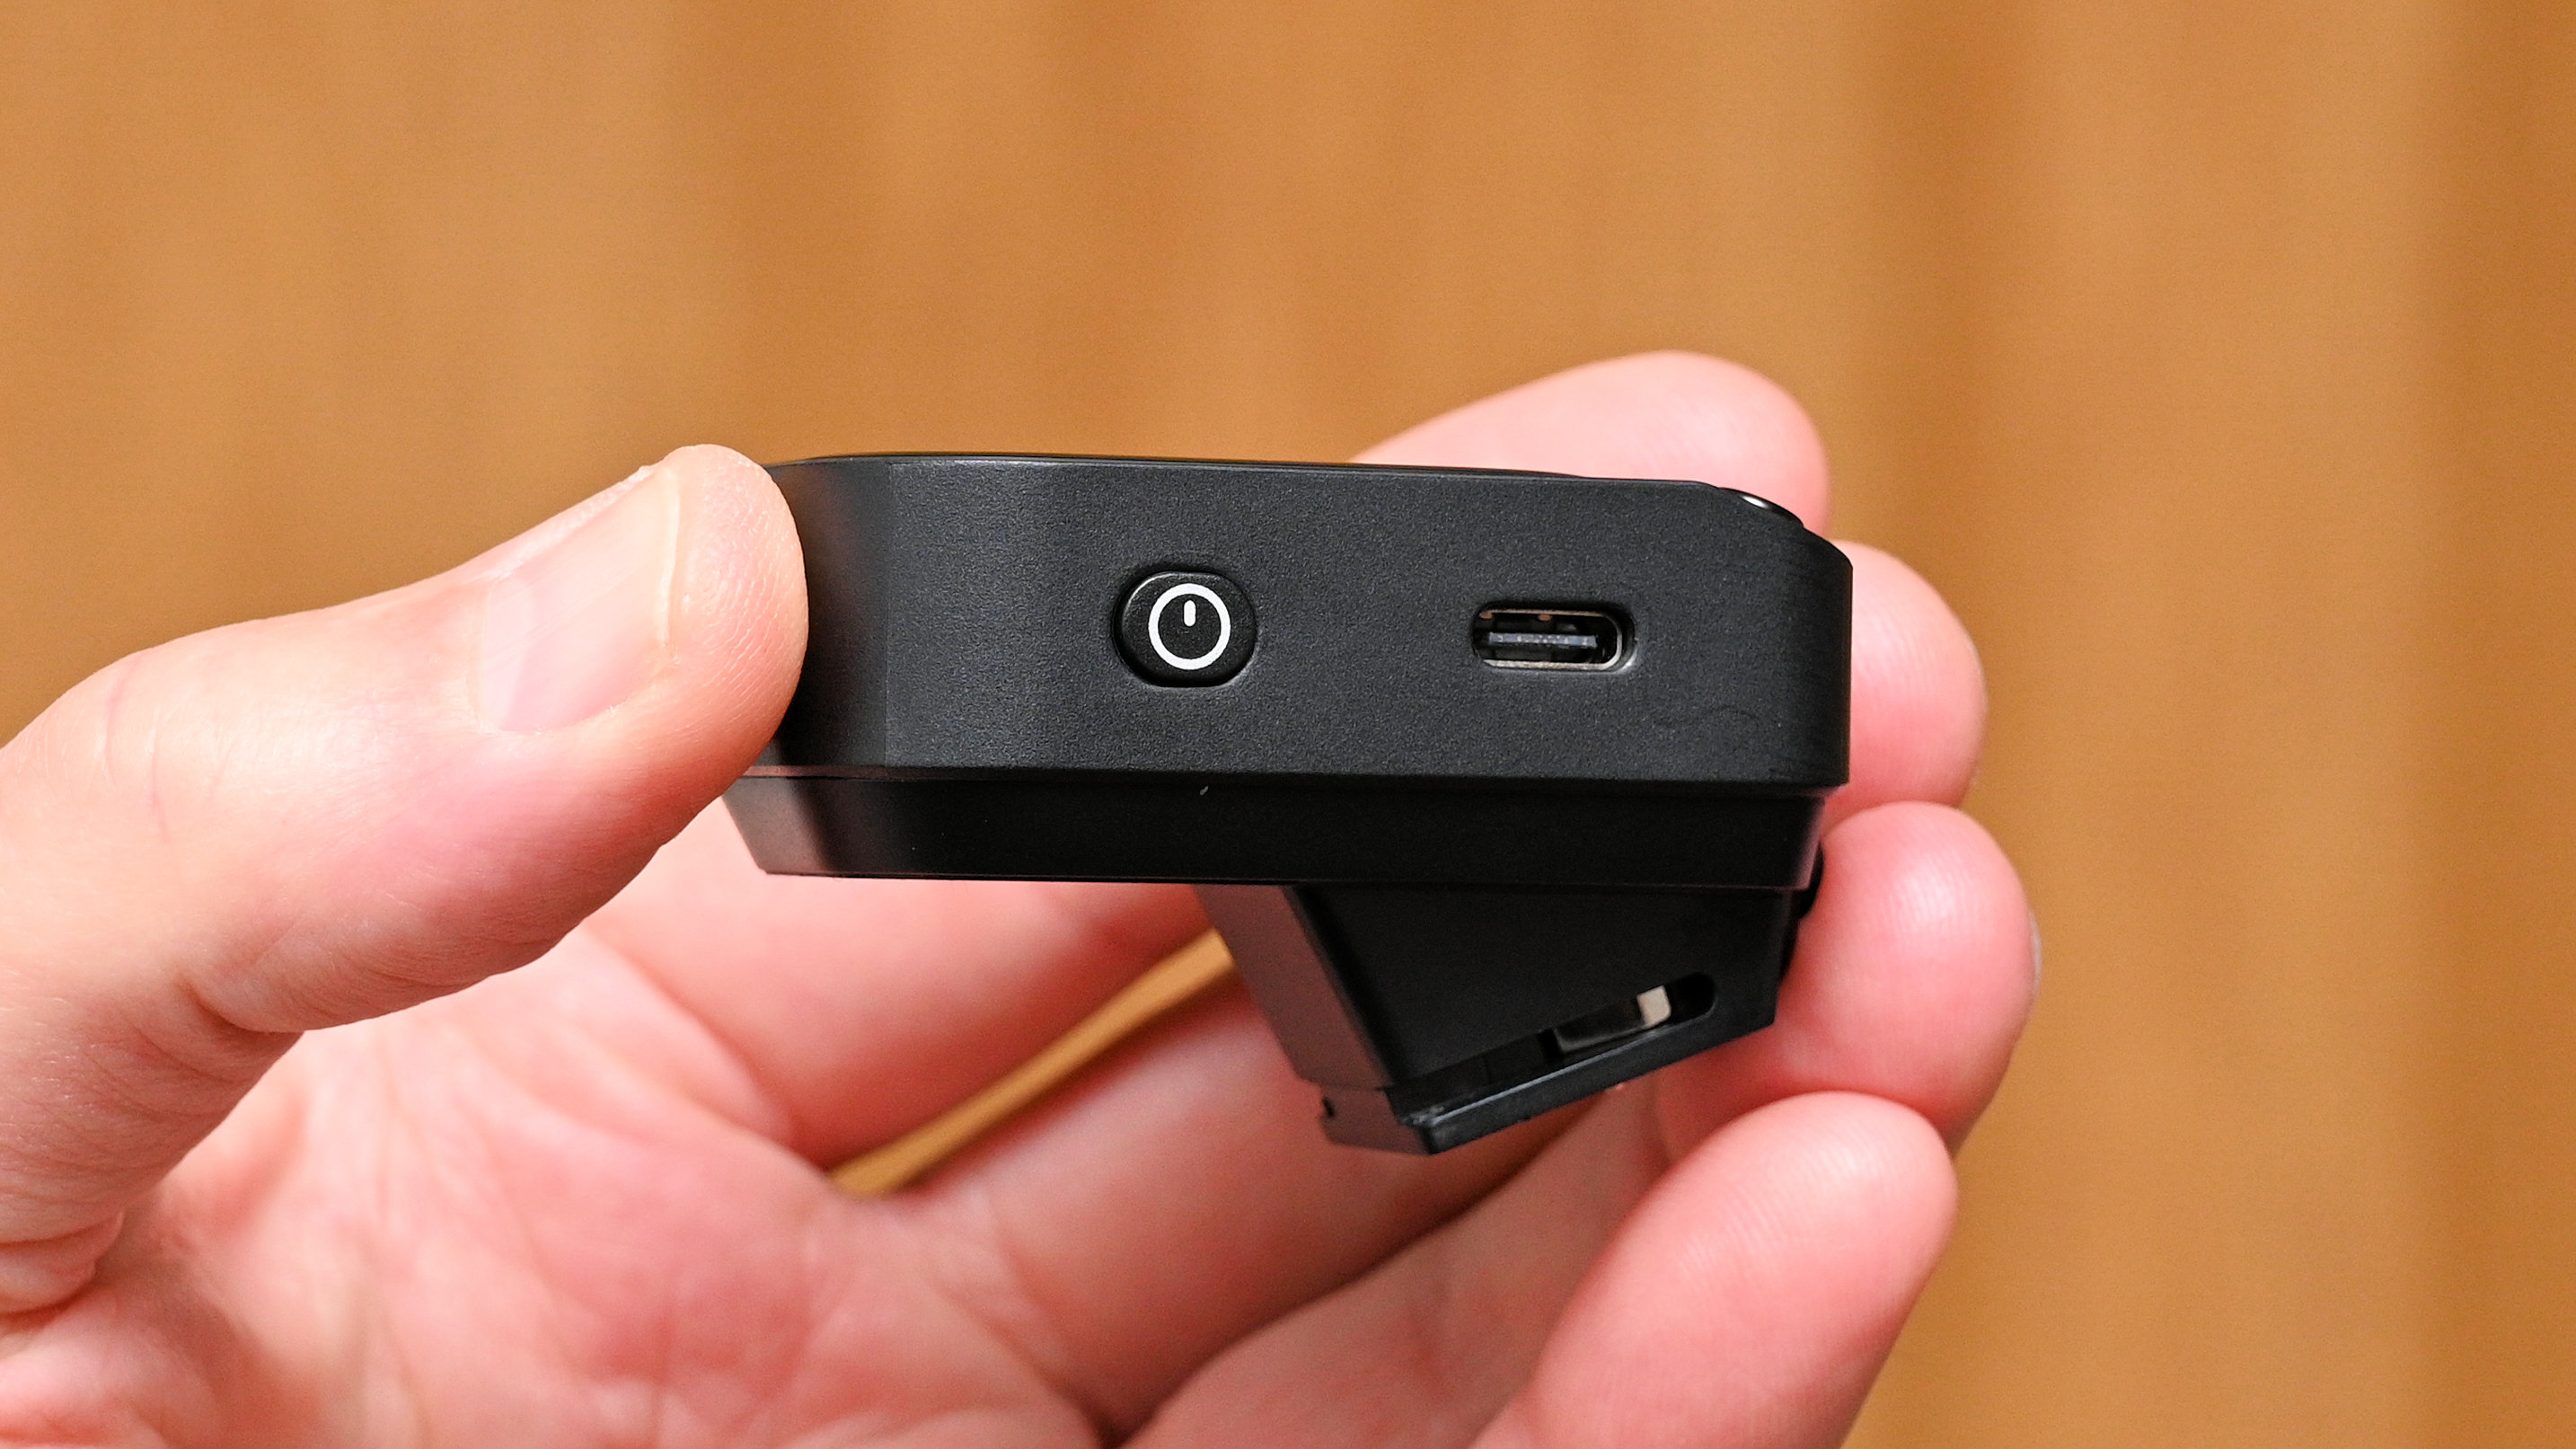
Turning our attention to the left-hand side of the trigger, there’s a power on/off button towards the front and a USB-C socket towards the rear. The USB-C port enables charging of the internal 3.7V 1000mAh Li-ion battery, as well as applying firmware updates, if and when needed. A cable is supplied, but you’ll need to bring your own charger. It takes around 2.5 hours to charge a completely flat battery, which is then good for around 6-10 hours of use. Suffice it to say that a fully charged battery should last you for even the longest shooting session.

The main screen for controlling each flash or group of flashes gives direct access to TTL or manual flash modes, flash exposure compensation or manual power adjustments, the brightness of modelling lamps (or turning them off), and either automatic or manual zoom settings. In essence, all the main controls and adjustments that you most often need are literally right at your fingertips, with a clear and colorful information display. Such is the joy of touchscreen technology.
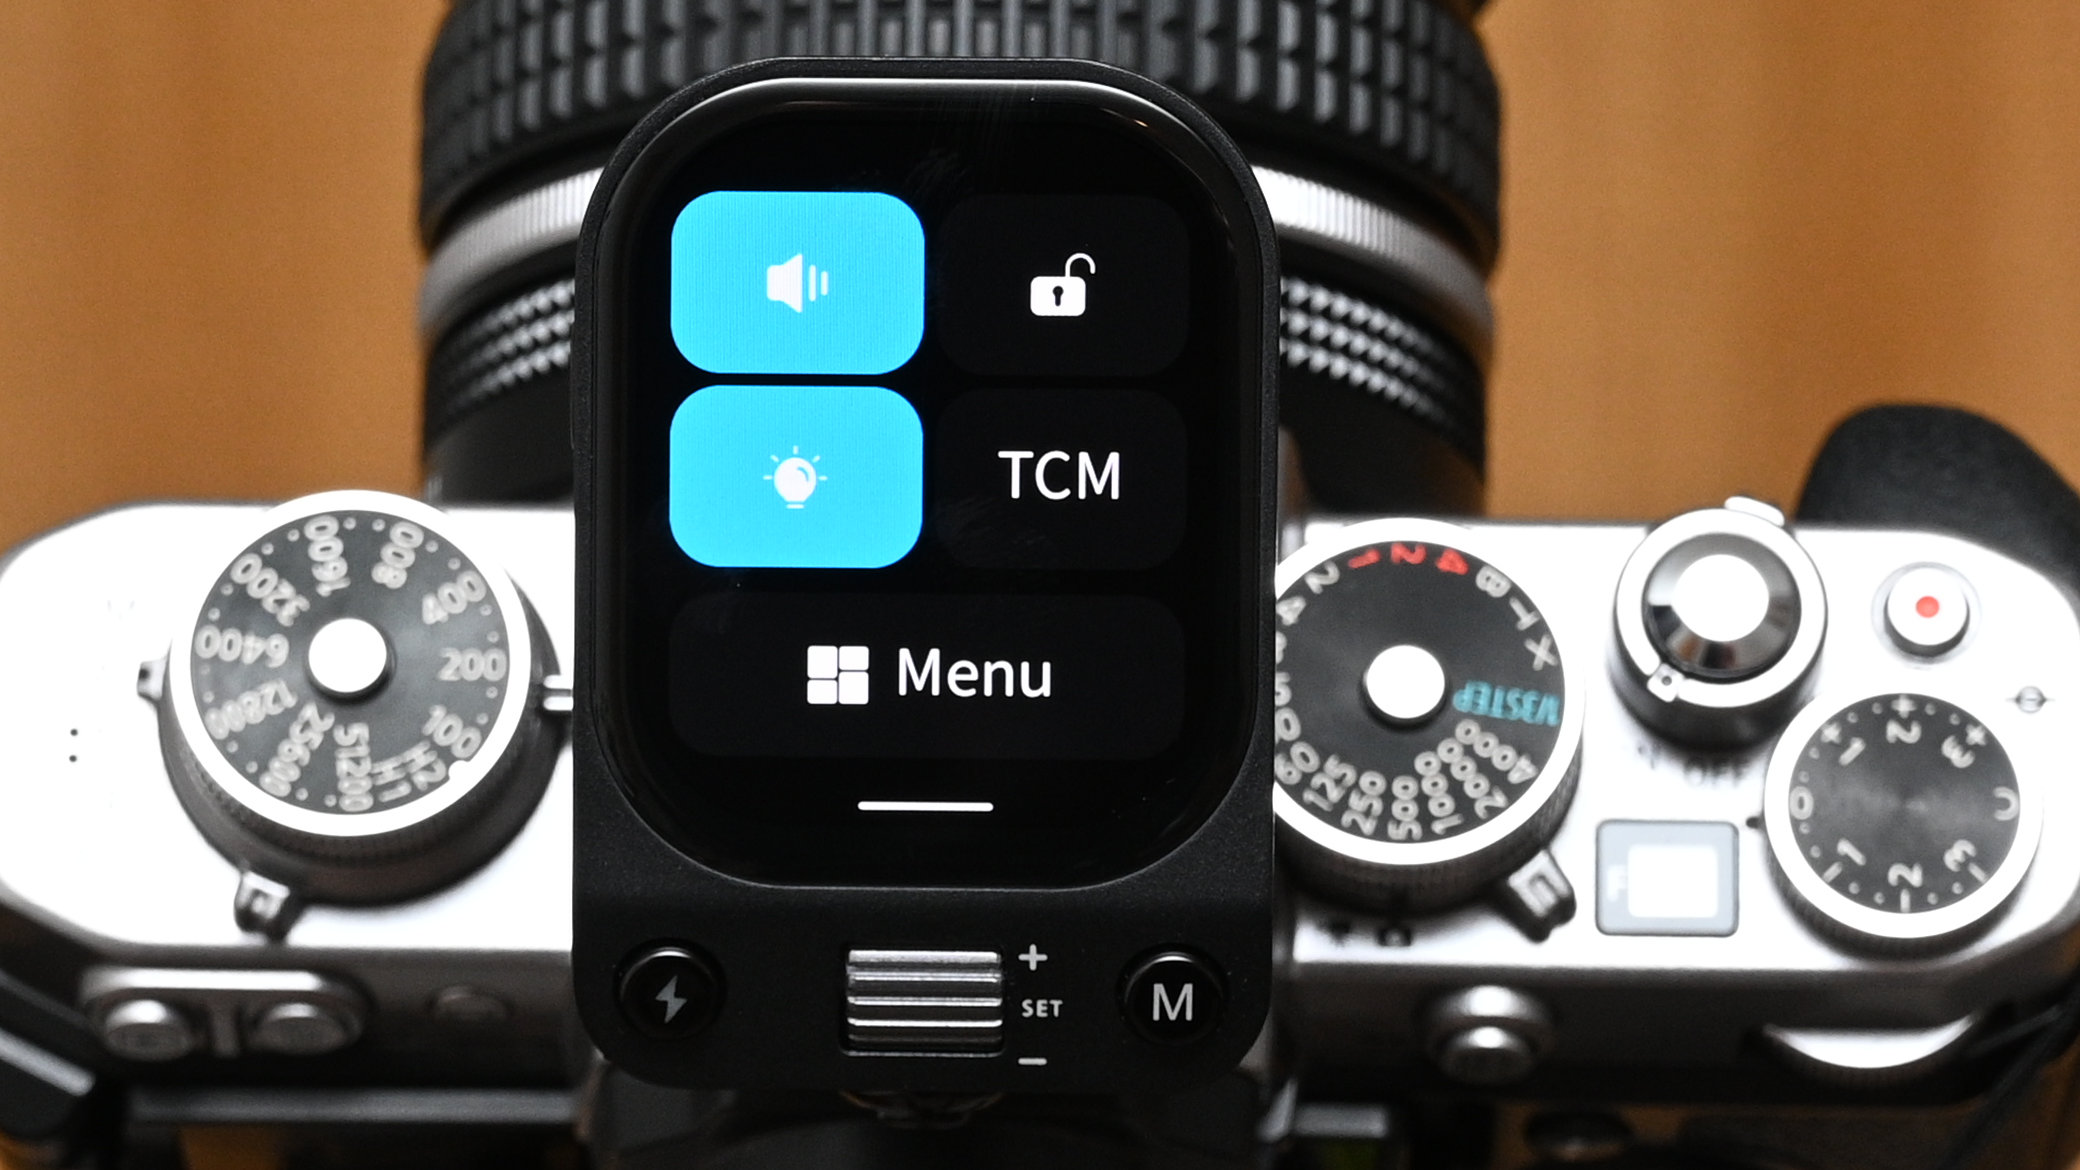
A swipe down from the top reveals a secondary menu, giving easy access to beep settings, a lock screen to avoid any unwanted accidental adjustments, modelling lamp on/off, and TCM mode. The last of these is one of my favorites, as it enables you to use TTL flash metering to get yourself into the right ballpark, then automatically convert this to a manual power setting that you can use as a base before making any fine adjustments. Alternatively, a long press or the M button also gets you to the above set of functions. In both cases, a Menu section at the bottom of the touchscreen gives access to additional settings.
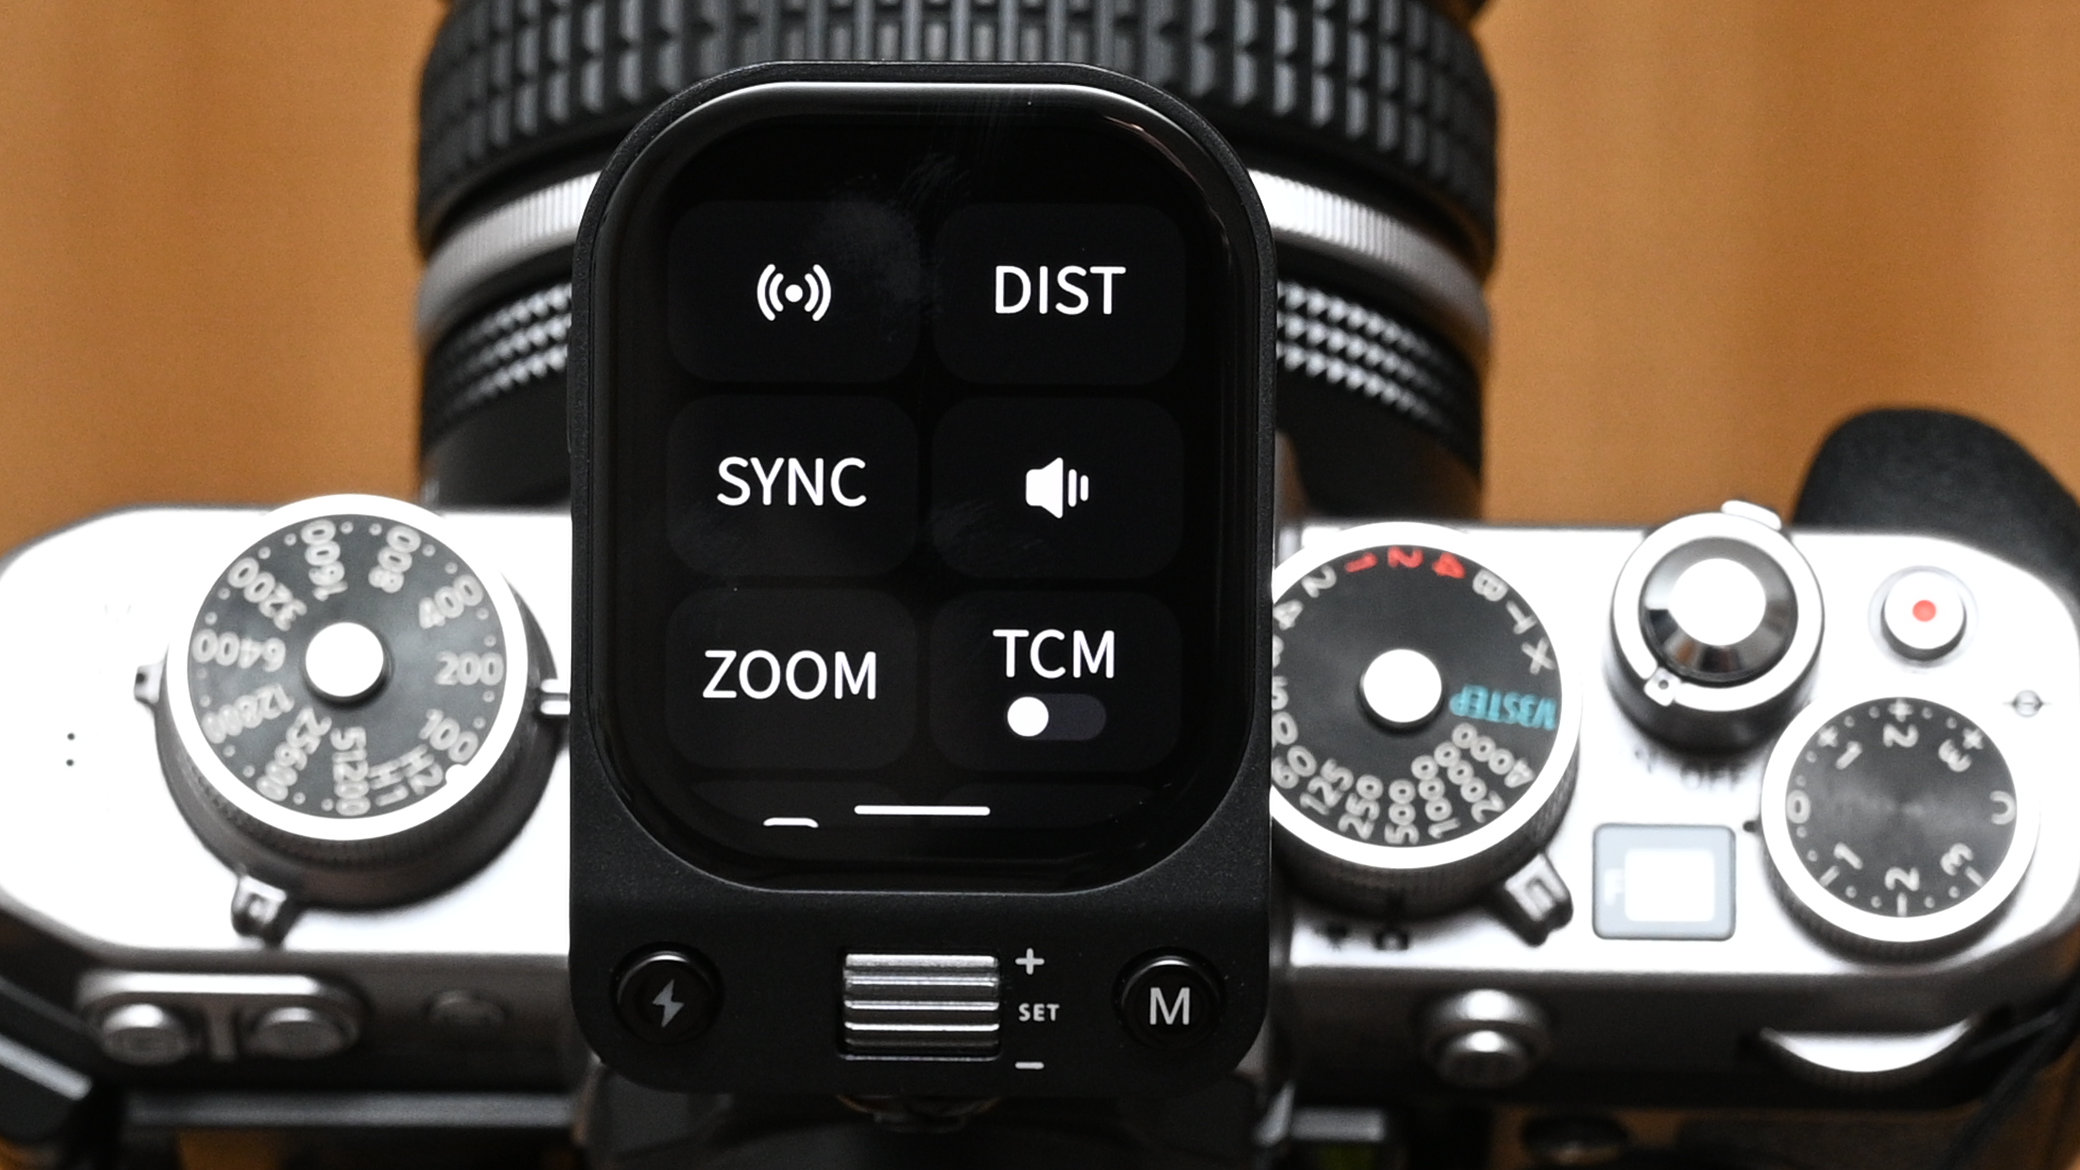
The additional settings in question include RF channel and ID options, distance, sync type, zoom and TCM. The ‘distance’ setting gets around a problem I’ve sometimes experienced with wireless flash triggers not working at very close range. Go to this menu option and you can select alternatives of 0-10m or 1-100m, making triggering more reliable at any range of distances.
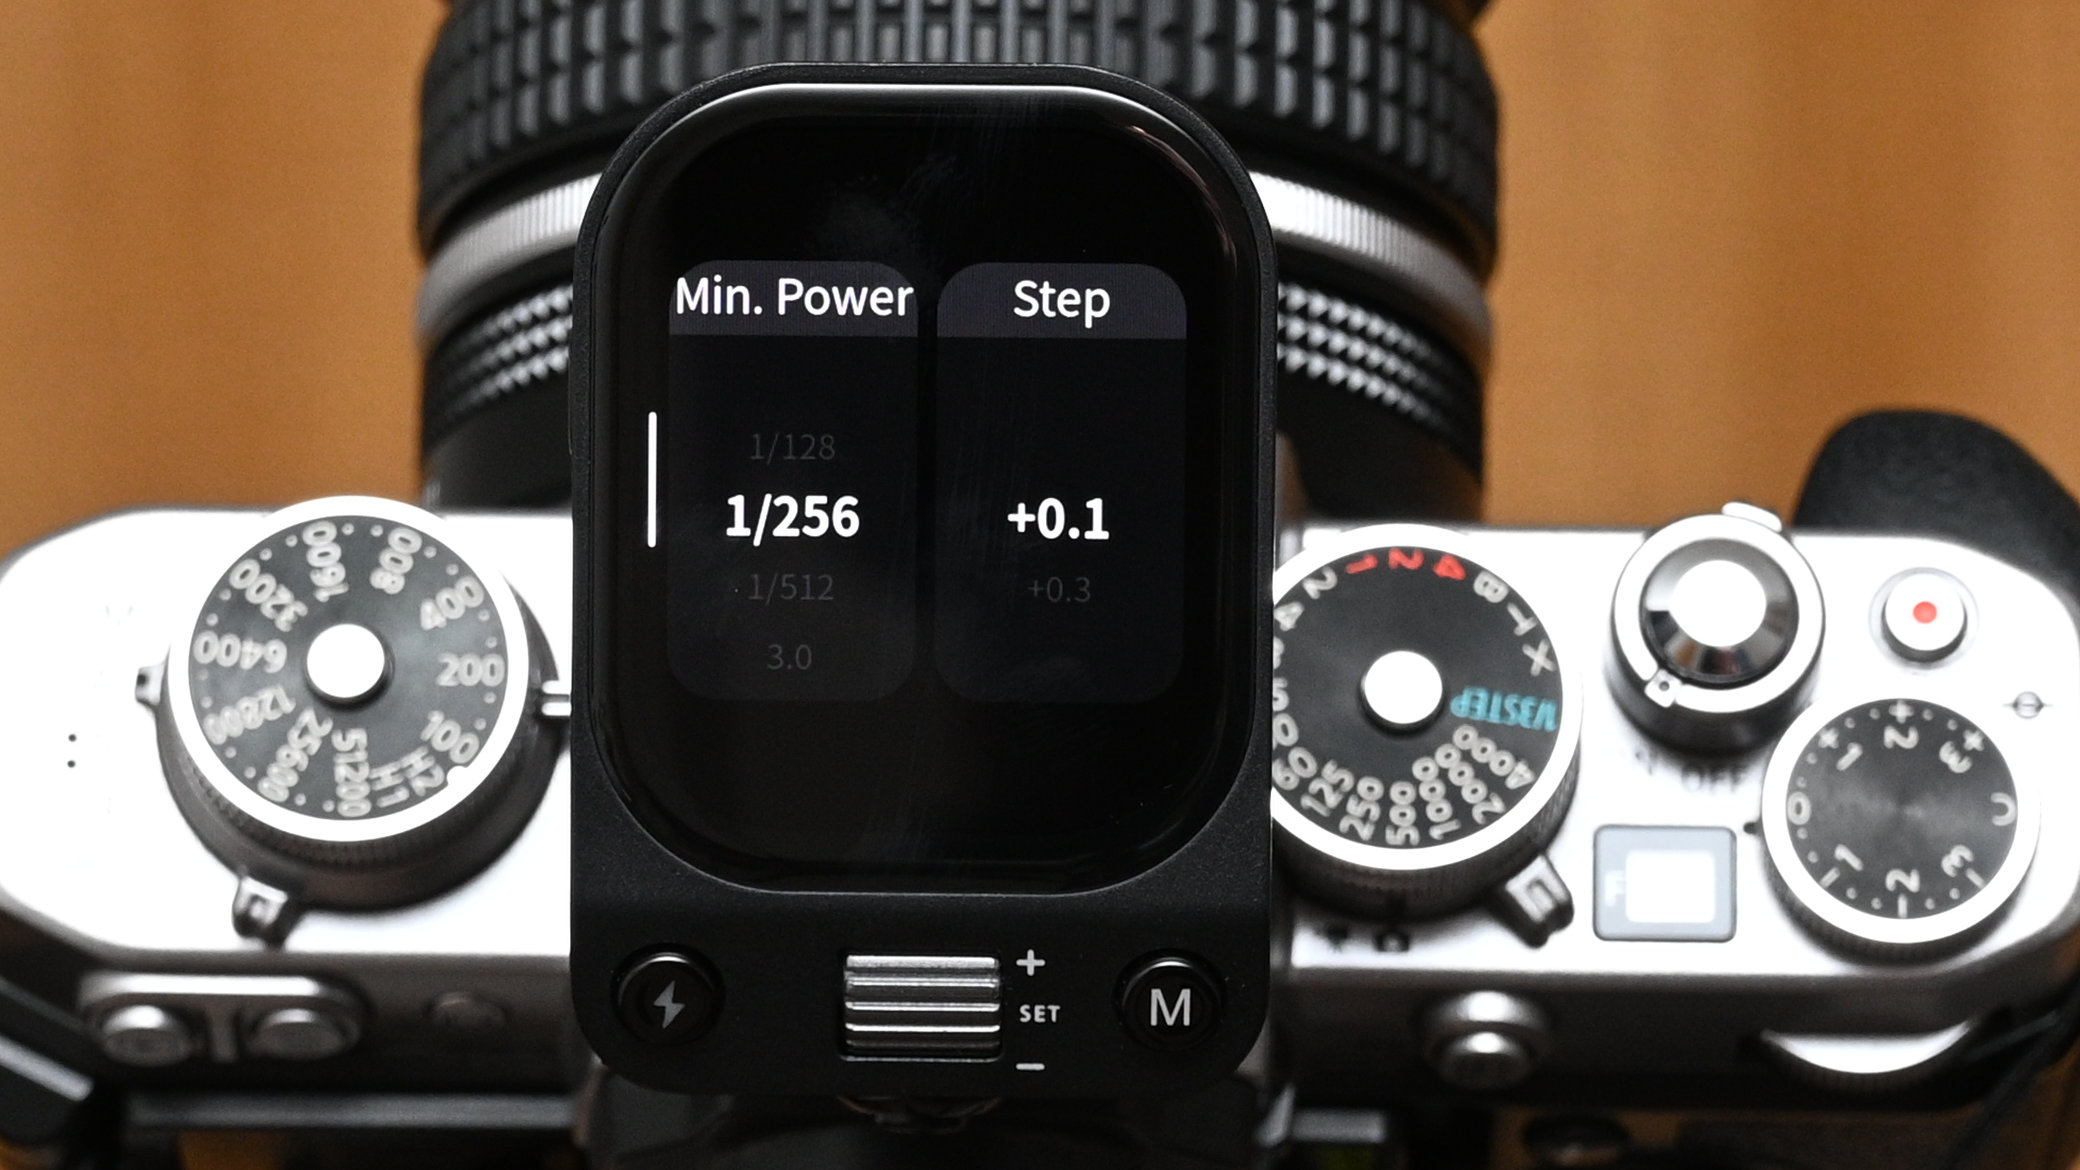
There’s one more menu option that I find particularly useful. By default, the trigger enables adjustments of flash power with compatible Neewer flashes in tiny increments of 0.1EV steps. I can find that overly fussy and sometimes prefer to make adjustments in coarser one-third EV steps. The setup menu enables you to switch between both options, as well as dialing in the lowest minimum power setting that you want to be made available, for example, 1/128th, 1/256th, or 1/512th. Sometimes a more limited range makes operation speedier in practice.
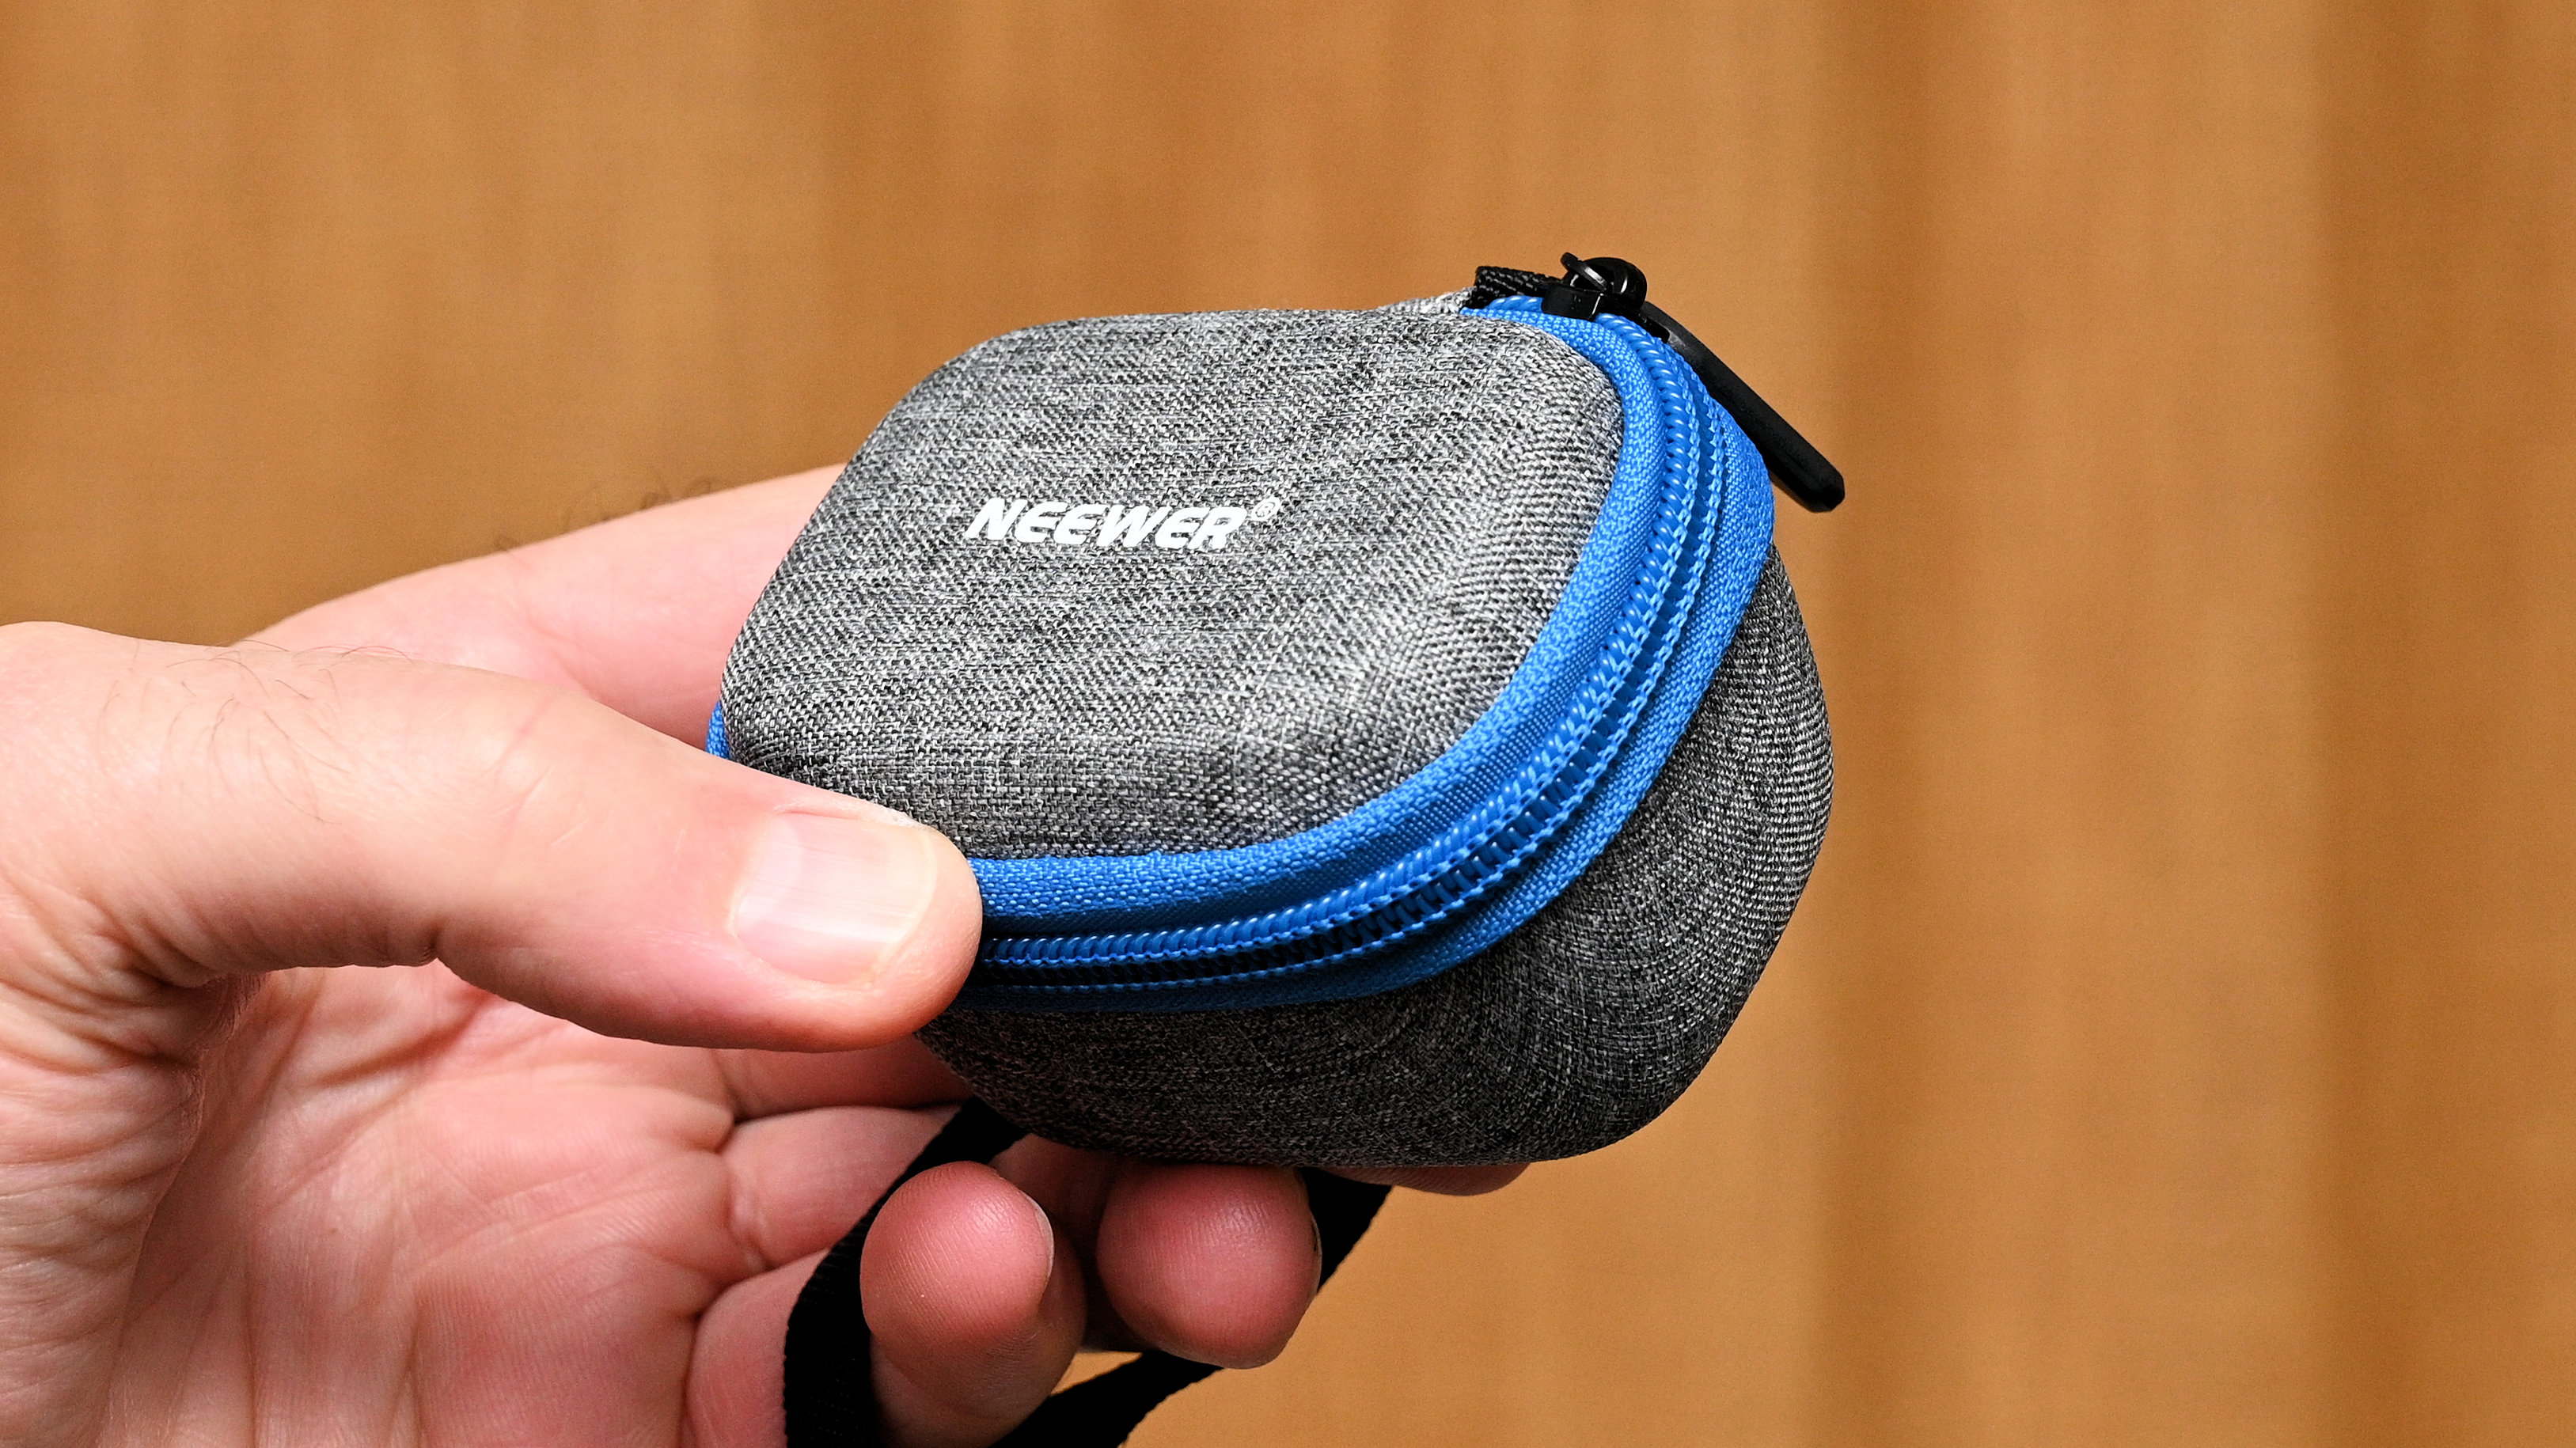
I think that the Neewer trigger is neatly designed and beautifully finished. To help it stay that way, it’s supplied complete with a smart carrying case that’s fitted on the inside, has a zip closure, and a wrist strap. It’s a nice little extra that I’ve not often seen supplied with wireless flash triggers.
Neewer QZ Touchscreen TTL Wireless Flash Trigger: Performance
Reliability and consistency are key factors in the performance of a flash trigger. Throughout my testing, I found that I was able to rely on the Neewer to effectively fire the flash every time, so I never missed a shot. The two different ‘distance’ settings are a bonus here, as you can tailor the connectivity for short-range or longer distances of up to 100m / 328ft. As I’d expect from an RF wireless trigger rather than an infrared remote, the signal cuts through obstacles in its path and works around corners.
The other element of performance that I find crucial is that a dedicated flash trigger should make it quick and easy to remotely control and make adjustments to the functions of the flashgun or studio/location flash head. The Neewer really excels here, with an intuitive touchscreen interface that makes it simple to apply all sorts of changes to pretty much any and every function and setting. All in all, this trigger simply works, and it works really well.
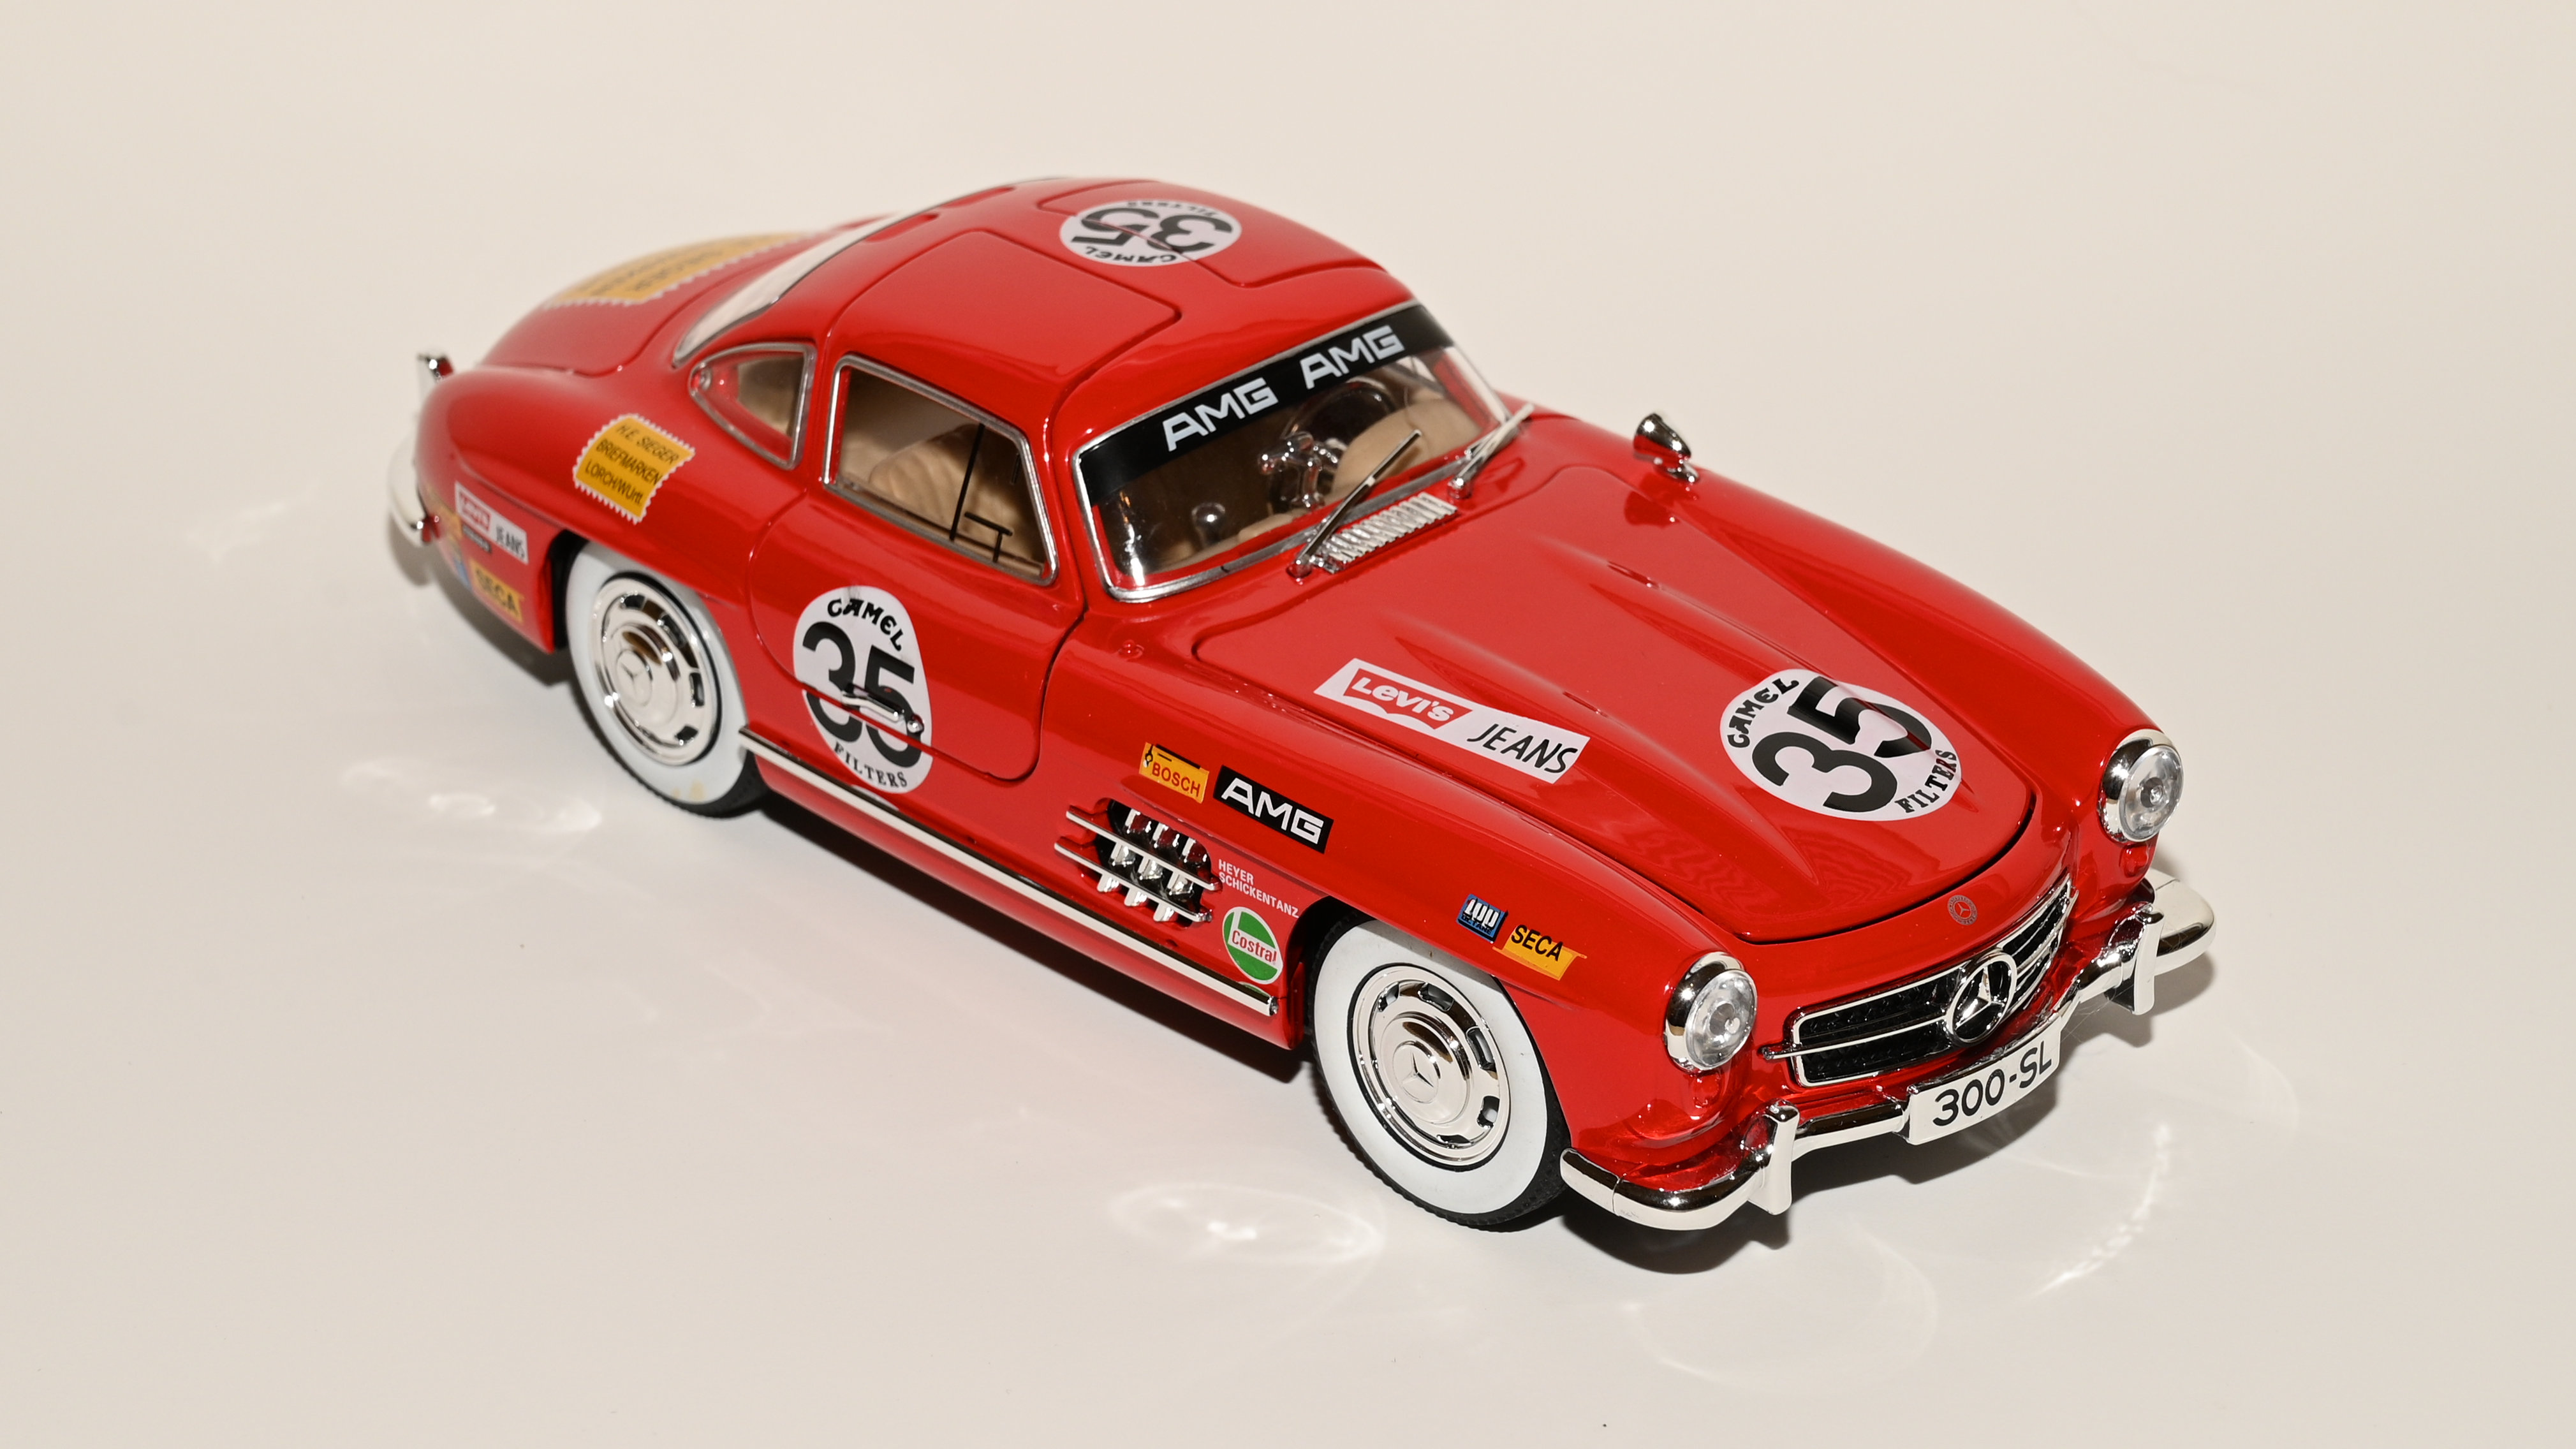
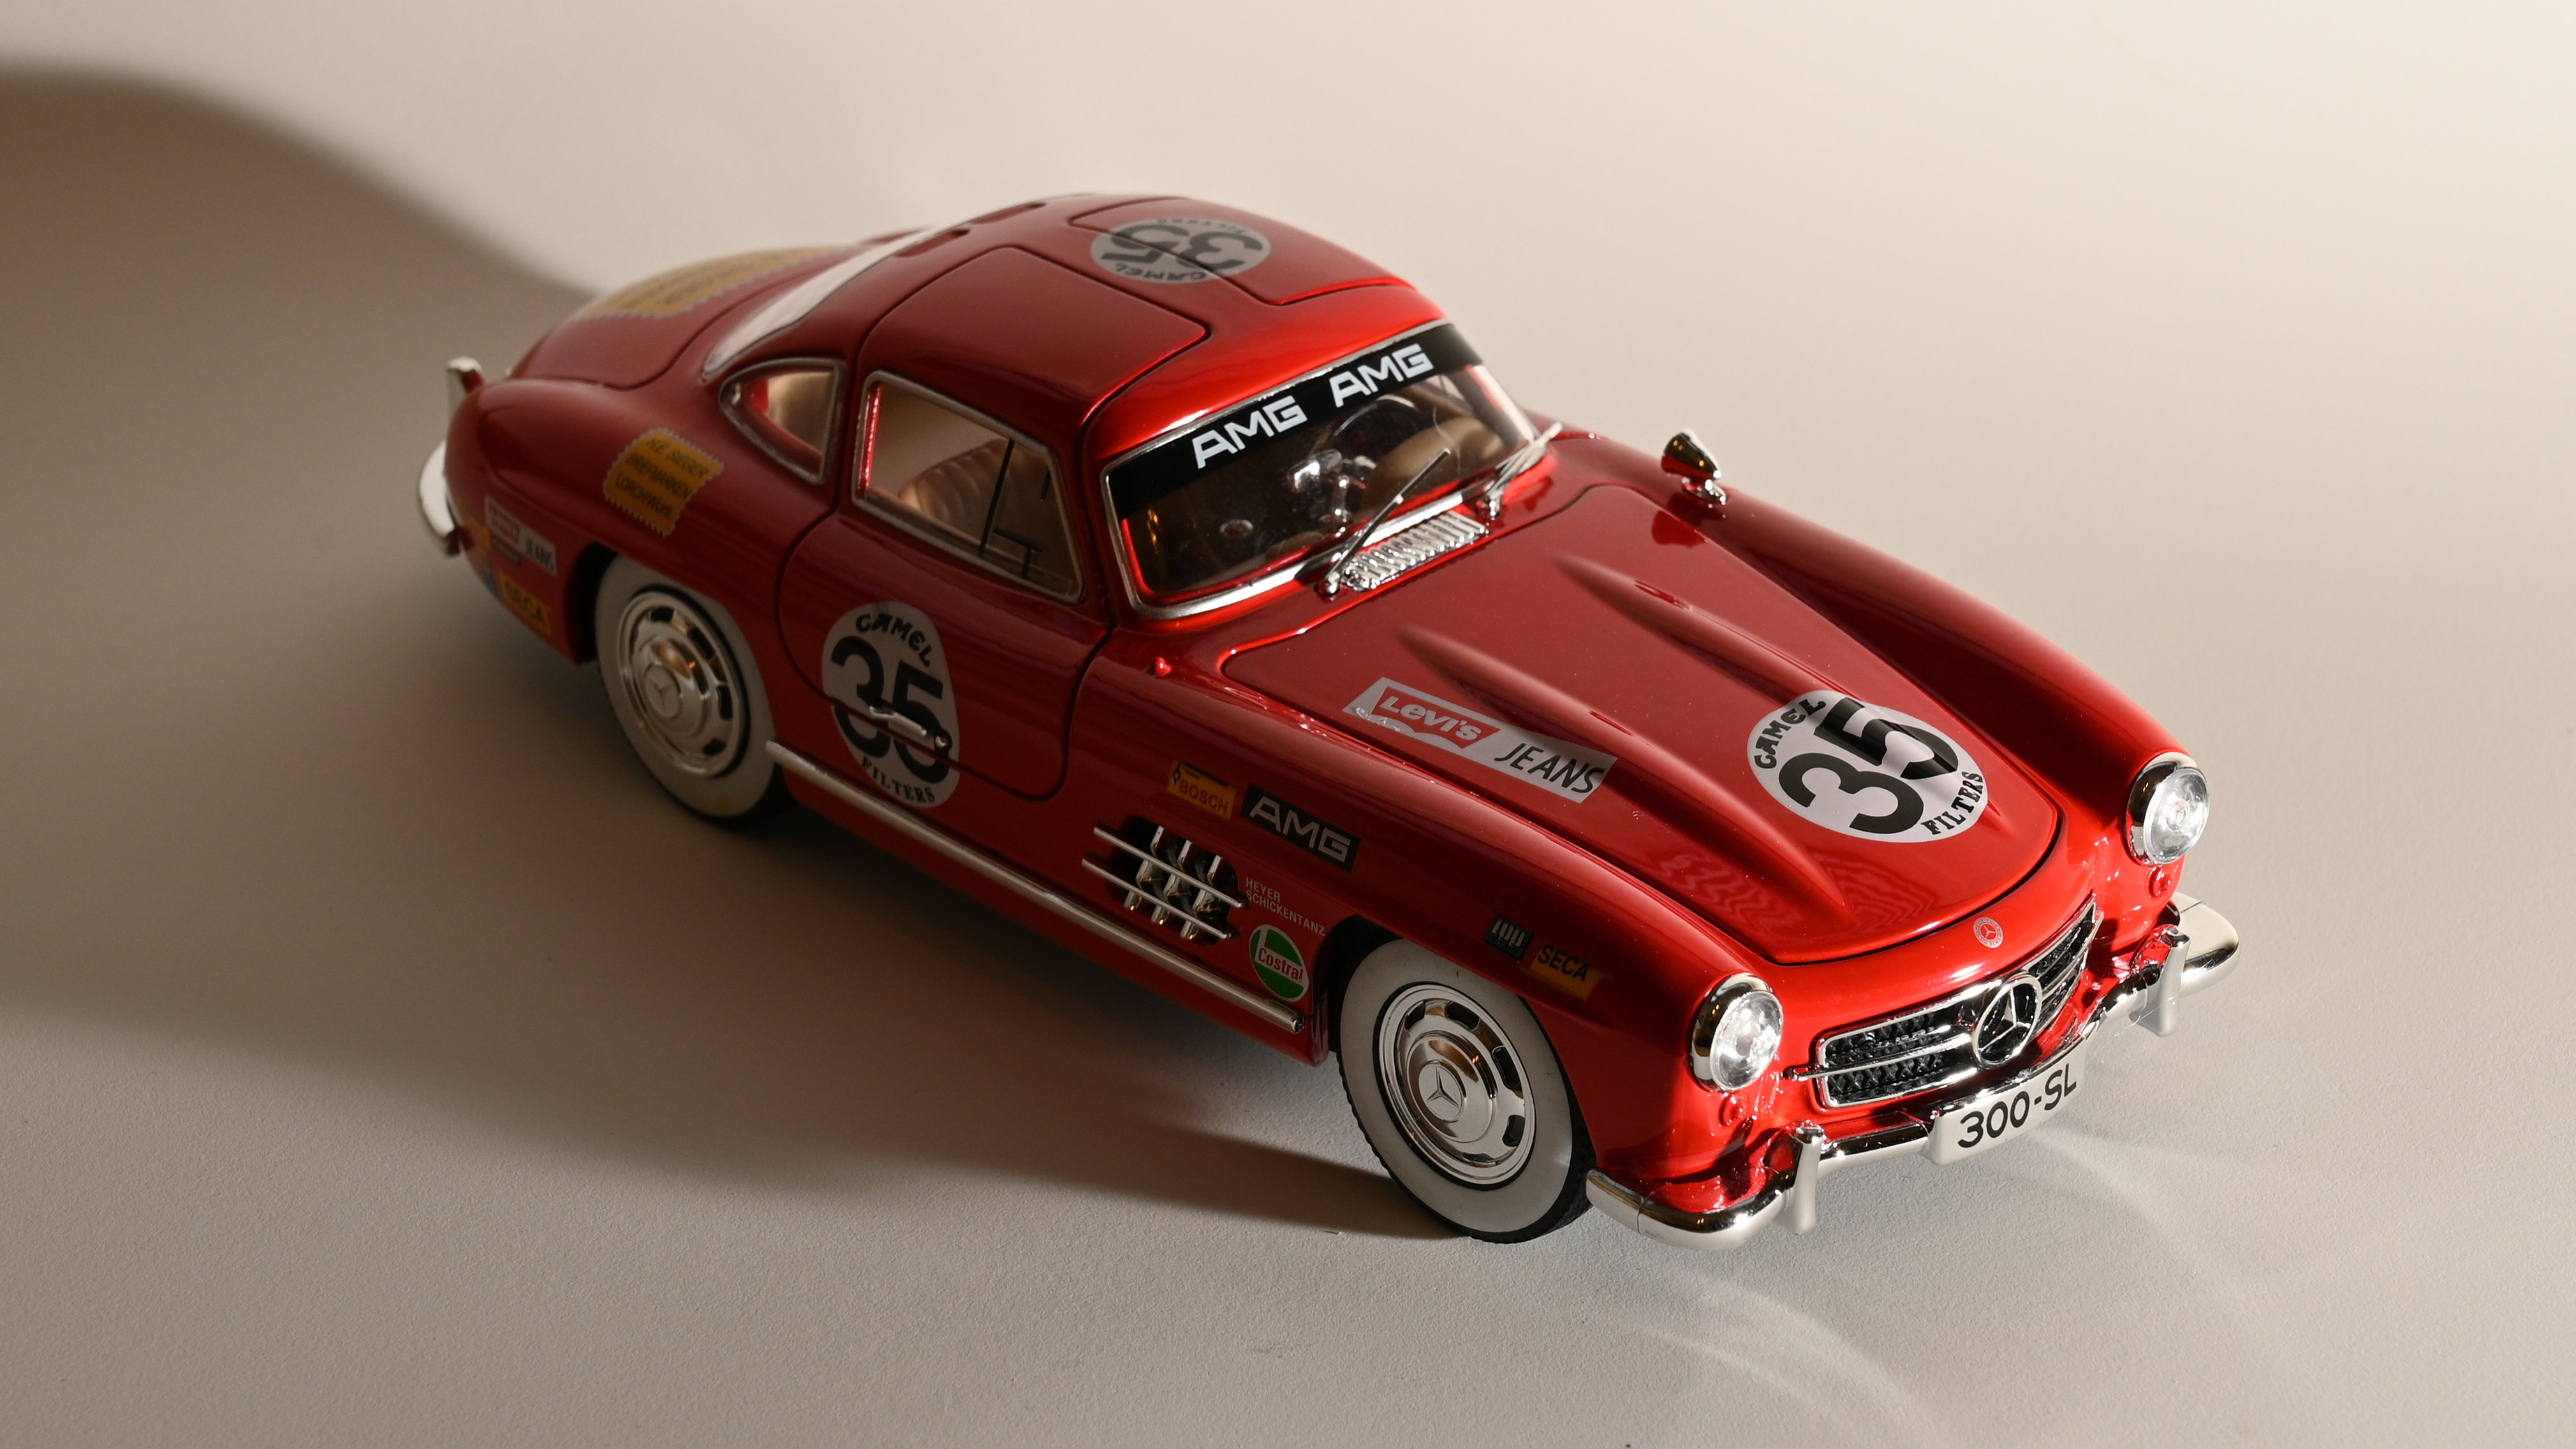
The main bonus of any wireless trigger is that you can use your flash remotely, off-camera. The example shot above is of a model car that measures about 20cm / 8 inches in length. It was taken with a Neewer Z3 100Ws flashgun aimed directly at the car, while mounted in the camera’s hotshoe. The result is a typically 2-dimensional ‘flat’ looking image with no real modelling. Using the flash remotely, you can play around with positioning to enable more creative lighting effects. For the shot below, I used the flash down low and off to one side to give a more interesting dynamic.
Neewer QZ Touchscreen TTL Wireless Flash Trigger: Verdict
I think that the Neewer QZ is a next-generation flash trigger that takes the breed to a new level in terms of performance, convenience, and ease of use. At its heart, the HD OLED color touchscreen enables wide-ranging adjustments with the minimum of fuss and bother, in double-quick time. Couple that with the 100 per cent reliability rate during my testing when triggering remote flashes, and you’re onto a sure-fire winner. It’s certainly not the cheapest flash trigger around, but it’s definitely one of the best and most desirable. It’s simply perfect for wireless-enabled Neewer flashes, but don’t rule out buying an optional Neewer QR Wireless Flash Receiver for use with other brands of flashgun.
|
Features ★★★★★ |
Top features include an HD OLED color touchscreen, internal Li-ion rechargeable battery and wide-ranging dedicated functions. |
|
Design ★★★★★ |
Small and lightweight but robust and beautifully finished, complete with a highly intuitive interface, it’s a triumph of design. |
|
Performance ★★★★★ |
Performance is top-drawer in terms of both triggering range and reliability, and the speed and ease with which adjustments can be made. |
|
Value ★★★★☆ |
It’s pricier than some flash triggers on the market but typical of Neewer, you get a lot for your money. |