NBA 2K26 is here, and numerous changes have been made, including a significantly smaller City and the return of a traditional-style Park. And each Season, the Parks will switch, and that rotation includes the iconic 2K16/17 Parks representing Old Town, Sunset Beach, and Rivet City.
Another popular feature from that era of 2K was the MyCOURT, which went away and was replaced by the Gatorade Facility Courts for the first few years of the current gen. The MyCOURT made its much-welcomed comeback in NBA 2K25, and although the customization was limited to just murals, it was still nice to see it return.
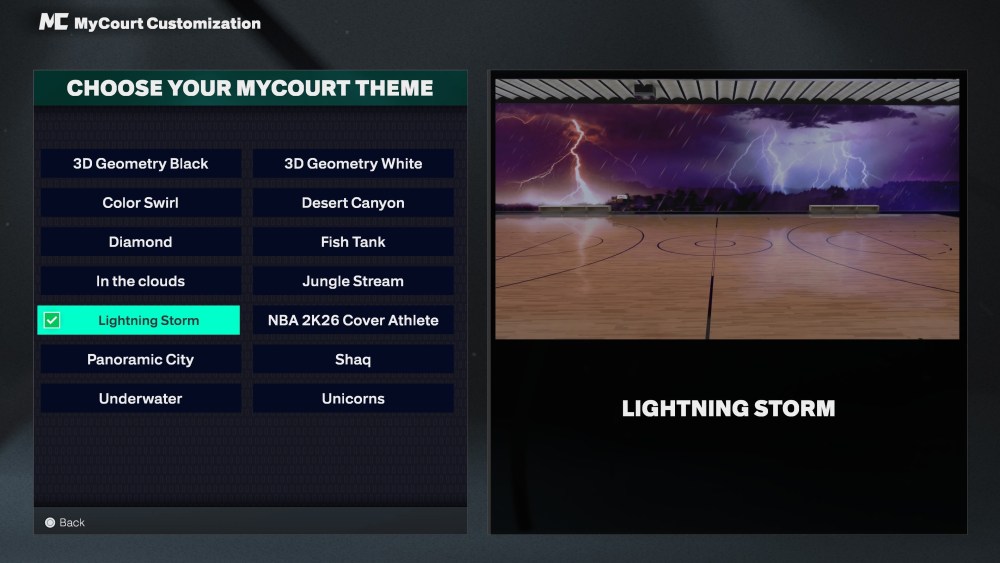
Now, MyCOURTs are not only back for NBA 2K26, but the customization is deeper than it’s ever been. In the past Park era 2Ks, MyCOURTs offered plenty of fun customizing options, including changing the floor by choosing from default options, changing the color of the rim and net, and changing the look of the backboard. You were able to choose a scoreboard, too. But we’re going to break down the depth of NBA 2K26’s MyCOURT, starting with the wall murals.
Wall Murals
So wall murals have been a staple of the MyCOURT experience in NBA 2K for years. When the MCs returned in 2K25, the mural was the first and only customizable option, where you could change the look, usually after unlocking it.
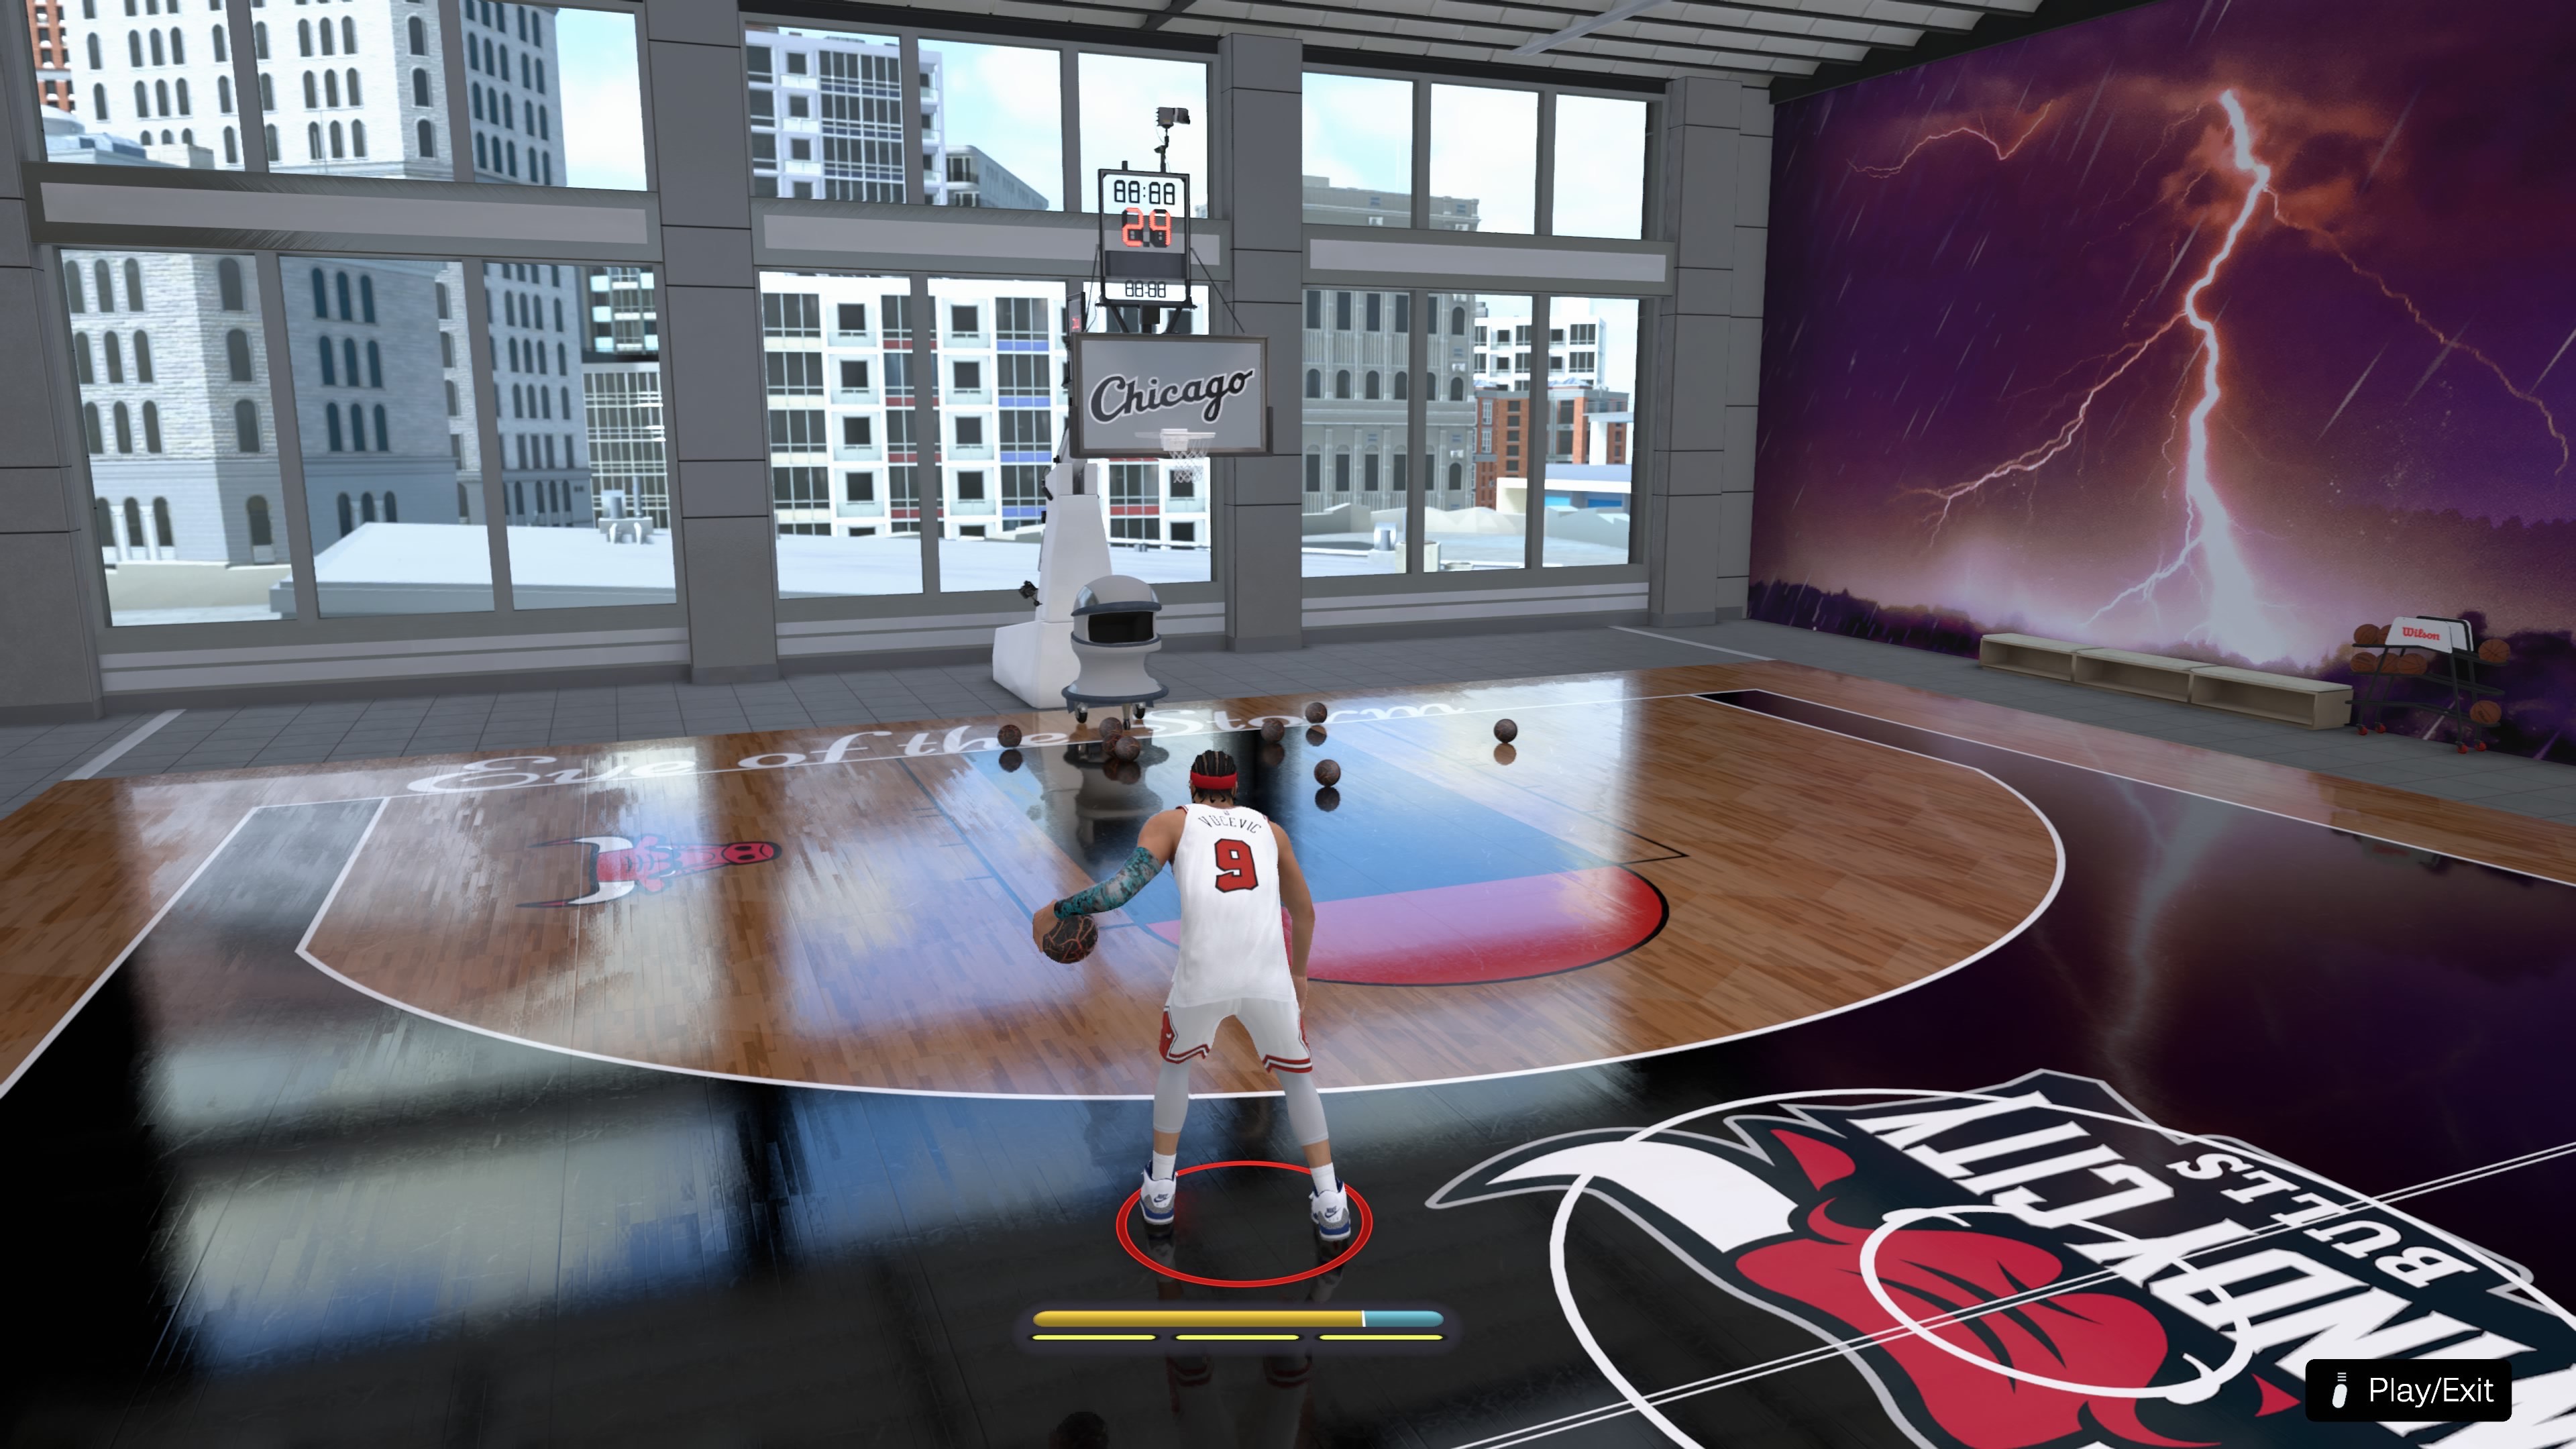
It’s the same thing here in NBA 2K26. There are a couple of initial choices, but you can unlock more later through Season rewards, among other things. One thing that was nice about their return last year was how big and vibrant they looked compared to the older games. And it’s that big, rich style that’s returned for NBA 2K26; not to mention, the whole place just looks nice, as your MC is located in a high-rise with windows.
The Baskets

Now we’re starting to get into the nitty-gritty with what’s truly new for MyCOURT. So, in NBA 2K26, you can change not only the color of the rim, but you can also change the color of the foundation of the hoop itself to suit your style. You can also change the entire hoop itself from a select number of options.
And easily the coolest part about customizing your hoop is that you put up any image you want on your backboard. Yup, that’s right. Just upload an image to NBA2K.com, and then you can slap that image up on your backboard. I currently have one of the logos of my beloved White Sox on my backboard (pictured).
There are some things to keep in mind, though. If you want to upload a custom image for the backboard, make sure you choose one of the first two default baskets (Basket ProAm 1 or Basket ProAm 2). Any other basket that you choose can’t be customized. Of course, you can switch baskets anytime you like. Another thing is that, unfortunately, you can’t change the color of the net.
The Floor

Undoubtedly, the deepest area of your MyCOURT in NBA 2K26 from a customization standpoint. You can change your floor’s color shade, patterns, etc. You can switch up the colors on your three-point line, the paint, etc. Wait, there’s more. You can add text to your baselines and other areas of the court. Want to give your MyCOURT a unique name? Well, you can do that now with the texts.
And of course, just like with the backboard, you can add any image you want to your floor, whether it’s in the middle of the court or in the mid-range area. Maybe you want to add the logo of your favorite college or high school team to the floor. Or perhaps a G-League team logo (though they should be default options from the jump).
If you don’t feel like uploading your own images, you can surf through the community uploaded options and add those images to your court or backboard. There are plenty of cool and funny options to choose from. As awesome as MyCOURT always was, these new customization options in NBA 2K26 really make your court feel like your own. The only thing I miss is the ability to unlock brand-new MyCOURT locations, such as the Thierry Henry forest house (loved that place). Run that back sometime, 2K.

.png?w=600)

