Like many of us, Robert shared the dream of building a custom PC case. However, unlike most of us, Robert made it by combining wood, 3D-printed gears, and acrylic to create a unique kinetic custom case. The case features multiple moving parts that create kinetic movements you get to see on the front panel, operated by gears and shafts behind it, hidden away thanks to the new external casing made of wood.
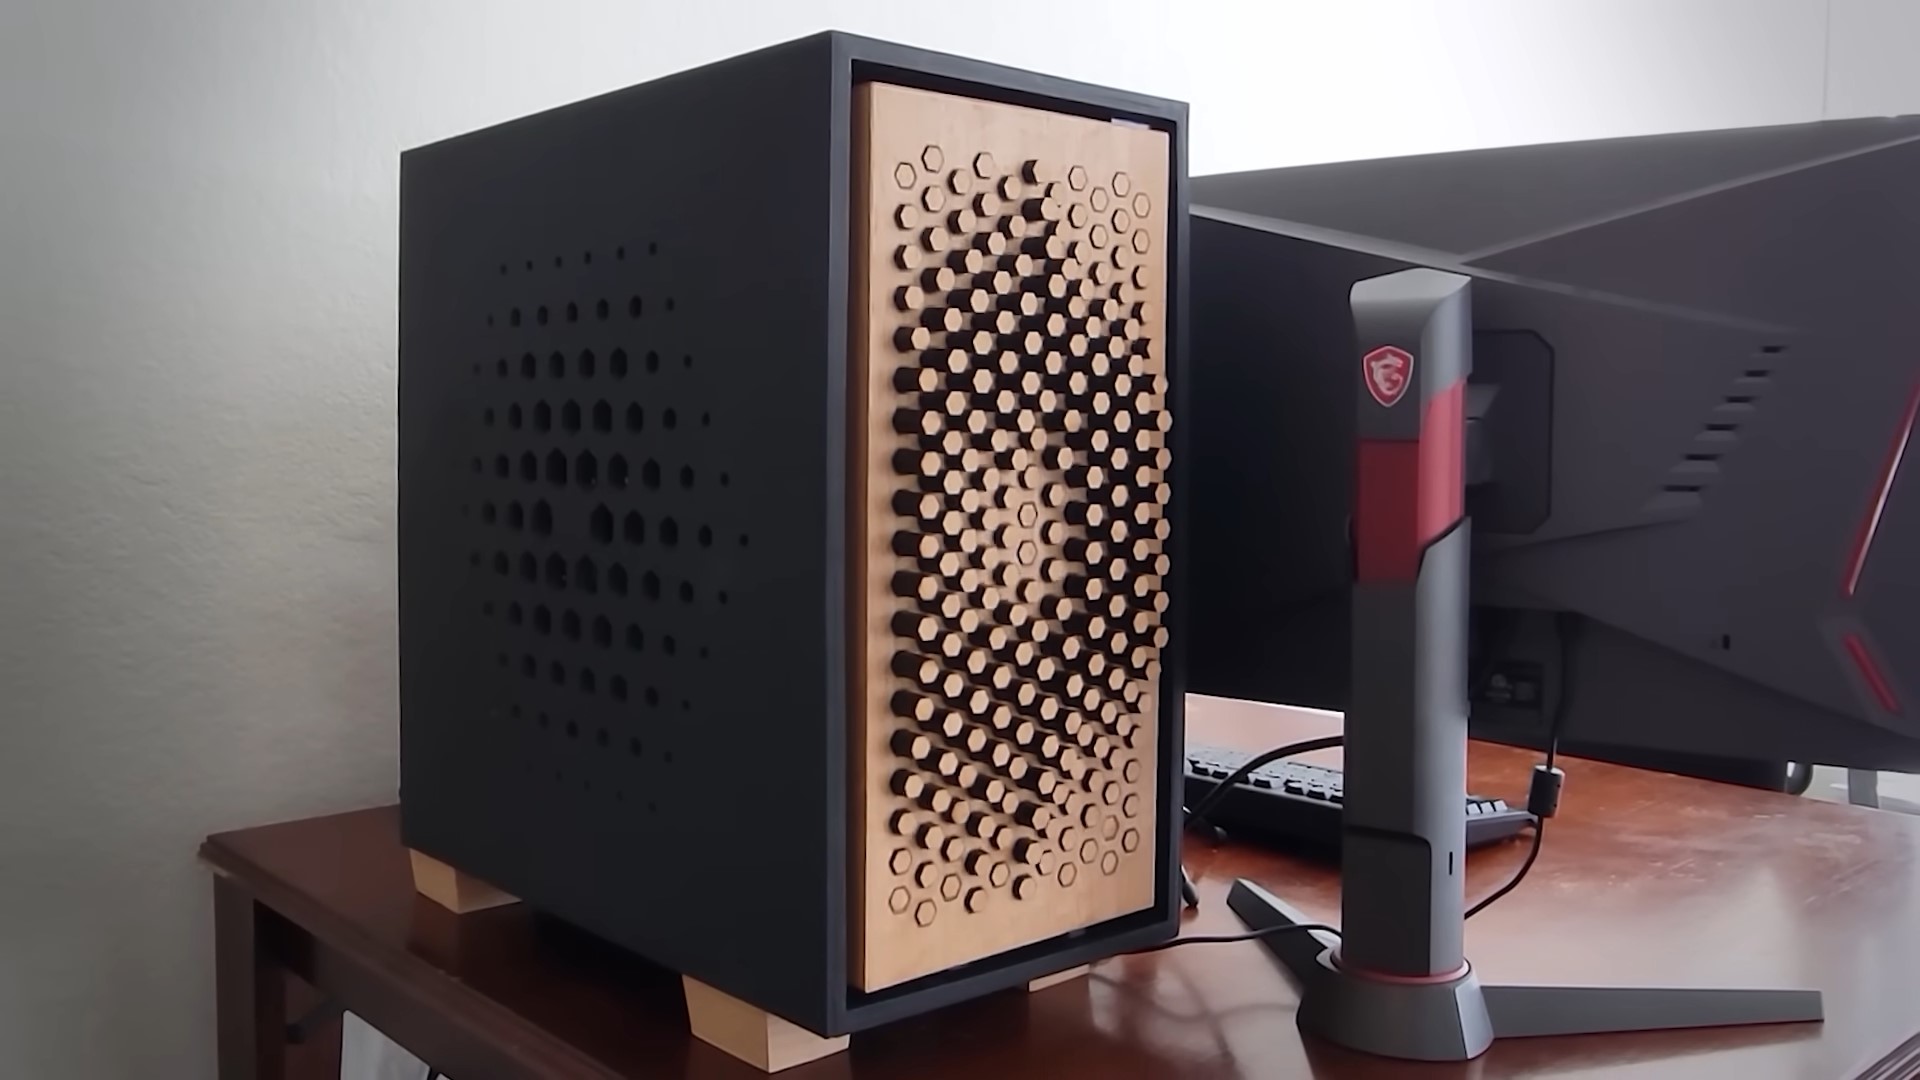
He repurposed his old PC case as a mainframe to hold the core components of his system. The Corsair Crystal 570X case was ideal for him once he removed the side and front glass panels. He made a new external body out of plywood, with multiple hexagonal cut-outs on the sides. The outer body was designed to have an all-black finish with wooden accents and is pressure-fitted by slipping it over the 570X. Although he considered using fasteners and magnets as mounts for each panel, this was a preferred choice for multiple reasons. After solving the challenges with the wooden surface's paint job, he focused on the front panel movements, a vast undertaking, and the project's highlight.
The Heart and Soul of This Kinetic Movement
The brain of this kinetic movement is an Arduino Uno board with a combination of codes from multiple sources to move the 4988 stepping motor and the Nema 17 motor. Once he got the perfect rotation through trial and error, he installed the setup inside the case and powered it from the motherboard. So far, Robert has been nothing but impressive, and the video does a great job of providing that valuable edutainment. But here comes the complicated part, which demanded much time, effort, patience, and experiments with different materials and gear designs.
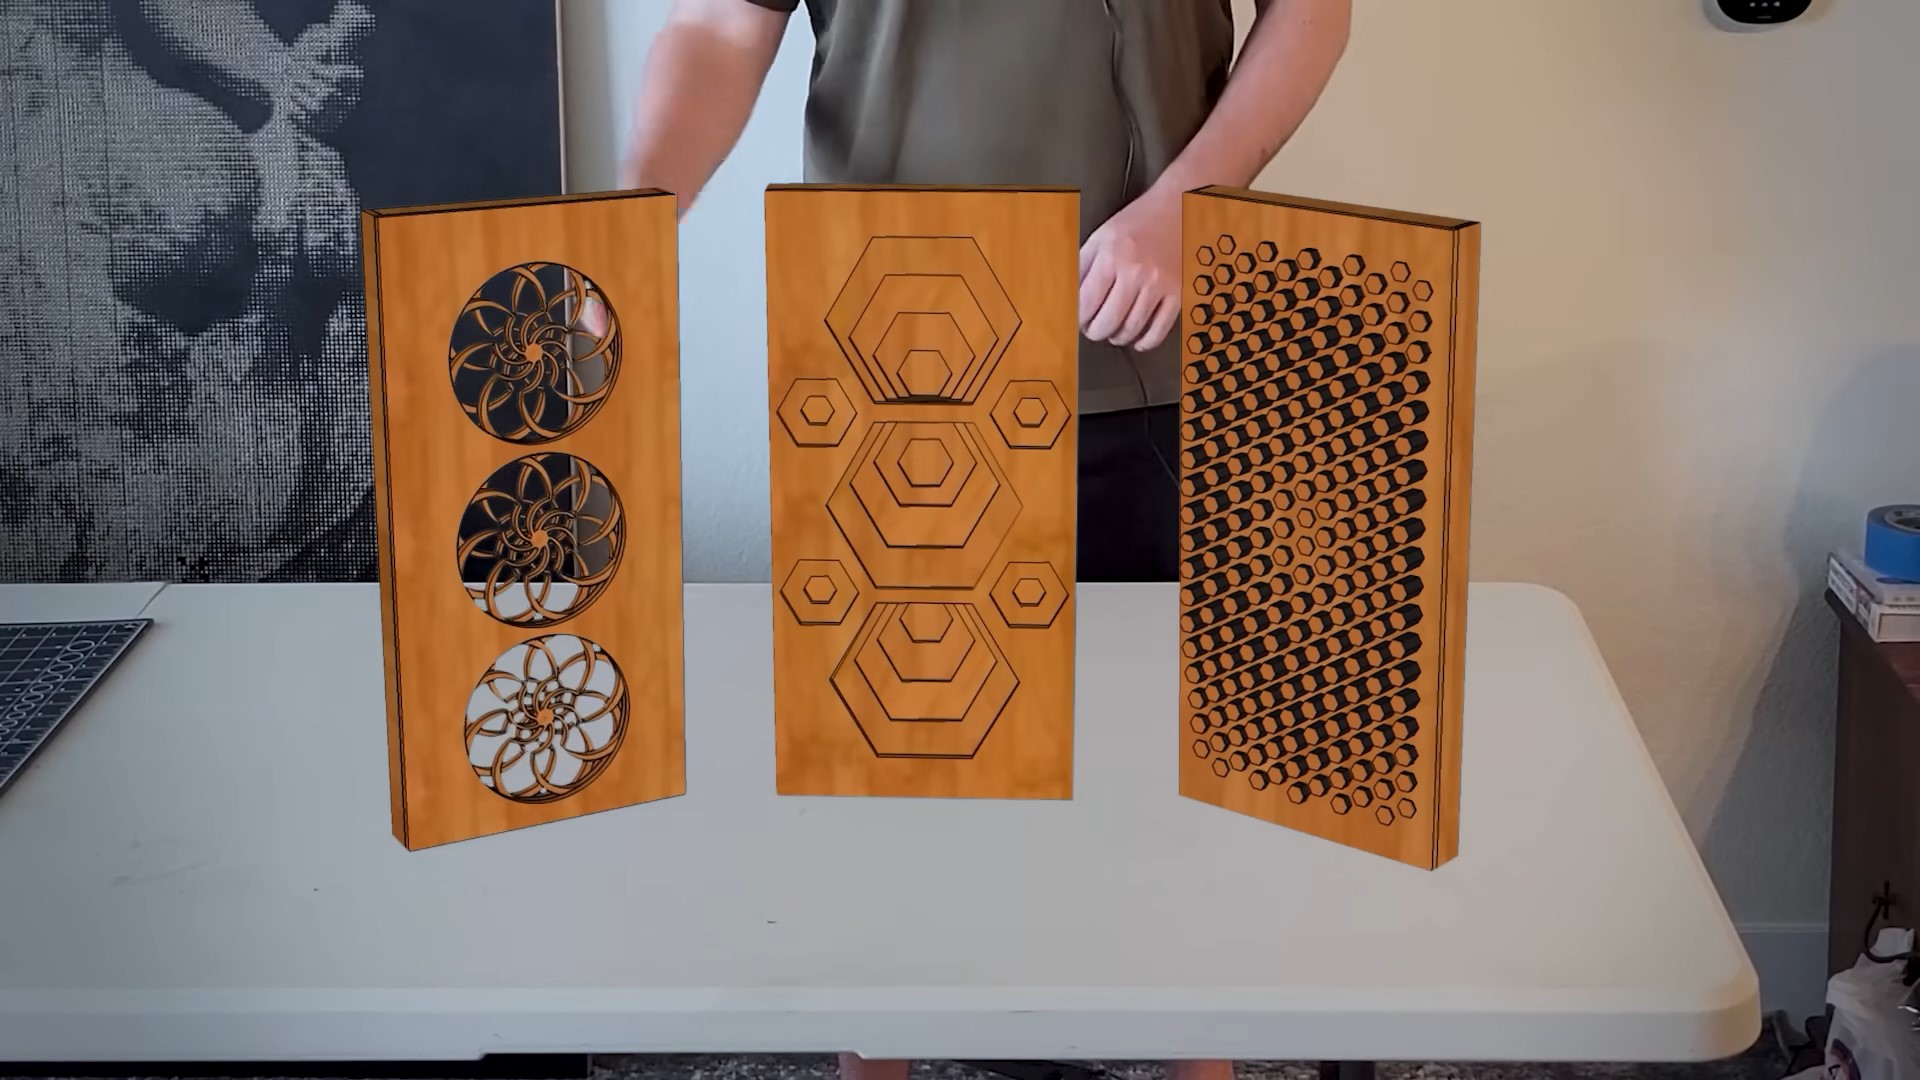
He decided on three front panel complications, starting with what he says is the most straightforward design and working his way up to the most complex. The front panel is modular, allowing for different front panels to be switched, each with other complications. The main body and the front panel had to be made seamless, allowing the case to get air in from the sides of the kinetic front panel. The NEMA 17 motor was connected to a gear, which was then installed through the case, moving other gears behind the front panel. The front panels are secured onto the case with custom 3D-printed clamps installed on the 570x's body.
First Kinetic Movement
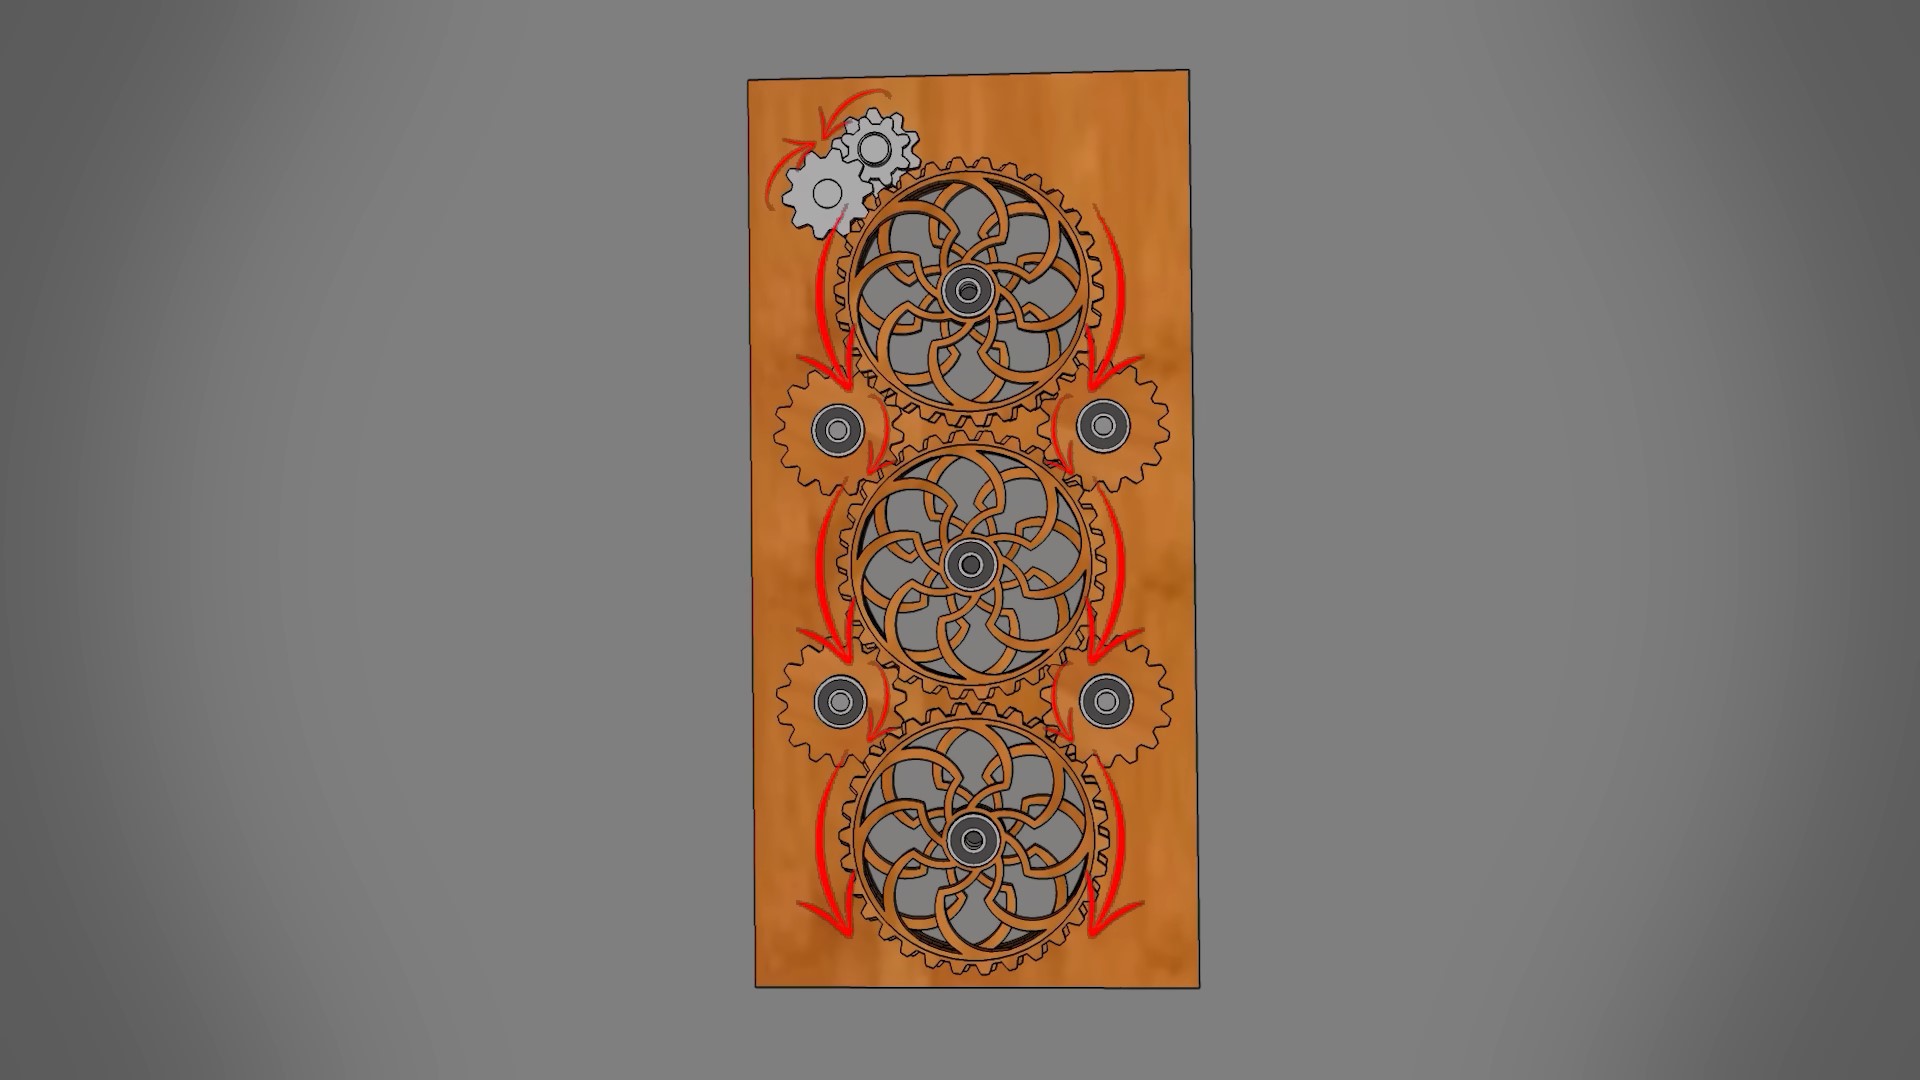
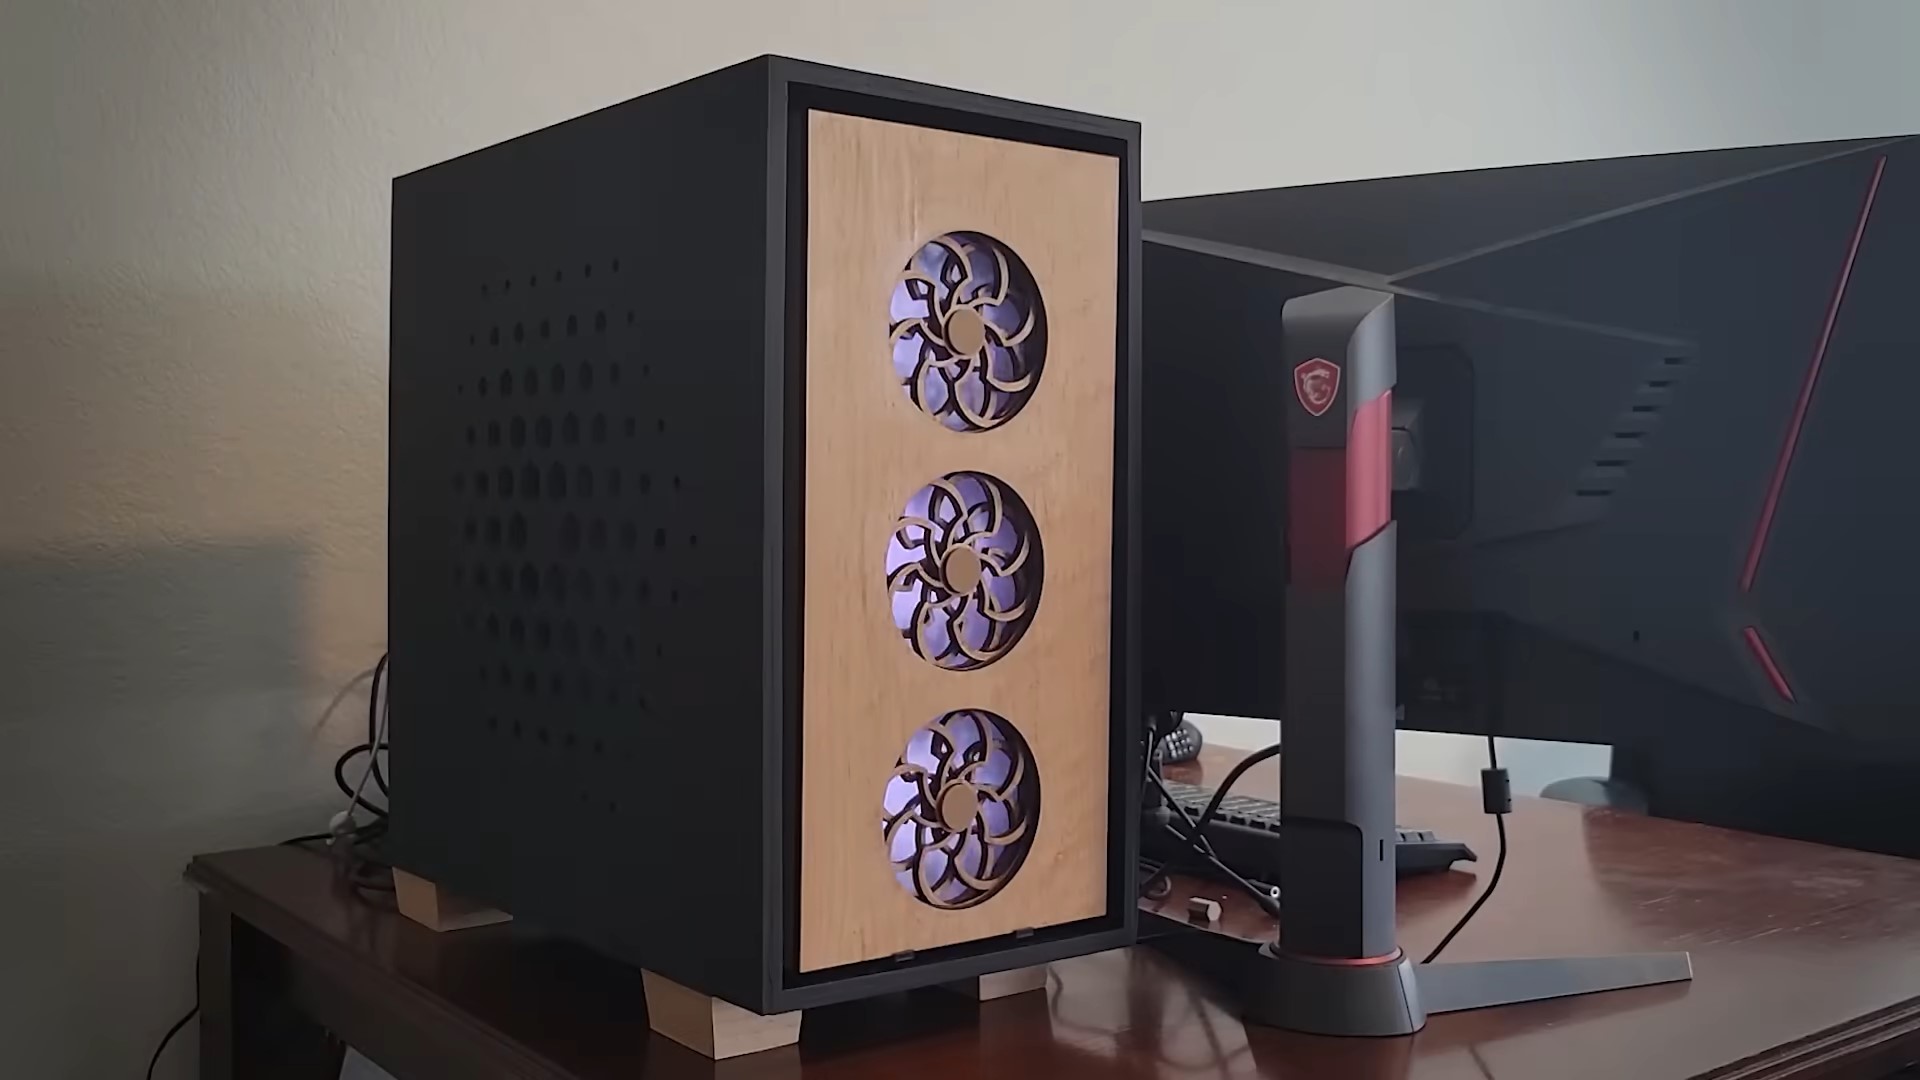
His main inspiration for the design was David C. Roy, a kinetic sculptor who designed over 150 different and one-of-a-kind complications. The first front panel design used three circles overlapping the three front panel fans on the 570x, with the inner design resembling a rounded stained glass rose window frame. These internal frames would move along with the patterns of the gears. This involved making three gears made of plywood with ball bearings with 3Dprinted gears and crossbars, eventually connecting to the Nema17's main gear.
Every gear and momentum had to be fine-tuned to ensure no friction from jagged edges between the gears. This is combined with a frosted-looking panel using paper over the plexiglass. This resulted in a great diffusion of the lights in front of the fans that can be seen from the kinetic 'rings.' Robert created a smooth and trippy style kinetic motion. He calls this simple, anything but that for any of us. But the next design he did was extraordinarily challenging, and it was impressive to see the entire process explained clearly in the video.
Third and Final movement
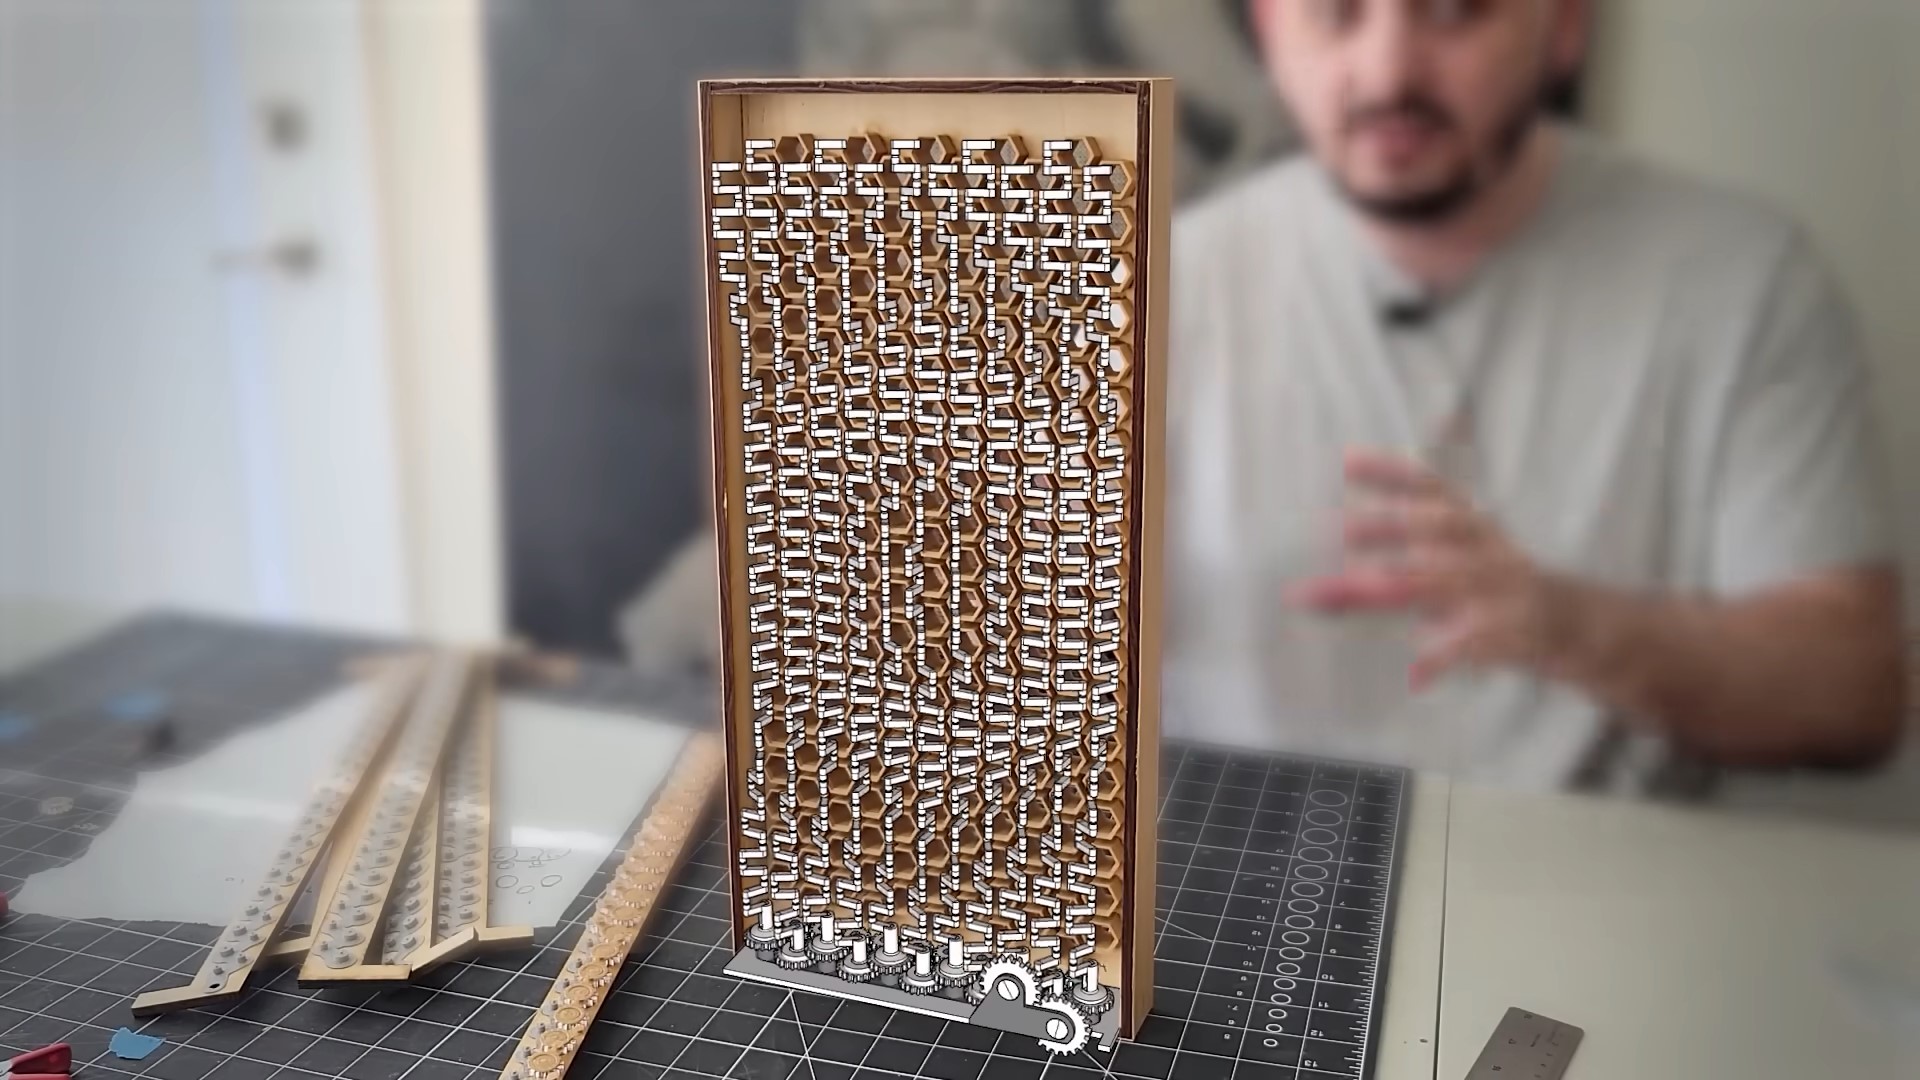
The whole 'adventure' encouraged Robert to skip the second design for the third and most complicated design. This kinetic movement is as complex as creating unique movements for a mechanical clock made from scratch and assembled by hand using different materials. The comparison couldn't be far from the truth as this step increased from 14 moving parts to a jaw-dropping 885 parts involving 214 3D printed components. The whole front panel will have hexagon movements, which creates that seamless illusion of synchronous action through different sections of the front panel while making it appear that they're individually moving due to varying heights, like a wave.
Robert had to play it safe with two gear designs to determine the perfect choice after working on each hexagonal tab and its shaft on the front panel that would protrude and depress through. While it used wooden panels and a combination of 3D printed and acrylic parts, he had to fine-tune by sanding every hole and using black vinyl on the components to ensure smooth movements.
The gears connecting the main gear to this complication had a challenge as it involved many more moving parts. Laser-cutting acrylic, though very accurate for the job, does leave jagged edges between the gear teeth. Robert got a great idea by combining 3D printed and acrylic gears, giving him the smoothness of the kinetic transition he required. All the time, money, and hard work resulted in a tremendous kinetic front panel that couldn't be helped but appreciated. With the remaining parts of the plywood, he made matching case feet, and it was a final finish- the first DIY kinetic case with a modular front panel design.
The internal movement was as mesmerizing as its effect on the front. It is tough to say which one looks incredible. Both do. Two different yet beautiful sides of the same front panel!
Inspired by Cyberpower's Once Ambitious but Unreleased Project
This project was inspired by Cyberpower's announcement of the Wild Kinetic series cases, which were supposed to be available for purchase in late 2022. Unfortunately, nothing came out of it, and there were no updates from Cyberpower. That didn't stop Robert. He wanted one, and the second best option was to make one.
This may inspire Cyberpower to speed up the process or return to the drawing board. In any case, it inspired at least one person to build a kinetic case, and I wouldn't be shocked if others followed suit. When this was covered, Cyberpower said its Kinetic cases would cost $249, an incredible value considering the time, money, and effort Robert would have spent on his. But by comparison, Robert made something to be proud of and extraordinary. Buying one off the shelf is one thing, but it is something when building one yourself. Robert is one of the few who lives by Coolermaster's 'Make it Yours' punchline.