Can’t find the remote you need? We feel your pain. With so many devices on hand, it’s easy to lose track of a remote or two. But why bother buying a universal remote when you could create one from the ground up with a totally unique design? That’s what Cello-mike seems to have been thinking when he created this TinyPICO-powered universal remote project. We should note, this board doesn’t use a Raspberry Pi Pico but rather an ESP32 board.
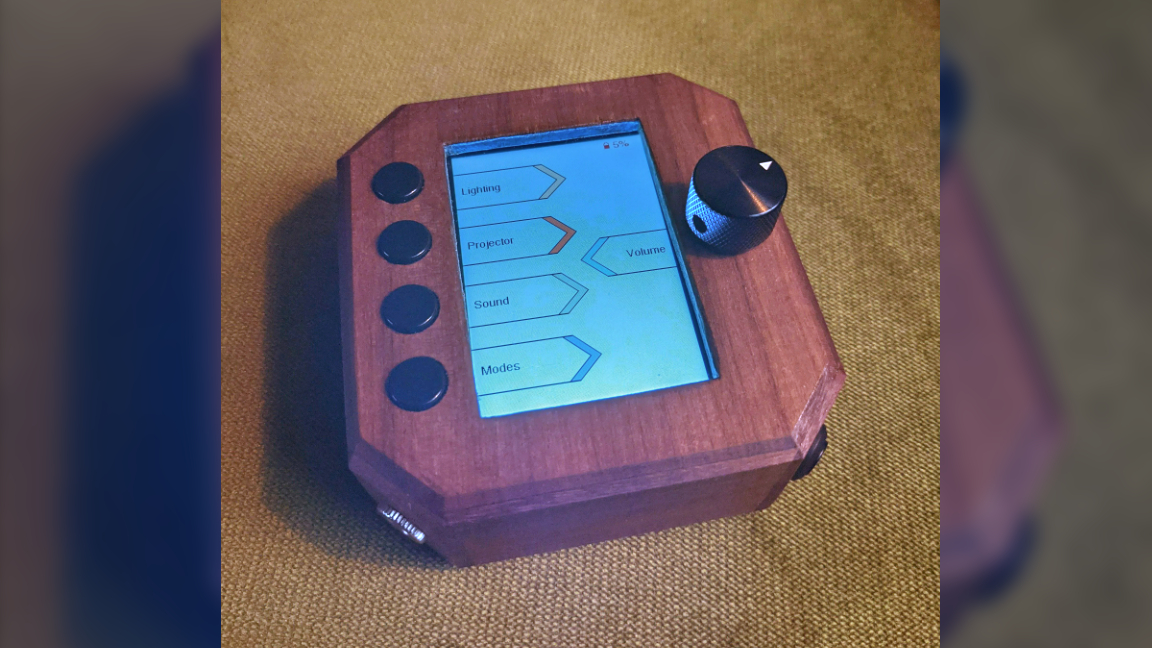
The remote is shaped like a small box with a screen. A custom interface lets you choose what device you want to control. There are four buttons off to the side as well as a rotary encoder that can be used to adjust gradual settings like volume. It even has functions built in to adjust the smart lights in the room.
According to Cello-mike, the box communicates with devices using infrared signals. It’s programmed to copy the signals from his various remotes to emulate them as needed. He also noted that while the TinyPICO board is capable of supporting WiFi, it’s a little power-hungry and eats up battery life so he opted to leave WiFi communication up to the receiver box which is constantly plugged into power using a phone charger.
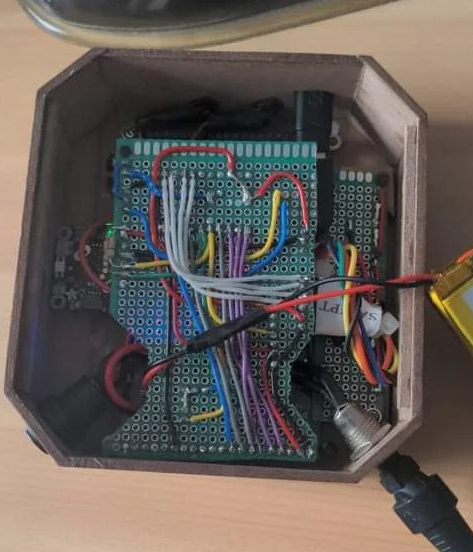
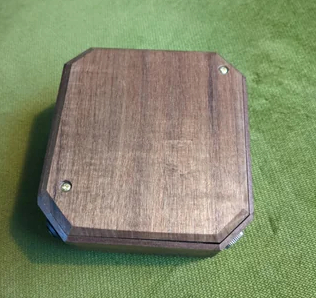
The TinyPICO board was chosen mainly because of its small size. A protoboard is included to connect the extra components like buttons and rotary encoder. While many projects we come across tend to use 3D-printed housing, Cello-mike opted to create this shell with a bit of woodworking. To help match the new remote with his furniture, he chose to use a nice chunk of walnut in its construction.
The UI was written using Adafruit’s graphics library. The interface had to be drawn from the ground up and apparently took a fair bit of time to complete. Cello-mike explains that the hardest part in designing the GUI was the highlight feature that shows which device has been selected when a button is pressed.
If you want to get a closer look at this project, check out the original thread shared to Reddit. If you’re looking for more maker projects to inspire, you can always peruse our monthly list of best Raspberry Pi projects.