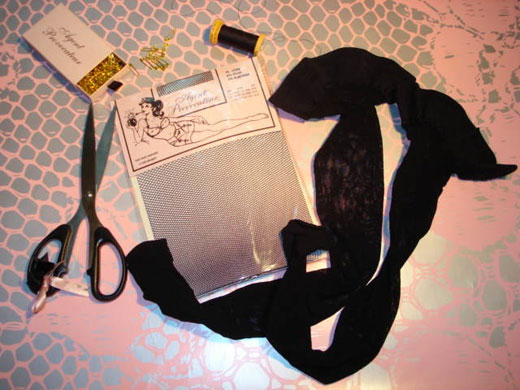
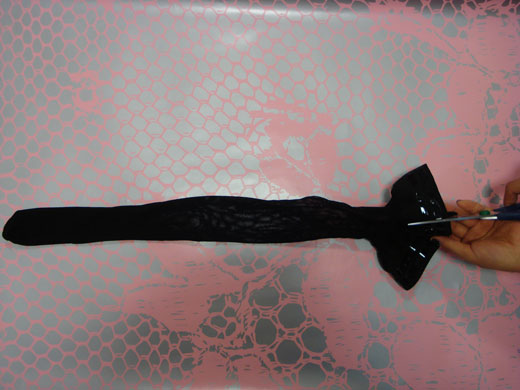
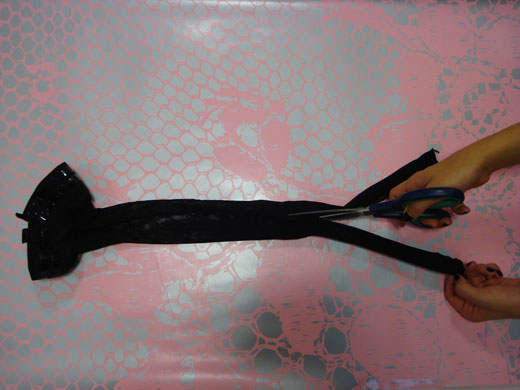
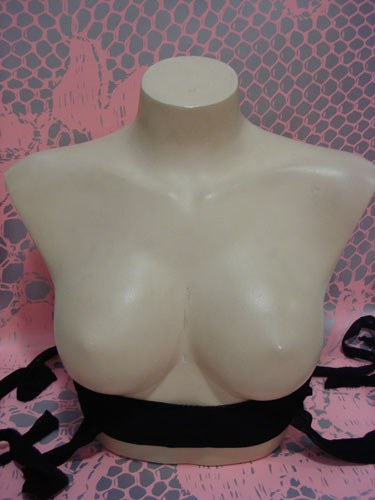
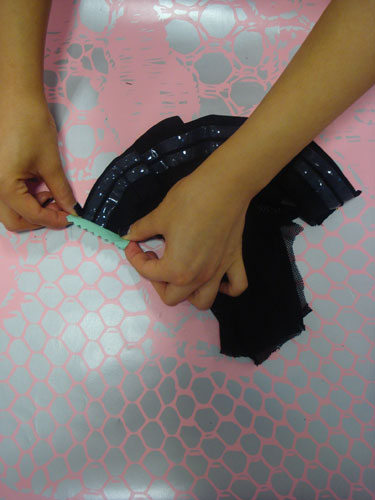
You will need: two pairs of hold-up stockings, old or new, or two pairs of tights – coloured fishnets work well; a pair of scissors; thread; four pieces of scrap fabric in a similar fabric to the stockings (2.5cm by 2.5cm), and a sewing machine (although you can hand sew this if necessary)Photograph: PRTake one pair of stockings. Cut all the way down each of the stockings, starting at the elastic top – cut through the elastic and down the leg. Cut the toe seams off the end of each stockingPhotograph: PROpen up the stocking so that it lies flat, then cut straight down the middle from the toe, stopping at the elastic. Do this to both stockings. Then take each of the hold-ups and measure the elastic band under your bust – each band should fit across the front of your chest. Trim each side if necessary – together they will reach all way around your chest and back. Lie both equally trimmed stockings on top of each other with the elastic grip facing outwards and the soft sides touching Photograph: PA
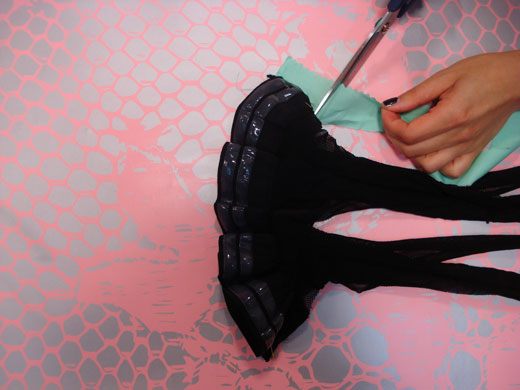
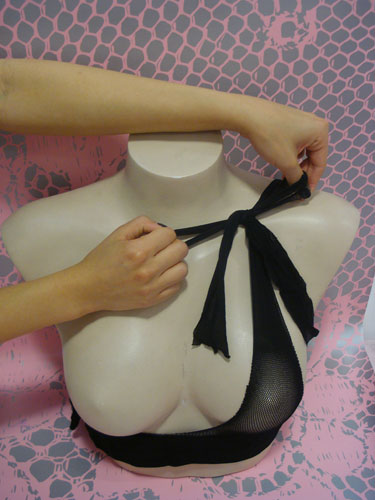
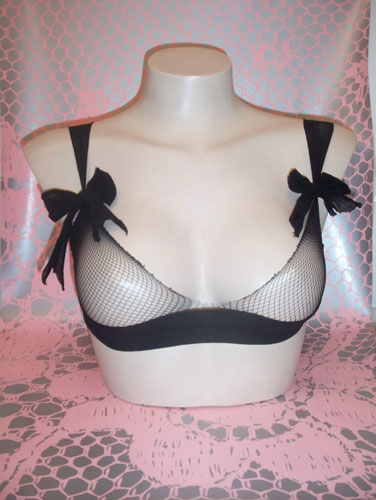
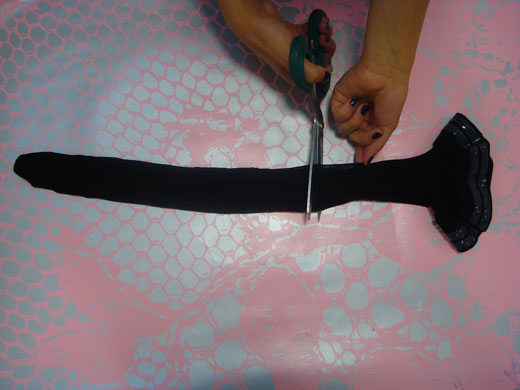
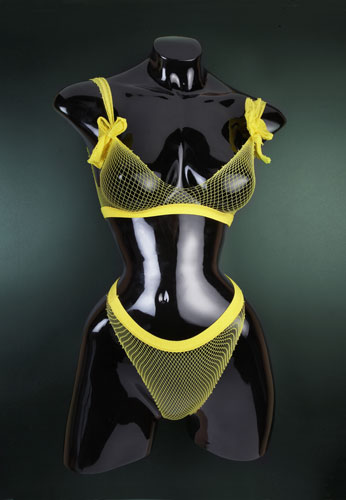
Place the scraps of fabric over the open ends of the elastic. With the sewing machine, stitch the ends of the elastic stocking tops together (a straight no1 lock stitch is best). You will now have a full circle of elastic with four lengths of stocking hanging from the band. (You could also try this with a pair of tights: cut the toes off the tights. Cut a straight line from the toe to the waistband of the tights up what would be the outside of the leg. Then cut a straight line up the inside of the leg and across the gusset and down the other leg to the toe. Neatly and evenly trim off the gusset – you want as neat and straight a line as possible. You will be left with four lengths of tight hanging from the waistband – when you put it on (see step 4), the seams/gusset should be under your arms. However, it is easier and more effective to use hold-up stockings, as they don’t have a gusset and the sticky elastic helps provide support to the bust) Photograph: PAPull the garment over your head and place under your bust with the elastic grip against your skin and the four stocking lengths facing upwardsPhotograph: PRTake the front length of left stocking and the back length of left stocking. Bring them together over your left shoulder and tie in a bow to your desired position and tightnessPhotograph: PRRepeat over your right shoulder. Trim any excess fabric from the tiesPhotograph: PRTake your second pair of hold-ups. Cut straight down the leg of each stocking, starting at the elastic top and cutting through the elastic all the way down to the foot Photograph: PRCut the length of stocking in half and discard the foot Photograph: PRAs in step 4, lie the two trimmed hold-ups on top of each other, mirrored, with the elastic facing out and the soft sides touching. Pin the sides together for sewing. Now cut the shape of your brief: think about how much or little you want to cover up! You may want the back to be slightly bigger. Allow approximately 4cm width for the crotch. (You could also try this with tights: take a pair of tights and cut them off at the knees. Hold them against your hips with the front seams at your sides, and pull one leg down to your crotch – cut off the tights at this point. Turn around and do the same with the other leg. Lie the tights out flat, on their side, one leg on top of the other, with the seams at either side. Follow the instructions to cut out the shape of the brief as above, treating the front seams of the tights as the sides seams of your brief)Photograph: PRTo finish the brief, sew the crotch together with a sewing machine and trim any excess fabric from the seam. Turn your brief inside out, and you have a handmade brief. You can embellish and personalise your bra and brief with chains and safety pins, and by cutting shapes into the elasticPhotograph: PRThe finished article in yellow fishnet. You could go demure and use some black opaques ...Photograph: PR
Sign up to read this article
Read news from 100’s of titles, curated specifically for you.