Shooting in low light can create magical, cinematic photos – but it also comes with editing challenges. When your image relies on just a few small light sources, getting the right contrast, mood and subject focus can be tricky.
In this step-by-step tutorial, you'll learn how to enhance low-light photos in Affinity Photo 2 using powerful targeted editing tools like Curve Adjustment Layers or Detail Refinement & Noise Reduction.
Whether you're working with a candelit portrait, a neon-lit street scene or ambient twilight, you'll learn how to guide the viewer's eye, deepen the atmosphere, and make every pixel count.
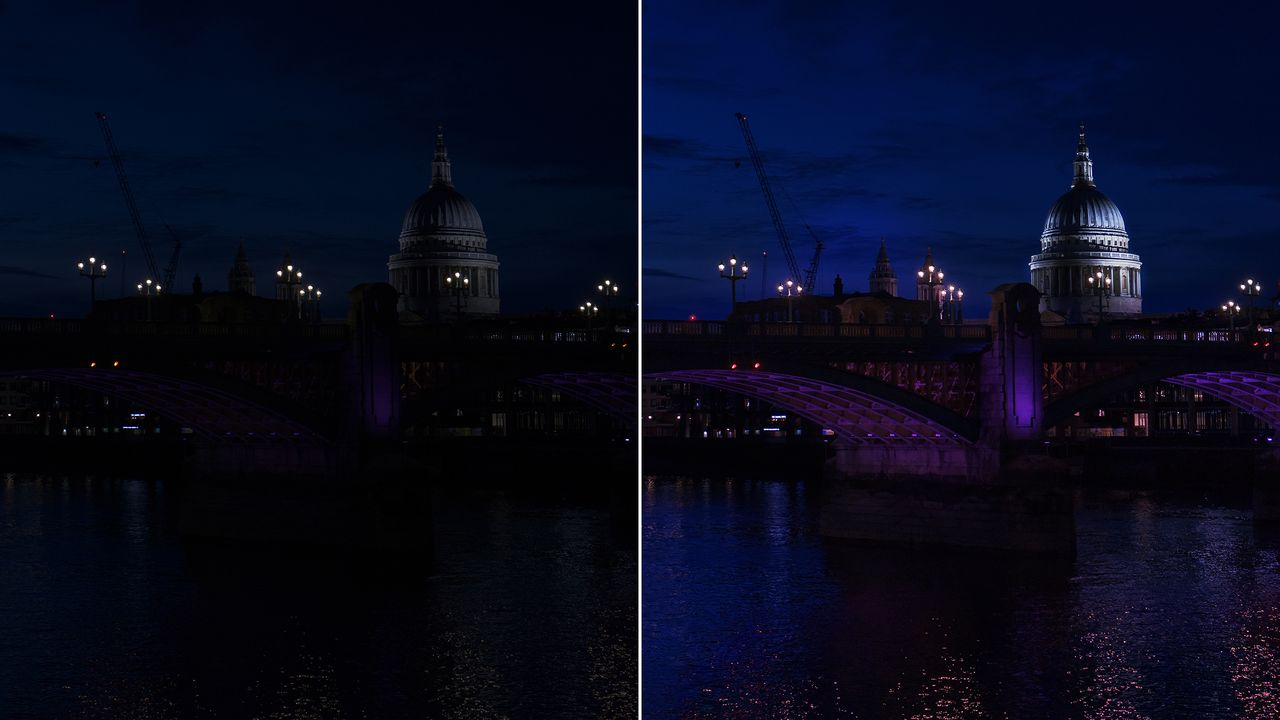
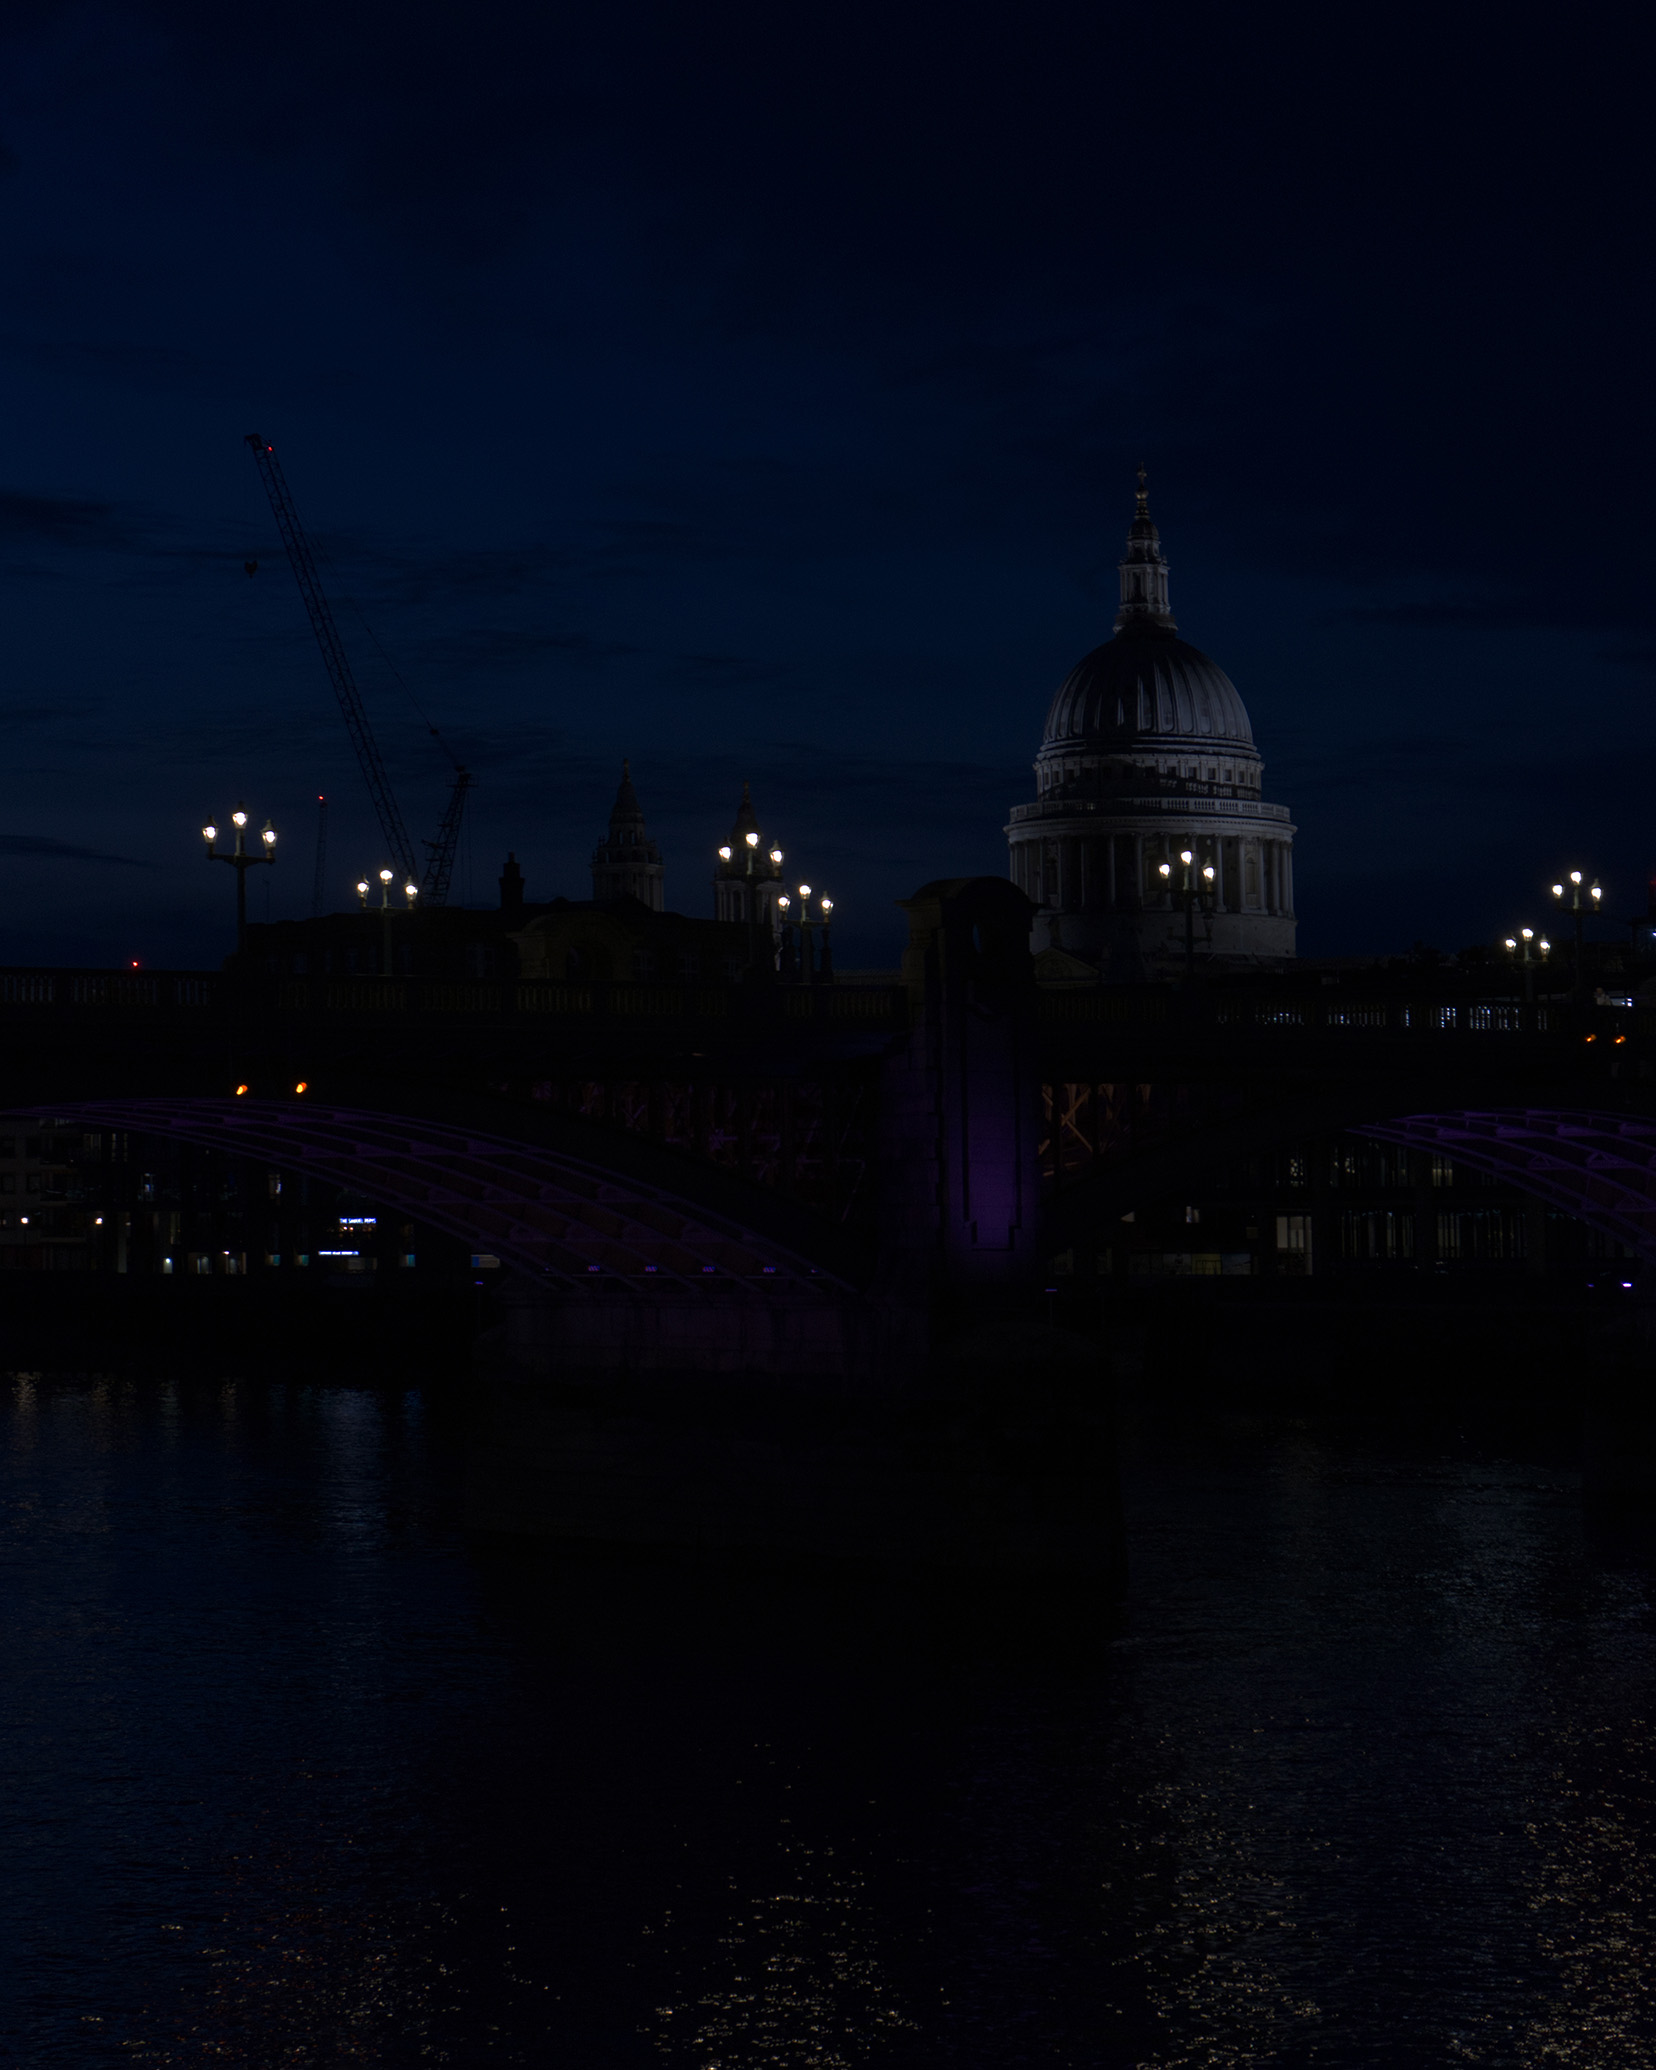
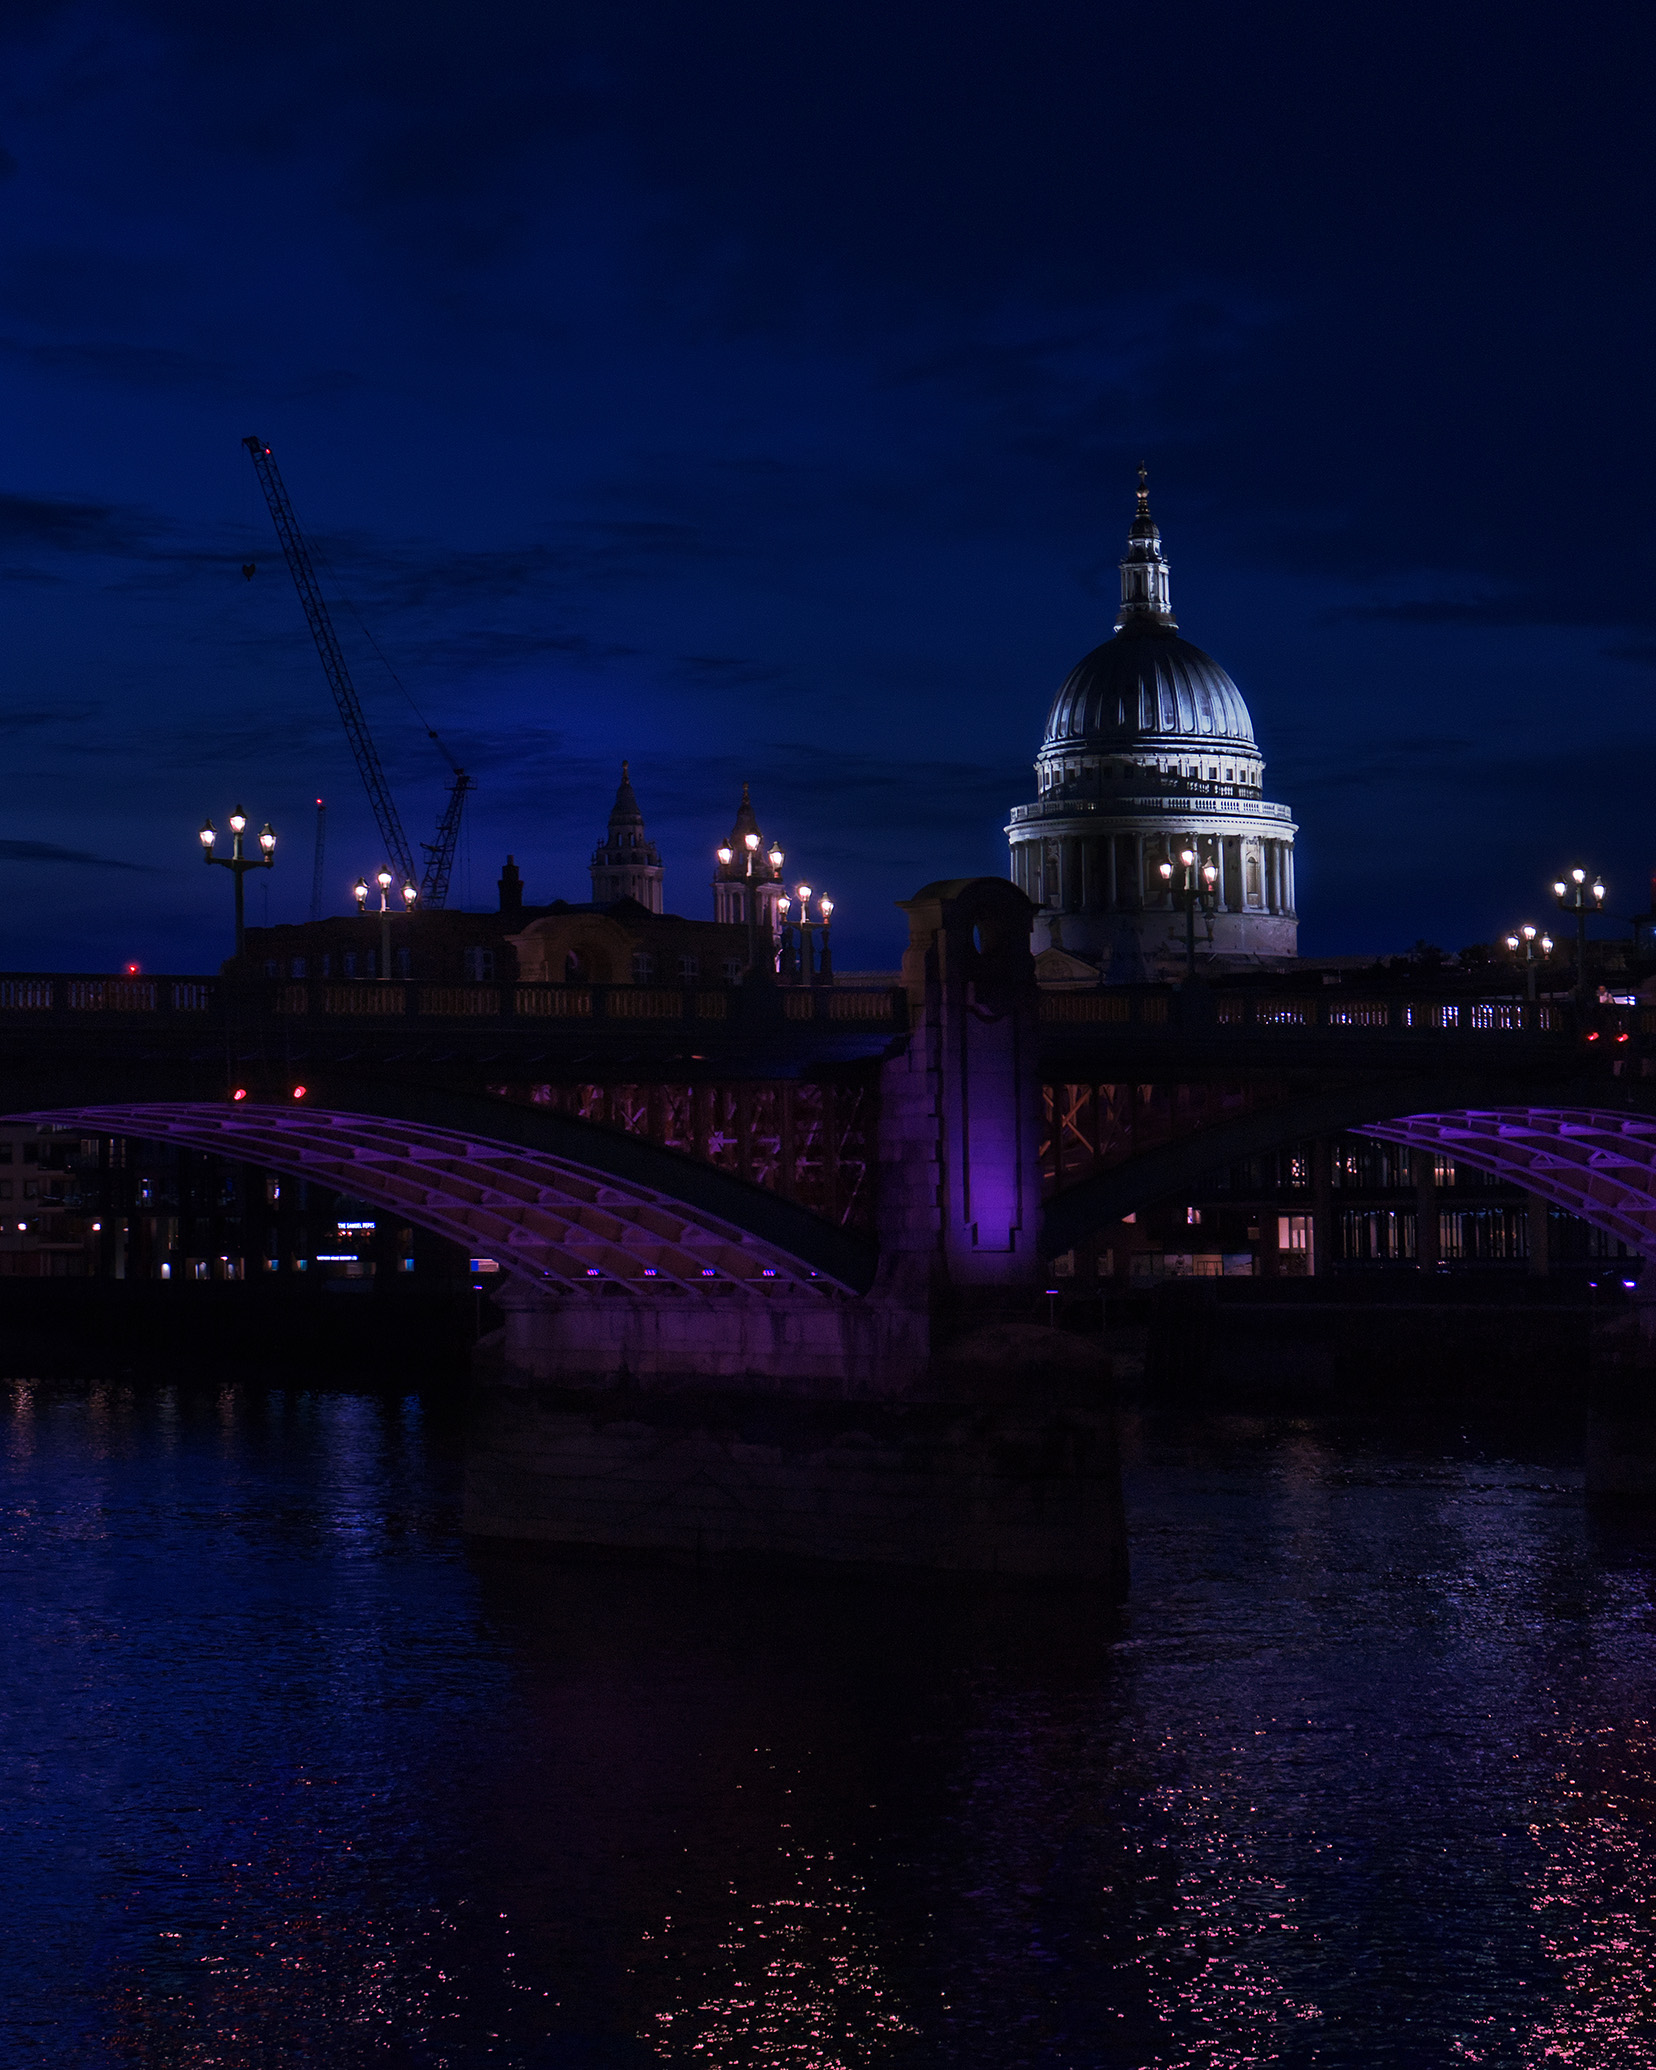
Before and after
Editing steps
1. Change Tonal Curve

Open your RAW file and the Development Persona will open. Affinity automatically sets the Tonal Curve to Apply tone curve, which enhances highlights and contrast. To start with a more neutral base, set the Tonal Curve to Take no action by clicking on the seventh symbol in the headbar.
2. Basic edits
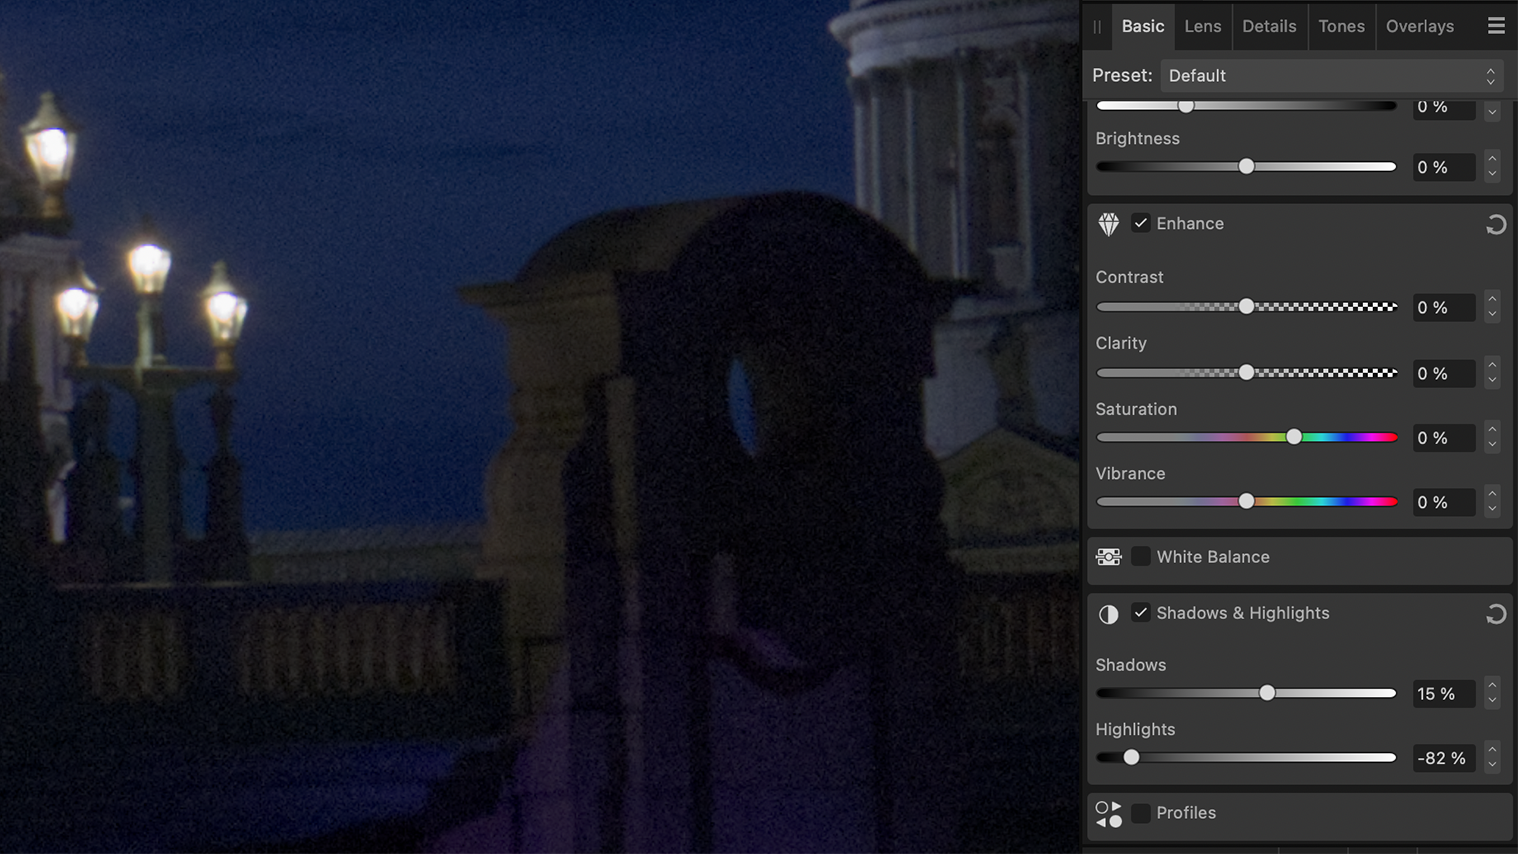
Go to the Basic option and increase the Shadow slider while also decreasing the Highlight slider. Navigate to the Detail option and use the Luminance sliders to reduce image noise. Use the Detail Refinement slider to bring back sharpness. Don’t overdo these settings as it may start to look unnatural.
3. Select midtones
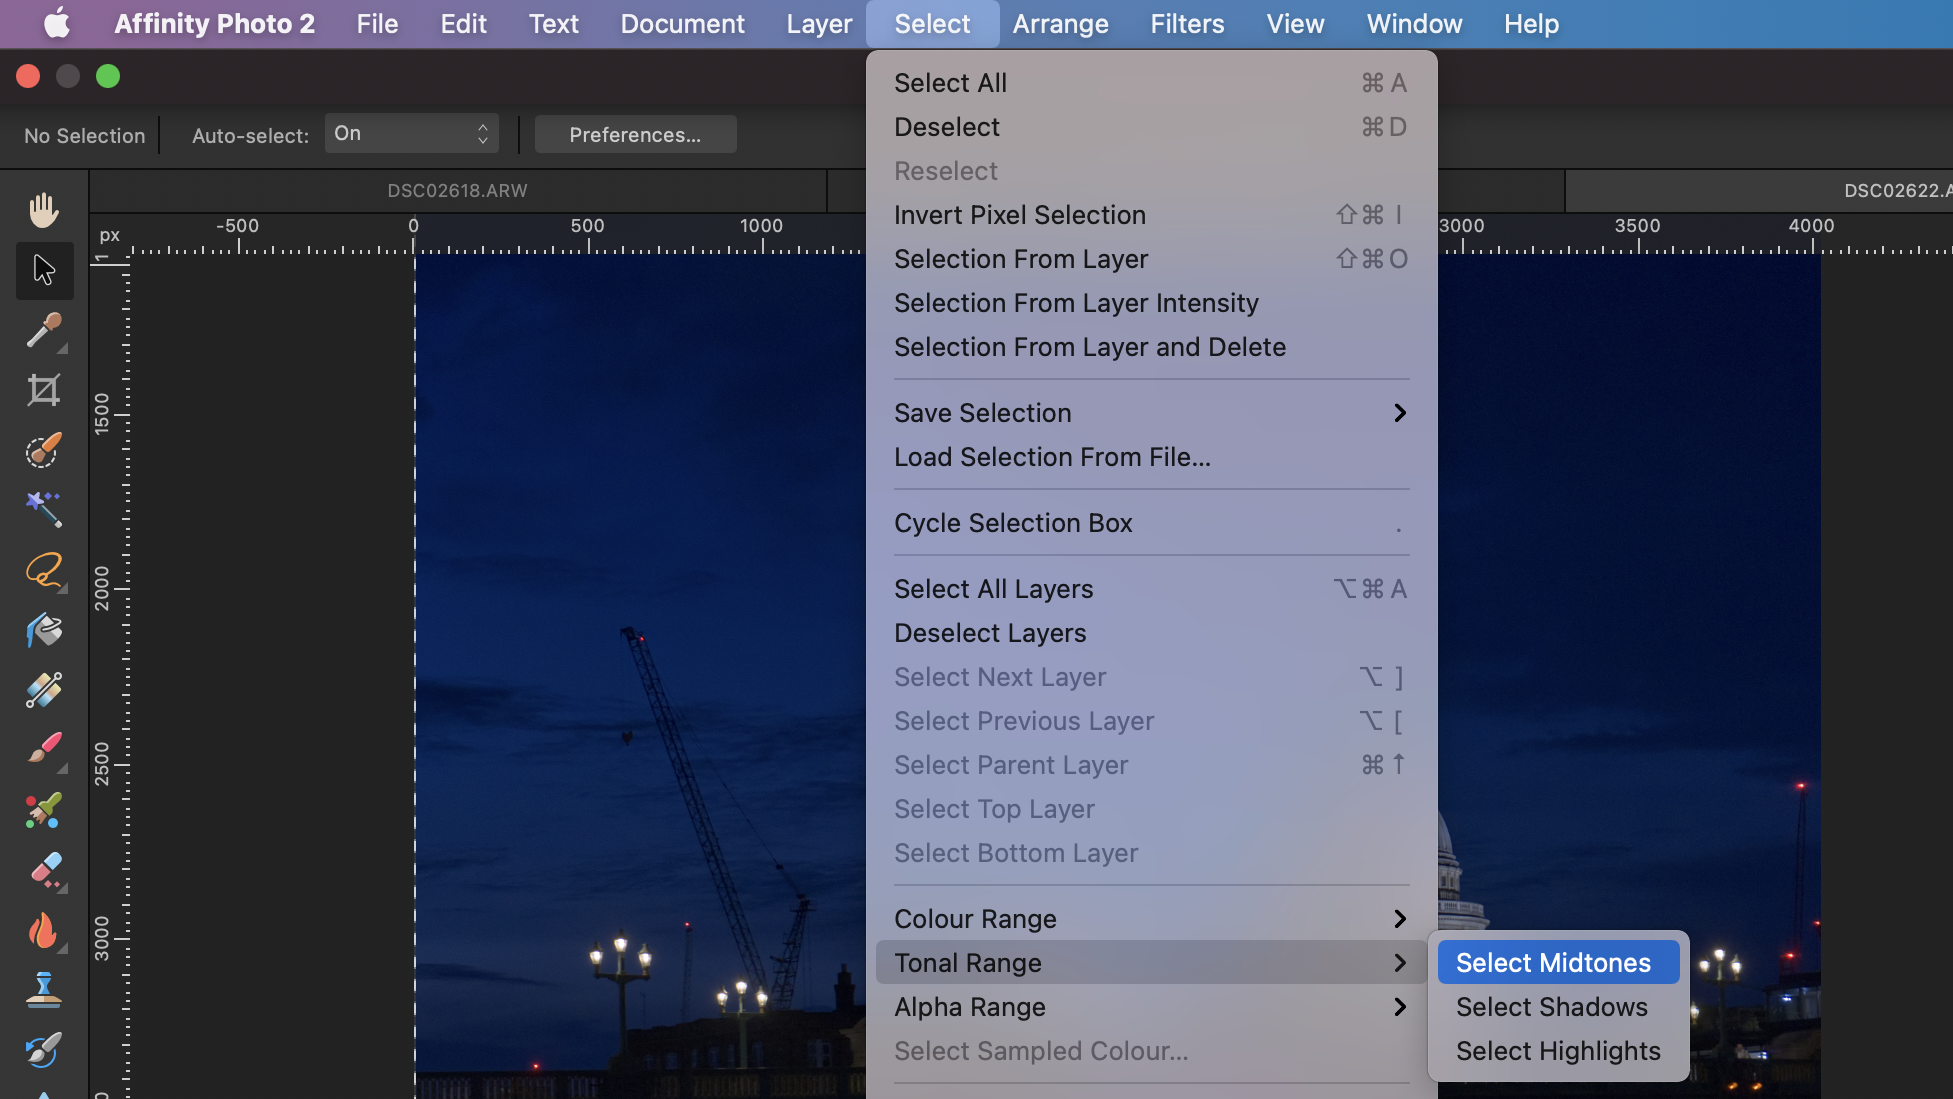
After clicking on the Develop option, it’s time to start working non-destructively on the major edits. Go to the headbar and click on Select. Next, enable the Select Midtones option under the Tonal Range category. This will enable Affinity to autoselect all midtones for you to work on.
4. Bring back midtone contrast
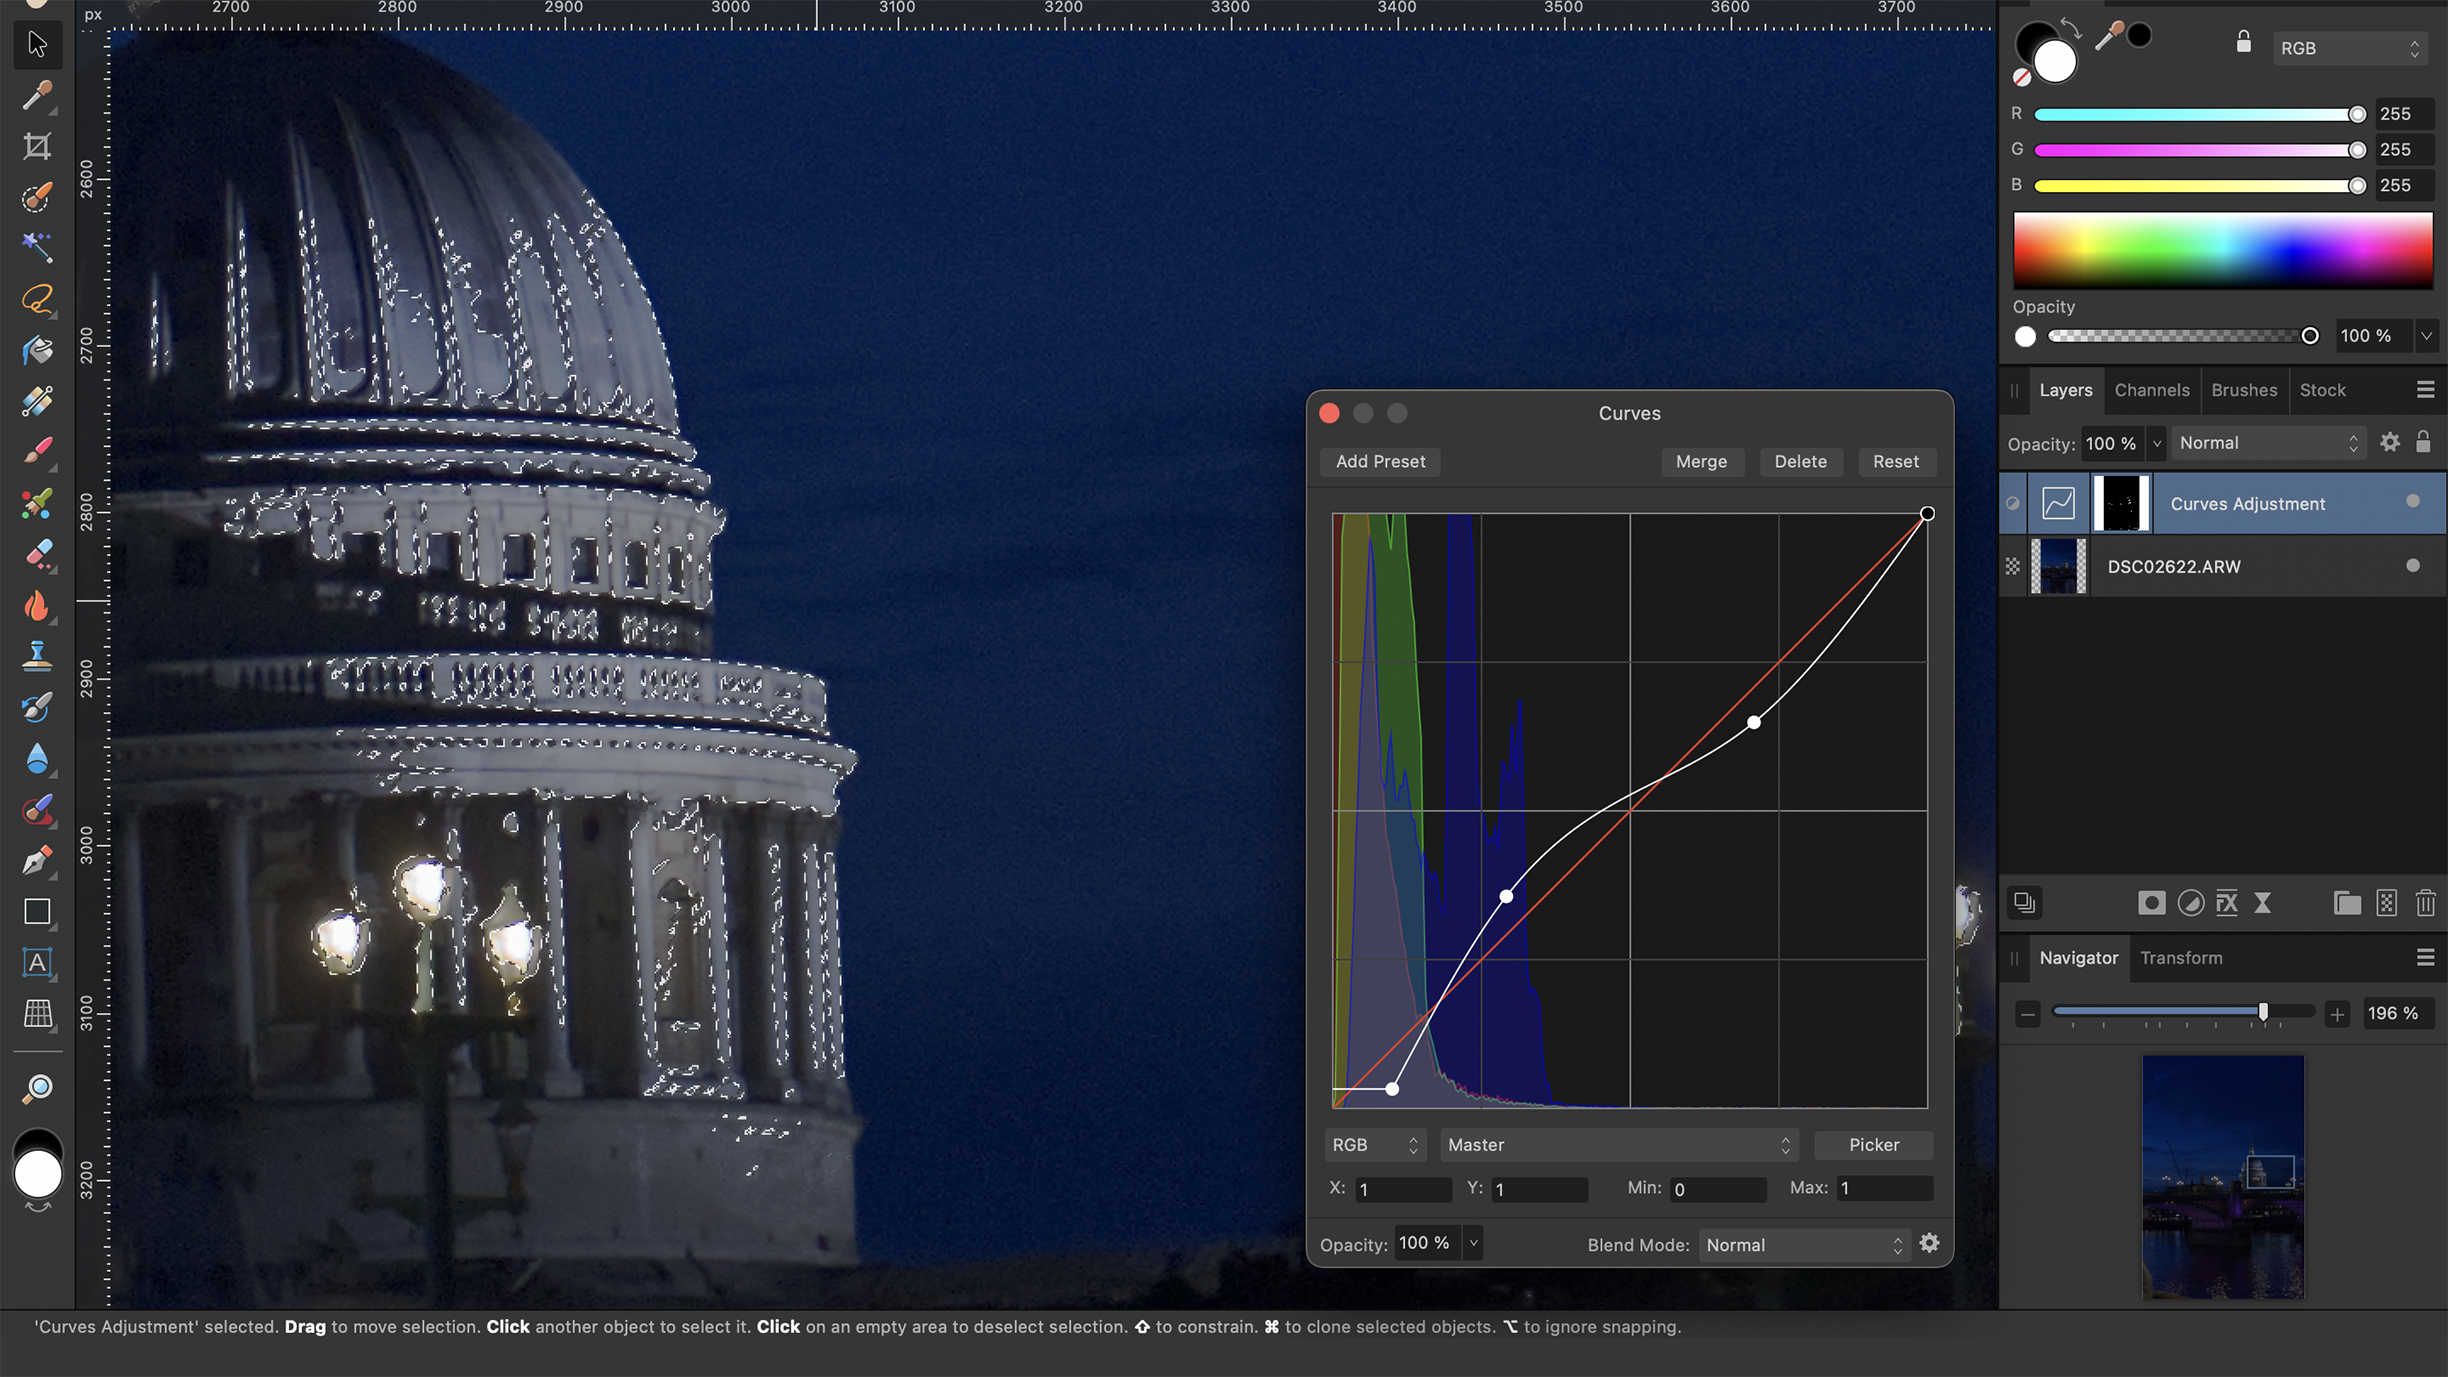
Create a new Pixel Layer above the Background Layer. Add a Curve Adjustment Layer and adjust the anchor points to modify the curve as per your preference. Keep in mind that, for now, you’re only working on the midtones. For the best results, focus on enhancing the contrast.
5. Fine-tune exposure
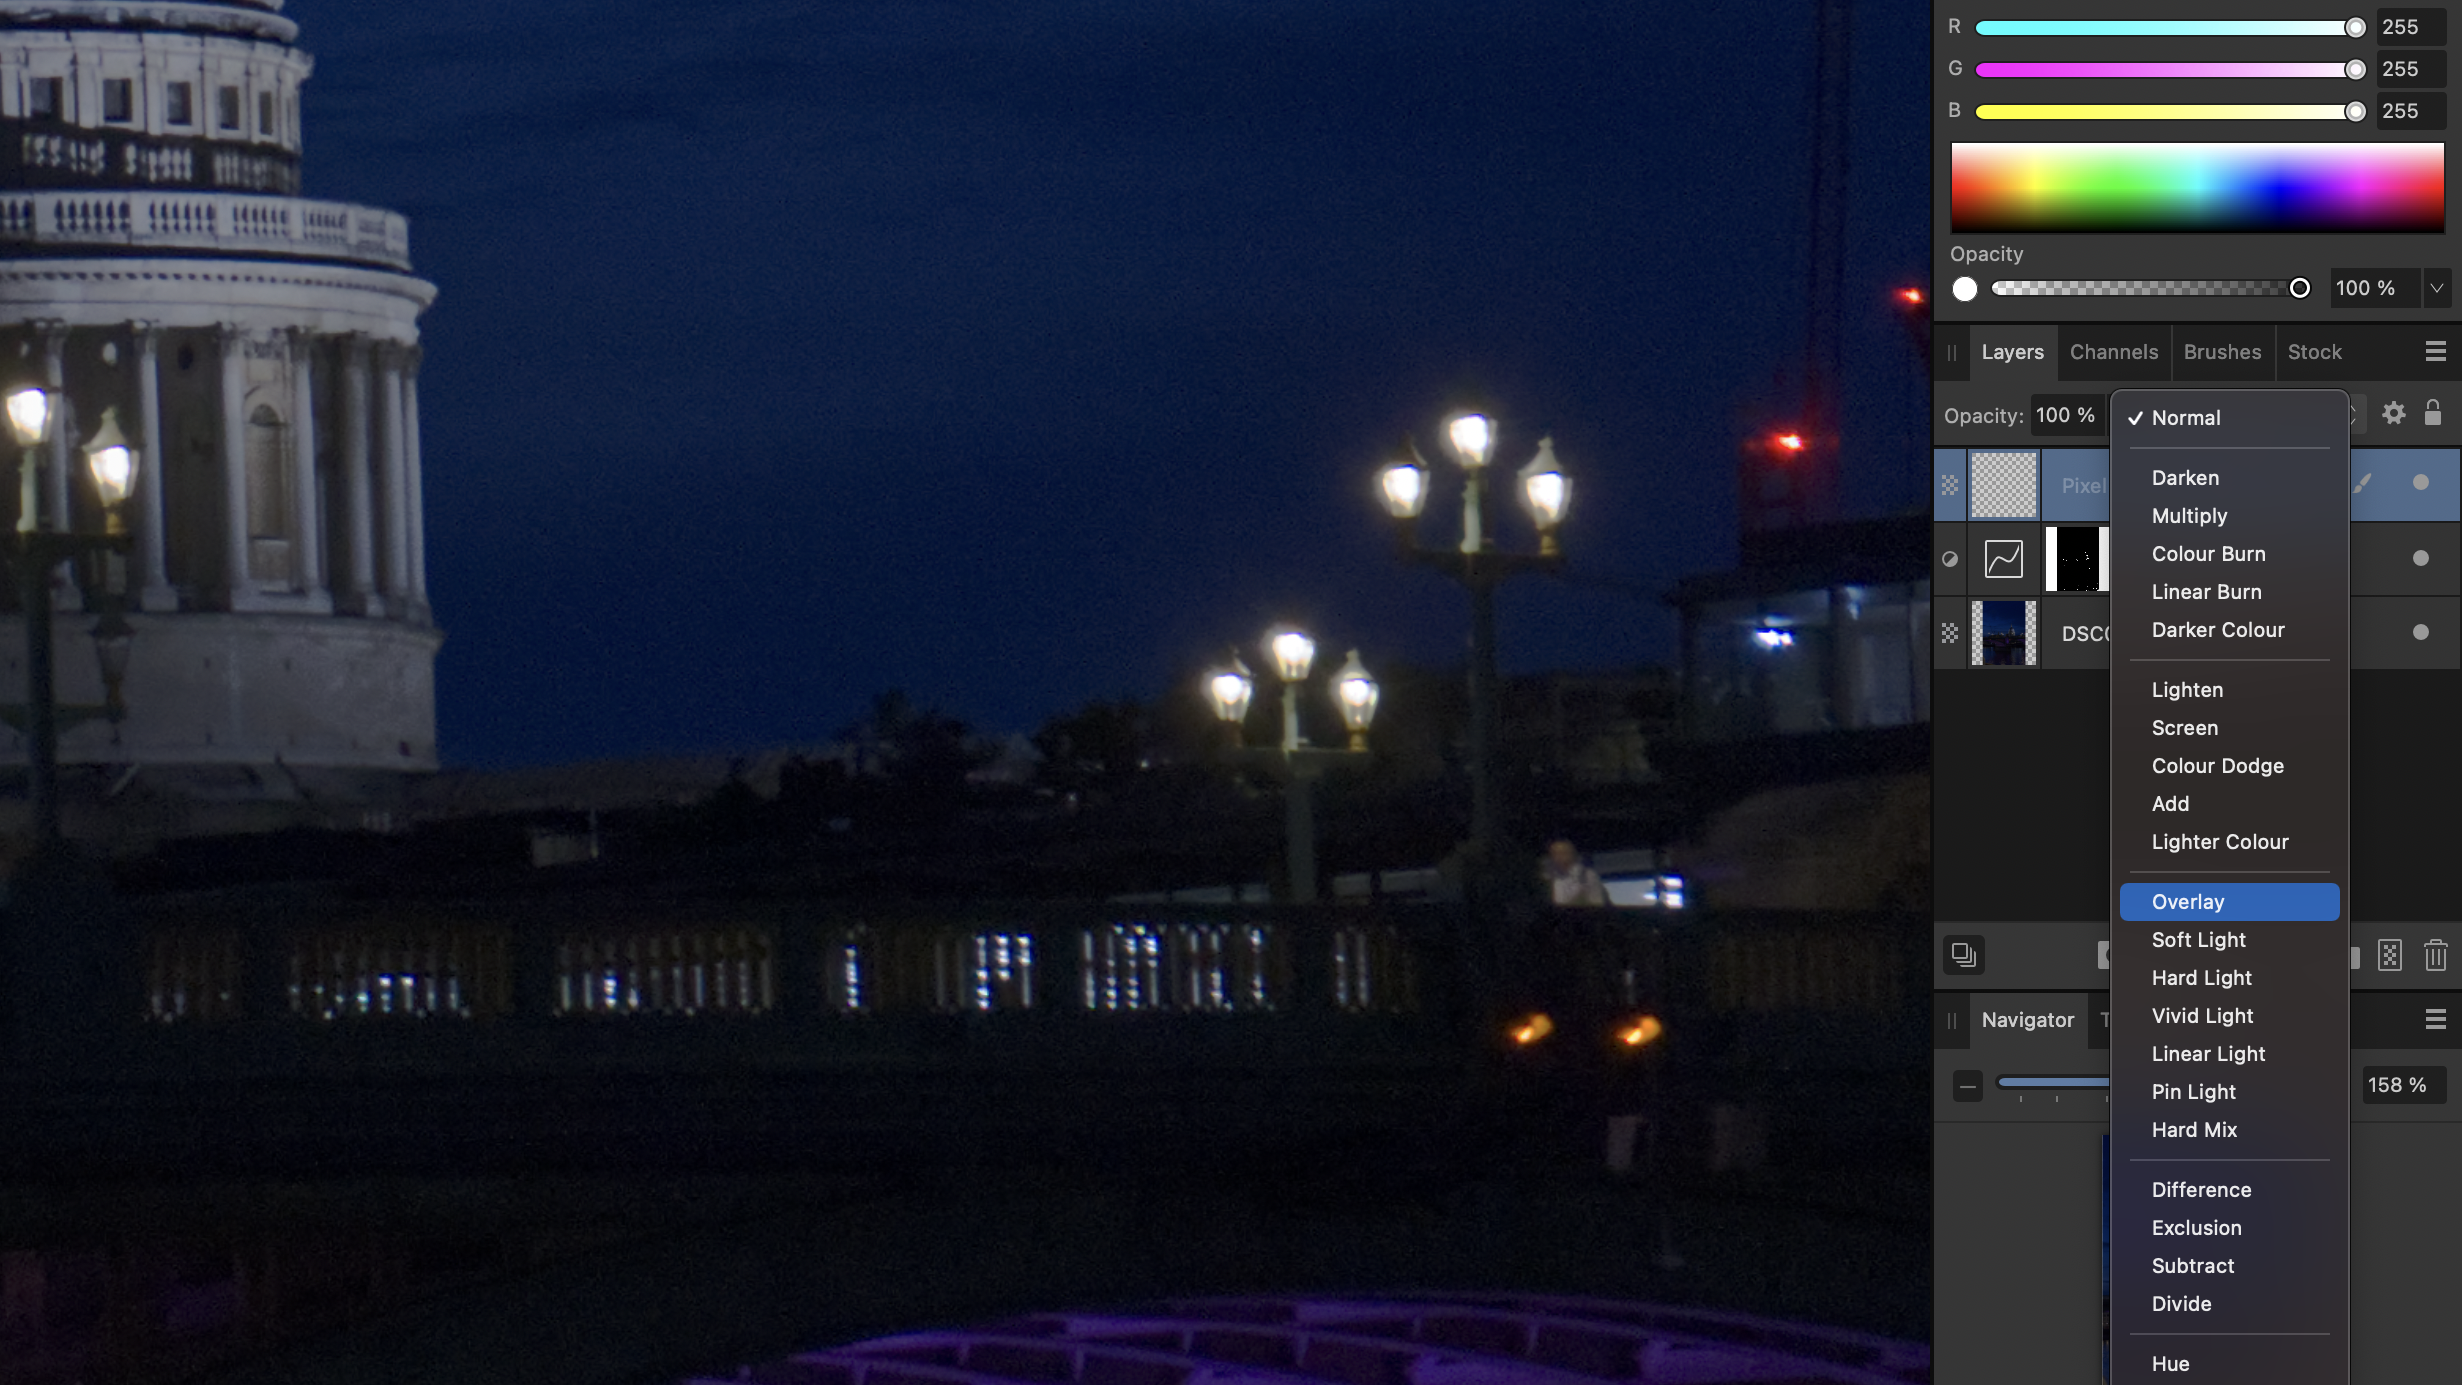
To adjust the exposure of specific image elements, add a Pixel Layer. Change the Blend mode to Overlay and decrease the Opacity to 20%. Select the Brush tool with a soft setting. In the Color Panel, choose White to lighten or Black to darken elements and paint over them.
Key tip
Edit exposure and add colour
Using a soft brush with a White or Black color on a pixel layer above the background layer can do more than simply adjust the brightness of image elements. Using a light or dark shade of the color pink, for example, can enhance the tone of the image, making the colours pop.
You might also like...
Browse the best low-light cameras, the best photo editing software, and the best free photo editing software.