Photographers, video creators, students, and teachers often move files from cameras to Macs through SD cards. One card may hold class photos, event footage, client videos, project images, or everyday work files. So when the Mac suddenly stops reading the card, it is easy to assume the worst.
The issue may be simple. A reader may be loose. A USB-C adapter may be failing. The card may mount for a second and then disappear. In other cases, macOS may show a "disk not readable" or "disk not mounted" message before you can open the files.
A camera card Mac error does not always mean the data is gone. Start with connection checks, avoid formatting, and move to recovery only when the card or files still cannot be accessed.
Start with simple connection fixes
Before assuming the SD card is damaged, check the connection.
Try another SD card reader or USB adapter. Use a different USB-C or USB-A port on the MacBook. If the card is in a built-in MacBook SD slot, remove it, check for dust or debris, and insert it again carefully. If another Mac is available, test the card there as well.
A weak reader or dirty slot is a common cause of a Mac SD card reader fix issue. If the card works with another reader, the adapter or card slot is probably the problem, not the card.
Check whether the card appears in Disk Utility
Open Disk Utility and check whether the card appears in the sidebar. If it appears but does not mount, try mounting it manually. If Disk Utility shows an error, do not format the card before recovery.
This step matters when the card contains RAW photos, JPEG files, video clips, or project media. Formatting too early can make recovery harder, especially if the files have not been copied anywhere else.
Do not format the card yet
If macOS says the card is unreadable, corrupted, or needs to be formatted, do not confirm the prompt right away. Formatting may rebuild the file system and reduce the chance of recovering the original files.
Also avoid Terminal commands unless you know exactly what they do. Some repair commands can change the card structure. When the card holds important media, protect the data first and repair later.
Common reasons a Mac cannot read a camera card
MacBook SD slot recovery problems can come from several places:
- A faulty card reader or adapter
- Dirty or damaged card contacts
- A damaged file system on the card
- Removing the card while files were still being written
- Moving the same card between camera and computer without safe ejecting
- A card formatted in a file system the Mac does not handle well
- Power loss, failed transfer, or incomplete file import
These problems are common in camera workflows. Some can be solved with basic troubleshooting. Others need a recovery scan before the card is repaired or formatted.
When the Mac is the problem, not the card
Sometimes the SD card is fine and the Mac is the issue. A macOS disk mount issue can appear after a system update, after connecting too many external devices, or after using a hub that does not provide stable power.
If the Mac is not detecting any external disks, restart it and reconnect the card. If the card mounts on another Mac but not on yours, the issue may be the USB-C port, adapter, SD slot, macOS settings, or the hub.
If the card is detected but the files are missing, damaged, or inaccessible, move to a recovery workflow.
Where Wondershare Recoverit fits
Wondershare Recoverit is relevant when the card is visible but files are lost, deleted, formatted, or inaccessible. Its Mac recovery page covers deleted files on macOS. Its memory card recovery page covers SD, SDHC, SDXC, microSD, and other camera storage cards.
If files were lost from Mac storage after a failed card transfer, you can use Recoverit to recover deleted files on Mac. If the problem is the camera card itself, Recoverit can support Mac sd card recovery by scanning the affected card.
This is useful for camera users, photographers, vloggers, and creators who need to recover photos, videos, or other media files from a card that was unreadable, formatted, or disconnected too early.
How to use Recoverit for Mac SD card recovery
- Connect the SD card safely.
Use a reliable reader or adapter. If the card does not mount, try another reader or port before scanning. Do not format the card when macOS prompts you.
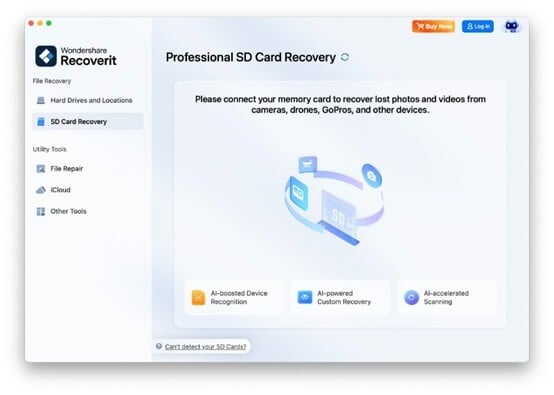
- Open Recoverit on your Mac.
Select the SD card or external storage device as the scan location.
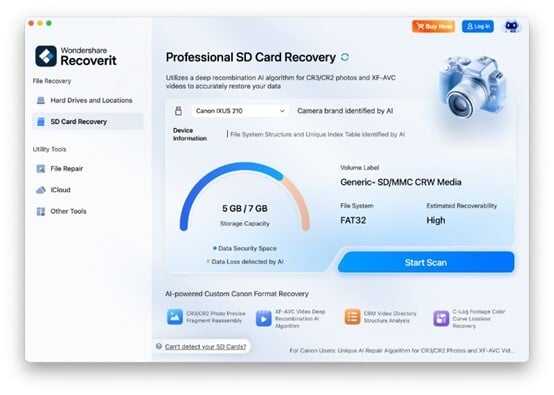
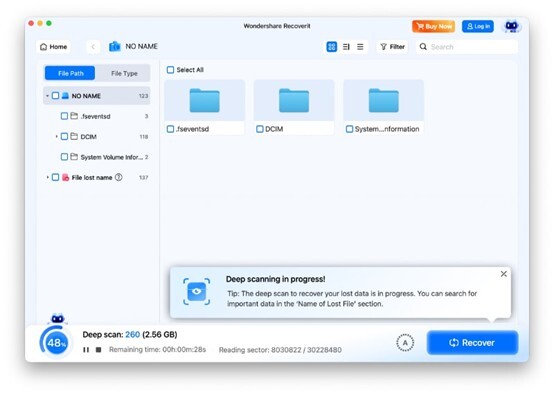
- Start the scan.
Let Recoverit search for deleted, formatted, or missing files. For camera cards with large photos or long video clips, allow the scan to finish.
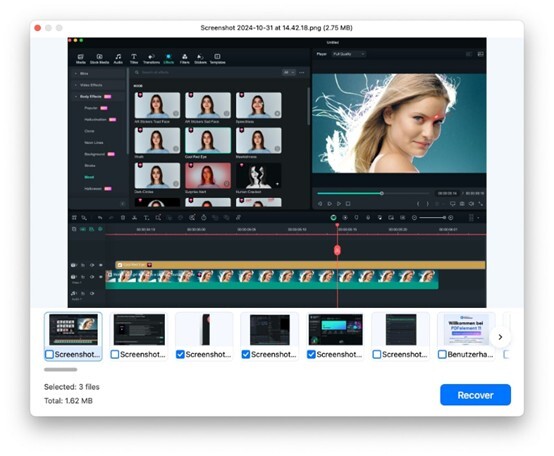
- Preview and filter results.
Search by file type, name, date, size, or folder structure. Photographers may look for RAW and JPEG files. Video creators may search for MOV, MP4, or other camera video formats.
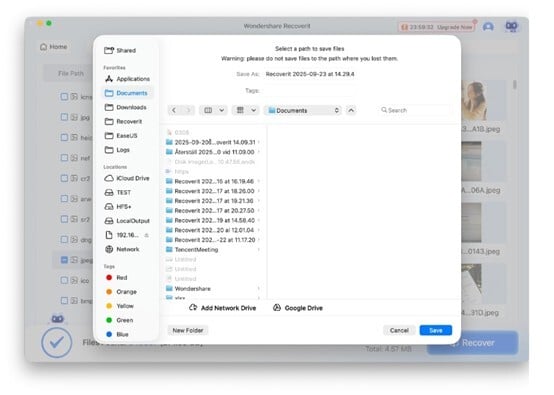
- Recover files to another drive.
Save recovered media to your Mac, an external SSD, or another storage device. Do not save recovered files back to the same SD card during recovery.
- Check the recovered media.
Open photos, play video clips, and confirm the files are complete before using the card again.
After recovery, fix the card or reader problem
Once the files are safe, deal with the original issue. Back up the recovered files first. If the card keeps failing, replace it. If the card works but the reader or adapter is unreliable, switch to a better one.
For ongoing work, eject the card safely before removing it. Avoid pulling the card during transfers. Keep a backup routine for camera projects, especially after paid shoots, school events, or long video sessions.
Prevent future camera card errors on Mac
Photographers and video creators can reduce future errors by formatting cards inside the camera instead of moving them between devices randomly. Back up important shoots before clearing cards. Label cards by project so used cards and empty cards do not get mixed up.
Mac SD card reader fix problems are stressful, but the recovery path should stay simple: check the reader, avoid unnecessary formatting, recover files before repair, and save restored media somewhere safe.