In the first part of this tutorial, we took a deep dive into how Logic Pro’s stock synthesiser Alchemy generates sound. Hopefully you now have an understanding of Alchemy’s principles and how it generates tones.
In this tutorial, we'll explore the various ways in which Alchemy allows us to affect, modulate and manipulate sounds beyond what is capable in the Source section alone.
Alchemy supports numerous modulation and envelope controlling pathways. To assign them, simply right-click on the desired dial/knob and select which modulator or envelope you wish to control it with.
There is a wide range of modulators to choose from. Let’s take a look at what they are and how they work.
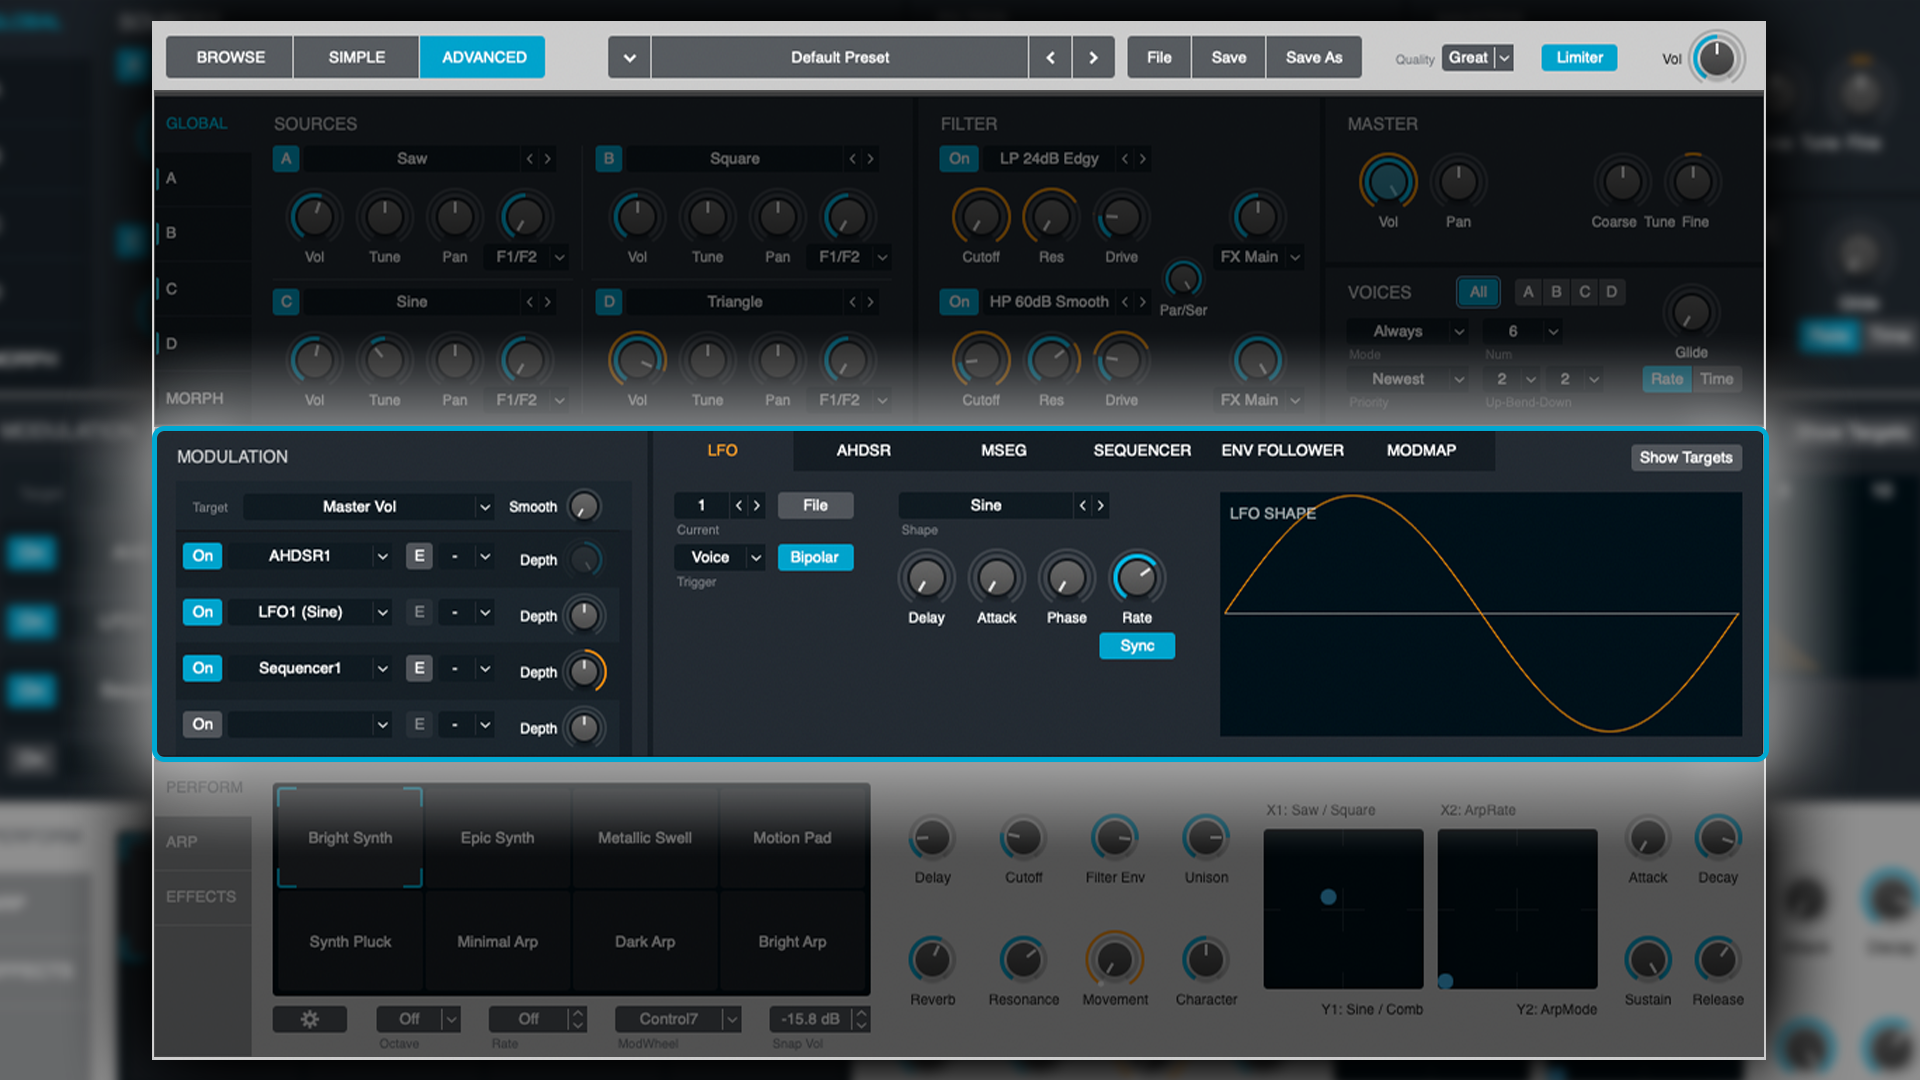
LFOs
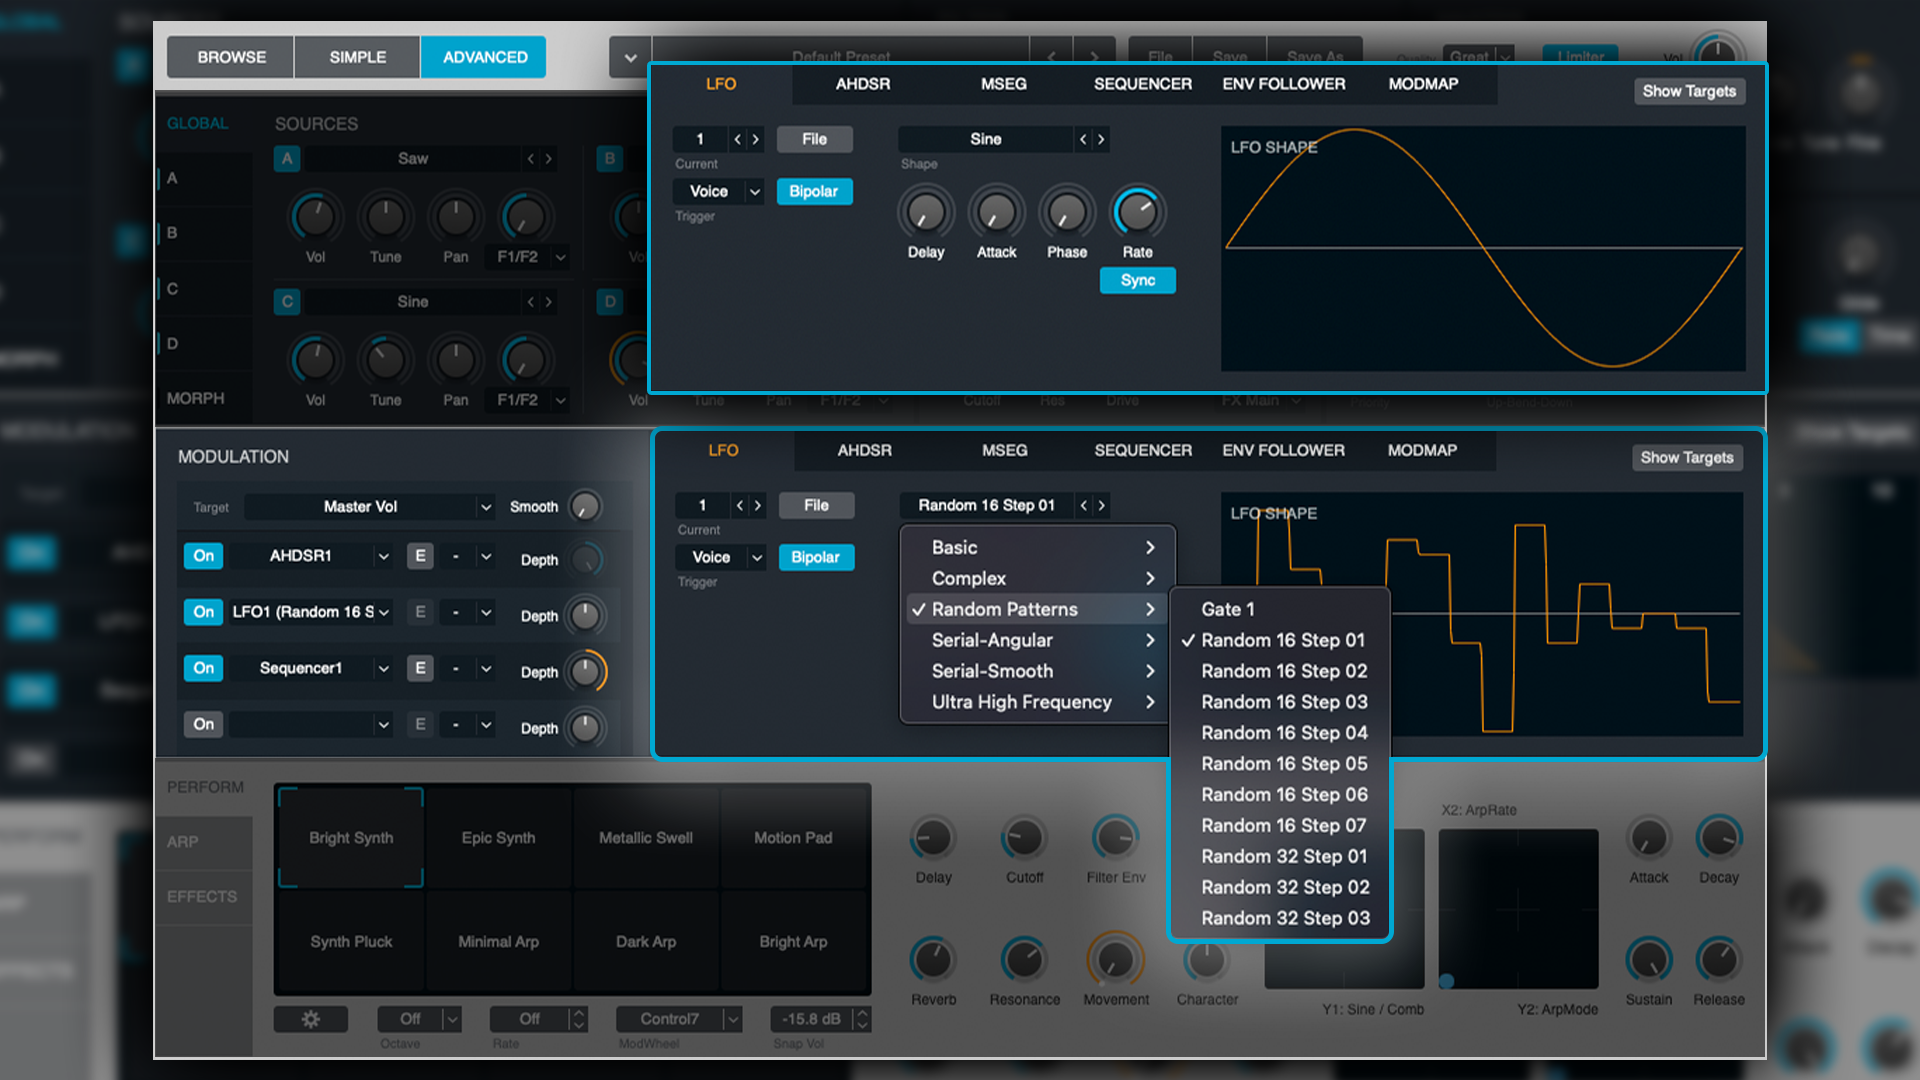
Alchemy supports seven LFOs, each of which hosts a whopping 72 waveforms to choose from. These range from conventional or Basic through to bizarre and randomised waveforms that can produce fascinating results.
As you might expect, you can assign LFOs to standard things such as amplitude/volume, filter cutoff, pitch, etc. However, you can also assign these LFOs to the parameters of the Sources, meaning you can modulate things such as Formants or Spectral effects. The possibilities here are near limitless.
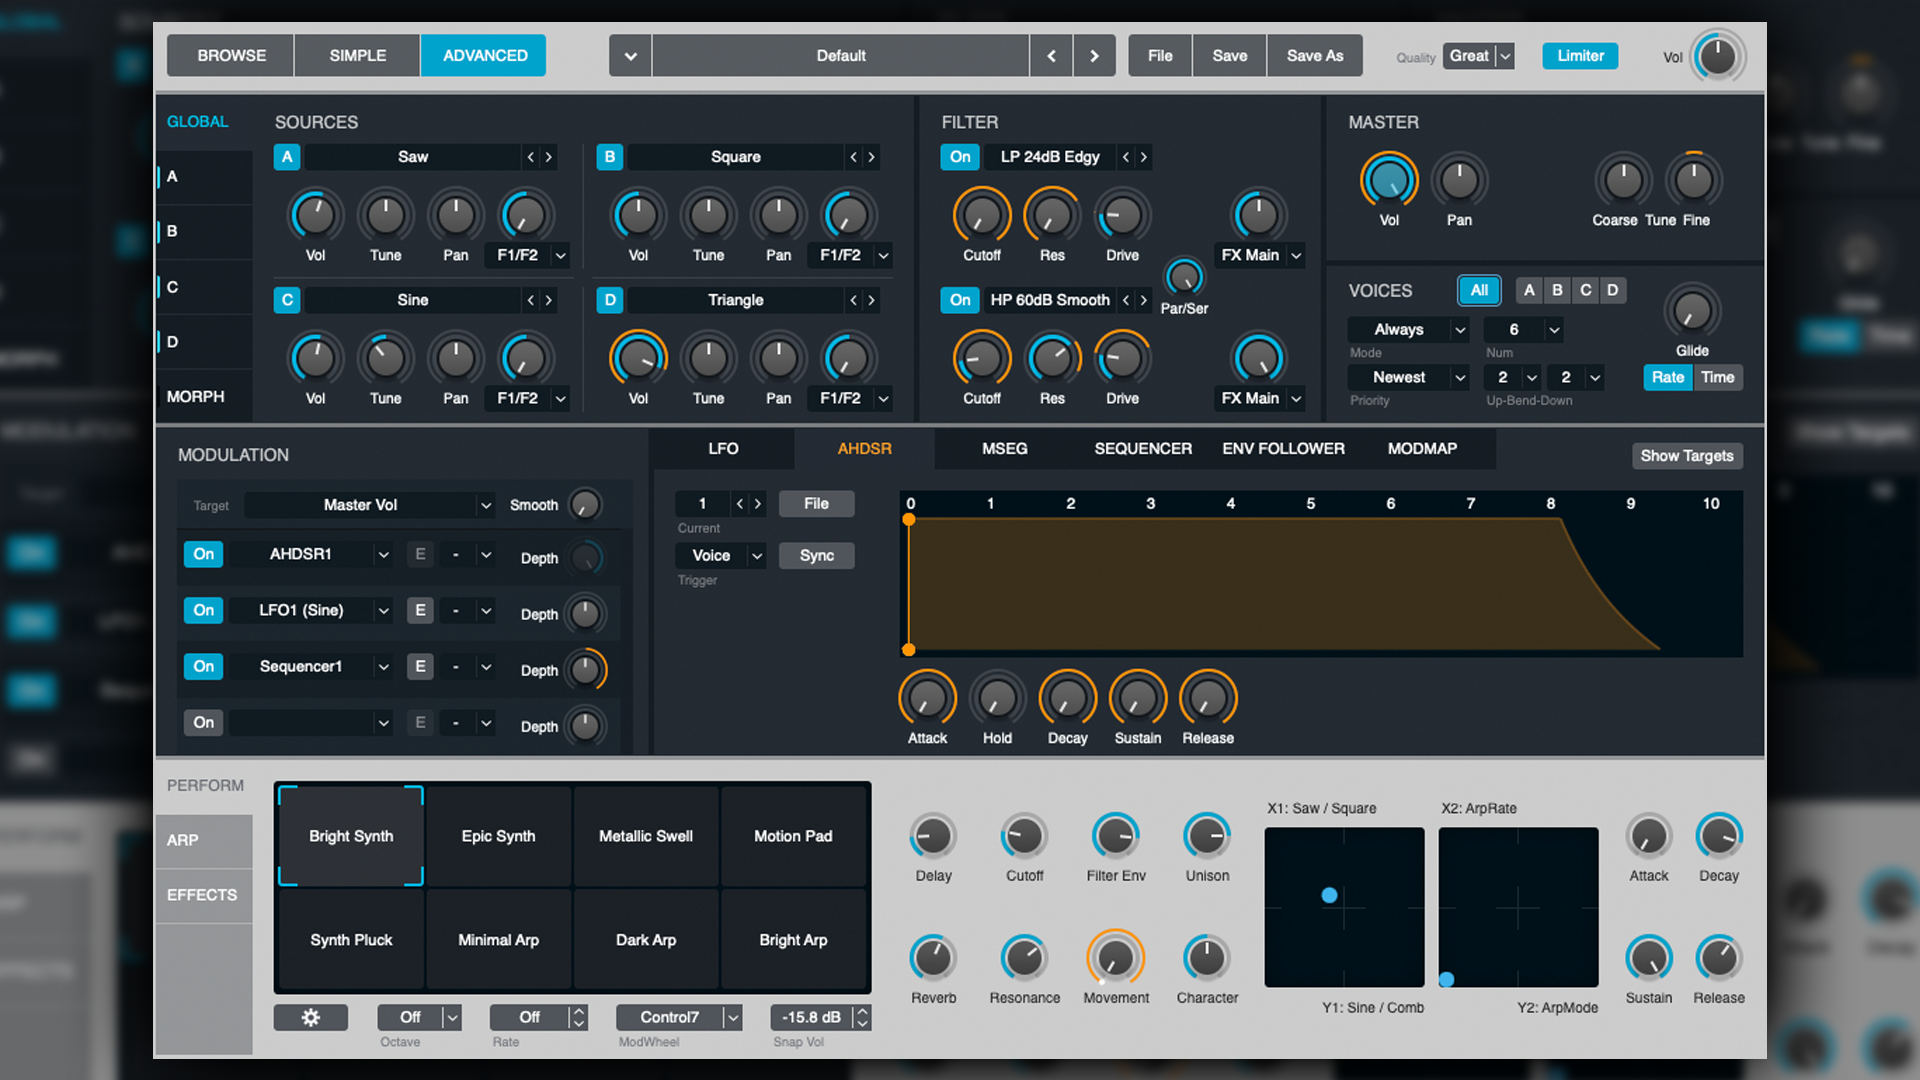
AHDSR Envelope
Think of this like a conventional ADSR envelope, with an additional step, called Hold, between Attack and Decay.
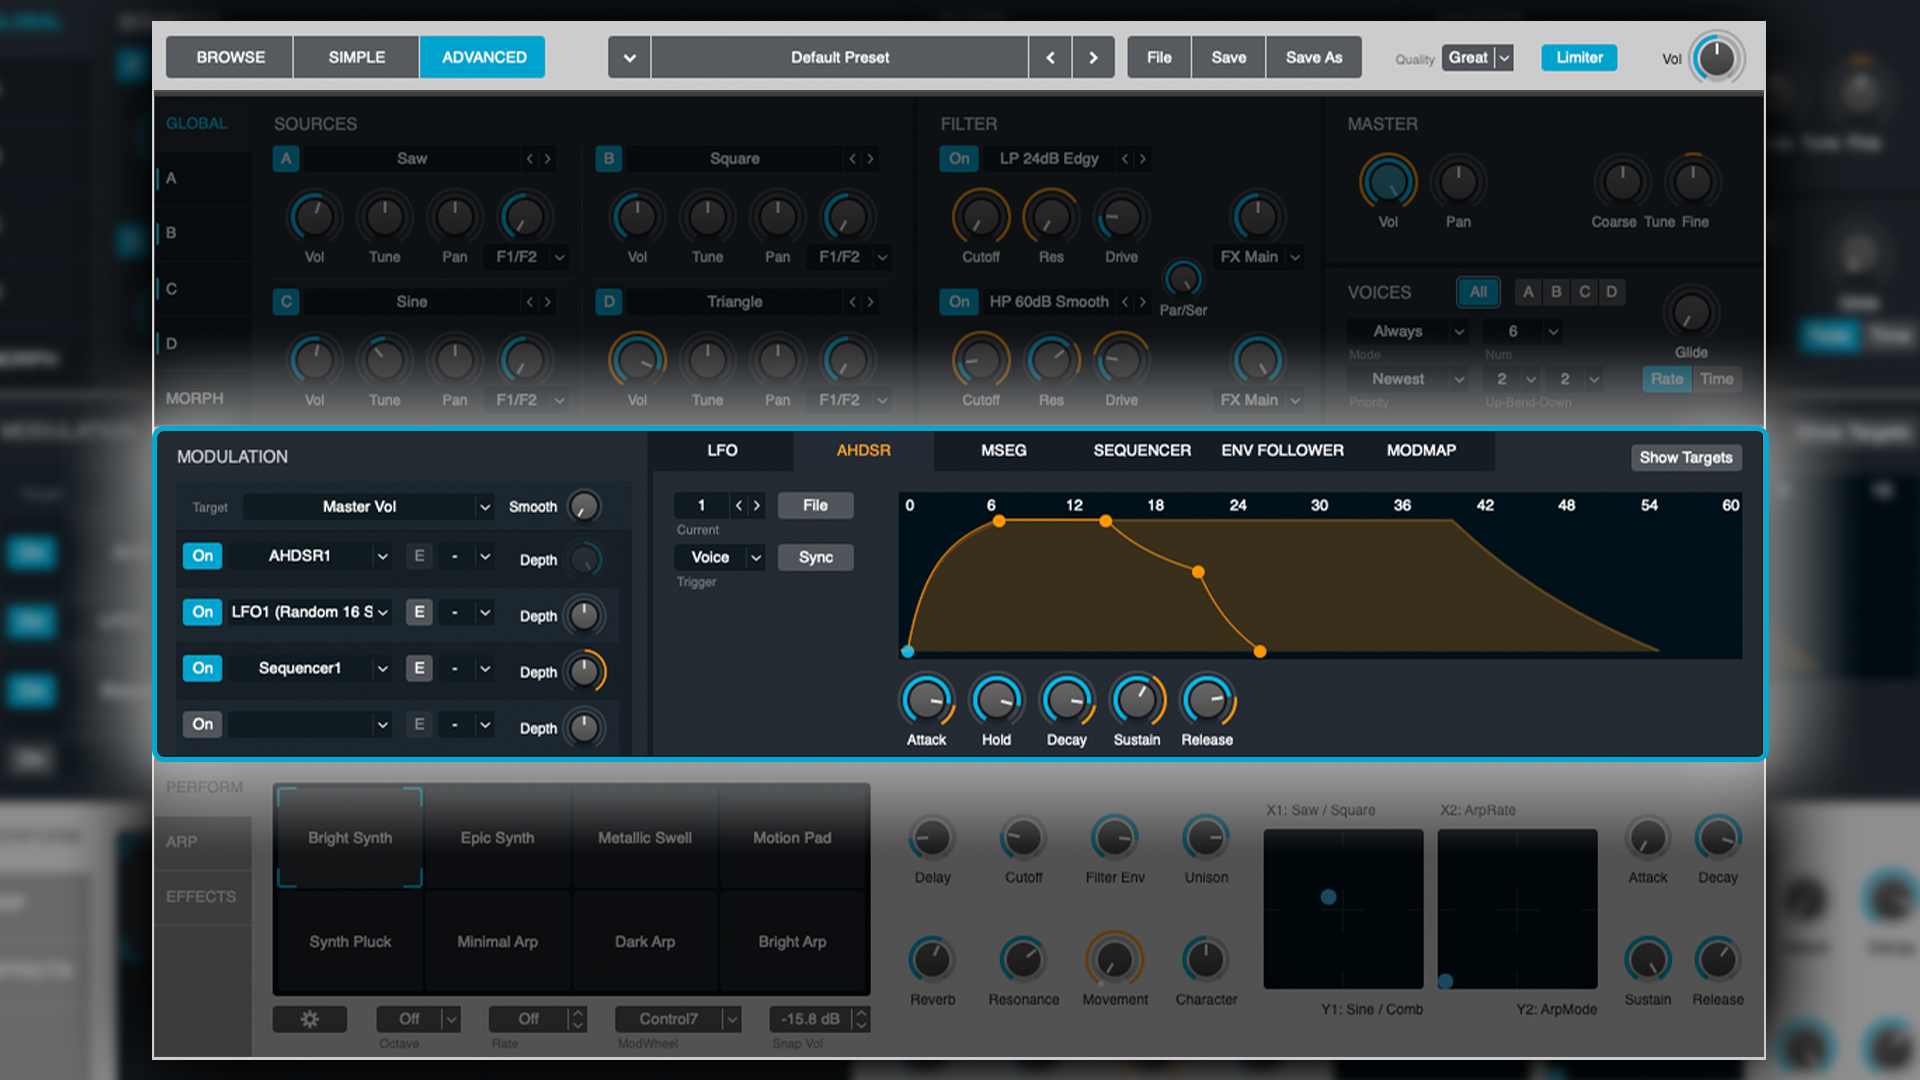
The advantage of having the Hold stage is that it allows the Decay and Sustain stages to be handled like a secondary swell of sorts. A good use could be having something like the stereo width of a granular Source expand, Hold in an expanded setting for a brief period before thinning for later phase of the tone’s duration.
MSEG
The Multi Stage Envelope Generator is actually simpler than it sounds! If you’ve ever used the TAL-NoiseMaker, it’s essentially the same as that synth’s Envelope Editor. Much like drawing an automation curve, you click on the line to create waypoints, and then manipulate their position to create a curve to your desired envelope shape.
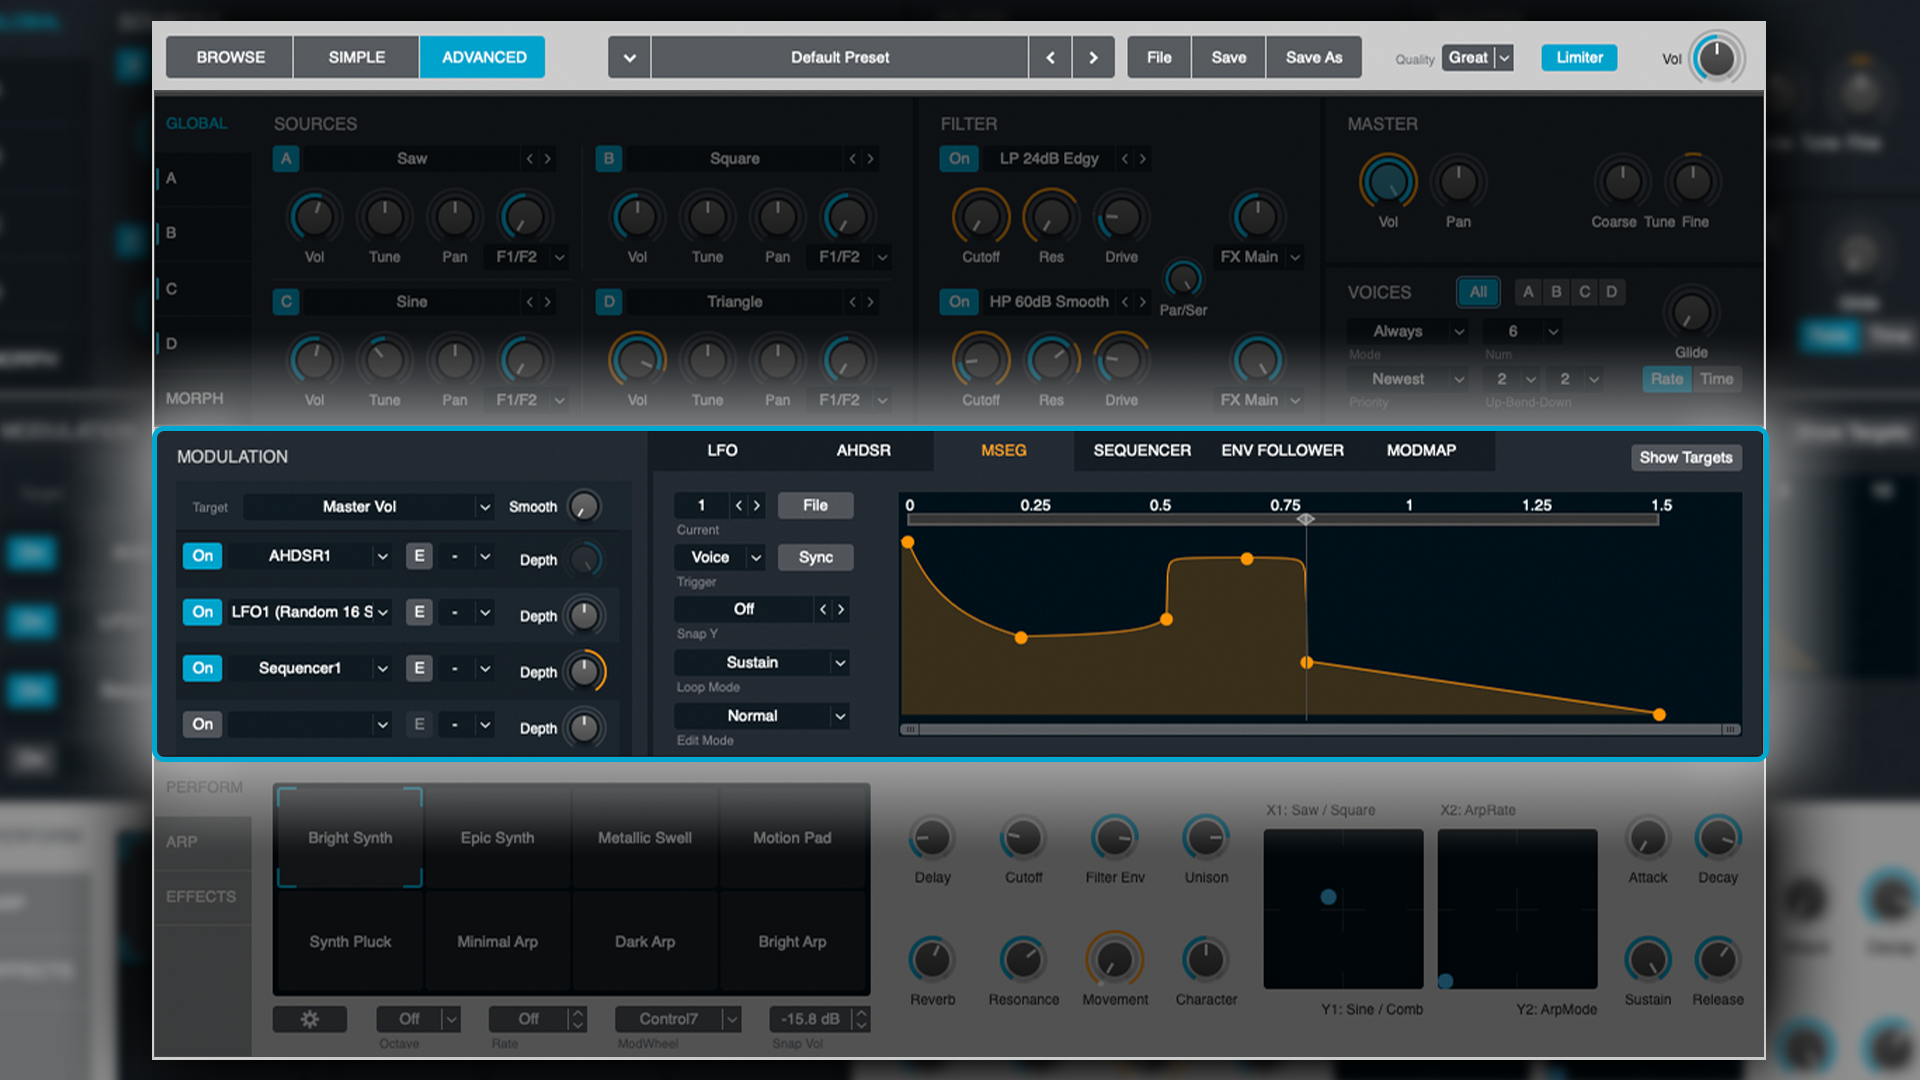
You can control the speed with which the envelope is read, as well as the direction and behaviour with which it tracks/reads; one-shot (loop-off), continuous loop, forward/back, sustain.
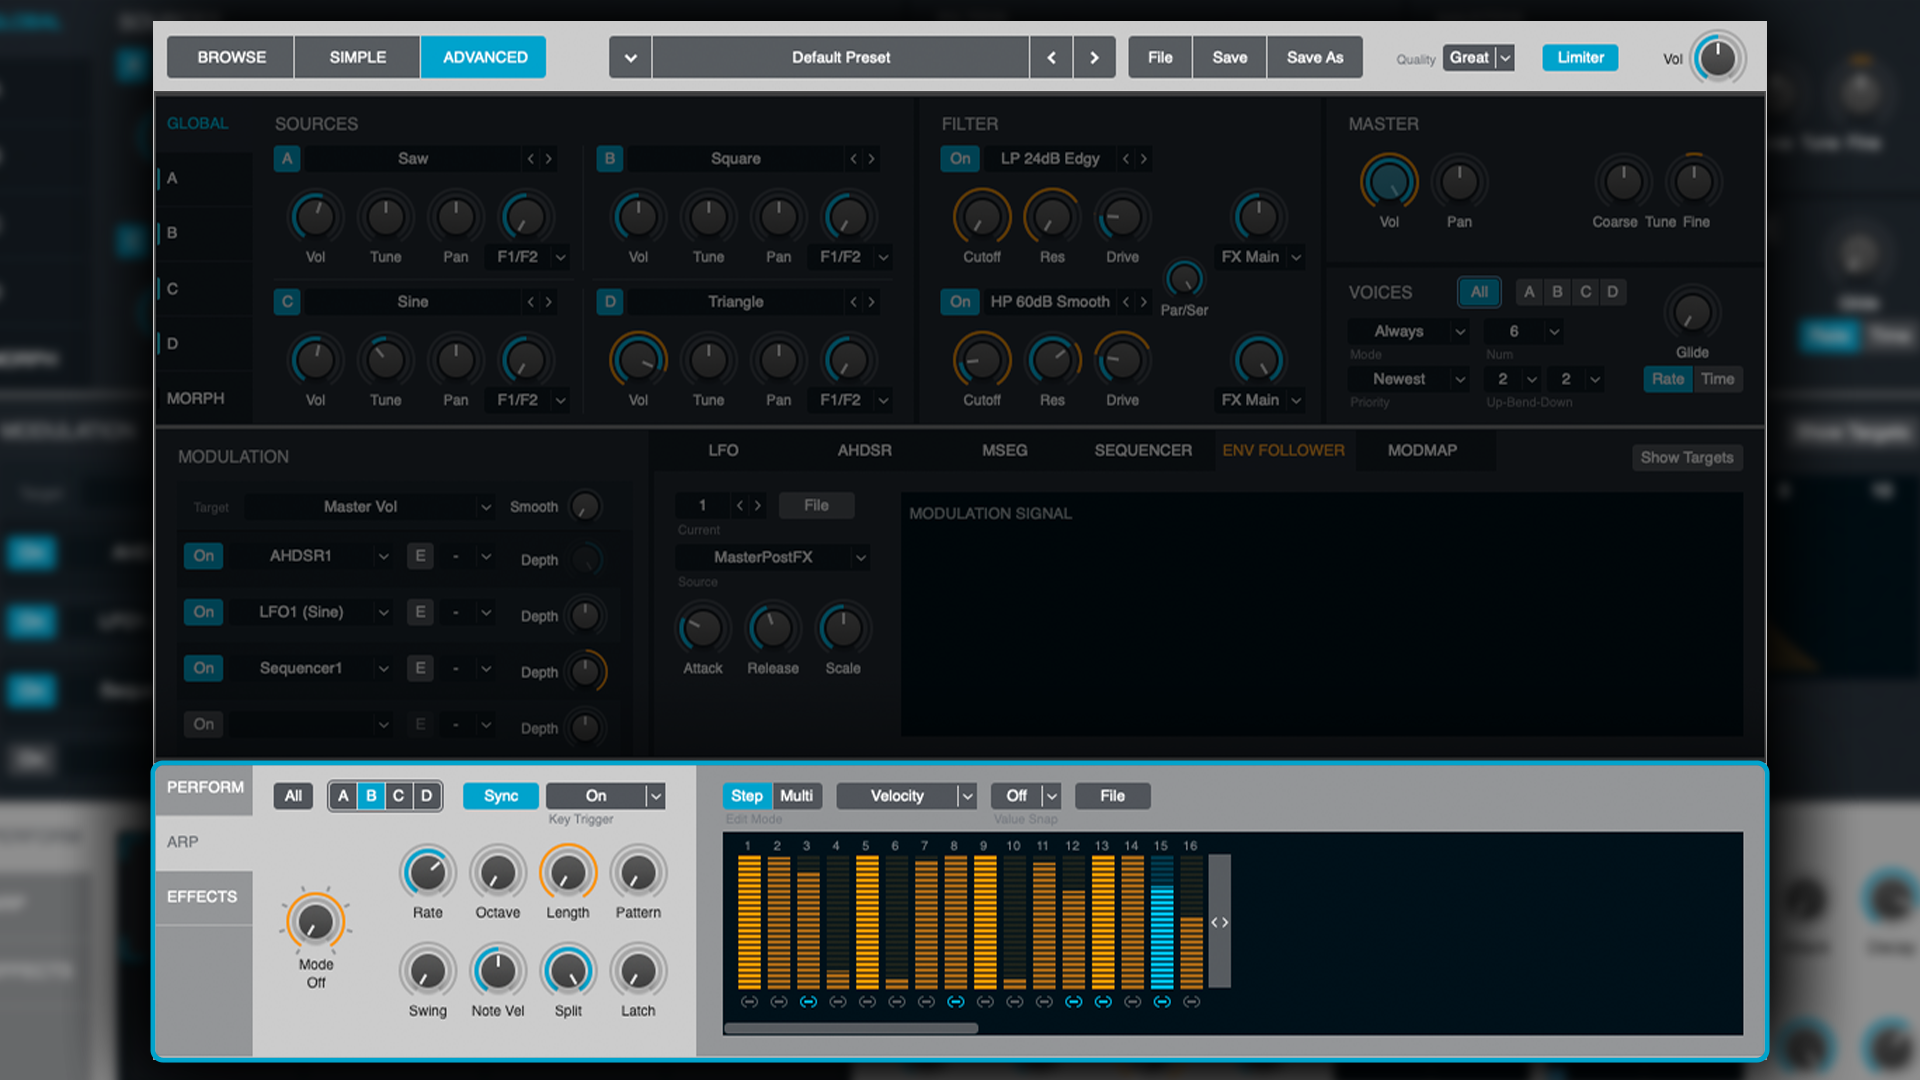
Envelope Follower
The ENV Follower is an envelope that opens/closes based on the amplitude of a waveform from a chosen sound-source, i.e. the signal envelopes itself based on the synthesiser’s own sound generation.
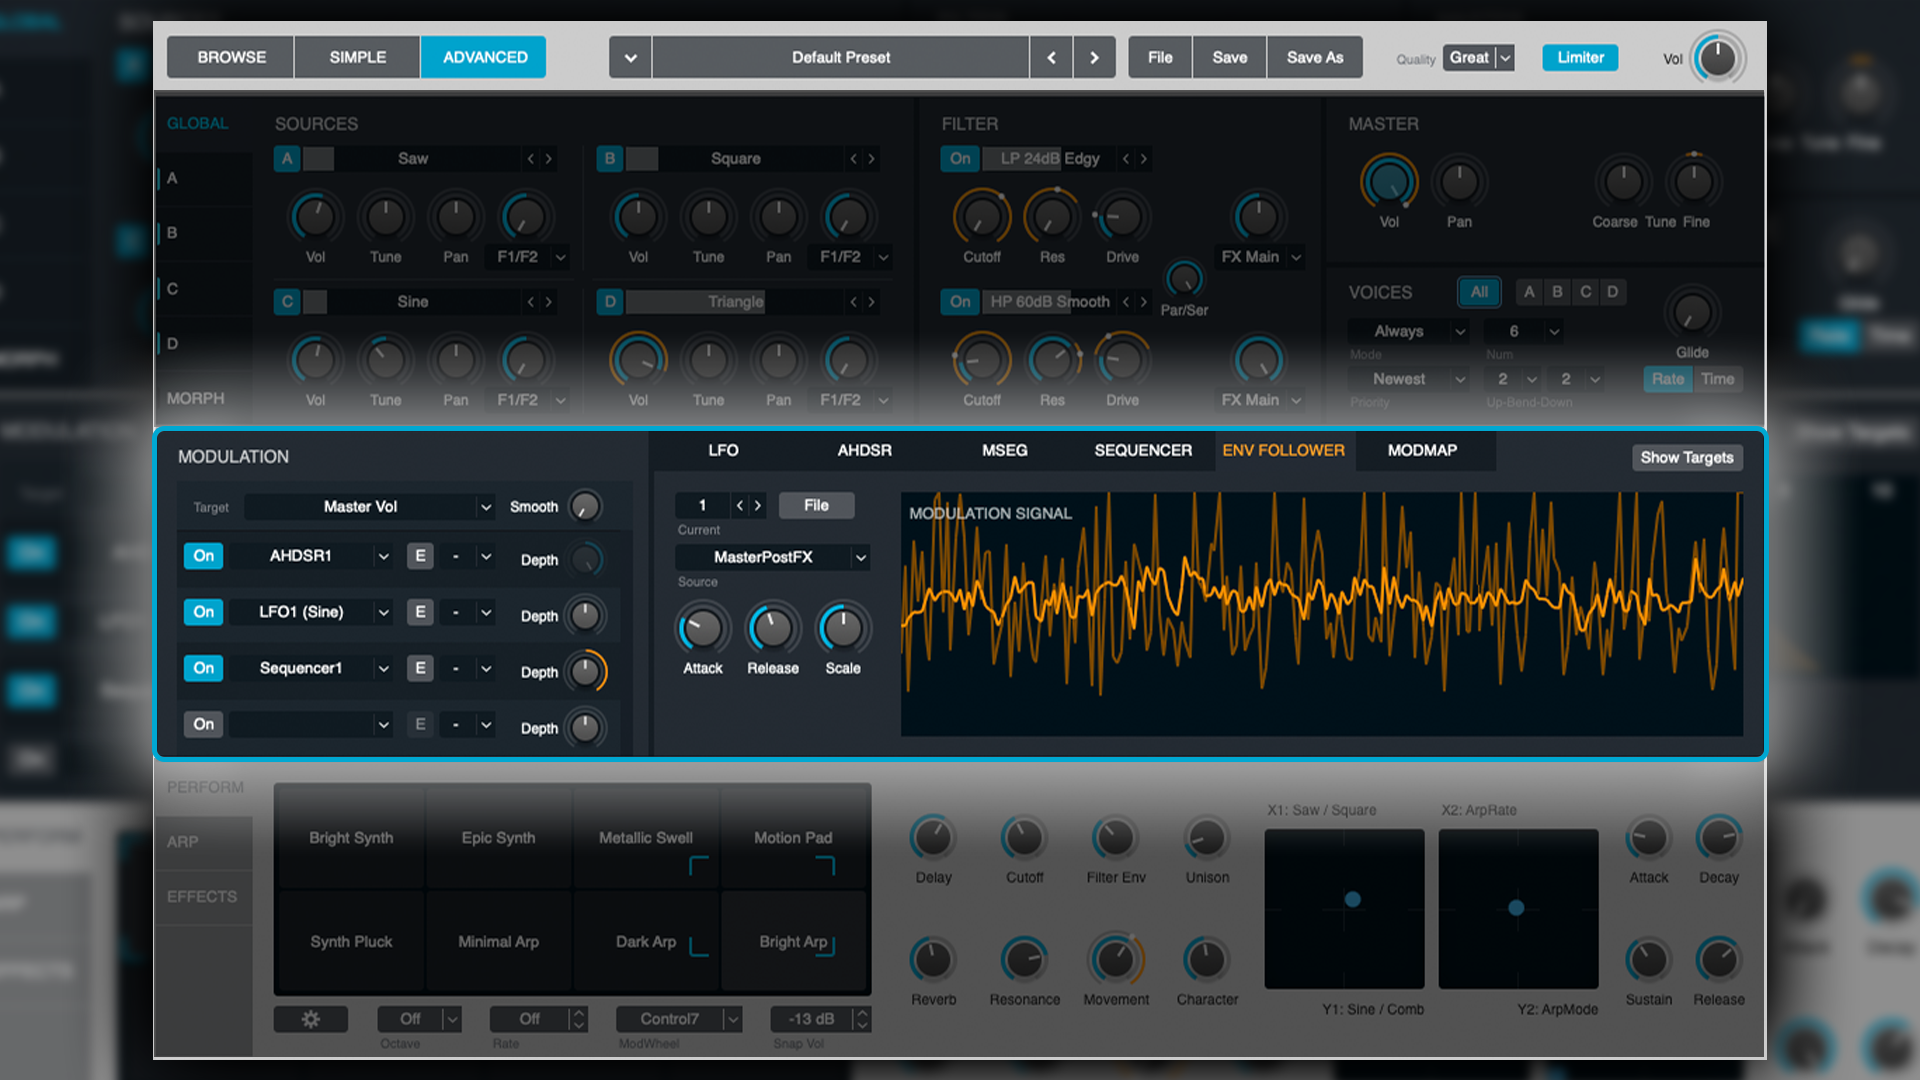
For example, let’s say you’re using all four Sources, three of them are pads, but one of them has a pluck characteristic. If you make that pluck the reference-point for your ENV Follower, and assign your ENV Follower to the global cutoff filter, the filter will close-off as the pluck dies aways, giving the frequencies of your combined Sources the same behavioural characteristics as the pluck.
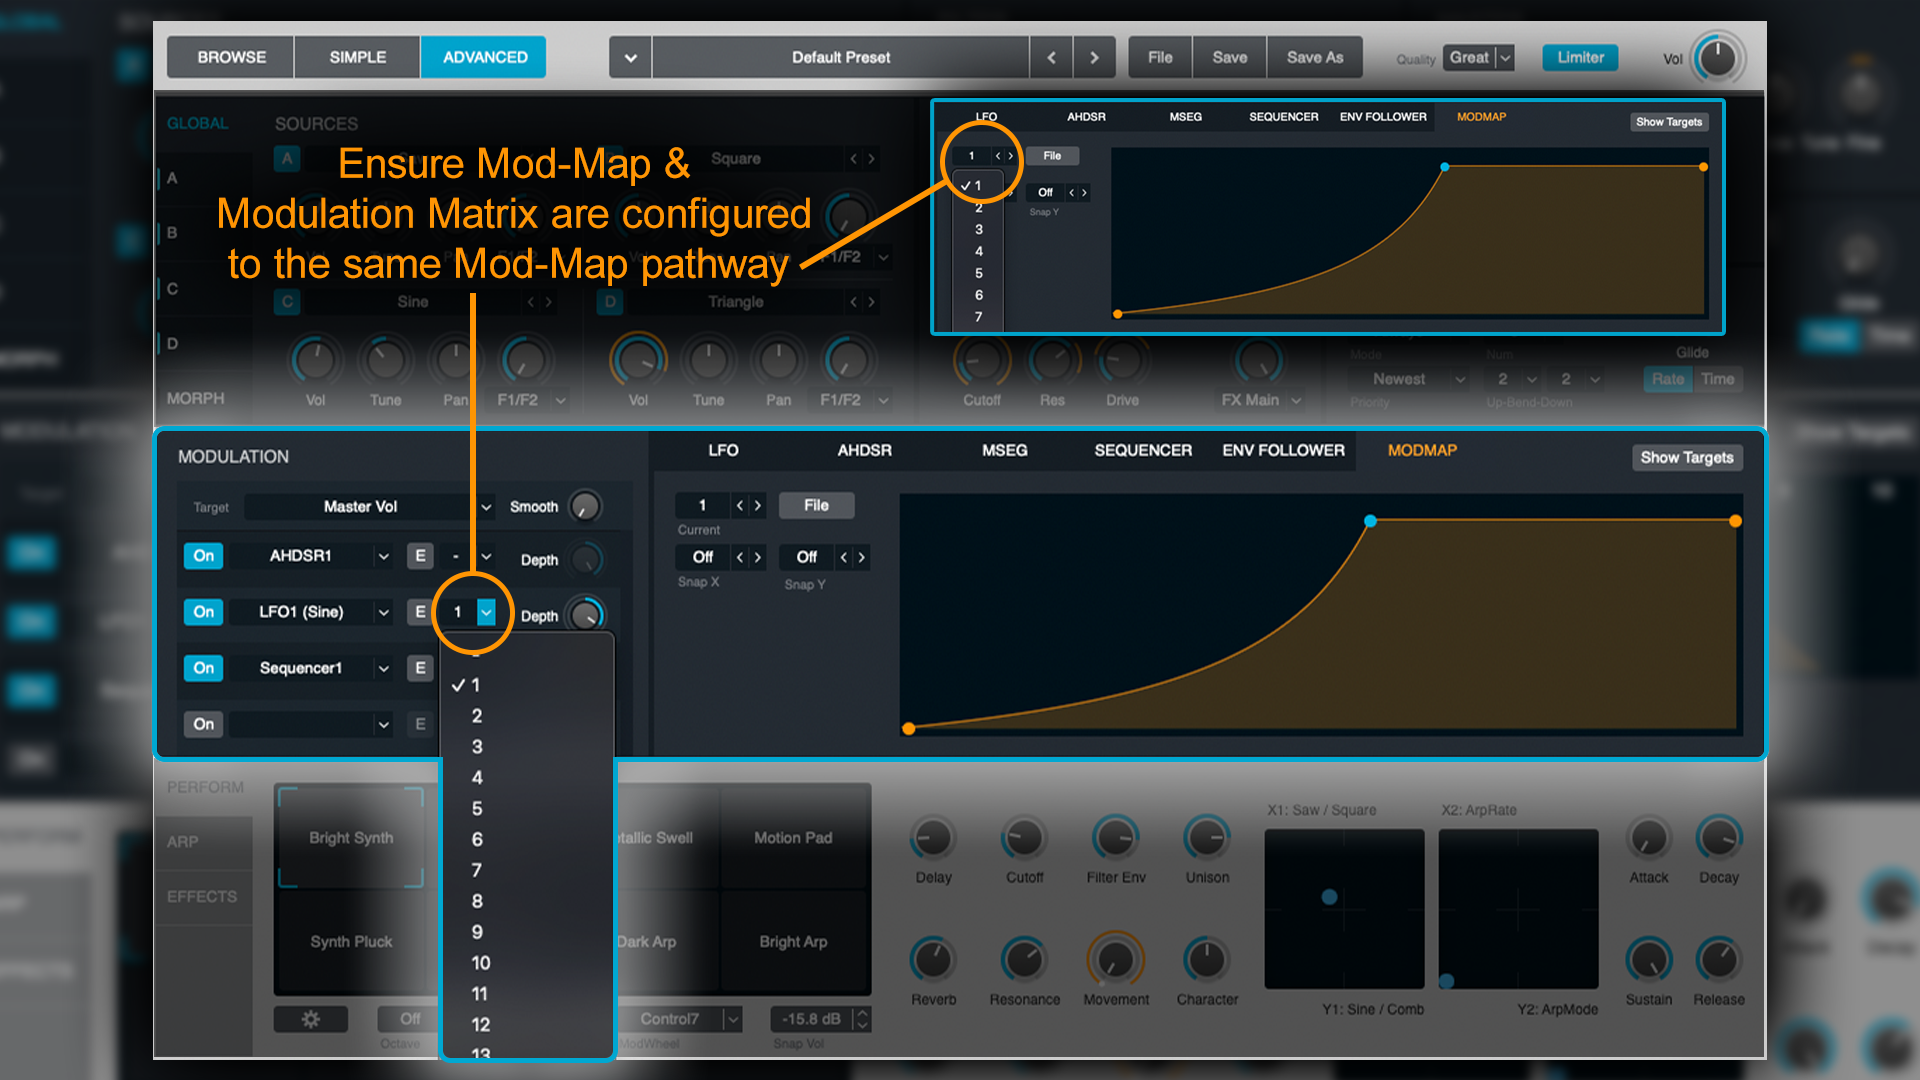
Modulation Maps
The Modulation Map isn’t a controlling device as such, but rather a utility that allows you modify the behaviour of a modulator. You cannot therefore assign it to other parameters on the synth, but rather you assign it to modulators via the modulation matrix.
You might use the Mod-Map to make an LFO Rate speed up or slow down over a period of time, or perhaps have the Step-Sequencer increase or decrease in volume over time. In that regard, it can be simpler to think of it like a (multi-stage) envelope that can be applied to a modulator’s signal.
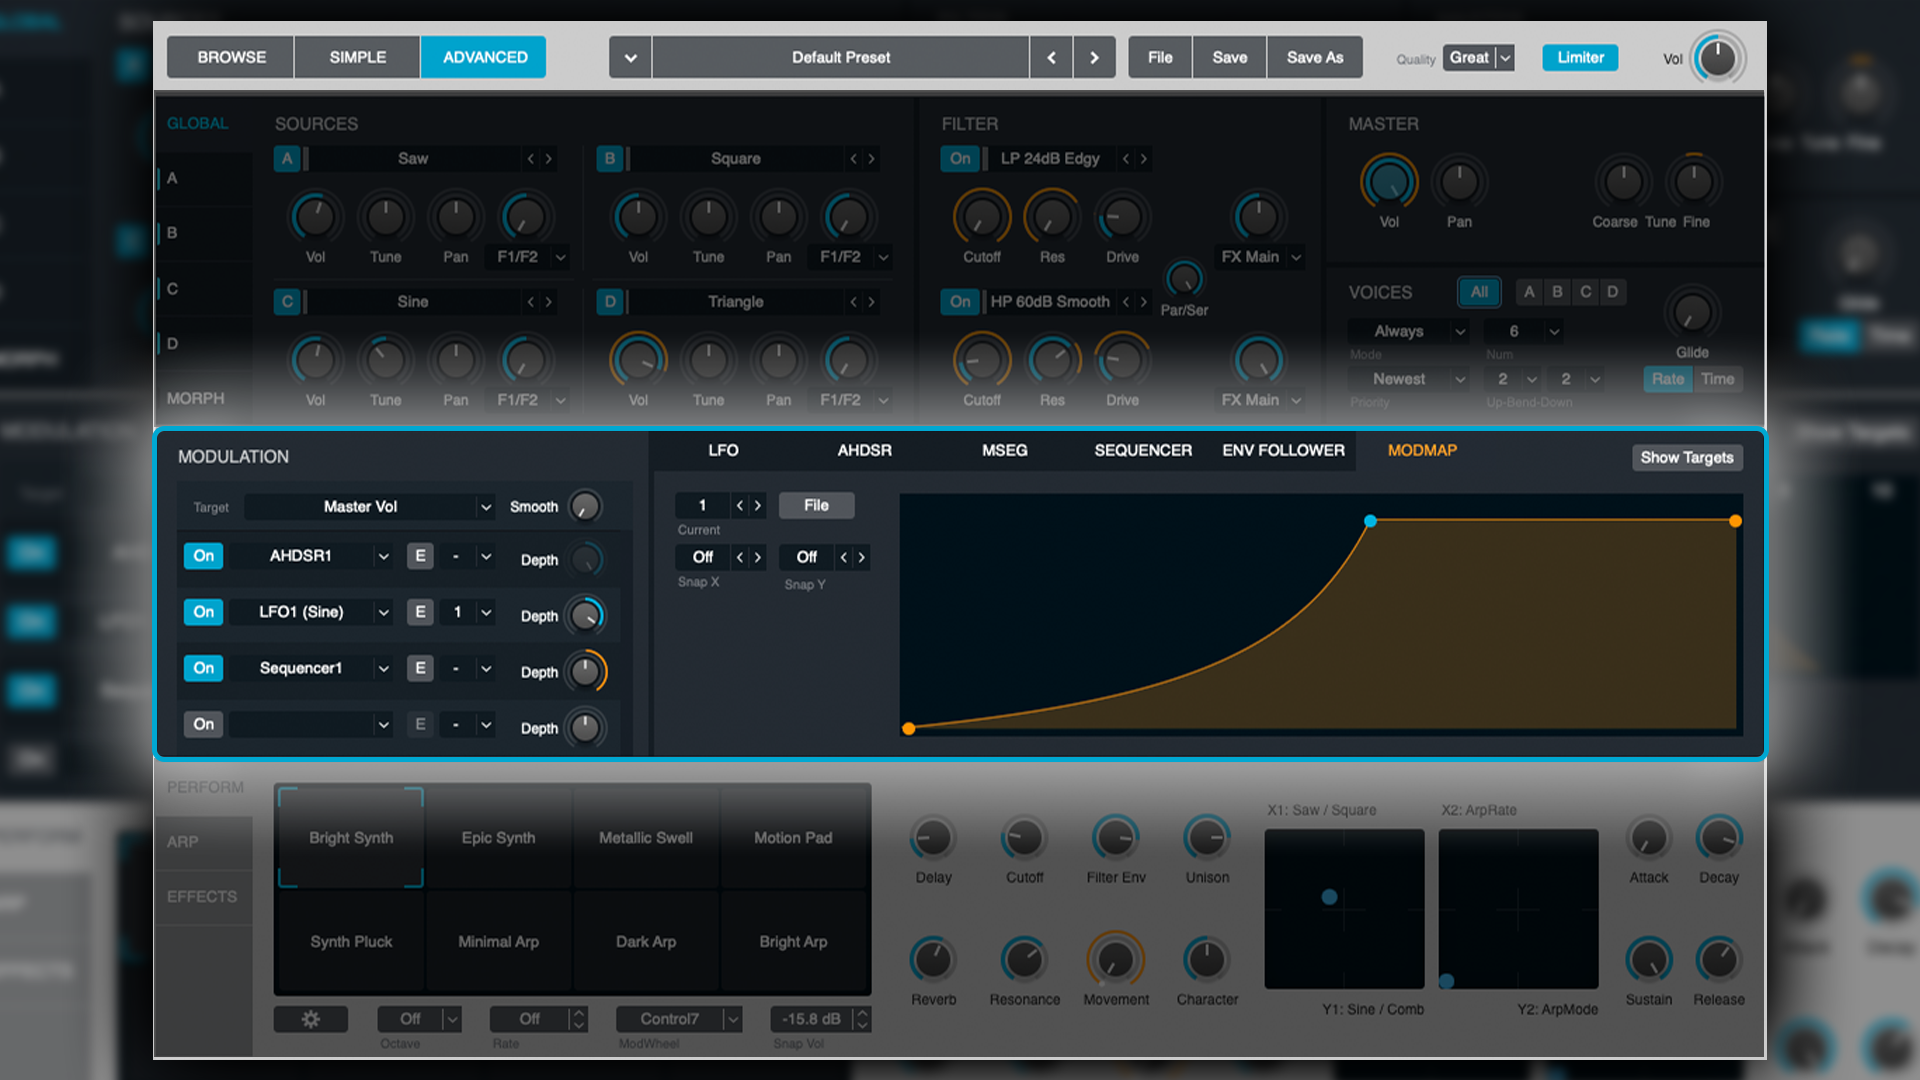
If you wish to Mod-Map a modulator, select the desired Mod-Map pathway from the Current drop down menu and ensure your desired modulator has a corresponding Mod-Map assignment. Now simply draw in your desired envelope shape, or select from one of the presets in the File drop-down menu.
That just about covers Alchemy's modulation section. As you can see, Alchemy is about as robust and thorough with its modulators as it is with its tone Sources. There’s tremendous depth and versatility, however once you’ve taken the time to familiarise yourself with things, it’s not nearly as daunting or complicated as it might at first seem.
Performance Parameters
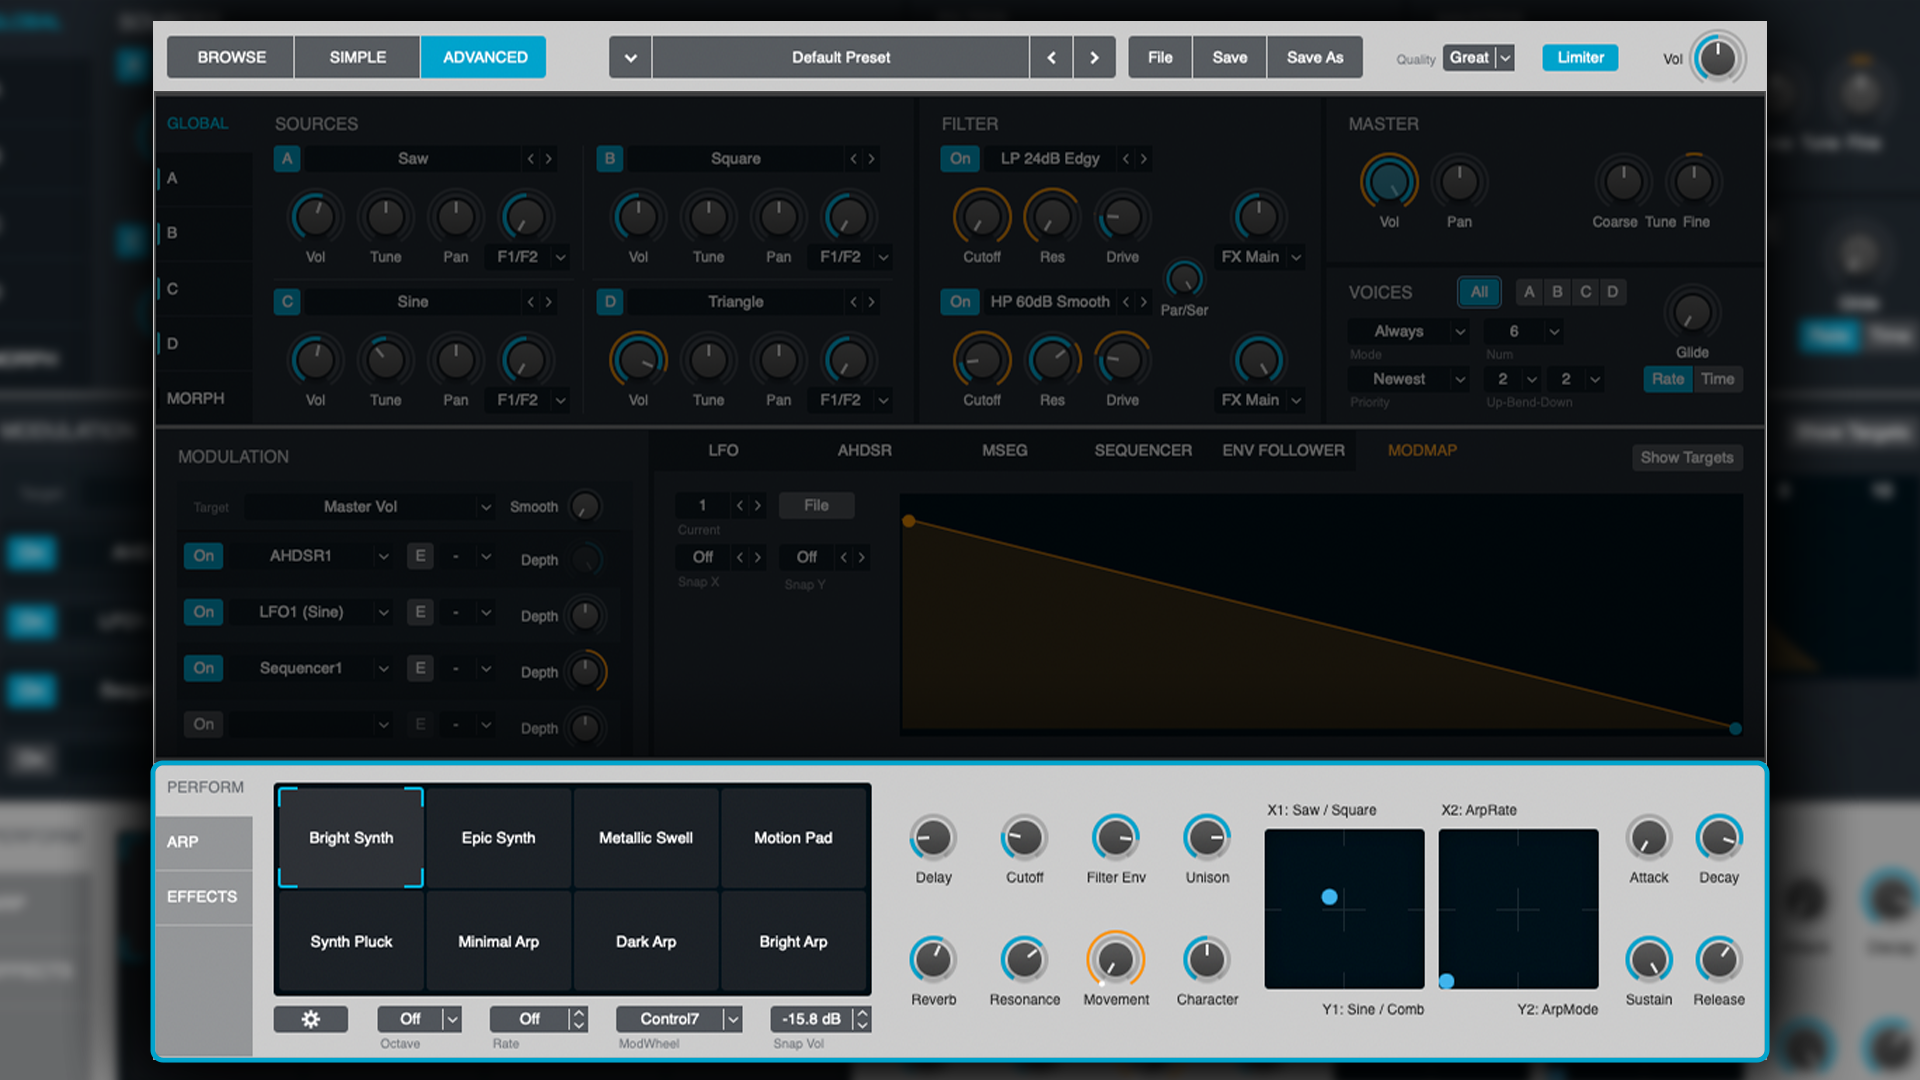
In the Performance pane, we have global parameters such as a Filter, ADSR Envelope, Unison, Reverb and Delay. It’s worth noting however, that these parameters are customisable and will change as you scroll through presets.
You may find there are controls labelled Character, Movement, Symmetry, Additive Pitch, etc. It all depends on the preset designer’s discretion and what is likely to be the most useful control for that particular patch. If you wish to change what these dials do, simply right-click on them to bring up reassignment options.
There are also two XY axis controls, which like the other dials, are fully assignable at the user’s discretion.
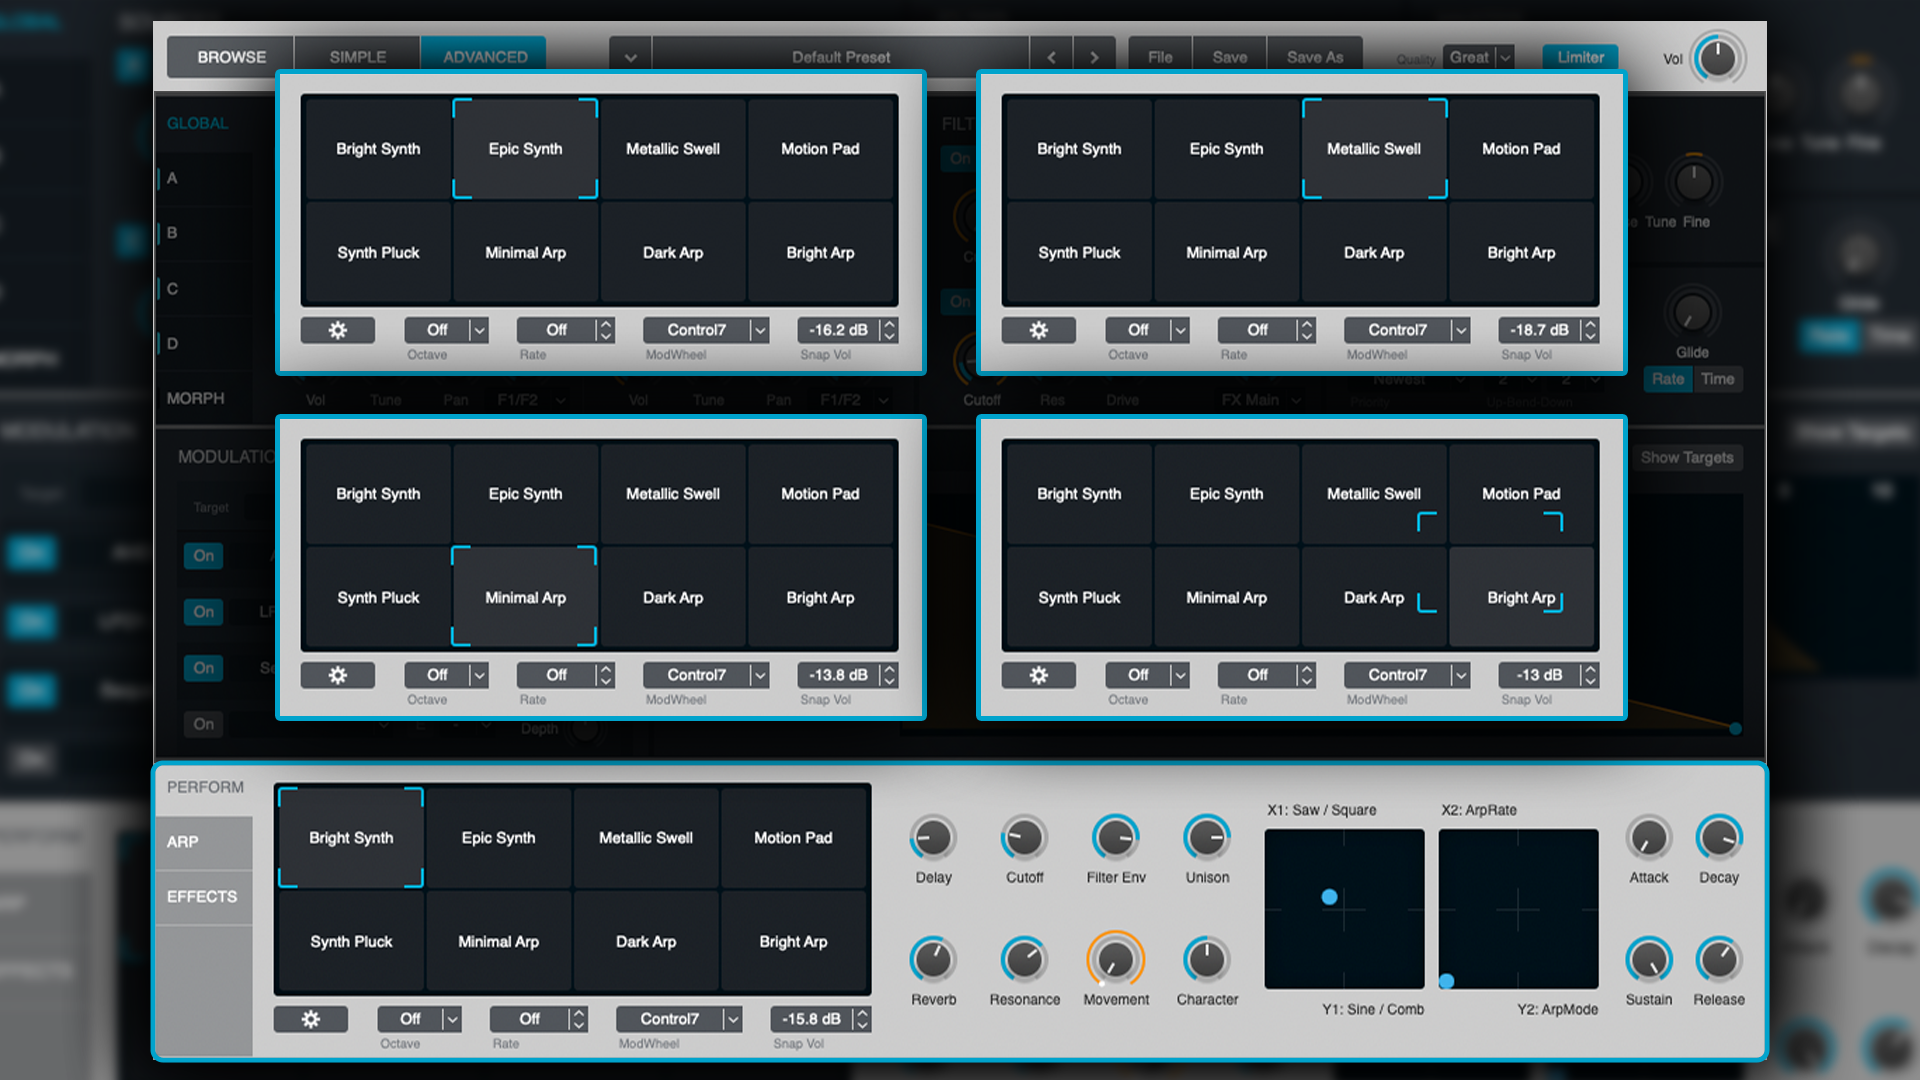
On the left of the Performance pane is a bank of descriptive words called the Snapshot matrix. This contains eight Snapshots, which can be thought of like Performance pane presets.
As you move the blue outlined target box, the controls of the Performance pane will blend/gradient through the different Snapshots. As with most controls on this synth, right-clicking on any snapshot window will present the necessary options (save, rename, etc).
Whilst this could take a long time to configure if you were to design your own presets, it’s a great way to navigate and vary sounds based on existing presets.
Sequencer
Alchemy’s step sequencer supports up to 127 steps (which is rather huge), and has a very wide range of speed/tempo-division and snap values, meaning you can have anything ranging from super-slow, evolving patterns, up to frantic and extremely choppy, rhythmic sequences.
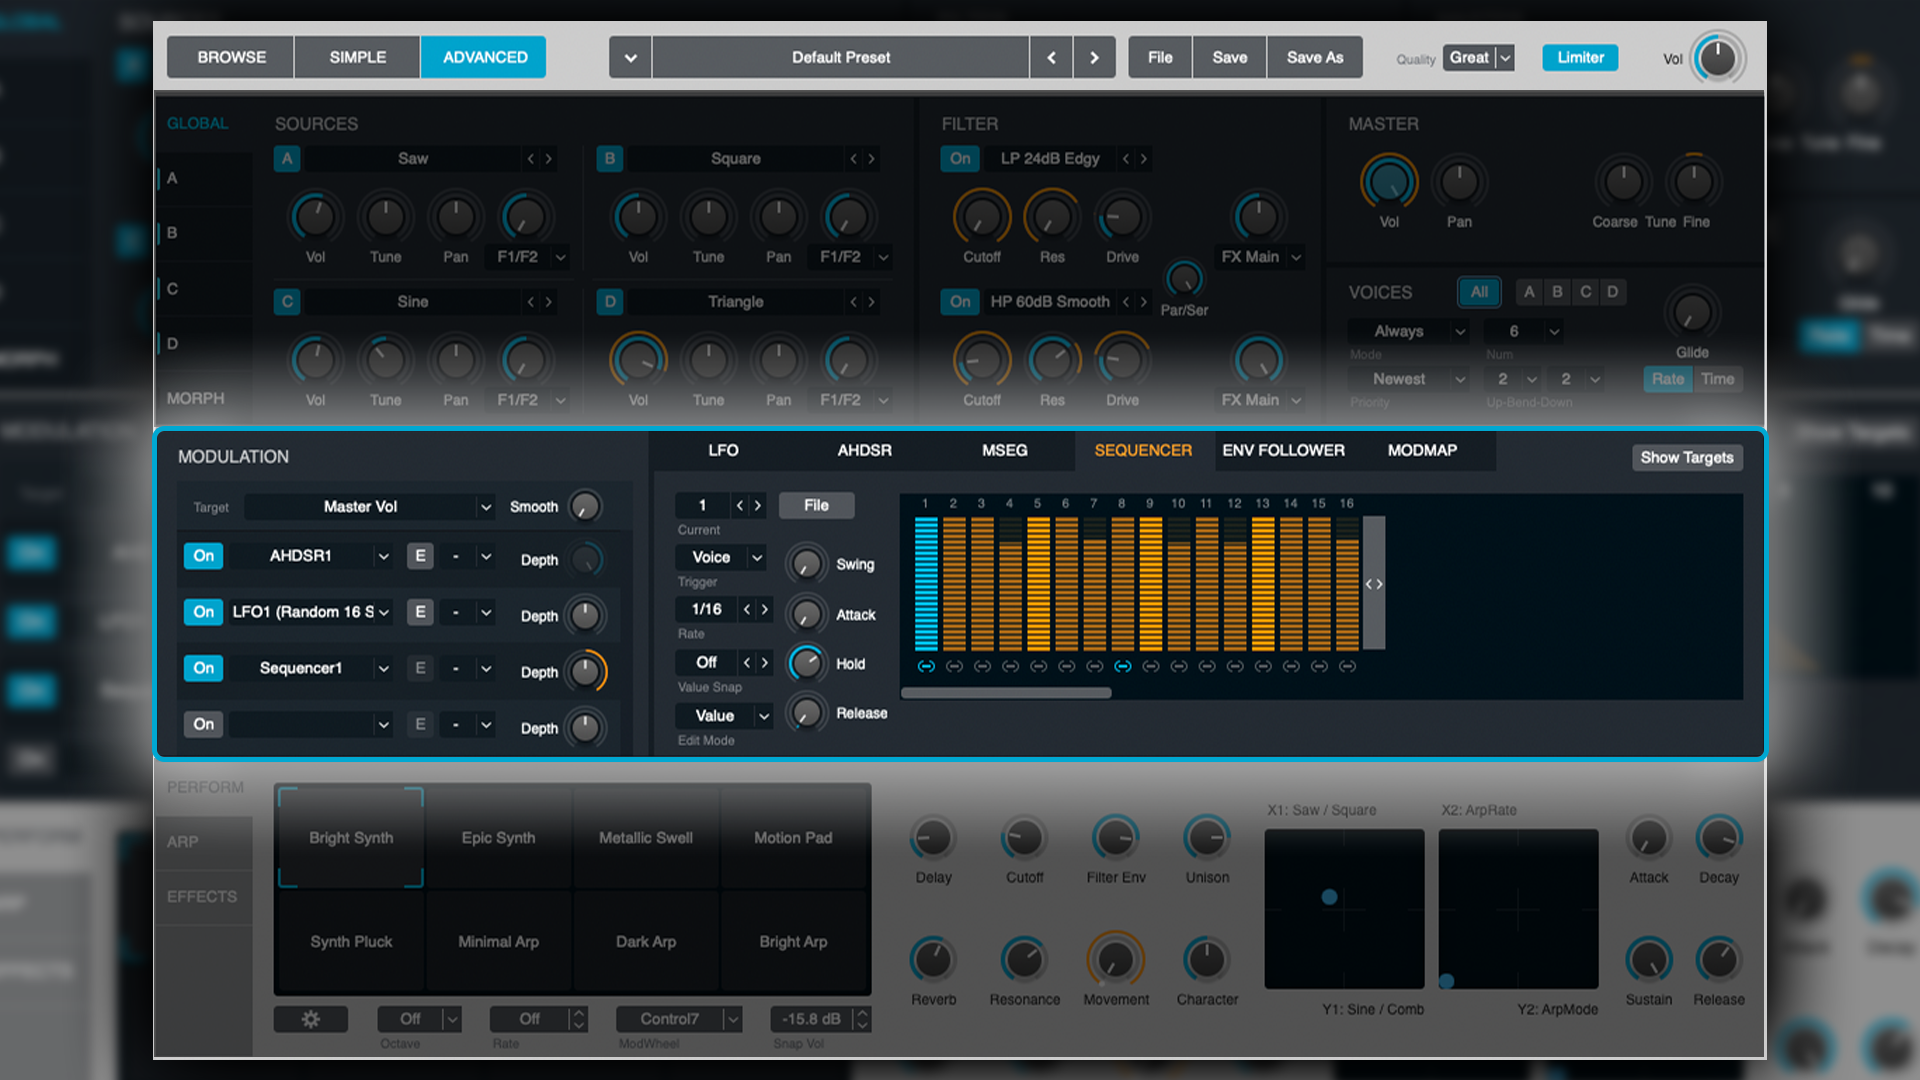
The long/slow range of the sequencer lends itself very well to drone and ambient pads, as they can be given very slowly-evolving characteristics.
Arpeggiator
The Arpeggiator and effects matrix can be found beneath the Performance pane in Advanced mode.
The Arpeggiator/Step Sequencer is very comprehensive, offering up to 121 steps, the ability to sequence Velocity, Tune, Pan, Swing, and Length (of note). There are also the two Arp Mod options which allow you to use this step sequencer as a modulator (via the Modulation Matrix), much like the other Modulation Step Sequencer.
Alongside this you’ll find a bank of controls that are commonplace on a sequencer:
- Mode - Which mode does the Step Sequencer operate in (up, down, up/down, random, etc)
- Rate - Speed (there’s also a sync button, so it can be synced or free-tempo)
- Octave - How many octaves does the arpeggiator range cover
- Length - How long are the notes held for
- Pattern - Scroll through 16 different sequencer patterns of your design
- Swing - How rhythmically swung is the pattern
- Note Vel - What is the velocity setting of the notes (overridden by velocity sequencing)
- Split - Allows you to determine the highest note value played by the sequencer
- Latch - Scroll between Off, Hold and Latch modes
The buttons A, B, C, D, and All refer to the Sources. Select which ones you wish to arpeggiate.
Effects
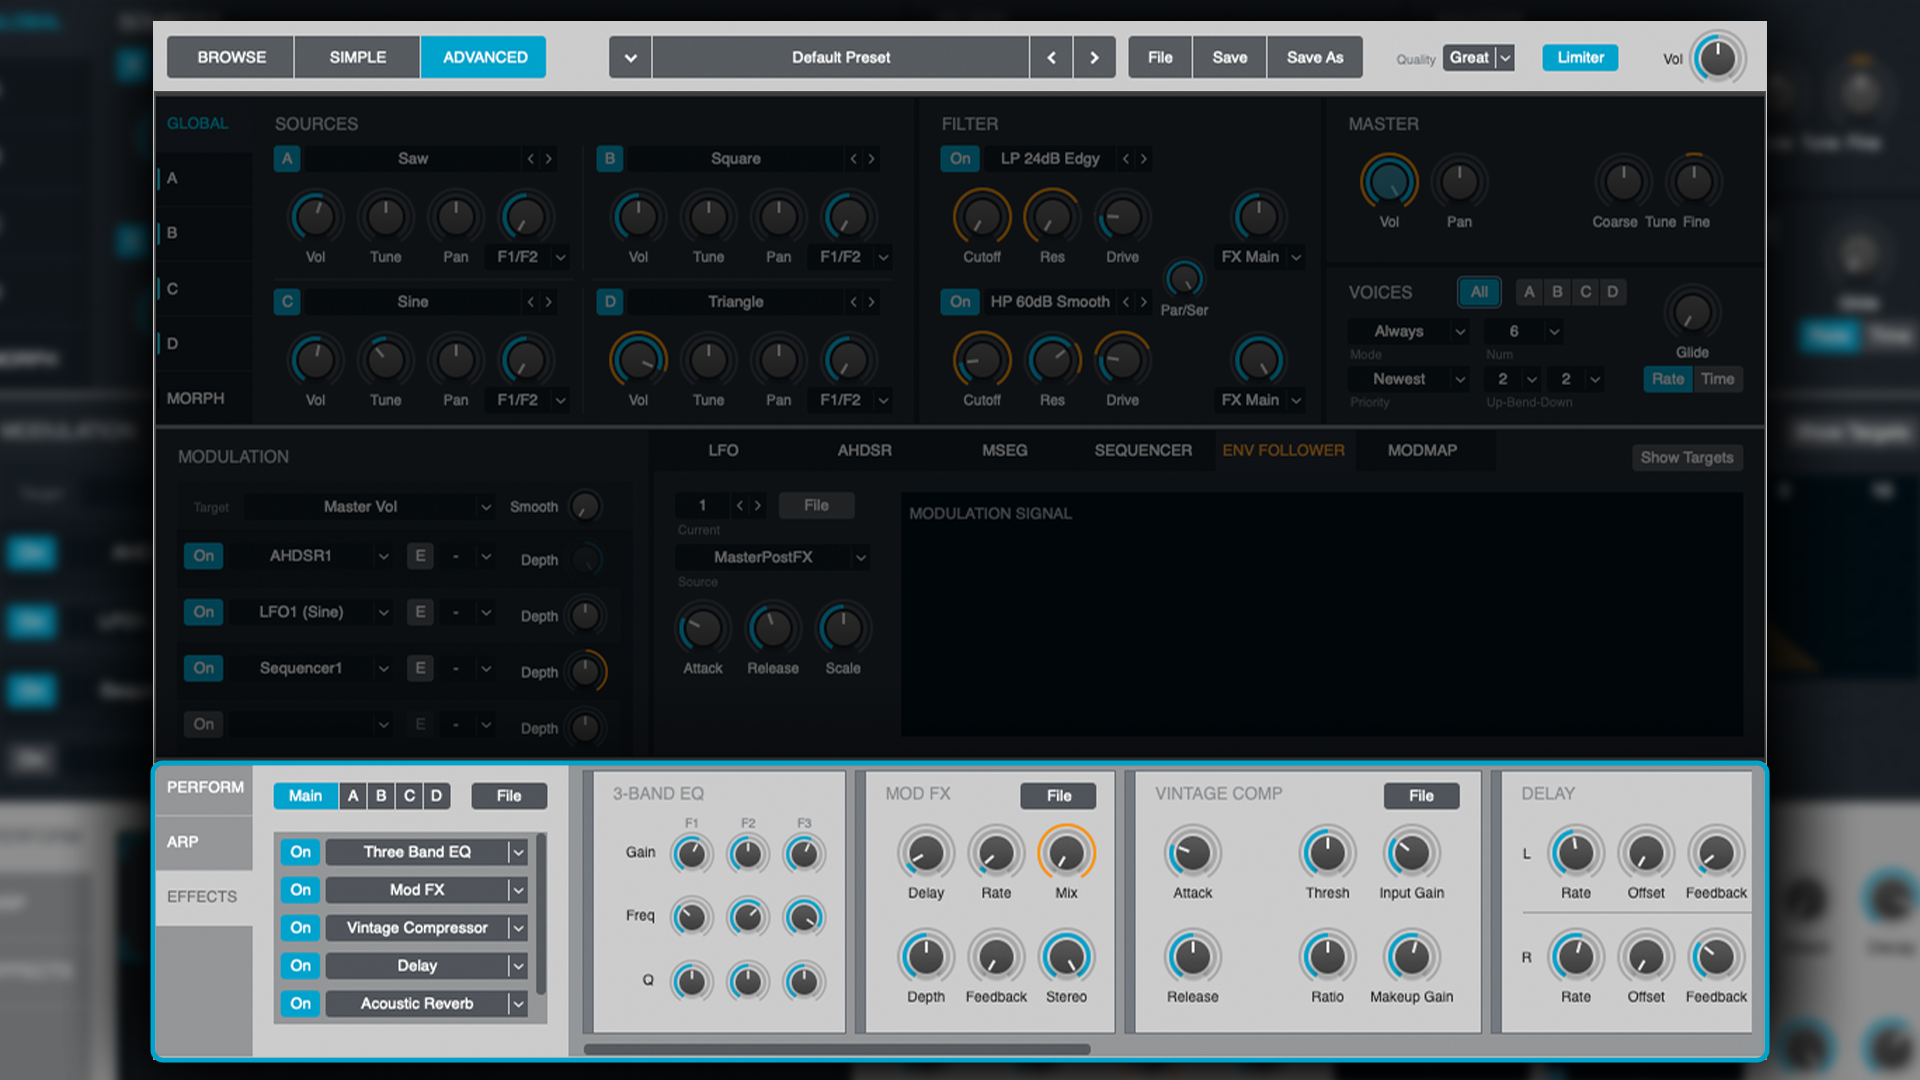
Lastly we have the Effects section. The Effects matrix allows you to assign effects to individual Sources and also at a global level (Main). The matrix also allows for up to 16 effects per source/main. I.e. you can rack up 16 effects per Source and add a further 16 effects globally. Not too shabby! Effects included are:
- Delay - Stereo delay (mono-switchable) with filtering and tempo-sync
- Distortion - Including Bitcrushing, Mechanical, Tube and Exciter
- Distortion (Bass Enhancer)
- Distortion (Wave Shaper)
- Compressor (Phat Compressor)
- Compressor (Vintage Compressor)
- Filter (Band-Pass)
- Filter (Band-Reject)
- Filter (Multi-Mode) - Includes numerous low-pass models
- Filter (3-band EQ)
- Modulation - Generic modulation parameters allowing for Chorus-like effects with subtle use and Flanger-like effects with high-value settings
- Modulation (Phaser)
- Reverb (Acoustic Reverb) - Ideal for natural ambiences, such as halls and rooms
- Reverb (Classic Reverb) - Has more of a plate reverb quality
- Reverb (Convolution Reverb) - This appears to be a simplified version of Logic’s Space Designer and shares most of its impulse responses
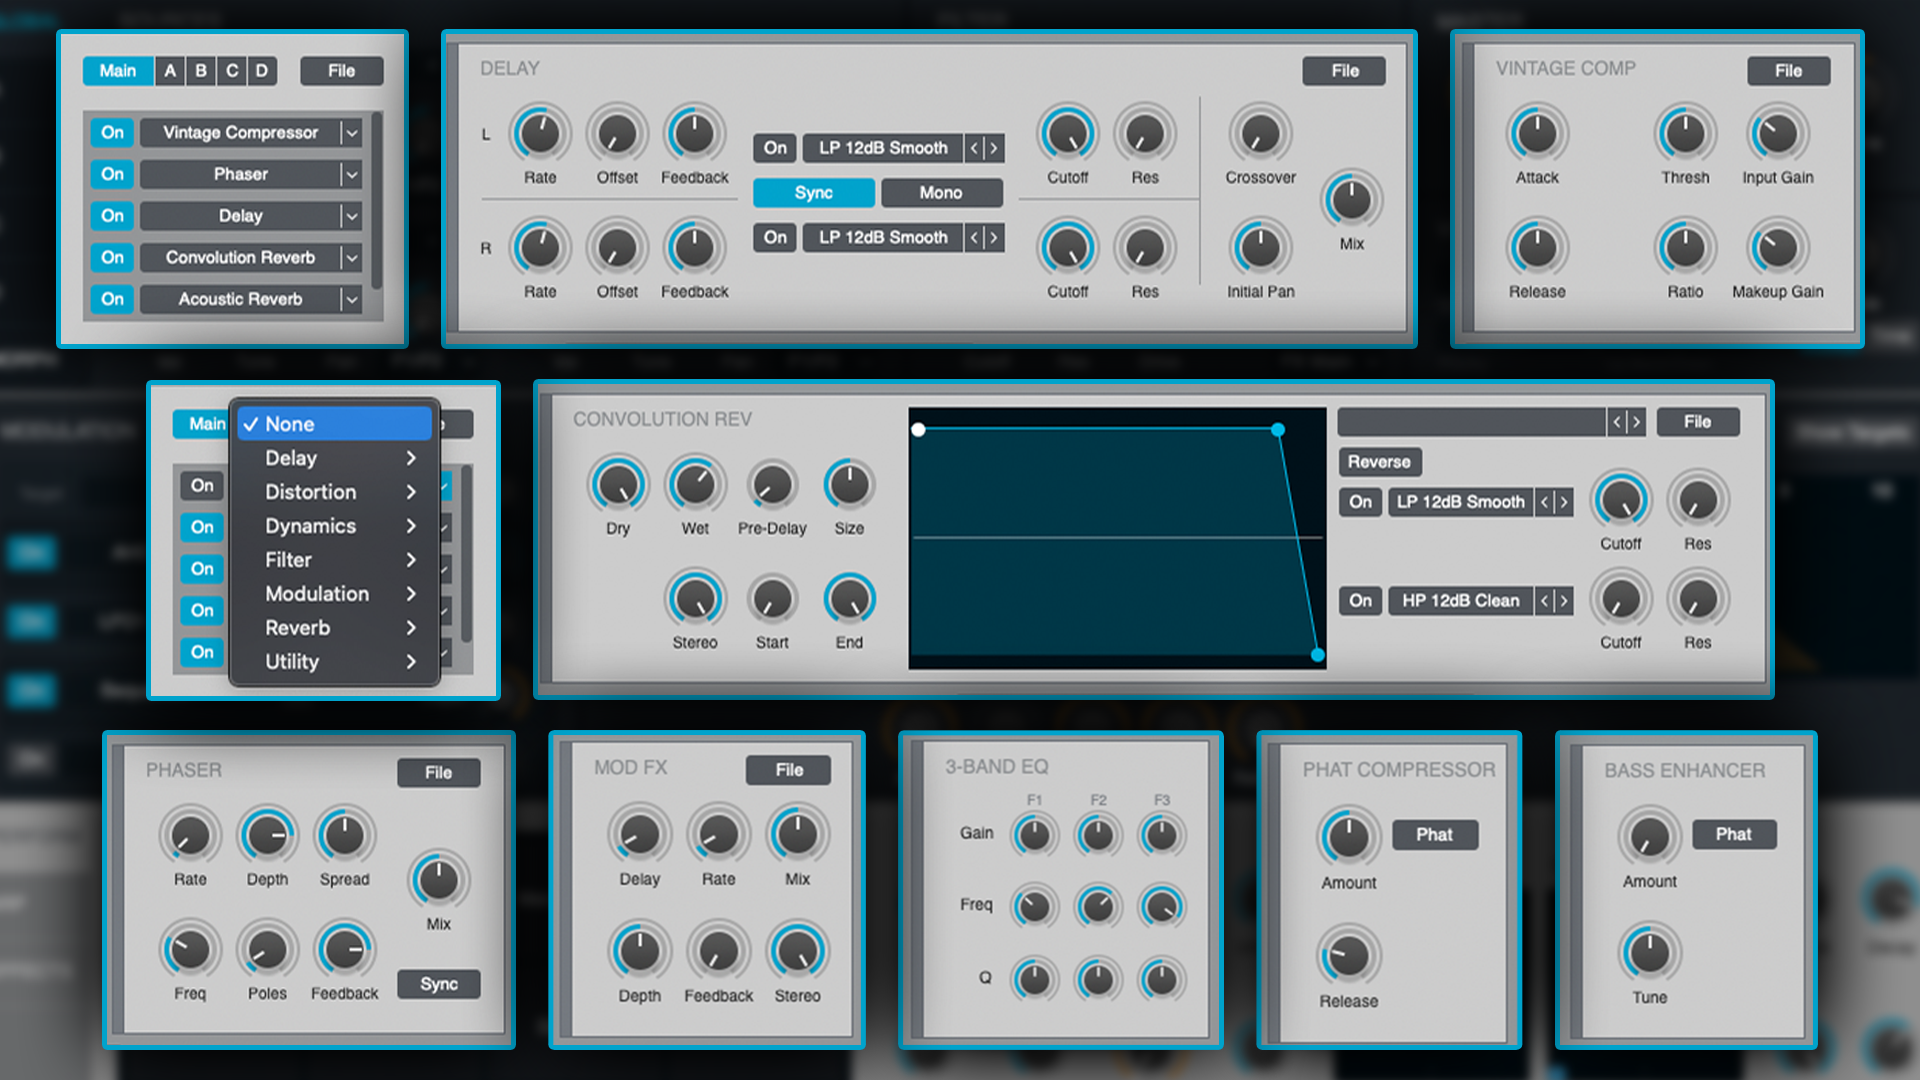
My gut feeling (although I could be completely wrong) is that most of these effects are variations on Logic’s other stock plugins, repackaged and condensed into Alchemy, but that’s no bad thing.
They’re all relatively straightforward to use. Some have very simple one or two dial interfaces, and if you’ve ever used any of these sorts of effects before, you’ll have no difficulty navigating them.
Just be mindful of the CPU load before you go racking up mountains of effects. Alchemy can be a bit processor heavy at the best of times, without unnecessarily loading up five or more instances of convolution reverb!
Conclusion
Alchemy is a beast - hence the two-part tutorial. It’s a true powerhouse of synthesis and whilst its premise could appear to be complicated for complication’s sake, in use, its level of detail and sophistication is nothing short of astounding.
It manages to reach the giddy heights of tonal design and sophistication found in icons of yesteryear, such as Yamaha’s DX-series FM synthesisers, Korg’s Wavetable range, and Roland’s PCM synths. It’s a mainstay in my production arsenal and I’ve found it catering to all kinds of needs, from retro-sounding synth-funk basses through to ethereal pads the likes of which I’ve not come across in any other synthesiser.
Best synth plugins 2023: synth VSTs to suit all styles and budgets
Moreover, it can be made to feel extremely futuristic and progressive, something I’d argue is hard to achieve in today’s era of near limitless digital possibilities. The granular and formant manipulations on acoustic instrument samples alone would make for an impressive stock synth in any DAW, however the fact that that’s just one of a number of sound creation possibilities is staggeringly impressive.
If you’re a Logic Pro user and into any sort of electronic music or you’re simply in need of any kind of textural layers in your mix, you’d be doing yourself a disservice not to explore what Alchemy has to offer. It’s not only one of the best stock synths available in a DAW, it’s one of the best synths ever made, period!