If you're a portrait or fashion photographer there's nothing nicer than working in a large, well-equipped studio with plenty of space for even the most out there of poses. Being able to seamlessly change background rolls, take photos from any angle you want and use professional lighting equipment makes a shoot so much easier but all of this comes at a price.
Studio hire is usually pretty expensive and if you're not being paid for a shoot, it might not be something you can regularly afford. You can, of course, shoot outdoors or in people's houses/restaurants/garden centers or art galleries but if you want to practice with studio lighting, well, you need a studio. Most of us aren't lucky enough to have access to a space large enough to fit a full 2.72m-wide background roll which is what you ideally want for shooting full-length body shots or group shots. However, there is a way you can get by just using a 1.35metre background roll which is much more manageable/
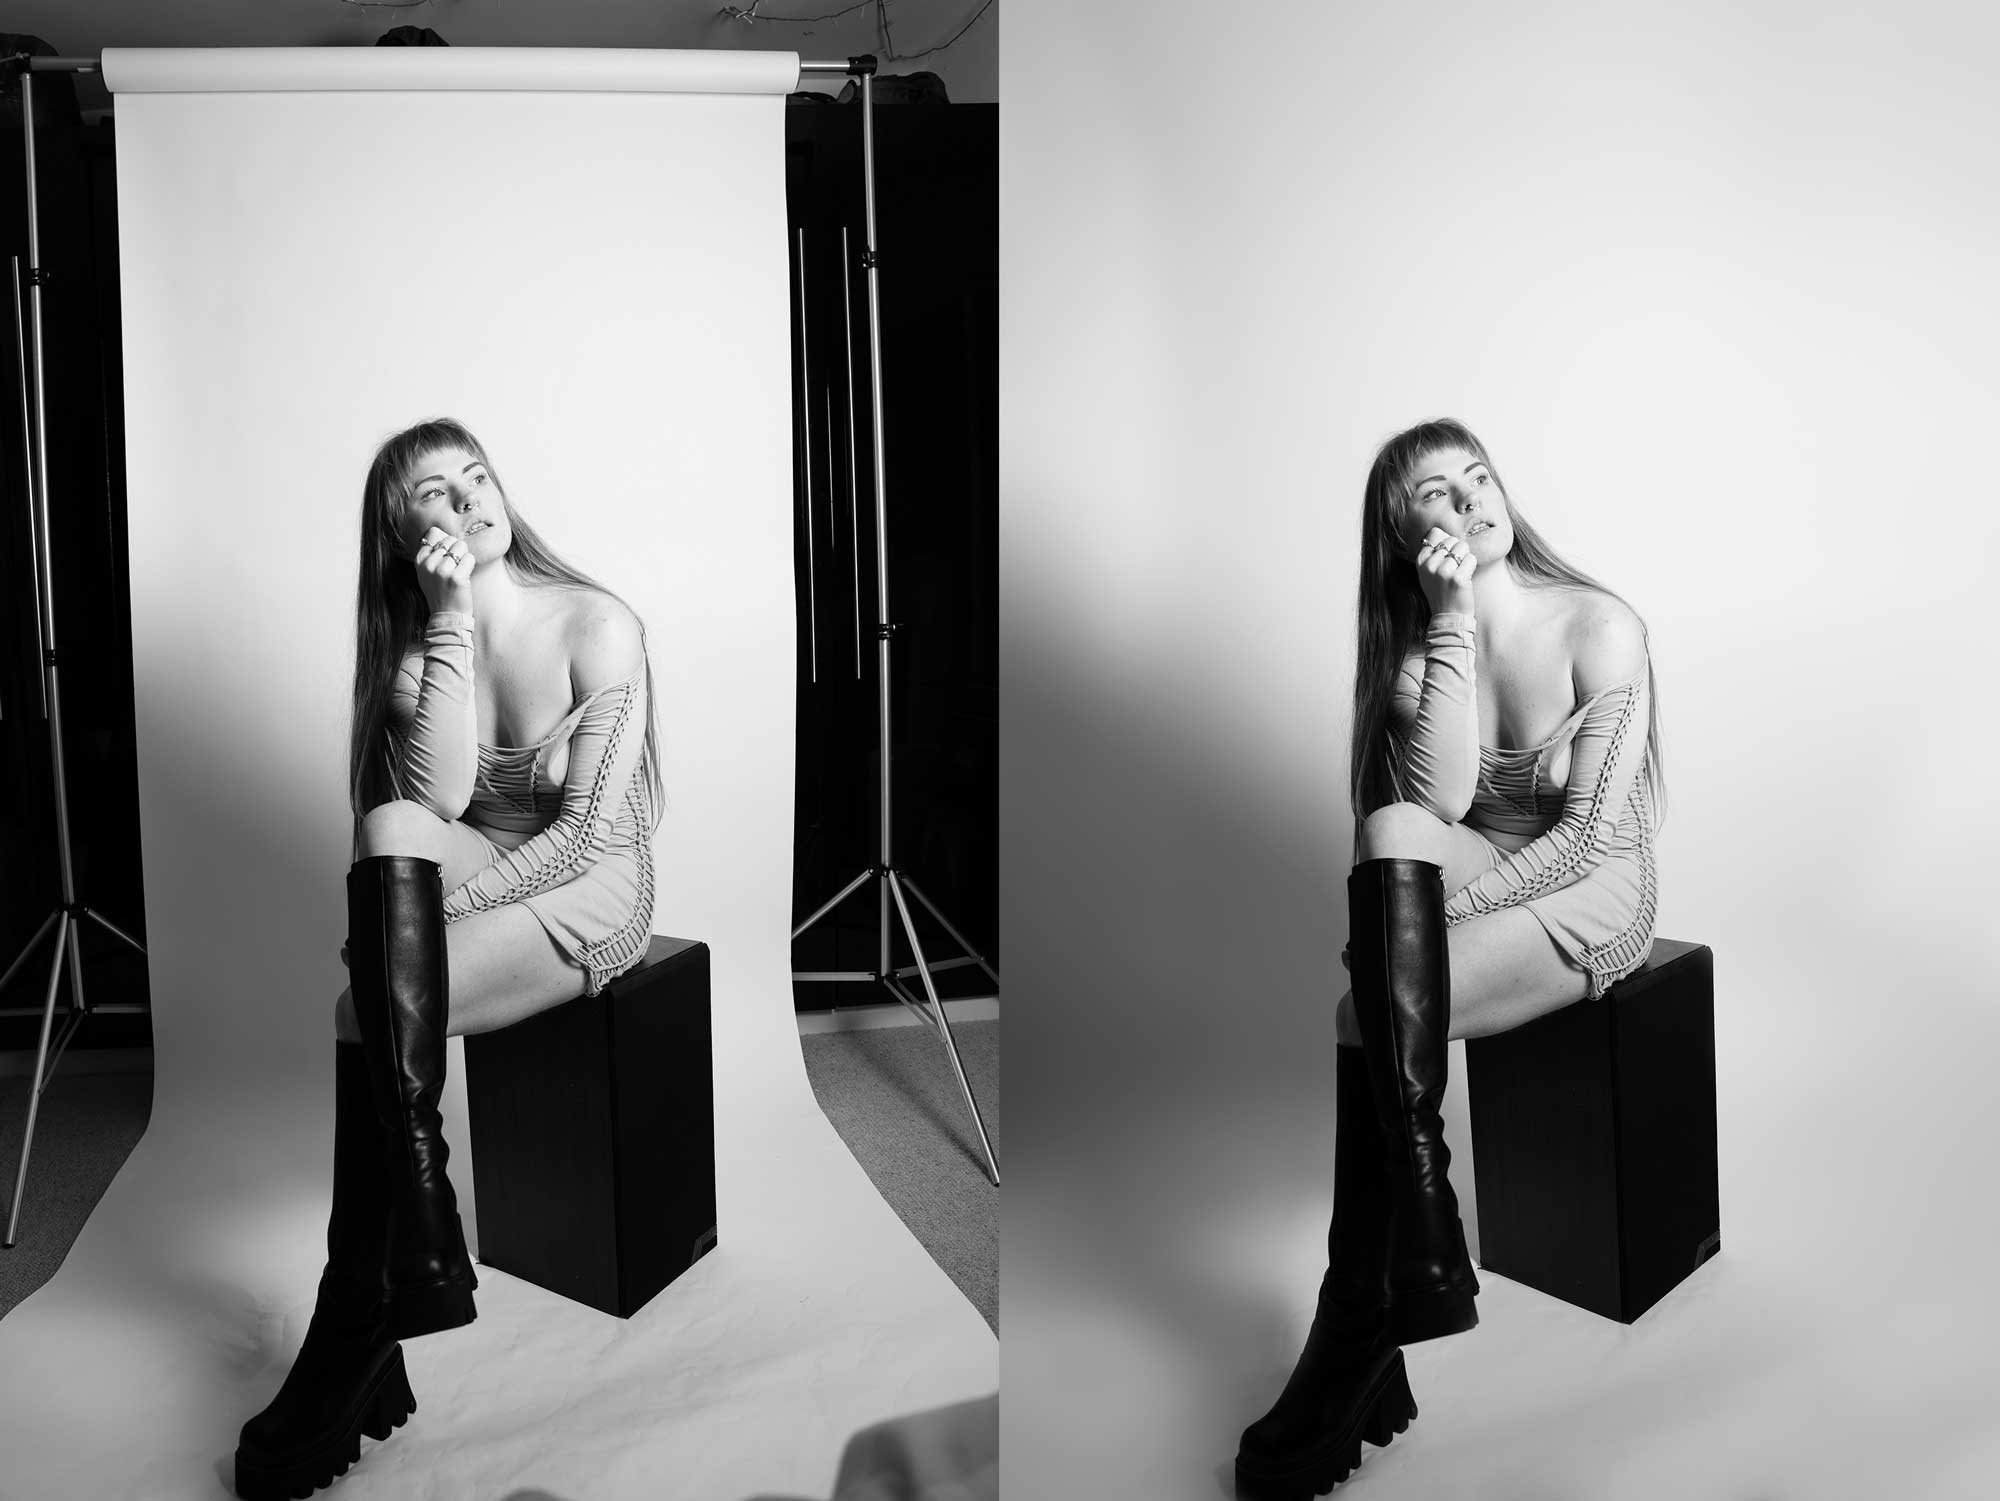
With this simple Photoshop hack, you'll learn how to expand your background so it looks like a proper studio space and no one will ever be able to tell the difference.
1. Duplicate the layer
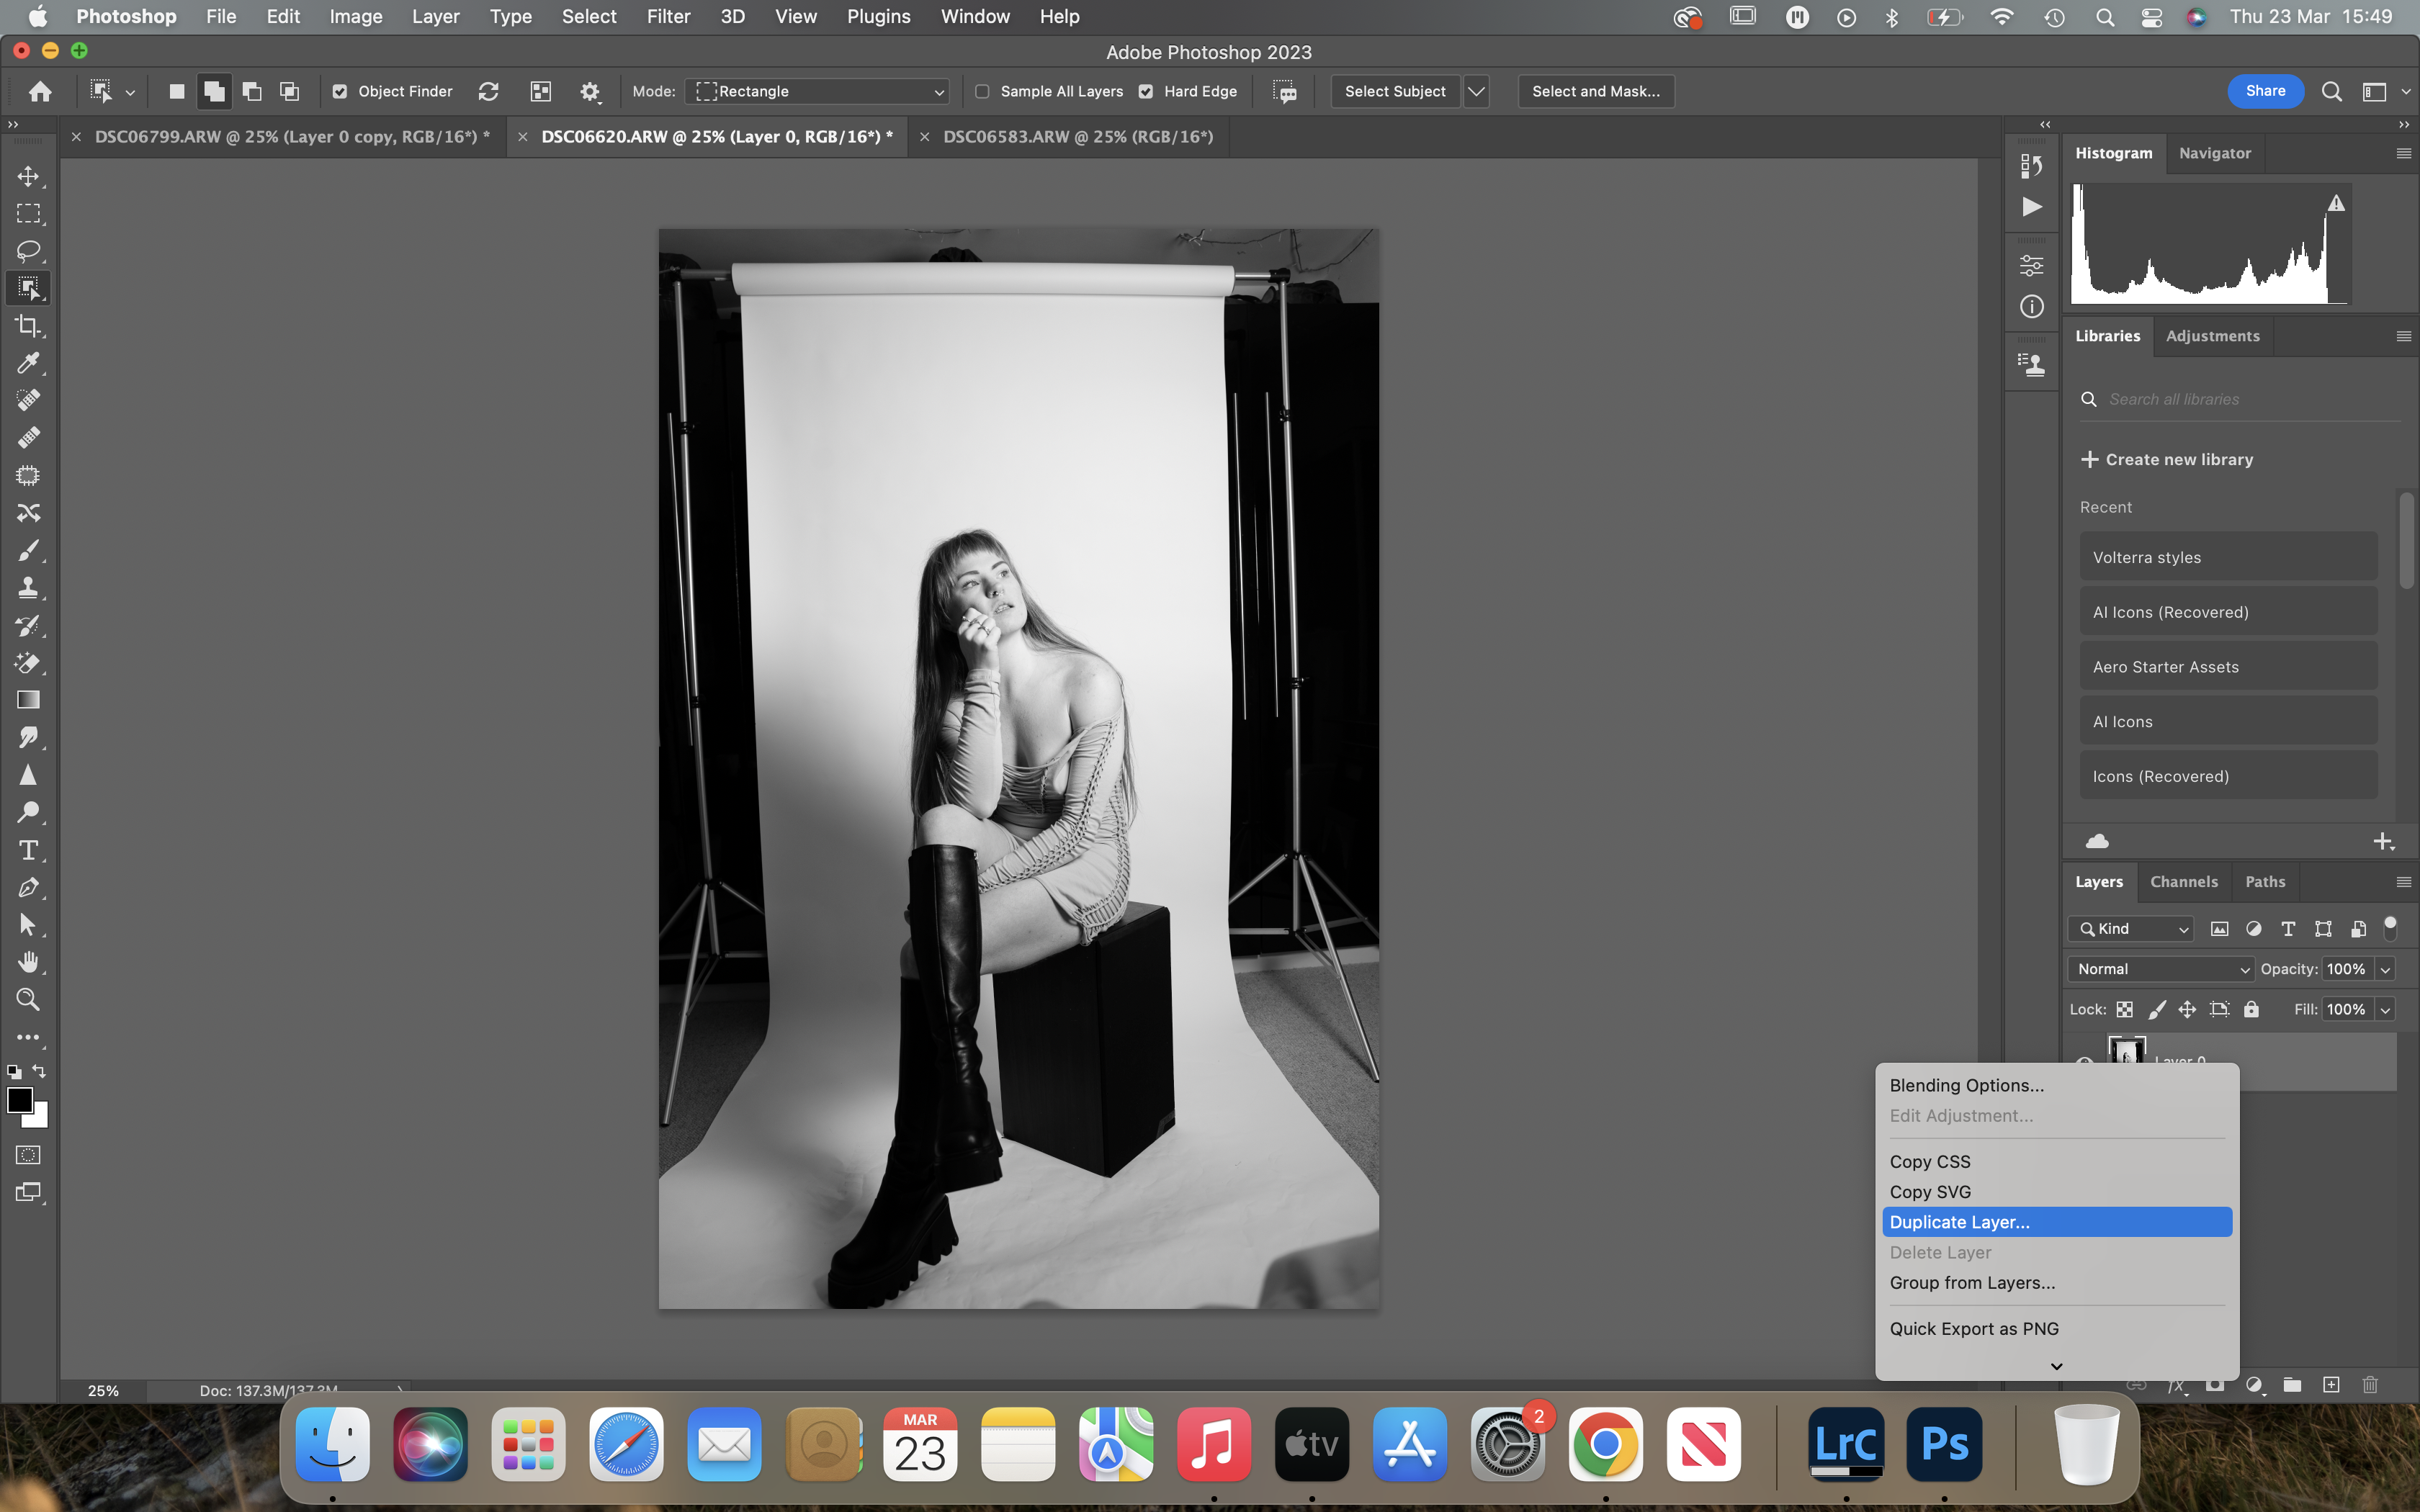
Start by opening the image you want to edit and duplicate the layer either by right clicking and scrolling down to duplicate layer or press Cmd/cntrl + J
2. Select the object
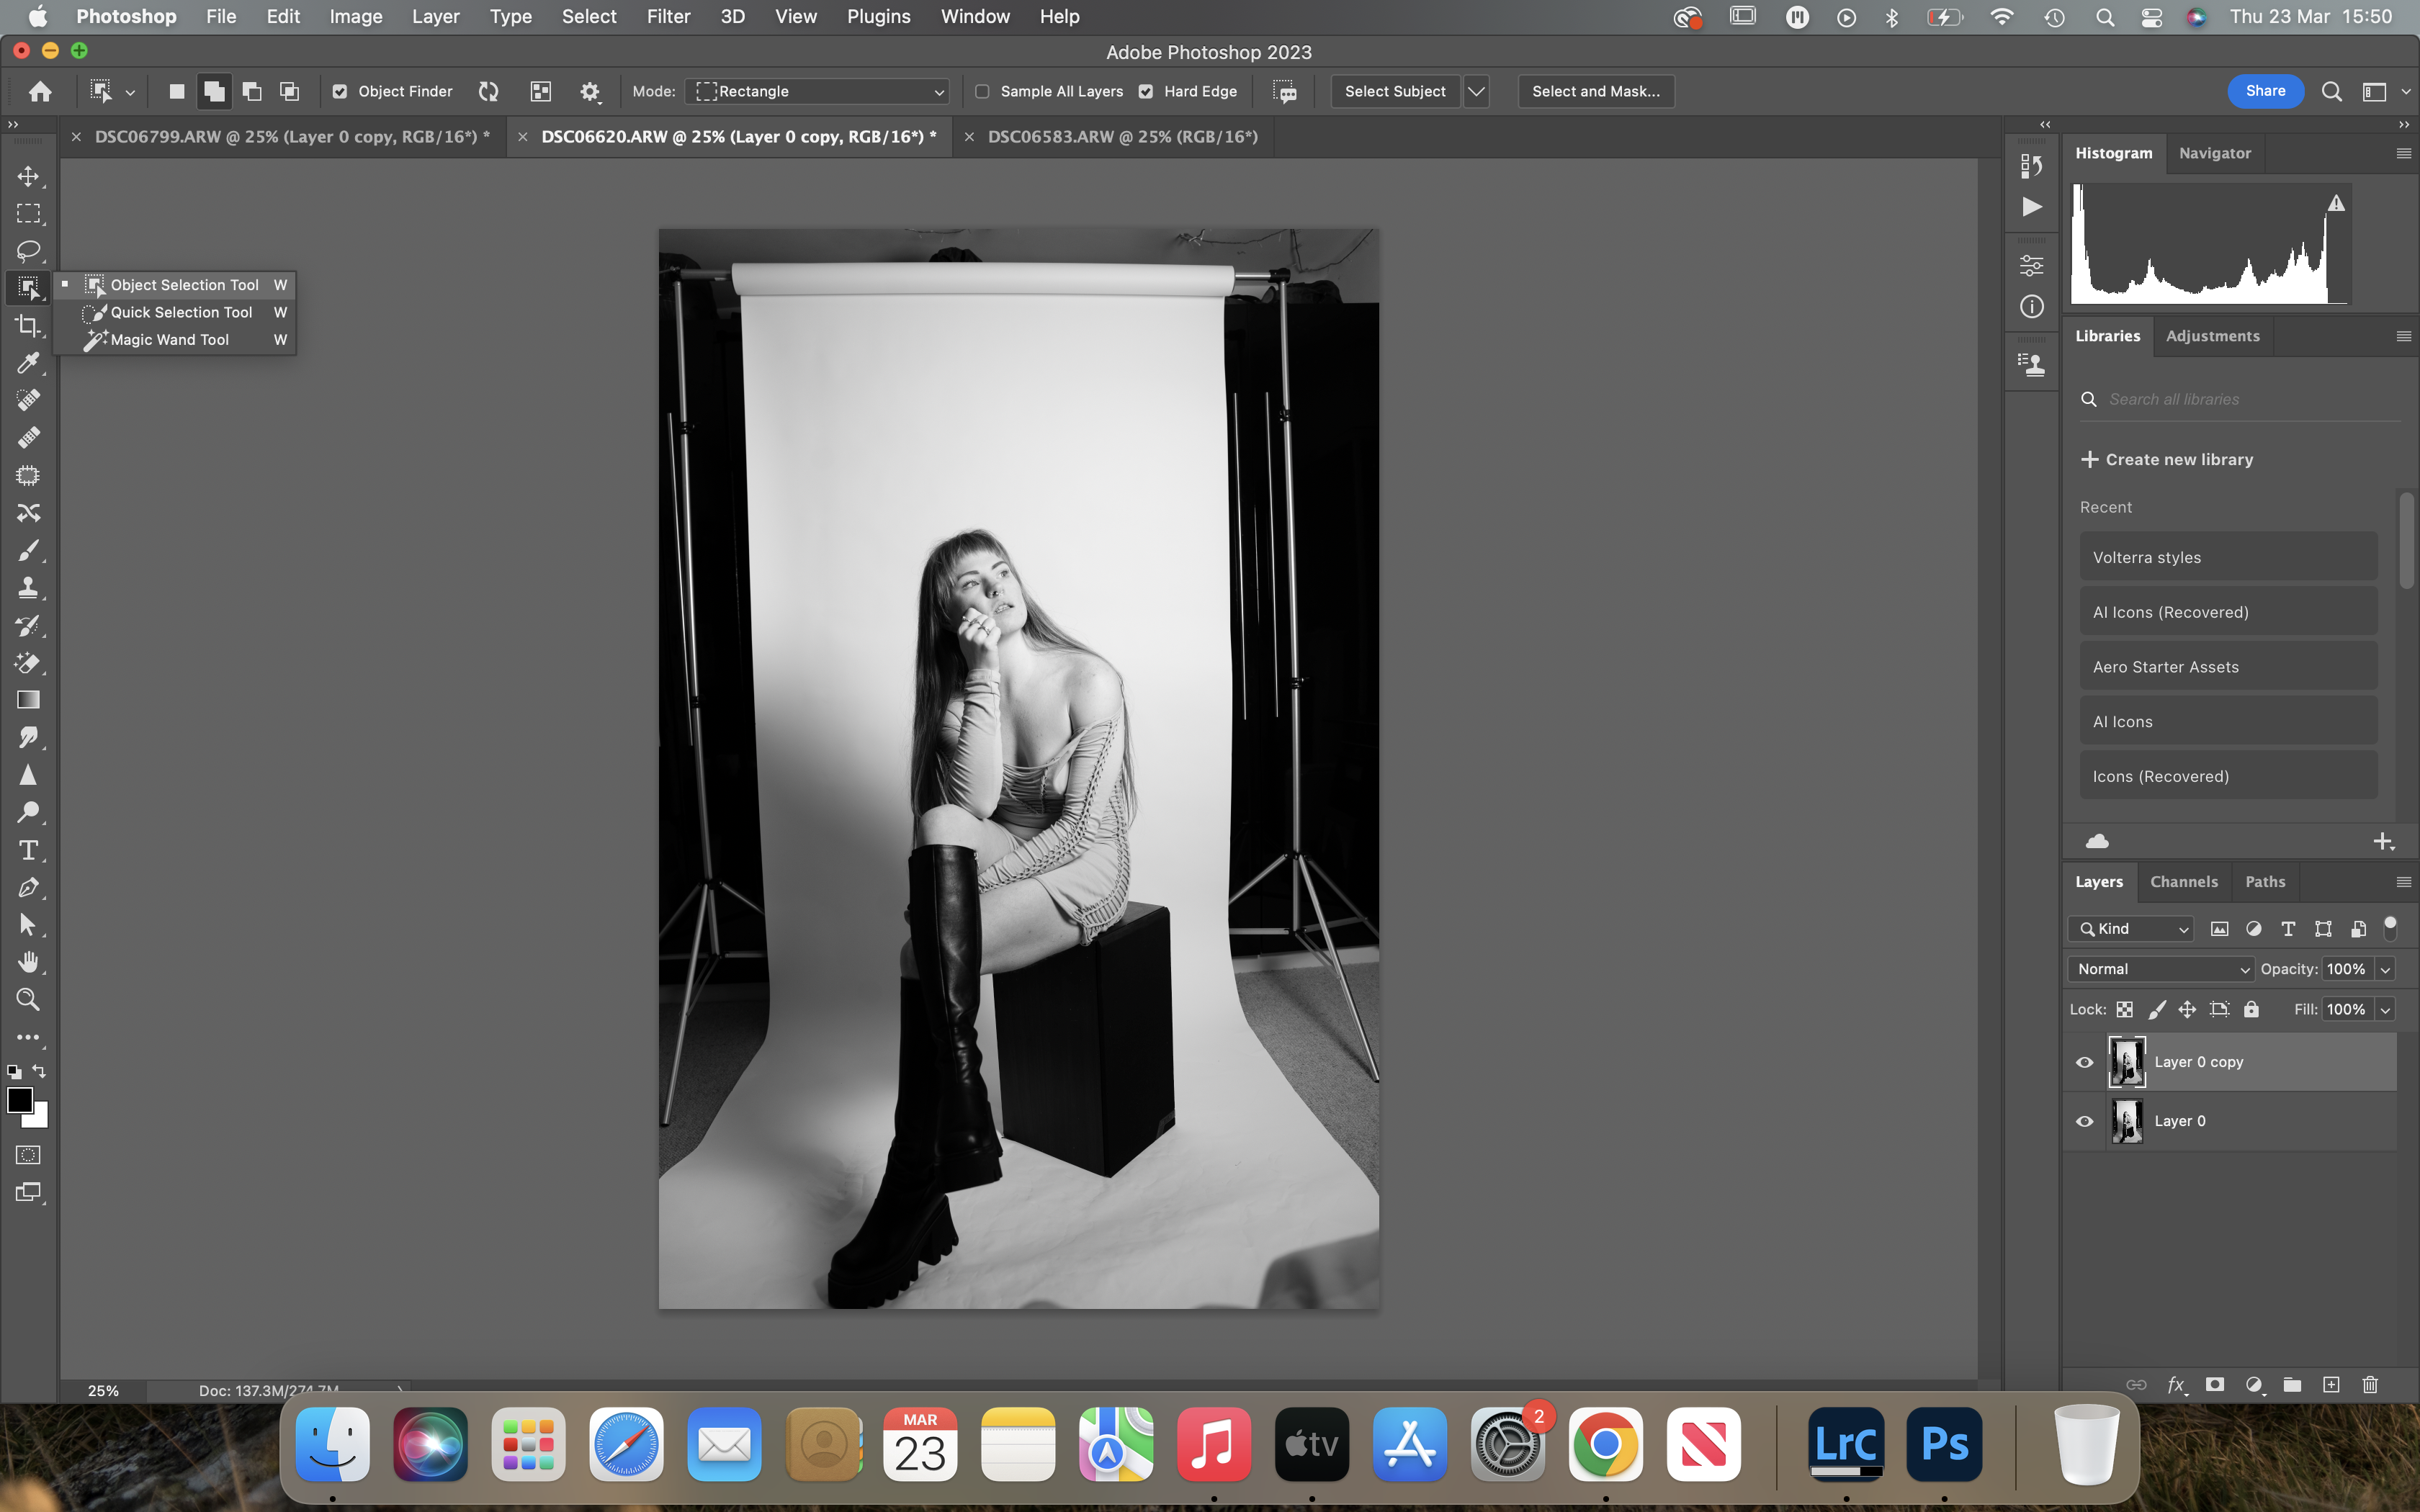
Choose the object selection tool and draw a rectangle marquee around your subject. If it doesn't quite select it all in one go, make sure you have add selection toggled and you can continue to add areas to the same selection.
3. Select inverse

Once your object is selected, right click and scroll down to select inverse so everything other than the subject is selected
4. Content-Aware fill
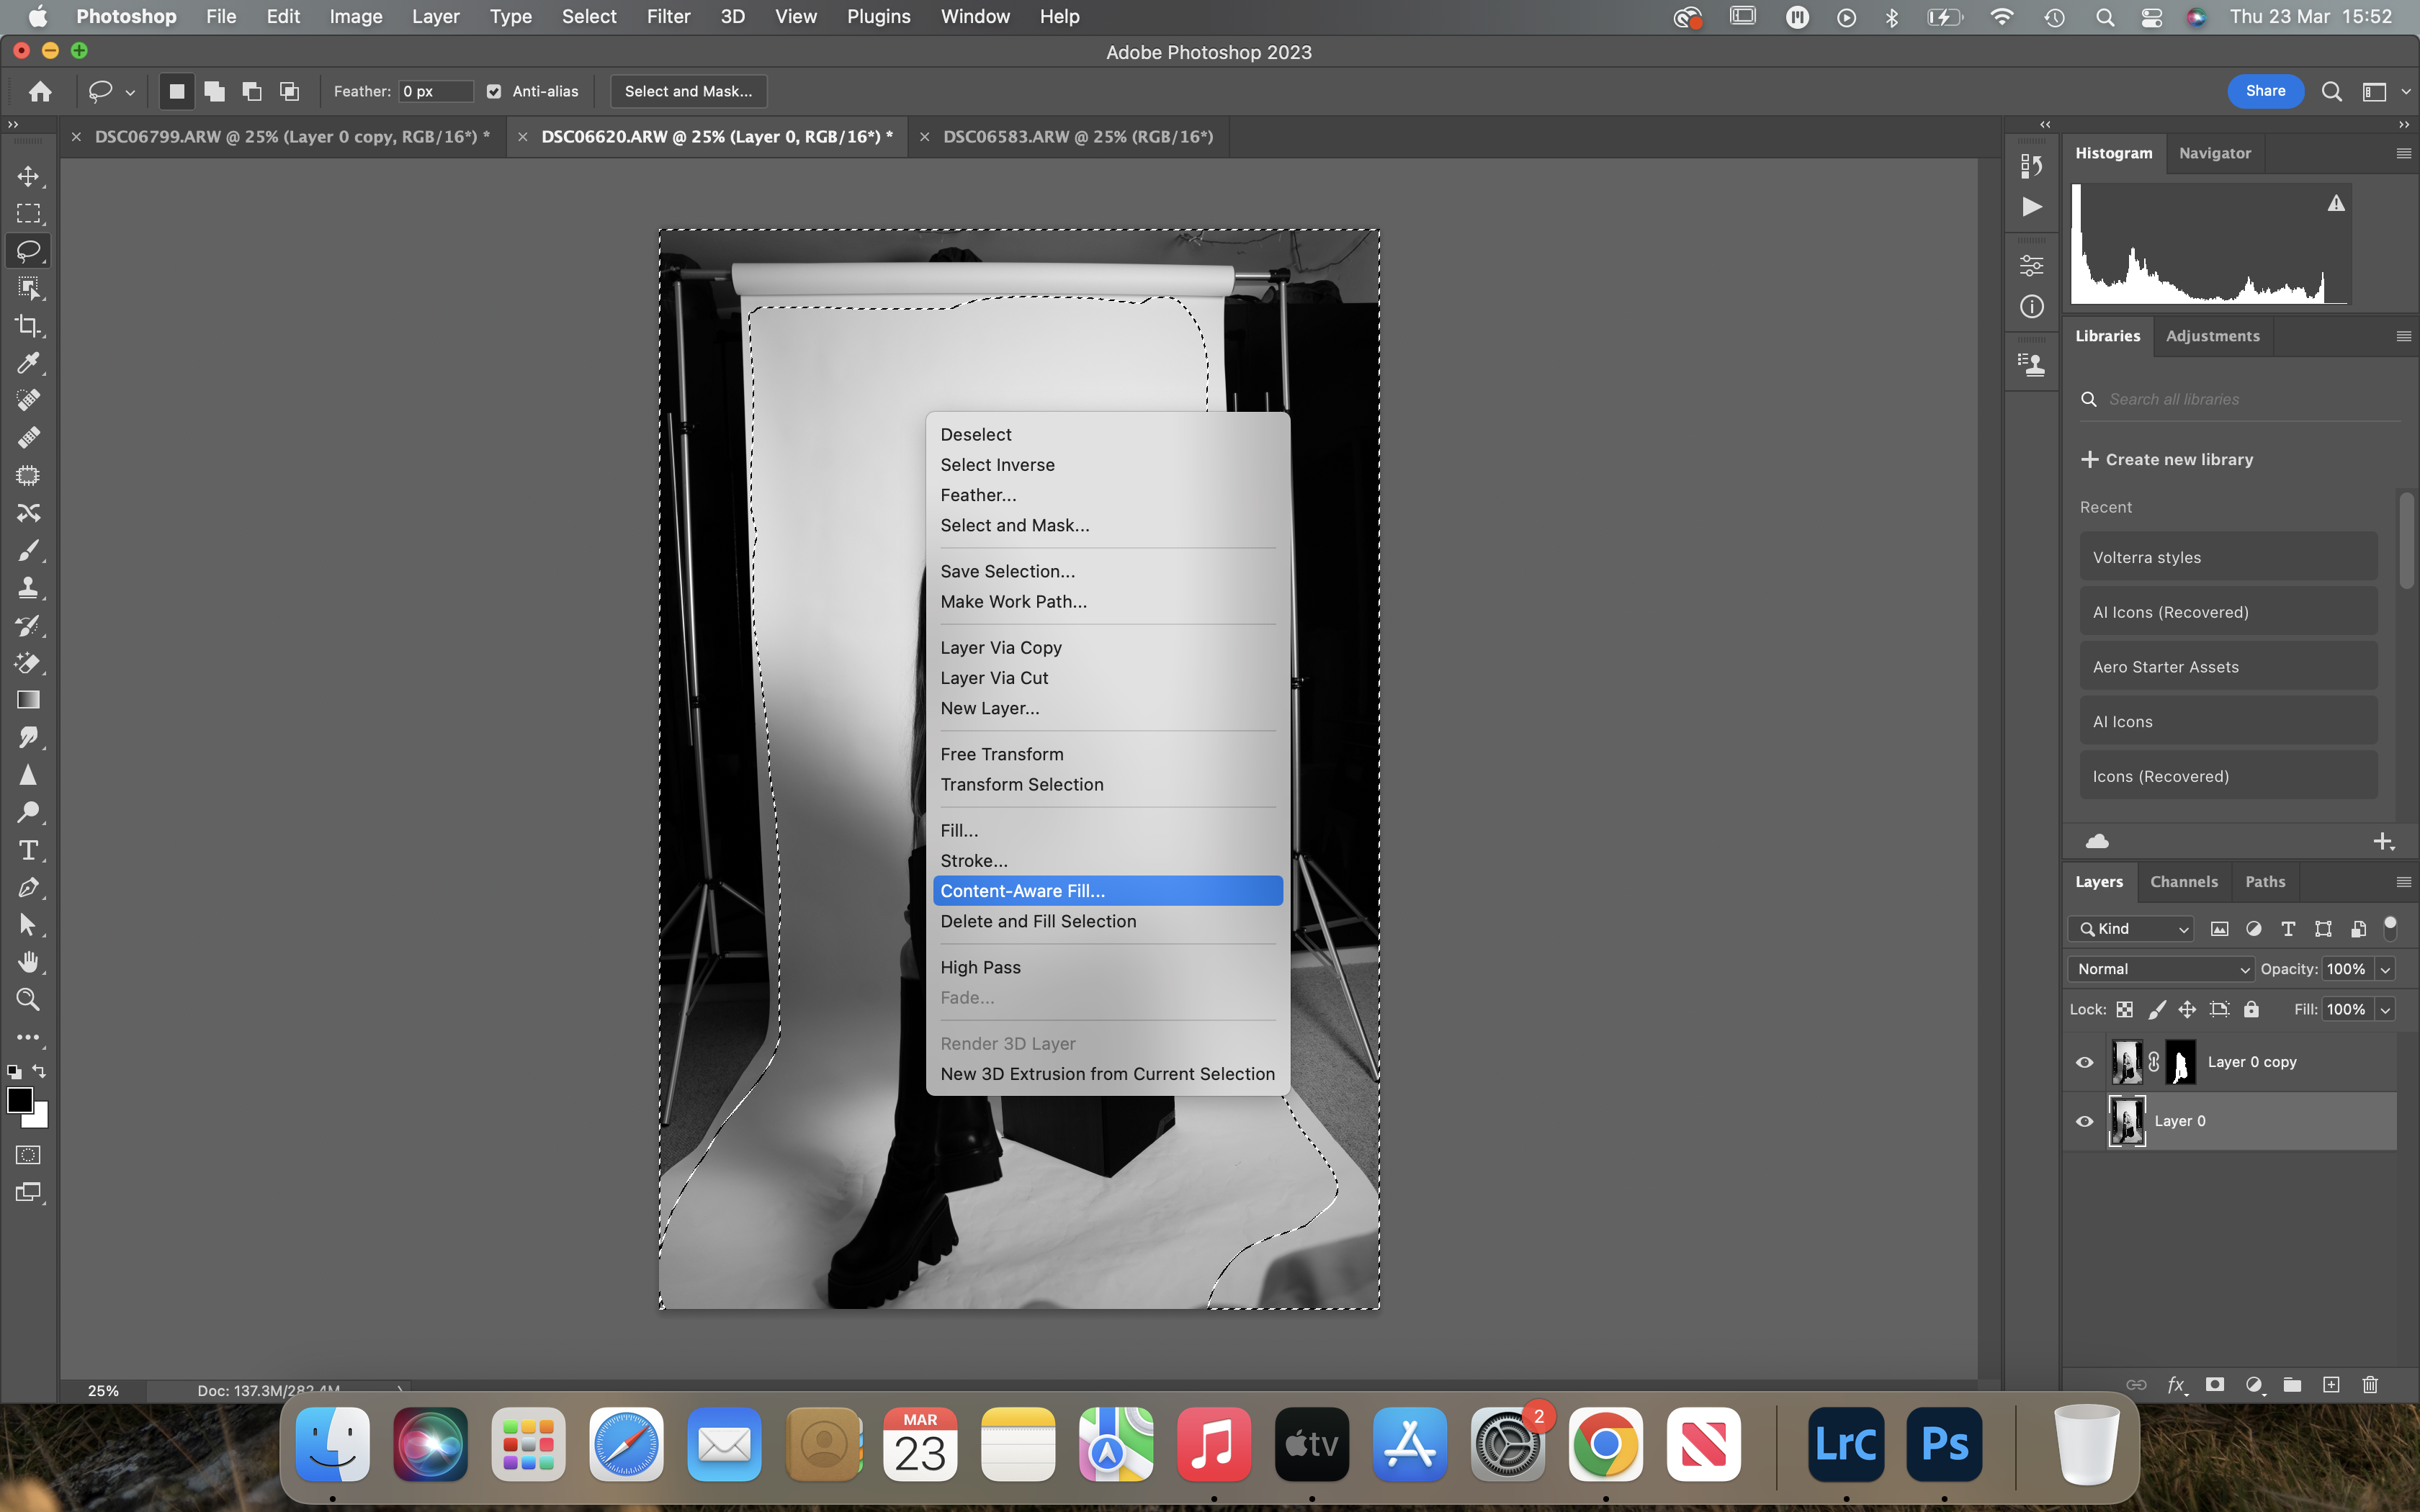

This is when Photoshop starts to get clever. Right-click again but this time scroll down to content-aware fill, it should bring up two windows. The green area is the area it will be sampling to expand your background so make sure you unmask your subject otherwise you'll end up with some very strange results.
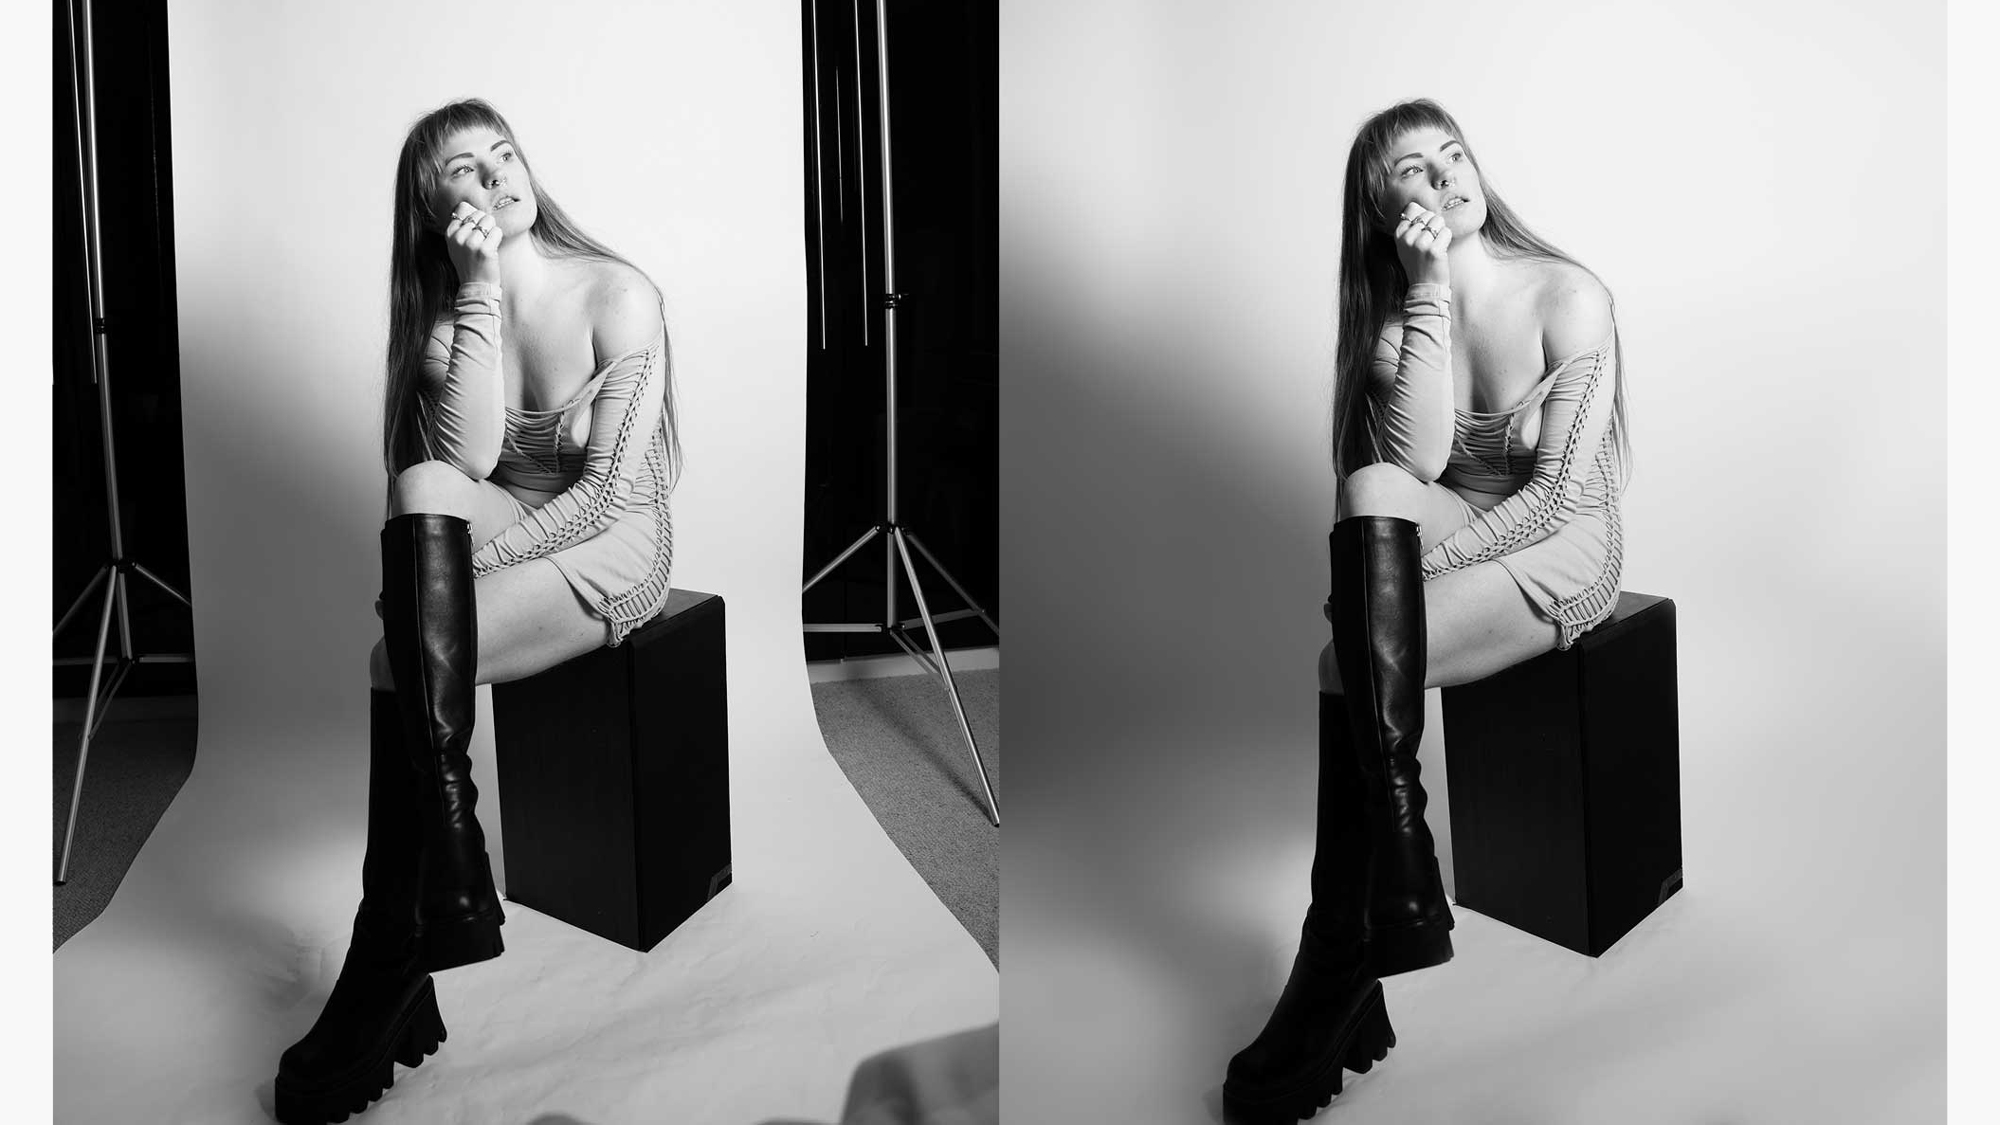
5. Click OK and boom, you're background is extended
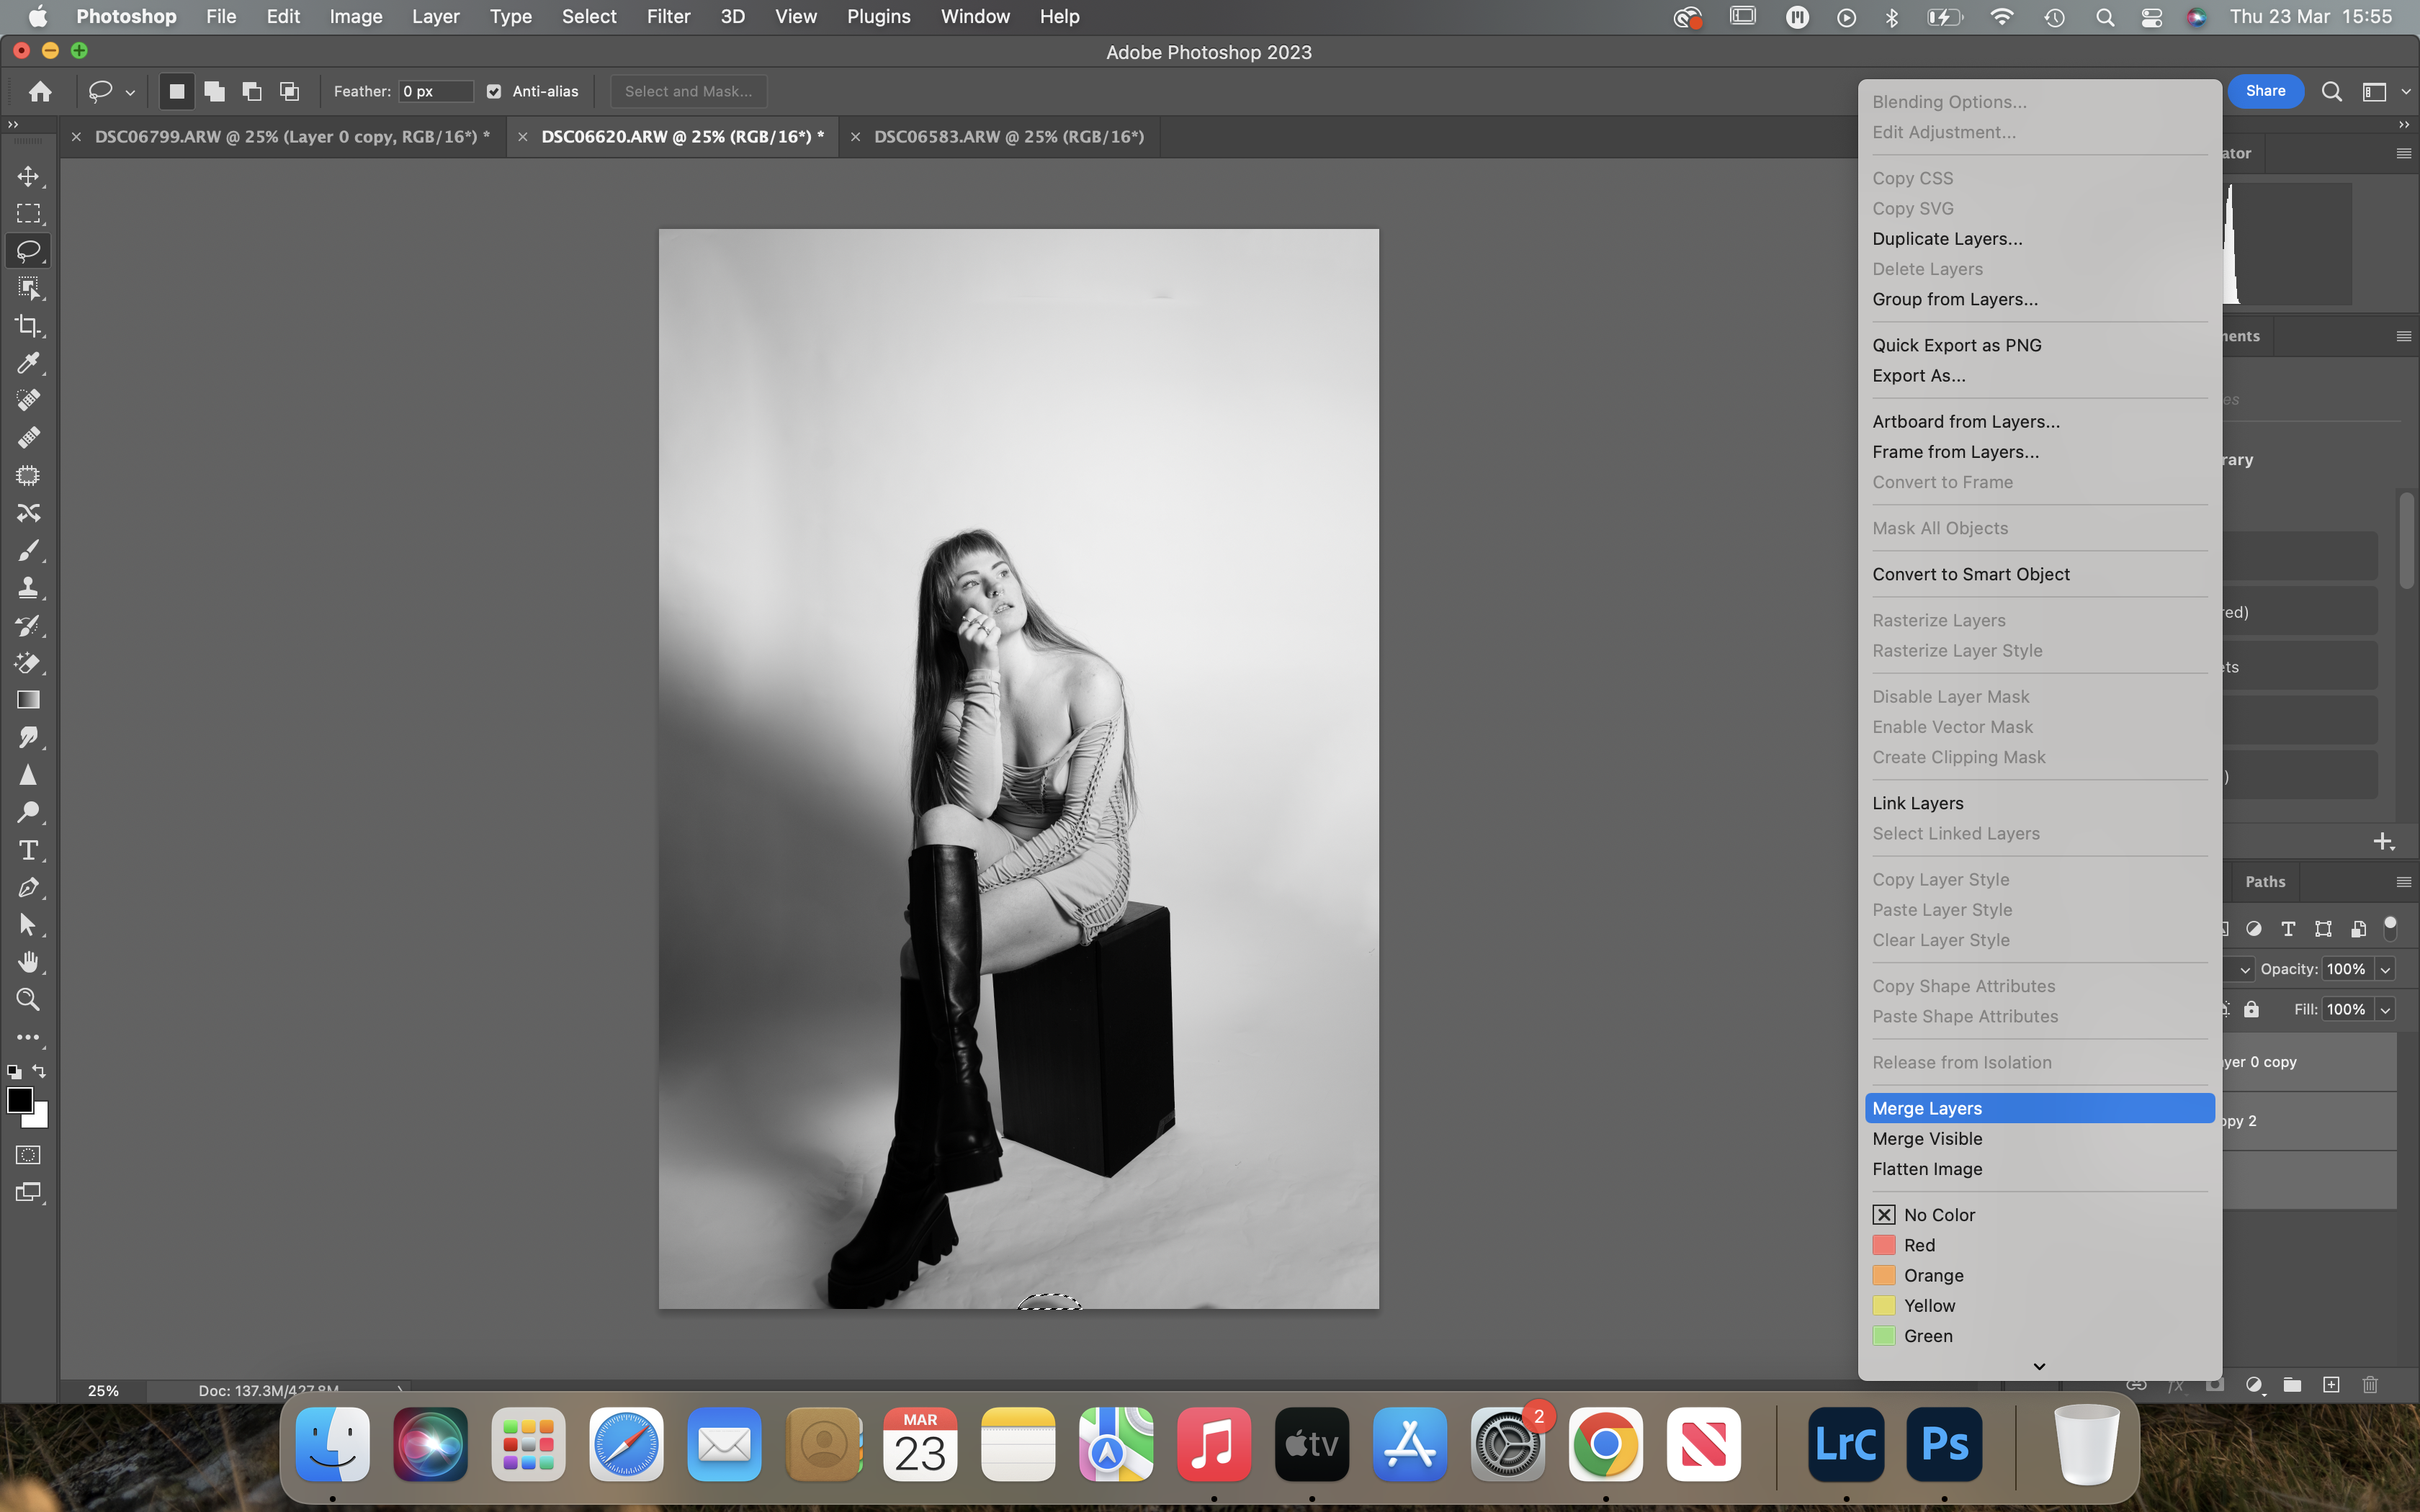
Once it's finished it should look something like this. You might have to clean it up a little using the patch tool, spot healing brush tool or the clone stamp (my favorite) to get rid of any areas that are a little too dark or bright. You should also edit out any really obvious wrinkles or creases in your background paper or fabric.
If you enjoyed this tutorial, why not check out how to remove a background in Photoshop, or how to create a fantastical storm in a tea cup if you want to get really creative