Not sure how to use the Tactical Map in Iron Nest? For me, one of the most enjoyable parts of this heavy turret simulator is plotting the map and using the available data to locate your targets. However, with little to no experience, starting your measurements in Iron Nest can feel a bit daunting. In this guide, I’ll explain how to find targets as quickly and easily as possible.
Recommended Videos
Iron Nest Map and Measurements Explained
The Tactical Map is where Iron Nest turns from a heavy turret simulator into a proper battlefield puzzle. You are not simply told where to shoot. Instead, you need to read the information provided by High Command and Field Reports, transfer the useful details to your Clipboard, place the right markers on the map, and then use bearings and distances to work out where the enemy actually is.
It may look intimidating at first, especially when the map starts filling up with tokens, lines, circles, and notes. However, once you understand how the coordinate system works, the whole thing becomes much easier to read. Think of it as a mix between artillery plotting, a board game, and Battleships, except every correct measurement gets you one step closer to landing a massive shell on target.
RELATED: Complete Iron Nest Beginner’s Guide – Learn How to Play
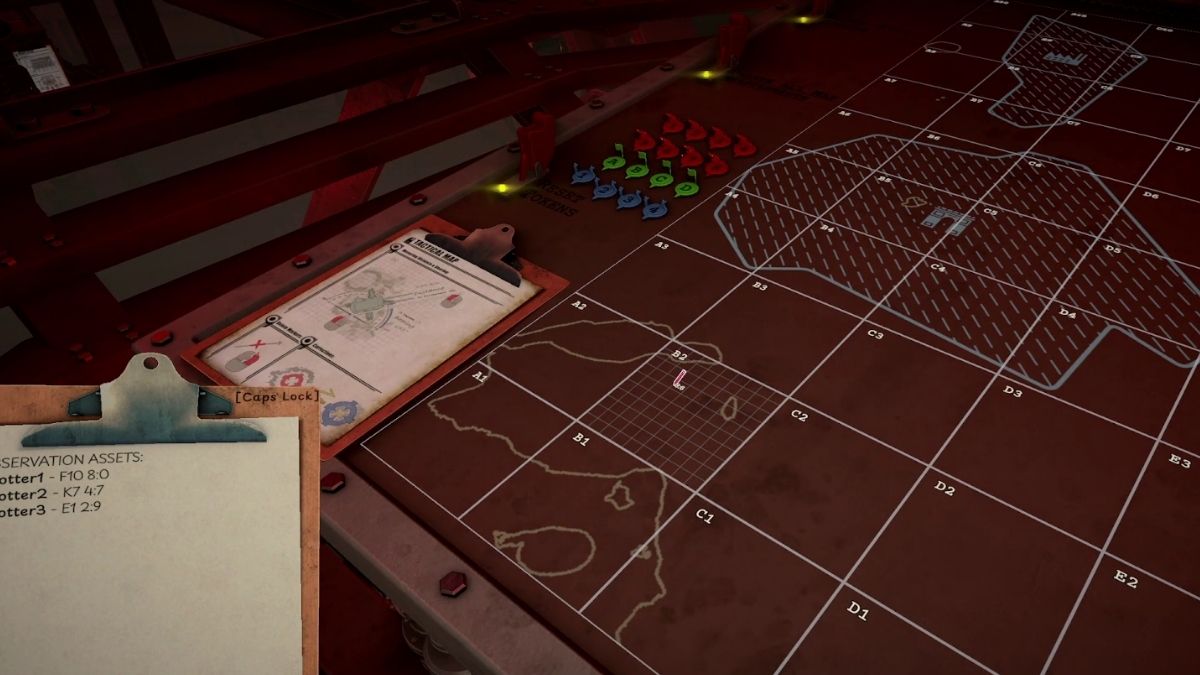
How the Iron Nest Map Grid Works
The Tactical Map is split into a large 20x10 grid. Columns are marked with letters from A to T, moving from left to right, while rows are marked with numbers from 1 to 10. The bottom row is row 1, so always keep that in mind when reading coordinates. Each large square on the map is identified by its column letter and row number, similar to a spreadsheet cell. For example, K5 means column K, row 5, while R8 means column R, row 8.
However, that is only the first layer of the coordinate system. Every large cell is also divided into its own smaller 10x10 sub-grid. These sub-cell coordinates use two numbers, but unlike the main grid, they start at 0 rather than 1. This is why you will see sub-cell coordinates such as 0:4, 8:0, or 9:0.
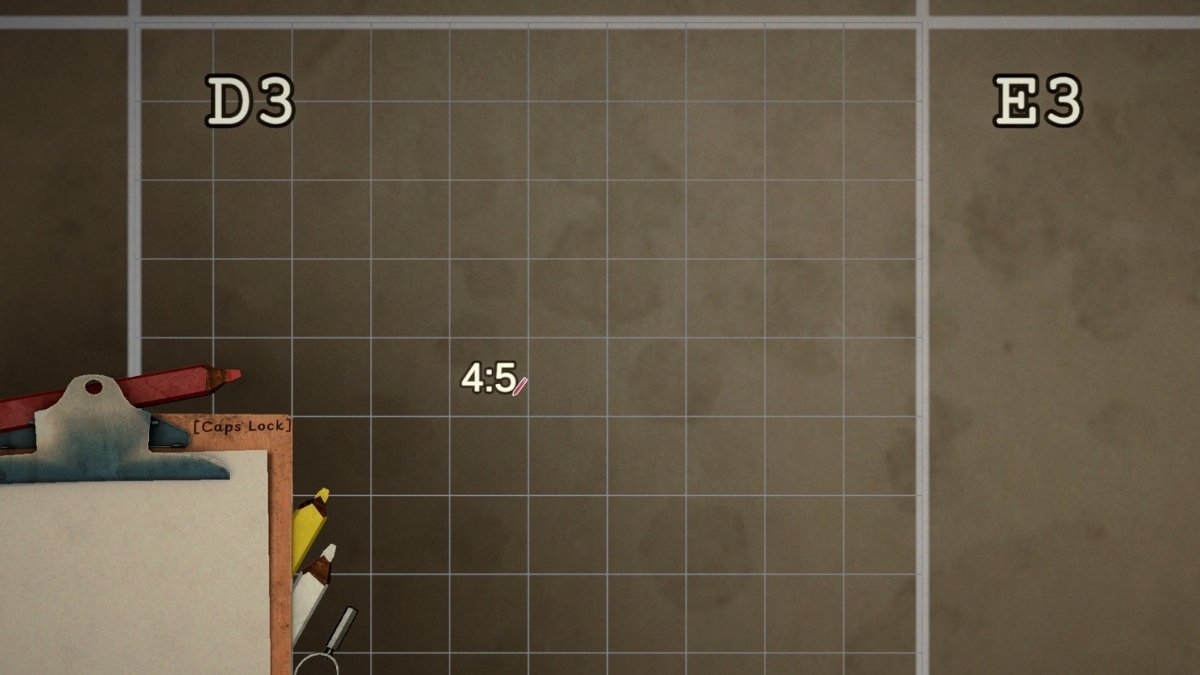
When the game gives you a precise location, it will combine both systems. For example, F10 8:0 means the location is inside the F10 cell, at sub-cell 8:0. Another example would be I7 2:4, which points you to cell I7 and then to the 2:4 position inside that cell.
PRO TIP: Always place tokens as close to the correct sub-cell as possible. A small mistake early on can throw off your lines, bearings, and distance measurements later.
Iron Nest Map Tokens and What They Mean
Coordinates tell you where something should be, but tokens are what help you keep track of everything visually. You will use them to mark your own position, observation assets, reference points, and enemy targets once you narrow them down. In the current build of the game, these are the main tokens you will use on the Tactical Map:
| Token Type | How to Use It |
|---|---|
| Iron Nest Token | Use this large token to mark the current position of your Iron Nest. This should usually be the first token you place at the start of a mission. |
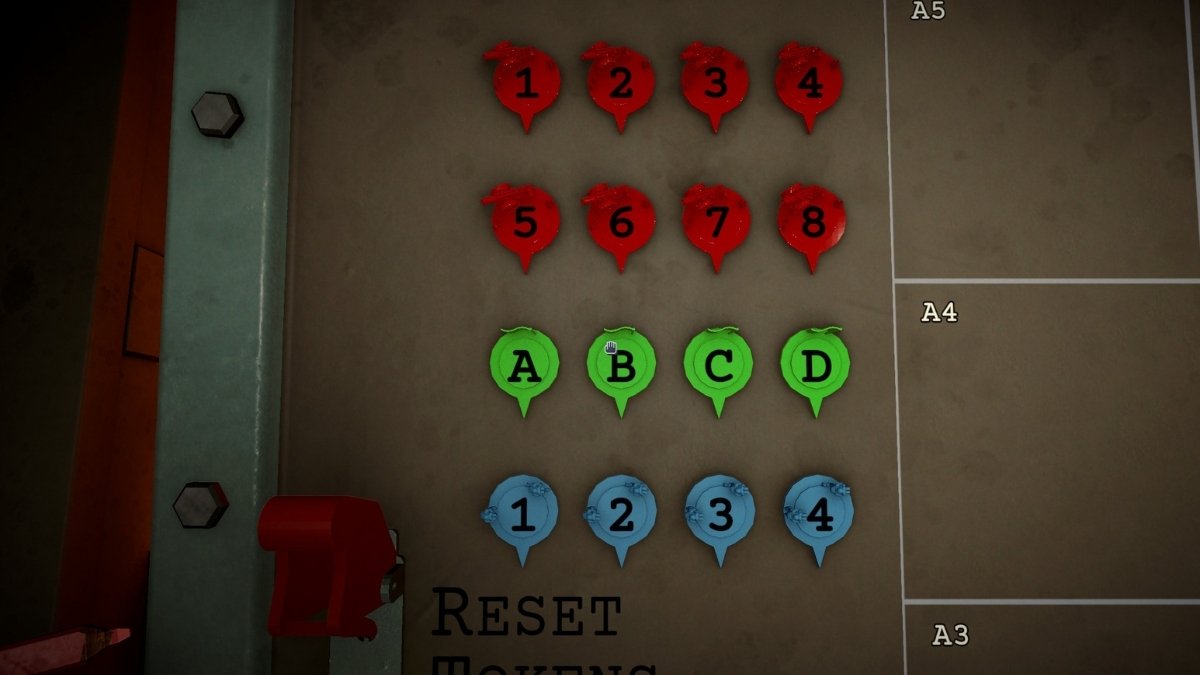
| Blue Number Tokens (1-4) | Use these tokens to mark your observation assets, also known as Spotters. |
| Green Letter Tokens (A-C) | Use these to mark Reference Points mentioned in the mission brief or field reports. |
| Red Number Tokens (1-8) | Use these to mark enemy Targets after you have worked out their position. |
These are your main map markers, and most of your plotting will revolve around them. Keeping them organized is important because once several targets, spotters, and measurement lines are on the table, the map can quickly become messy.
You will also see Skull tokens appear above target locations after firing. A red Skull token confirms that you have destroyed an enemy target. A blue Skull token, however, means your shot also hit a friendly unit.
Finally, you will notice various nuts and bolts scattered around the map. These can also be moved and placed manually. I am not yet sure whether they have a specific dedicated purpose, but you can still use them as improvised markers for anything that does not fit into the normal token categories.
How to Find Targets on the Iron Nest Map
Once you understand the grid and tokens, the next step is learning how to actually locate targets. The basic idea is simple: mark everything you already know, collect every useful clue, then use measurement tools to narrow down the target's position.
In most missions, you will not start with the target's exact location. Instead, the game will give you partial information, such as bearings from spotters, distances from reference points, or descriptive hints about the surrounding terrain. Your job is to turn those clues into a firing solution.
Step 1: Place Every Known Position First
Before you start measuring anything, place all the confirmed information on the map. This gives you a clean foundation for every line, circle, and calculation that comes afterward.
- Mark the Iron Nest first. The High Command brief will give you your current location, so place the Iron Nest token there before doing anything else.
- Place your Spotters next. Observation assets usually come with full coordinates, such as Spotter 1 — N5 4:0 . Use the blue number tokens to mark them.
- Add Reference Points if provided. If the brief or reports mention reference points, find them on the map and mark them with the green letter tokens.
These three groups - your Iron Nest, your Spotters, and your Reference Points - are usually the most important fixed positions on the map. In other words, they are the points you will measure from. That is why I recommend placing them in this exact order whenever you begin a mission.
RELATED: Iron Nest Counter-Battery Fire Guide – How to Stop Enemy Artillery
Step 2: Move Useful Clues to Your Clipboard
After your known positions are marked, open your Clipboard and clear any old notes if needed. Then check both the High Command and Field Reports typewriters for information that can help you locate the enemy. At the moment, the two most important types of target data are Bearings and Distances:
| Data Type | What It Tells You |
|---|---|
| Bearing | The direction of the target from a known point, such as a Spotter, Reference Point, or the Iron Nest. |
| Distance | How far the target is from a known point, such as a Spotter, Reference Point, or the Iron Nest. |
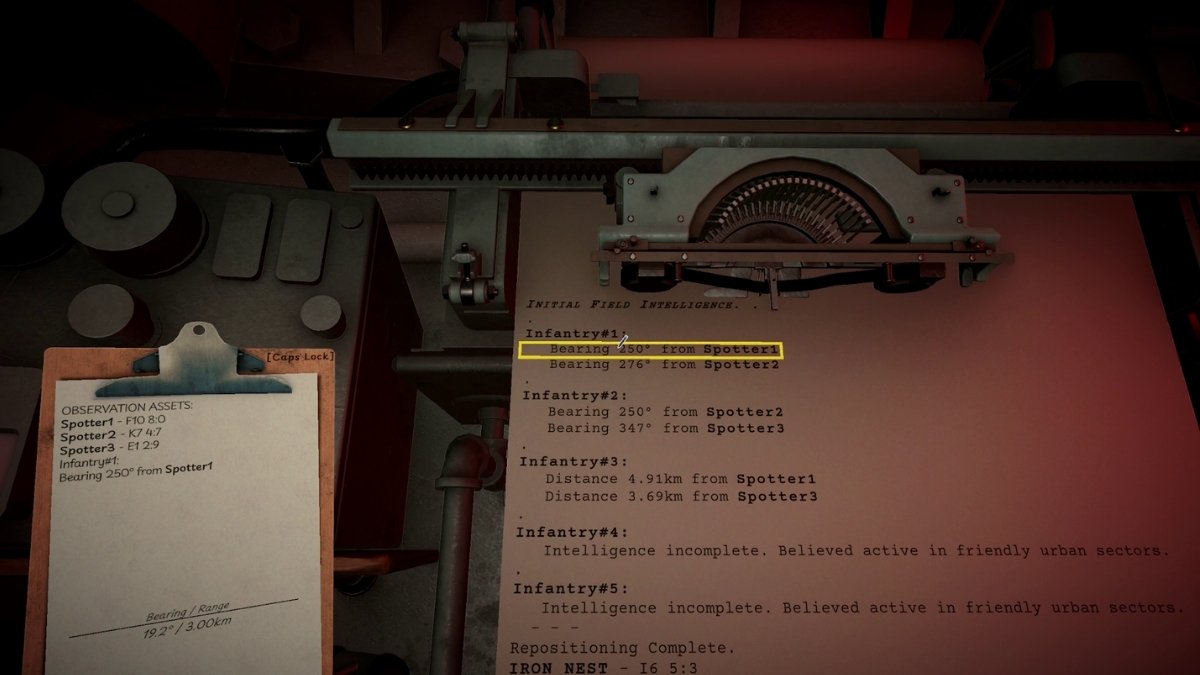
A target report can look something like this:
Target #1 - Bearing 186° from Spotter#1 - Bearing 111° from Spotter#2 Target #2 - Distance 7.45km from Spotter#3 - Distance 3.56km from Spotter#1
Sometimes, the information will be less precise. Instead of clean numbers, you may get descriptive clues, such as a target being across the river, near a specific object, or somewhere around a certain area. In those cases, you will need to combine the available measurements with rough visual estimates.
Pro Tip: Unless you are dealing with enemy artillery, I recommend finding and engaging targets one at a time. Marking everything at once can make the Tactical Map difficult to read. Artillery is the exception because firing your first shell will start the counter-battery timer, so you should identify and mark every artillery position before opening fire.
Step 3: Use Lines and Circles to Pinpoint the Target
Now comes the fun part: actually plotting the target. When you interact with the map and open the Clipboard, you will see three colored wooden pencils — red, yellow, and white — along with a drawing compass. These are your main measurement tools.
The pencils all serve the same basic purpose, but having multiple colors helps with visibility. Use them to draw measurement lines without turning the map into an unreadable mess. The compass is used when you need to work with distance-based clues.
Finding a Target With Two Bearings
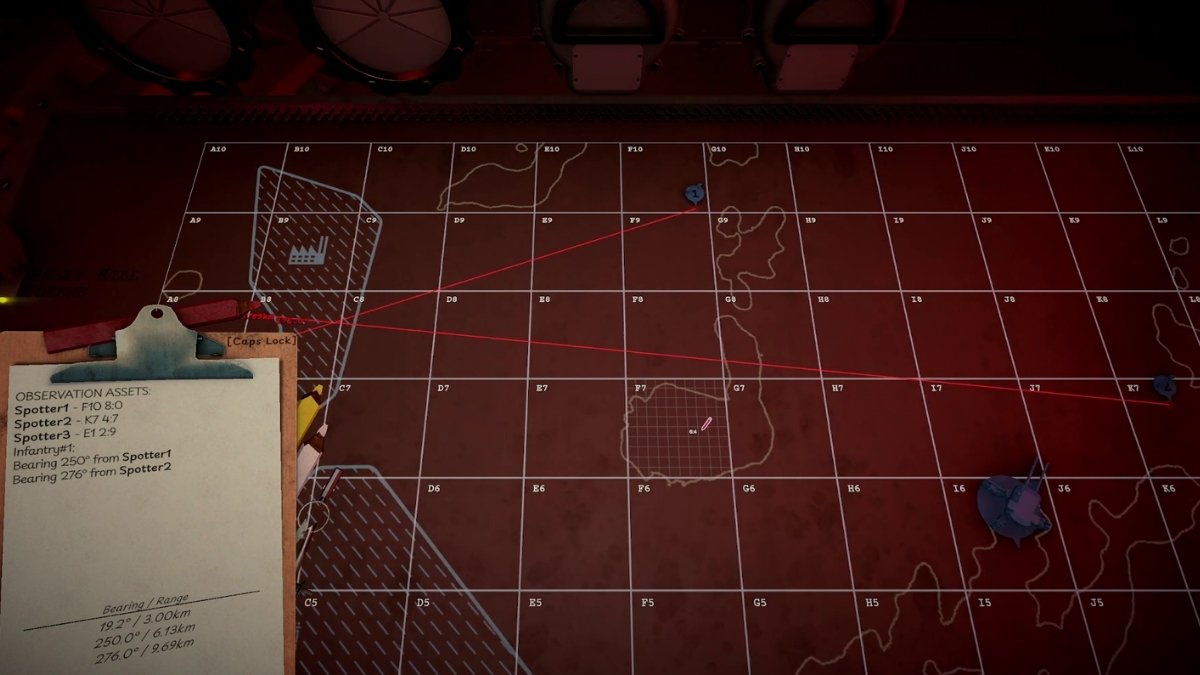
If a target report says Bearing 186° from Spotter#1 and Bearing 111° from Spotter#2, you can find the target by drawing two directional lines and looking for their intersection.
- Start from the exact sub-cell where Spotter #1 is placed.
- Draw a line from that point at 186° . The game will display the bearing and distance while you draw, so you do not need to calculate the angle manually.
- Extend the line far enough across the map. When using a bearing, the direction is what matters most; the line simply needs to continue far enough to cross the other clue.
- Repeat the process from Spotter #2 , this time drawing a line at 111° .
- Find the point where the two lines intersect. That intersection is your target location.
- Place a Red Number Token on the target's sub-cell so you can easily track it.
Finding a Target With Distance Data
Distance clues work slightly differently. Instead of giving you a direction, they tell you how far the target is from a known point. For example, if the report says Distance 7.45km from Spotter#3, the target could be anywhere at that distance from Spotter #3.
That is where the drawing compass becomes useful. Use the Spotter as the center and mark the distance around it. If you have a second distance clue, such as Distance 3.56km from Spotter#1, repeat the process from that second point. The target should be where those distance measurements overlap or intersect.

If the information is incomplete or descriptive, you may not get a perfect intersection. In that case, use the best overlap, nearby terrain features, and any additional hints from the report to make a reasonable estimate.
RELATED: Iron Nest First Impressions – Inside the Belly of War
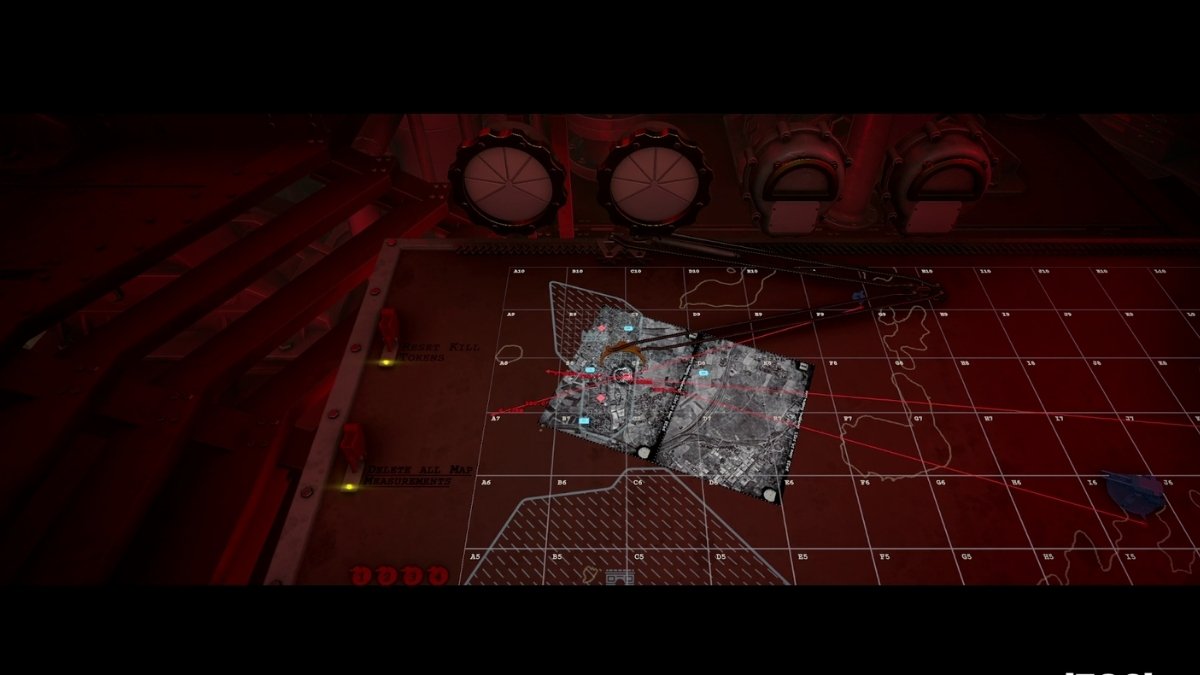
Step 4: Get the Final Bearing and Range
Finding the target on the map is only part of the job. Once you know where it is, you still need the correct firing data for the Iron Nest itself.
To get that data, draw a direct line from the sub-cell occupied by the Iron Nest to the sub-cell where you marked the target. The game will display the two values you actually need: Bearing and Range. These values will also be added to your Clipboard automatically.
The only Bearing and Range values you need for firing are the ones between the Iron Nest and the target. Any earlier bearings or distances were only used to locate the target on the map. Once you have the final firing data, you can delete the extra measurement notes from your Clipboard to avoid confusing them with the real shot data.
Final Tip: Keep your map as clean as possible. Use different pencil colors when needed, remove outdated Clipboard entries, and do not place more target tokens than necessary unless the mission specifically requires it. A readable map is often the difference between a clean shot and wasting valuable time.
Iron Nest Map FAQs
And there you have it, now you're fully equipped to read battlefield data, use the Tactical Map in Iron Nest, and make precise measurements to locate your targets. Thanks for reading, and while you're here, don't forget to check out our dedicated Iron Nest hub for more guides, tutorials, walkthroughs, and much more.