It's worth knowing what iPhone recovery mode is, in case of emergency. It's a last resort for getting your iPhone to work if it's completely frozen, or a computer or other device doesn't recognize it. It's also what you can do to open up an iPhone that's been disabled from too many incorrect password attempts.
Assuming your iPhone has functional side and volume buttons, and you've got a Mac or PC handy to assist you, you can try out recovery mode if you've got a phone that's otherwise locked up tight.
How to put an iPhone in recovery mode, and restore it
- Plug your iPhone into a Mac, or a PC with iTunes installed
- Open up Finder or iTunes, depending on your computer
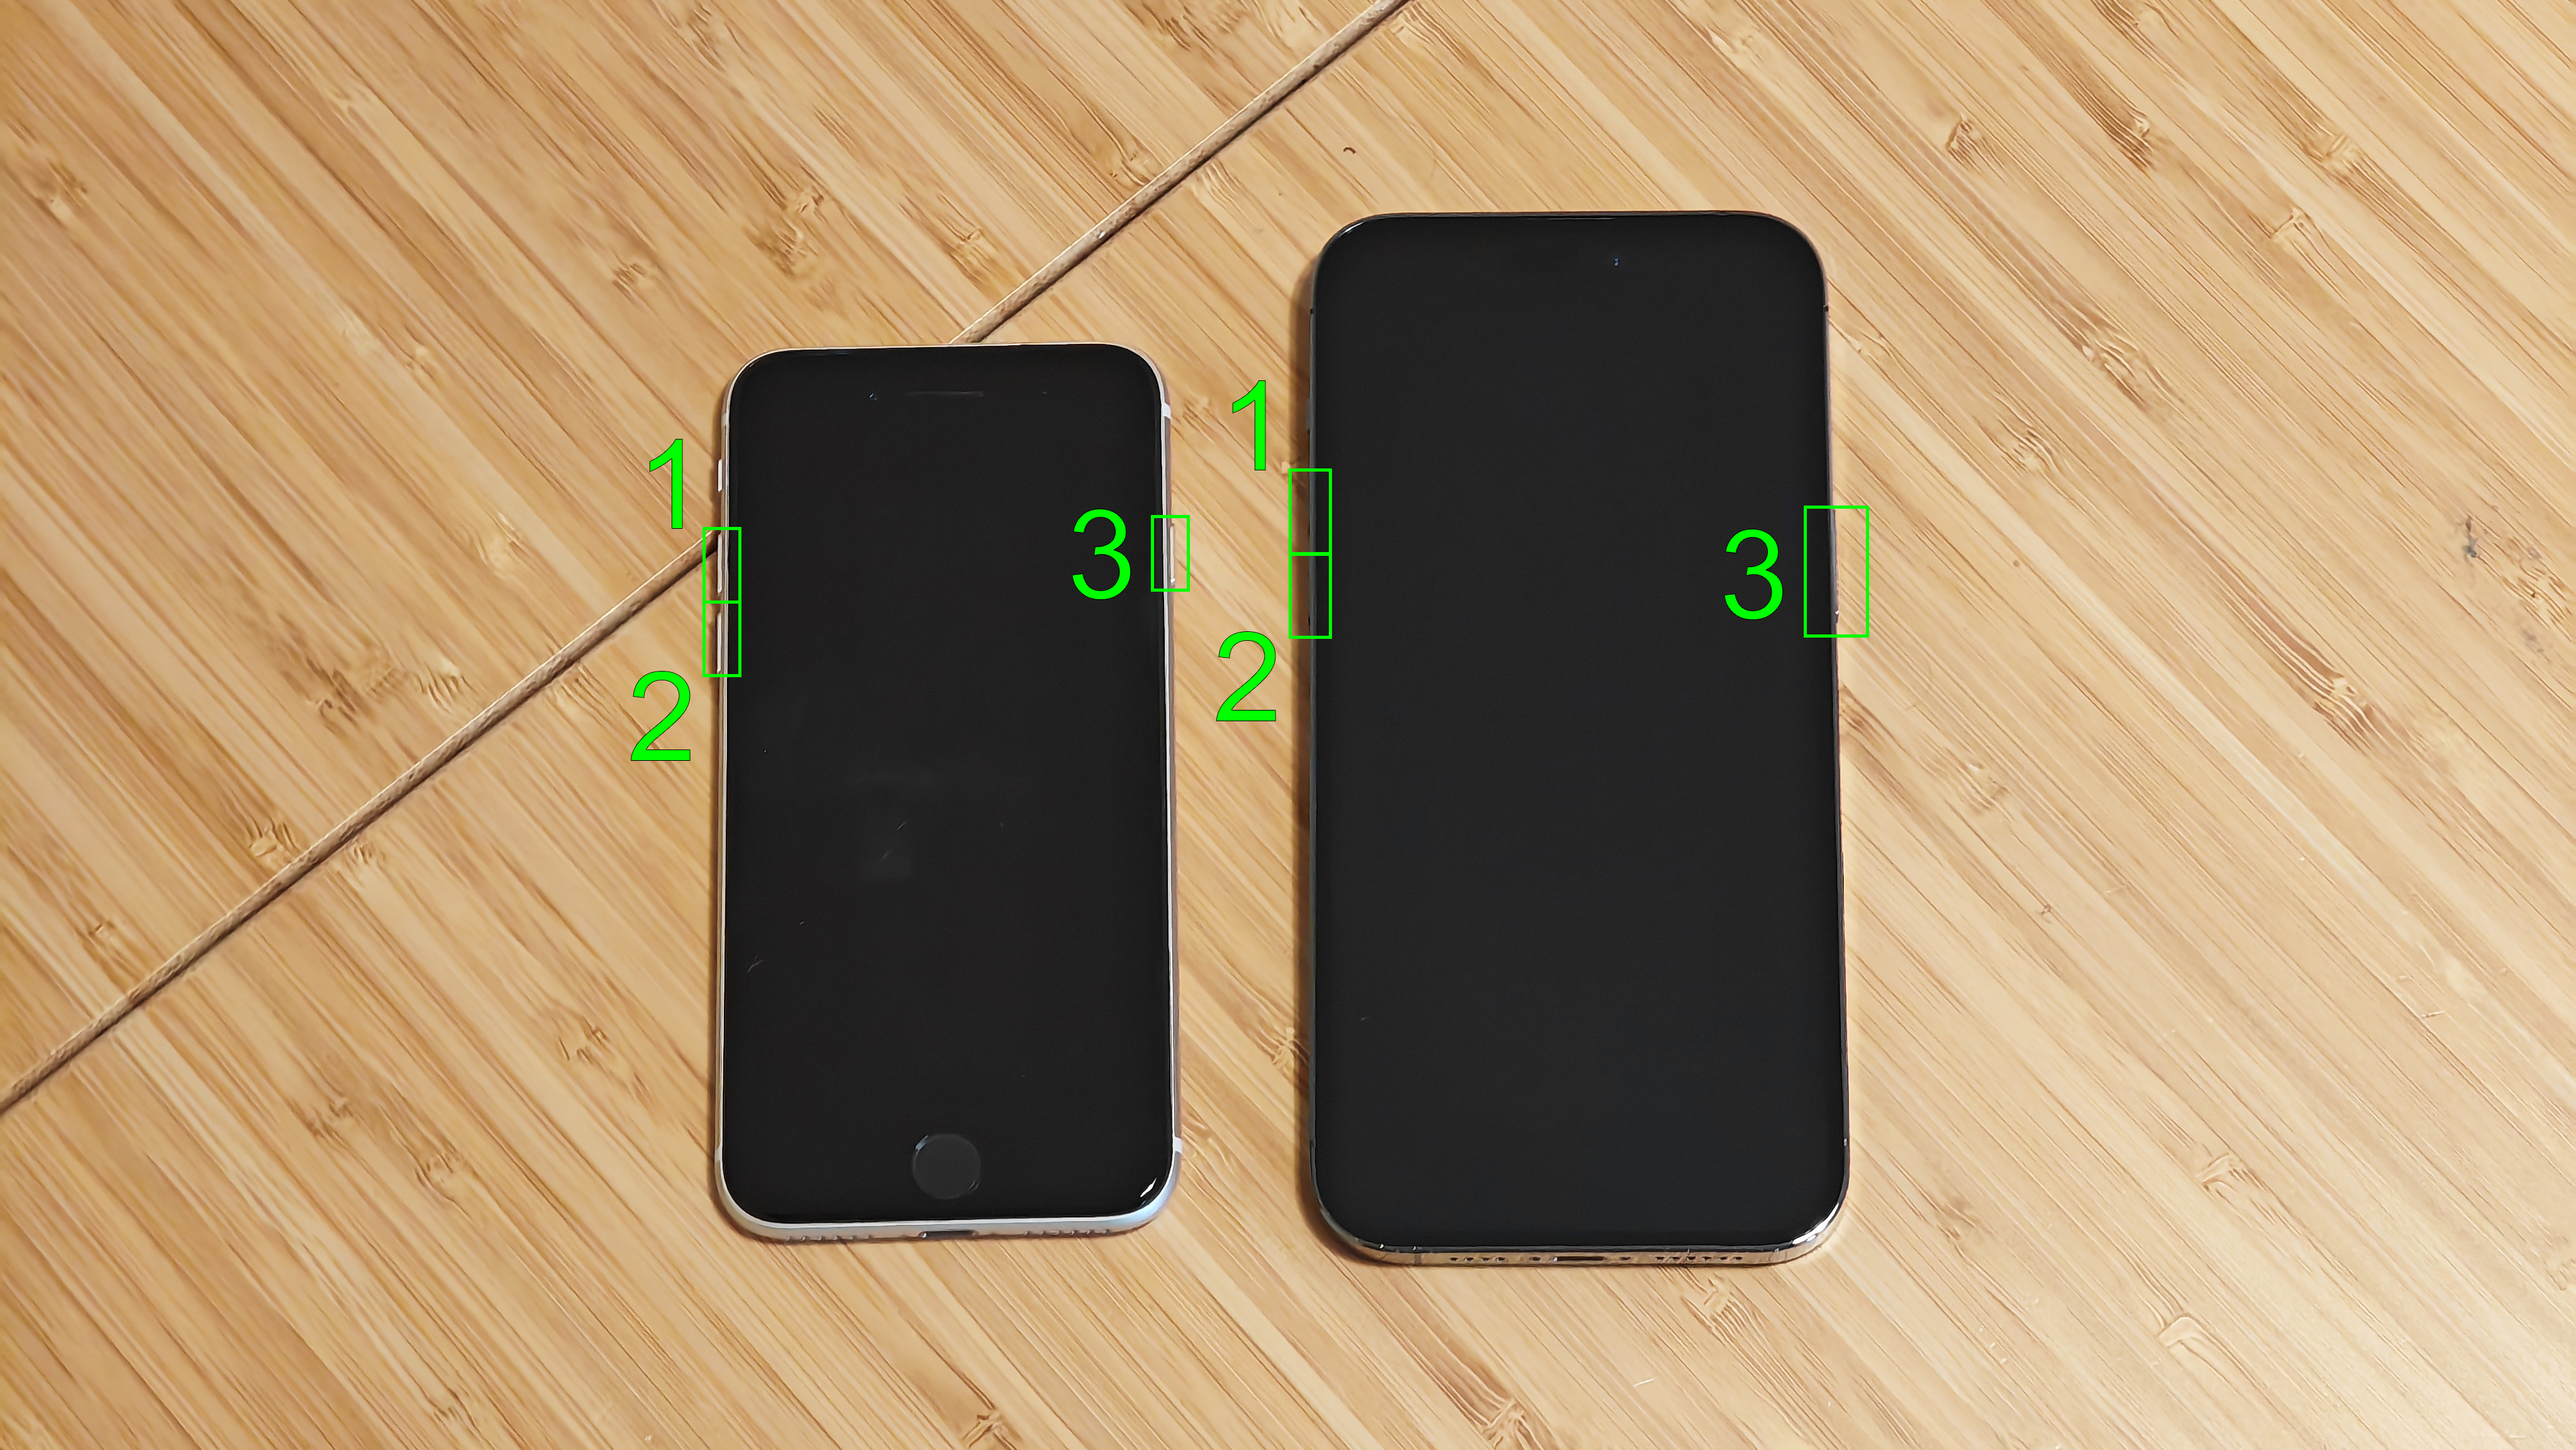
- Press volume up, then volume down, then press and hold the side button on the iPhone until Recovery Mode is enabled.
- Open the iPhone in Finder or iTunes
- First attempt to update the iPhone, or restore it through the on-screen prompts
- Set up your iPhone again as necessary
Read on for more detailed, illustrated steps
Note: This guide relies on the fact that your iPhone still has functional buttons. If your phone's damaged in a way that stops you from doing the necessary button presses (see step 3), you'll have to take it into Apple for fixing and restoring.
1. Plug your iPhone into a Mac, or a PC with iTunes installed
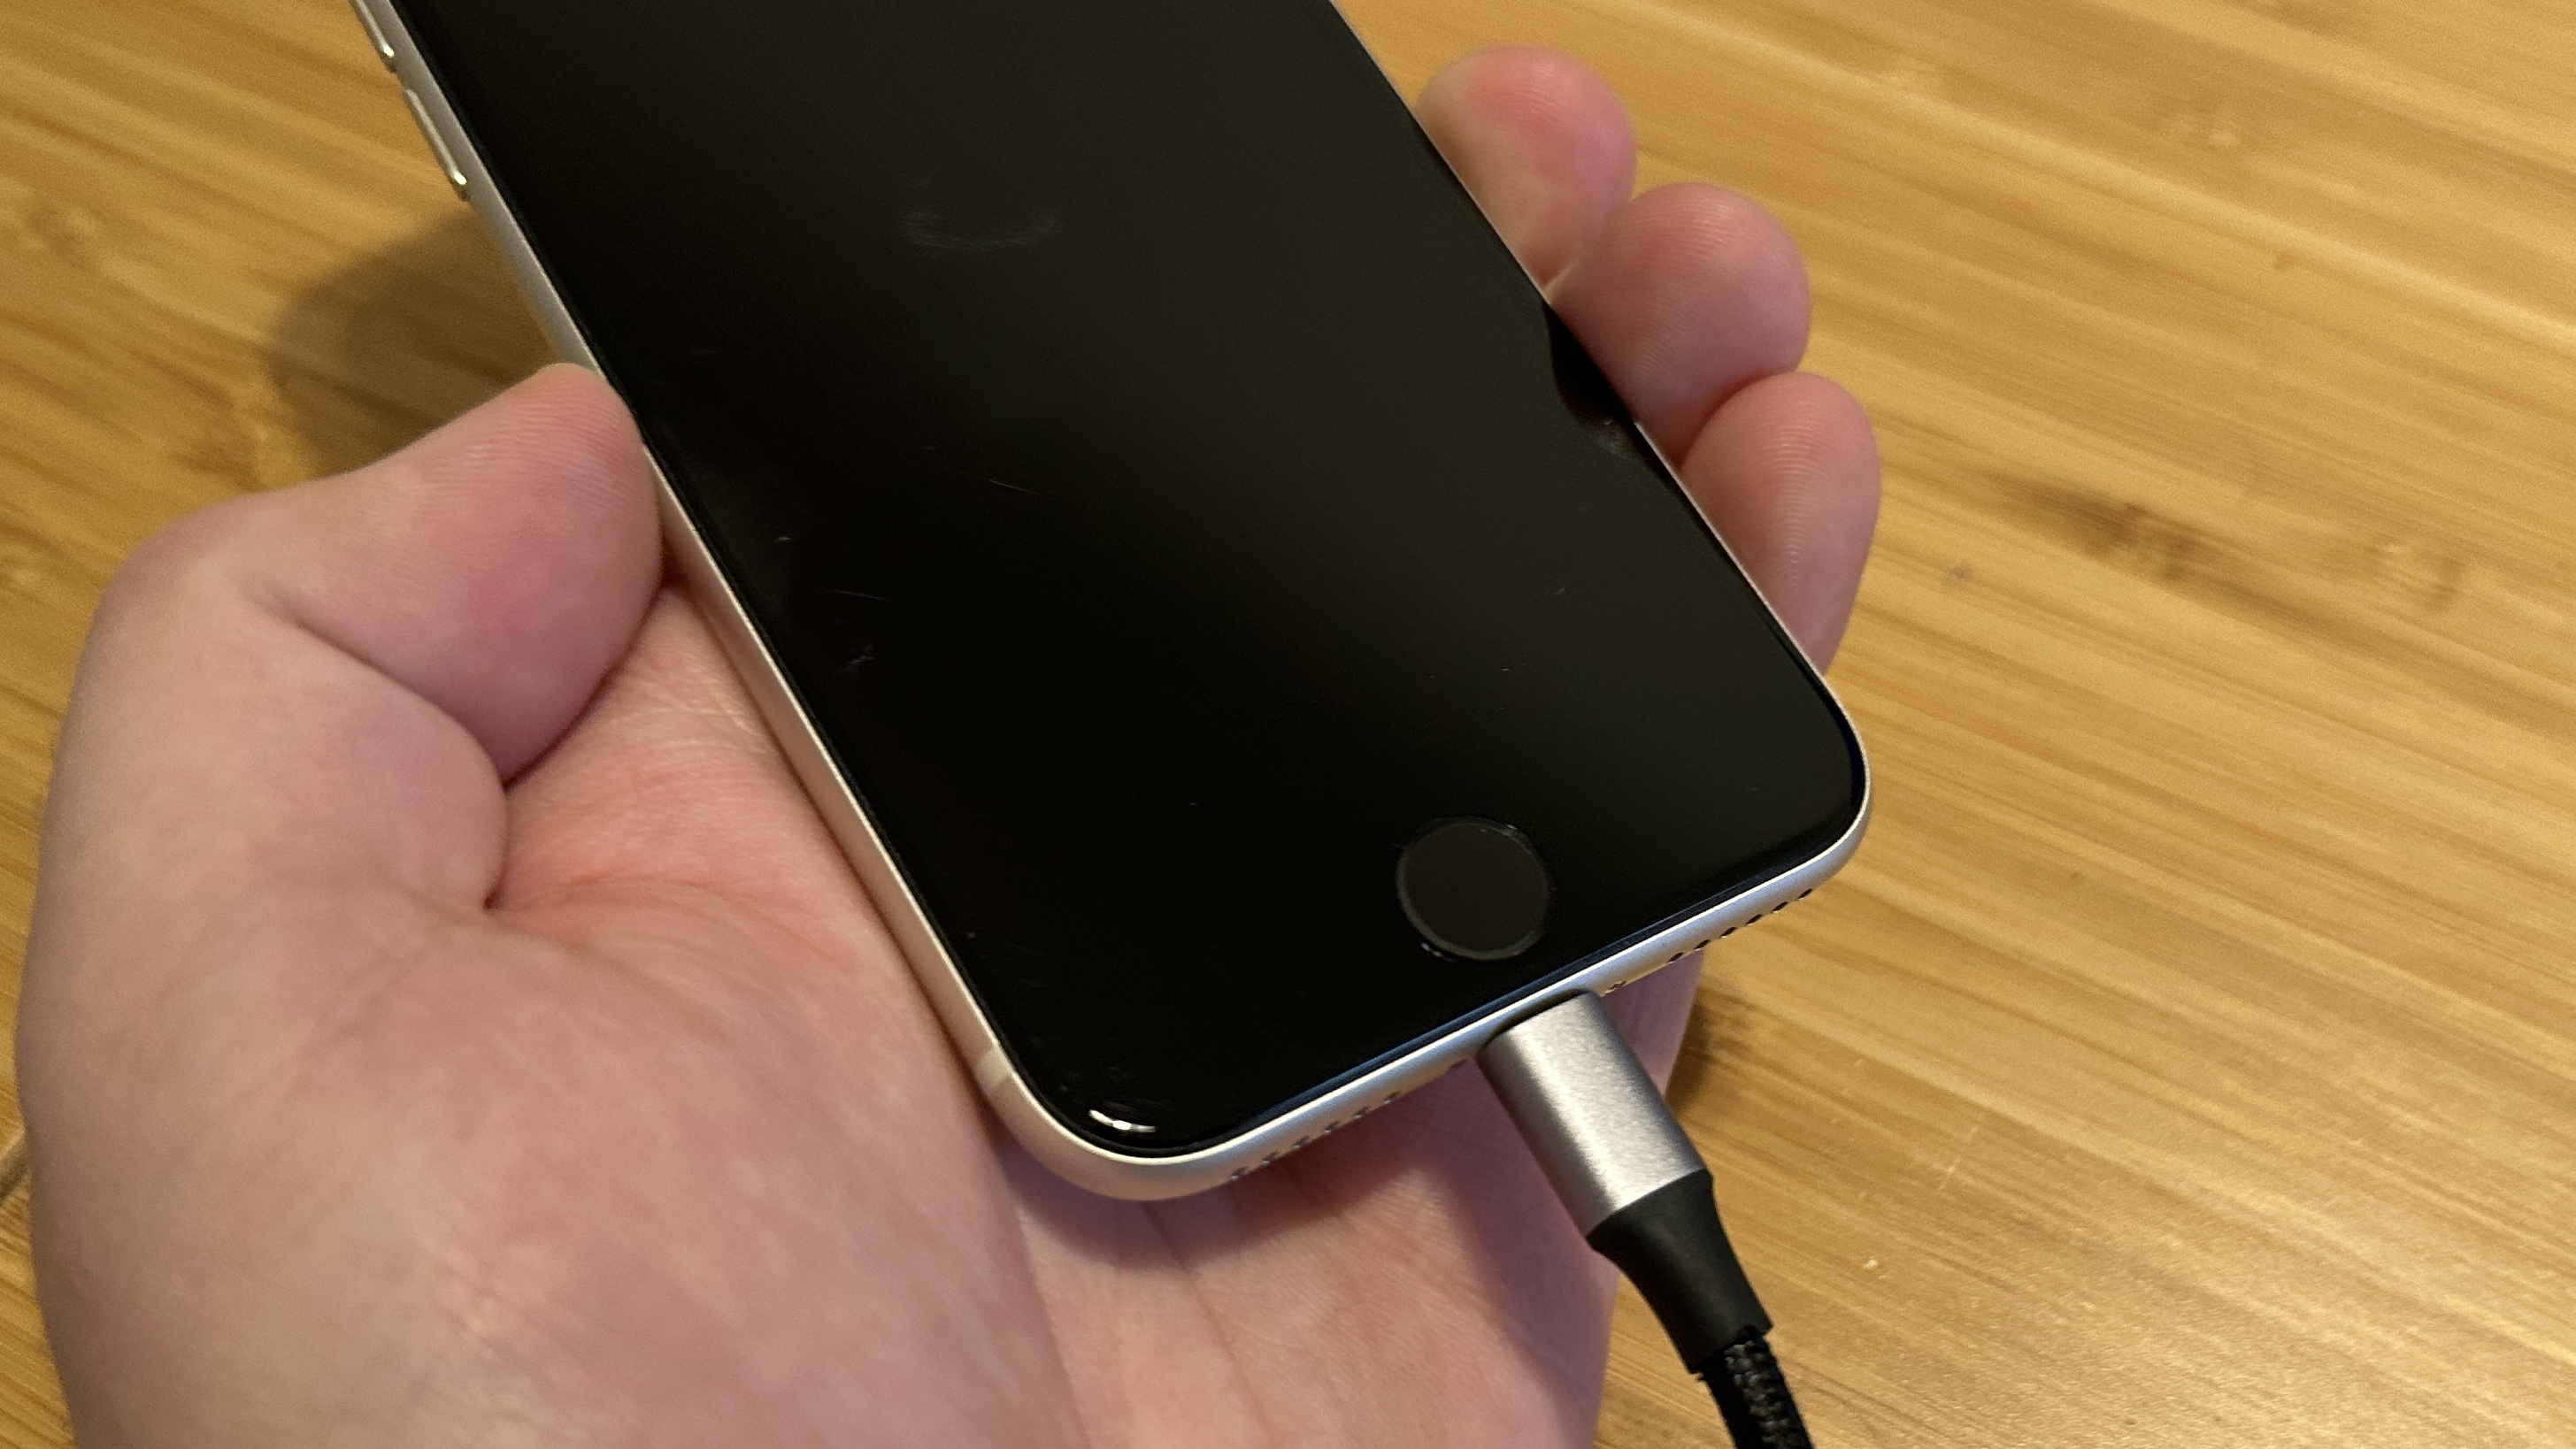
Get your Lightning cable, either with a USB-A or USB-C end depending on your computer's available ports, and connect up your iPhone and machine.
2. Open up Finder or iTunes, depending on your computer
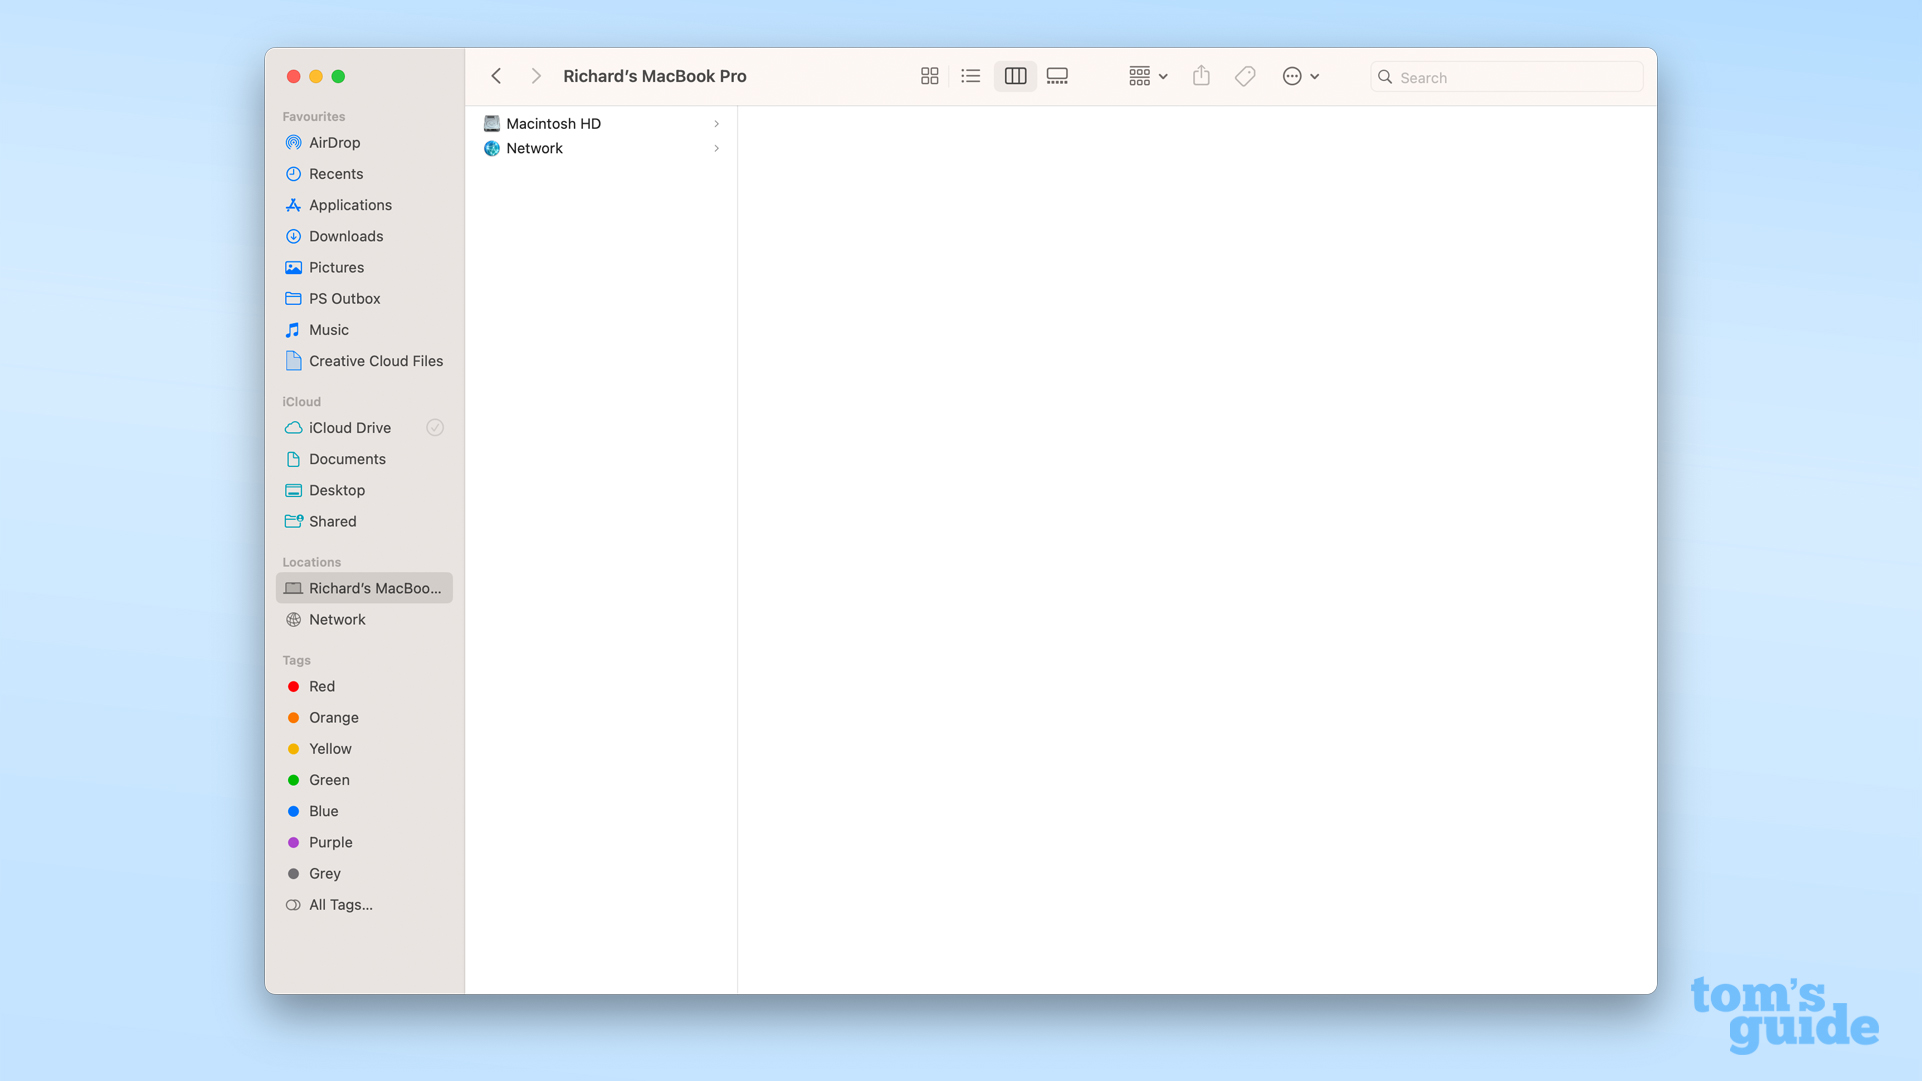
Before you do anything more to your iPhone, make sure your computer is ready to help restore the iPhone.
On a Mac, you'll need to either open Finder if you're running macOS Catalina or newer, or the iTunes app if you're running macOS Mojave or earlier.
If you're on a Windows PC, you'll need to have iTunes installed (available from Apple) no matter its version, and have it up to date and open.
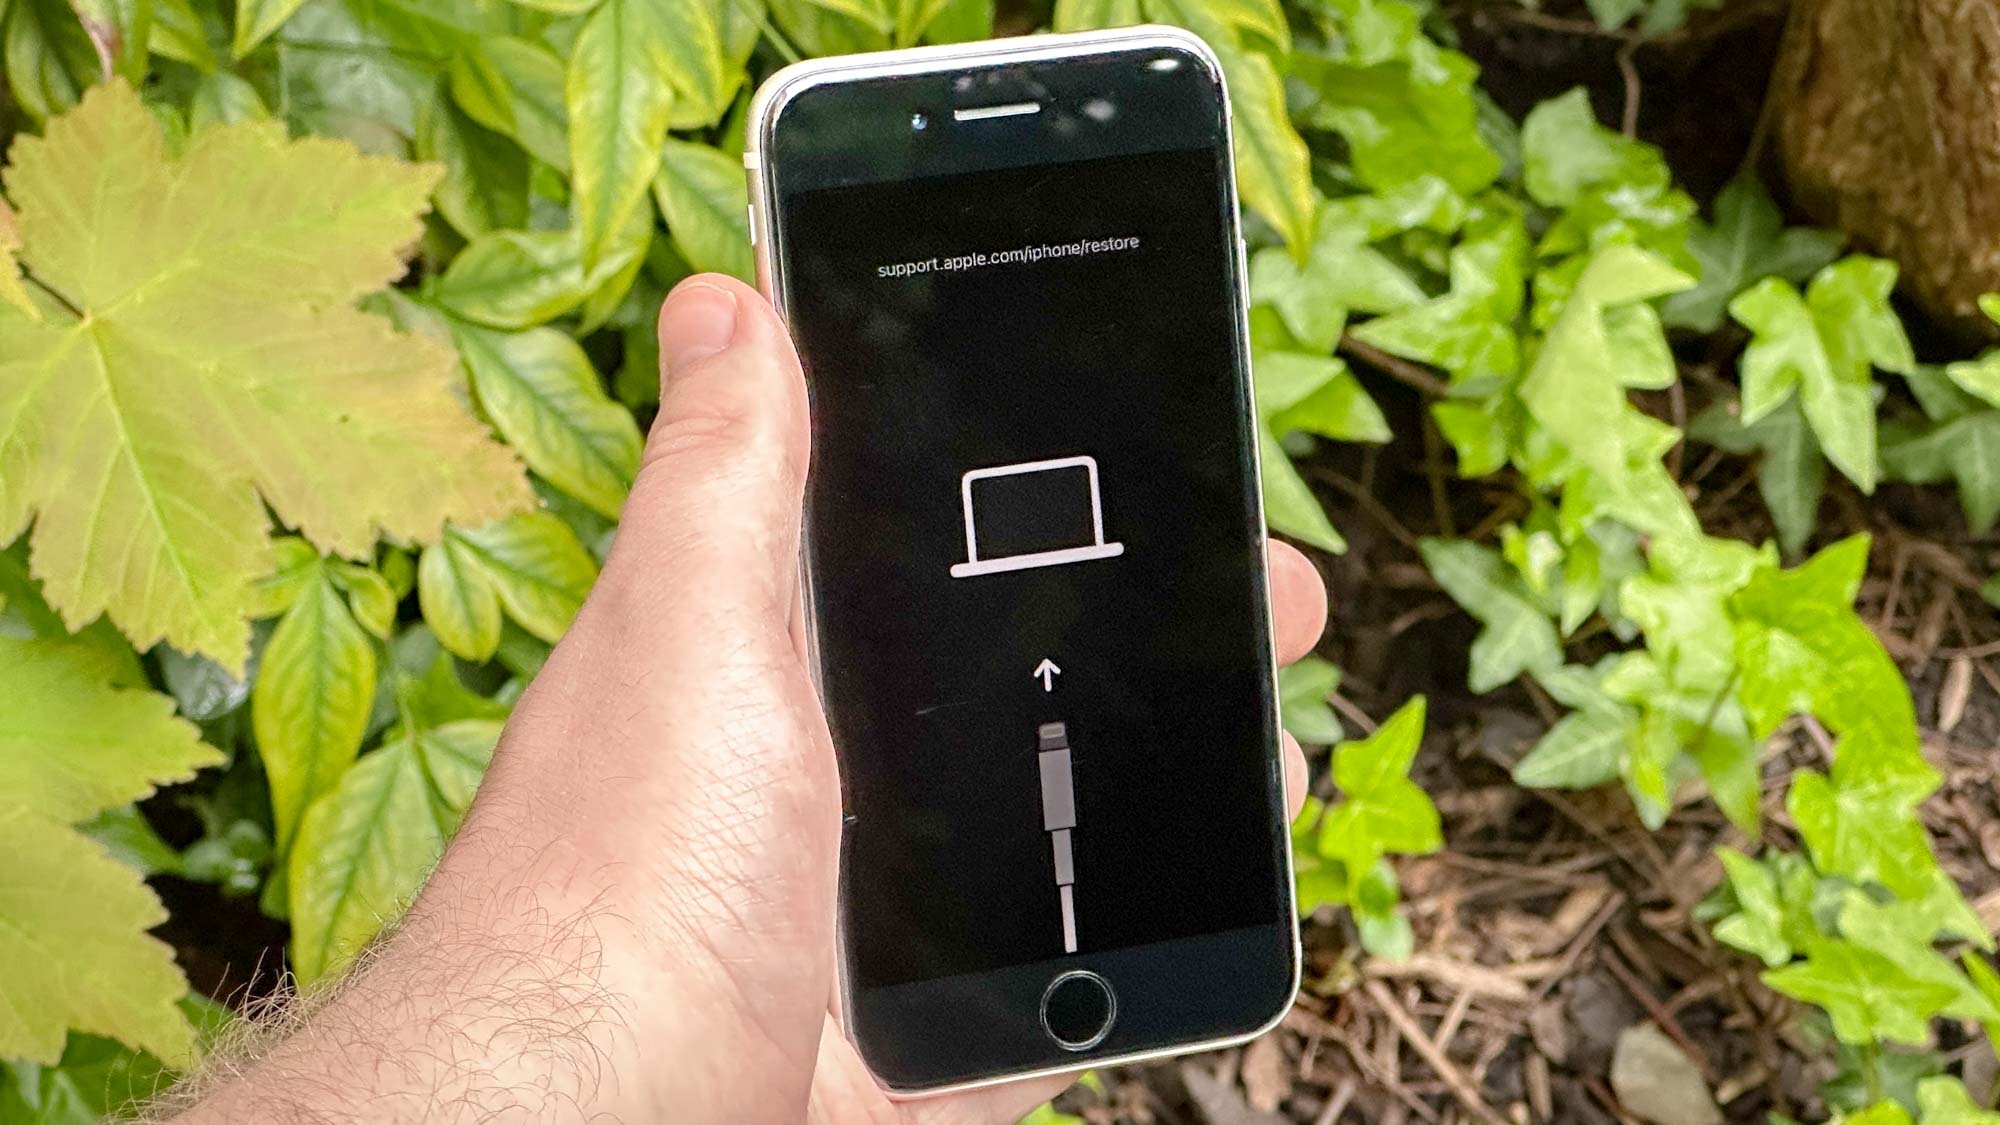
3. Press volume up, then volume down, then press and hold the side button on the iPhone until Recovery Mode is enabled.
To put your iPhone in recovery mode, you'll need to use the three-button sequence above. Make sure you keep holding the side/power button down even after the phone's restarted and shows the Apple logo. Only let go when your phone displays the recover mode screen, shown here.
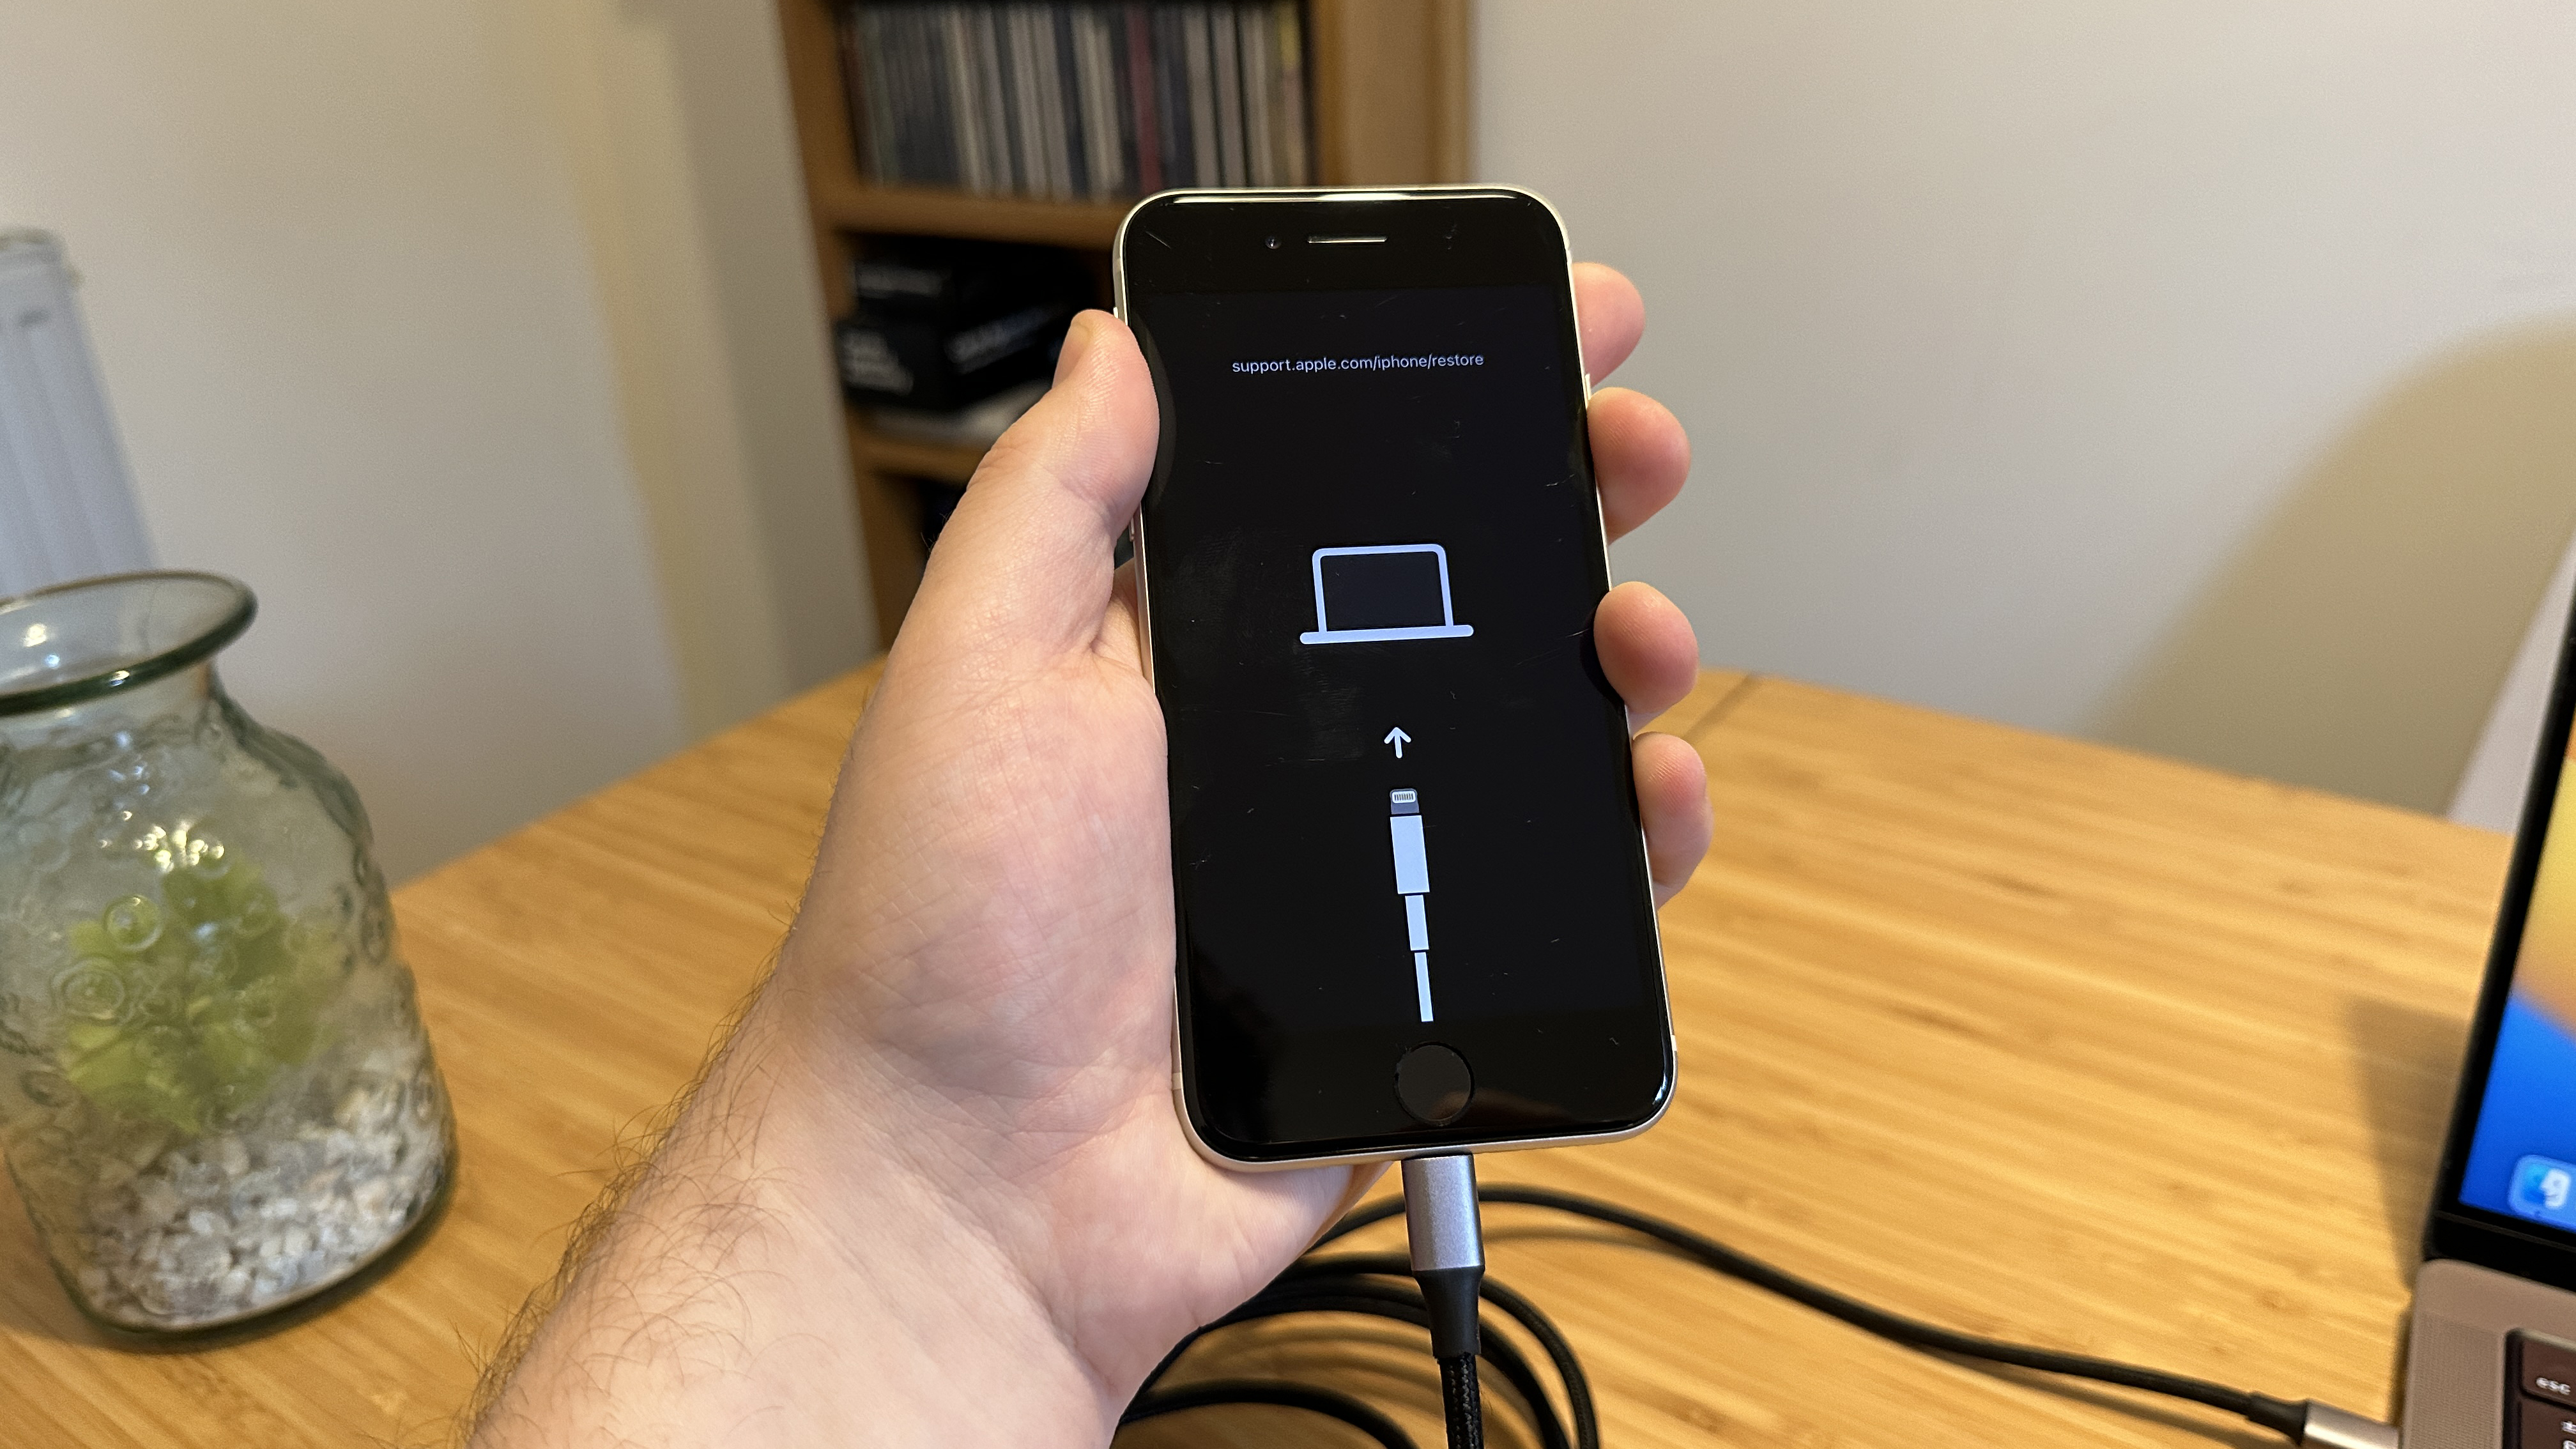
Alternatively, with your iPhone turned off, press and hold the side button while plugging the iPhone into your computer. Keep holding as the Apple logo appears on screen, and you should also enter recovery mode.
If you do this without having your iPhone plugged in, you'll hard reset your iPhone instead. This could solve your problem, but it isn't the same as recovery mode, which we're focusing on here.
4. Open the iPhone in Finder or iTunes
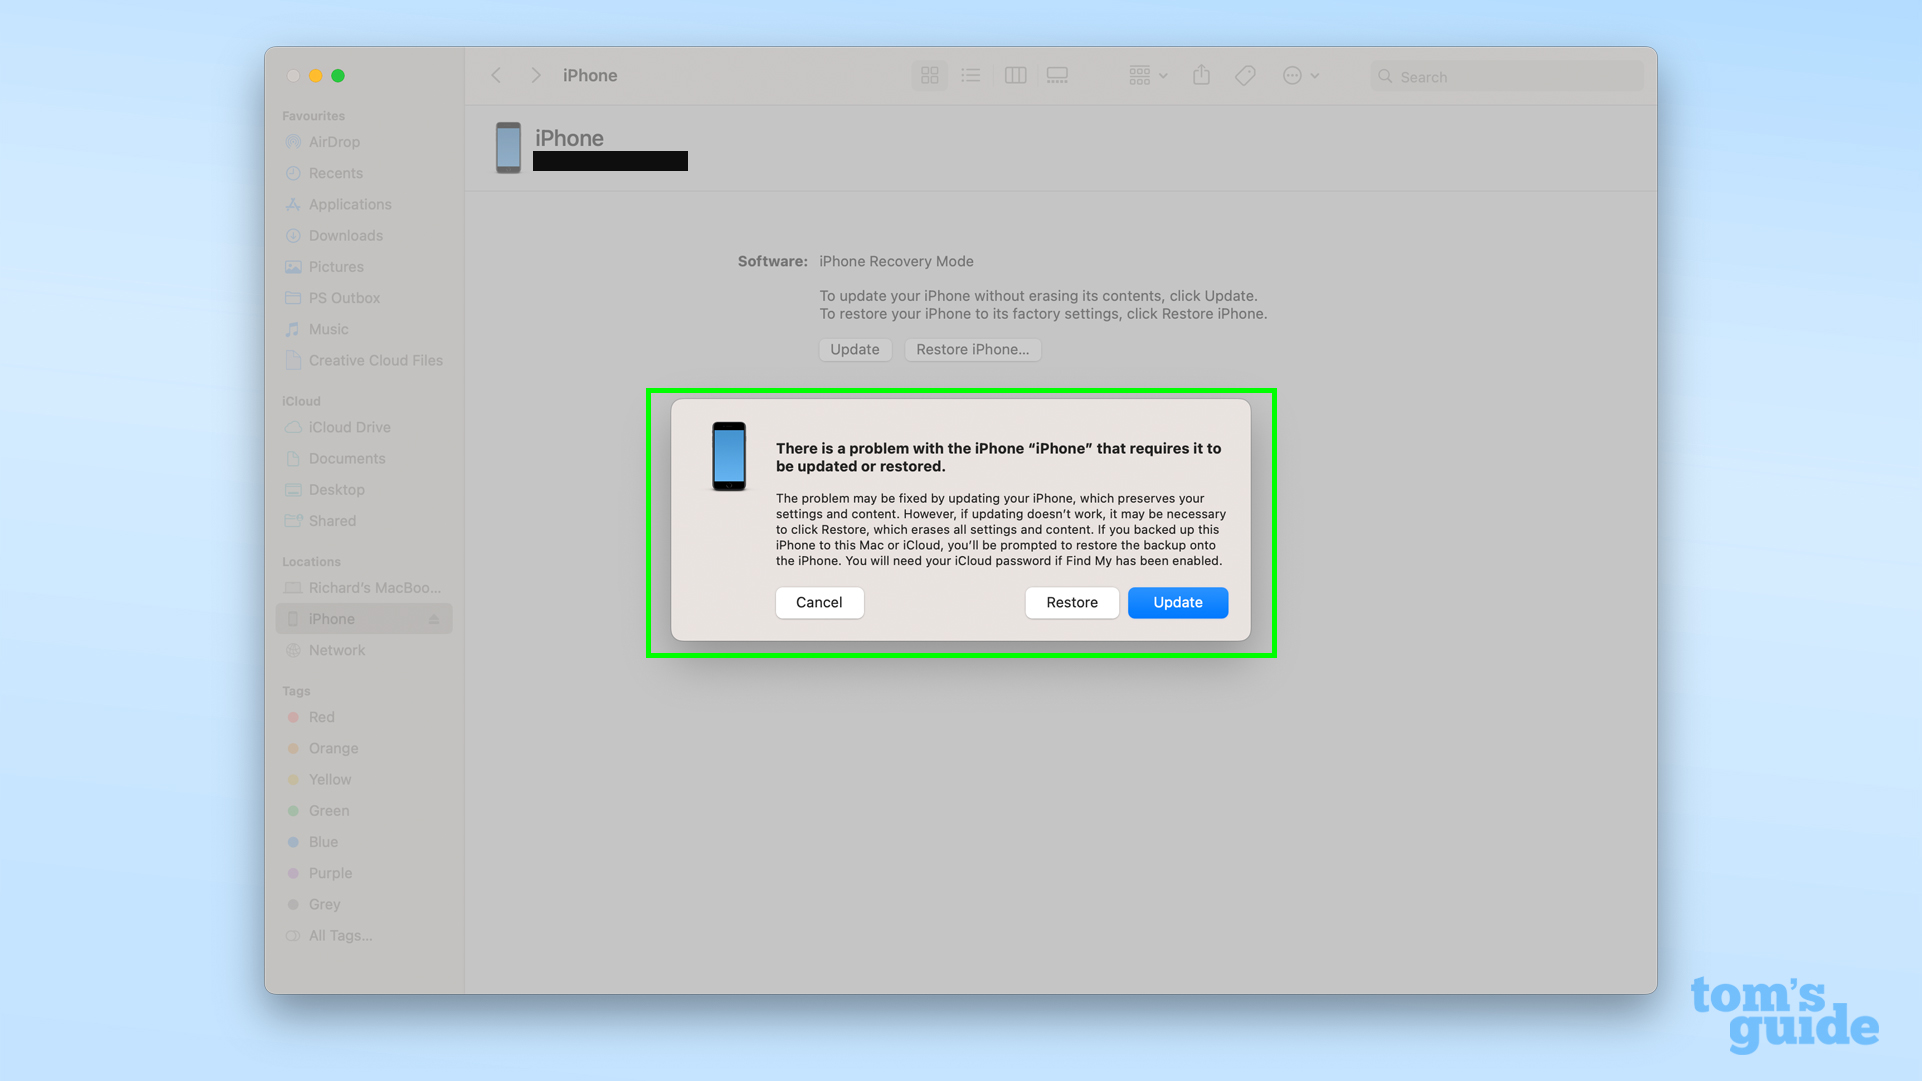
With recovery mode enabled, you can now look for it on your computer, be that in Finder or iTunes. Once the iPhone's popped up, click it.
5. First attempt to update the iPhone, or restore it through the on-screen prompts
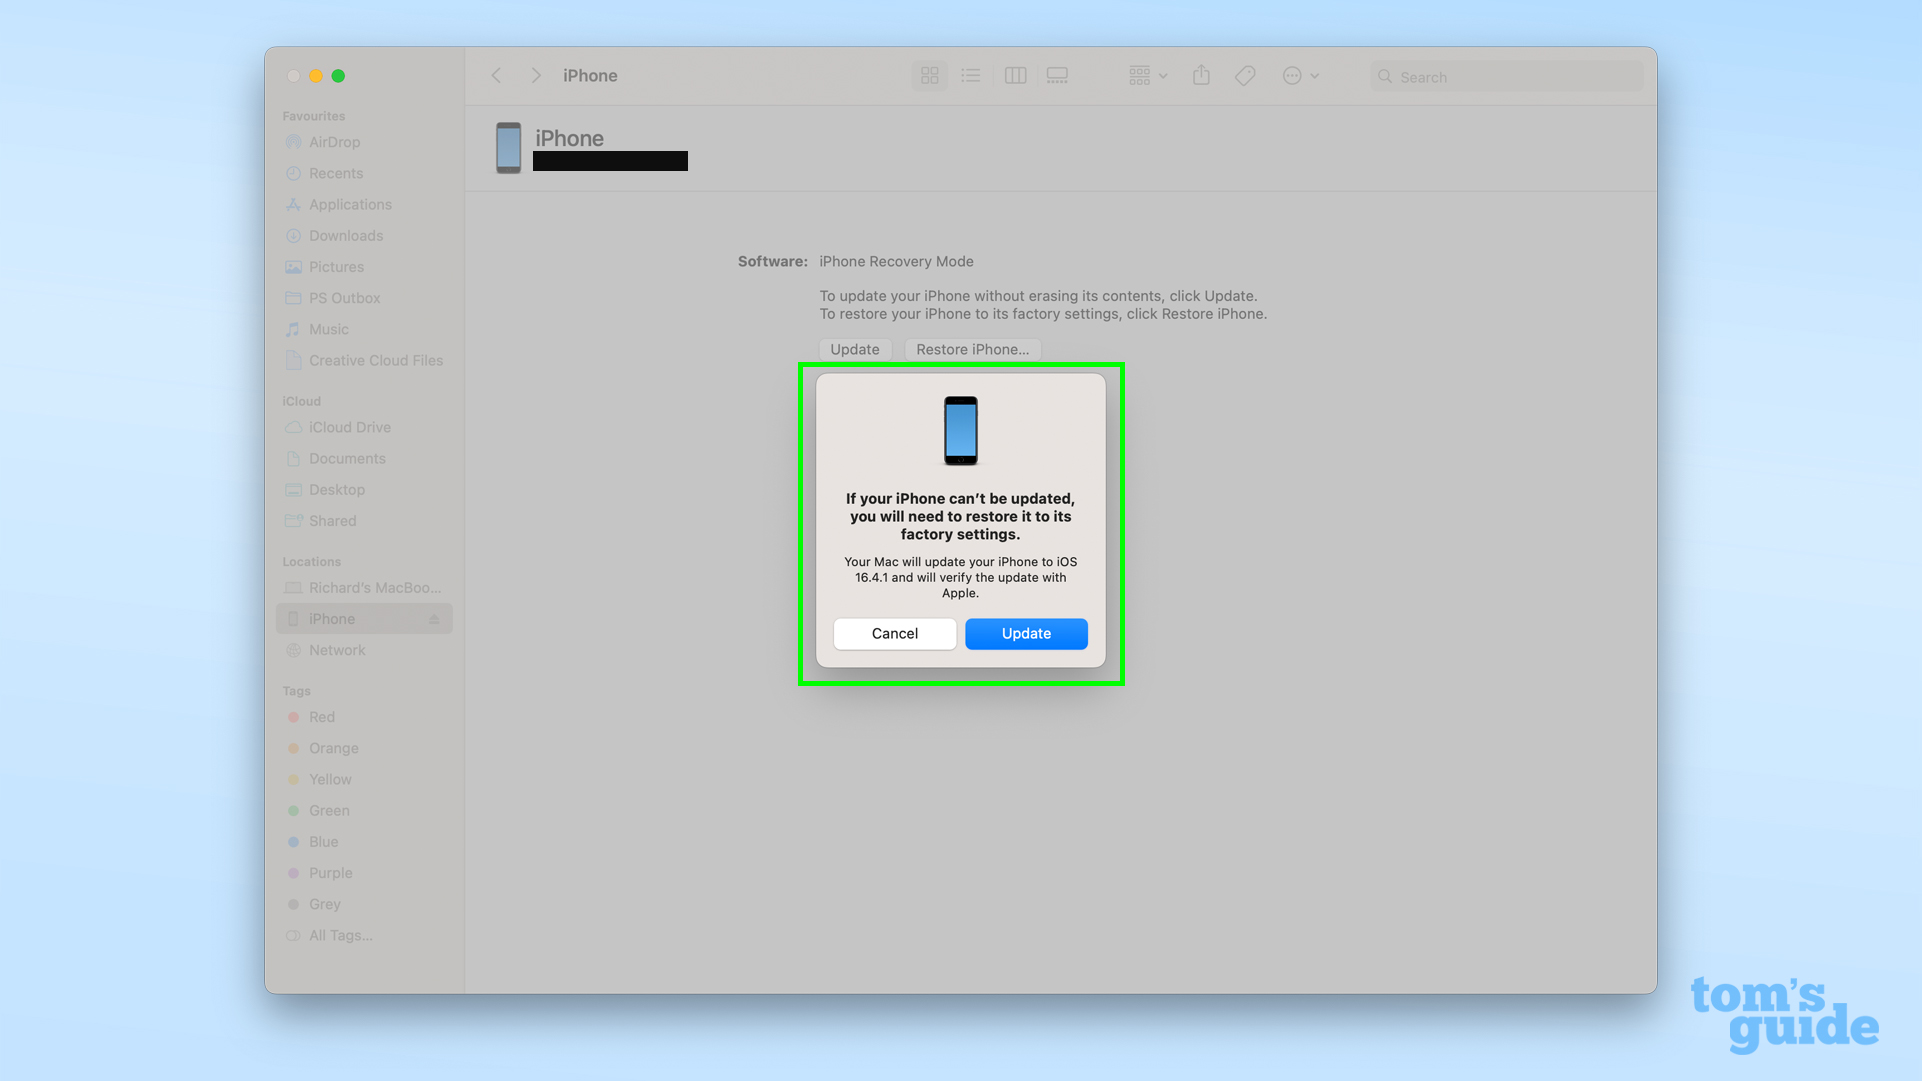
You'll then be able to pick whether you update or restore the iPhone to factory settings. It's best to start with Update first, as it'll reinstall iOS to try and fix the issue. Only go for Restore the iPhone if that fails, since that'll mean waving goodbye to any data saved on your phone.
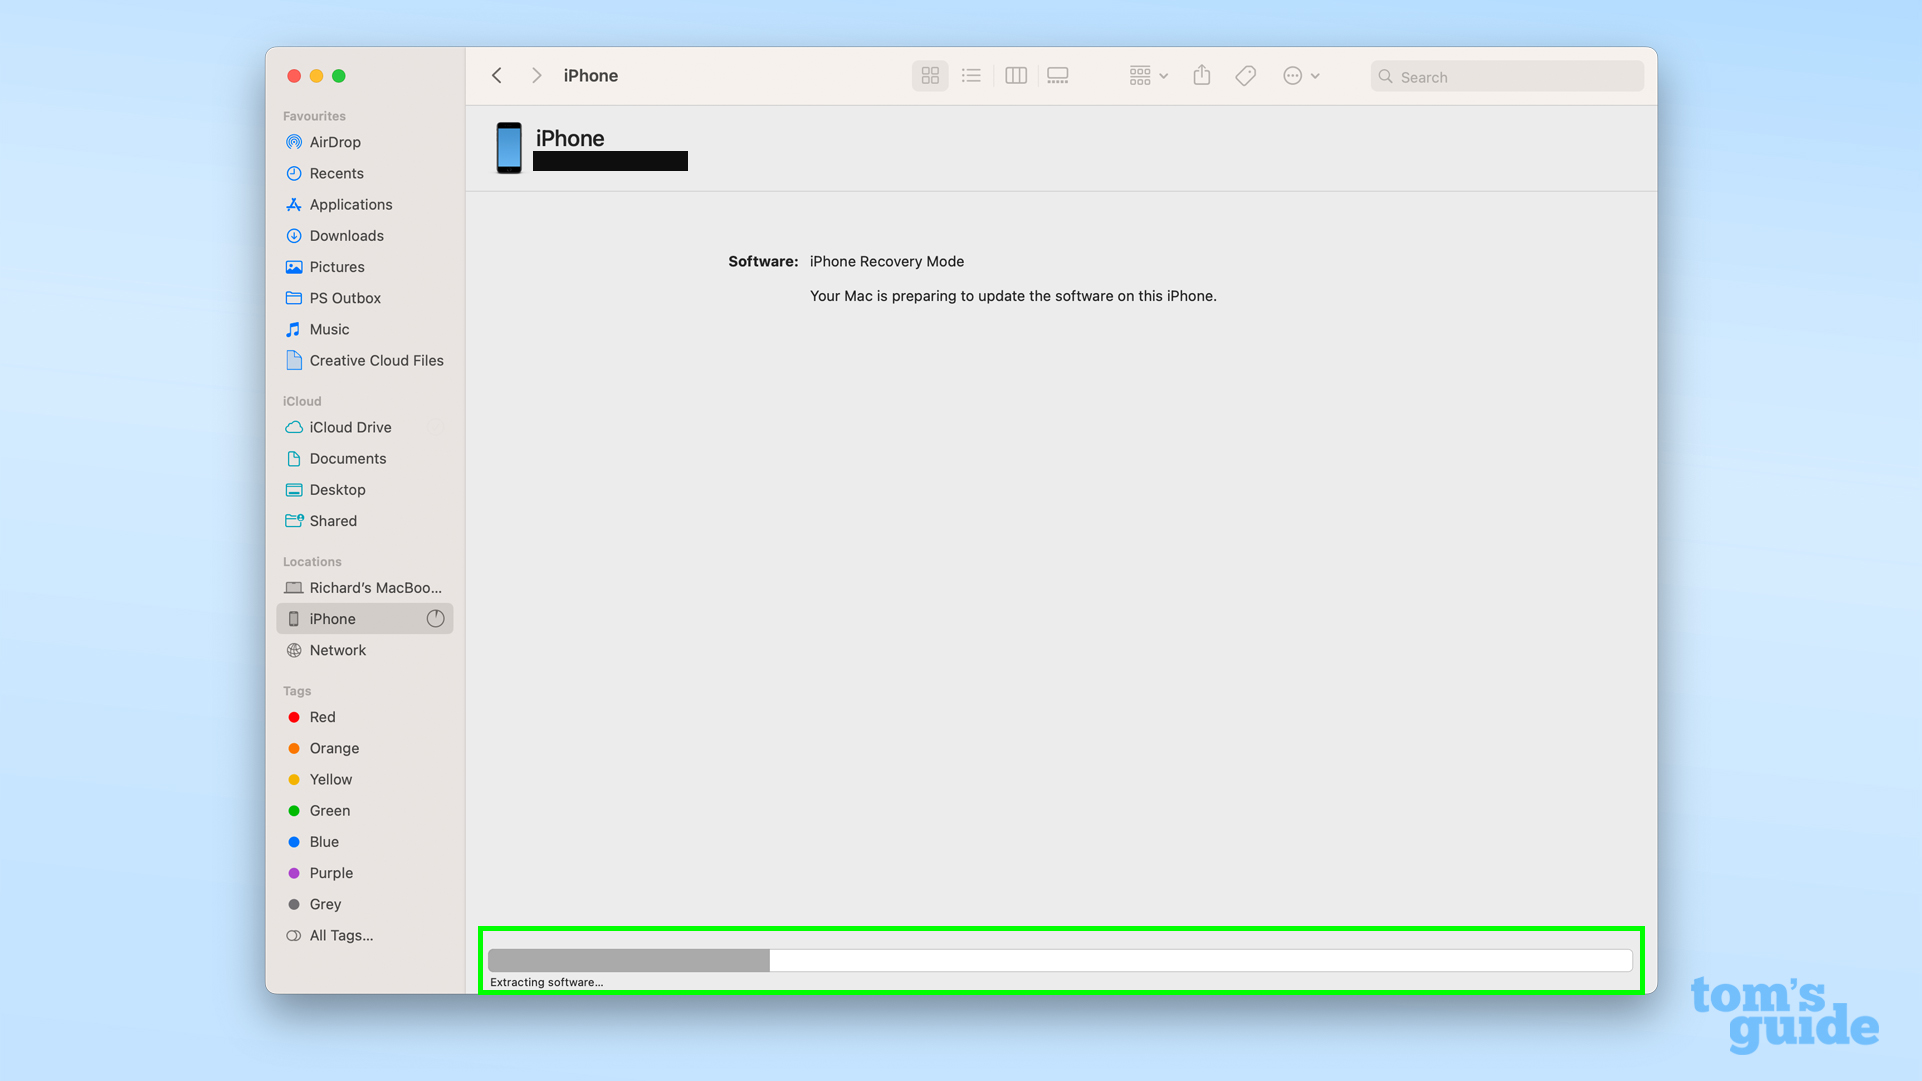
Be warned that these steps could take several minutes to finish, so don't hang around expecting it'll be done imminently.
If the process takes longer than 15 minutes and your iPhone leaves recovery mode, Apple recommends trying the recovery mode process again once it's finished.
6. Set your iPhone up again as necessary
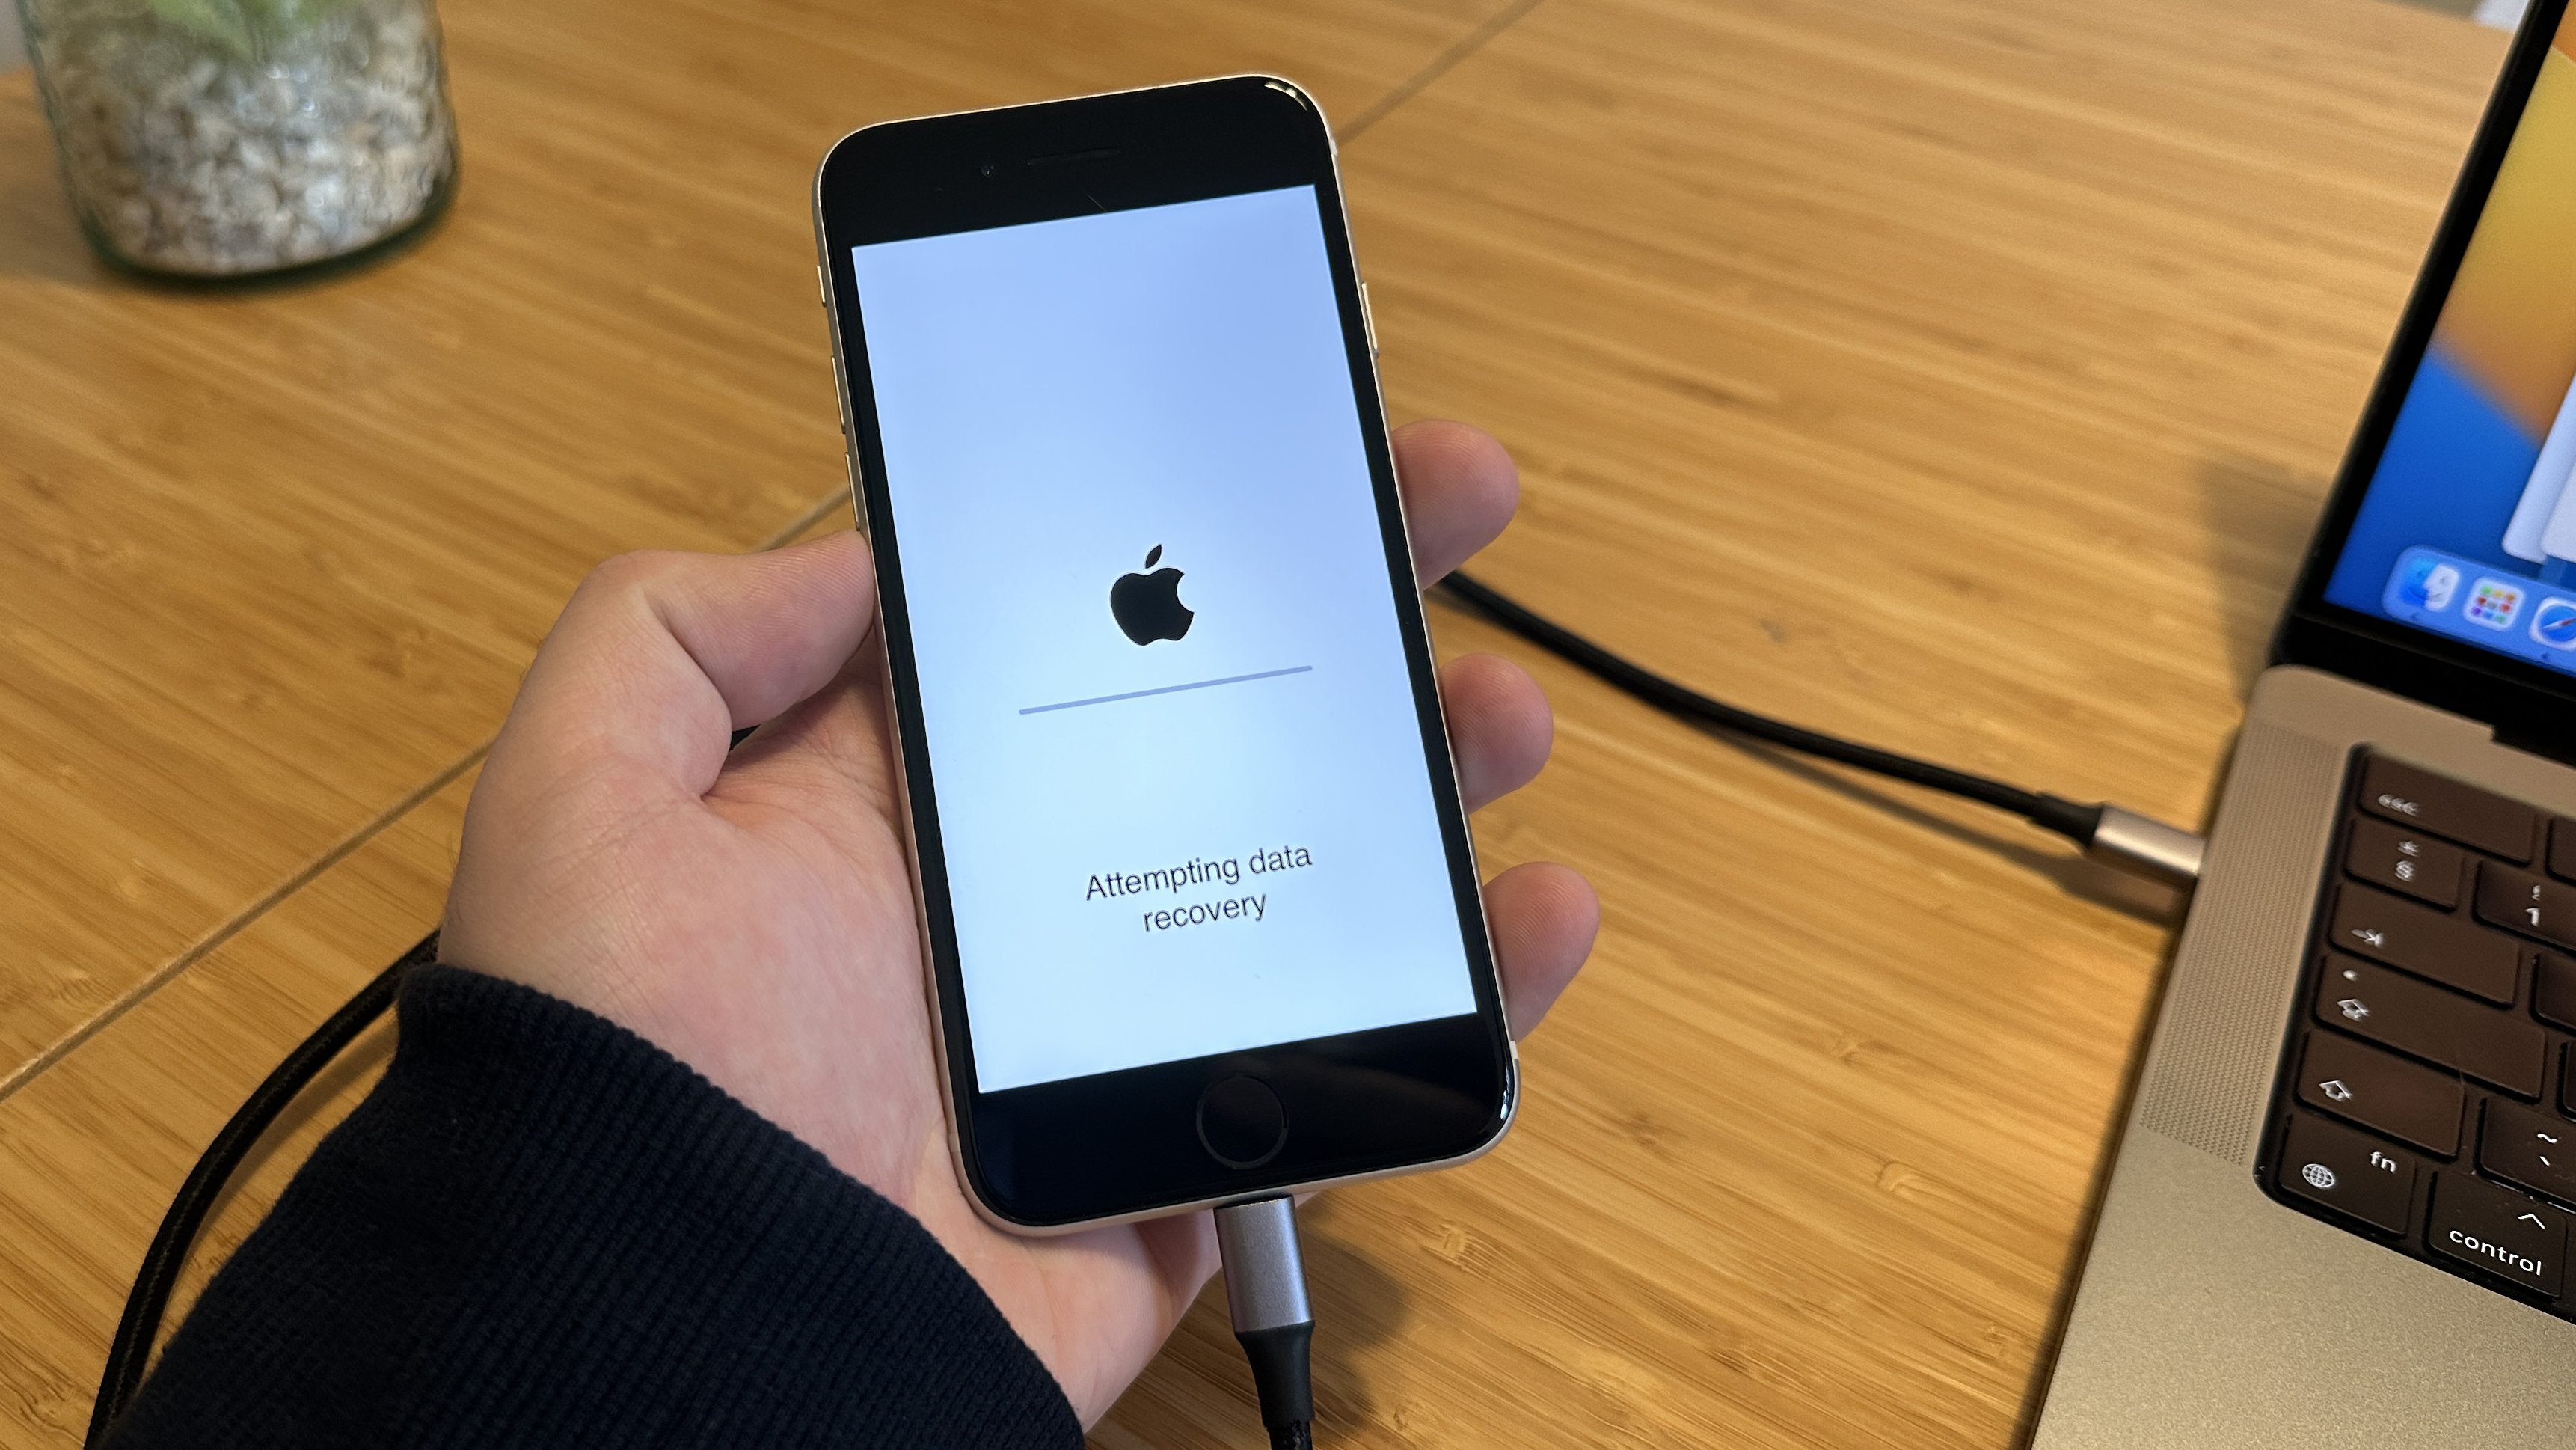
Once the reset is done, you will either be able to set the iPhone into data recovery mode (shown here), or set it up from scratch if it was fully reset. Either way, you shouldn't lose much if any data if you have an iPhone backup set-up.
Read more about how to back up your iPhone in this guide so you're prepared in case of situations like this.
From start to finish, the whole process took us the best part of an hour to complete. If you're reading this in advance of trying to put your own iPhone into recovery mode, then ensure you set aside some time where you can babysit your phone through the process.
We've got more iPhone how-tos for you if you need more advice or tips. For instance, we can demonstrate how to schedule a text on iPhone for preparing messages to go out at a precise time, how to delete wallpapers on iPhone if you're fed up of your current background, or how to edit Control Center on iPhone to put the functions you use the most within easy reach.
Can't decide what to learn next? Take a look at our hidden iPhone features everyone should know for a selection of our favorites.