Wondering how to improve your figure drawing? Understanding the structures of the human body and the relationships between them is key.
This will make you more efficient in your mark-making, and more able to convey the three dimensional nature of your subject. Here we suggest some shortcuts and simplifications that can help you with accuracy and lighting, and lead you to create stronger portraits.
Want to take your drawing digital? See our guide to the best drawing tablets and the best laptops for drawing.
01. Perspective isn’t just for buildings
Some people say that perspective only matters for buildings and is unnecessary for the figure. This couldn’t be further from the truth! The first thing about the figure is that it exists in 3D. Understand this and you’ll understand drawing.
02. This is the secret to efficiency
Whether you’re working fast or slow, these structures give us the guide we need to know for which marks count the most. Every mark is an opportunity to show off the perspective.
03. Keep structure in mind for every part of the body
These structural opportunities exist throughout the body and the sensation of three dimensions is entirely due to this communication. Not all details are created equal; learn anatomy and you’ll learn which ones to focus on!
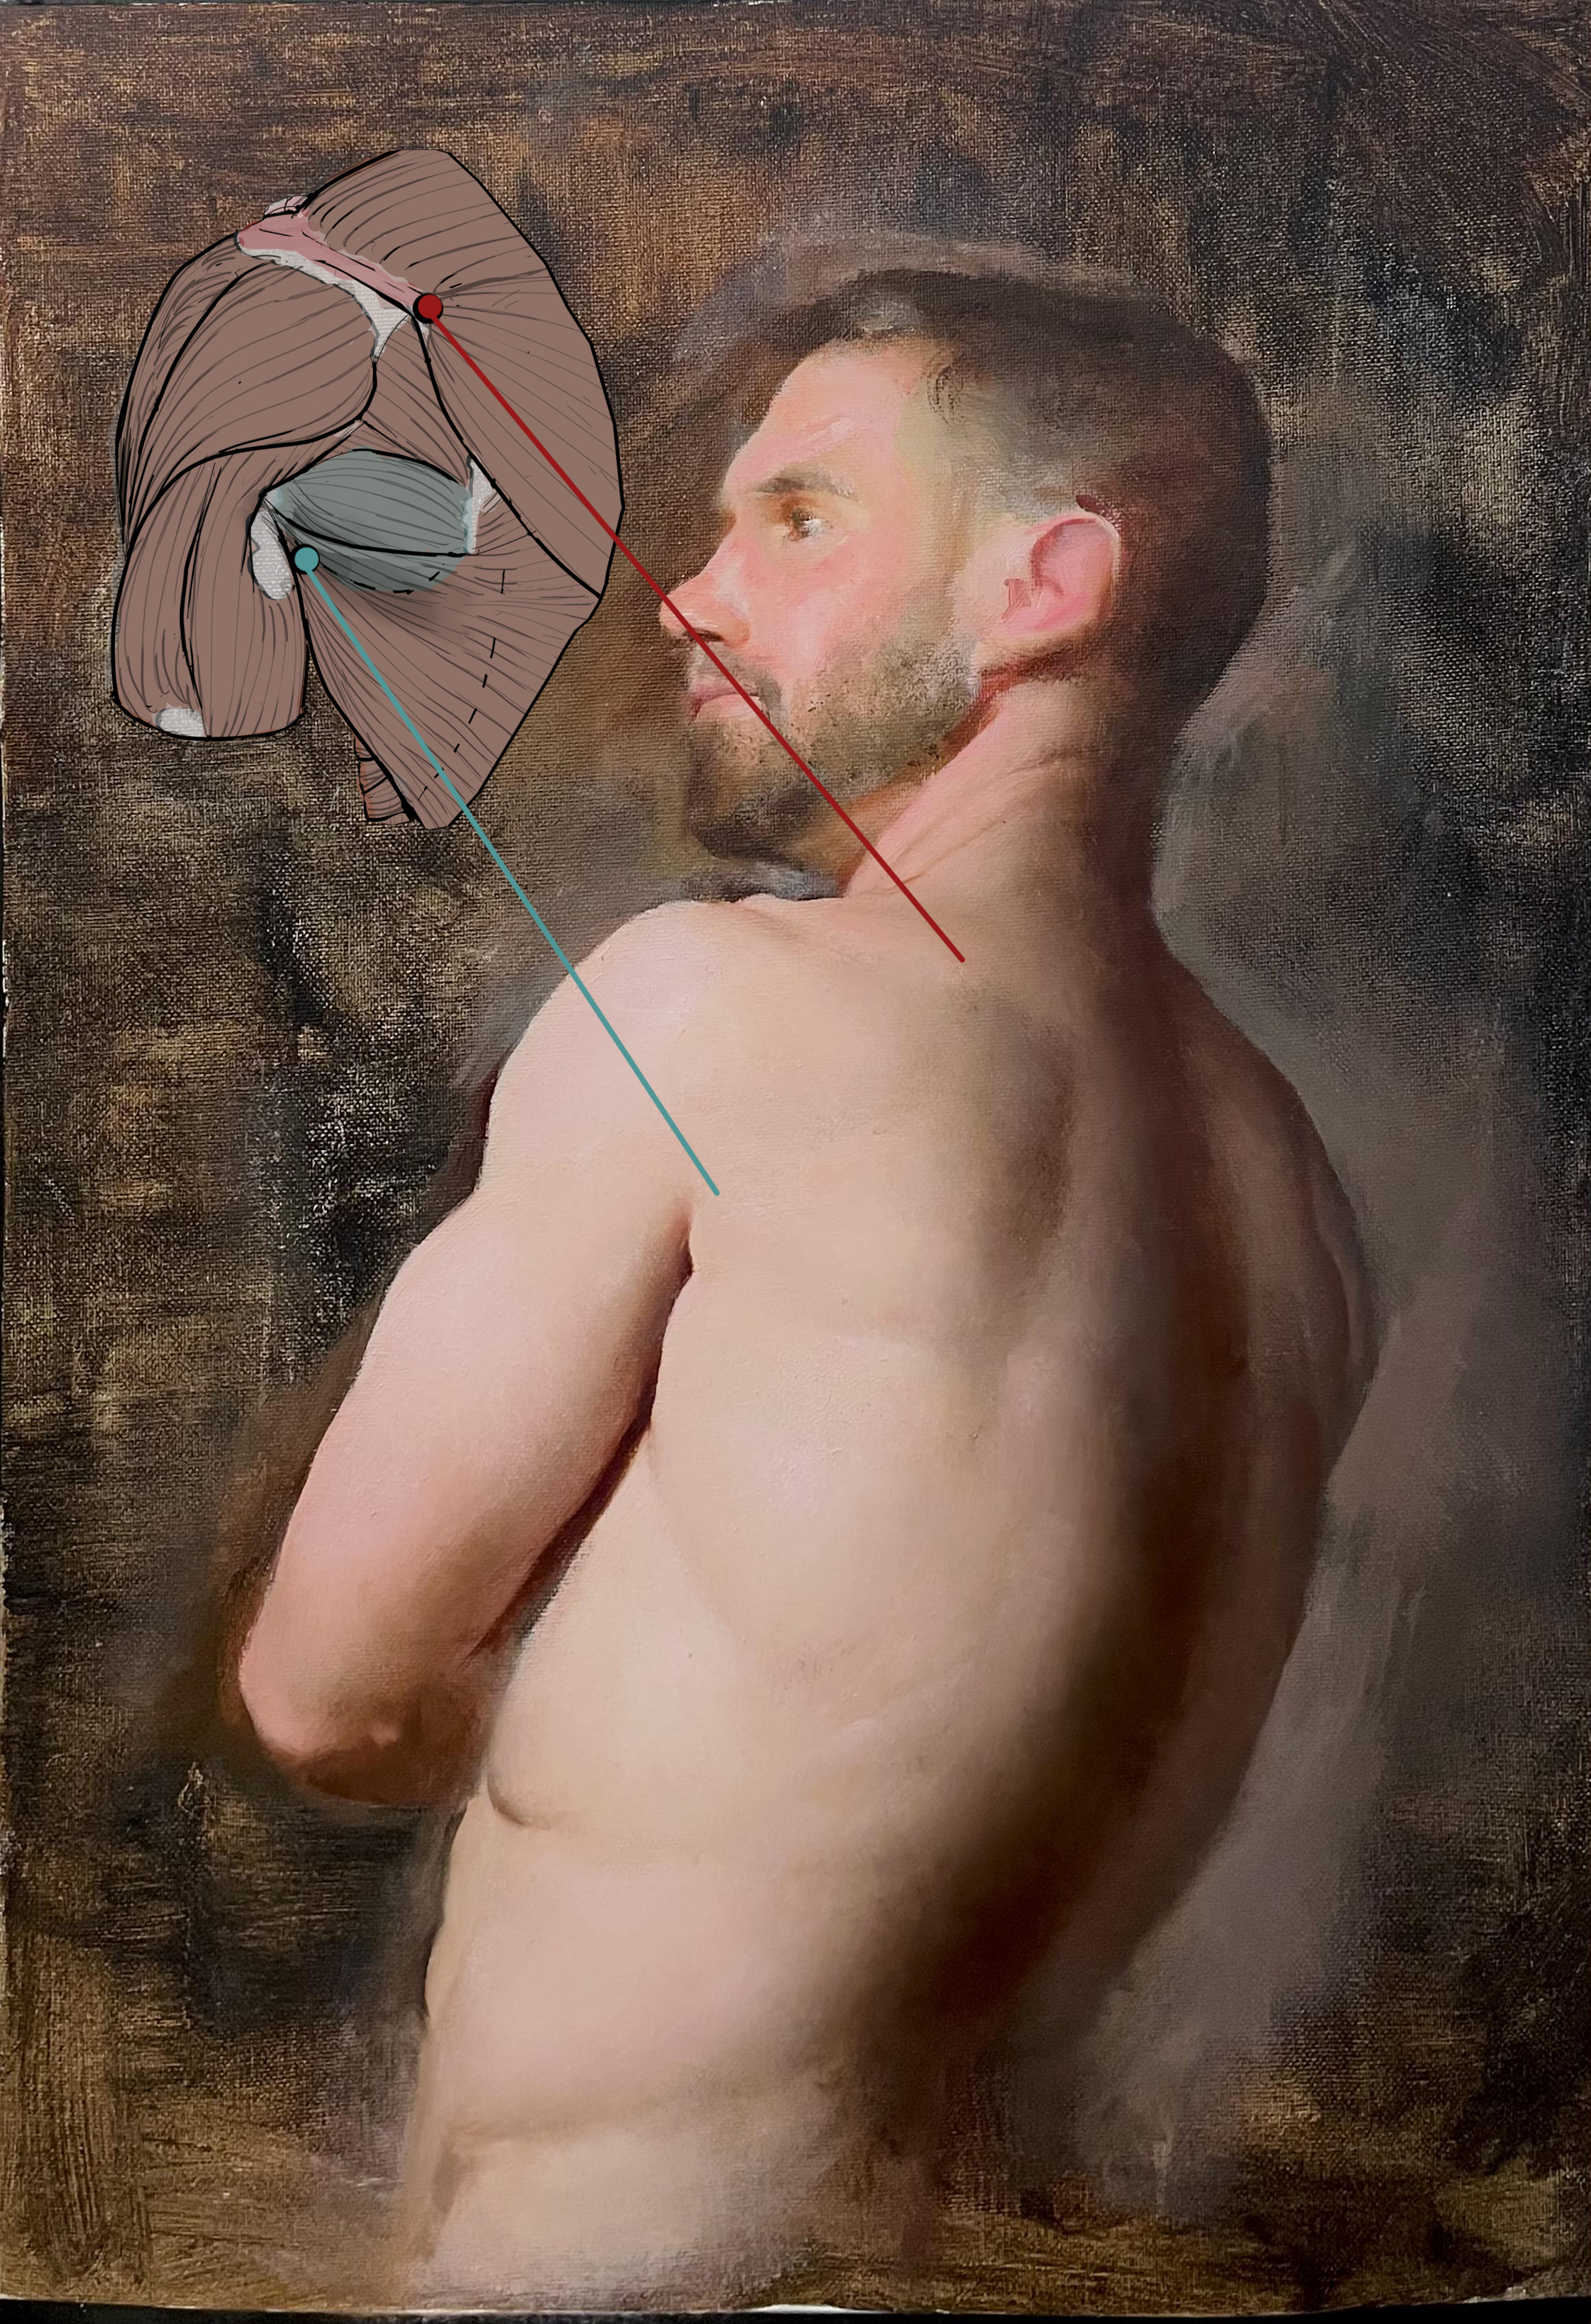
04. Simplify the bones
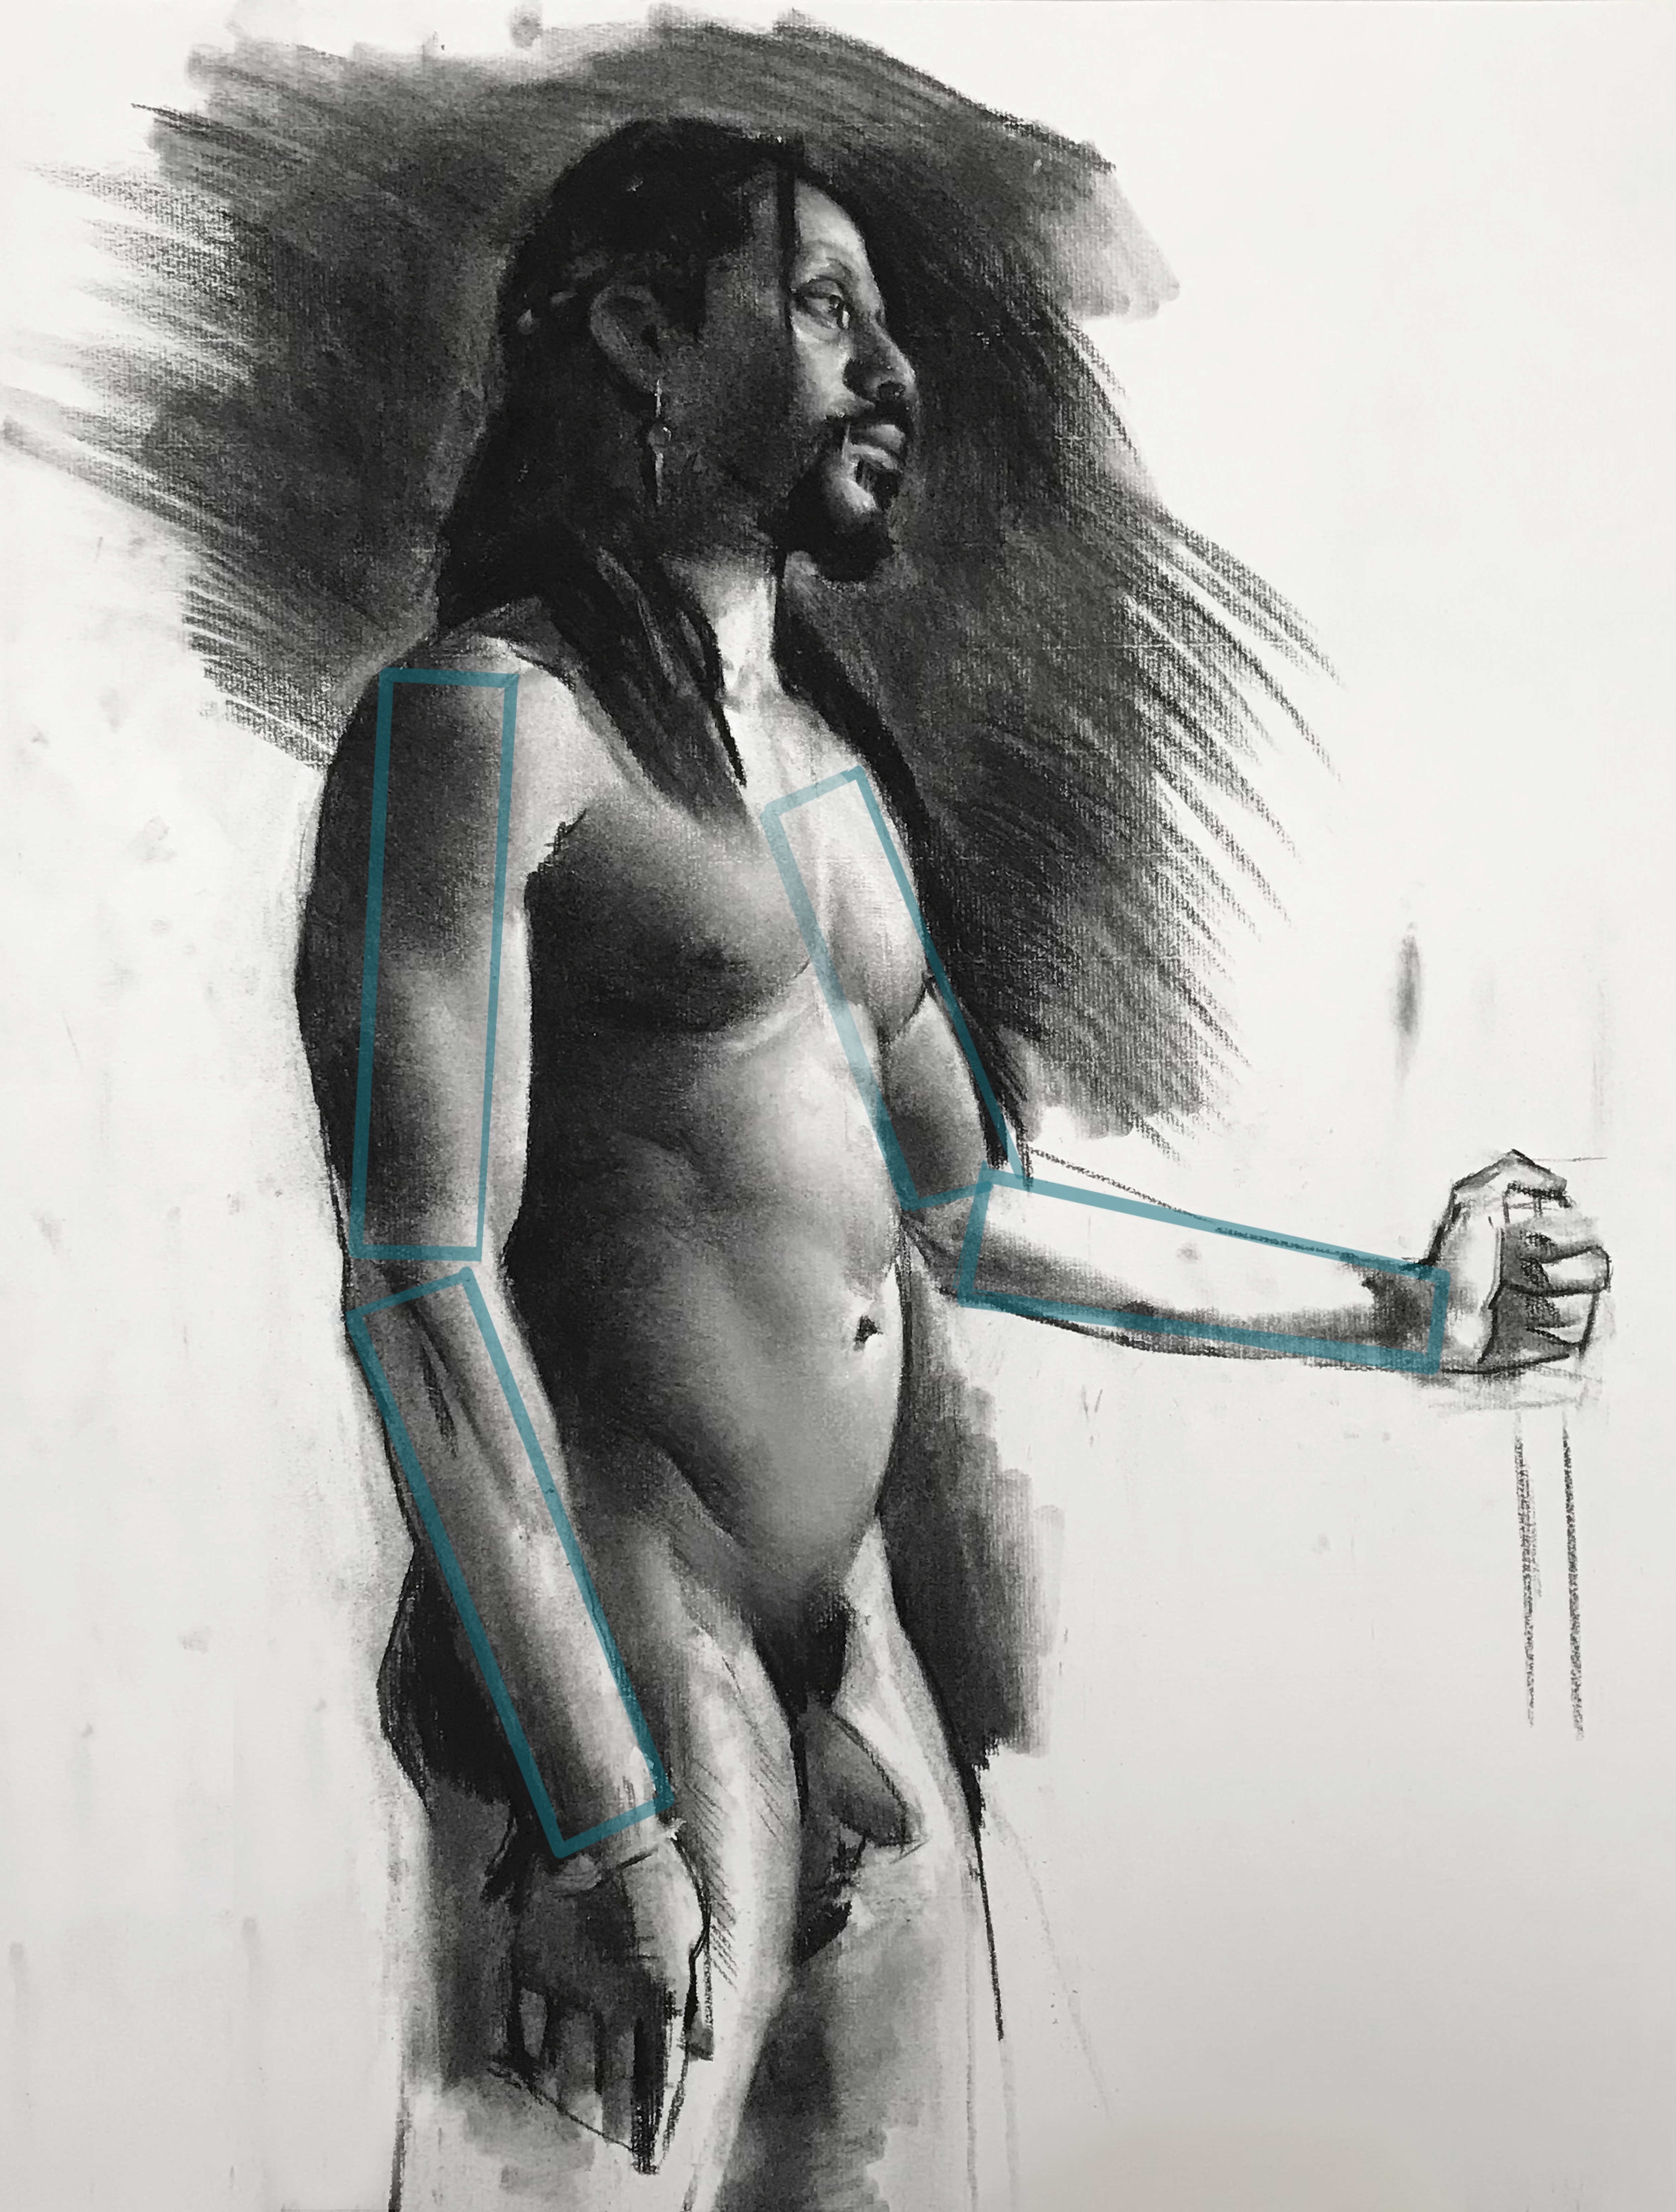
As we approach learning anatomy it can feel overwhelming, so simplifying the structure is key. One simplification that I always like is to consider the arm bones as two simple rectangles over which I can hang the muscles.
05. Respect the shapes
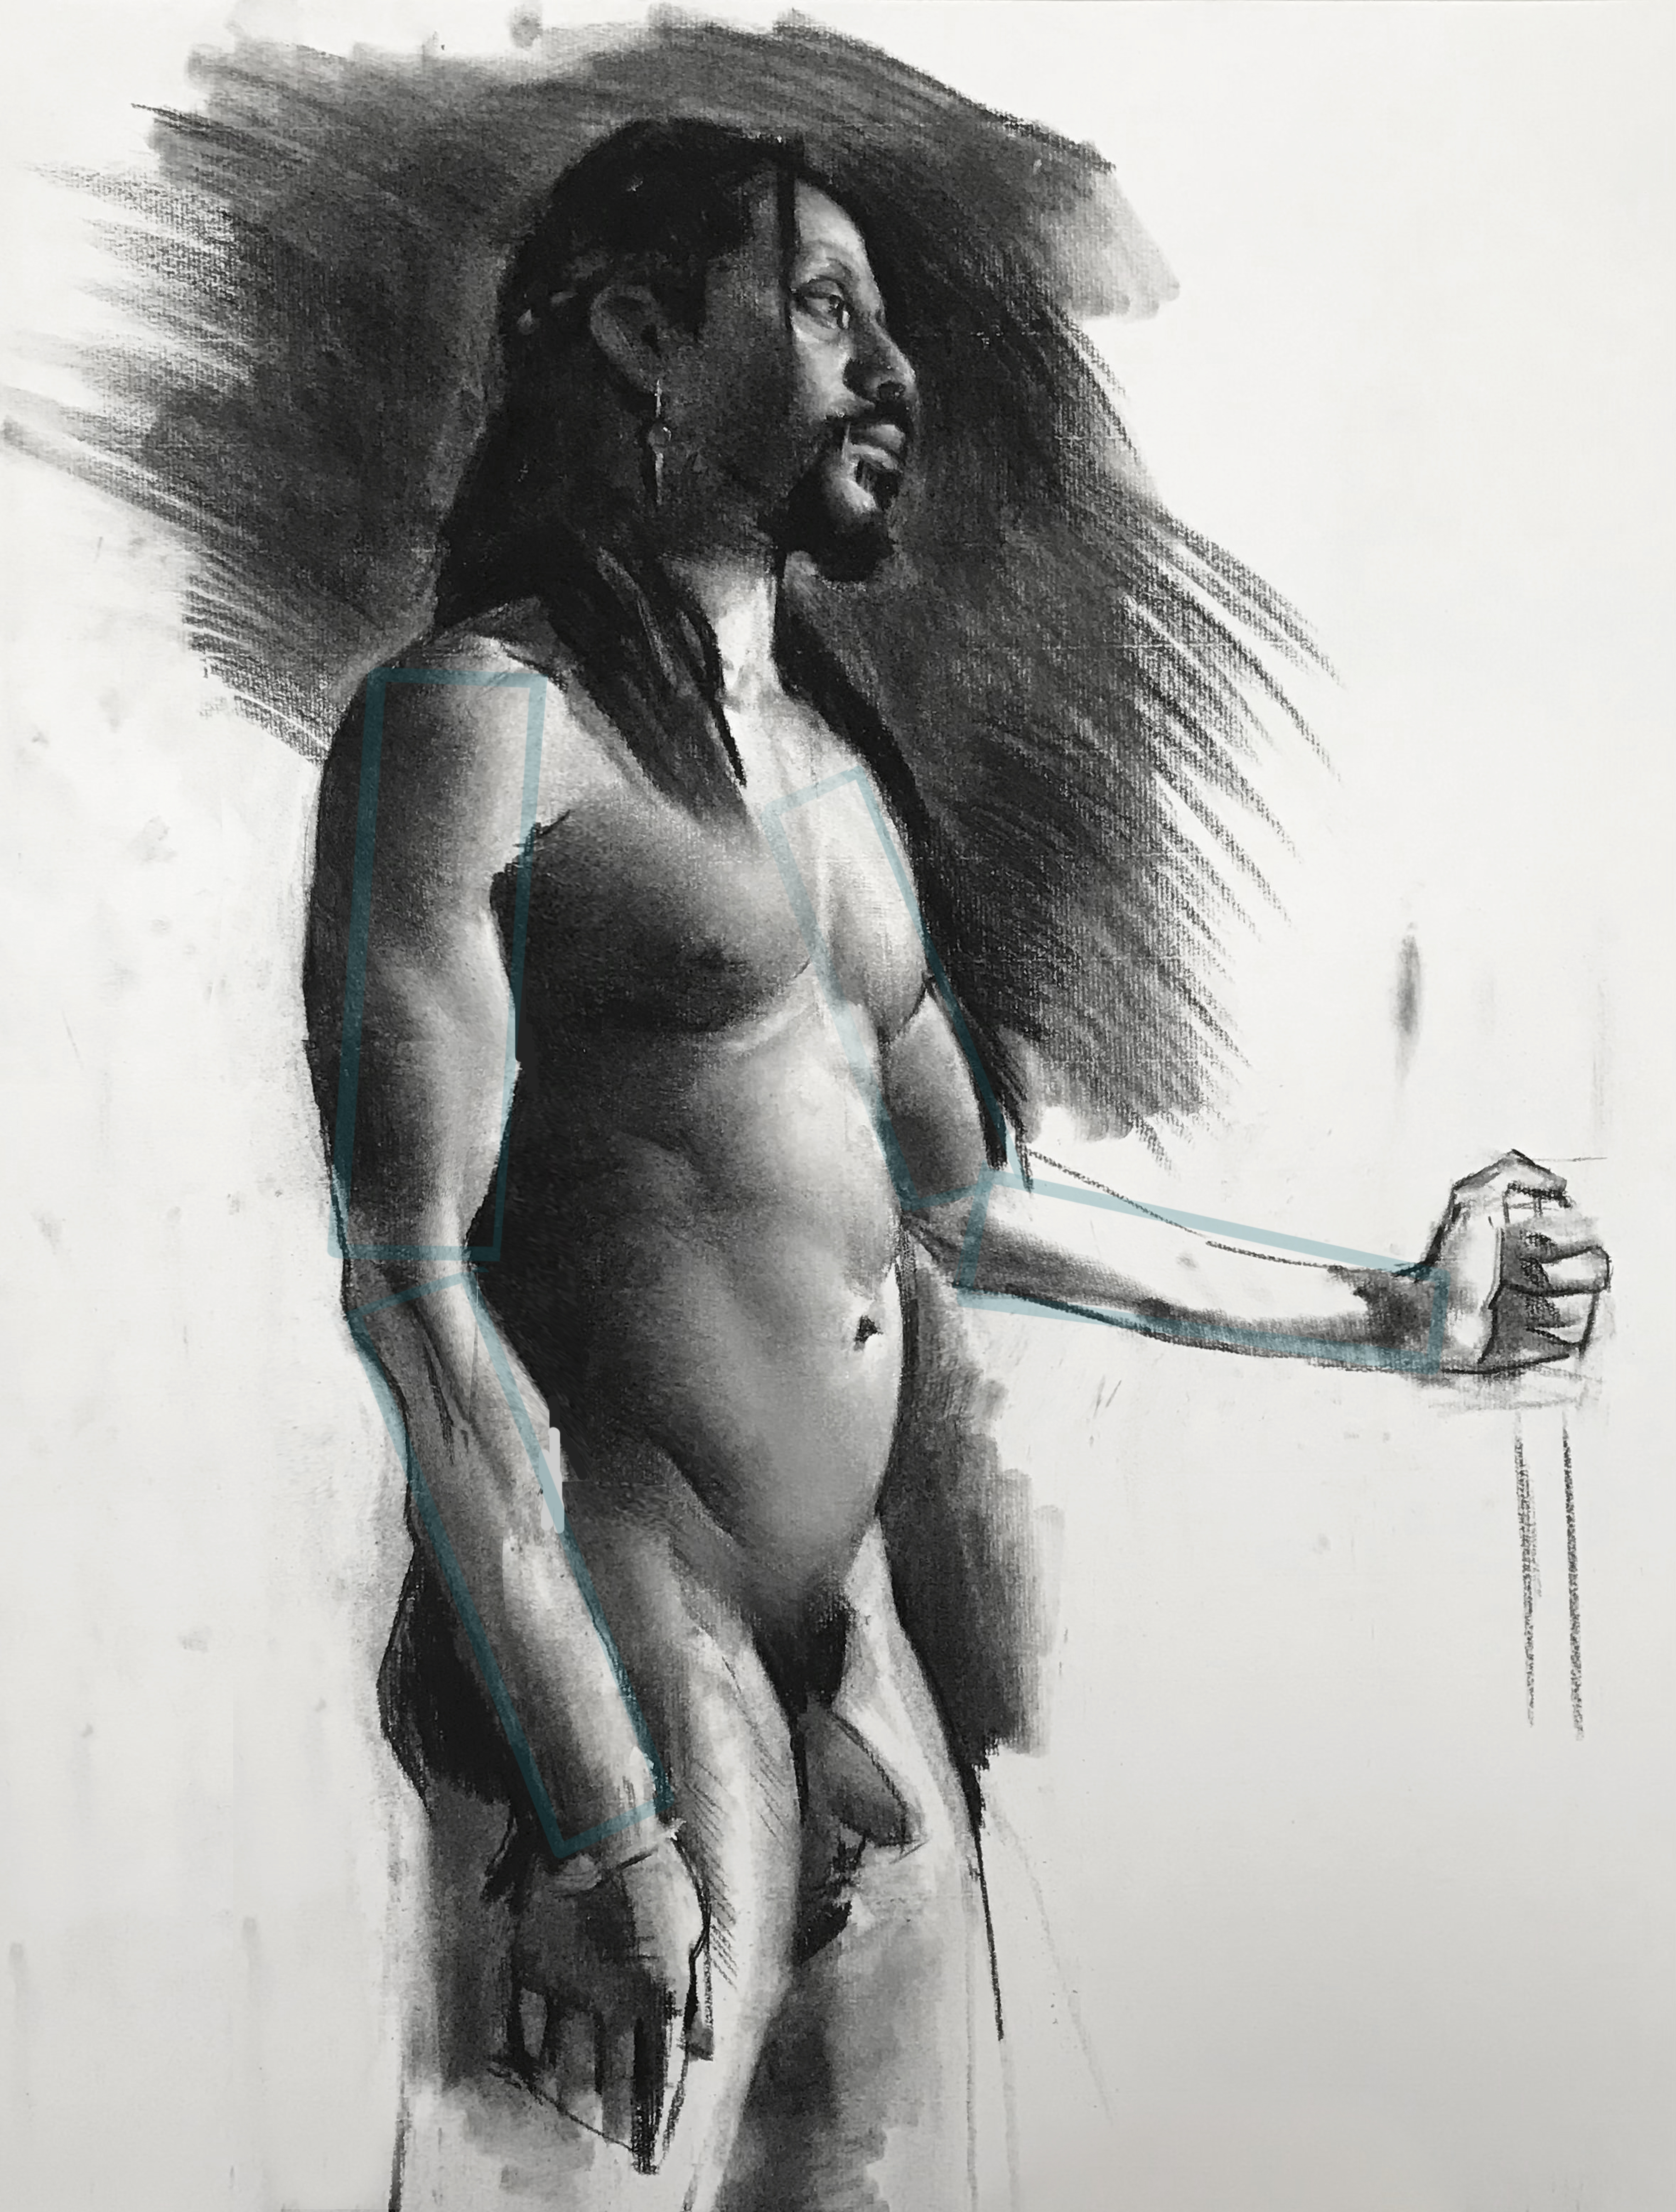
Once we have the simple structure nailed down, it’s important we respect its boundaries. If we over-step the shapes, you’ll see how much structure we lose, as the bones appear broken! What simplifications can you come up with?
06. Form first
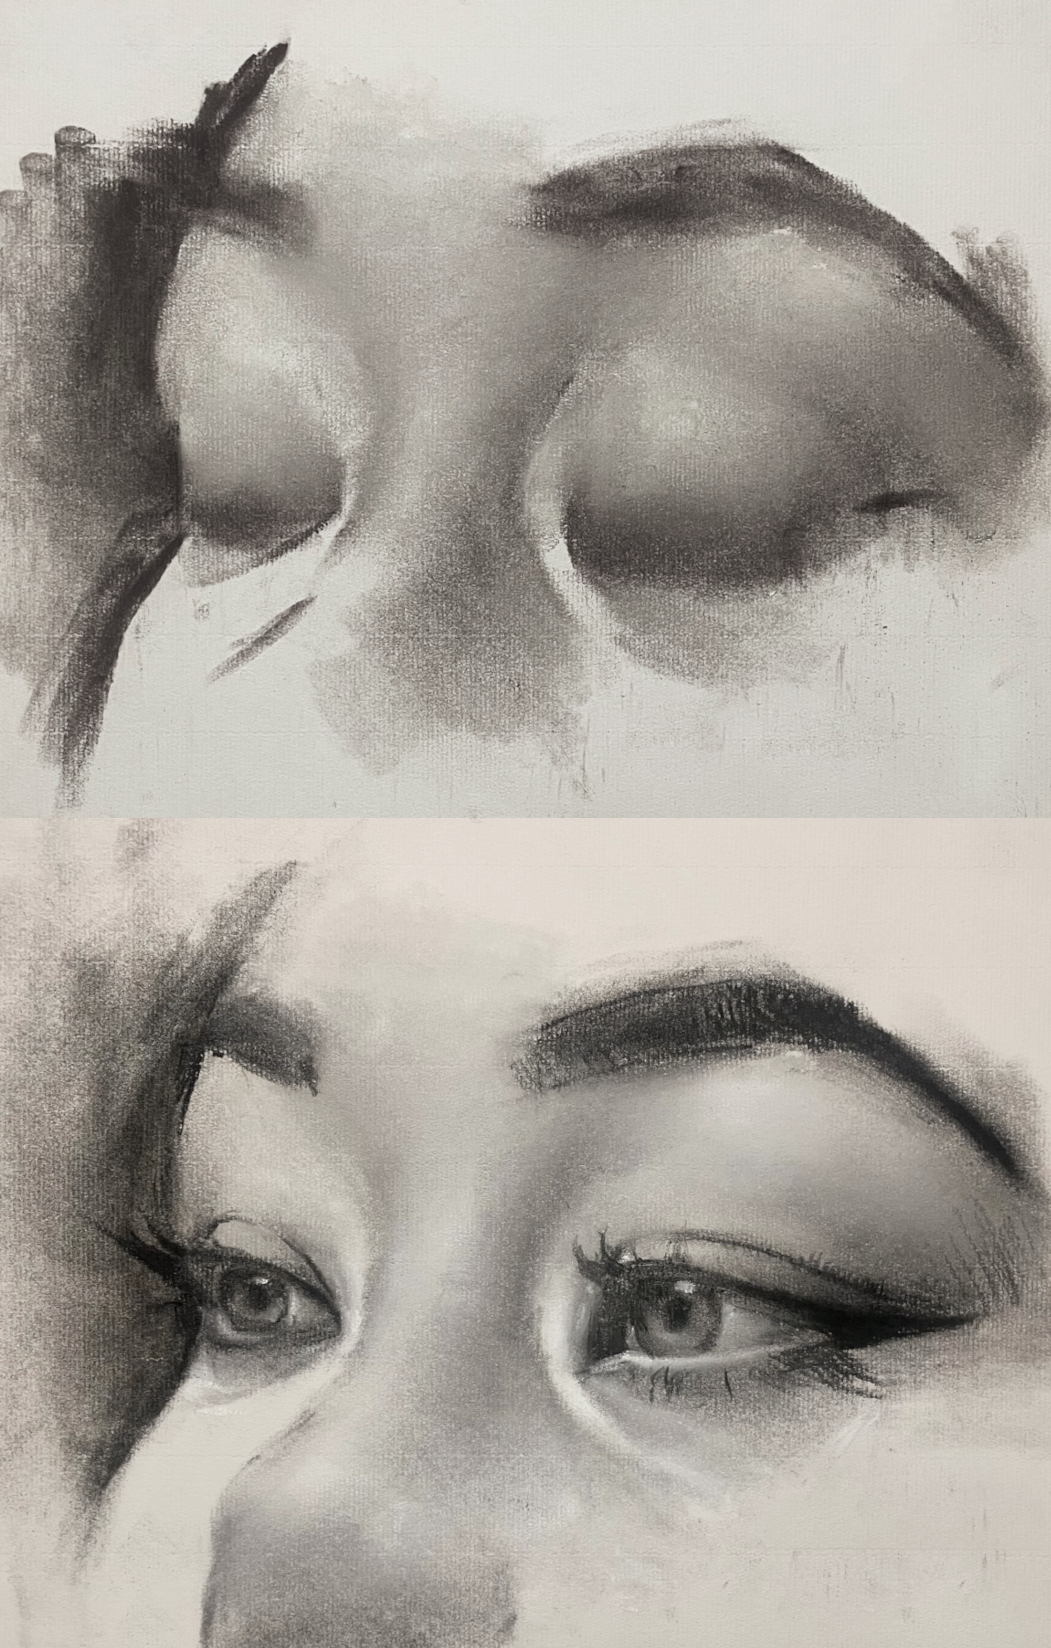
Before we tackle the details of any area, it’s best practice to block in the larger forms. The eye is my favourite example for this. Focus on the form and the details that follow will take care of themselves.
07. Find the big idea
Starting our portraits this way allows us to grasp the big idea of the lighting. Ensuring each piece fits into the larger picture without distracting detail.
08. Each detail echoes the whole
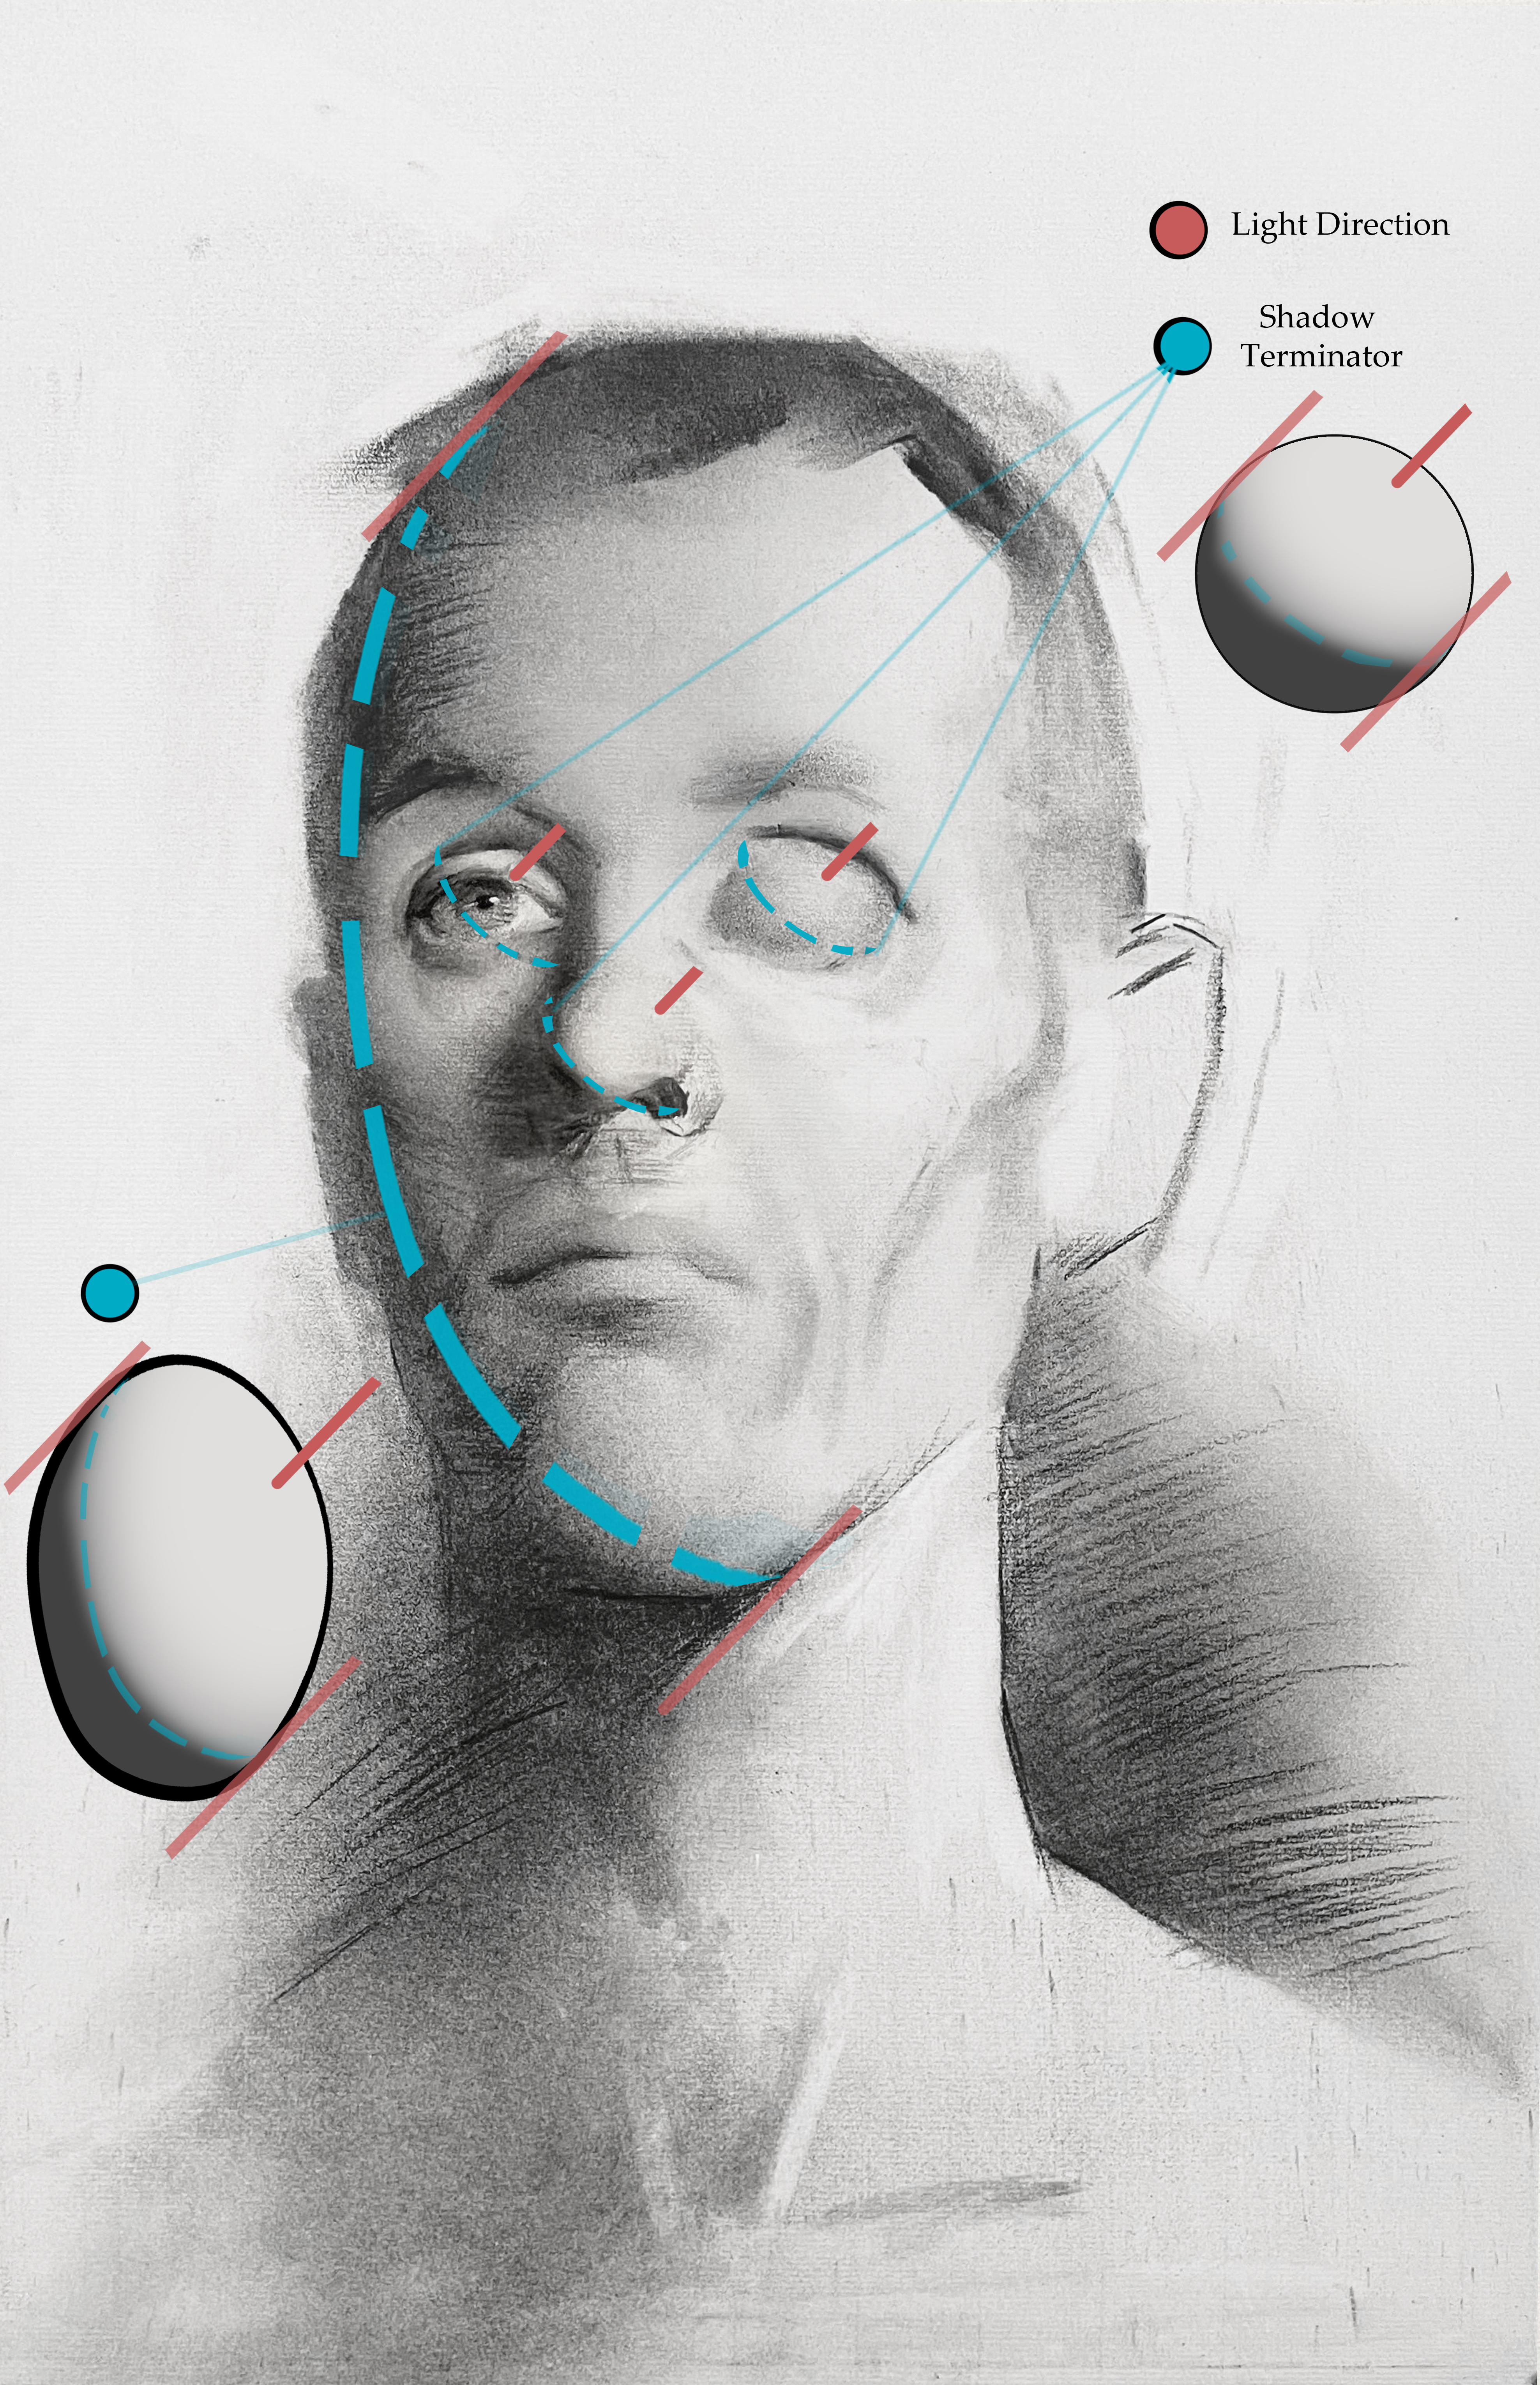
One way this broad look helps is that it allows us to analyse the lighting as a whole. The eyeball is a microcosm of the lighting of the larger form of the head that has the same light direction.
09. Shape focus
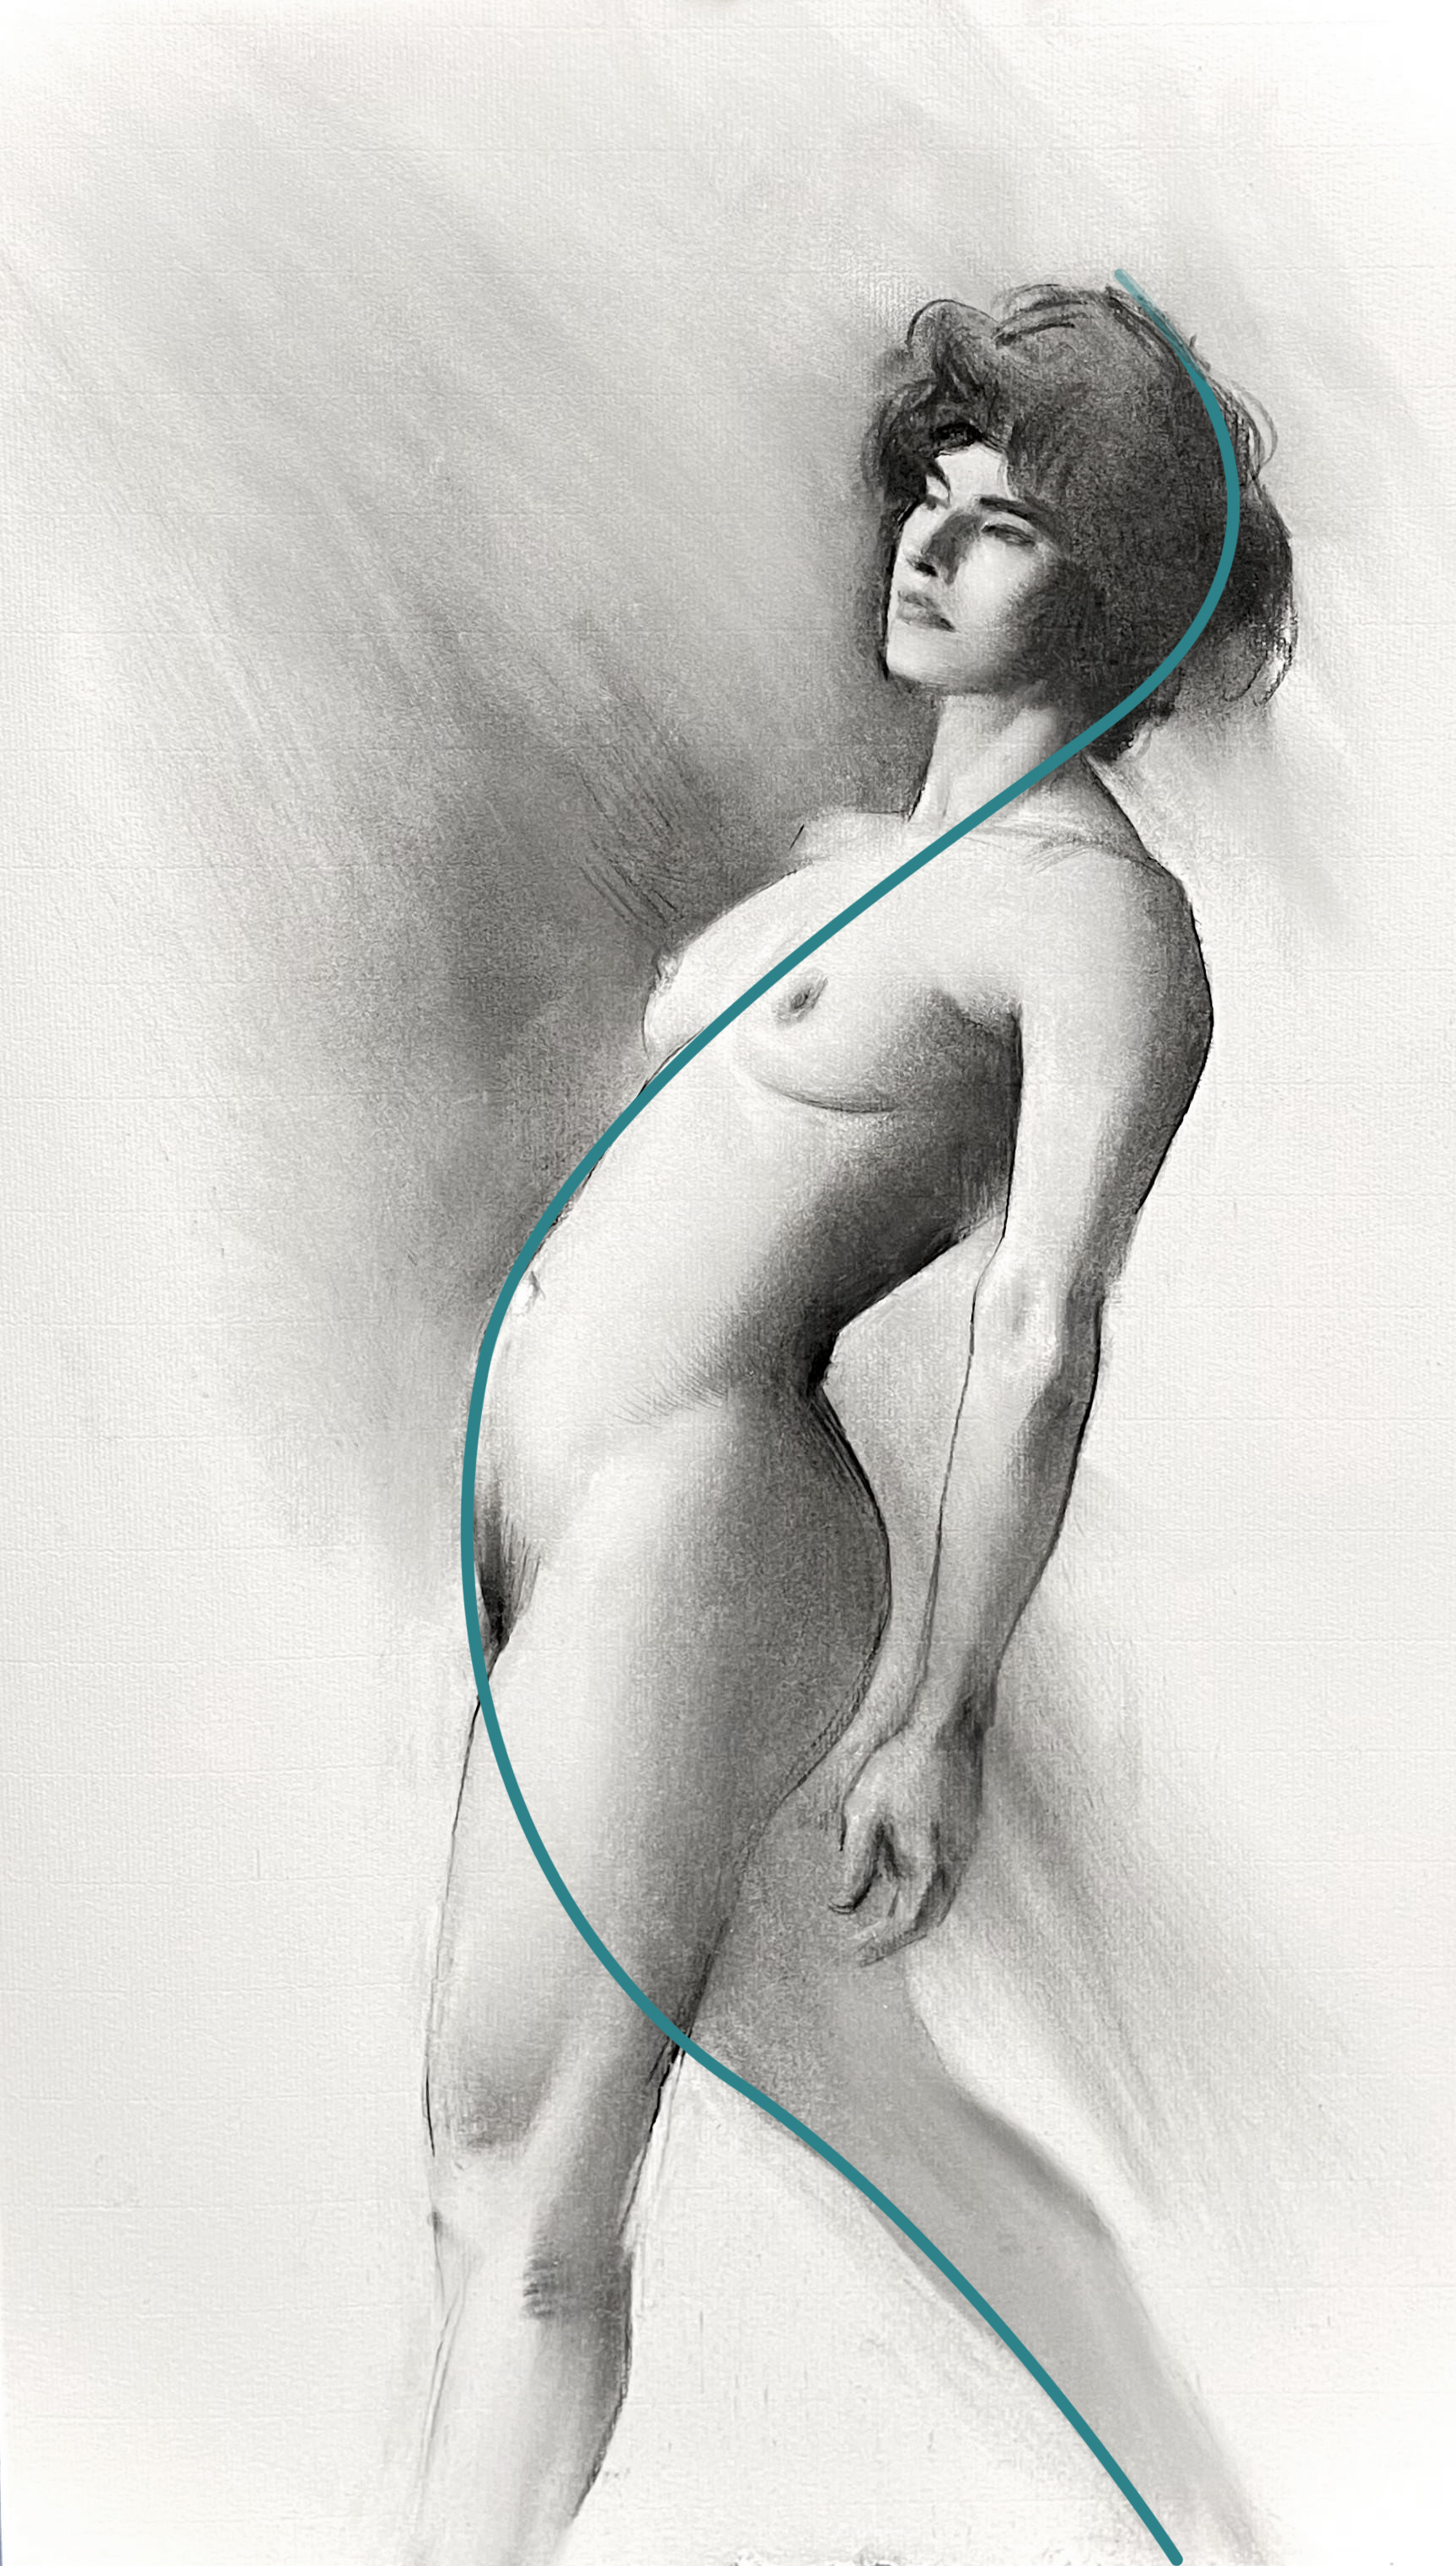
This isn’t just for the lighting, focus on grasping the largest shapes of the pose and the details will sit together more gracefully.
10. Less is more
Just because we know a structure is there doesn’t mean we should describe every bit of it. Try to describe the beginning and ends of forms and leave the middle to the viewer’s imagination.
Relationships to remember
Recognise these patterns and there’s nothing to fear
11. Easy eyes
The simplest view of the eye is that of the classic almond shape. We can learn a simple lesson of orientation even at this stage. If we make the curvature even on the top and bottom, we create an eye facing us directly. Straighten the top line for an eye facing down, and the reverse for an eye that’s facing up.
12. Straight above, curved below
Seeing the eye this way helps us to decipher it when we get to the complex language of a more rendered piece. Make it easy to remember: if we’re facing down it’s as simple as ‘straight above, curved below’.
13. Curved above, straight below
If confronted with an upwards view of an eye it’s the opposite: ‘curved above, straight below’.
14. Dot-to-dot
Another simplification to use when we’re dealing with symmetrical forms is to think of them simply as three dots: two on the sides and one in the centre. Their relationship controls the view we perceive in our art.
15. Consistent patterns
Apply this simplification to every symmetrical part of the head. Seeing the head first in this way can make us realise that the relationship is always consistent for every part of the head.
Golden rules for the head
Follow these tips to draw your features correctly
16. Match the ear
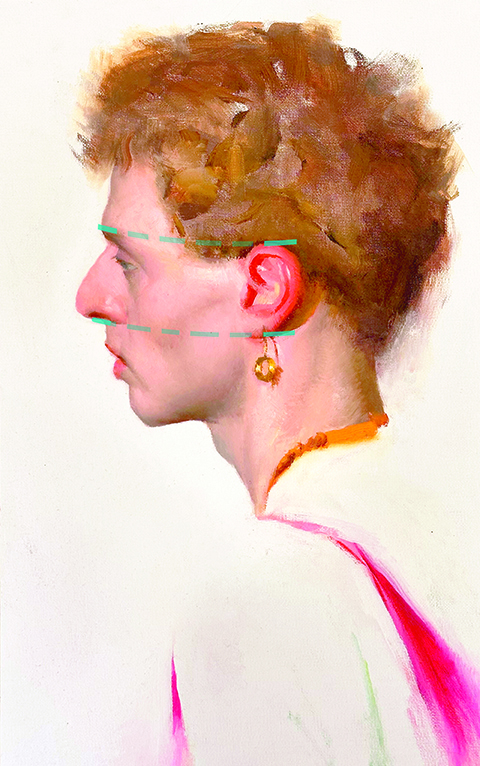
The first, most powerful relationship to establish is the front to the side. The size of the ear is often the same size as the top of the brow to the nose, so make sure to relate them!
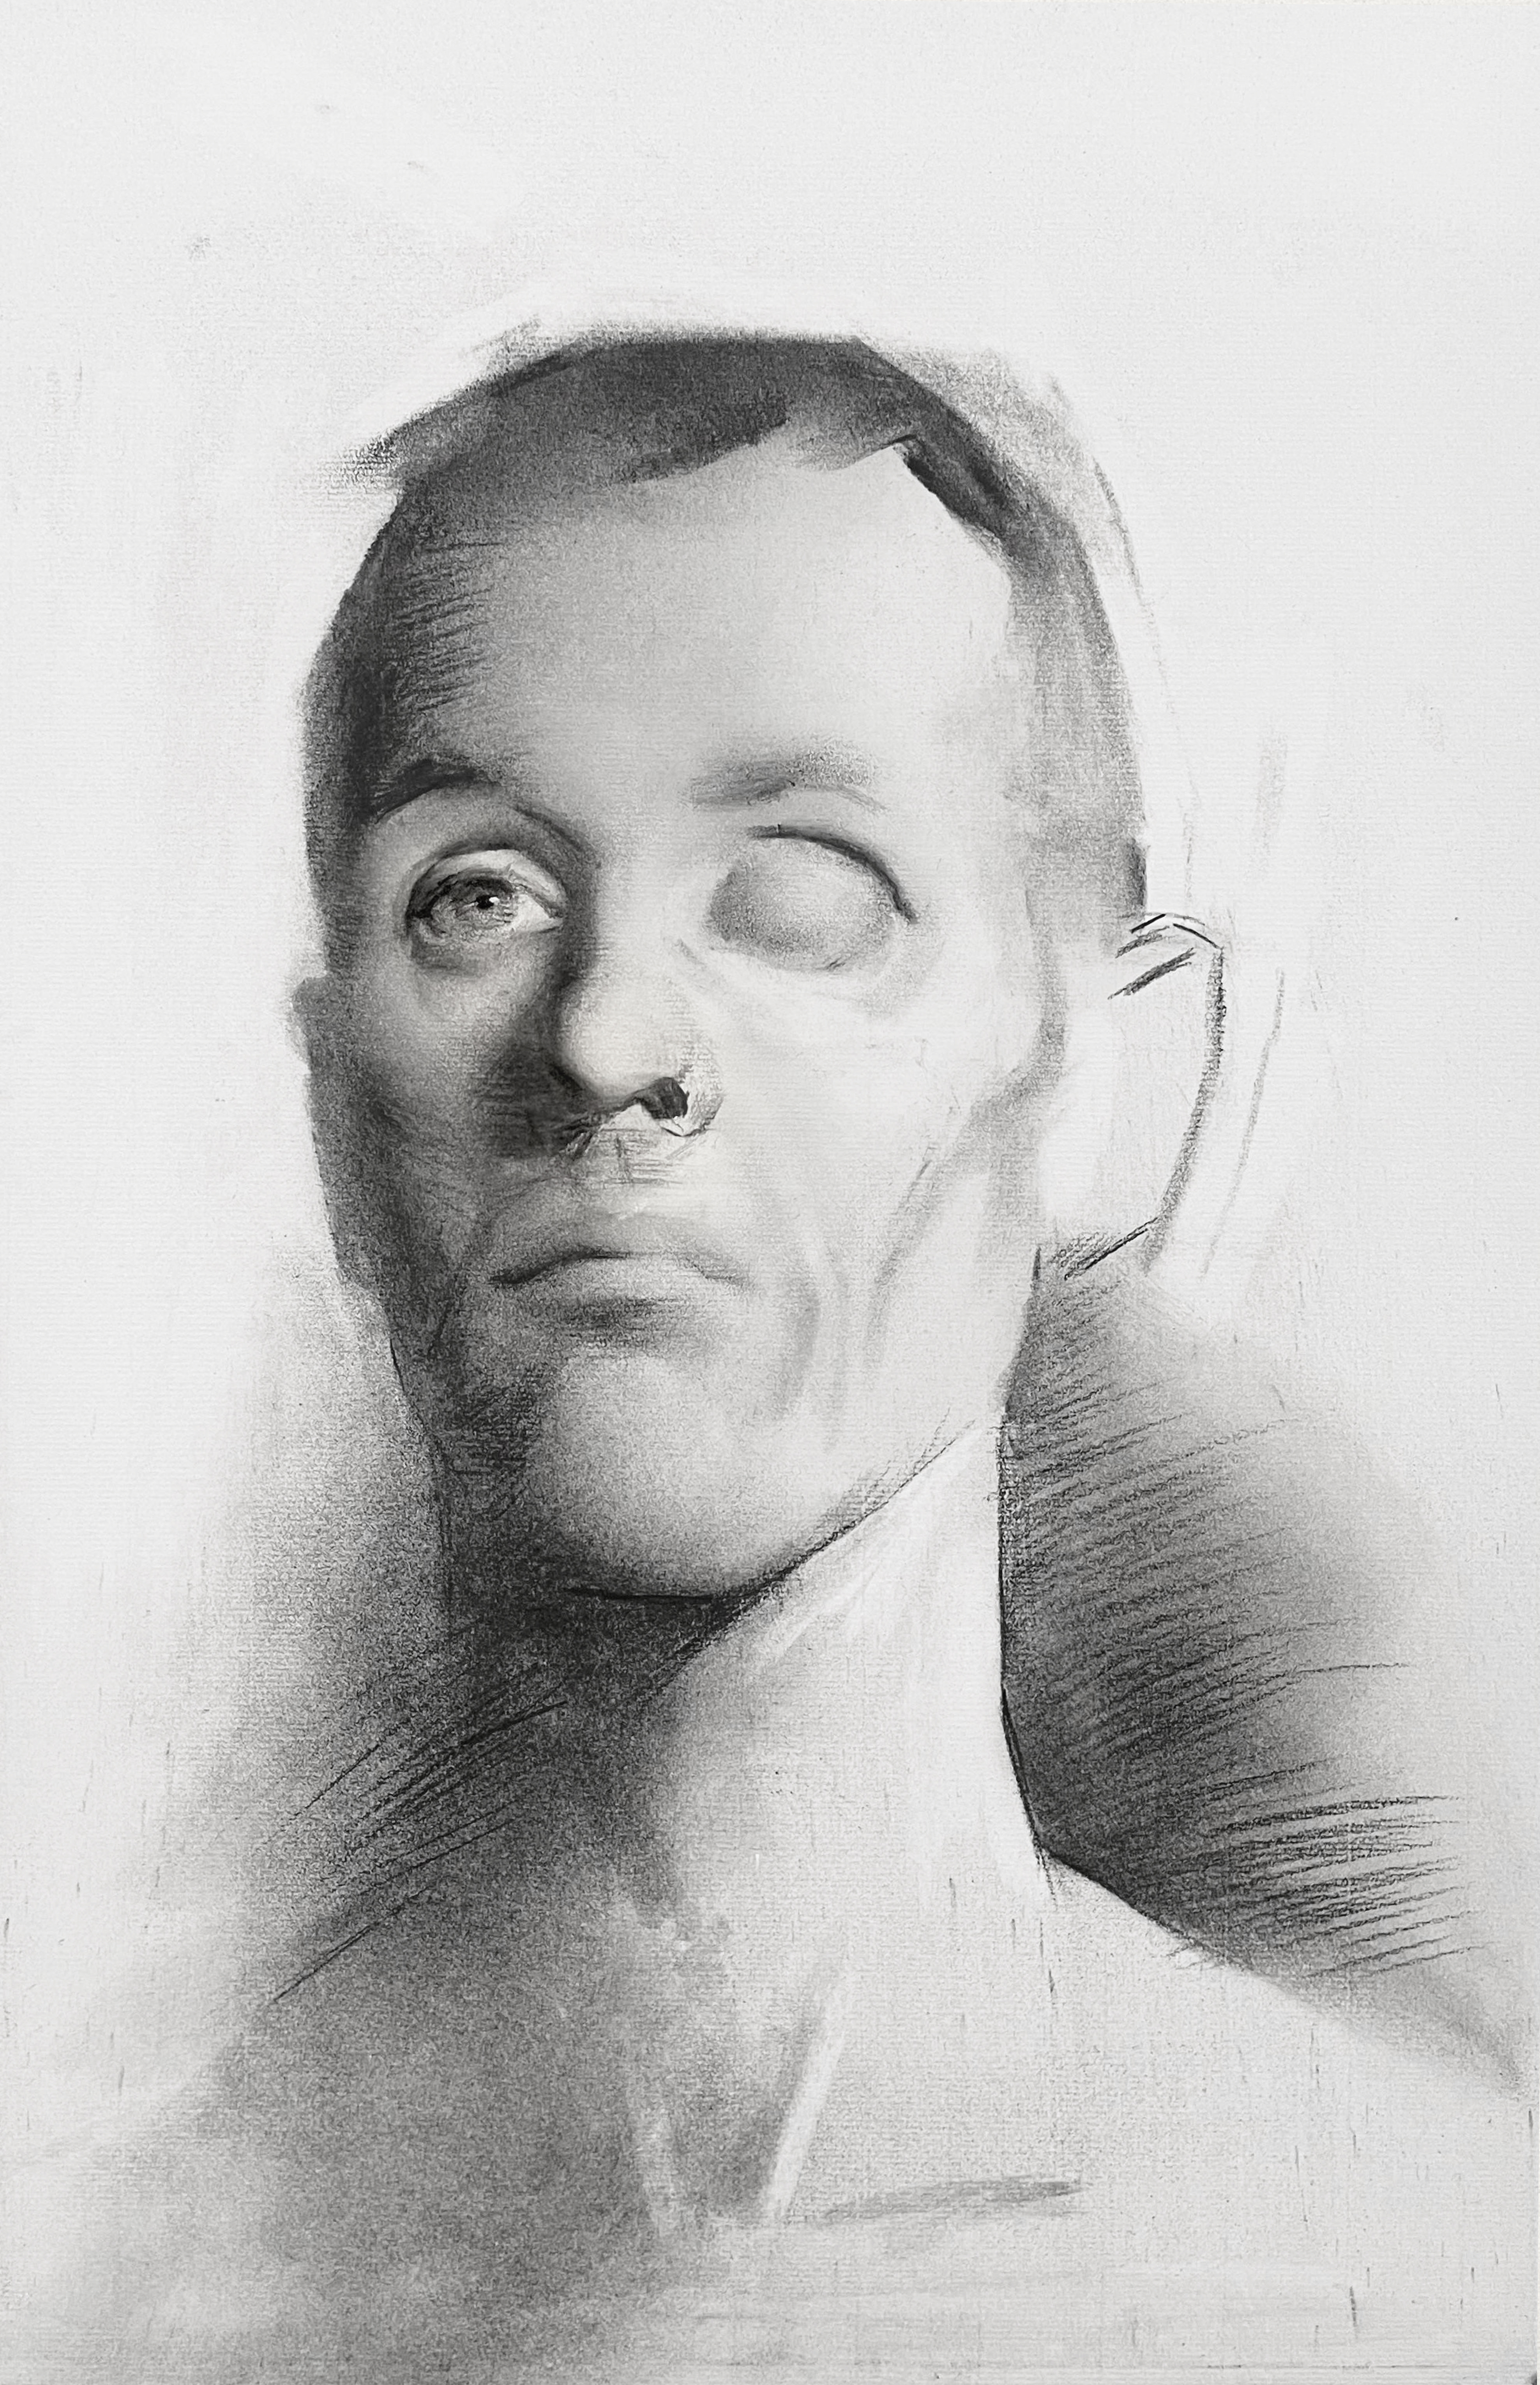
17. Find the hidden cheekbone

The cheekbone is an incredibly important part of the face structure, but often missed by students. Seek it out and look at how much stronger your portraits are.
18. Secret landmarks
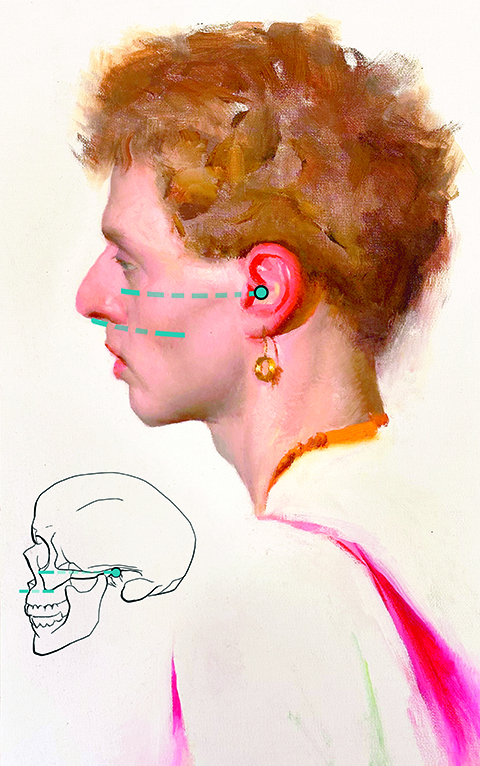
Useful relationships for placing the cheekbone are that the bottom of the nose lines up with the bottom of it, and the cheekbone’s top lines up with the bottom of the eye and the earhole.
19. The Frankfort horizontal
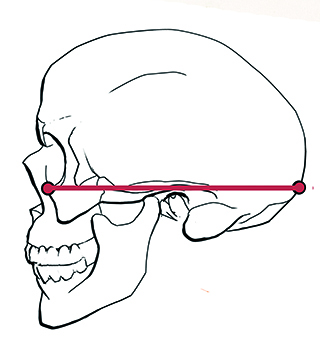
A lesser-known relationship is the Frankfort horizontal: the eye socket, the top of the cheekbone, the earhole, and the start of the neck are all on a single line.
20. Back to front
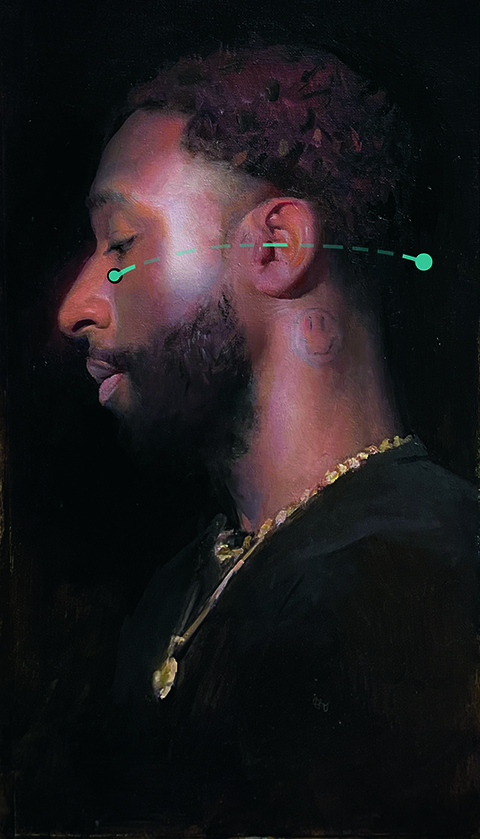
The line of the Frankfort horizontal is our best simple tool to relate and unite the front, side and back structures of the head and will be a powerful new addition to your toolkit.
For more tips, see our piece on gesture drawing and on how to draw a female figure.
Get more tutorials in ImagineFX
This content originally appeared in ImagineFX magazine, the world's leading digital art and fantasy art magazine. ImagineFX is on sale in the UK, Europe, United States, Canada, Australia and more. Limited numbers of ImagineFX print editions are available for delivery from our online store (the shipping costs are included in all prices).