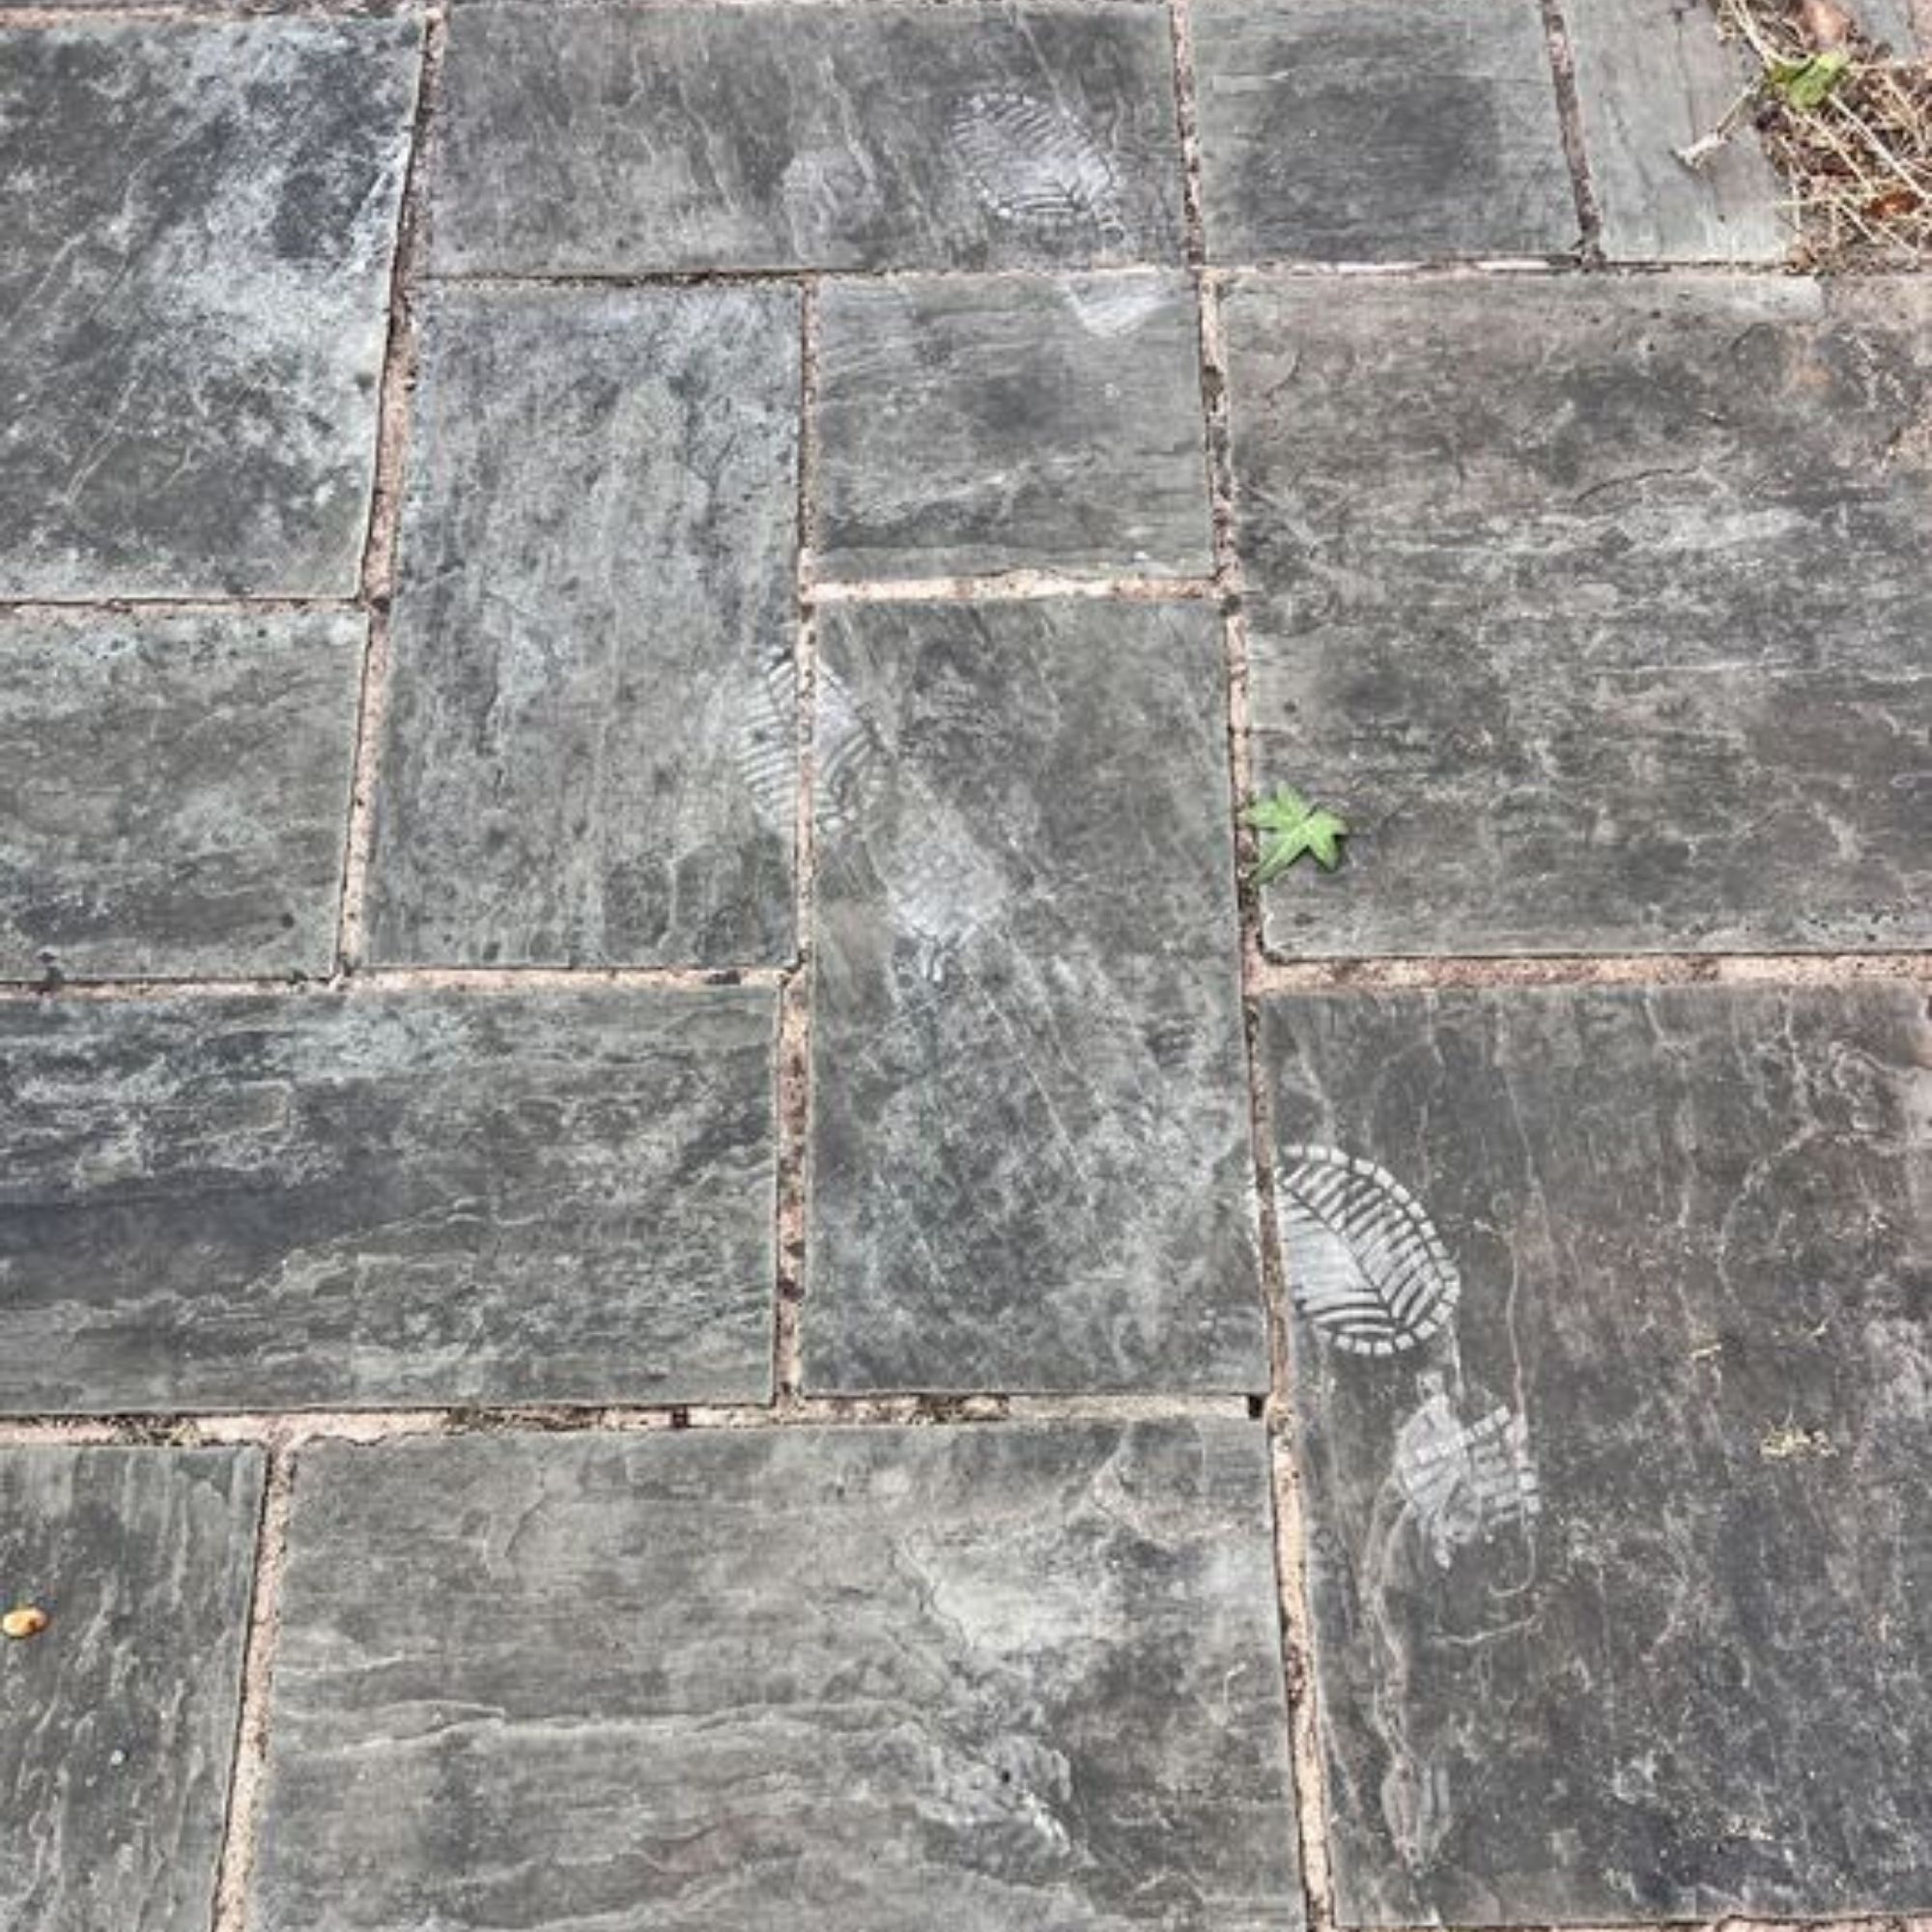
My garden has always been a space with a lot of potential, but no matter how many flowers I planted or outdoor accessories I styled, the patio remained an eyesore. With its crumbling grout and black spot-stained surface, I wasn’t sure how I would improve the look without replacing it completely.
Unfortunately, I didn’t have £5,000 lying around for me to splash on a brand new patio. So, it looked like I might be stuck with it forever. That was, until I started searching for patio ideas, and found myself on the patio regrouting side of TikTok.
I realised that all I needed to do was give my patio a well-needed makeover by giving it a good scrub and refreshing the grout lines.
How I saved £5,000 on my patio
Despite the effort I put into painting my fences and curating colourful, cottage-style garden border ideas to beautifully frame the space, the patio made the garden feel unkempt. With its dark and dingy appearance, I felt reluctant to host outdoors until I figured out something I could do about it.
While I still gazed longingly at the Cotswold stone patios on my Pinterest boards, I hoped that my patio makeover project might just do the job.
The first thing I had to do was give it a much-needed clean with a pressure washer and patio cleaner. To save money, I borrowed my partner’s dad’s Karcher High Pressure Washer, and bought some of the Pro-Kleen Ultimate Black Spot Remover from Amazon.
This worked as an absolute treat to remove black spots on the patio. First, I used my hosepipe to wet the patio. Then I applied the black spot remover, following the instructions, leaving it on for 1-2hrs before jet washing it off. Almost instantly, I noticed the black stains lifting, and was pleasantly surprised by a fairly light grey patio underneath. I used the patio cleaner twice on stubborn stains.
How I regrouted my patio
Next, I needed to remove the old, tired grout. Admittedly, most people in the videos I watched used an angle grinder to do this, which I didn’t have. But I did have my partner’s SDS drill, along with a hammer and chisel, which worked just fine.
Once we drilled out the crumbling grout, we used a dustpan and brush to clear the area, ready to regrout.
It’s a good idea to use patio sealer before grouting to avoid something called picture framing - this is where your tiles can appear stained around the edges. I used the ProJoint Pre-Grout Stone & Porcelain Paving Sealer.
When it came to finding grout, I wanted professional-grade grout in the hopes that it would last us a long time - and hopefully, prevent me from having to do this again anytime soon. I settled on ProJoint Titan Ultra High Strength Epoxy Paving Grout in the shade neutral/buff.
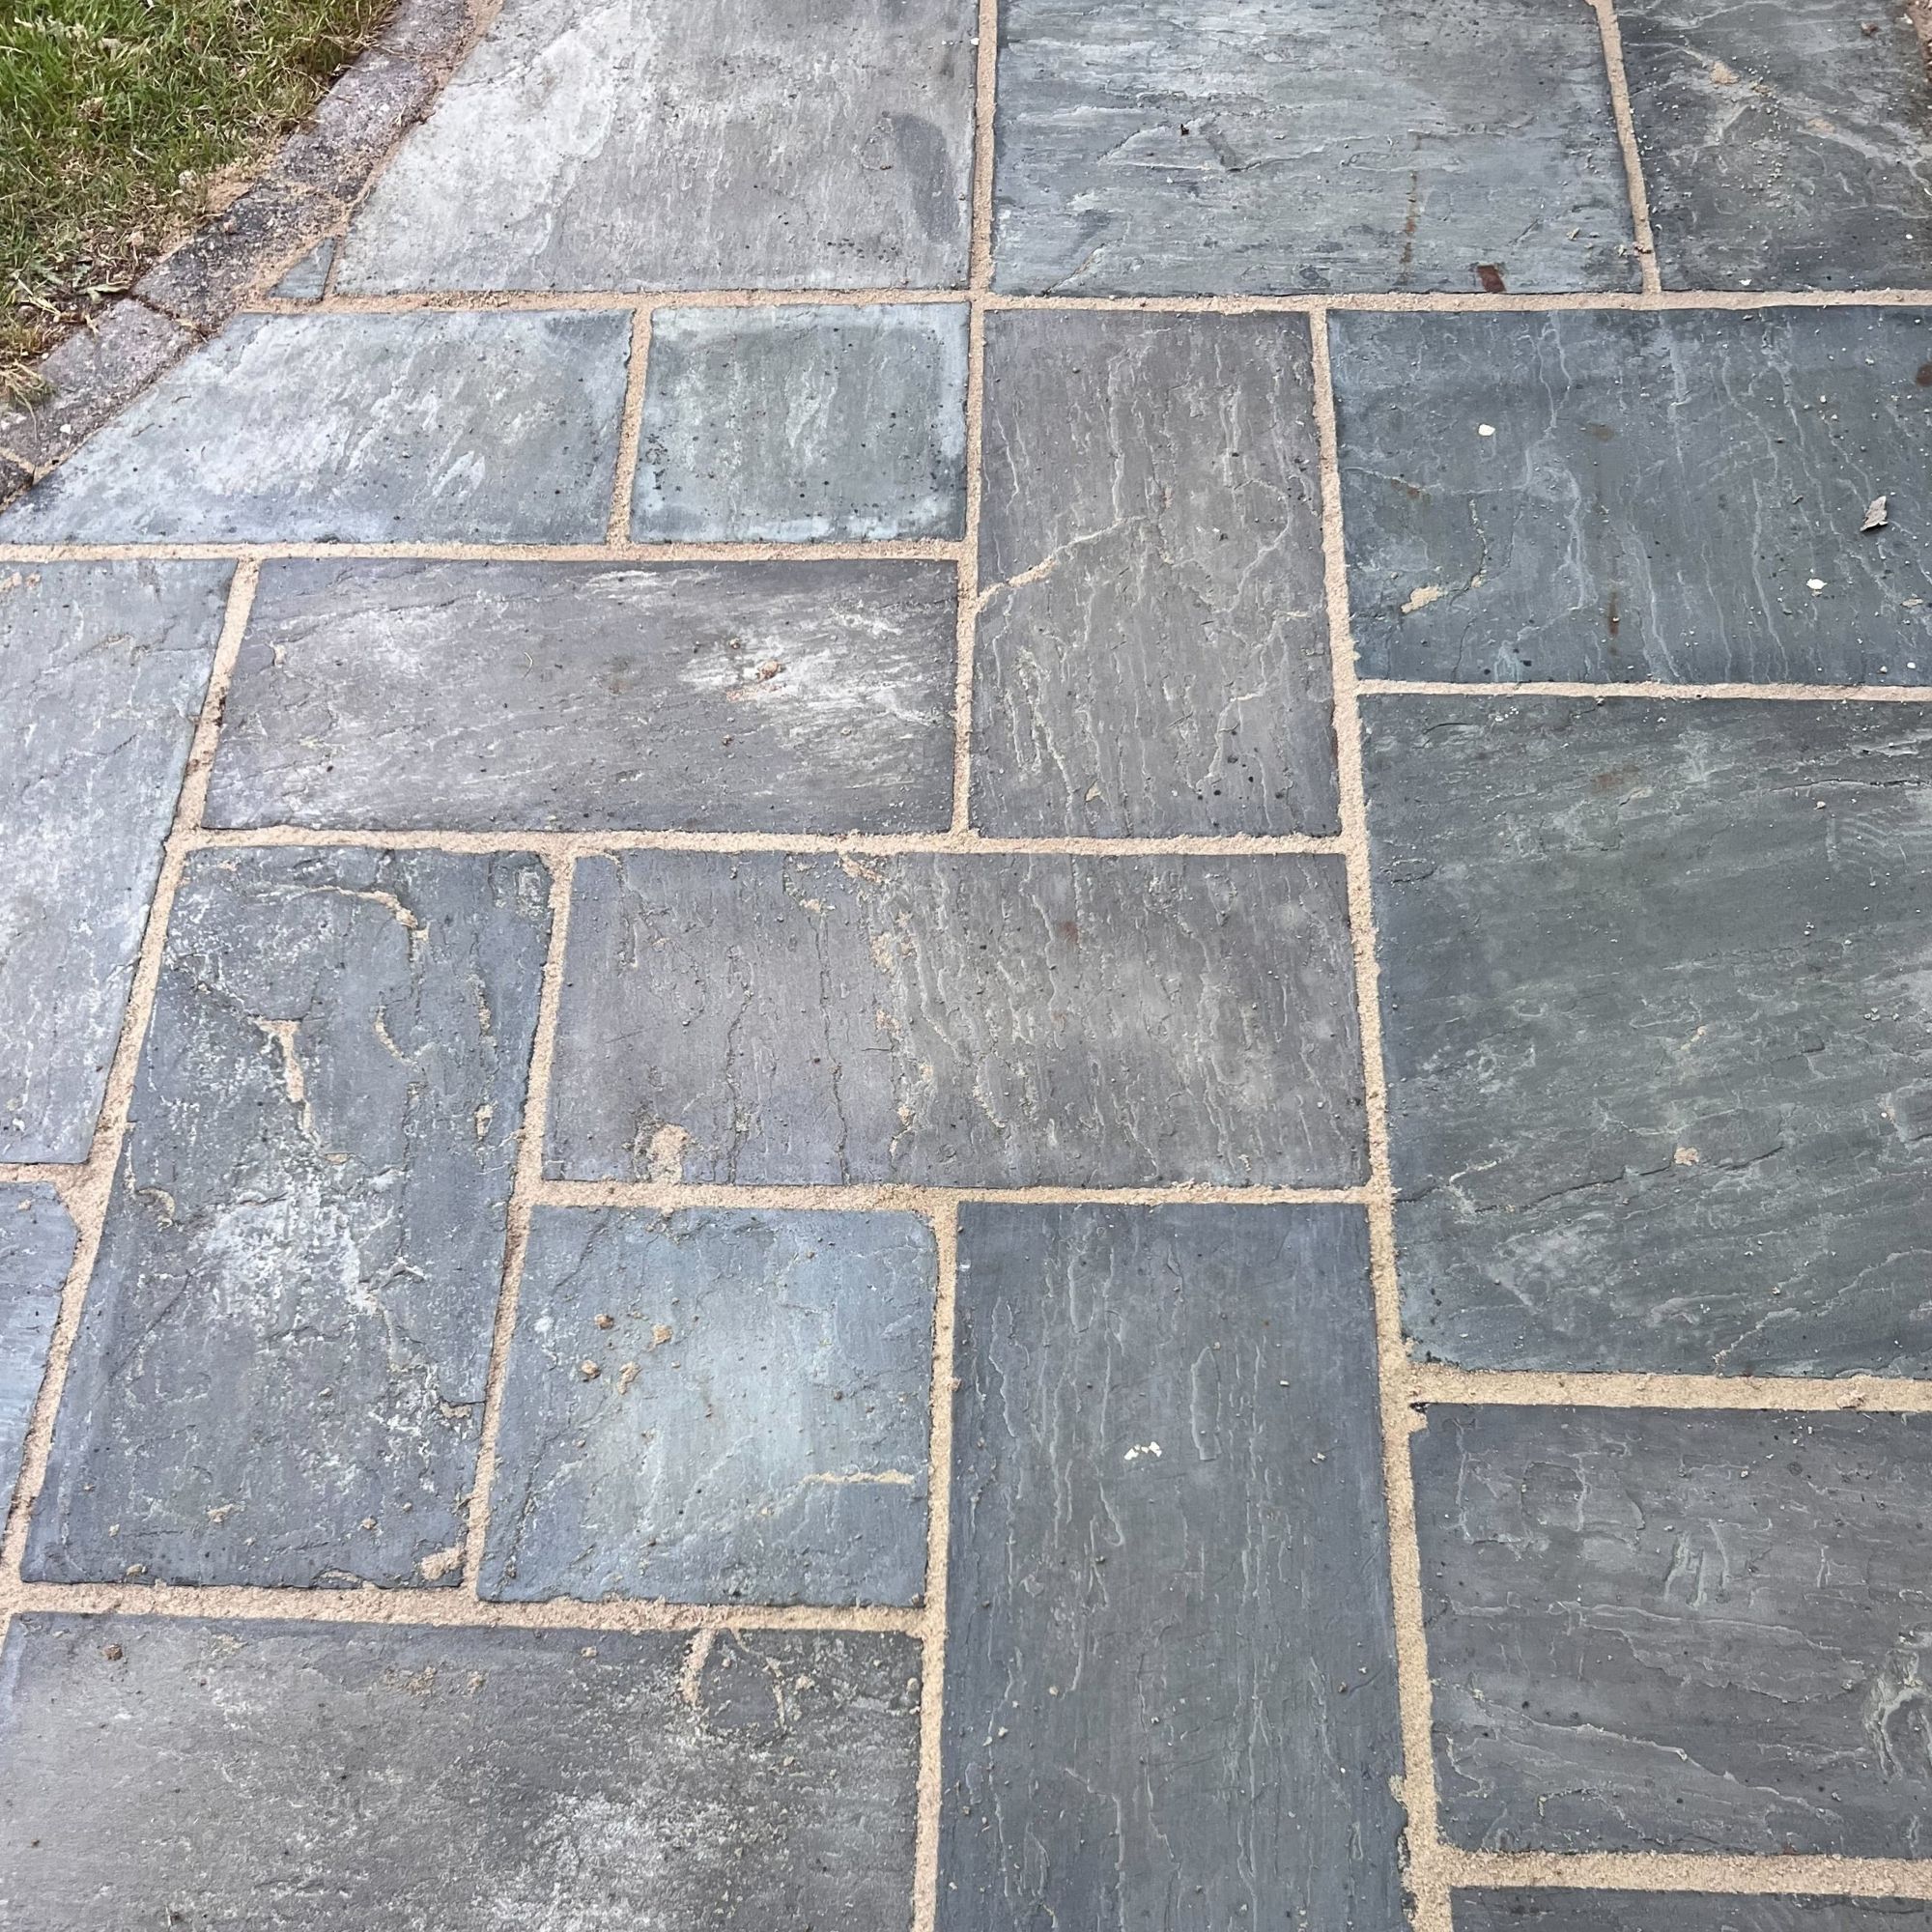
To use this according to the instructions, all I had to do was mix the grout and resin using a plasterer's mixer. Then, wet the patio and apply half of the mixture, using a rubber grout squeegee to push the grout into the grout lines. Once complete, I then used a brush dipped in water to brush away the excess grout, leaving perfectly grouted lines between my patio slabs.
I found this process fairly beginner-friendly – I’ve never done anything like this before, and now I’d add patio regrouting to my growing list of DIY accomplishments.
How much I spent
In total, I spent around £360 on a combination of the grout, sealer, and black spot remover. Although I wouldn’t say this is affordable, considering it would have cost approximately £5,000 for a new patio, it has certainly saved me a significant amount of money, and not to mention grief too.
It’s not a Cotswold patio – but it’s definitely a patio I feel proud of now. It’s a lovely, grey stone paired with a clean, natural grout that looks perfect with my country-cottage style garden.