Although you can play games out of the box on Windows 11, there are still many tweaks you can apply to further improve your computer's gaming performance.
You can, for example, turn on and off system features to increase the frame rates and experience smoother gameplay, such as Game Mode, GPU scheduling, VRR, Memory Integrity, and virtualization.
It's possible to enhance visuals with Auto HDR and Super Resolution features if your hardware supports them.
Additionally, you can perform some maintenance tasks, such as freeing up storage space, debloating the system, installing system and driver updates, changing power settings, and making other tweaks to ensure the computer is in optimal condition for gaming.
Finally, I realized I said no hardware upgrade is required. However, if you have an NVMe SSD, Windows 11 will automatically use the "DirectStorage" feature, which can dramatically cut asset-loading delays, making world loads feel nearly instantaneous on supported games.
In this how-to guide, I'll outline the top tweaks you can implement on your Windows 11 computer to enhance gaming performance.
Tweaks to boost gaming performance on Windows 11
The tips outlined in this guide are not listed in a particular order, and some of them may require specific hardware, meaning they will only apply to certain devices.
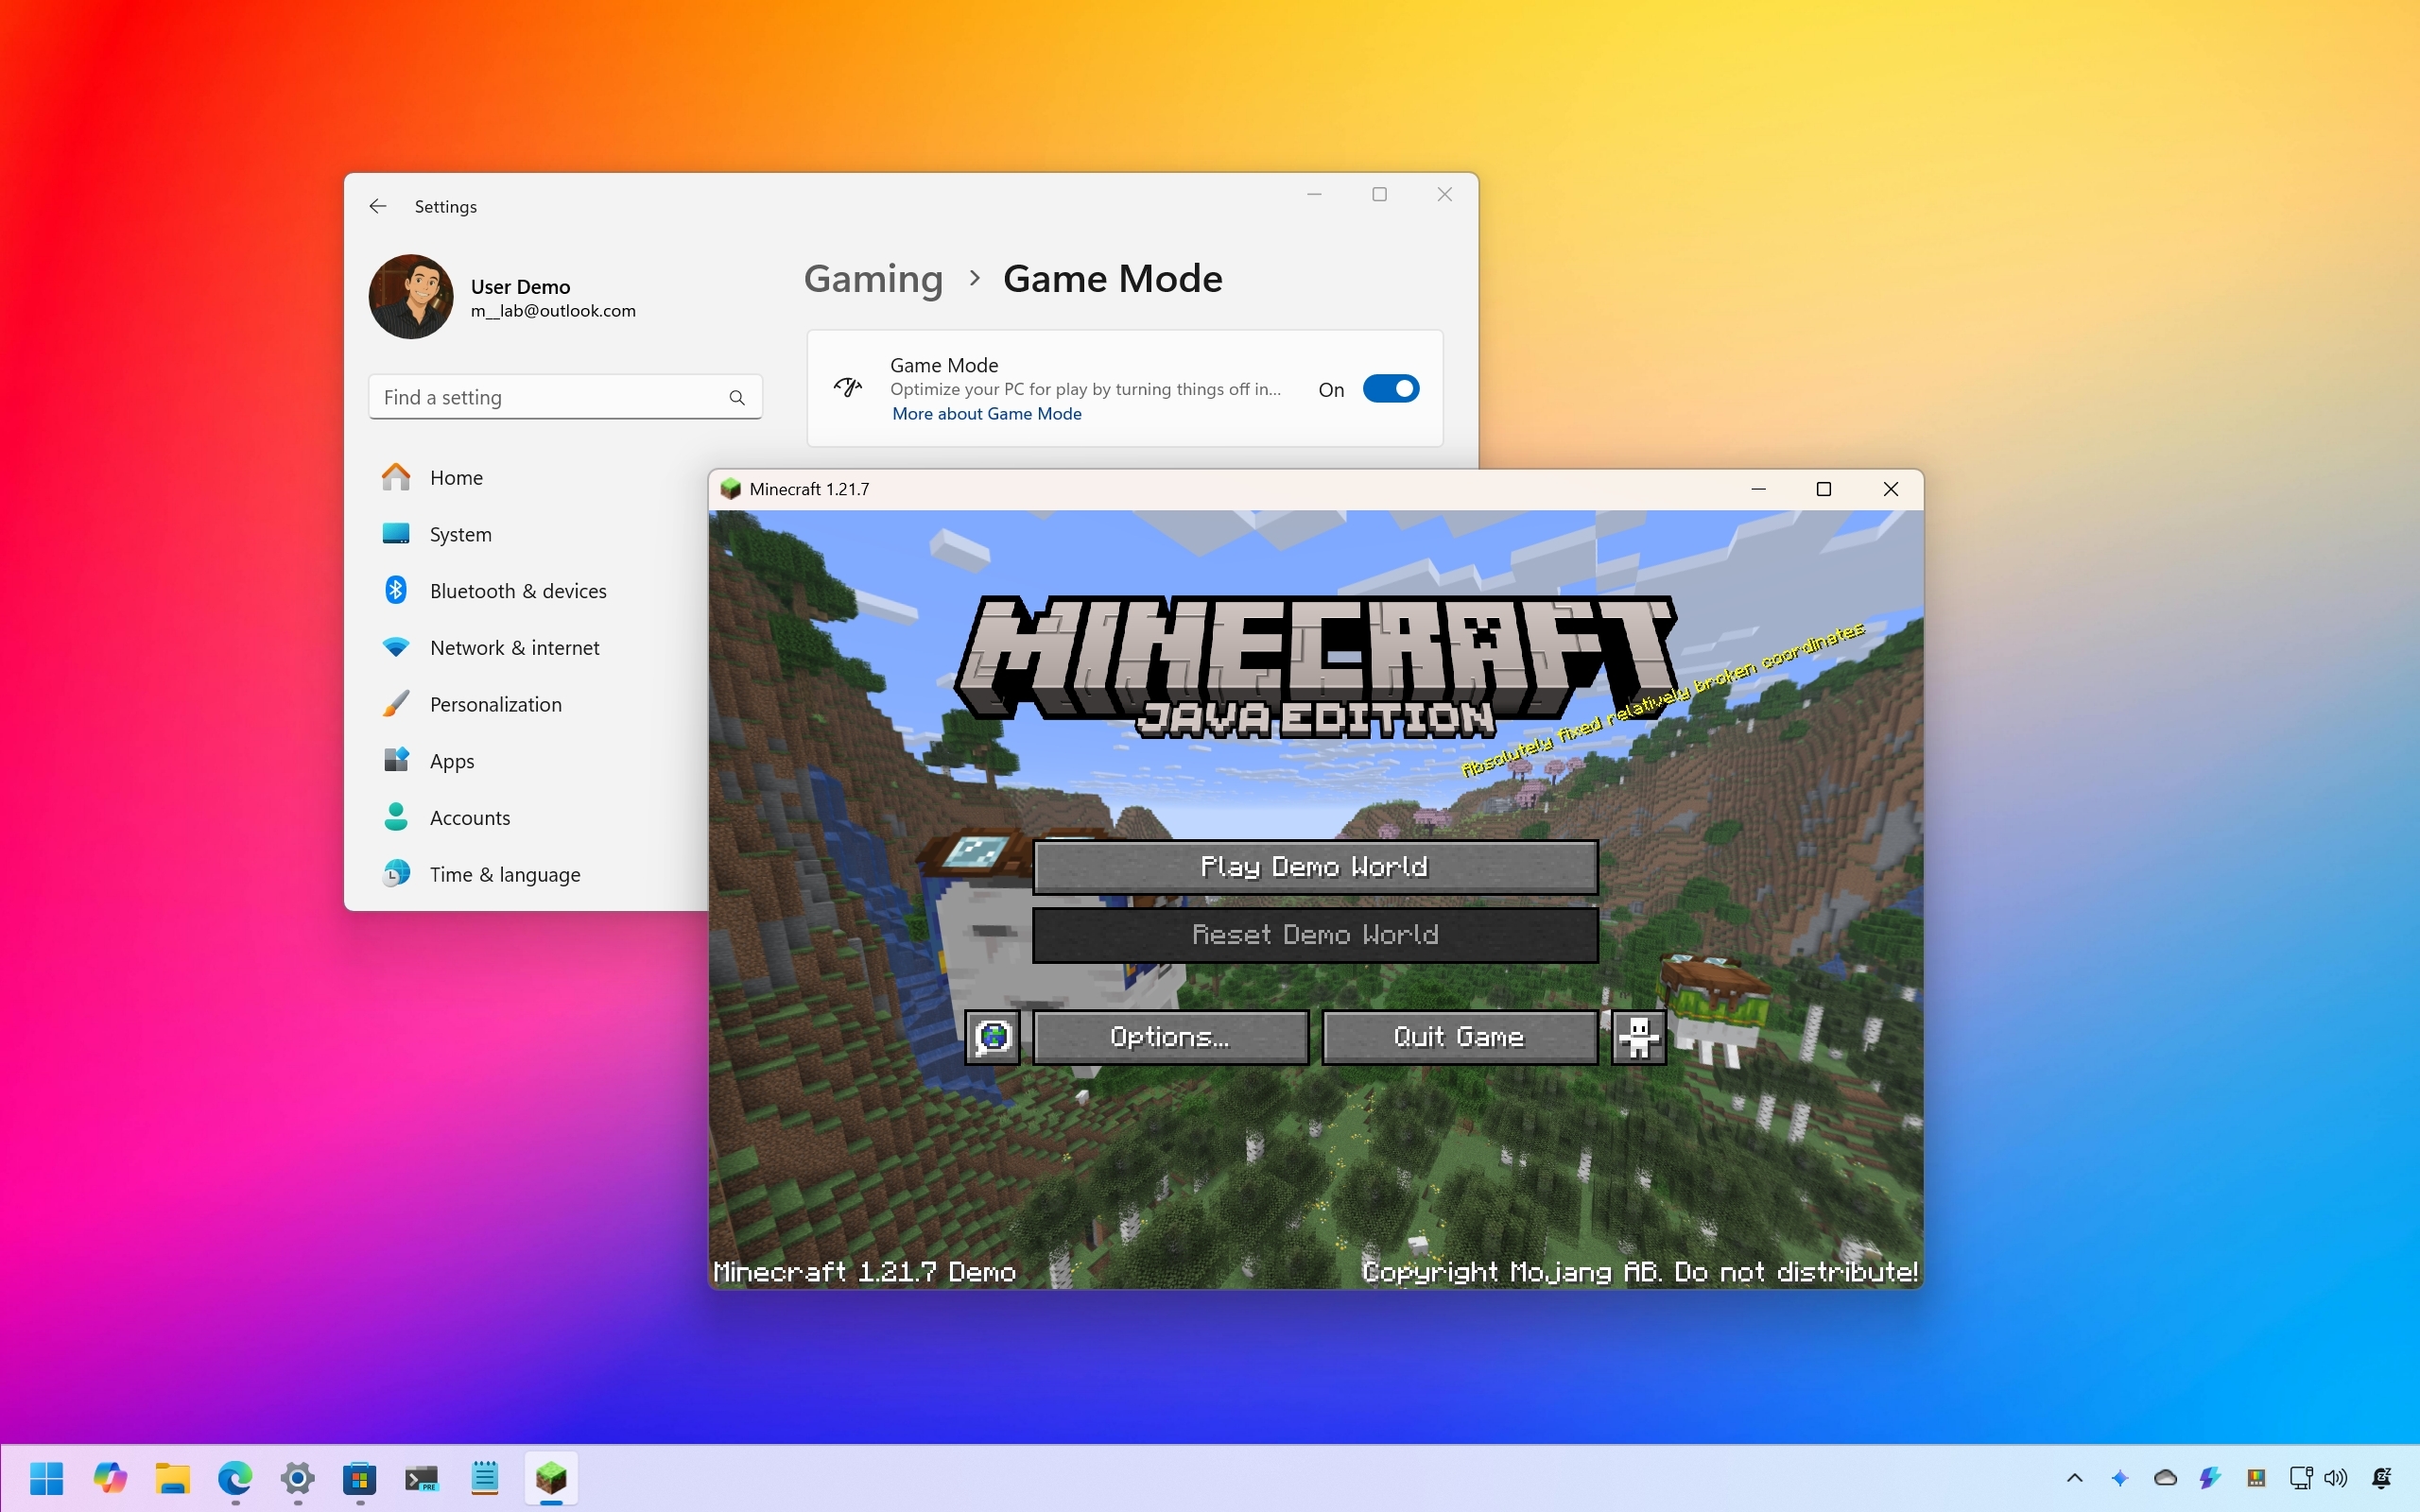
1. Enable Game Mode
Game Mode is a built-in feature that Microsoft has designed specifically to optimize your computer for gaming by prioritizing game processes and minimizing background interruptions.
The feature is often enabled by default on Windows 11. However, you can easily check its state and toggle it on or off with these instructions:
- Open Settings.
- Click on Gaming.
- Click the Game Mode page on the right side.
- Turn on the Game Mode toggle switch.
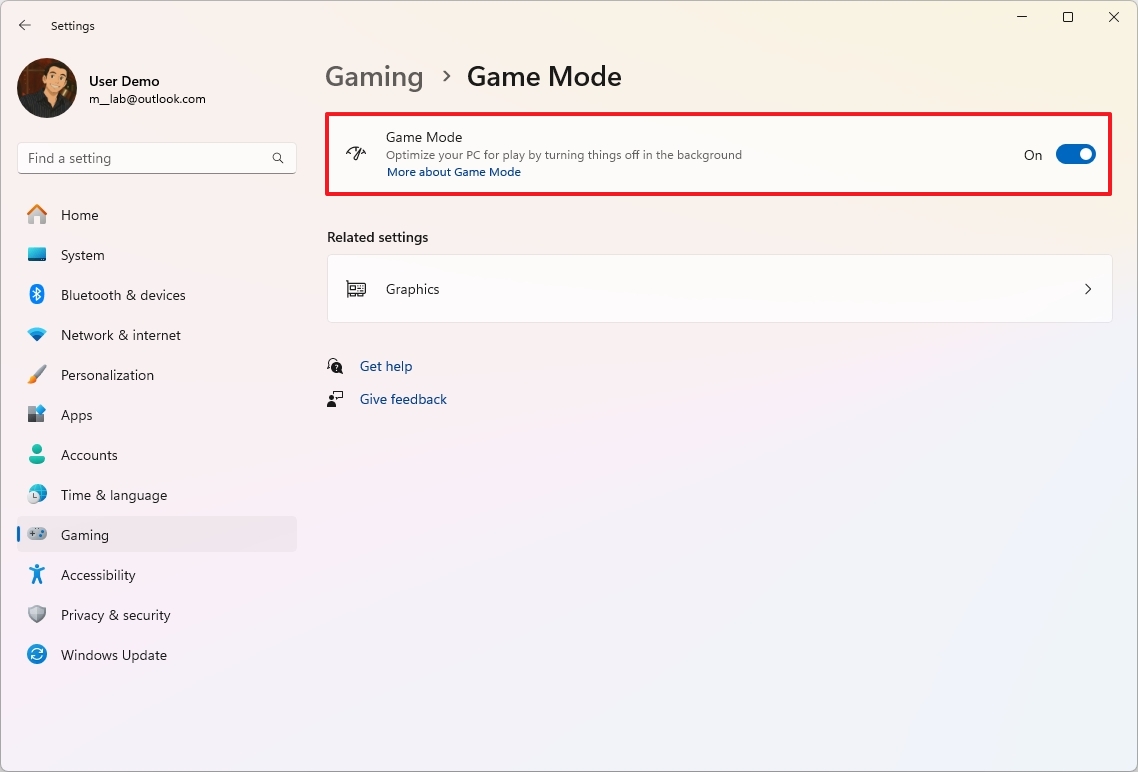
Once you complete the steps, the impact can vary depending on your system's hardware and the specific game you are playing. However, this feature can lead to improved performance, especially on computers that might otherwise struggle with background tasks.
2. Disable Memory Integrity
According to Microsoft, if you're noticing performance issues while playing games on Windows 11, this can be due to the Memory Integrity and Virtual Machine Platform security features.
When optimizing your computer for gaming performance, it's recommended to turn off this feature and then turn it back on after completing your gaming session.
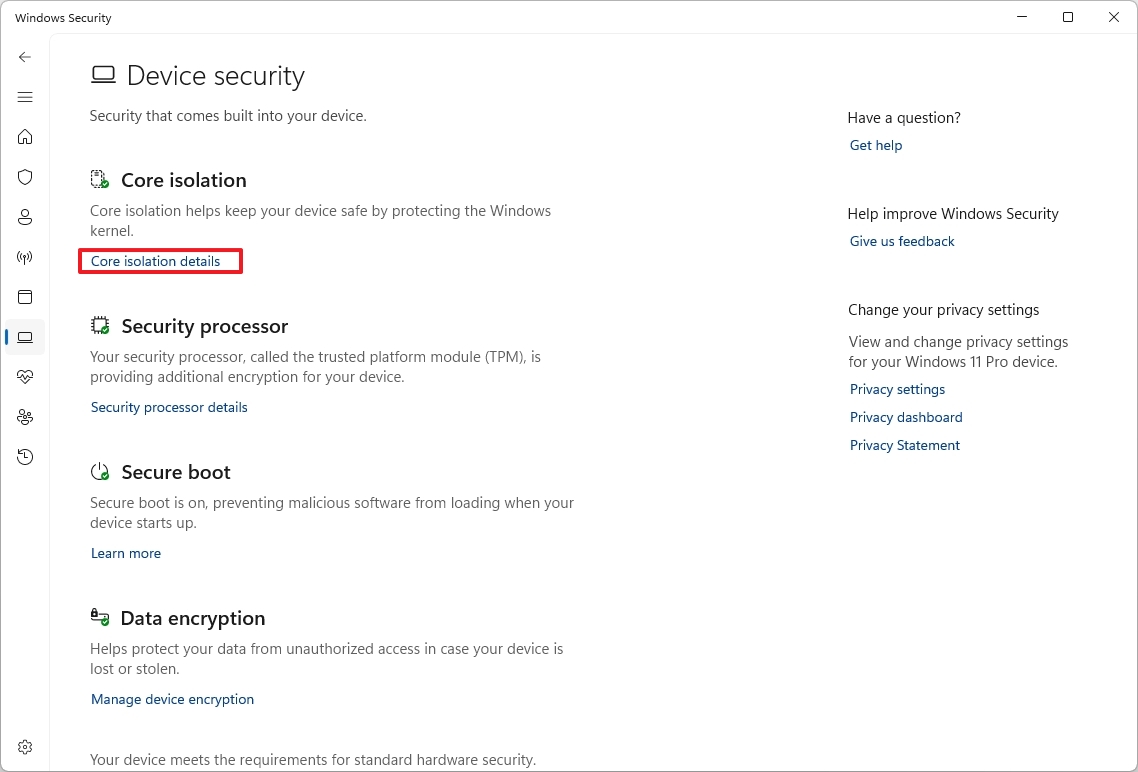
To disable Memory Integrity on Windows 11, use these steps:
- Open Windows Security.
- Click on Device Security.
- Click the "Core isolation details" option on the right.
- (Option 1) Turn off the Memory Integrity toggle switch to disable the feature
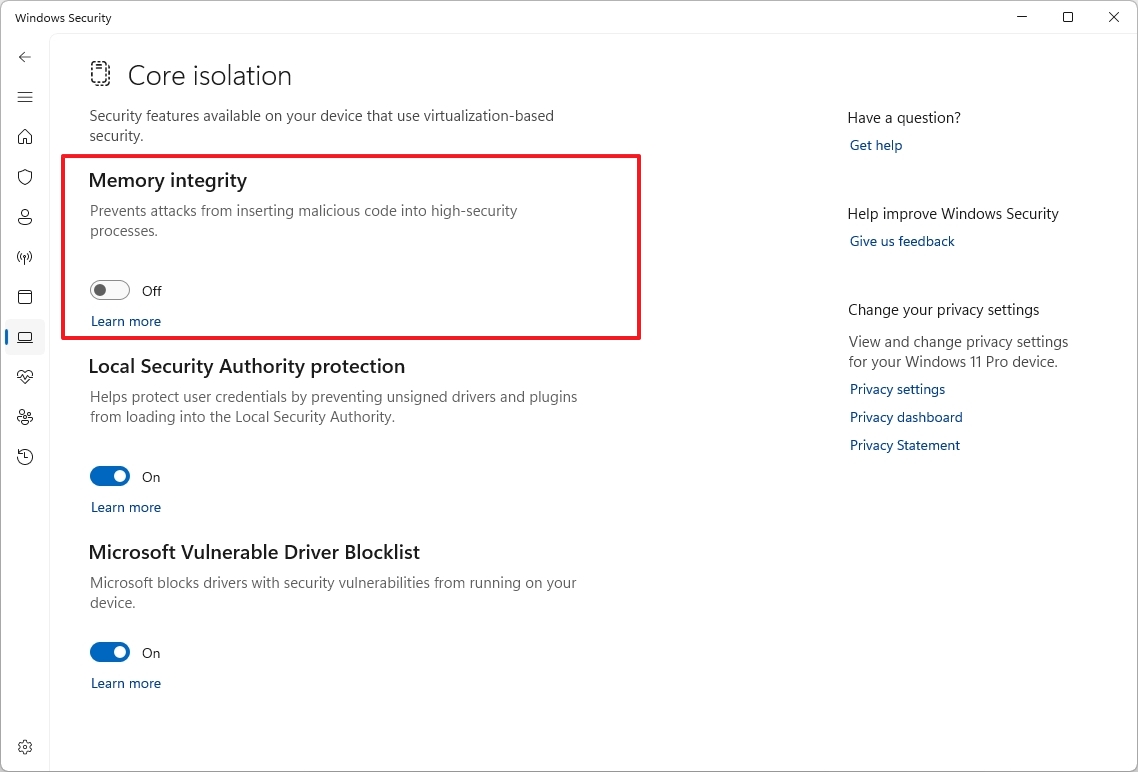
- (Option 2) Turn on the Memory Integrity toggle switch to enable the feature.
- Restart the computer.
Once you're done playing games, Microsoft recommends re-enabling the feature.
3. Disable Virtual Machine Platform
To turn off virtualization on Windows 11, use these steps:
- Open Settings.
- Click on System.
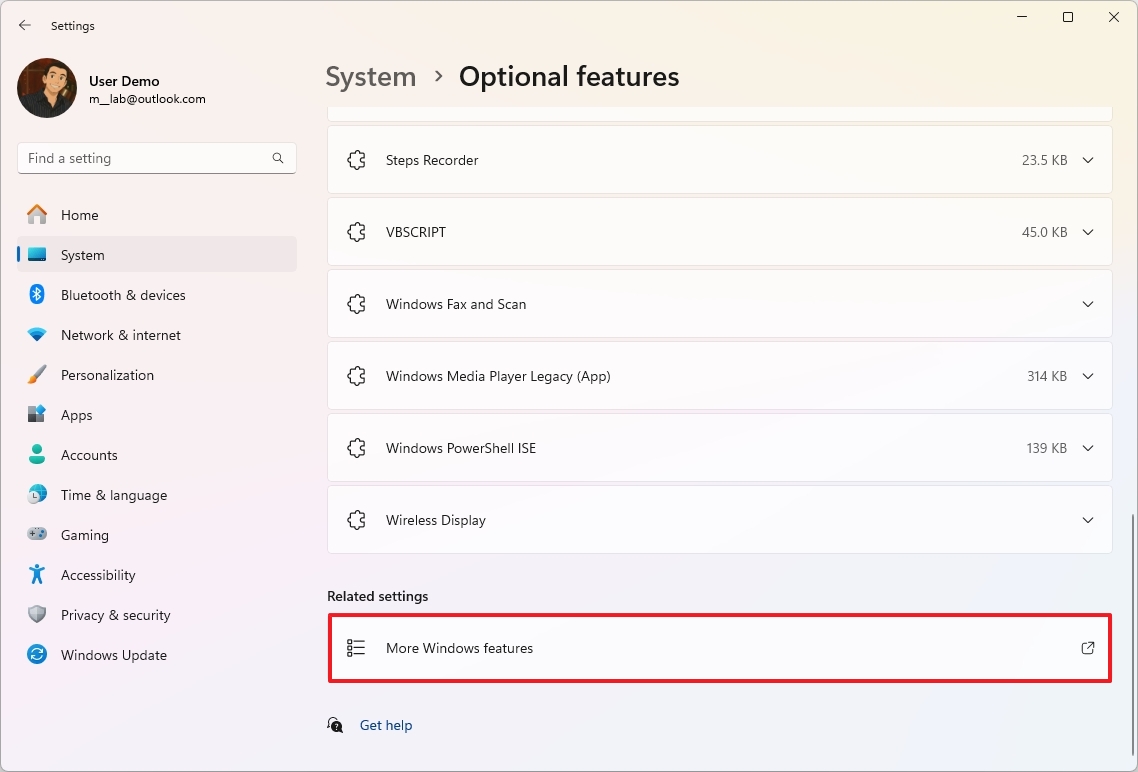
- Click the Optional features page on the right side.
- Click the "More Windows features" setting.
- (Option 1) Clear the "Virtual Machine Platform" option to disable the feature.
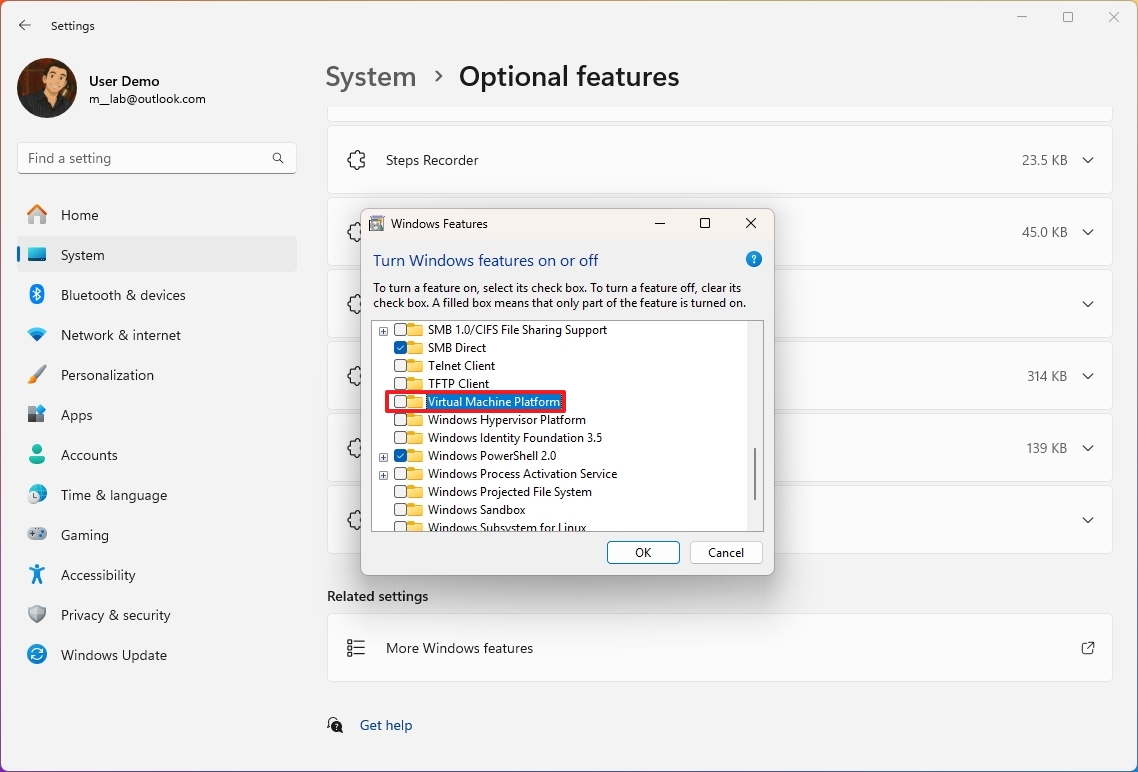
- (Option 2) Check the "Virtual Machine Platform" option to enable the feature.
- Click the OK button.
- Restart the computer.
After you're done playing games, Microsoft recommends re-enabling the feature.
4. Change power mode
On Windows 11, setting the power mode to "High Performance" is often recommended because it aims to maximize your system's resources to deliver the best possible gaming experience.
Of course, if you're using a laptop, you will achieve better performance by gaming with the device plugged into a power source.
To change the power mode on Windows 11, use these steps:
- Open Settings.
- Click on System.
- Click the "Power & battery" (or Power) page on the right side.
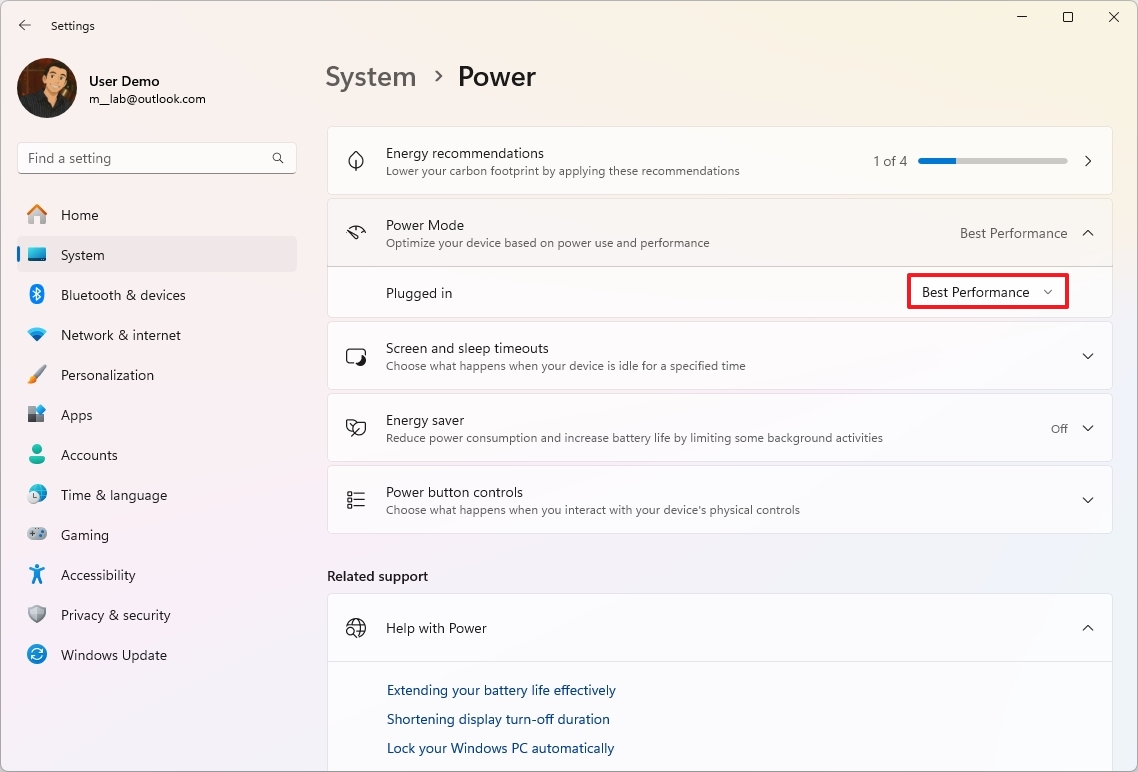
- Click the Power Mode setting.
- Choose the Best Performance option for the "Plugged in" and "On battery" settings.
Once you complete the steps, the processor, graphics cards, and other components will have access to more power to improve your gaming performance.
5. Enable Auto HDR
Auto HDR is a feature that enhances Standard Dynamic Range (SDR) games with improved color and contrast for HDR-capable displays, providing a more immersive visual experience without impacting performance or requiring developer updates.
To enable Auto HDR on Windows 11, use these steps:
- Open Settings.
- Click on System.
- Click the Display page on the right side.
- Turn on the HDR toggle switch.

- Click the Graphics setting at the bottom of the page.
- Turn on the Auto HDR toggle switch.
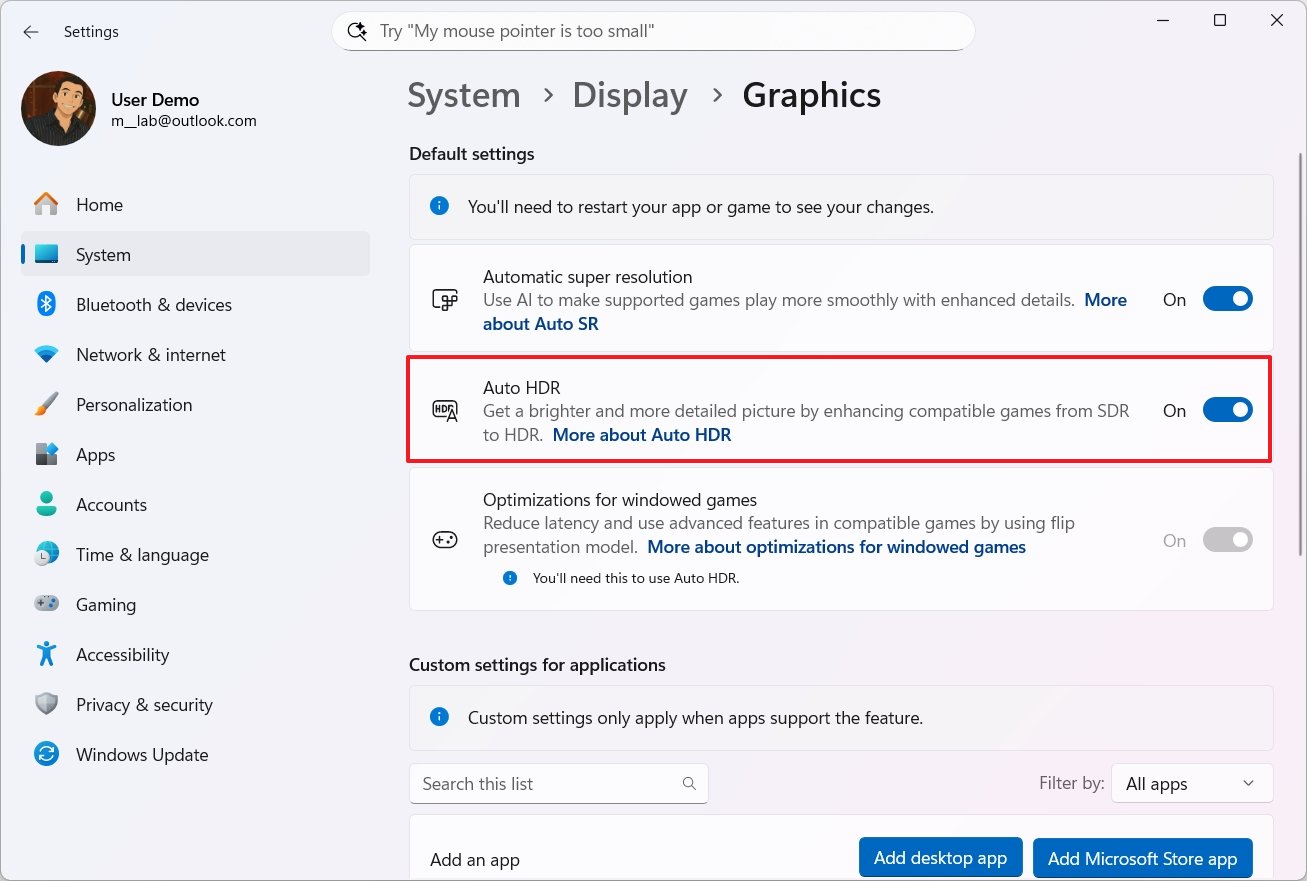
Auto HDR relies on the system's "HDR" capabilities, which also have to be turned on, and the "Optimization for the windowed games" feature.
6. Enable Automatic Super Resolution
Automatic Super Resolution (Auto SR) is a Windows 11 feature that uses AI to upscale games to improve frame rates and image quality.
The feature delivers a smoother and more immersive gaming experience. The only caveat is that Auto SR is only available for Copilot+ PCs and is compatible with specific games.
To enable Auto SR on Windows 11, use these steps:
- Open Settings.
- Click on System.
- Click the Graphics page on the right side.
- Turn on the "Automatic super resolution" toggle switch.
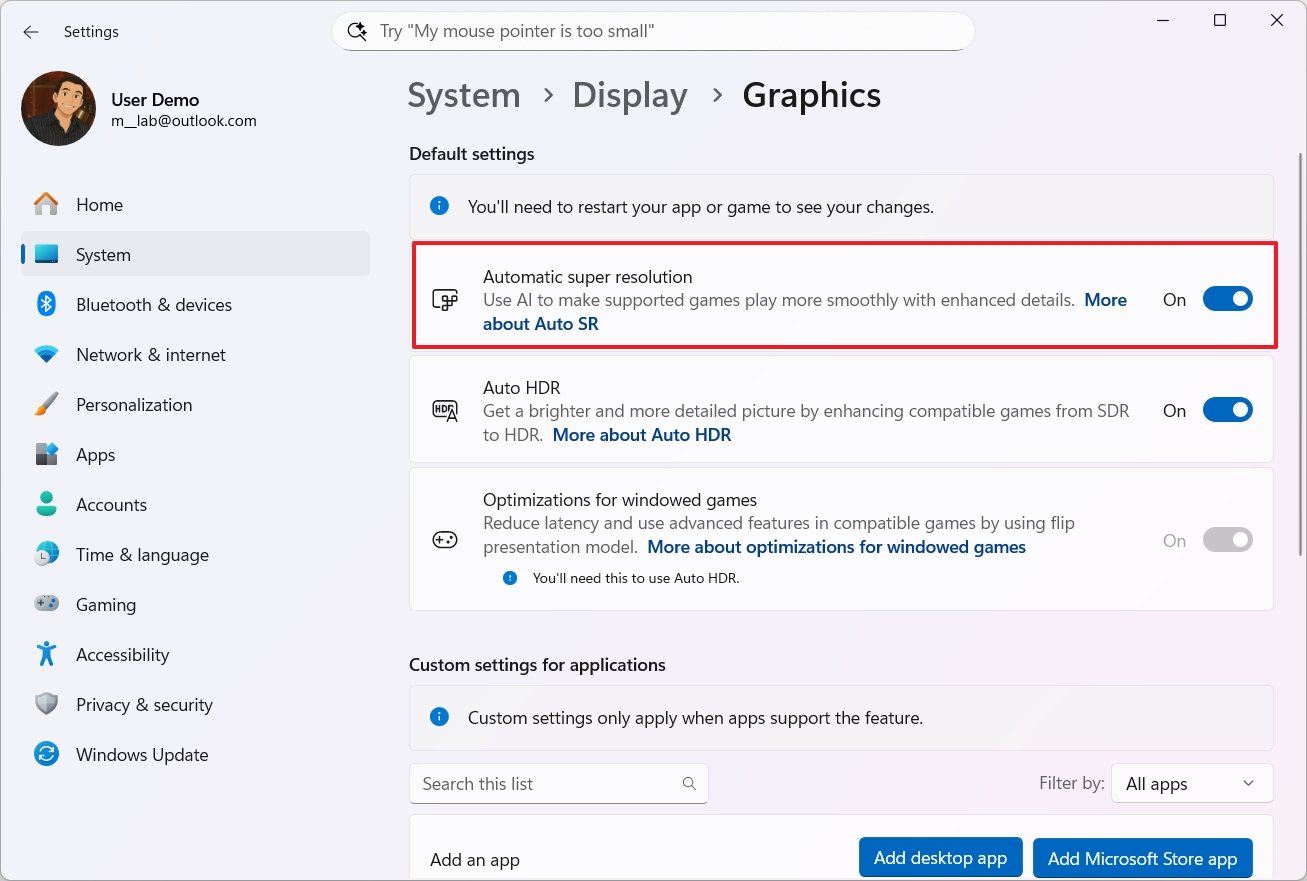
If the feature is causing issues for a specific game, but you want to continue using it for other games, you can turn off the Super Resolution feature from the game settings under the "Custom settings for applications" section.
7. Change game default GPU
Although I recommend letting the operating system use a specific graphics card, you can change the default GPU on a per-game basis.
- Open Settings.
- Click on System.
- Click the Graphics page on the right side.
- Select the game from the list.
- Choose the High Performance option in the "GPU preference" setting.
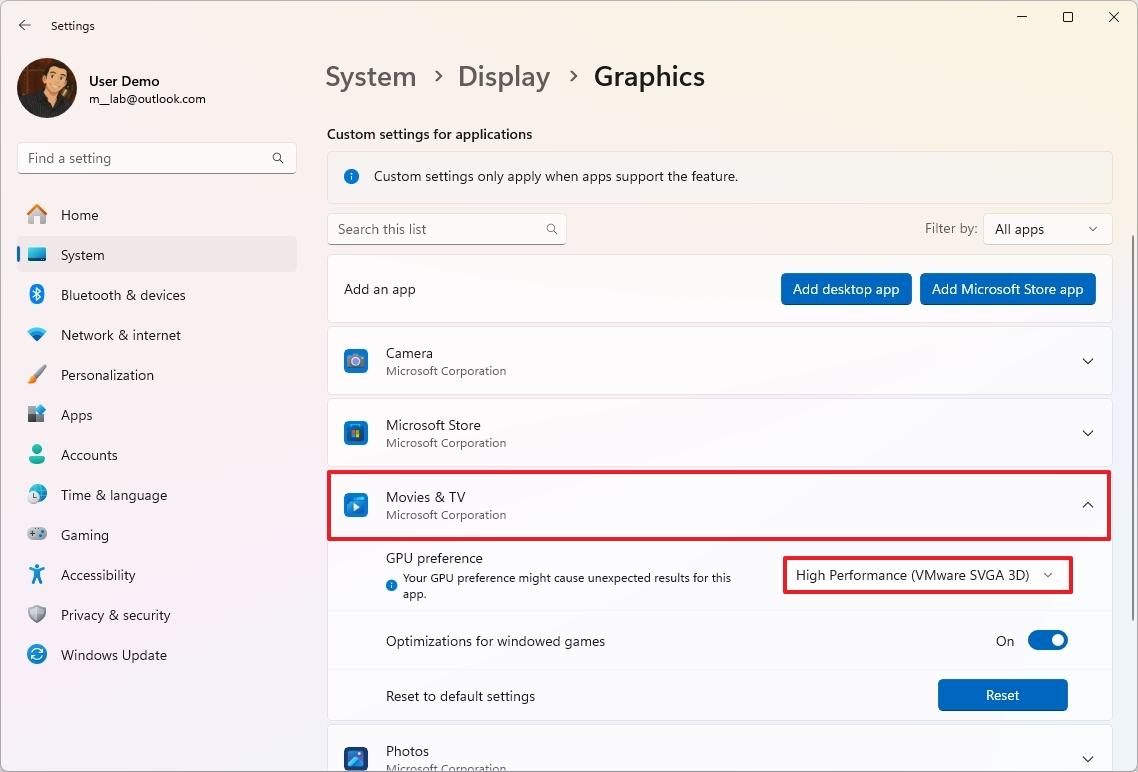
Although you can choose the graphics card for a specific game, the system can ignore the request and use another card as necessary.
8. Install games on secondary drive
If you have a secondary drive, it's a good idea to offload the games from your computer to improve gaming performance on Windows 11, although the impact depends on the type of drive you have.
The issue is that the main drive (where Windows 11 is installed) is constantly being accessed by the operating system. If you also have your games on the same drive, they may take longer to load levels and assets.
By installing games on a separate drive, particularly a faster one (such as an SSD), you effectively dedicate the drive's resources primarily to the game, reducing friction with the operating system.
Microsoft Store
To install new games directly into a secondary drive from the Microsoft Store, use these steps:
- Open Microsoft Store.
- Open the game page.
- Click the Get (or Install) button.
- Choose the secondary drive to download the game.
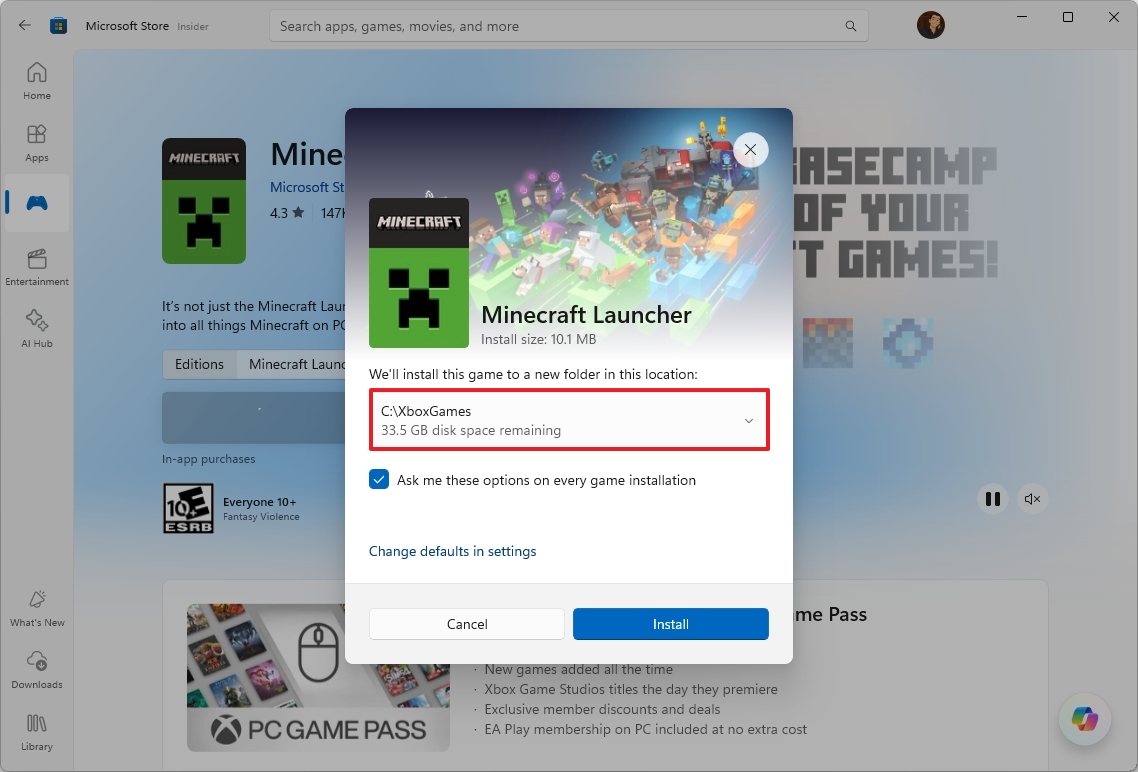
- Click the Install button.
You should also be able to change the default location for installing games from the Microsoft Store Settings page, but in my installation, the option was missing. It wasn't until I clicked the "Change defaults in settings" option from the game page that the option appeared on the Settings page.
Xbox app
To install new games directly into a secondary drive from the Xbox app, use these steps:
- Open Xbox.
- Click the profile menu and choose the Settings option.
- Click on Install options.
- Select the secondary drive in the "Change where this app installs games by default" setting.

Once you complete the steps, the next time you install a game, the app will download the title to the drive you specified.
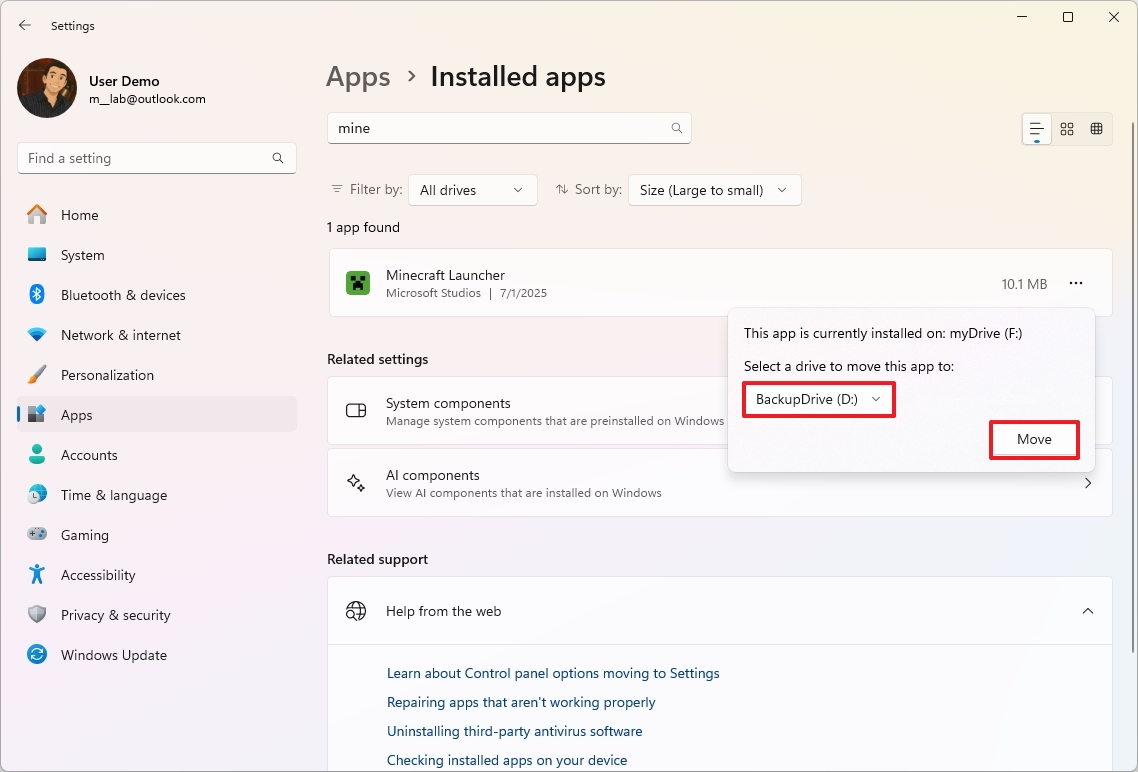
Transfer existing games
If you have games already installed on the main hard drive, you may be able to offload them to a secondary drive from the Settings app. Here's how:
- Open Settings.
- Click on Apps.
- Click the Installed apps page on the right side.
- Select the game from the list and click the menu (three dots) on the right.
- Choose the Move option.

- Select the drive to offload the game.
- Click the Move option.
You may have to repeat the steps to transfer any other remaining game.
9. Optimization for windowed games
Windows 11 includes a feature known as "Optimizations for windowed games" that can improve the performance of games running in windowed or borderless windowed mode. Traditionally, these modes have had higher input latency and lower performance compared to exclusive full-screen mode.
This optimization transitions games using older presentation models (such as DirectX 10 and 11's "blt-model") to a more modern "flip-model" presentation, allowing games to bypass the Desktop Window Manager (DWM) for direct display output, similar to how exclusive fullscreen works.
To use optimizations for windowed games in the operating system, use these steps:
- Open Settings.
- Click on System.
- Click the Graphics page on the right side.
- Turn on the "Optimizations for windowed games" toggle switch.
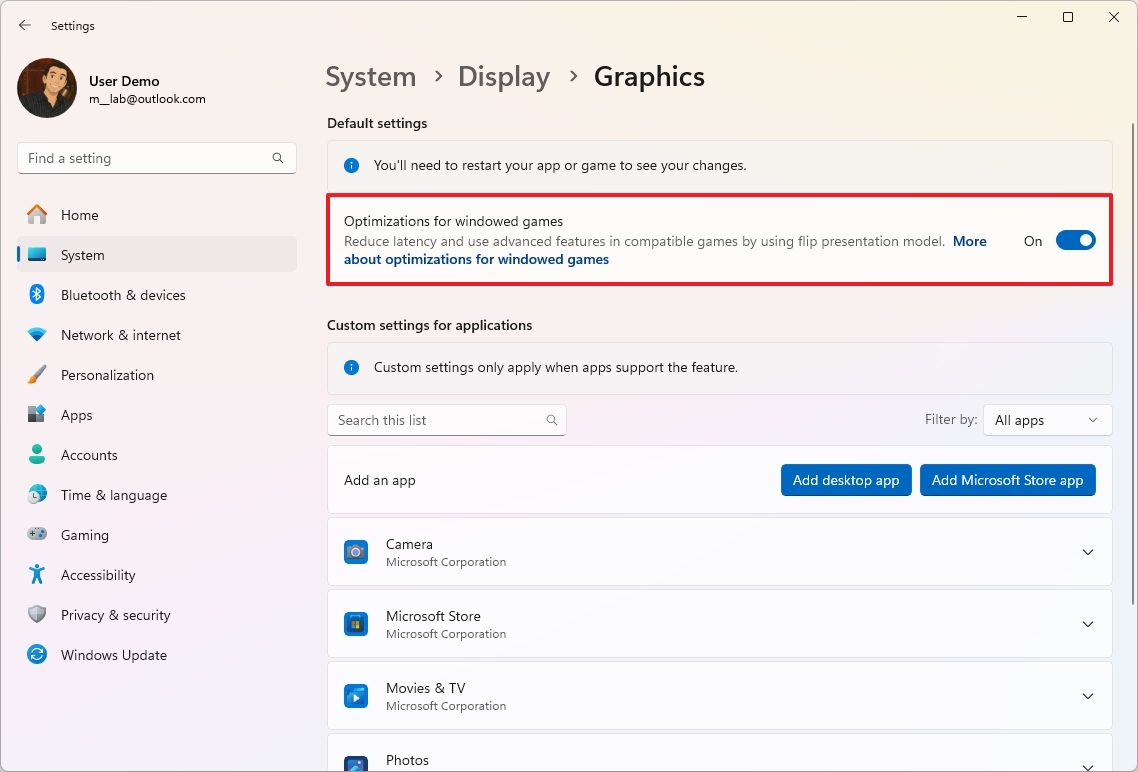
Once you complete the steps, you will experience higher performance on games that are not running in full-screen mode.
10. Change refresh rate
Adjusting the refresh rate on your monitor is one of the most significant ways to enhance your gaming experience on Windows 11. That's, of course, if you have a monitor capable of higher refresh rates and a graphics card powerful enough to render frames at those rates.
The refresh rate, measured in Hertz (Hz), indicates how many times per second your monitor can render the image on the screen. For example, a 60Hz monitor refreshes 60 times per second, a 144Hz monitor refreshes 144 times per second, and so on.
If your monitor refreshes more frequently, it displays new frames more often, resulting in significantly smoother motion, especially in fast-paced games. It also reduces input latency, and you will see less screen tearing.
To set your system to the highest refresh rate, use these steps:
- Open Settings.
- Click on System.
- Click the Display page on the right side.
- Click the Advanced display setting at the bottom of the page.
- Select the highest rate using the "Choose a refresh rate" setting.

- (Optional) Turn off the "Dynamic refresh rate" toggle switch.
After you complete the steps, games should play at higher refresh rates.
It's worth noting that setting your monitor to its highest refresh rate doesn't automatically guarantee that your games will play at that rate. This is because the monitor can only display the frames that your computer sends to it. If your computer can't produce frames as fast as your monitor can refresh, then the monitor will only be able to render the number of frames that were sent.
11. Disable apps at startup
If you have many different apps launching during startup, the computer will take longer to start, and the background services for those applications will consume more system resources, which can negatively affect gaming performance.
If you want to improve your computer's performance for gaming and other tasks, it's always recommended to keep apps at startup to a minimum, and here's how:
- Open Settings.
- Click on Apps.
- Click the Startup page on the right side.
- Choose the Startup impact option in the "Sort by" menu.
- Turn off the most impactful apps running on your system.
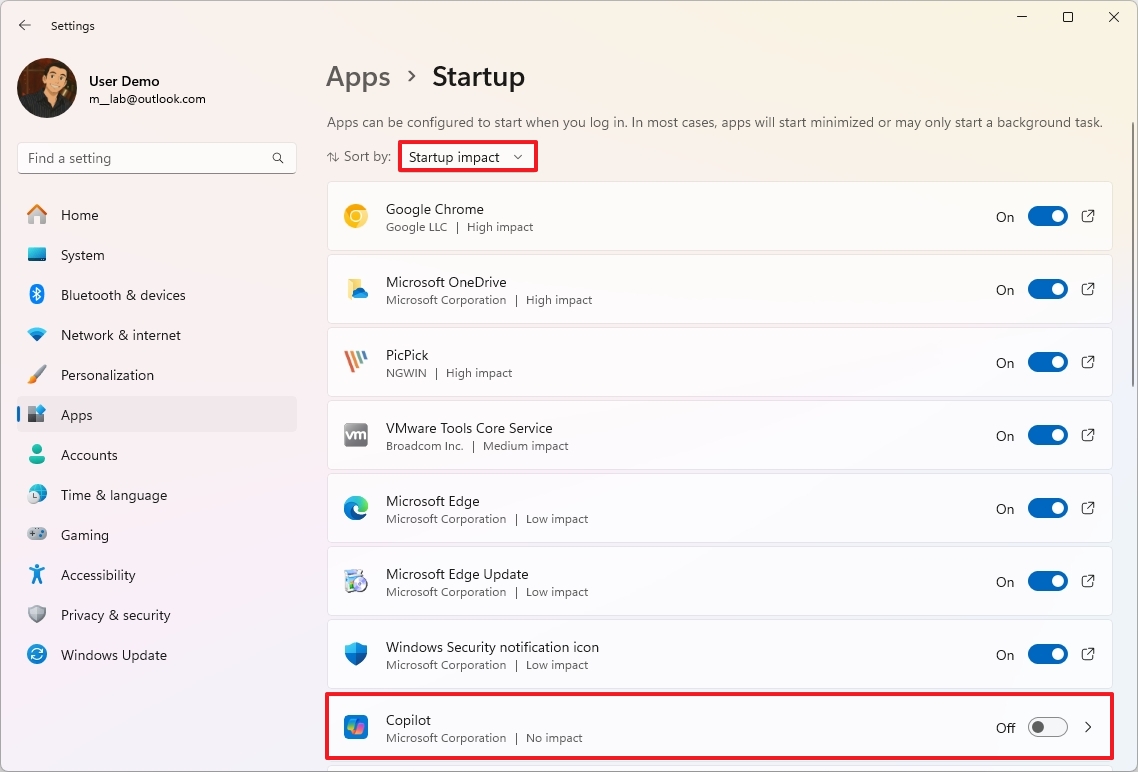
- Quick note: Although you can turn off any application, be careful with the app. For instance, do not turn off things like the Windows Security notification icon, Microsoft Defender, and other system services, as they can affect performance.
Once you complete the steps, depending on the app you had previously configured during startup, you'll notice a boost in gaming performance.
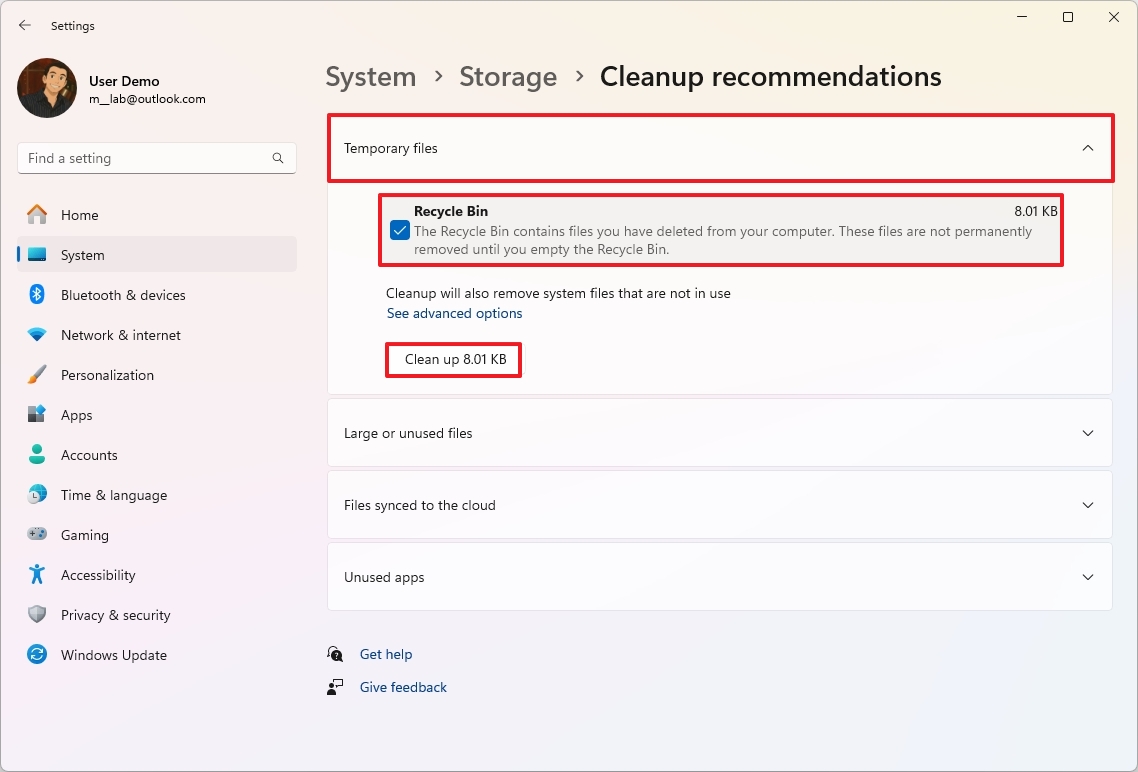
12. Free up storage space
It's never a good idea to run your computer when it's low on storage because this will negatively affect system performance. Usually, you never want to use a device with drive fill above 70 percent.
To increase the overall system speed and gaming performance, free up as much space as possible on the main system drive. You can also transfer already installed games to a secondary drive, as I mentioned earlier.
To free up space on Windows 11, use these steps:
- Open Settings.
- Click on System.
- Click the Storage page on the right side.
- Click on Clean recommendations.

- Click the Temporary files setting.
- Select the items to clear.
- Quick tip: You can also click the "See advanced options" button to access the Temporary Files settings and delete additional junk files.
- Click the "Clean up" button.
- Click the "Large or unused files" setting.
- Select the files to clear from the hard drive.
- Click the "Clean up" button.
- Click the "Files synced to the cloud" setting.
- Select the files already synced to the cloud.
- Click the "Clean up" button.
- Click the Unused apps setting.
- Select and remove the apps you rarely use to free up more space.
After completing the steps, you may notice an improvement in overall performance on Windows 11, including while playing games.
On Windows 11, you have more than one way to free up space on your computer. You can refer to my previous guide for additional tips.
13. Install system updates
Although it's recommended to keep your computer updated for optimal performance, it's also a known fact that sometimes quality, as well as feature updates, can cause compatibility and other types of issues that can affect performance. As a result, it's important to research the update before updating the system if you're looking to improve gaming performance.
To install system updates manually, use these steps:
- Open Settings.
- Click on Windows Update.
- Turn on the "Get the latest updates as soon as they're available" toggle switch.
- Click the Check for updates button.
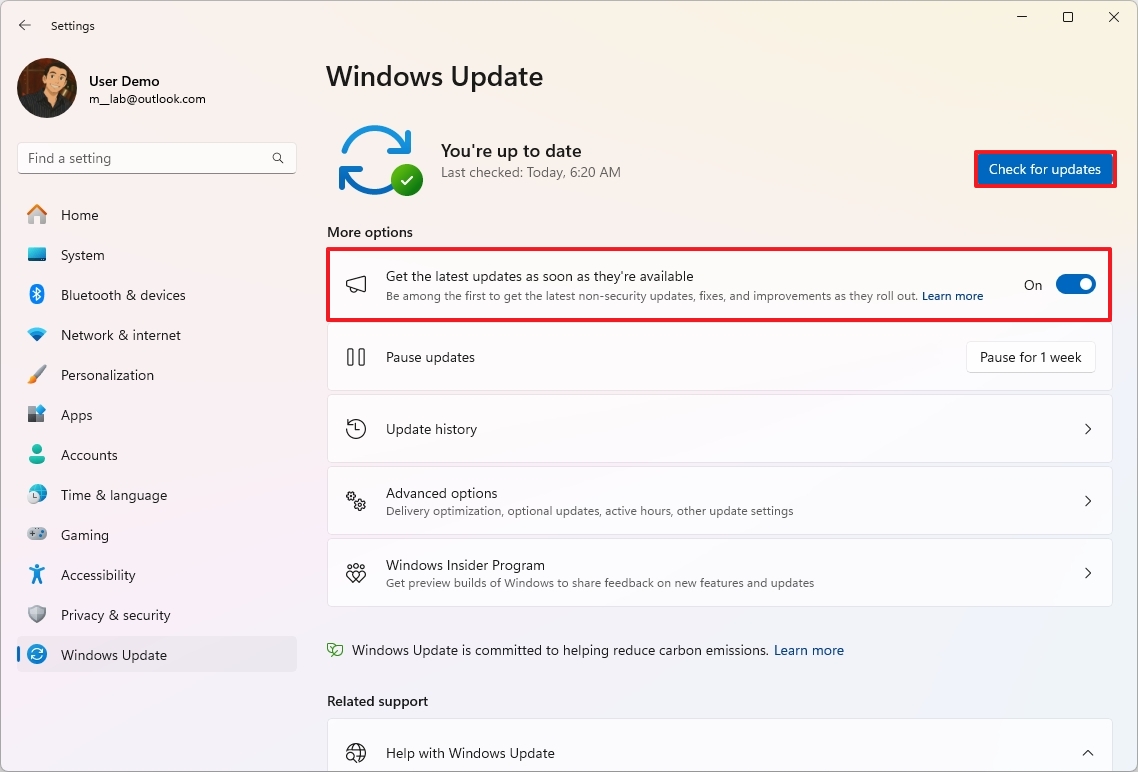
Once you complete the steps, you may notice an increase in gaming performance if the update was designed to address specific issues on games.
Additionally, it's a good idea to keep games up to date, as they can also offer improved performance and bug fixes.
14. Update graphic drivers
If you're using the drivers provided by the manufacturer, you may already have a Control Panel that allows you to check and download updates for your graphics card.
Update drivers from GPU app
To check for graphic driver updates on Windows 11, for example, using the Nvidia app, use these steps:
- Open the Nvidia app.
- Click on Drivers from the left pane.
- Click the Download button.
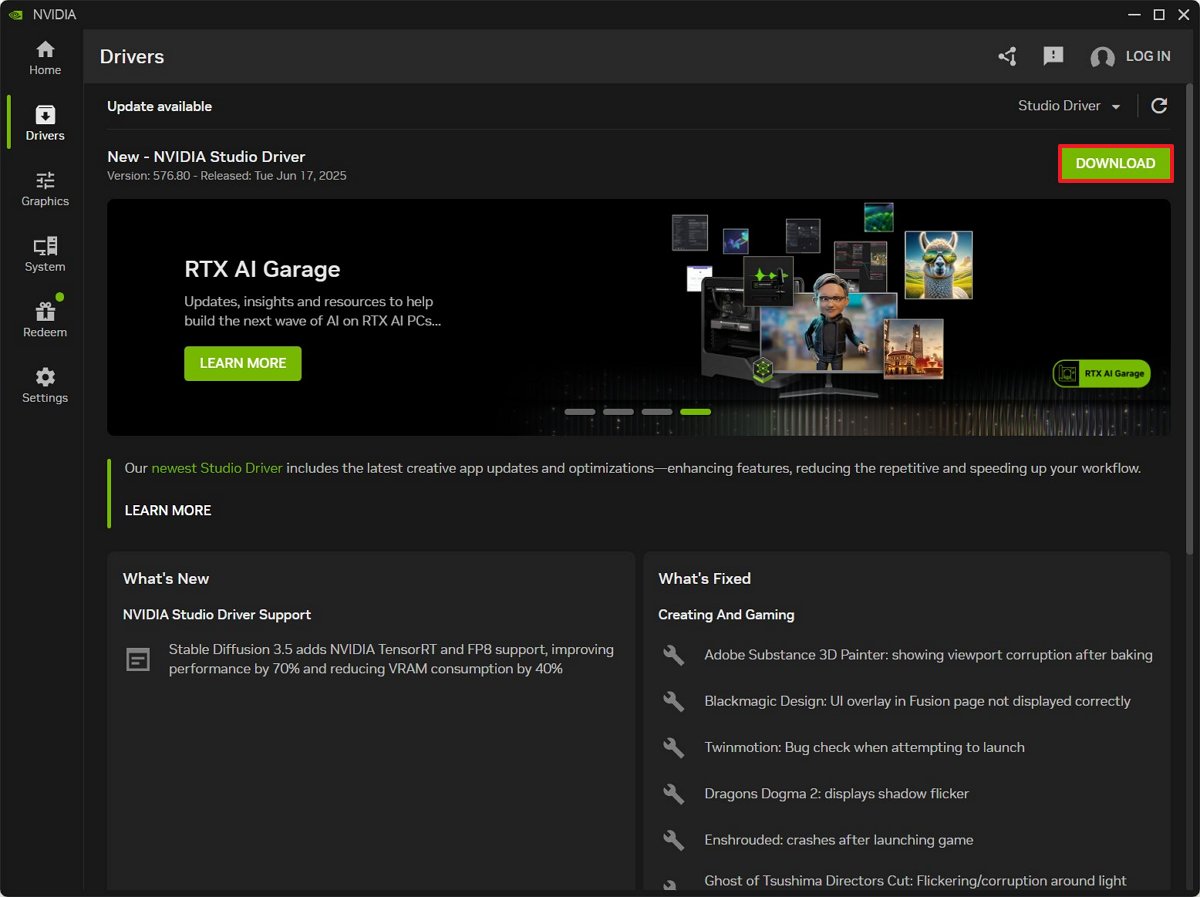
- Continue with the on-screen directions.
Once you complete the steps, you may have to restart your computer to apply the changes.
If you have an AMD system, the steps are obviously different using the Adrenalin Edition app, but the concept is the same.
Reinstall GPU drivers
If you're using the graphic drivers from Windows Update, you may not be running the most up-to-date version. In this case, you should uninstall the current drivers and then install the newer version provided by the manufacturer.
However, since there may be issues uninstalling and reinstalling the graphics card drivers, I recommend using the Display Driver Uninstaller (DDU) to perform a clean uninstallation of the current drivers and then a clean installation of the new version.
The DDU tool also comes in handy when changing the graphics card on your computer and when dealing with corrupted drivers.
In this example, I'll outline the steps to install the NVIDIA drivers:
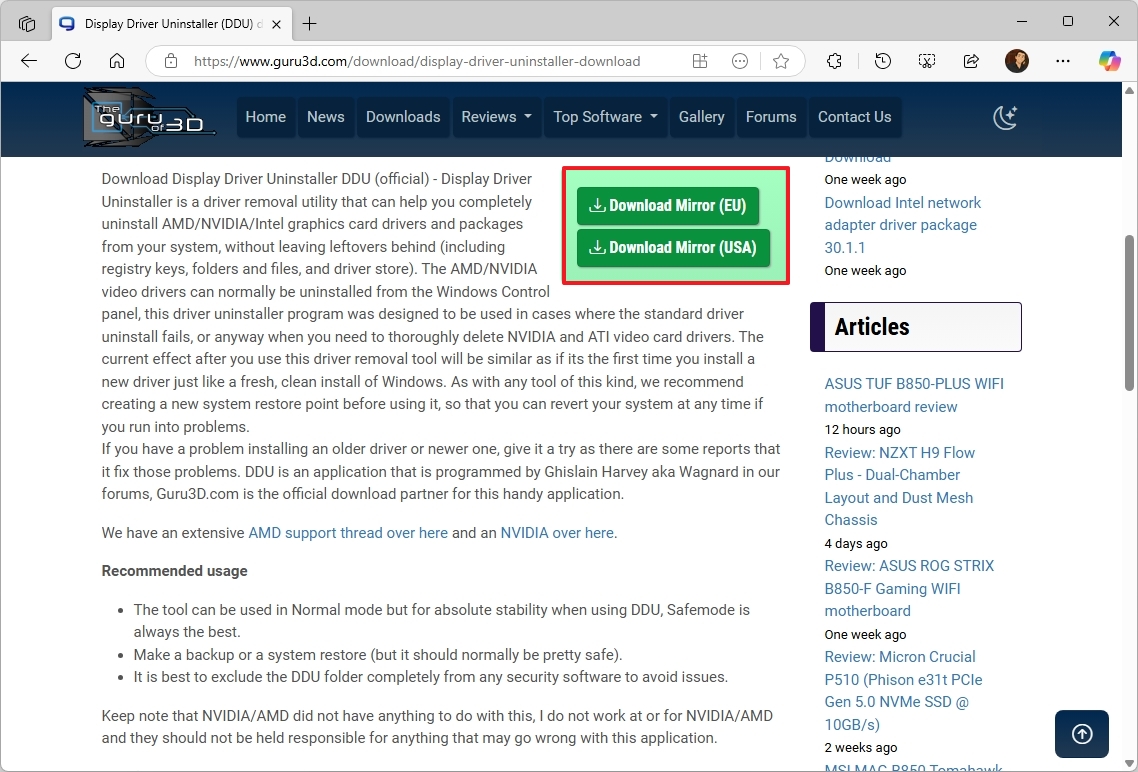
- Open the Guru3d website.
- Click the Download button nearest to your region.
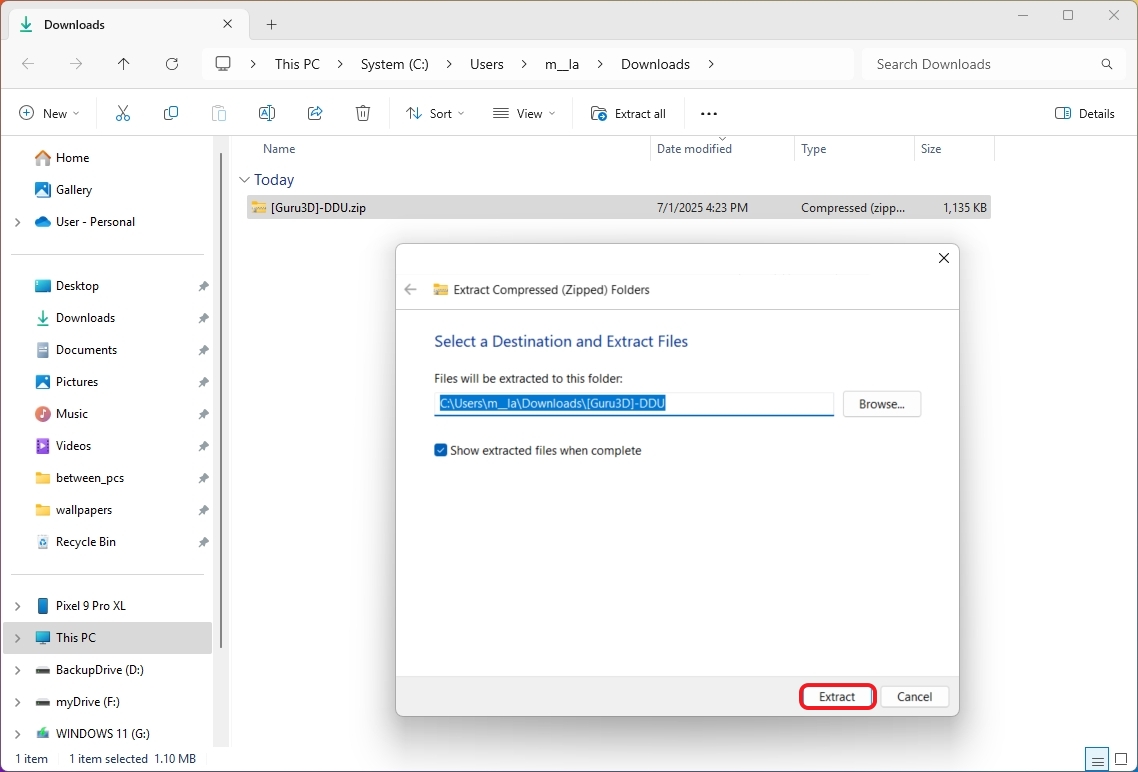
- Right-click the Zip file and choose the Extract All option.
- Click the Extract button.
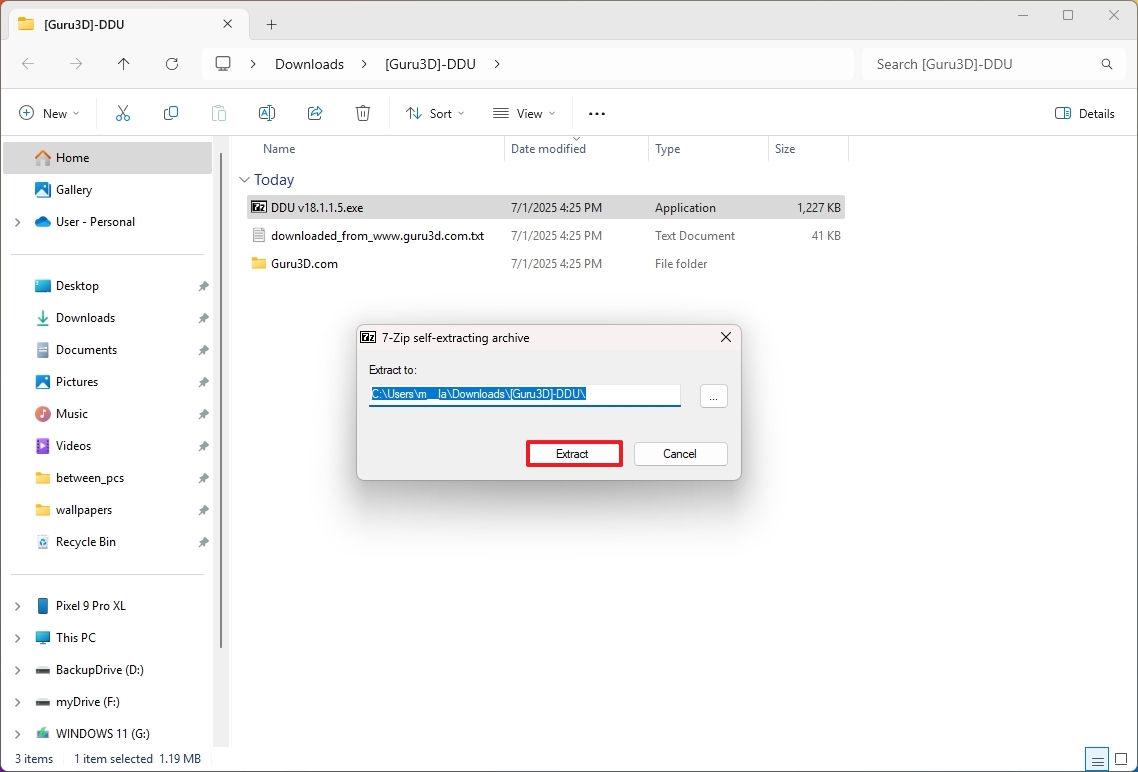
- Right-click the DDU ".exe" file and choose the Open option.
- Click the Extract button.
- Close running applications and save your work.
- Open Settings.
- Click on System.
- Click the Recovery page on the right side.
- Click the Restart now button for the "Advanced startup" feature.

- Click the Restart now button one more time.
- Click on Troubleshoot.
- Click on Advanced options.
- Click on Startup Settings.
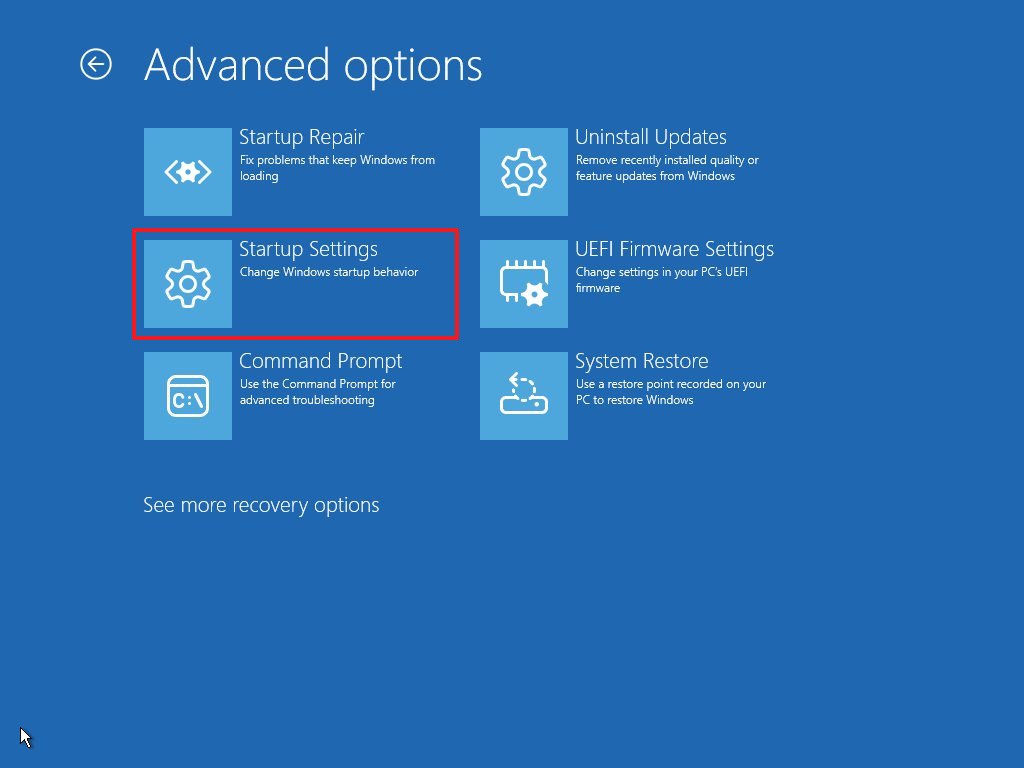
- Click the Restart button.
- Select the "Enable Safe Mode" option using the "F4" key.
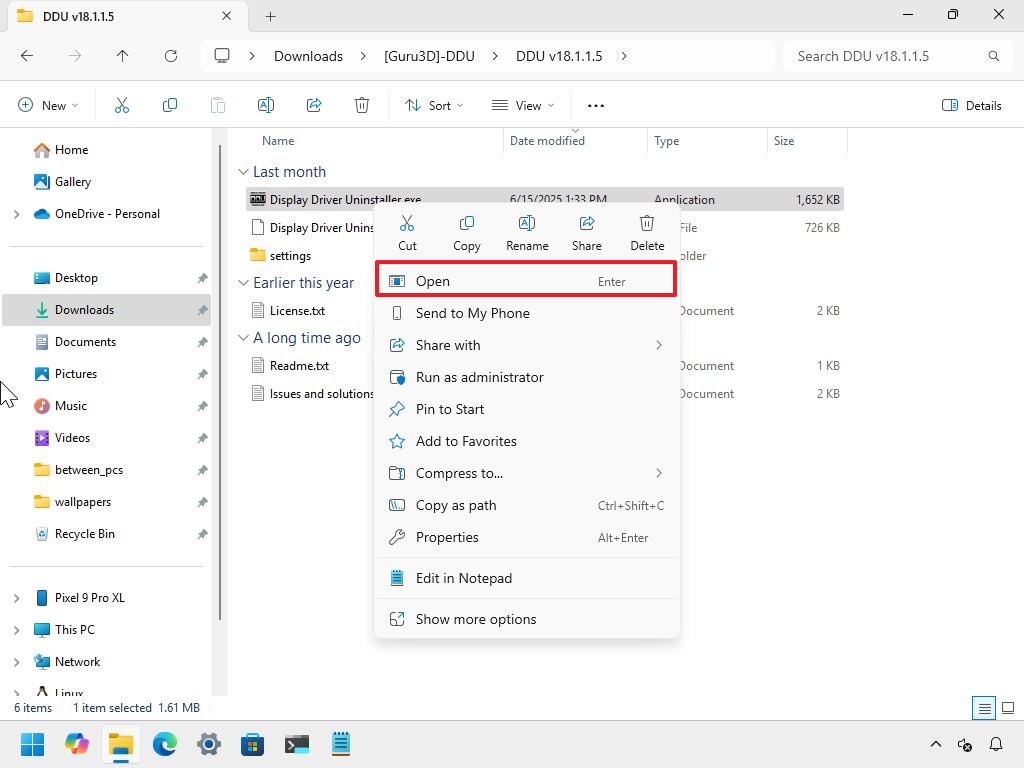
- Open the Display Driver Uninstaller extraction folder.
- Right-click the "Display Driver Uninstaller.exe" file and choose the Open option.
- Select the settings to use for uninstalling Nvidia or AMD drivers.
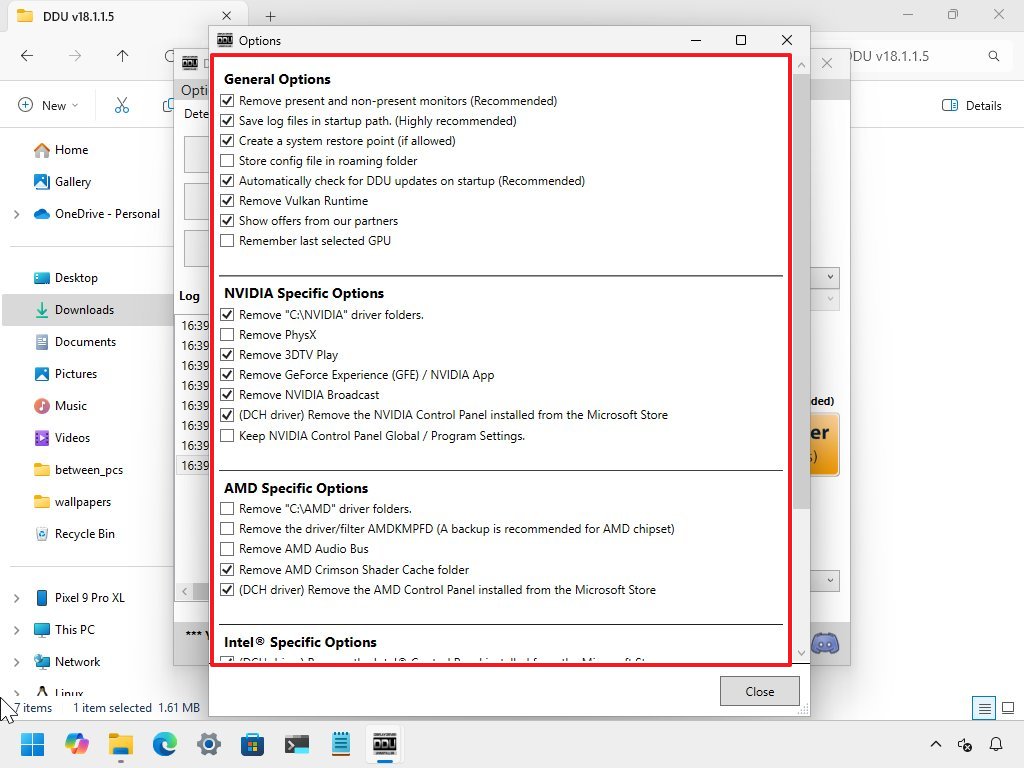
- Quick tip: If you don't understand the settings, the default configuration should work in most cases.
- Click the Close button.
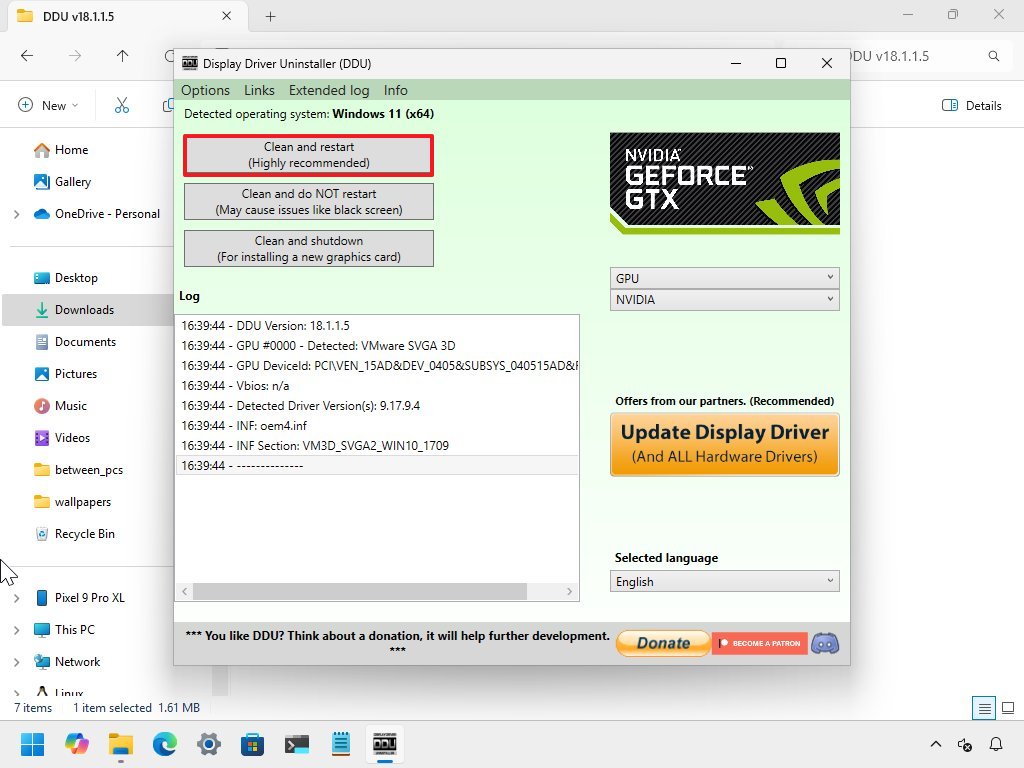
- Select the GPU option.
- Select the Nvidia or AMD graphics card using the setting on the right.
- Click the "Clean and restart" button.
After you complete the steps, you can proceed to install the latest version of the graphics card drivers.
If you're replacing the card, power off the computer and install the new GPU. Finally, power on the device and proceed with the driver installation.
Install GPU driver
To install the graphics card's latest drivers for optimal gaming performance, use these steps:
- Open the Nvidia website.
- Click the Download Now button and save the file to your computer.
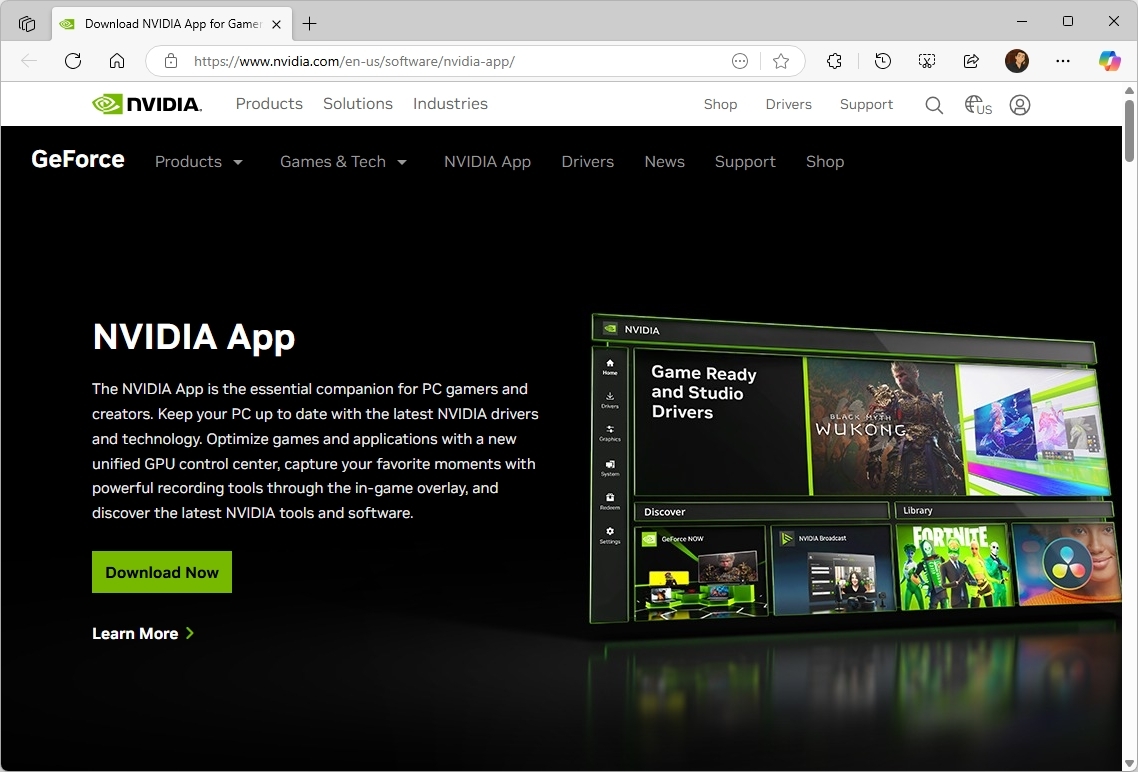
- Right-click the Nvidia App installer and choose the Open option.
- Continue with the screen to complete the installation.
If you have an AMD GPU, use these steps:
- Open the AMD website.
- Click the Download Software button and save the file to your computer.
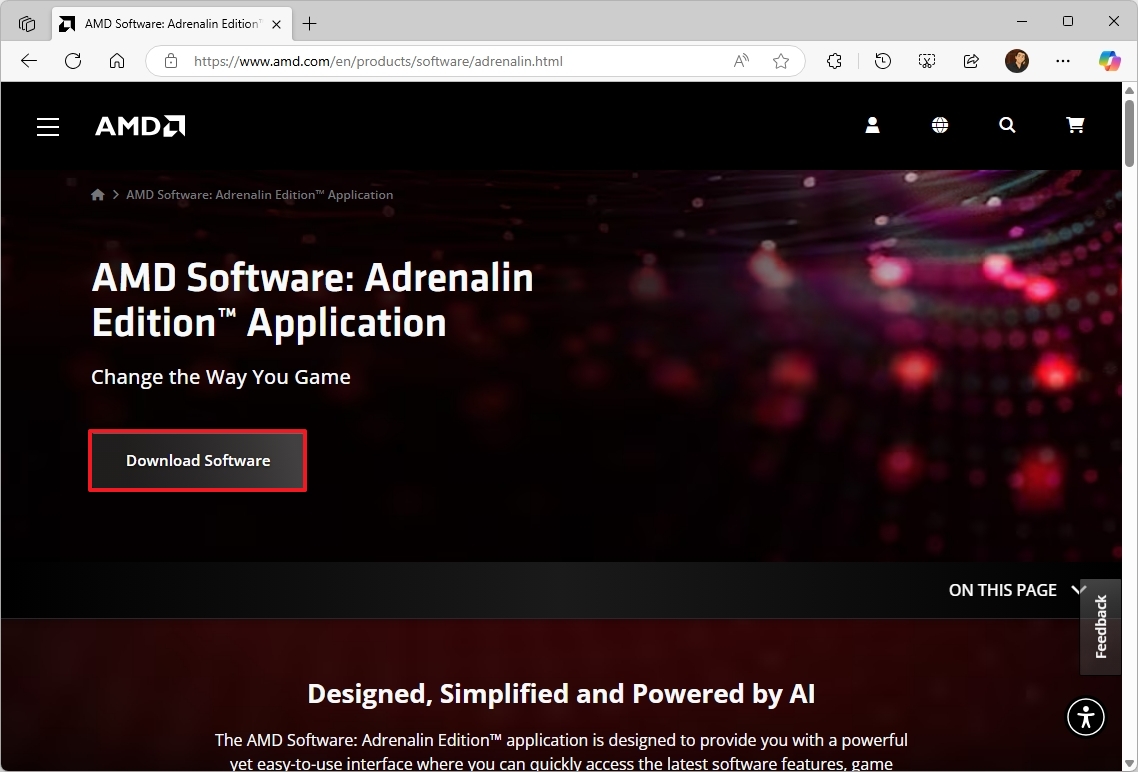
- Right-click the Adrenalin Edition installer and choose the Open option.
- Continue with the screen to complete the installation.
It's always recommended that you follow the instructions from the manufacturer.
16. Debloat setup
If you want your games to perform at their best, it's important to minimize the number of unnecessary applications installed on your computer.
First, software can create conflicts with your system configuration, potentially impacting performance. Additionally, many apps run background processes that compete with your games for CPU and GPU resources, potentially lowering frame rates.
When your system is busy with background tasks, it can cause input lag (delays between your actions and what appears on screen), making the gaming experience feel less responsive.
Unused apps and services also consume memory, leaving less available for your games. This can cause the system to use slower storage (paging or swapping), which may result in stuttering during gameplay.
Furthermore, more programs set to launch at startup increase boot times and can generate additional disk I/O in the background. On systems with traditional hard drives, this can significantly affect game loading times and the streaming of in-game assets.
To uninstall unused apps from Windows 11, use these steps:
- Open Settings.
- Click on Apps.
- Click the "Installed apps" page on the right side.
- Select the app, click the menu (three dots) button, and choose the Uninstall option.
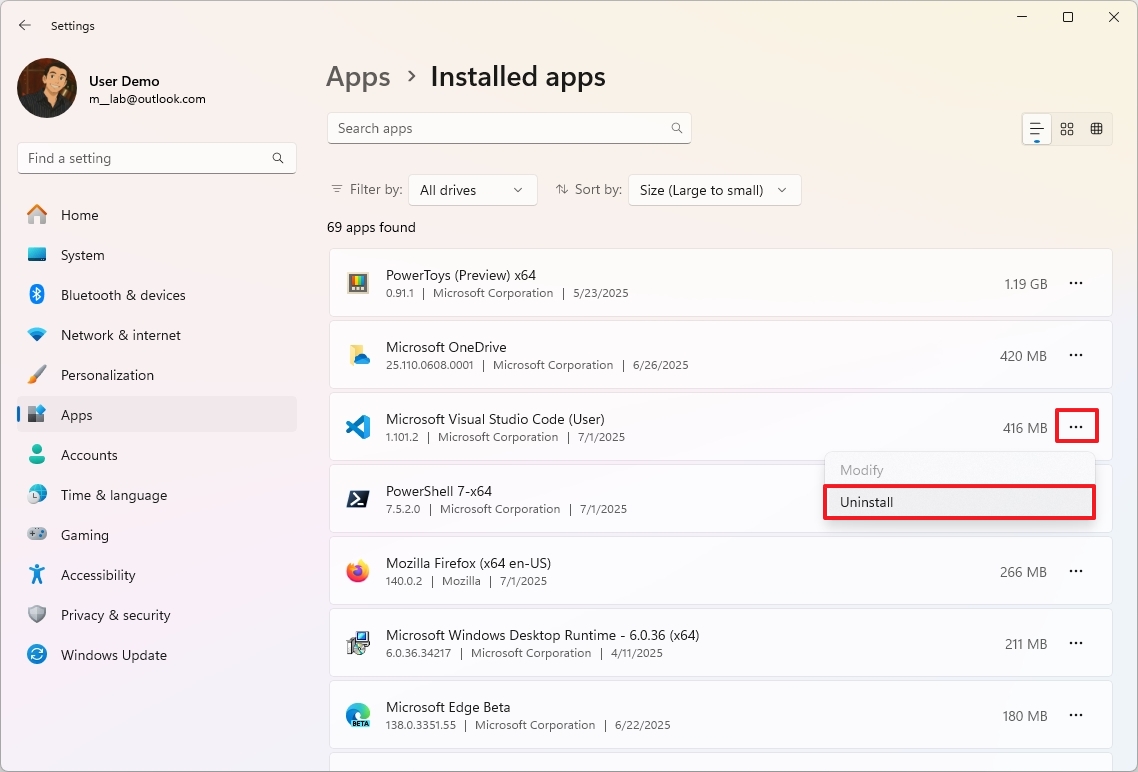
- Click the Uninstall button again to confirm.
- Continue with the on-screen directions (if applicable).
After completing the steps, you may need to repeat them to remove any additional applications.
Additionally, it's recommended to avoid using third-party scripting or tools, as they can sometimes harm your computer more than they can help.
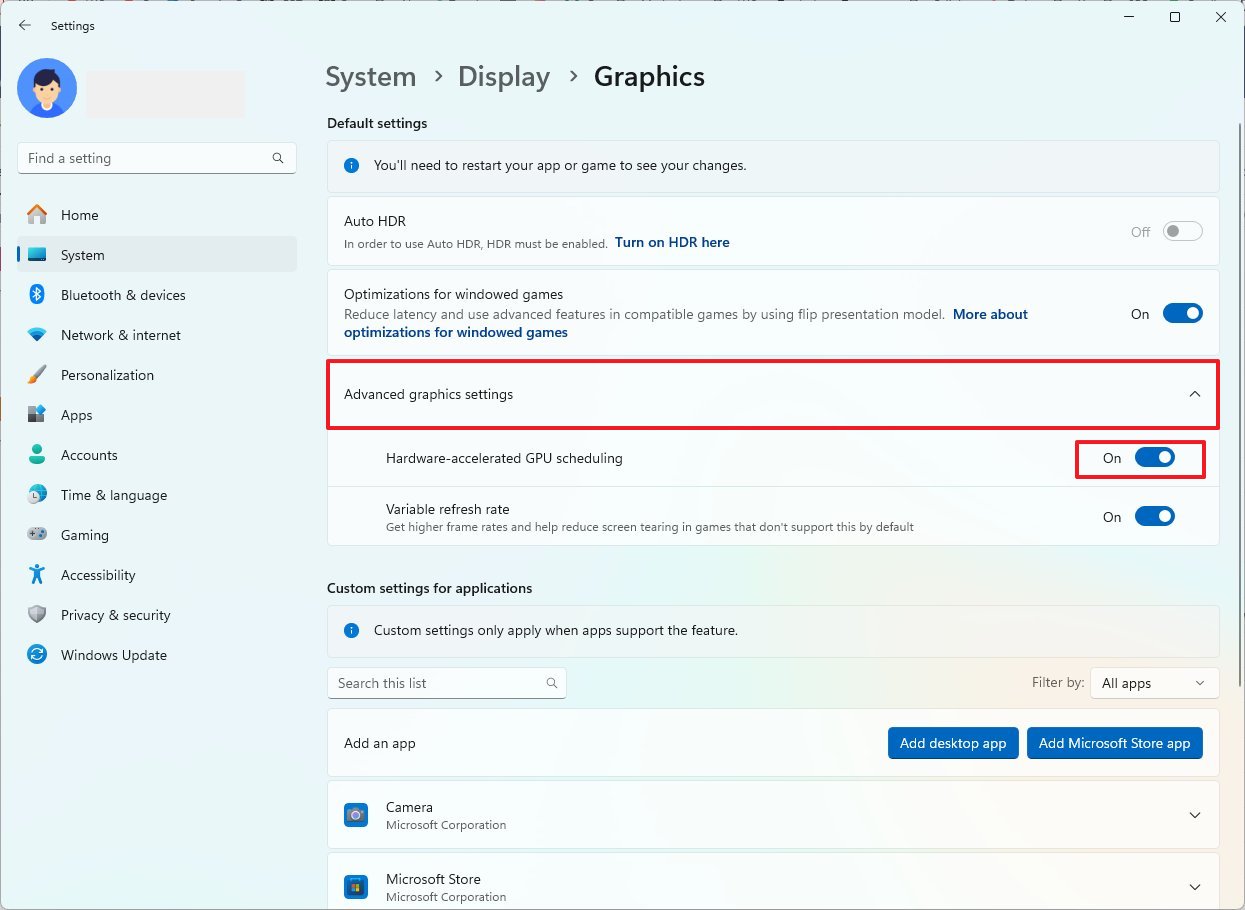
17. Enable GPU scheduling
On Windows 11, Hardware-accelerated GPU scheduling is a feature designed to improve performance and reduce latency by offloading specific graphics card scheduling tasks from the CPU to the GPU itself.
Usually, the feature comes enabled by default, but you can always check and enable it as necessary with these steps:
- Open Settings.
- Click on System.
- Click the Display page on the right side.
- Click the Graphics setting.
- Click on Advanced graphics settings at the bottom of the page.
- Turn on the "Hardware-accelerated GPU scheduling" toggle switch.
Once you complete the steps, the system should offload graphics tasks from the processor to the graphics processor.
18. Use DirectStorage
DirectStorage is a feature developed by Microsoft, initially for its Xbox Series X and Xbox Series S consoles, but now it's also available on Windows 11. The primary purpose is to reduce game asset loading times while supporting more expansive, detailed game worlds.
Traditional game loading is slow because the processor acts as a bottleneck, limiting the game's performance. Even with fast SSDs, the processor has to read compressed game data, then decompress it, and finally copy it to the GPU. This entire process limits how quickly games can load assets, especially as modern NVMe drives can deliver data much faster than the CPU can handle it in this traditional method.
DirectStorage enables games to retrieve data directly from an NVMe SSD to the GPU, resulting in less time the processor has to be involved in the asset loading process.
The feature works automatically, meaning you don't have to manually configure anything, but it requires having an NVMe SSD installed on the computer.
Also, there's one caveat. DirectStorage doesn't work for all games, only for a select number of titles. You will need to check your game's support website to determine if the feature is supported.
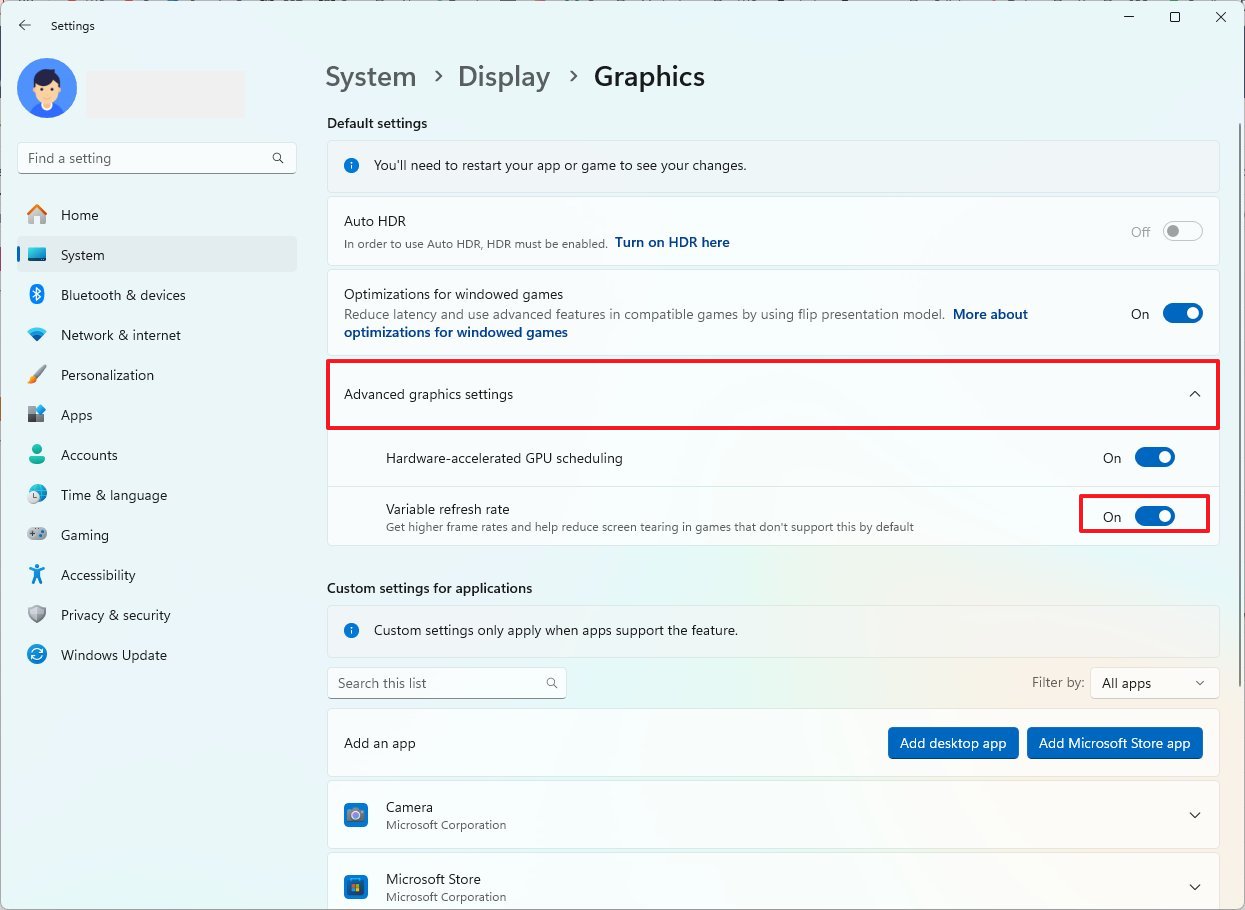
19. Enable Variable Refresh Rate
Variable Refresh Rate (VRR) is a feature that enables compatible displays to automatically adjust their refresh rate based on the frames generated by the graphics card, thereby increasing frame rates while reducing screen tearing.
If the feature is available on your Nvidia G-SYNC, AMD FreeSync, or VESA DisplayPort Adaptive-Sync monitor, you can check and enable the feature using these instructions:
- Open Settings.
- Click on System.
- Click the Display page on the right side.
- Click on Graphics.
- Click on Advanced graphics settings at the bottom of the page.
- Turn on the "Variable Refresh Rate" toggle switch.
If you don't see the option, you can confirm whether your monitor supports it by going to Settings > System > Display > Advanced display, and the display information section should indicate whether VRR is supported. If it's not supported, check the graphics control panel application and enable Nvidia G-SYNC, AMD FreeSync, or VESA DisplayPort Adaptive-Sync on the monitor.
20. Change settings in games
Another way to improve your gaming experience on Windows 11 includes adjusting the settings directly in the graphics card and game.
However, I must note that you should be aware of the potential consequences, as making these types of changes can significantly impact performance.
For instance, if you have the Nvidia app, inside the "System" section, you'll find the "Performance" tab, which allows you to adjust settings such as voltage and power limits for the GPU. If these settings are not adjusted correctly, it can cause various types of problems.

If you don't understand a setting, you can always use our forums or search using your preferred search engine, such as Bing, to find more information.
Inside the game, you can always control features like resolution, window mode, vertical sync, anti-aliasing, and many more that will be available in the pre-game experience.
Also, setting your game options to the highest level does not always mean high performance. Typically, you want to test various settings until you find the optimal balance with your hardware configuration.
21. Reset your computer
As a last resort, if you have had the same setup for a long time and your gaming experience feels sluggish, it may be time to reinstall the operating system to improve performance issues and resolve other system problems.
You can do this in different ways, including performing a clean installation of Windows 11, but the easiest method is to use the recovery settings with these instructions:
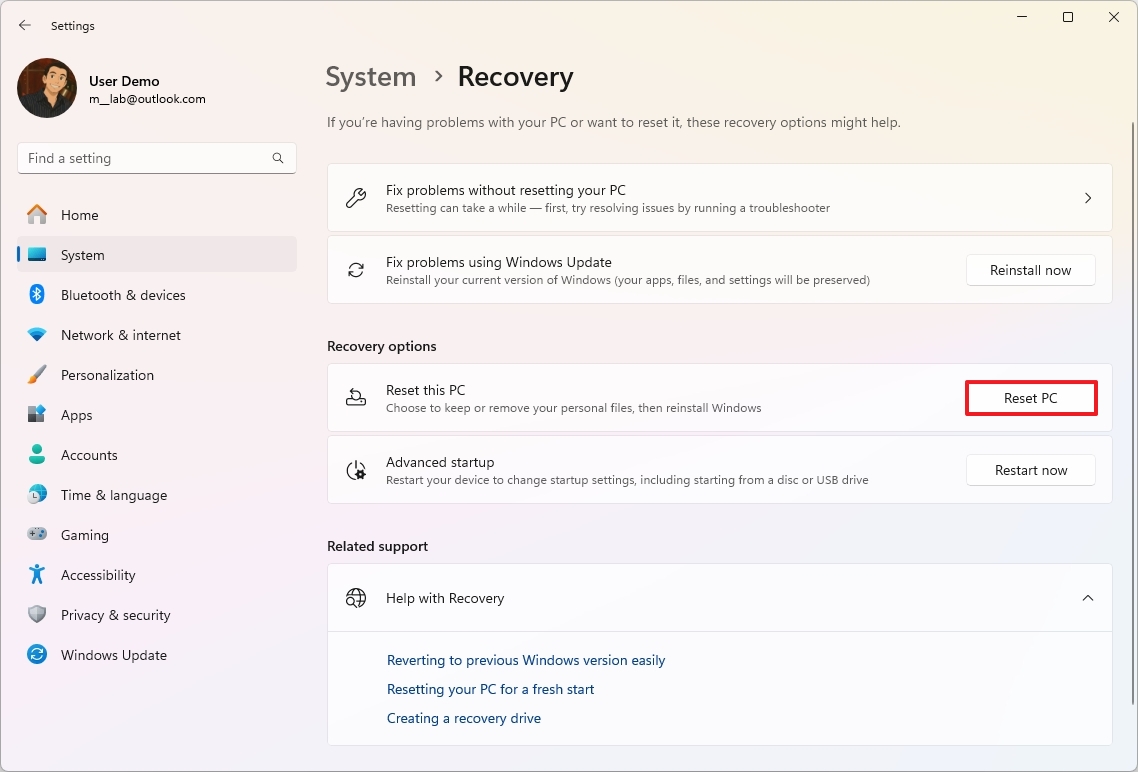
- Open Settings.
- Click on System.
- Click the Recovery page on the right side.
- Click the "Reset this PC" button for the "Reset this PC" feature under the "Recovery options" section.
- Click the "Keep my files" option.
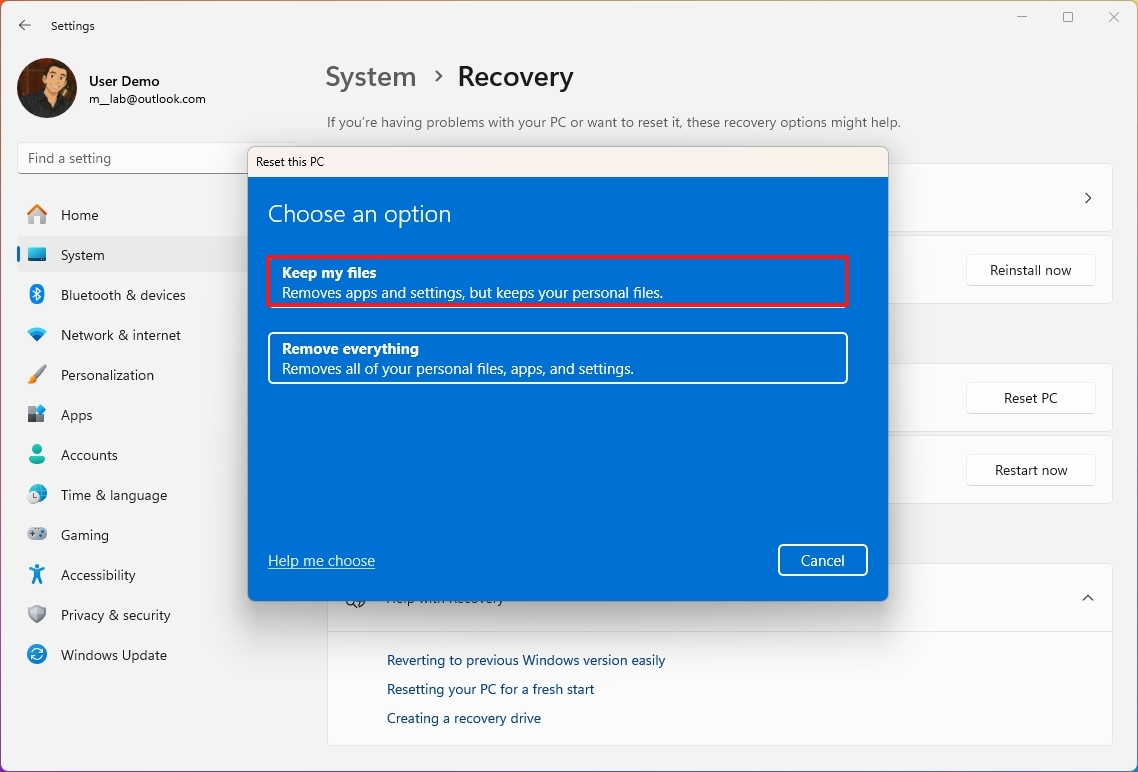
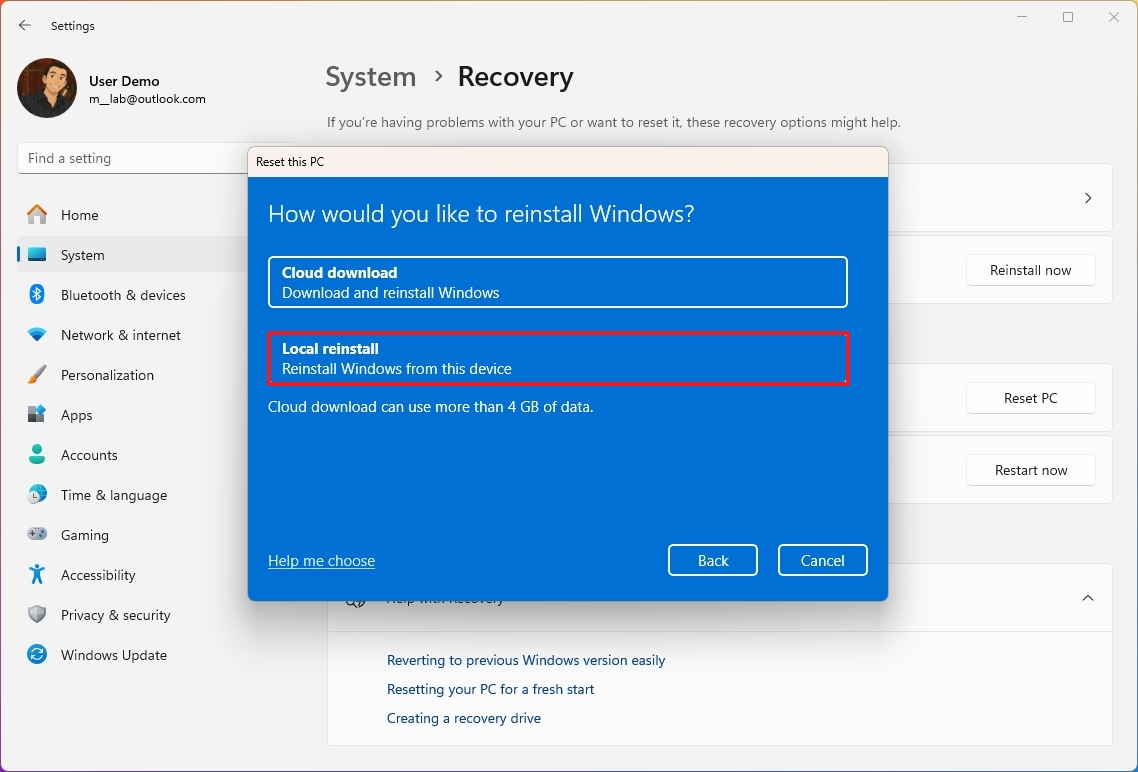
- Select the reset method:
- Cloud download: Downloads a fresh copy of the installation from the Microsoft servers and reinstalls Windows 11. However, this option will not restore the tools, apps, custom drivers, and configuration that came with the original image provided by the manufacturer.
- Local reinstall: Uses the files already available to reset the computer. This process will restore the factory drivers, settings, and tools if the device is branded (for example, Dell, ASUS, Lenovo).
- Review the apps to reinstall after the reset to factory settings.
- Click the Next button.
- Click the Reset button.
Once you complete the steps, the computer will reset to the default factory settings, preserving your files. However, after this process, you will need to reapply your settings and reinstall your applications and games.
You can also review the complete process, as well as the Windows 11 post-installation steps, in this comprehensive guide.
If you suspect your computer is sluggish, it could be infected with malware. If this is the case, running a full virus scan may help.
More resources
Explore more in-depth how-to guides, troubleshooting advice, and essential tips to get the most out of Windows 11 and 10. Start browsing here: