I've created an Adobe Photoshop Action that will add punch to JPEG landscape photos.
While one of the most common landscape photography tips is to shoot in RAW, because there’s more image data than a JPEG, sometimes you run out of memory card space – on a long trip, for instance. Or, the ultimate horror, your main card might develop a fault while you’re out somewhere scenic without a camera shop for miles.
So, you switch to JPEG, and while it saves on storage space considerably, it’s at the expense of getting the best out of the captured image. That’s where this Photoshop Action comes in.
I've designed my Action to offer a boost to contrast, color, sharpness and impact. It uses a combination of blended layers and adjustment layers, which can then be tweaked. Follow the tutorial and create it yourself to be reused when needed, which also means you can add elements or tweak the existing ones.
What is a Photoshop Action?
Actions are one of the oldest methods in Photoshop of automating enhancements. And while Adjustment Presets, Neural Filters and now the possibilities offered by AI-driven Generative Fill have all offered new ways of doing things, there’s still a place for Actions.
To access the Actions palette, go to Window > Actions. To use an Action, simply click on it to select, then click on the Play icon at the bottom of the palette.
To make your own Action, it’s best to have it all planned out in advance so that you're simply following steps that you already know the settings for. After creating the Action, by following this tutorial, it will then be available in the Actions palette.
One click there will run it, or if you assigned a function key, simply pressing that will do the same.
1. Start a new Action
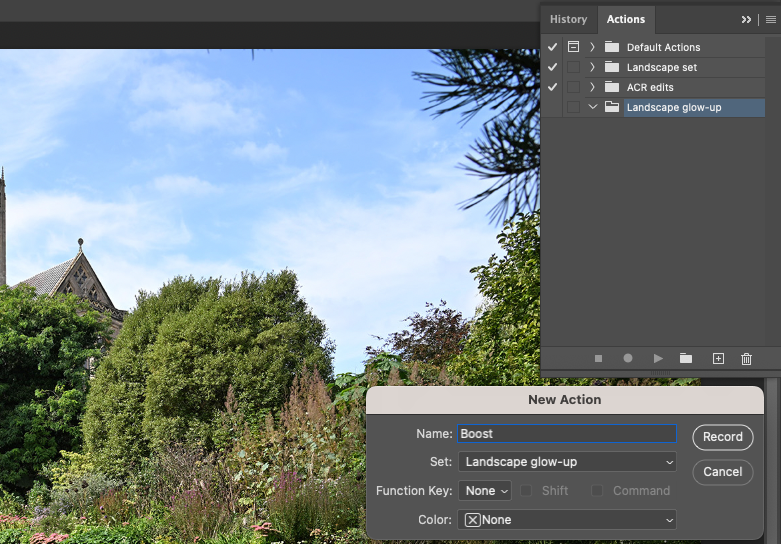
Load your image to work on and then open the Actions palette and click on the Create new set icon at the bottom. Photoshop can only save sets of Actions, so name it, then click on the plus symbol to create the actual Action.
Give your Action a name so you can recognize it later. If you want, assign it a Function Key, such as F10 here. Once happy, click on Record. The first thing to then do is duplicate the background layer.
2. Sharpen it up
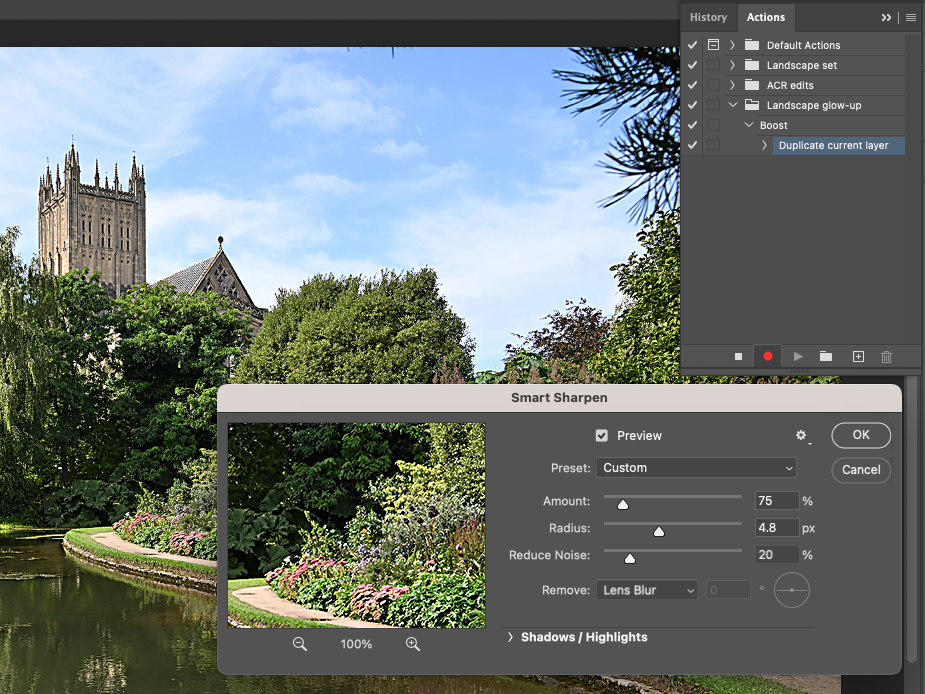
Call the new layer ‘Sharpness’ then go to Filter > Sharpen > Smart Sharpen. Enter values of Amount: 75%, Radius: 4.8px, Reduce Noise: 20% and Remove: Lens Blur. Click on OK to apply the sharpening.
These settings should be fine for the average, unsharpened landscape JPEG, so they can be used as-is. If an image is particularly soft or has lens shake, you can use different settings.
3. Adding impact
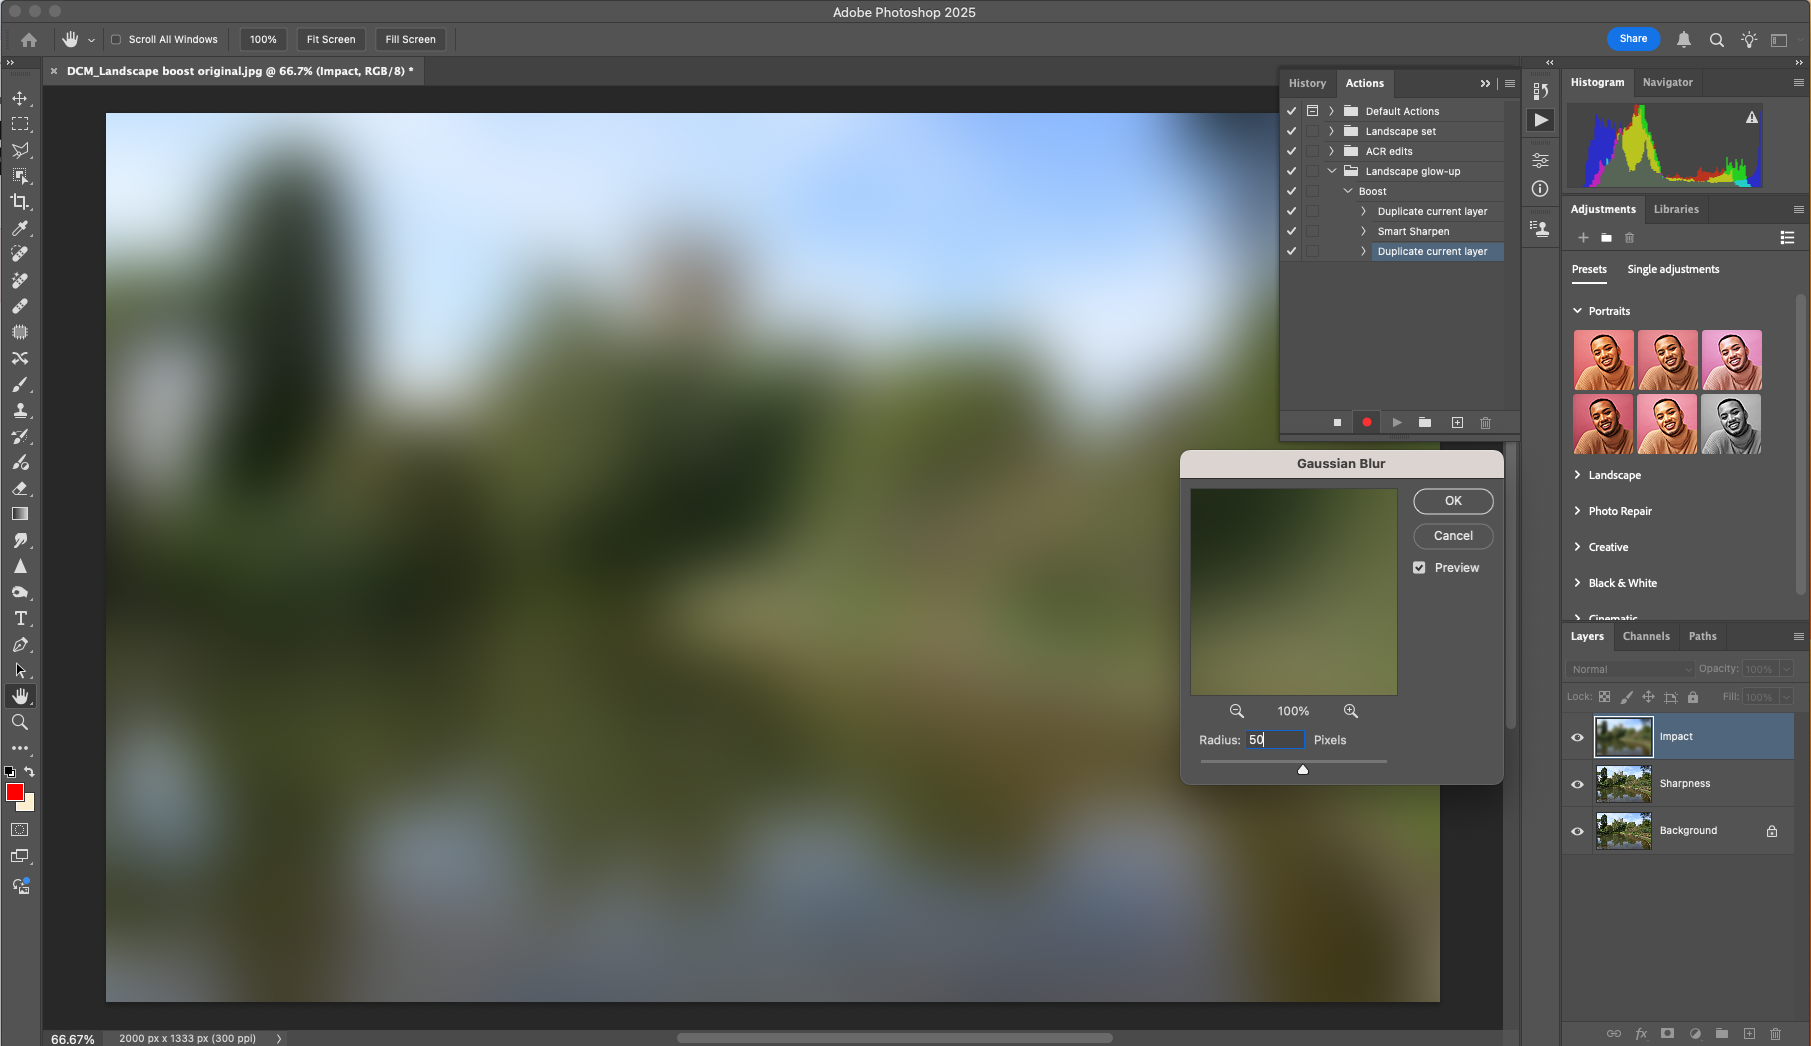
Duplicate the Sharpness layer and call it ‘Impact’. Then, with this layer selected, go to Filter > Blur > Gaussian Blur. For images around 6MP, a Radius of 50px is fine, for 12MP-15MP, up this to 75px.
For images 20MP and over you might want to try a Radius of 100px. Click OK and then change the Blending Mode to Soft Light. Check the highlights and reduce the Opacity if required.
4. Mix in some Vibrance
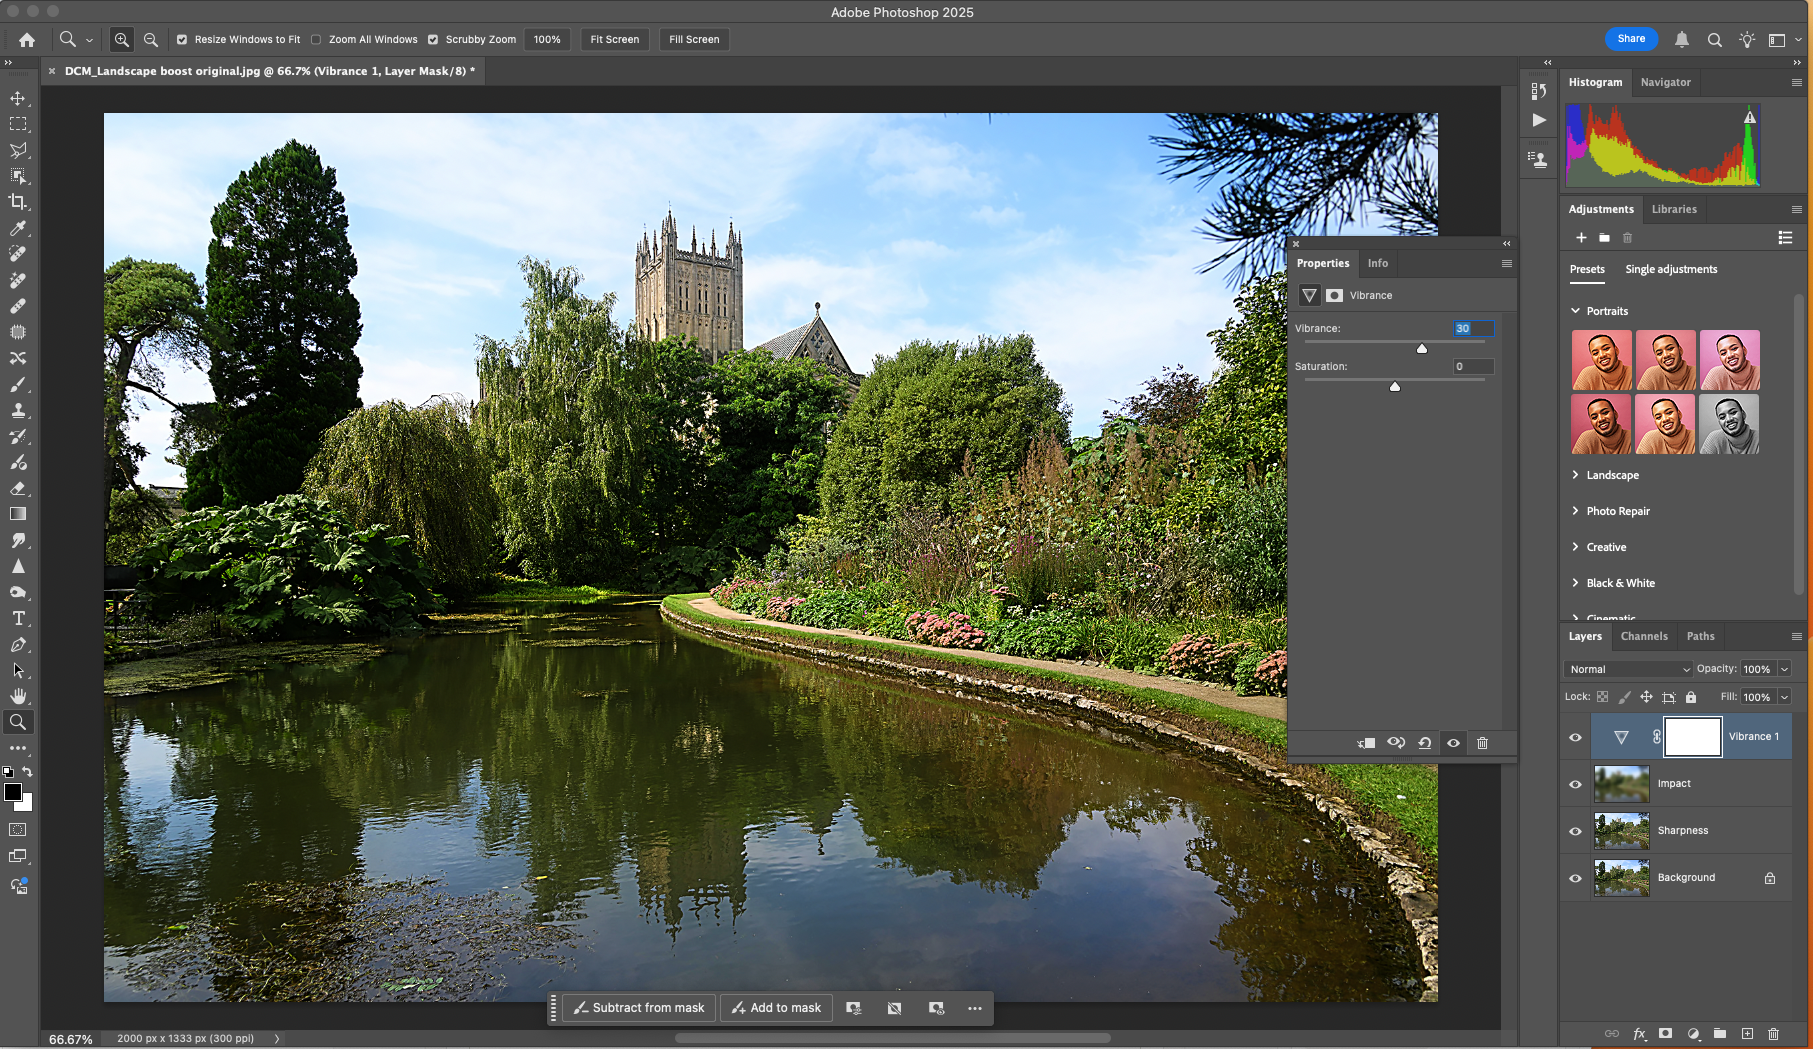
At this point it should all be looking quite spicy. Add an extra touch by clicking on the Create New Fill or Adjustment layer icon and select Vibrance. Enter a value of 20-30% for a reasonable, generic boost to the image.
Click on the square symbol next to the red dot to stop recording the Action. Ensure ‘Landscape set’ is highlighted then click on the three horizontal lines and select Save Actions.
You might also like...
Want more top editing hacks? Check out these Photoshop tips. Plus, I broke ALL the rules to photograph this classic film noir portrait.