I use Procreate to rework old sketches, and in this Procreate tutorial I will share how you can too. I’m pretty sure we can all relate to the infamous, 'unfinished' folder that’s buried deep down in your computer. Yes, that digital abyss filled with sketches, half-baked illustrations and ideas that we didn’t finish for one reason or another. For me, the folder isn't an artwork grave, but rather a limbo for potential illustrations.
From time to time, when I'm not in the best of moods, or it's one of those gloomy afternoons when I'm just feeling lazy, I spend time browsing through those files. I look for some older ideas that I still like, and then recycle them into something new – and Procreate is a great app for doing this work. (You'll need an iPad to use Procreate as it's exclusive to Apple, read guide to the best iPad for drawing to see which is best for you.) Some of the advice below is universal, so if you're using one of the best drawing tablets and Photoshop it'll still be useful.
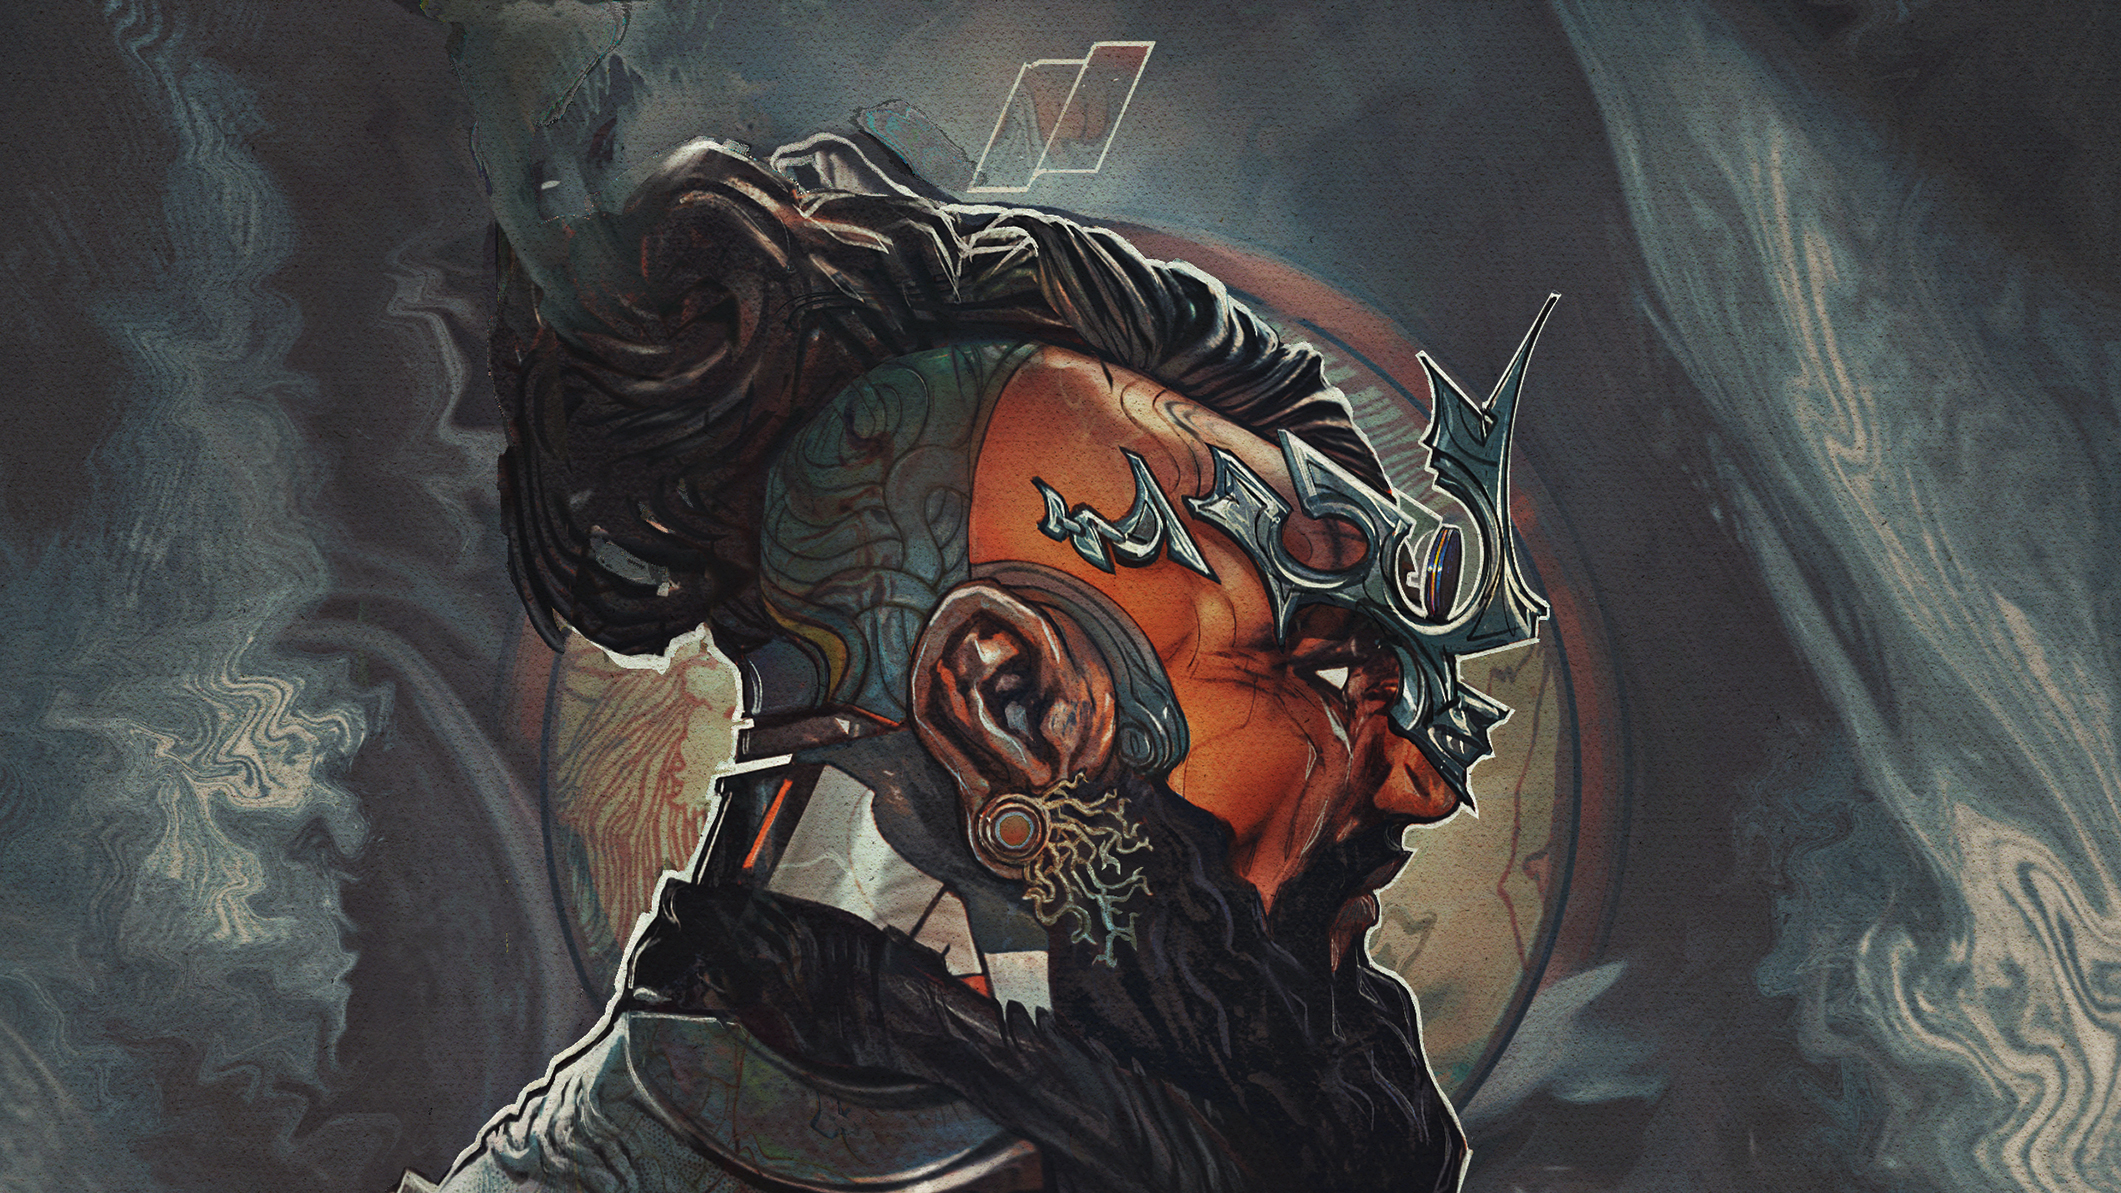
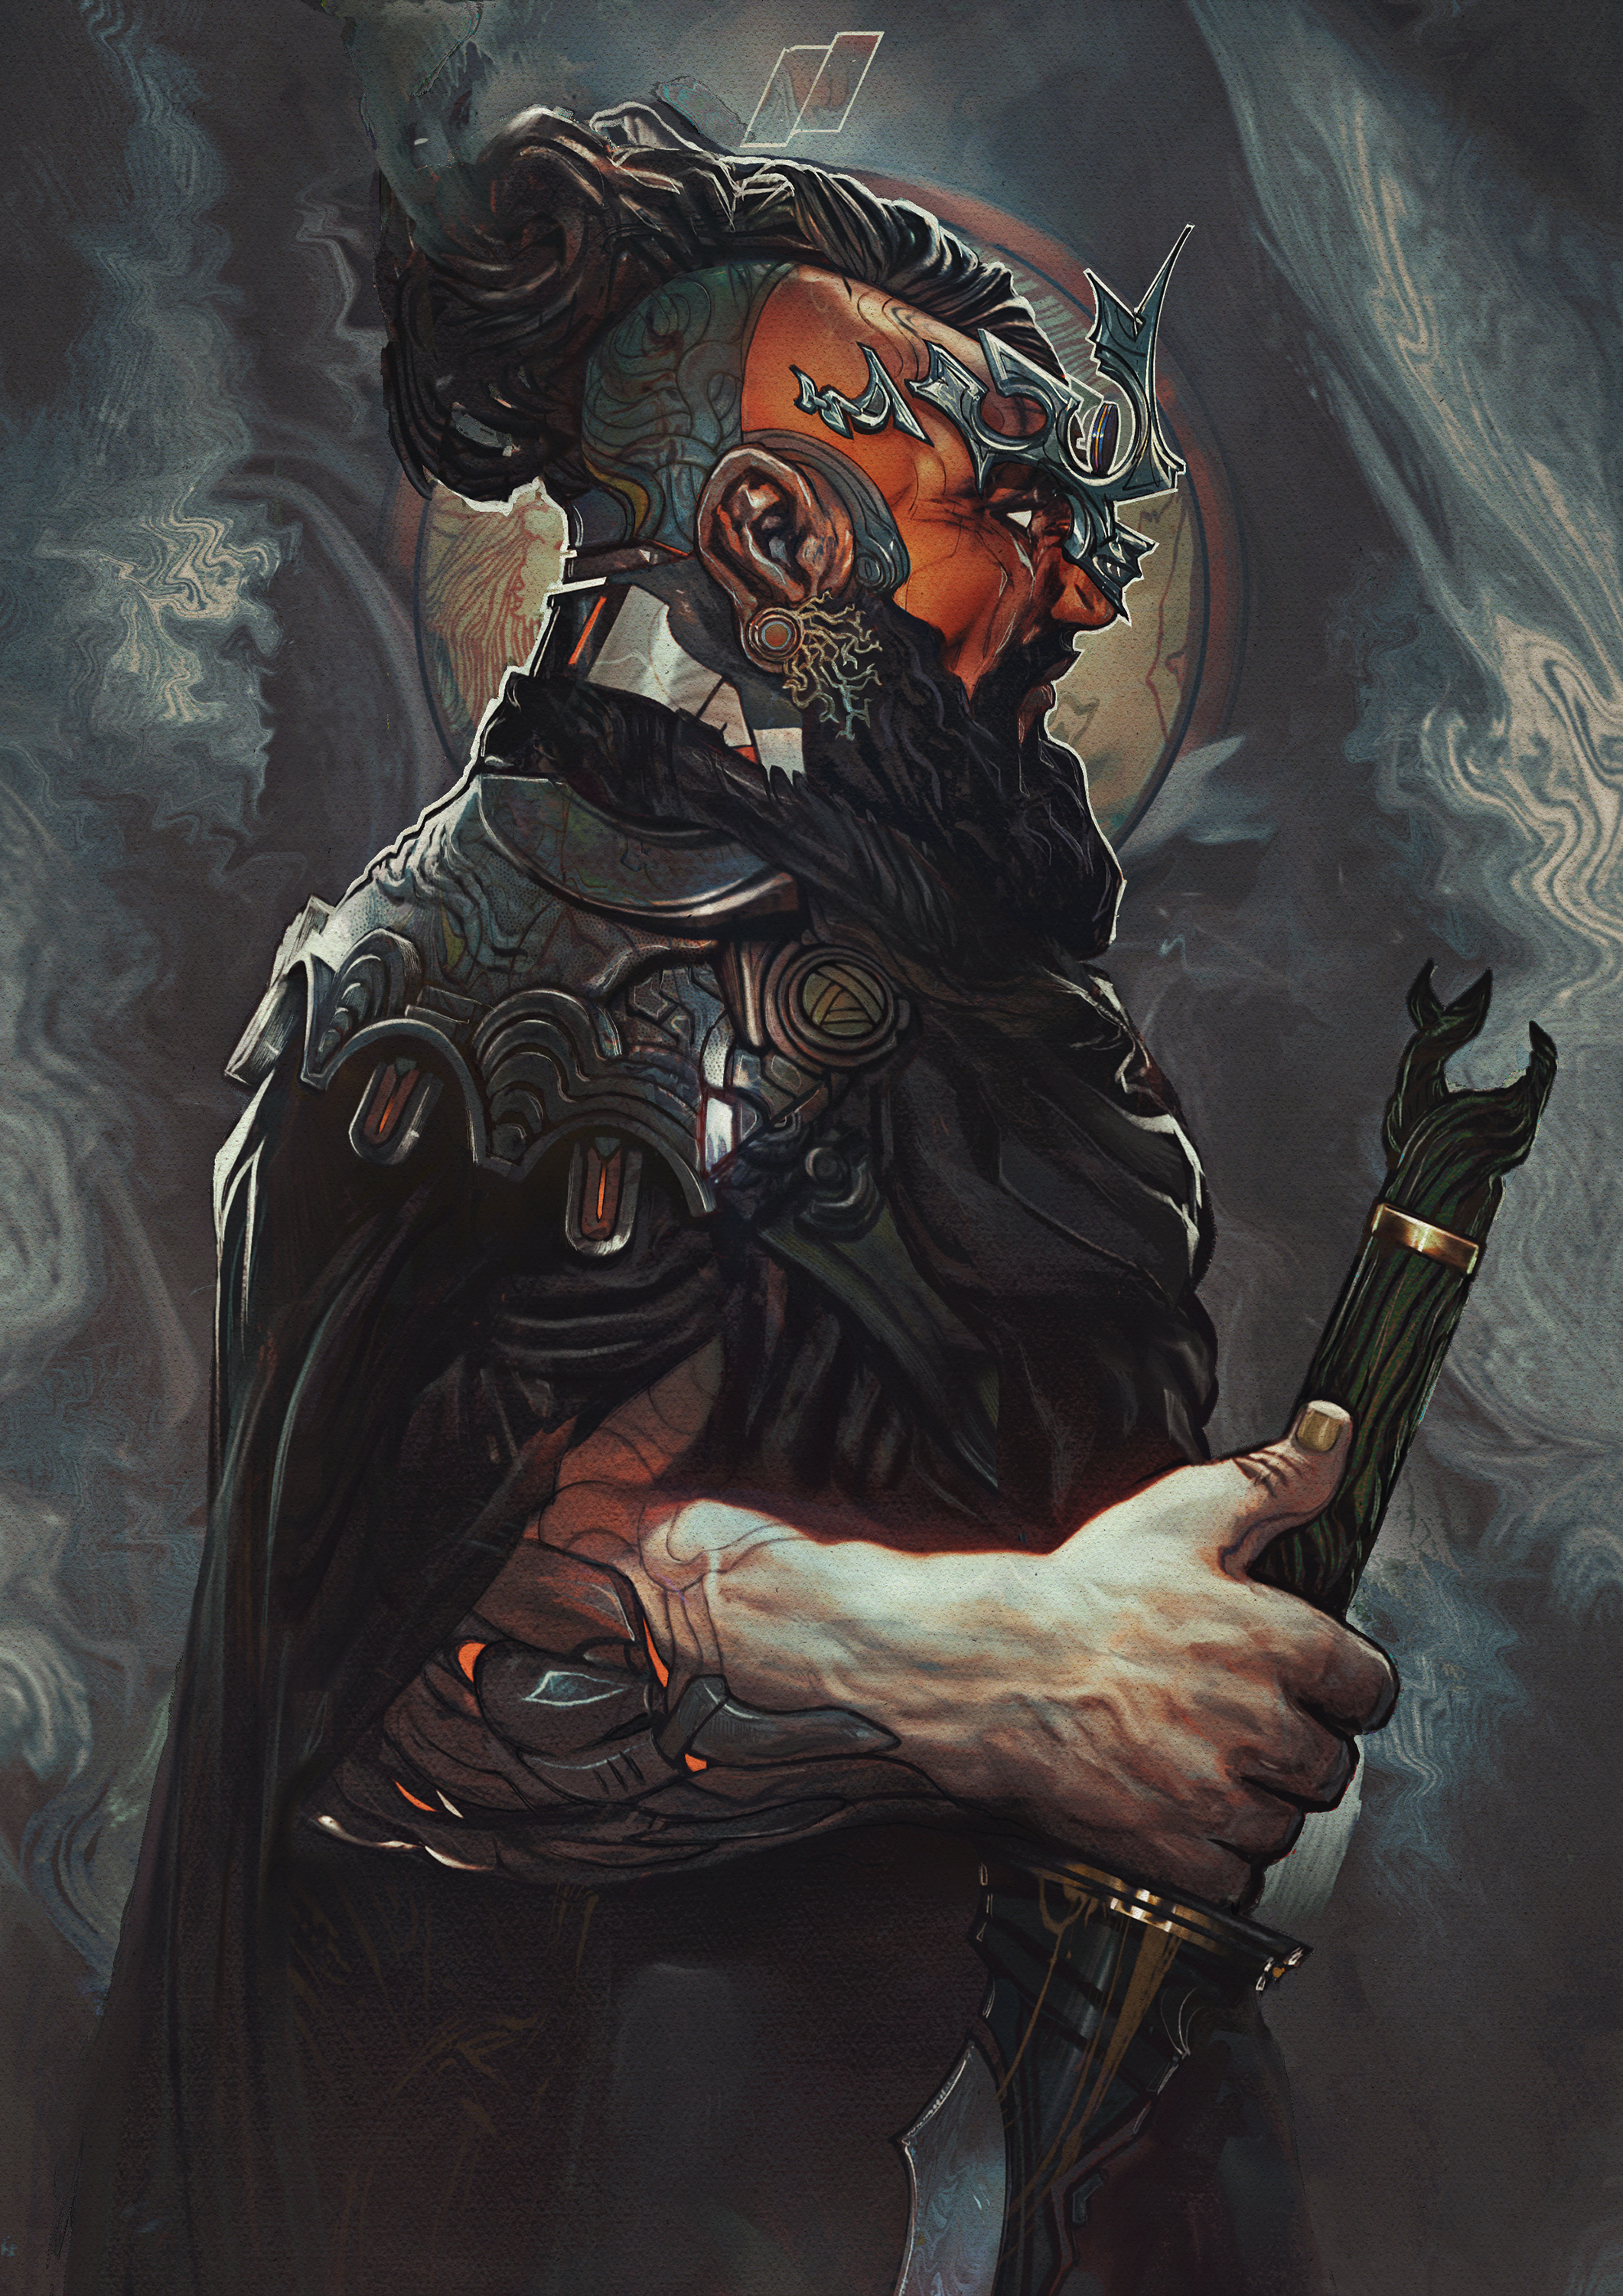
In this workshop, I'll show you how I’ve resurrected an older sketch that I've always liked – some sort of barbaric warrior – from the original sketch to a finished piece. We’ll even do some 'Frankensteining': adding fragments from other older pieces into this one. You can scroll to the bottom of the page to see the full-size finished illustration, or read on for the step by step of how it came together.
Use Procreate to rework old sketches: video tutorial
Procreate tutorial: my brushes
Custom brushes: the Sketchy Sarmento
This brush was created specifically for me by Max Ulichney, to emulate the Staedtler 8B – my favourite pencil. It’s the basic brush I use for everything I’ve painted on this workshop.
Procreate tutorial: use Procreate to rework old sketches
01. Digging through the grave
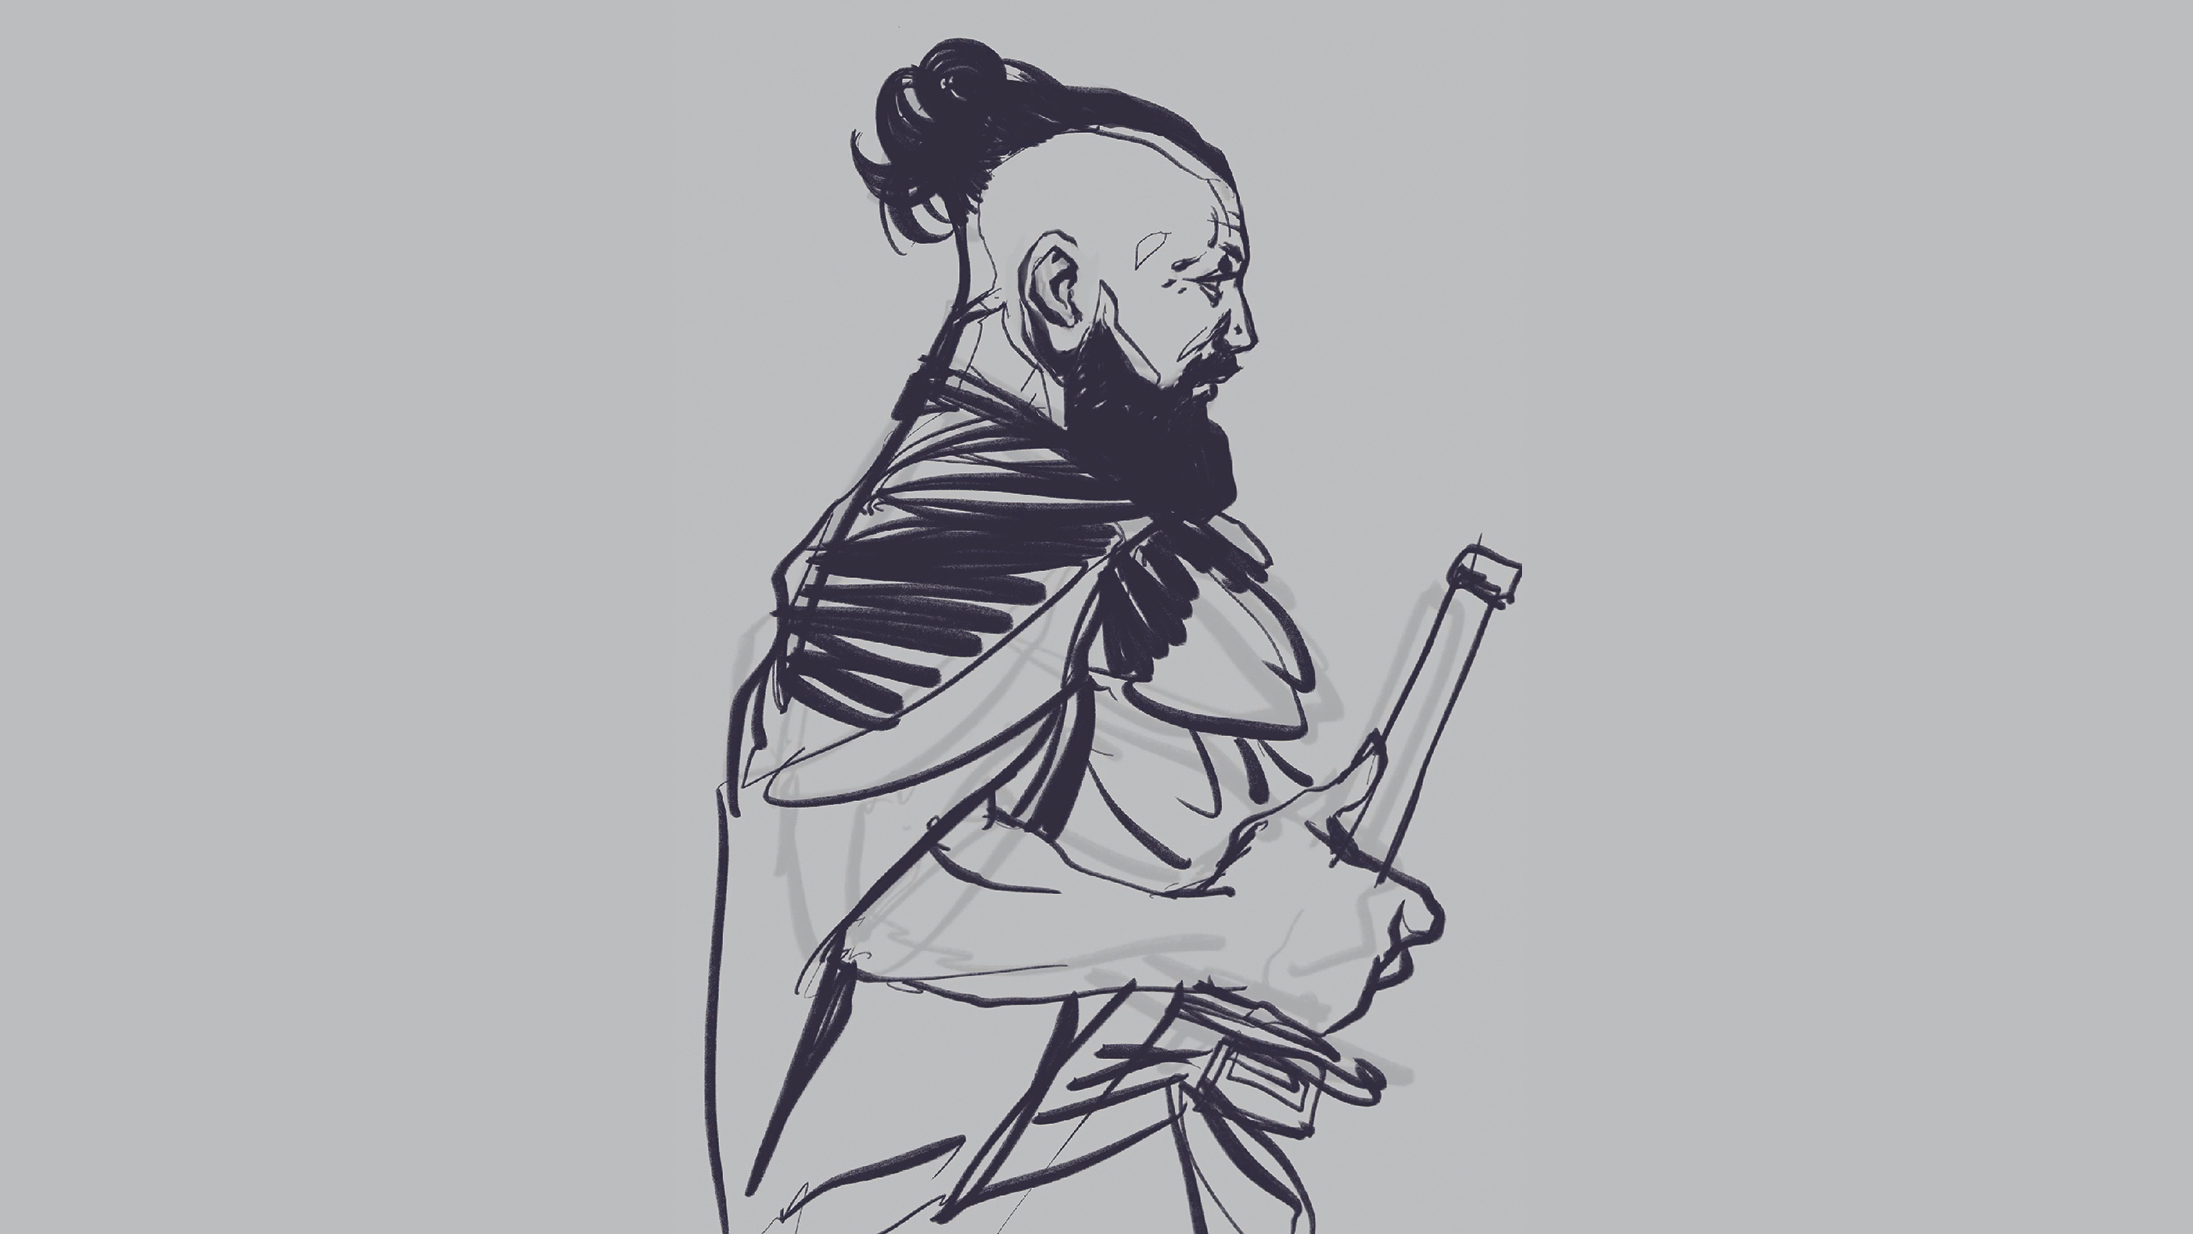
It all starts with the old idea. In this case, when looking through my files, I found this sketch that for some reason I never worked up into an illustration. I really like it: there's a pure, raw energy that I've often found occurs when doodling. The freedom of scribbling can yield lively results, but now is the time to turn that promise into a finished painting.
02. Adding a base colour
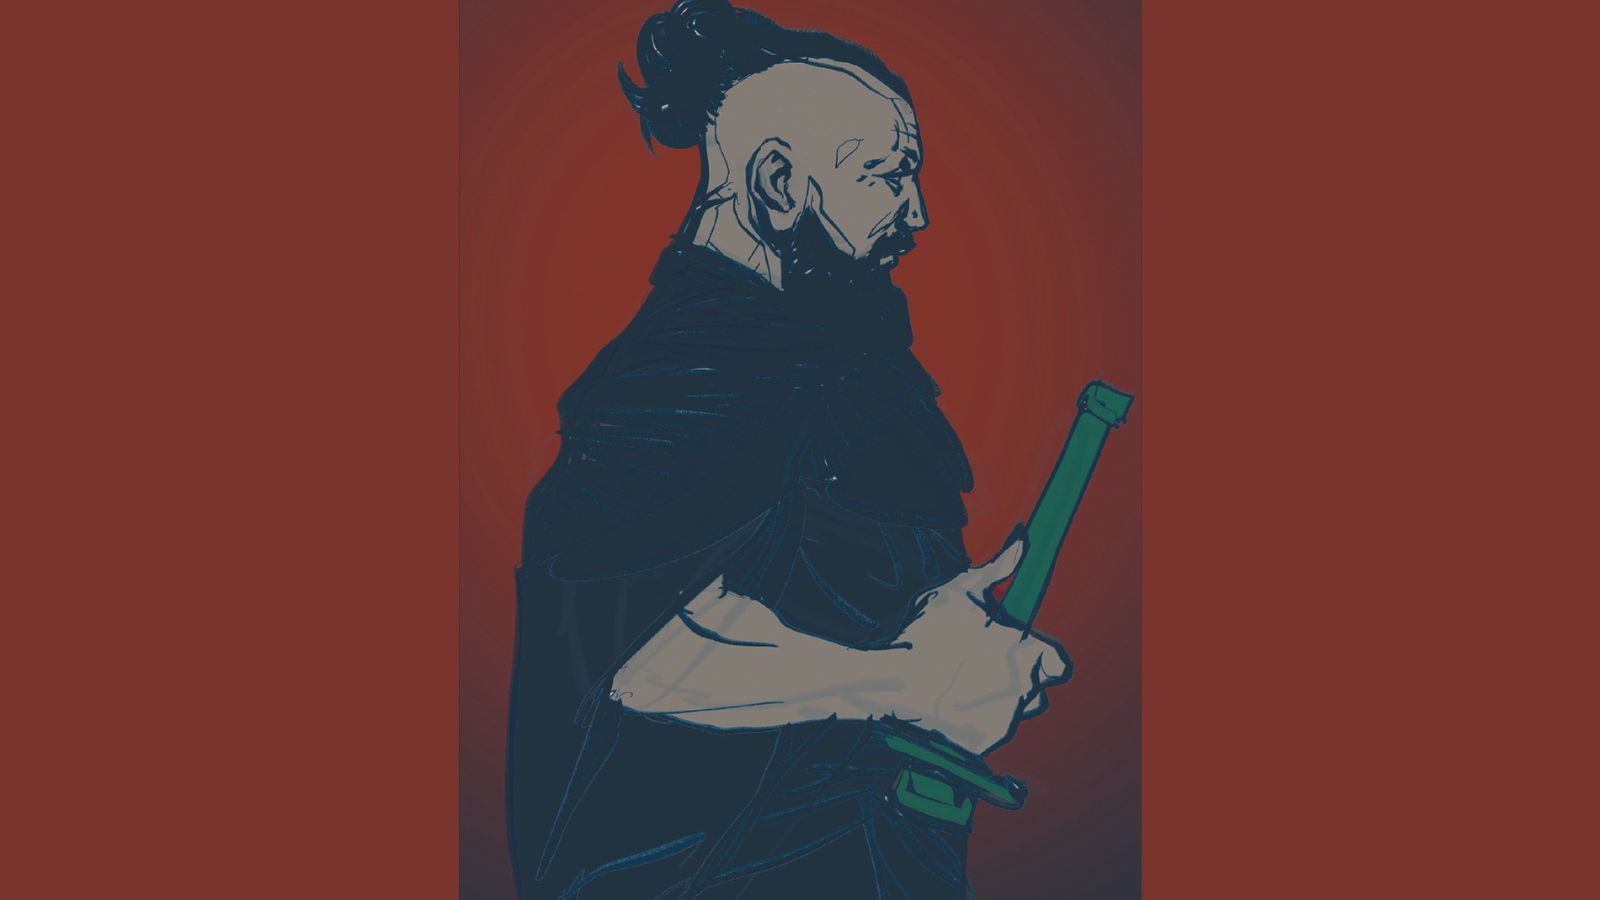
As I usually do during my working process, I start by sketching some thumbnails and developing the idea. I then choose my favourite composition to refine further. Since the sketch already exists I proceed to add some early colours, which I'll use to start 'sculpting' the illustration. The Color Fill tool in Procreate is perfect for these quick iterations, before moving on to the painting stage.
03. Working up the story design
Before I move on with the painting itself, I'll start establishing some traits of the character's design. This is when one of my very favourite aspects of the creative process starts to take place: setting up a storytelling background for the character. This will help me to define the design decisions I'll make, and align everything into a concise concept.
I decide that he's a retro-futuristic, technologically enhanced knight. This immediately inspires me, and aligns everything into a concise concept. Who is he, and why is he here? (If you want to explore background art, read our tutorial to painting vivid scenes using Procreate and Photoshop.)
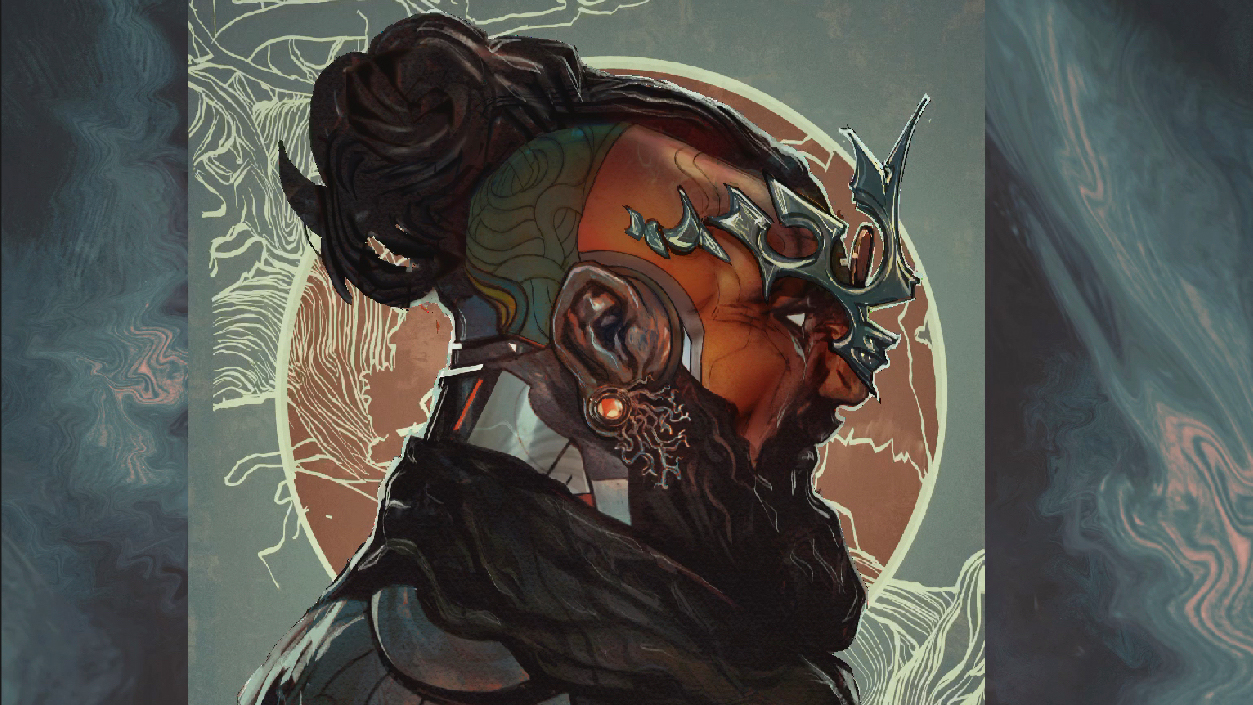
04. Defining the environment (or not)
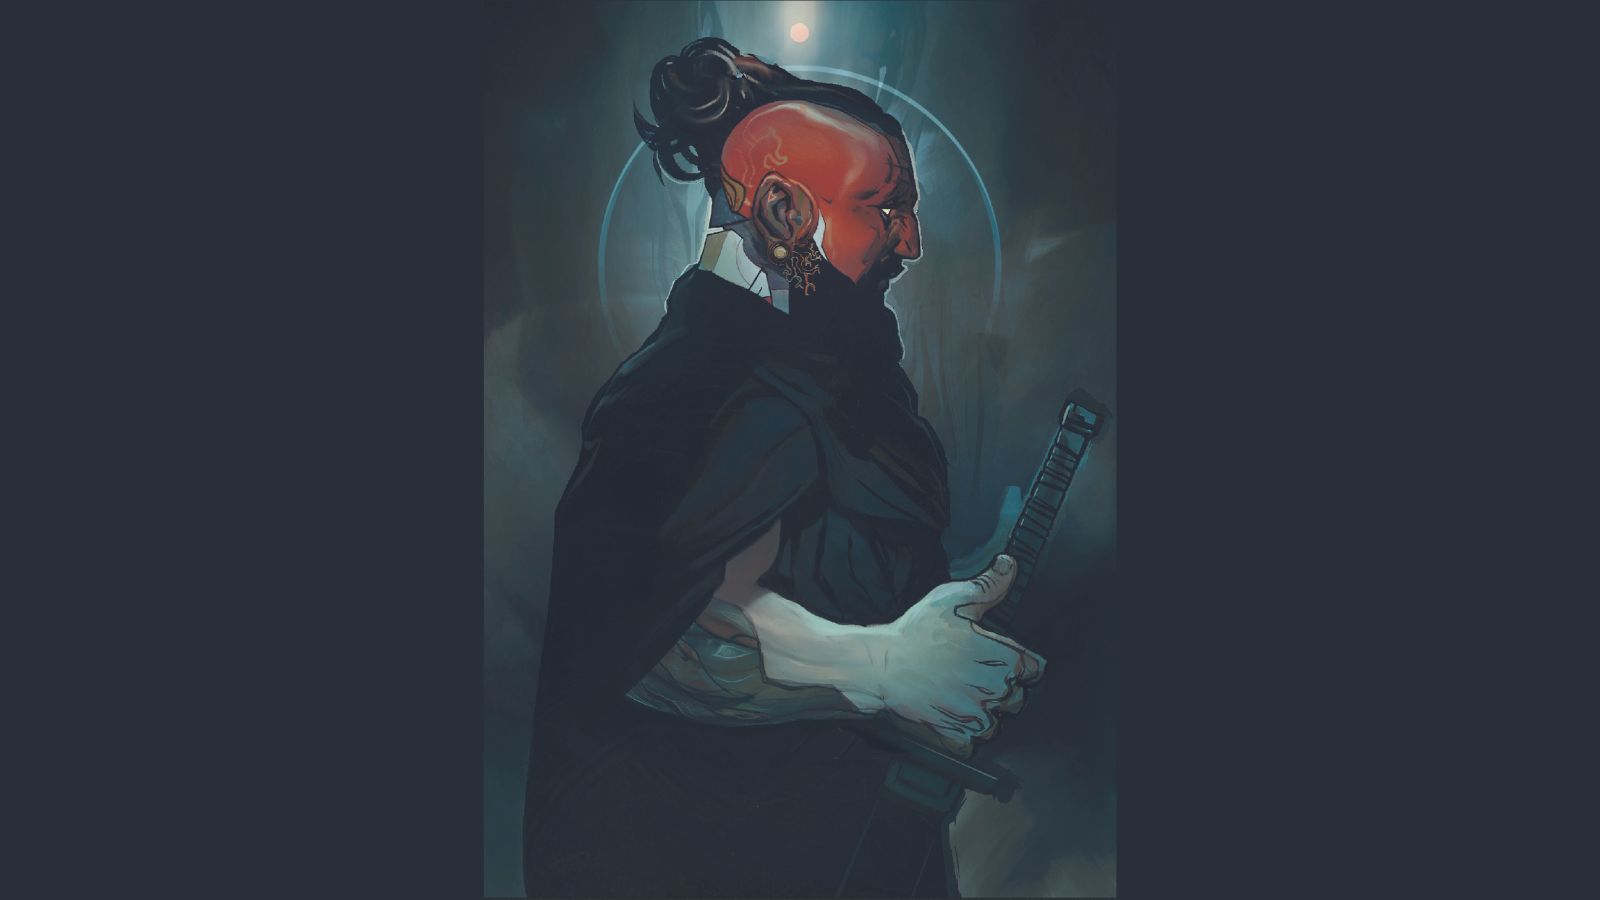
Sometimes the background plays a huge role in defining your character. An environment can strengthen the characteristics of your figure. However, the opposite can also be true. A simple painterly setting will do for my knight, since all we'll need to know about the illustration will be actually focused on our character itself. But I will attempt some possible archetypes and symbolism in the background, to hint at his identity.
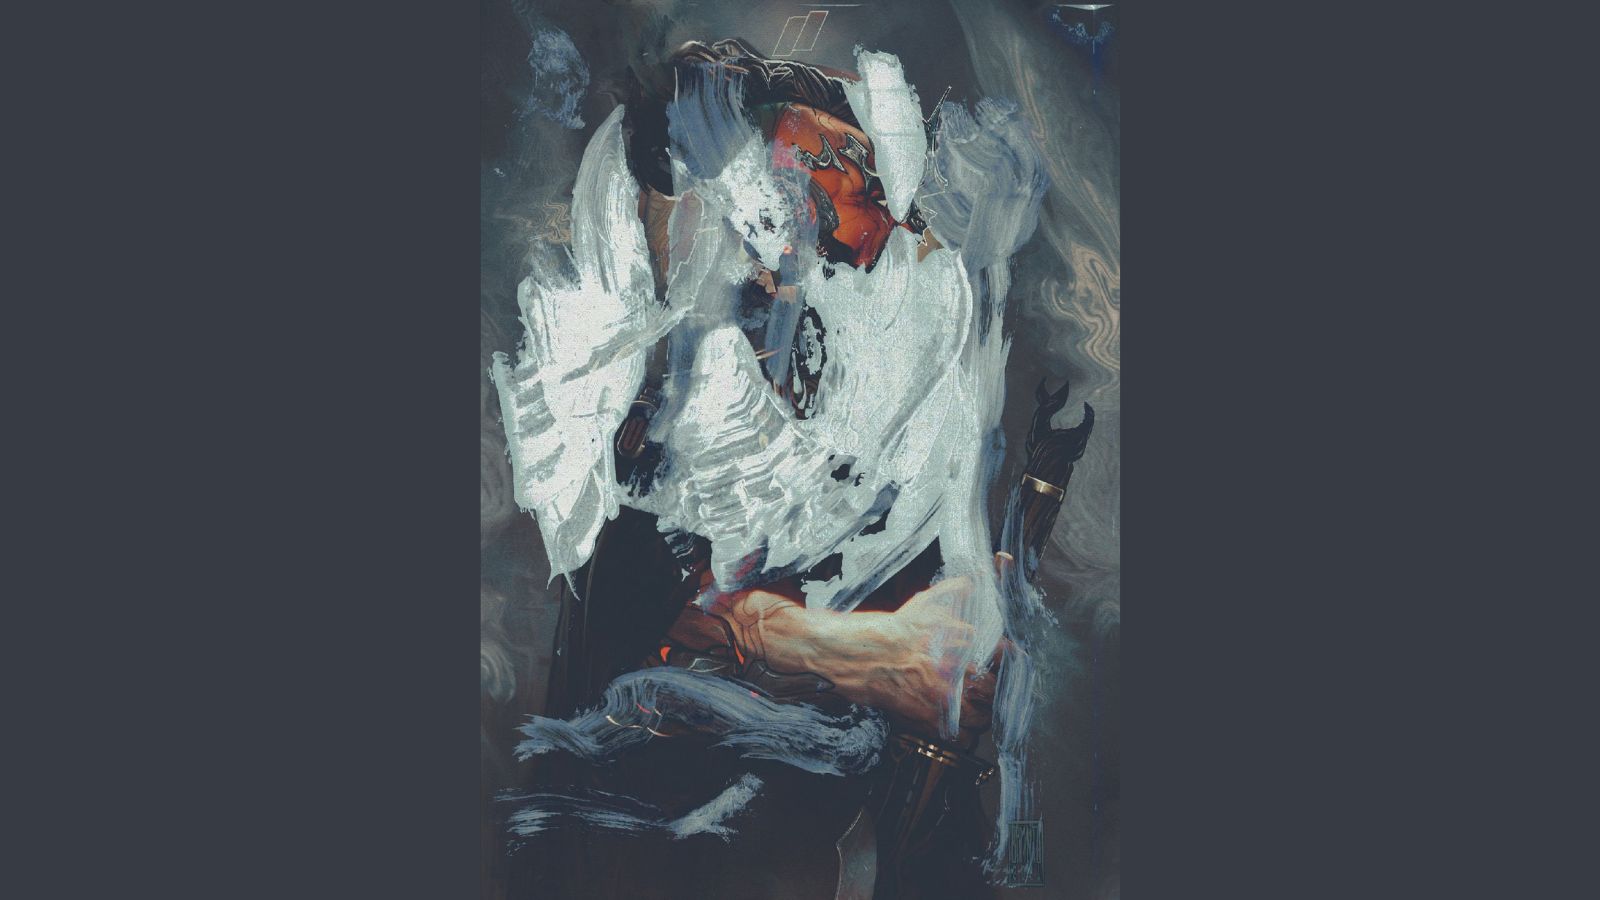
05. Using Liquify and solidify tools

One trick I’ve been developing in Procreate lately is what I call The Liquify Madness Extravaganza. Using the extraordinary Liquify tool, I'll create masses of pixel distortions and artefacts, then proceed to 'sculpt' shapes and textures into the composition. This often leads me to some fun and interesting results. The secret is to learn how to use and edit the results to uncover some real gems.
06. Designing the helmet
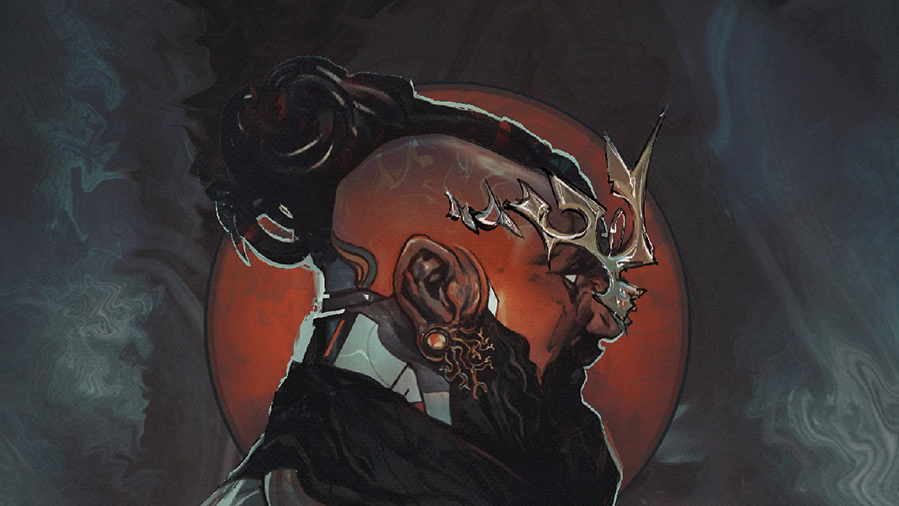
With the basic composition organised on the canvas, I start to define the elements that will give the illustration a sense of mystery and wonder. I decide he’s a sovereign knight in a realm of storytelling that exists between the fantasy and sci-fi, and so he needs a helmet that will reflect this blend of ideas. Floating pieces will 'embrace' his head, while also acting as an ornate crown.
07. Recycling fragments of old artwork
Searching through my files, I find an older line work texture that was meant for another piece, and this may fit perfectly into the 'halo' piece. I cut, paste and edit the shapes, and change the layer properties, until I find the right balance. It can't distract the viewer from the focal point (the head) too much, but needs to work as a graphic motif that will bring attention on to the crowded bust.
08. Forging the halo
After applying a texture to the halo piece, I come across an unfinished character illustration that has some elements which might work well for our knight. I throw them into the character’s silhouette (using a Clipping Mask) and then begin editing the usable portions, using the Liquify tool and changing the layer properties to Darker or Lighter Color, while also erasing and painting over the element to fill in the gaps.
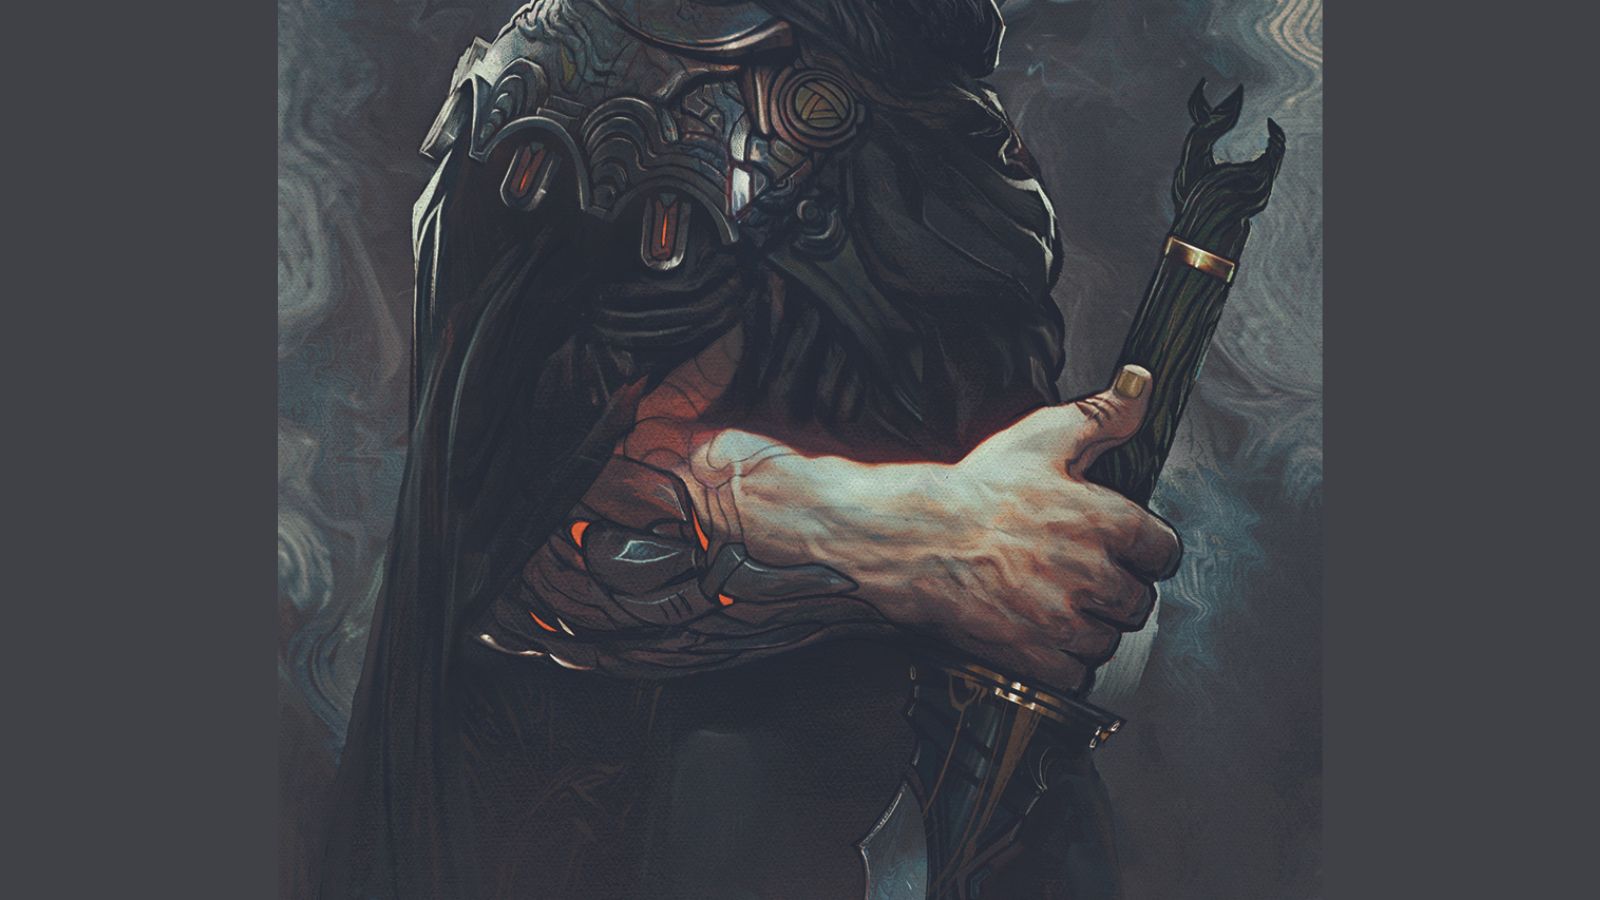
09. Refining textures and weight
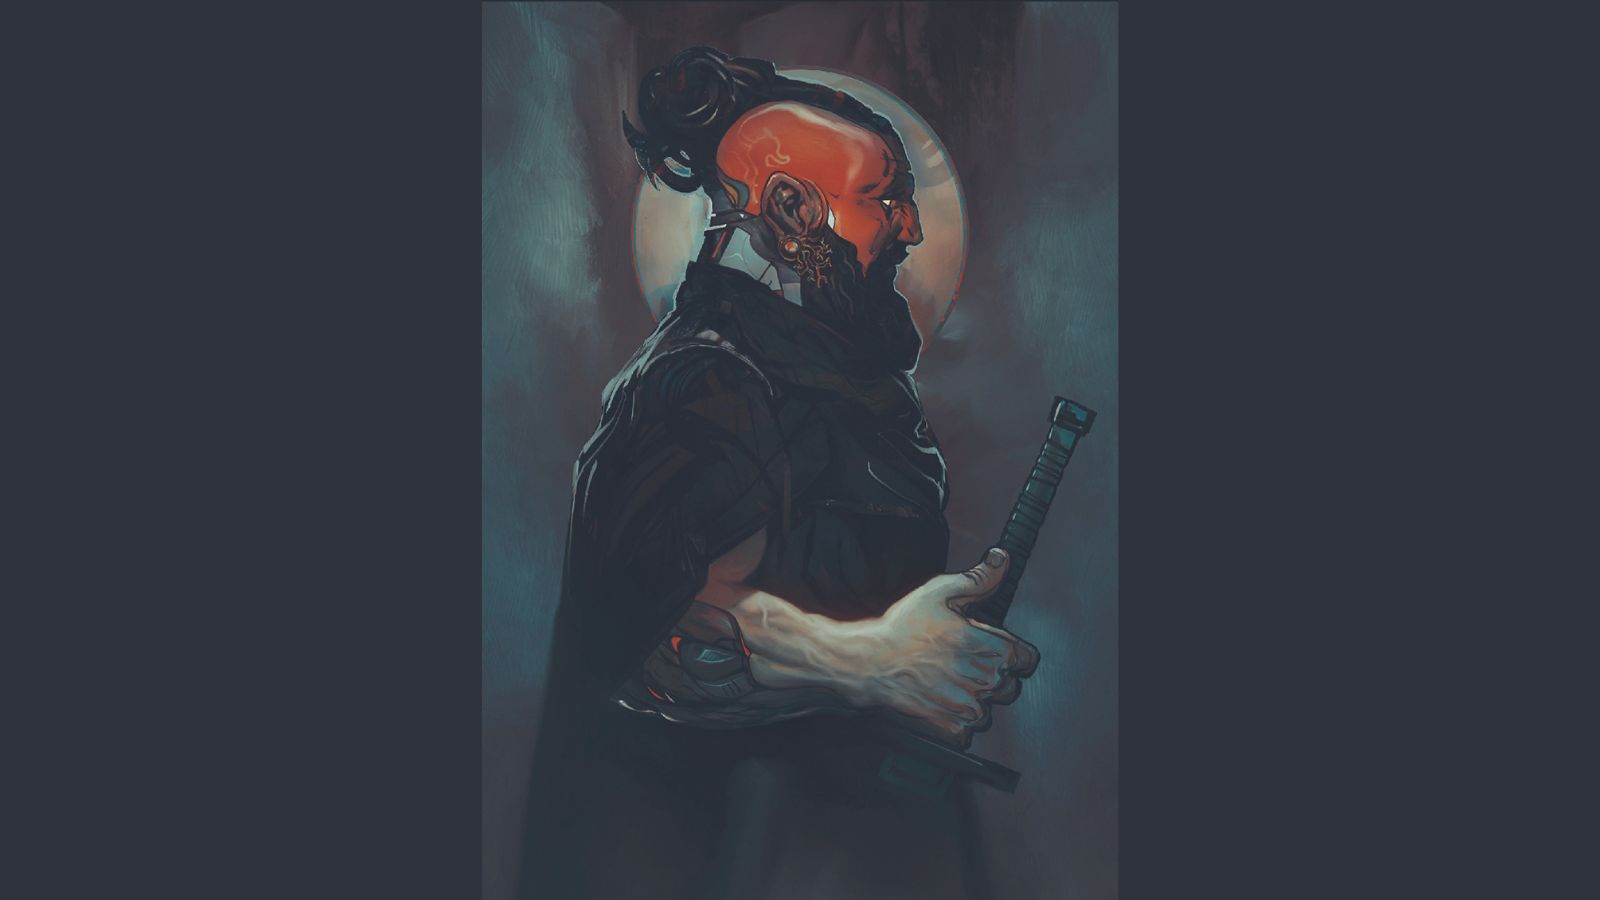
Placing some handmade textures (again, dip into your archives and re-use as much as possible) and watercolour paper textures will add the 'teeth' that this painting needs. This creates a boundary between the traditional and digital media. I sculpt the white paint texture into specific spots, where the knight's drapery may benefit from the organic-looking impasto. Setting the texture's layer properties to different effects will create the tone I'm looking for.
10. Beginning the 'Frankensteining'

The beauty of this approach – what I'm calling 'Frankensteining' – is that we not only make use of those unused ideas and visual motifs that we thought were cool, but there's also the possibility of merging all of these elements into a much better piece. Here I take a fragment from a portrait I've yet to finish that has an engaging metal plate design. This might improve the shoulder piece, and better balance the silhouette. You need to experiment and try new blends of old images.
11. Upgrading the garments
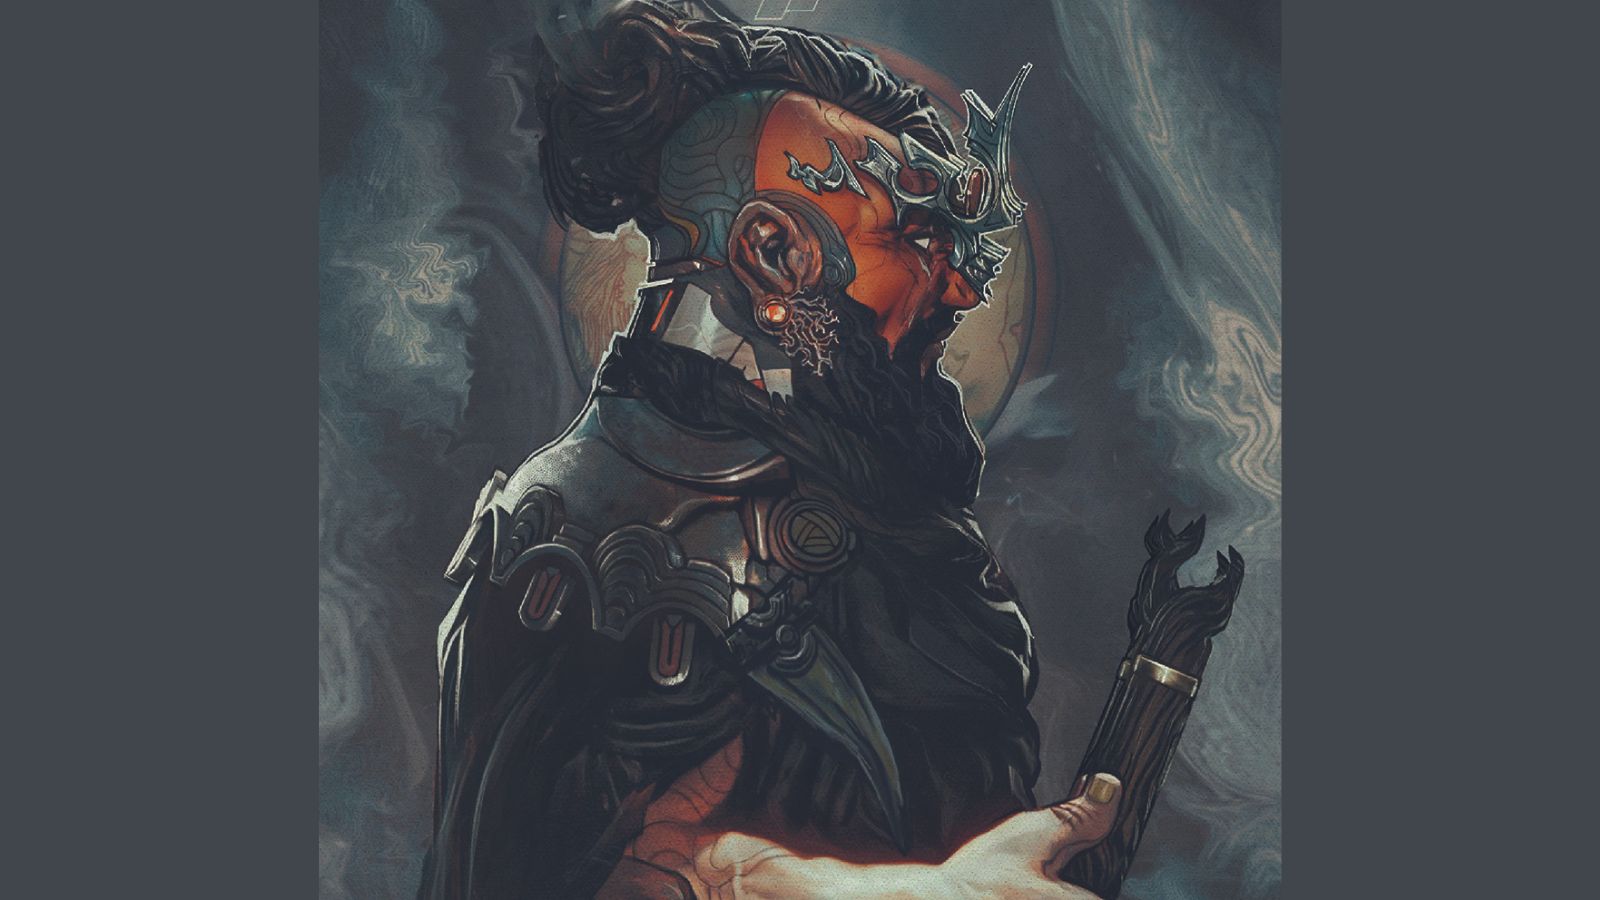
We gave our character a solid, basic armour and sword set – enough to make the 'sci-fantasy' knight concept work. But these elements are still lacking refinement, so I add to his garments and accessories with a wash of paint. Since I'm looking to achieve my own bend on the genre-defying amalgamation of fantasy and sci-fi, I add some technological hints to this quasimedieval gentleman to give him a Krull-meets-Dune feel.
12. Embellishing the surfaces

Now we'll get back to the Liquify trickery for a bit more fun! I duplicate the layers that I think will produce the desired distortions, such as the character itself, and choose the Crystals Liquify tool (with Momentum and Distortion both set to 100 per cent) to break it into interesting shapes. Setting the resulting layer to Darker Color gives me the material to work with, to give the armour and some other elements the extra textures that I’m looking for.
13. Designing medieval cybernetics
Because we already have a larger portion of the composition already defined, I start refining the finer details. This rendering and designing stage – the elements that will make the character really shine – takes time, but it’s the moment when you're able to unify your ideas.
I approach his armour, as well as the detailed organic cyber-enhancements in his arm and head, and still ask questions: can his red face be an actual armour piece by itself? How much of him is really… original? Never stop pushing your ideas.
14. Making the final touches
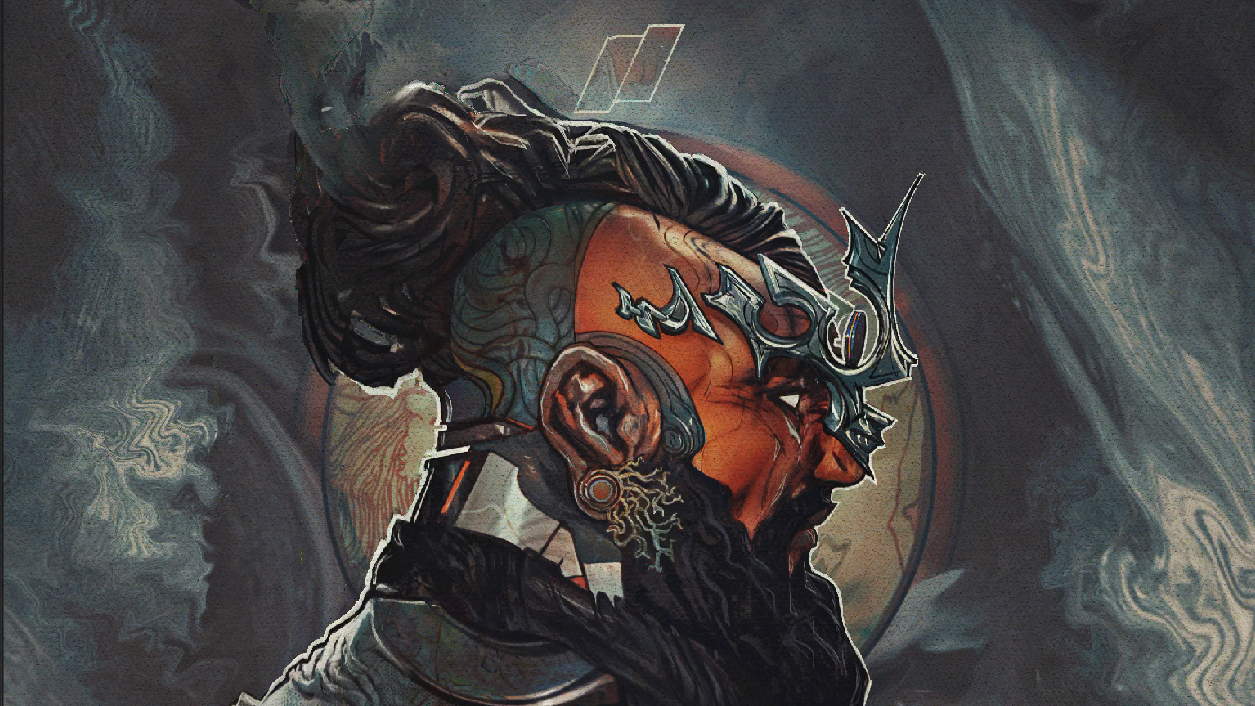
After the last few brushstrokes here and there, some colour adjustments and overall checks… behold the Knight of the Red Sun! From the ashes of an older illustration folder comes this behemoth of a warrior. Hope you had as much fun as I did! I can’t wait to see your own Frankensteinings and experiments that might turn an old piece sketch or idea into a great addition to your growing portfolio.
Get more Procreate tutorials in ImagineFX
This content originally appeared in ImagineFX magazine, the world's leading digital art and fantasy art magazine. ImagineFX is on sale in the UK, Europe, United States, Canada, Australia and more. Limited numbers of ImagineFX print editions are available for delivery from our online store (the shipping costs are included in all prices)
Alternatively, you can access us instantly through our digital options:
• Apple app (for iPad or iPhone)
• Pocket mags (multi-platform app, great for Android users)
• Zinio (multi-platform app for desktop or smartphone)