Photo Stacks are Google’s brand new way of organizing your photos in the Google Photos app on Android phones. The point of this feature to help organize your photo gallery, and group together similar photos in “stacks”. That way it’s easier to navigate the app and find similar-looking photos that have been grouped together.
Google Photos will notify you that Stacks are available, and that the whole process is done automatically. But if you never got that message, or accidentally dismissed it, you may be wondering how to switch the Photo Stacks feature on. It’s a pretty simple process, but there are multiple ways to do it. Here’s how to turn on Photo Stacks in the Google Photos app.
How do Google’s Photo Stacks work?
Photo Stacks are a new way to organize your Google Photos feed. It doesn’t change how much storage space your snaps take up, but it does make the Photos feed easier to navigate — in theory. The idea is that Google Photos will automatically stack photos that are similar and taken within a short space of time.
Each stack has a 100 photo limit, and by tapping the lead image you can see all the other stacked photos. Either as a grid or as a gallery at the bottom of the screen. Stacks can only be viewed in the Photos tab of Google Photos, and only applies to images that have been saved locally. So anything that’s stored on the cloud is going to be out of bounds.
It’s effectiveness is also fairly limited, and I found it rather difficult to find any Stacks in my feed — even with collections of photos featuring the same subject. Even when I did find them, some photos were omitted for reasons I can’t really understand. So, personally, I think it could do with some finetuning. Though even a small bit or organization can be beneficial.
How to turn on Photo Stacks in Google Photos (Method 1)
Here's the first way to enable Stacks in Google Photos.
1. Open Google Photos
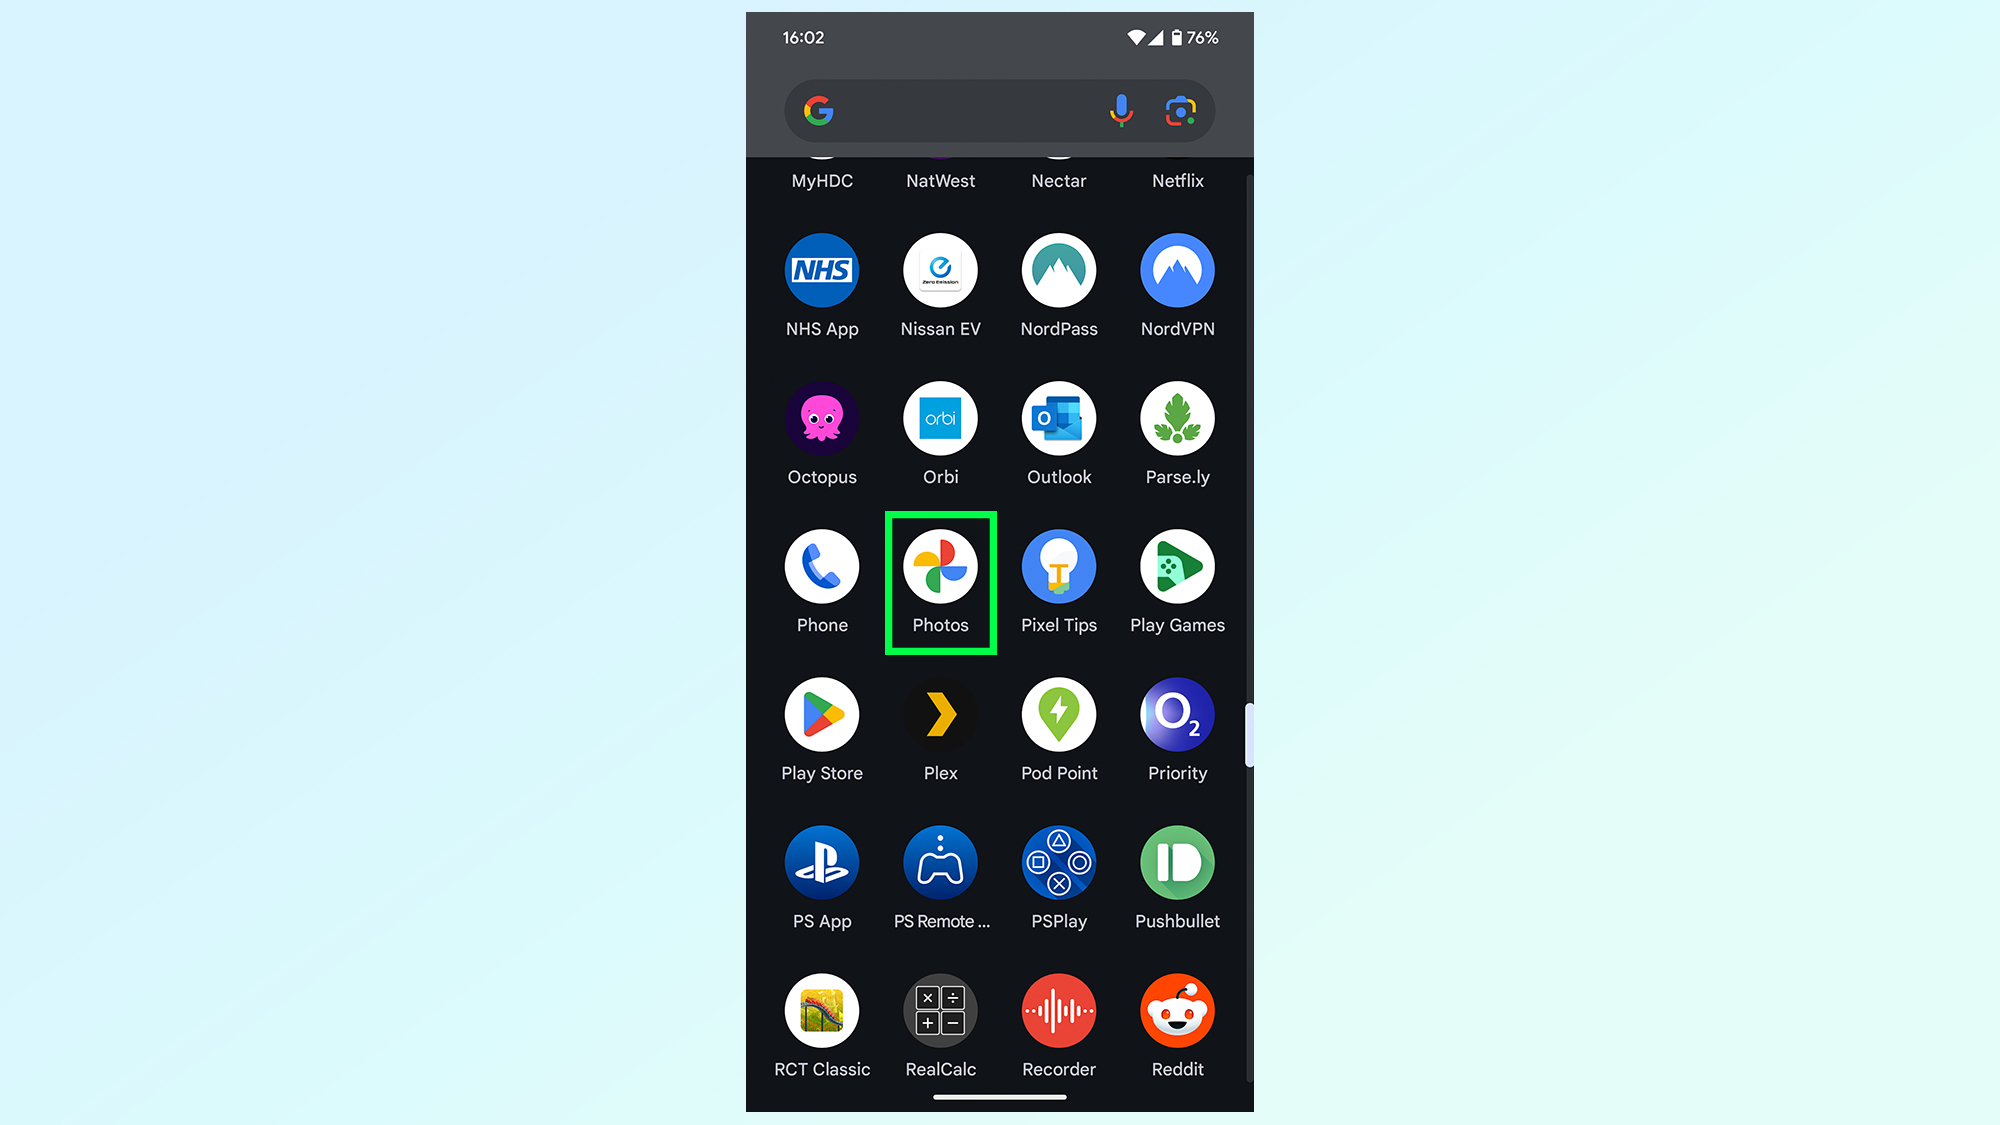
The first thing you’ll need to do is actually open the Google Photos app, which you can likely find in your app drawer.
2. Open the Photos tab
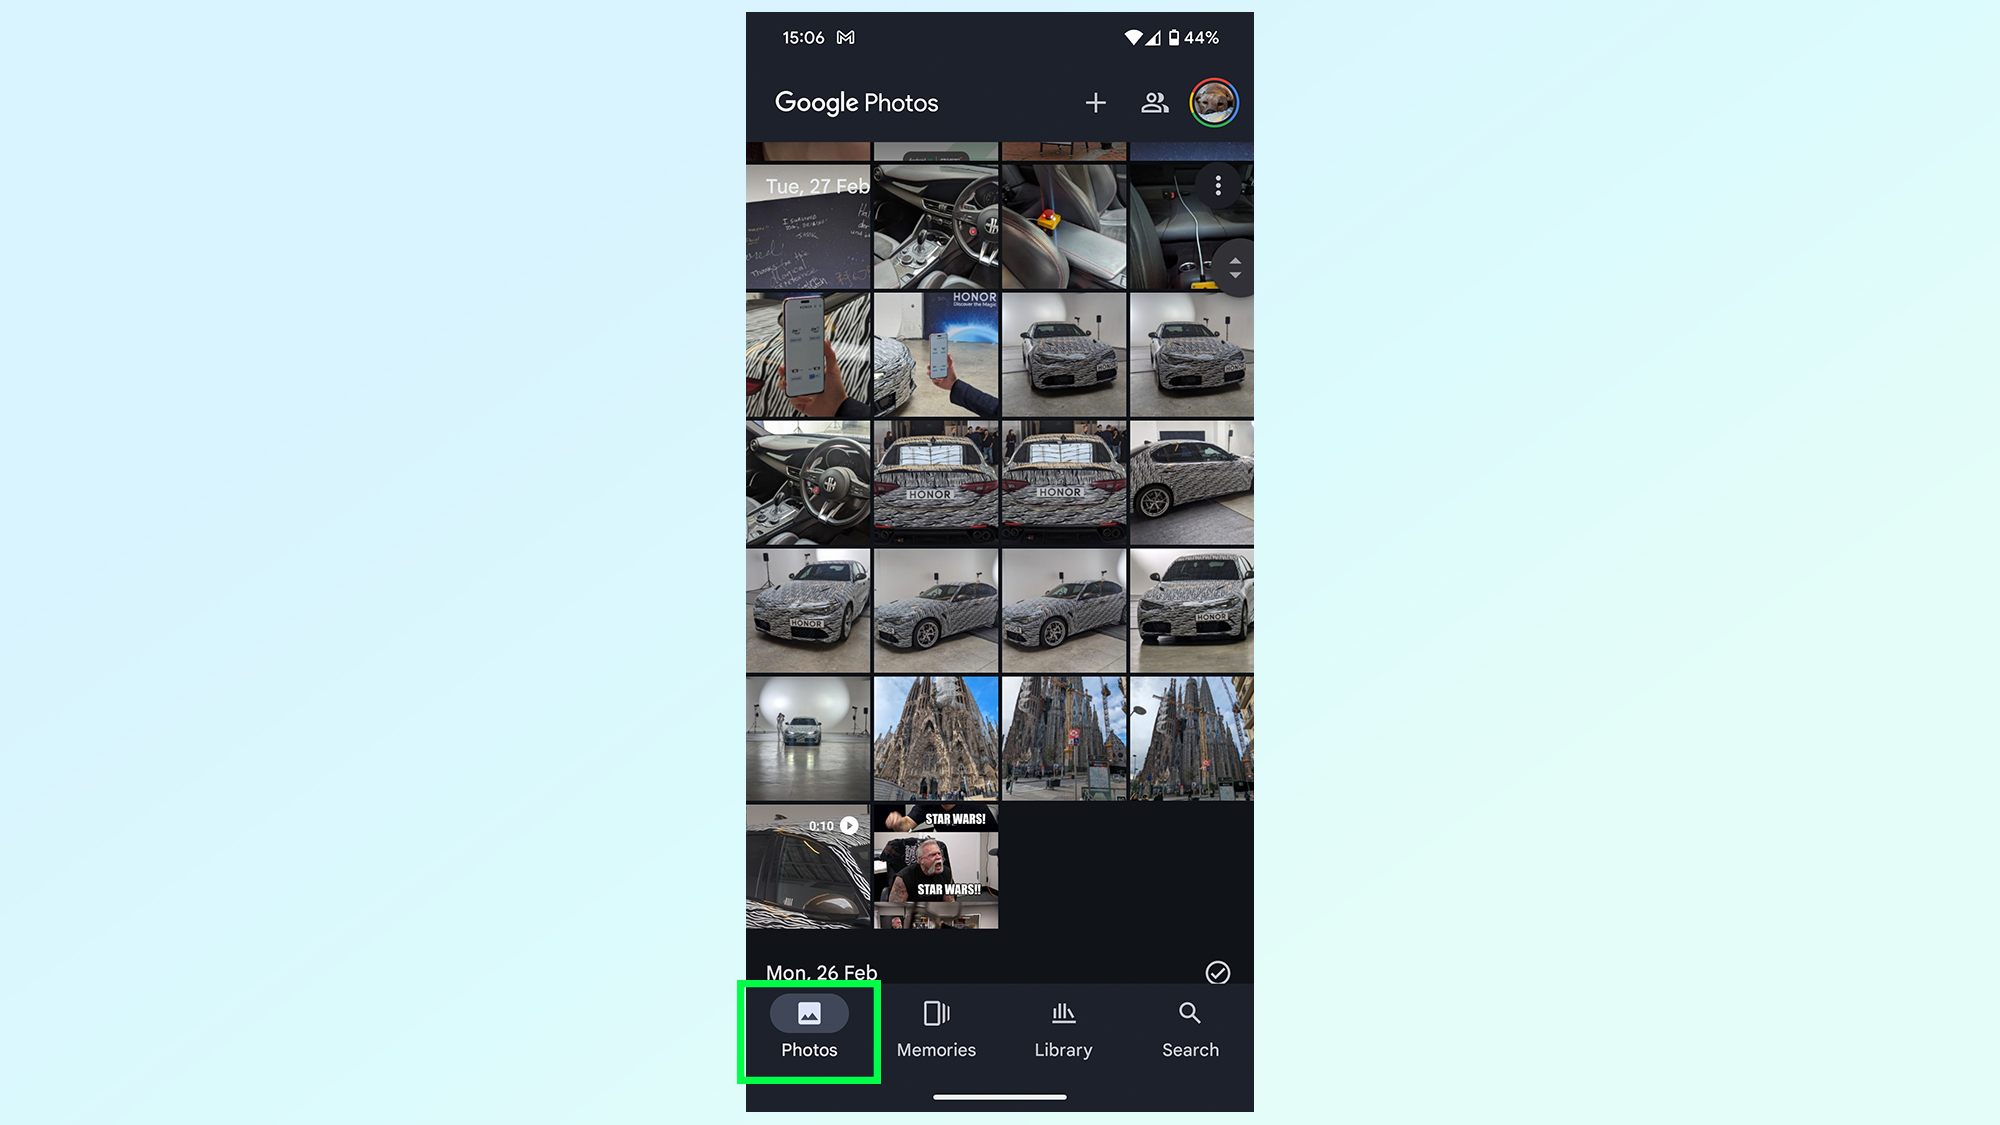
You’ll then need to make sure the Photos tab is opened. If this is your first time opening Google Photos for a while, it’ll likely default to this feed. If not, then you’ll find the icon in the bottom left-hand corner of the screen
3. Tap the 3-dot menu in the top right corner
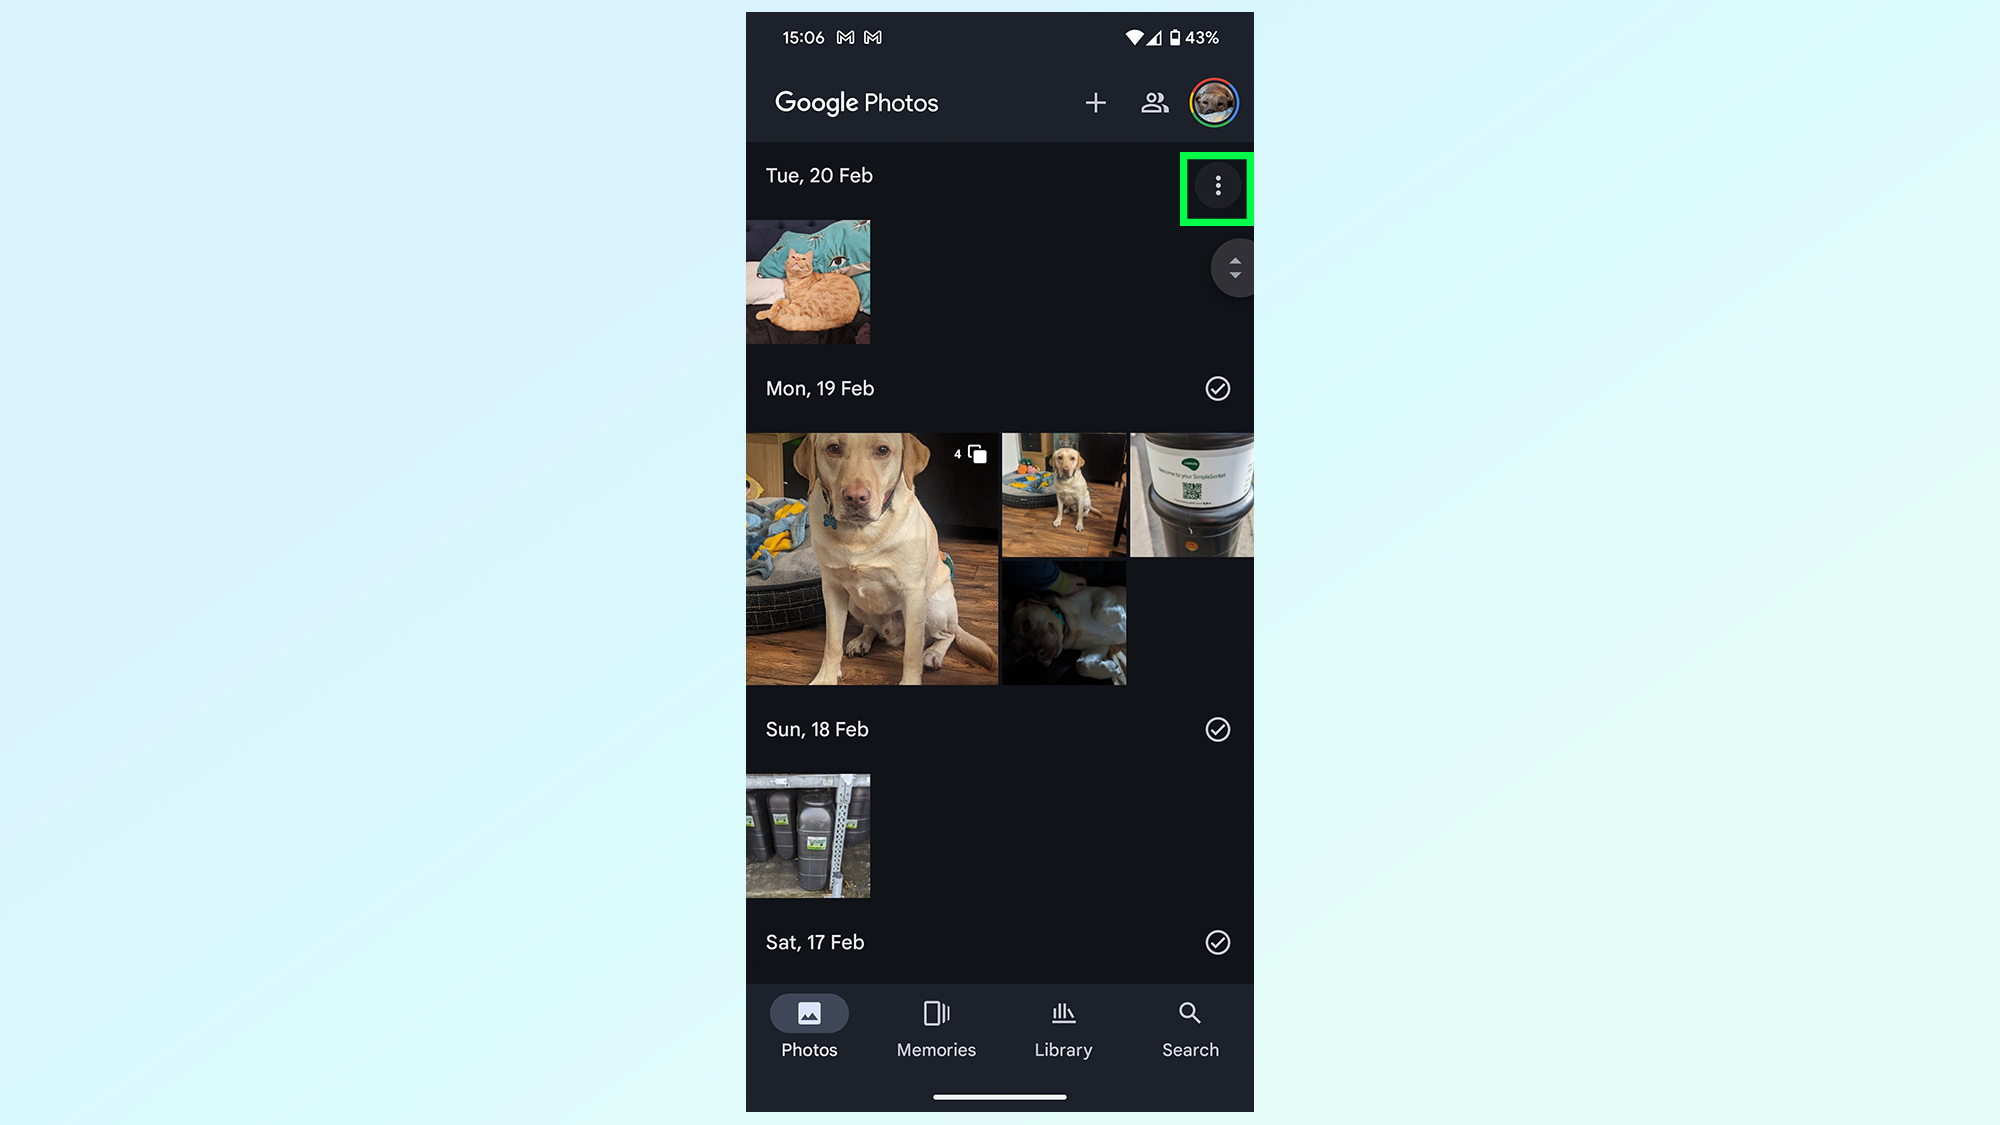
Once you’re in the Photos tab you’ll need to tap the three-dot menu in the top right corner. This icon is fixed and will remain in place no matter how far you scroll down your photo galley
4. Toggle on Stack similar photos
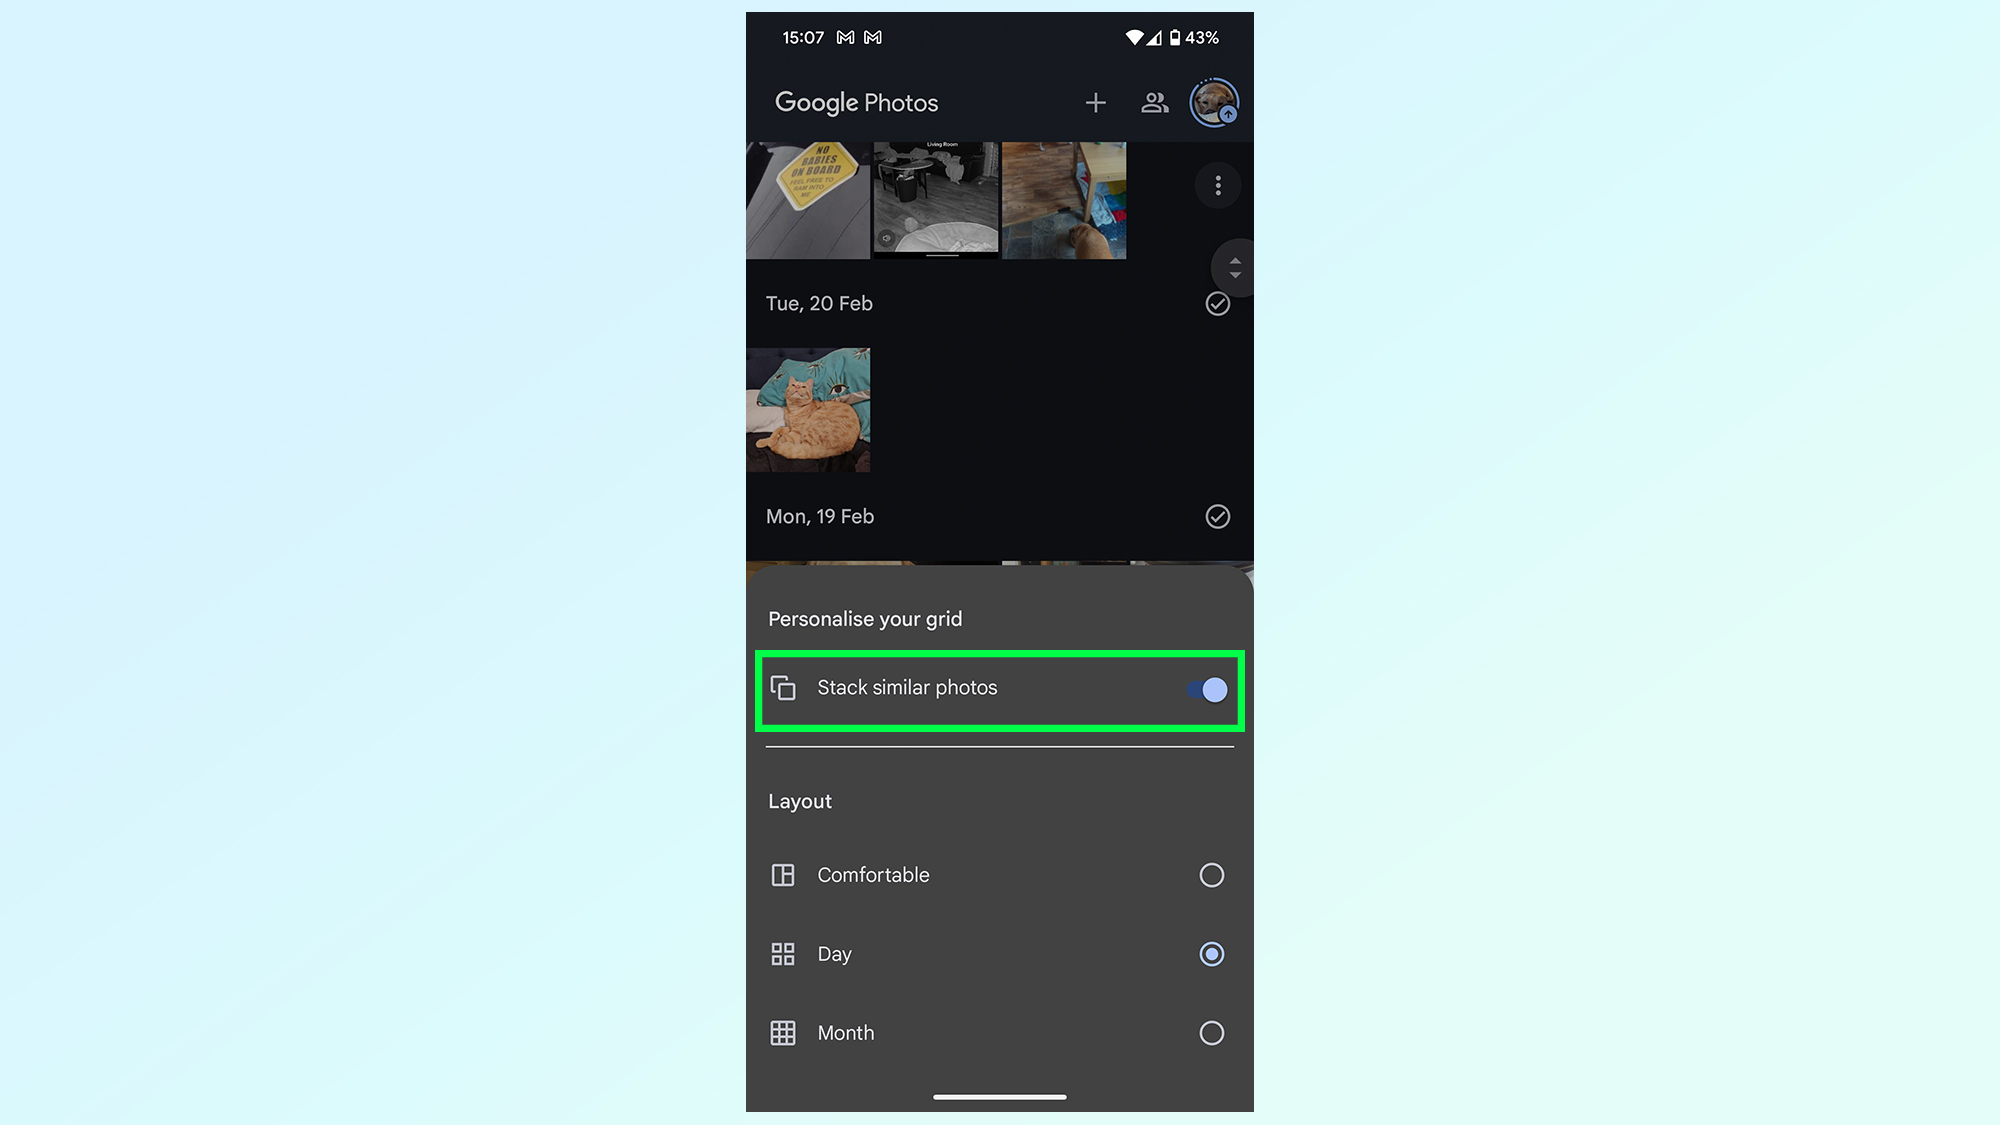
This menu lets you organize the layout of the Photos tab, and the very first option is a toggle to Stack similar photos. Make sure this toggle is switched on.
5. Find your photo stacks

Once active you’ll need to scroll down through your gallery to find the Photo Stacks. Depending on your layout they may not be obvious, but they’re easily identifiable by the double-square icon in the top right corner of the thumbnail
How to turn on Photo Stacks in Google Photos (Method 2)
Here's an alternate way to enable Stacks in Google Photos.
1. Open Google Photos
Open the Google Photos app in your app drawer, or wherever else you might have saved a shortcut.
2. Tap your profile picture then Photos settings

It doesn’t matter what tab you’re on this time, but you will need to be able to see your account profile picture in the top right corner. Tap this, then tap Photos settings at the bottom of the pop-up menu.
3. Tap Preferences then Stack similar photos
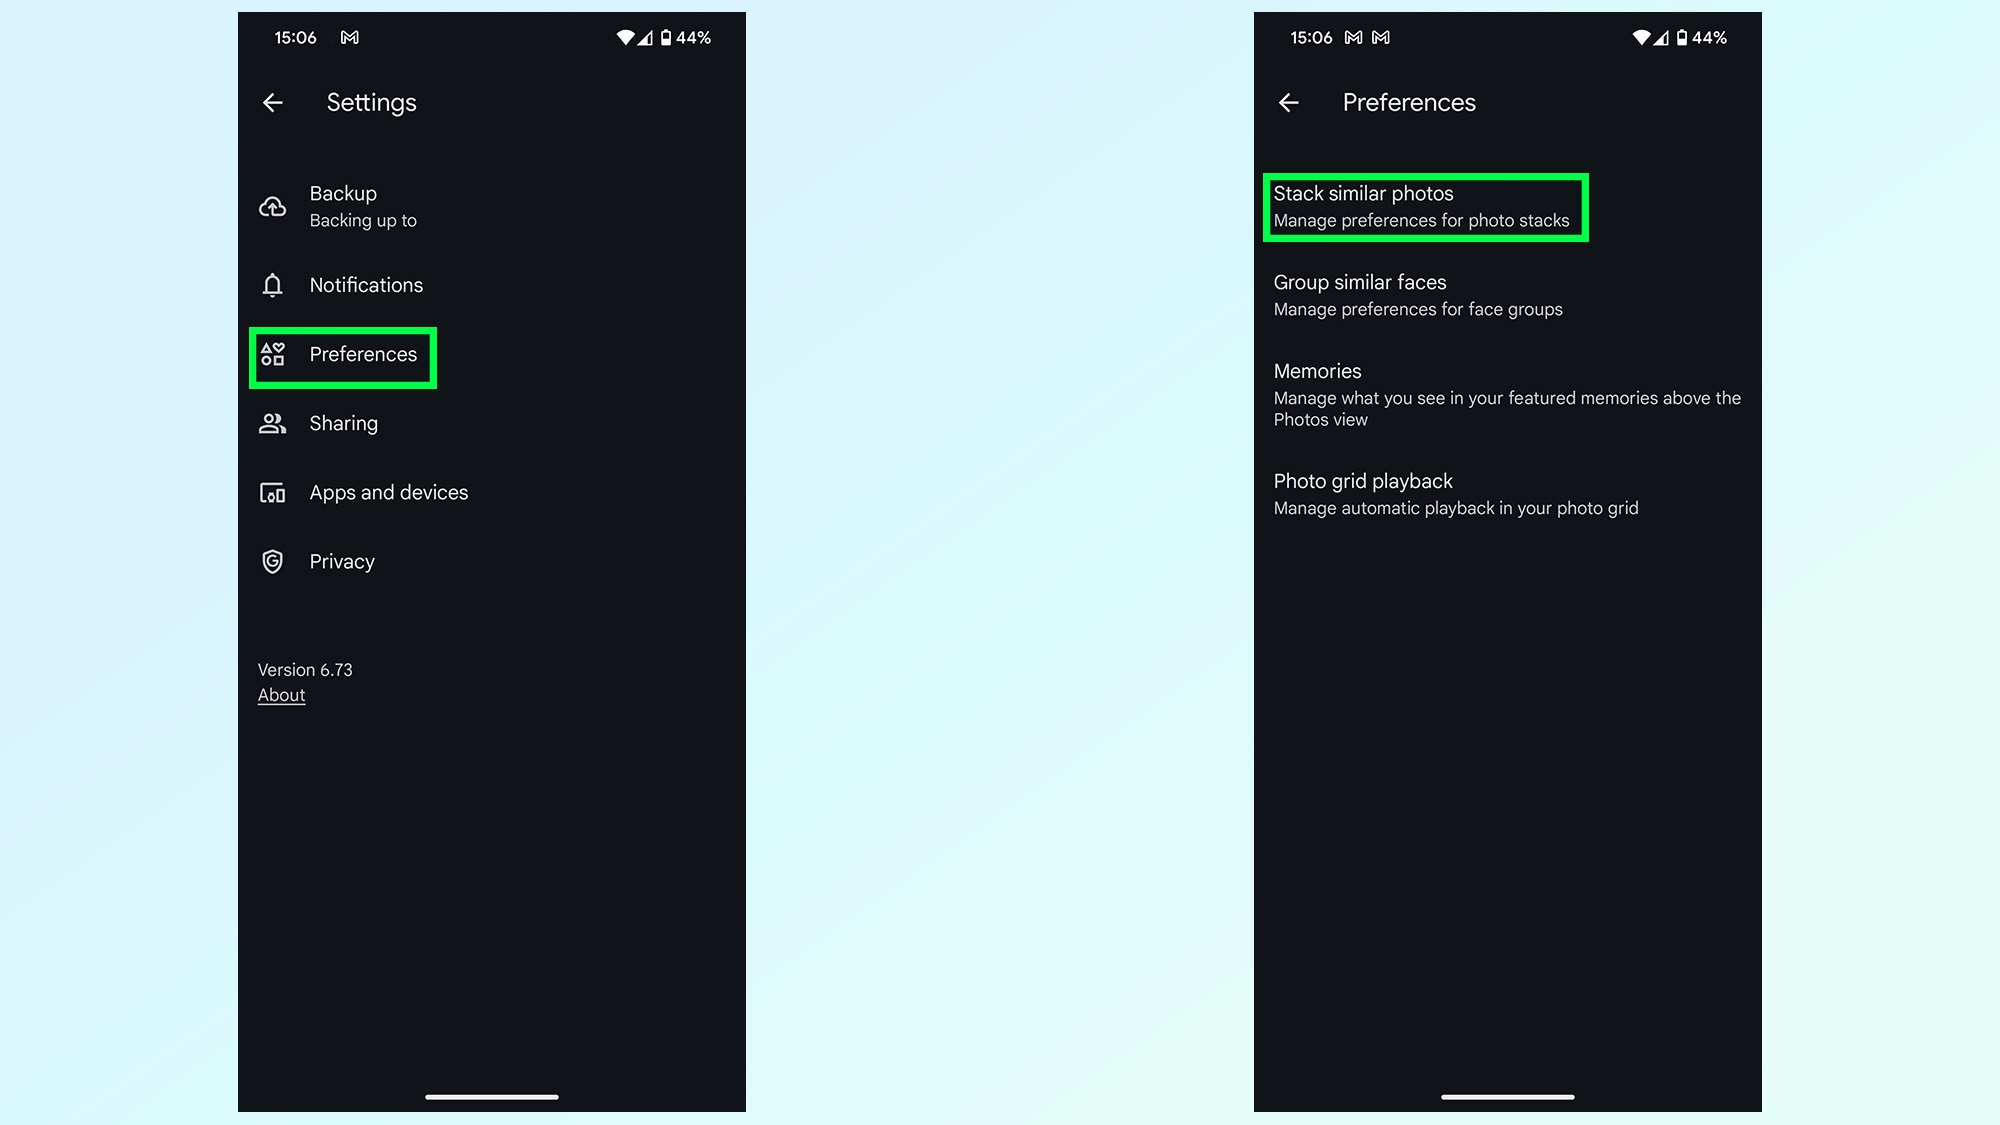
Once in the Photo settings menu you’ll need to tap Preferences in the middle of the screen, and then tap Stack similar photos at the top.
4. Toggle on photo stacking
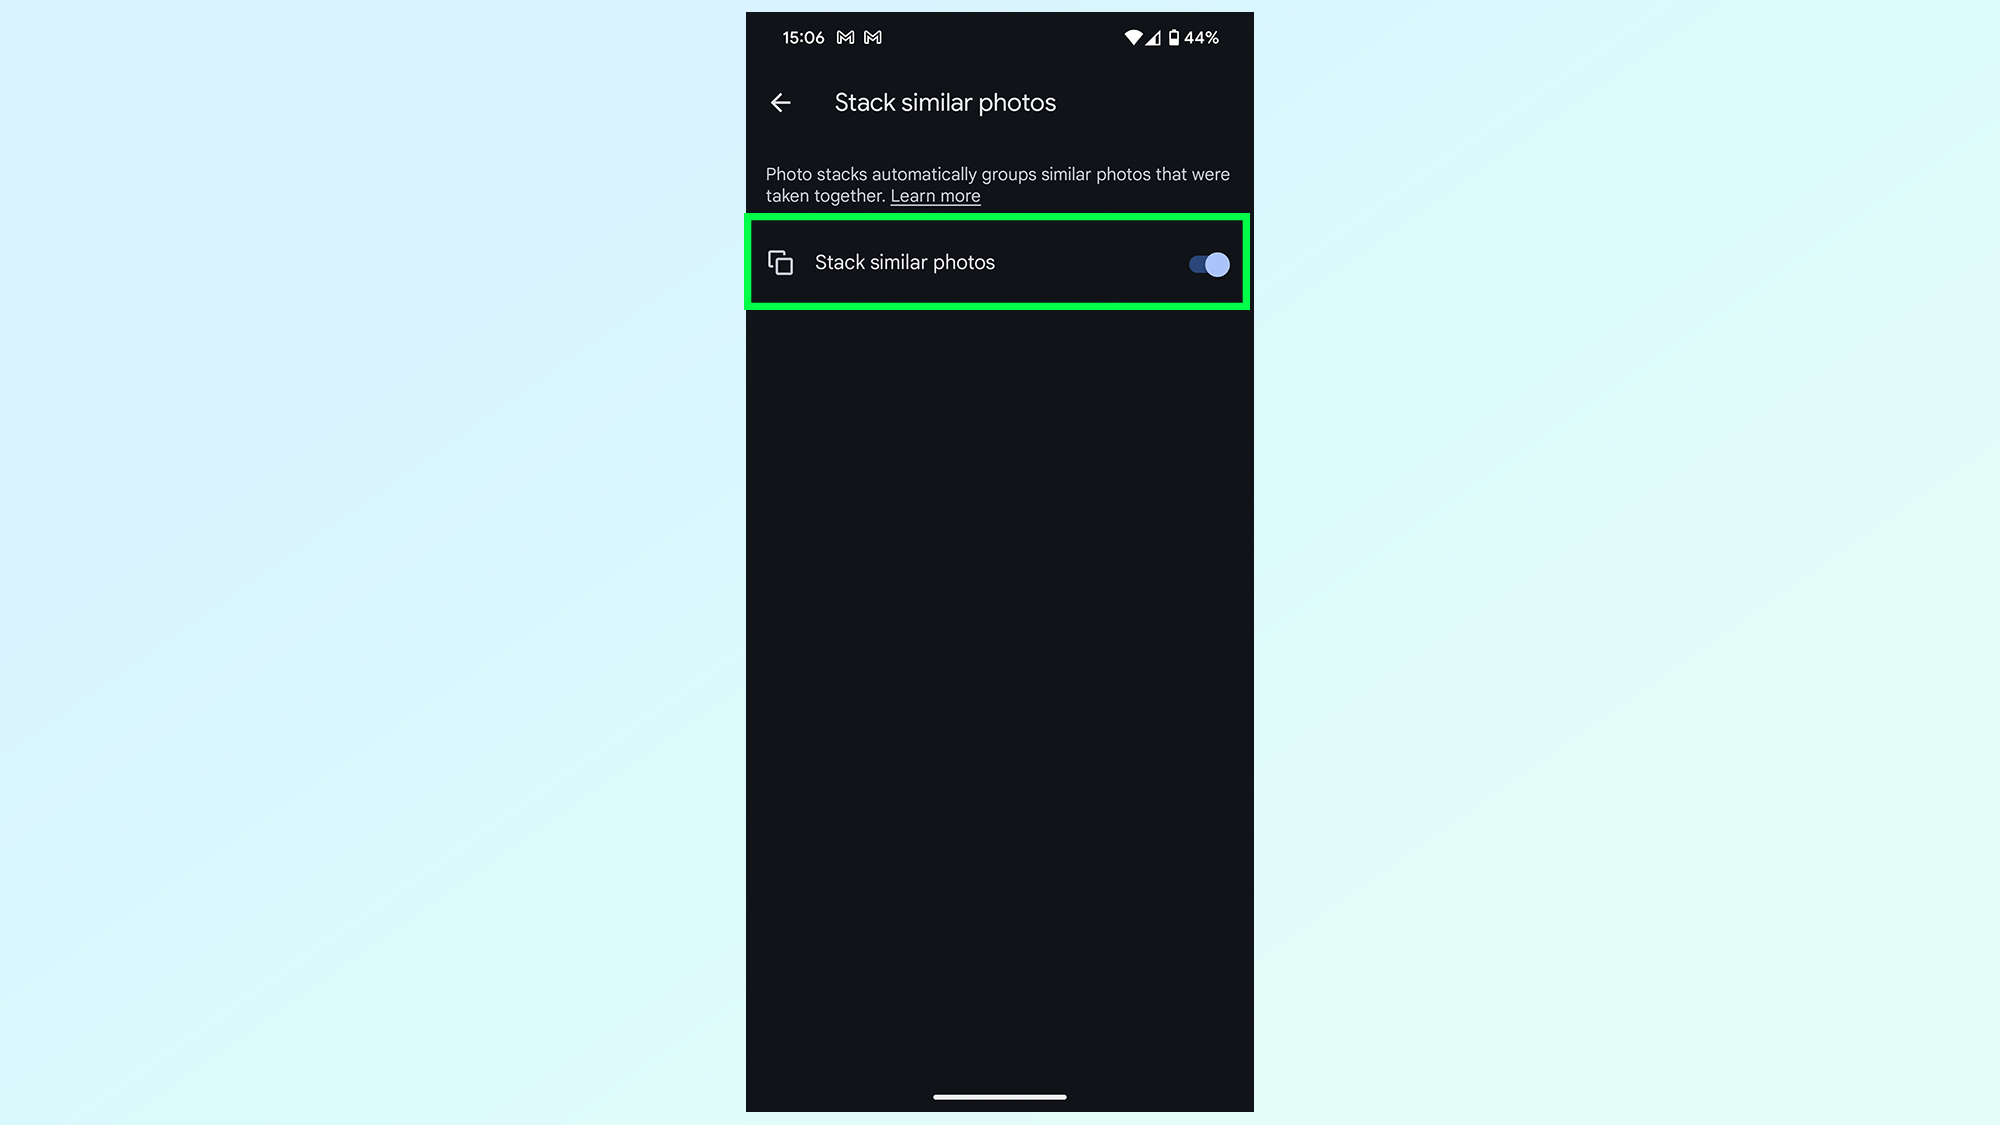
There’s only one option on the next screen, so toggle the Photo stacking option on.
5. Find your photo stacks
Leave all those menus behind and you’ll be able to scroll through the Photos tab to find all the stacked images Google Photos has picked out for you. They’re not that clear, but you can easily identify them with the double-square icon in the top-right corner of the thumbnail.
There you have it, a way to better organize Google Photos, within the bounds Google has currently set out. If you're looking for other tutorials on how to get the most out of your apps, be sure to check out our guides on how to use the Galaxy S24's interpreter mode for real time translation, how to call emergency services silently on iPhones, a way to jerry rig an iOS-style Standby mode on Android, and how to create double exposure photos on iPhones.