Unlike the other AI tools in Adobe Illustrator, Mockup works offline. It doesn’t utilise Firefly, but it is itself a beautifully impressive use of technology (and currently the only one here I use in a professional capacity). It uses AI to place a 2D image in situ on your choice of 3D settings, like a mug, so you can see how your design will work in reality.
In the past, I have relied on 3D renders in Blender to mock up product packaging, however Illustrator makes it possible to achieve similar results in a fraction of the time.
Here I explain how to use this brilliant addition to Illustrator in a step-by-step guide. Read about this and other tools in our Illustrator review, and if you need a different option, see our list of the best graphic design software.
How to use Illustrator's Mockup tool
01. Source image

Source an image. You can download directly into Illustrator from Adobe stock, take from an online image library or use your own image. Drag these onto the Canvas.
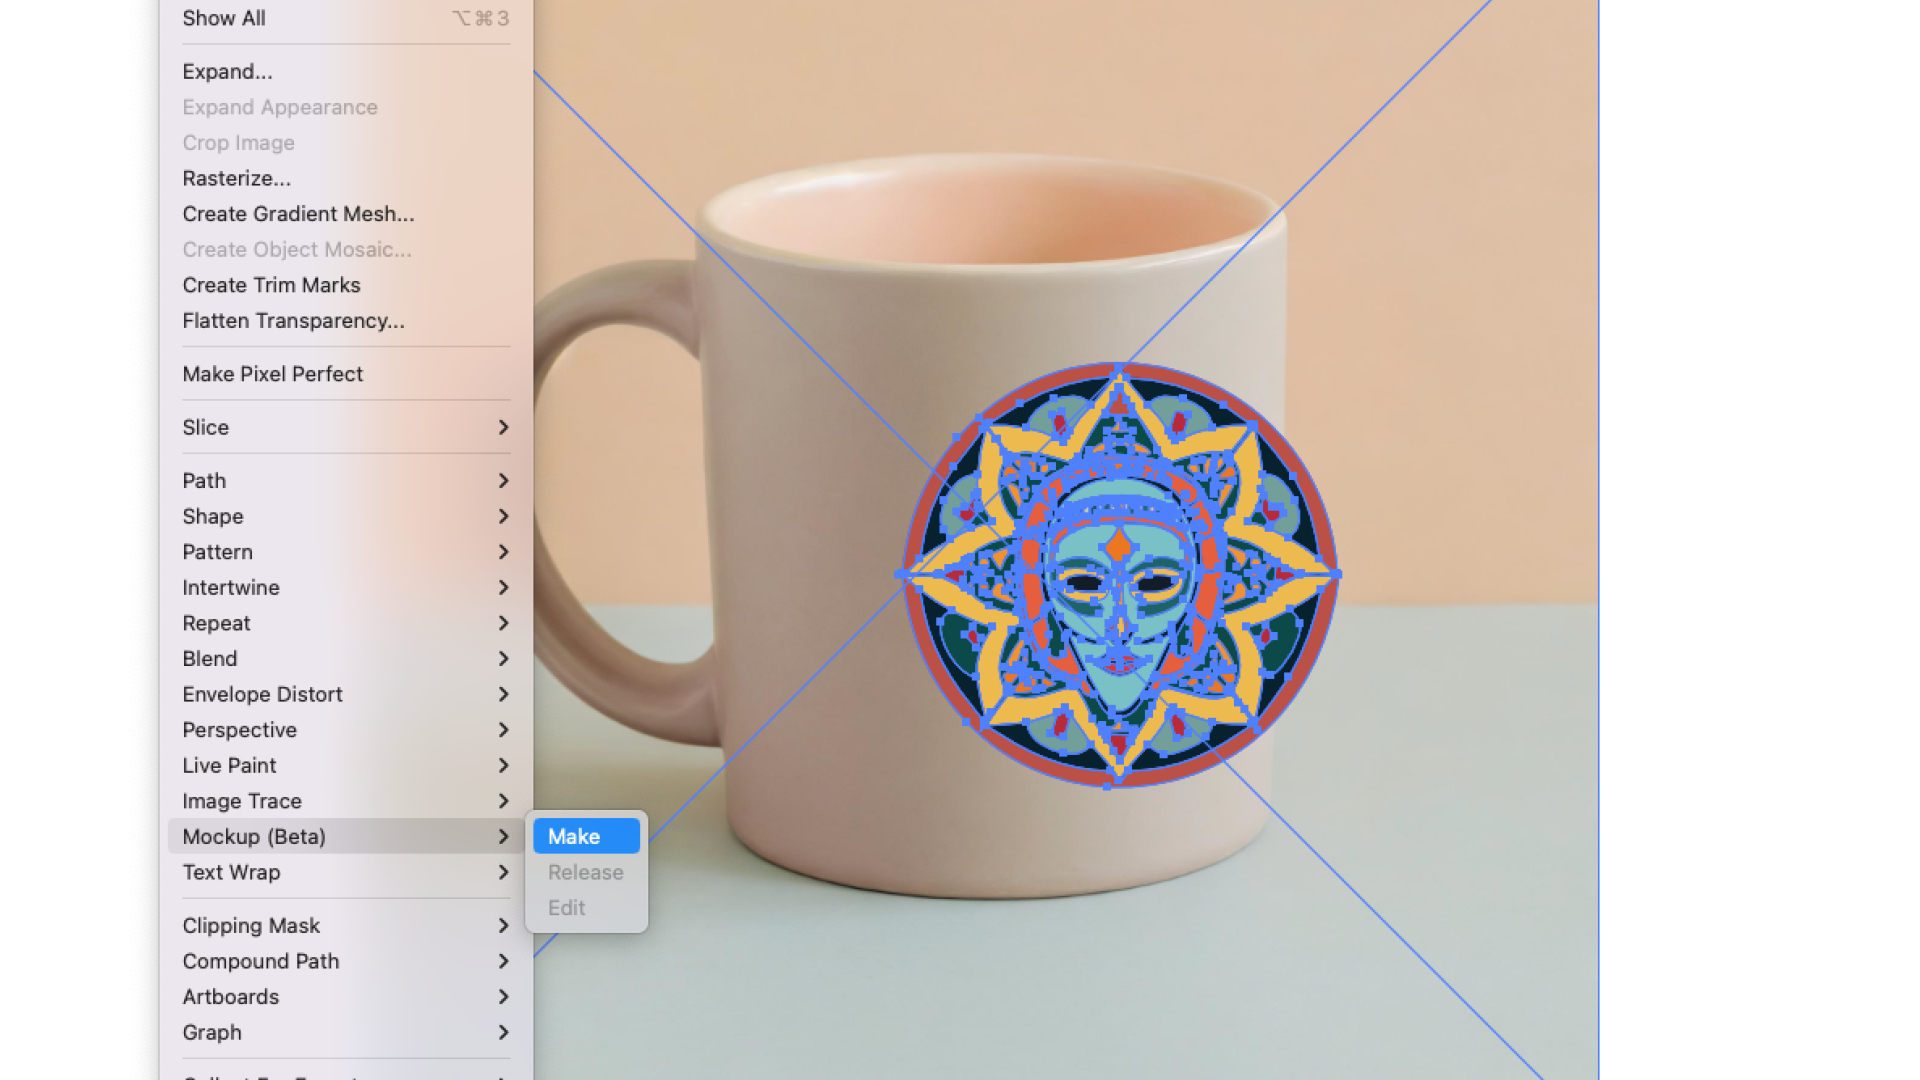
02. Generate Mockup
Select both your graphic and the image. Go to Object > Mockup > Make. It will analyse the image and map the graphic onto the image, taking the contours and curves into account.
03. Position graphic
Move your graphic around the image, until it fits your desired position. For a more realistic look, you can change the blending mode of the graphic to Multiply, so it adopts more of the colour of the image underneath.
For other how-tos, see our list of Illustrator tutorials and if you need them, the Creative Cloud deals around today: