On Chrome, Google apparently forgot to include a screenshot-taking feature like Microsoft Edge, but it's still possible to capture part of the screen or the entire page using different tools.
For example, you can use the Snipping Tool to capture areas of a page. The Developers tool gives you a more advanced tool to take screenshots from an area or the entire area of the page. And then, you can choose from countless plugins that can add capturing capabilities to the browser.
In this how-to guide, I will explain three ways you can easily take screenshots using Google Chrome on Windows 11 and 10.
How to take screenshots on Google Chrome
Although Chrome doesn't include a feature to take screenshots, you can still use the Snipping Tool on Windows 11, Chrome's Developer tools, and (my choice) the Screenshot Master Full Page Capture plugin.
Snipping Tool
If you have a device running Windows 11, you can use the Snipping Tool to capture parts of the screen.
To use the Snipping Tool to take screenshots on Microsoft Edge, use these steps:
- Open Google Chrome.
- Open the page showing the content to capture.
- Use the "Windows key + Shift + S" keyboard shortcut.
- Click the Snip button.
- Select the "Window" option.
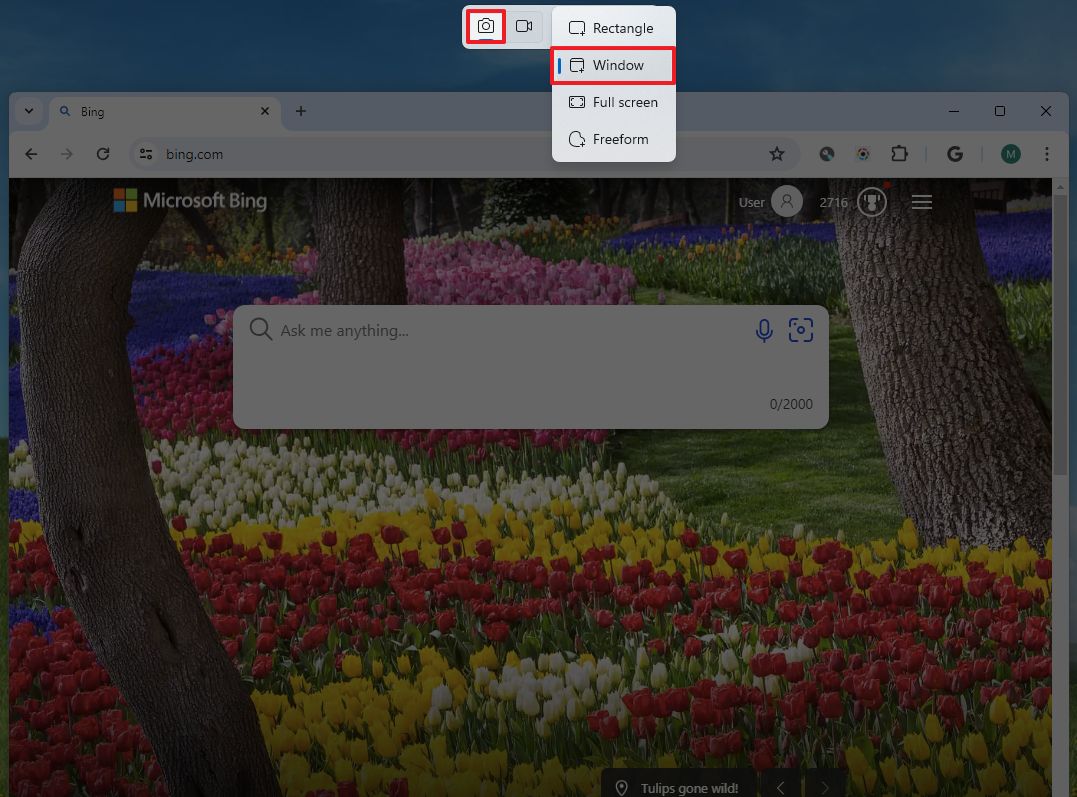
- Select the Chrome window to create the capture.
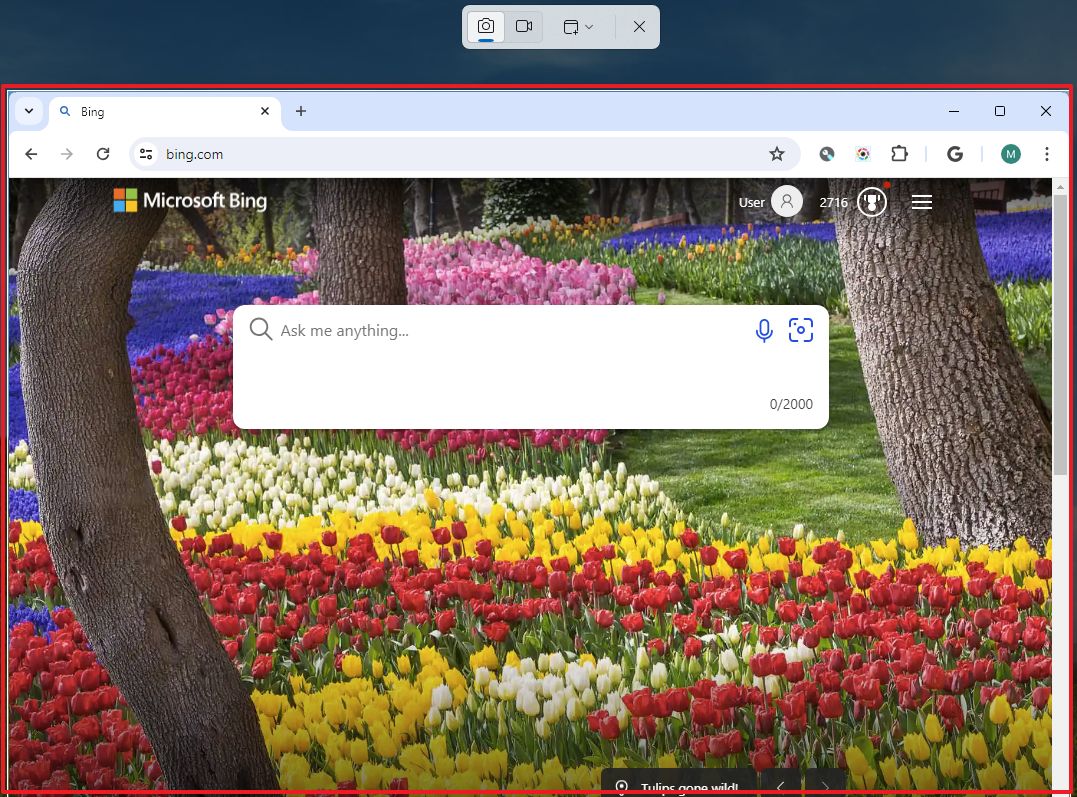
- Click on the Snipping Tool notification to open the capture on the app.
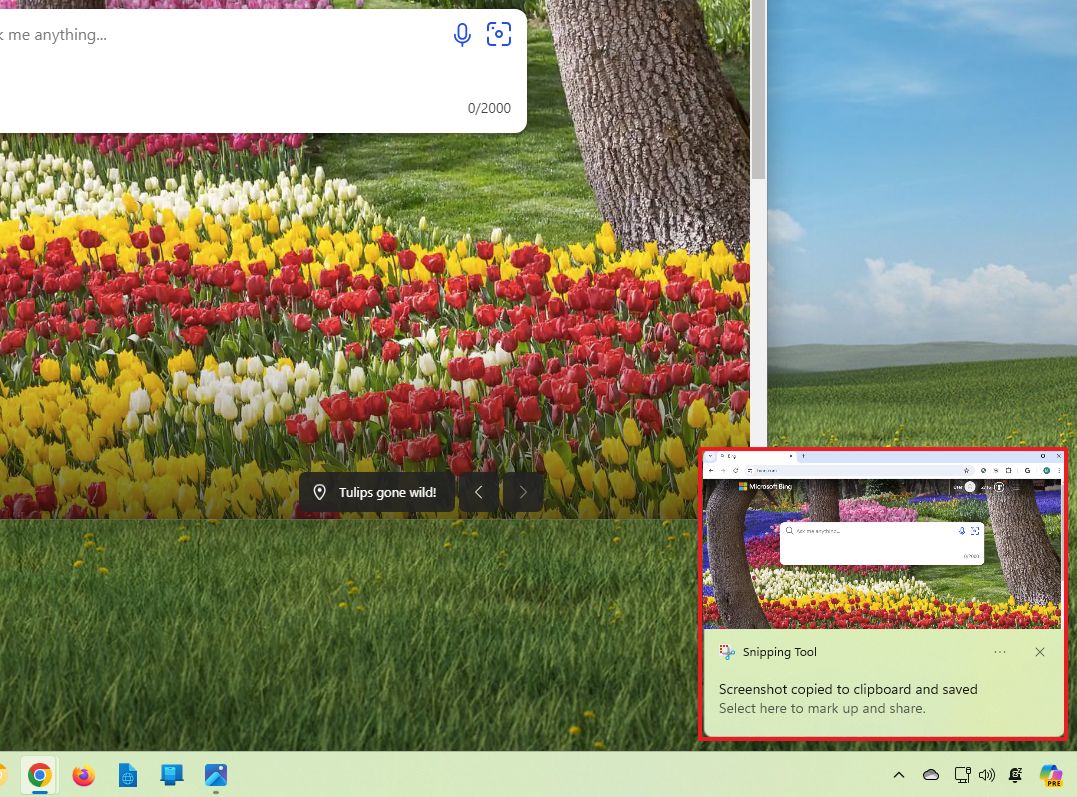
- Quick tip: If you don't see the notification, you can access it from the "Notifications" panel using the "Windows key + N" keyboard shortcut.
Once you complete the steps, you can edit the image and save the capture as an image file.
You can also check my previous guide with all the different ways you can use the Snipping Tool app to take screenshots on Windows 11.
Chrome DevTools
If you're willing to follow some extra steps, the browser DevTools includes an odd approach to taking screenshots. This feature is meant for developers, but anyone can use it.
To screen capture with DevTools, use these steps:
- Open Google Chrome.
- Open the page showing the content to capture.
- Press the F12 key or right-click the page and choose the Inspect option.
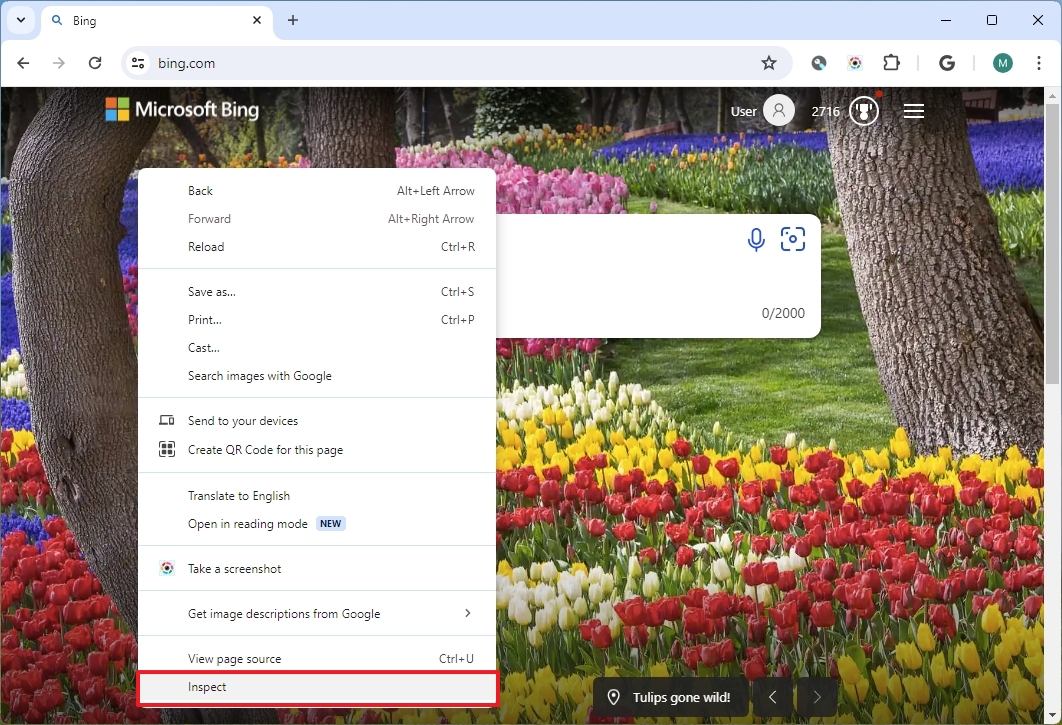
- Click the "Customize and control DevTools" (three dots) menu and choose the Run command option.
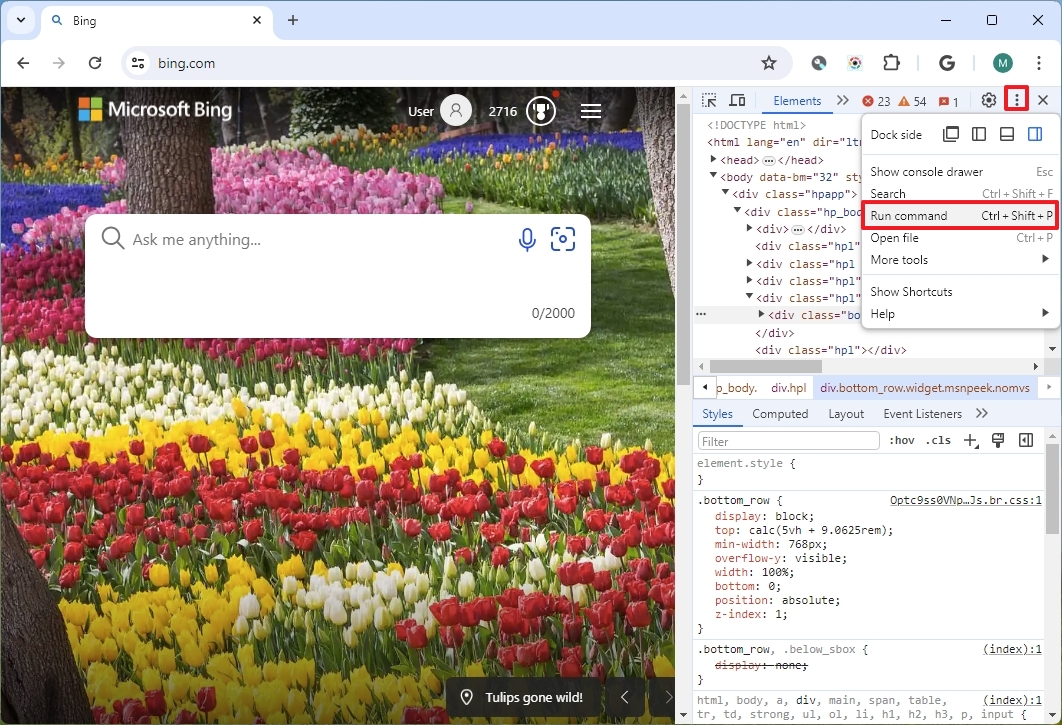
- Type "screenshot" in the Run command.

- Choose one of the options, for example, "Capture full size screenshot" option.
Once you complete the steps, the screenshot of the entire page will be saved on the computer as a ".png" file.
It's important to note that this feature only includes the basic functionalities for screen capturing. It doesn't include markup or other type of tools. Once you select the area or choose screenshot mode, the image will be saved automatically on the device.
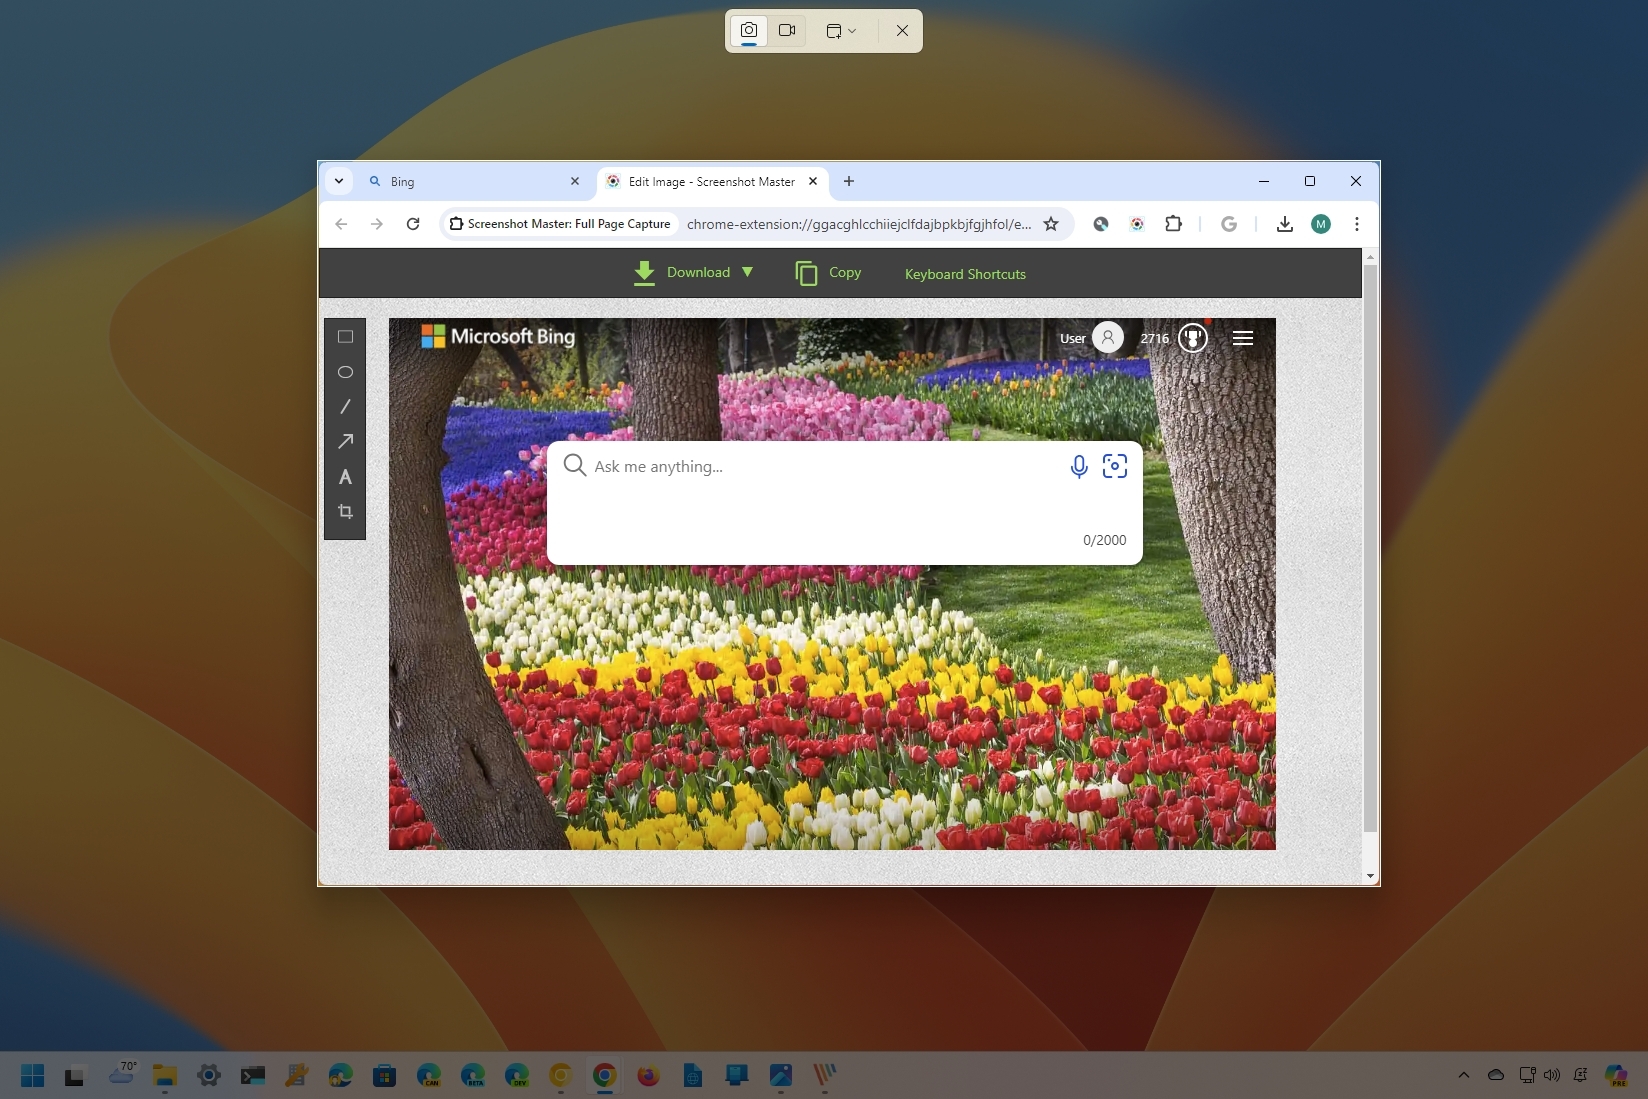
Chrome Extension
Alternatively, if you need a tool that offers an easier-to-use experience and editing tools with the option to screen capture the entire page, you can choose from many plugins from the Chrome Web Store.
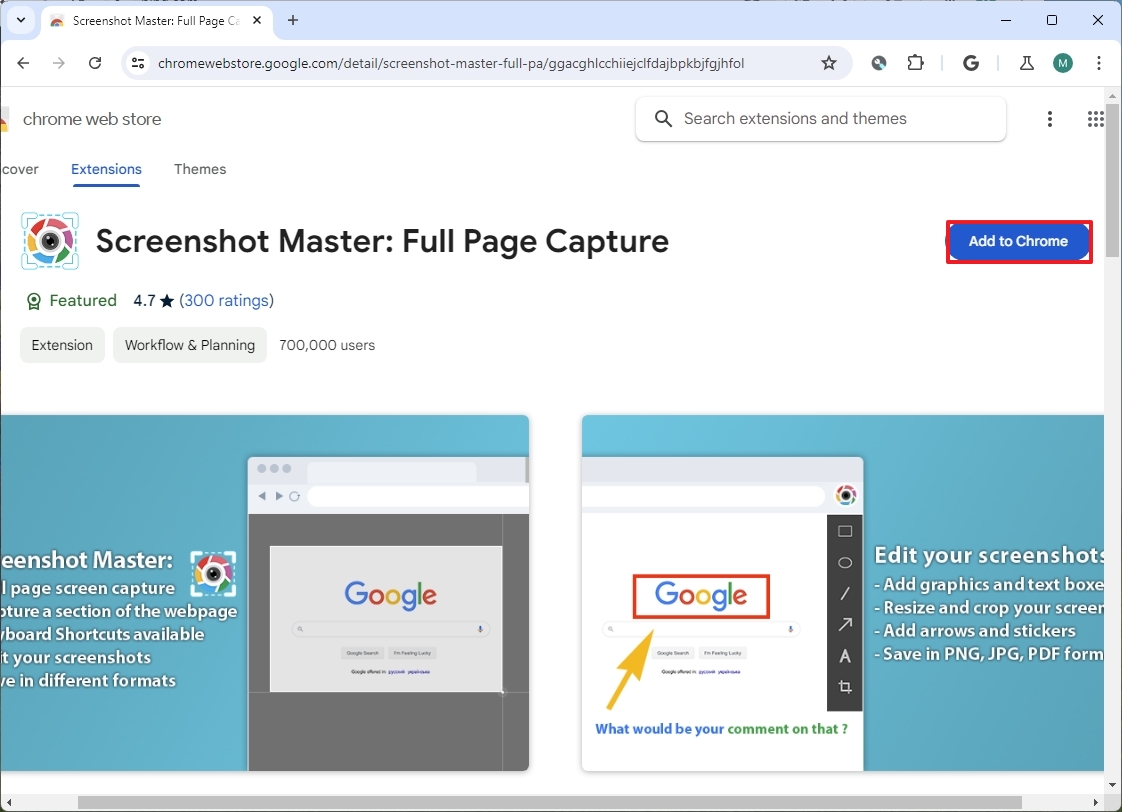
On a side note, the Chrome Web Store includes many extensions. I have tried many of them, and the only one that provided me with the feature I think everyone needs to take screenshots in Chrome was the "Screenshot Master Full Page Capture."
To use an extension to take screenshots on Chrome, use these steps:
- Open Google Chrome.
- Open the Chrome Web Store.
- Search the screen capture plugin. For example, Screenshot Master.
- Click the "Add to Chrome" button.
- Click the Add extension button.
- Quick tip: You can access the extension faster by going to the "Extensions" menu and clicking the pin button.
- Open the page showing the content to capture.
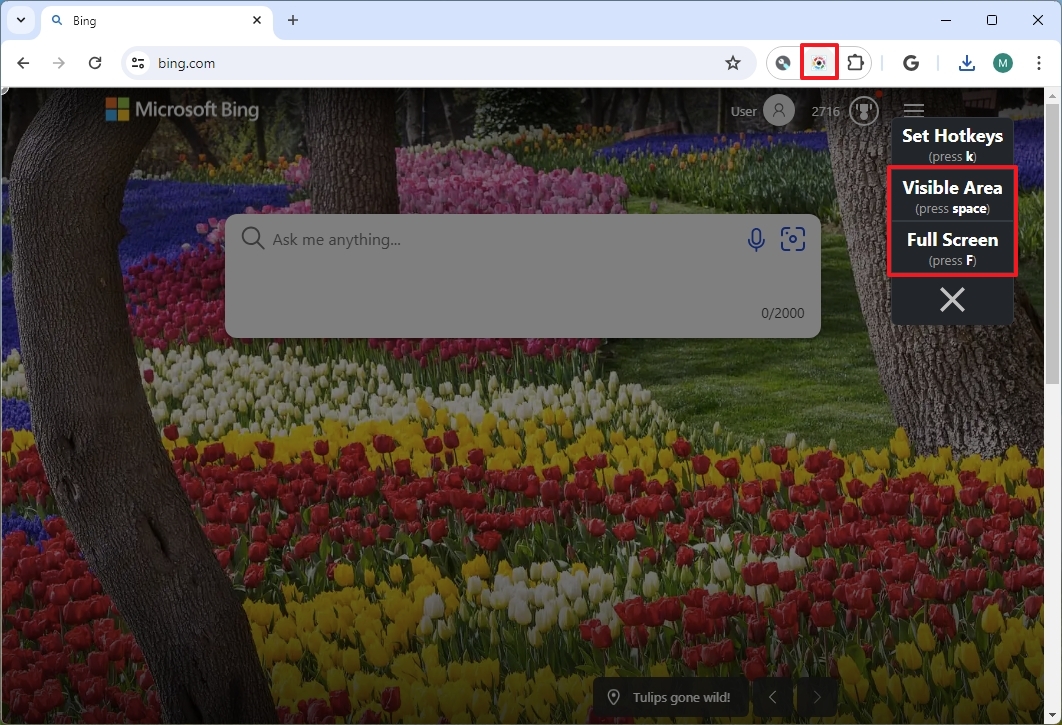
- Click the extension button.
- (Option 1) Press the space bar key to capture the viewable area of the page.
- (Option 2) Press the "F" key to capture the entirety of the page.
- (Option 4) Select the mouse for the area to capture.
- (Optional) Use the available tools to mark up the image with shapes and text.
- Click the Download button to save the image on your computer.
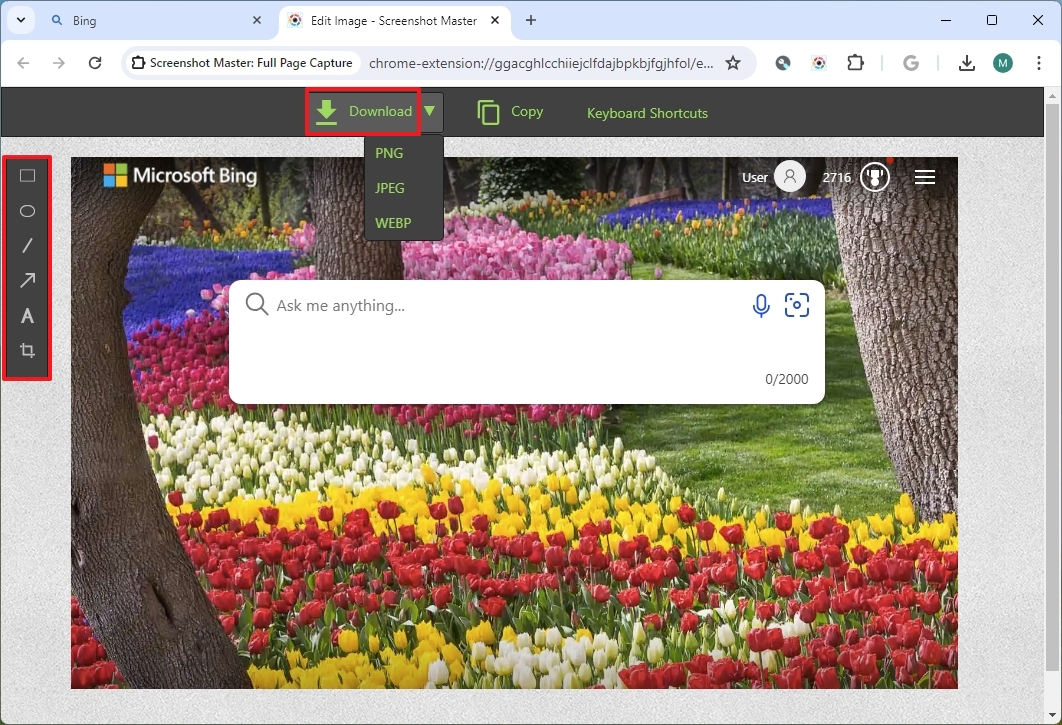
- Quick tip: You can open the download menu to choose the file extension, including ".jpg," ".png," or "Webp."
After you complete the steps, you will end up with a captured image file.
More resources
For more helpful articles, coverage, and answers to common questions about Windows 10 and Windows 11, visit the following resources: