Taking your photography to the next level might seem daunting at first, but arm yourself with some basic knowledge and you can take your snaps to the next level sooner than you might think. To push your creativity past the confines of a smartphone or point-and-shoot camera, invest in a digital single-lens reflex (DSLR) camera, such as the Canon EOS 100D: few cameras on the market will give you the creative control that you get with a DSLR.
Lesson one: master the settings
With any DSLR there are three main settings that you need to get to grips with: the shutter speed, the aperture and the ISO. Look to your camera's instruction booklet to find where these are located. These three elements are all interconnected on a camera; changing one will affect the others. Once you understand this basic principle everything else starts to make sense.
• Shutter speed: The speed that the shutter opens and closes dictates how much light is let in to the camera. The higher the second number (eg 1/60 compared to 1/30), the faster the shutter: less light is let in and action is frozen. A slow shutter speed lets more light in, meaning you can create deliberately blurred images or shoot when there's less daylight. However, the photograph can be affected by "camera shake": any slight movement is transferred on to the image, meaning it can end up blurred. That's when a tripod (or a flat, stable surface) comes in handy – but more of that next lesson.
• Aperture: The size of the hole through which the light enters the camera. The higher the number, or "f-stop", the smaller the hole and the less light that can enter. You use aperture creatively to affect how much of the image is in focus – this is known as the "depth of field".
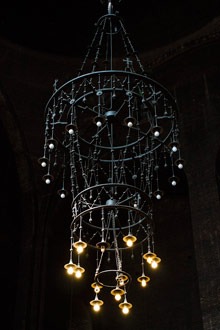
Greg Funnell for the Guardian
• ISO: The sensitivity of the sensor. In the days of film you chose this by the "speed" of film you used or how you chose to develop your film in the lab: now you alter it on the camera itself. The more sensitive (the higher the number) the less light is needed – therefore higher ISO's are better for pictures indoors or shots taken at night.
The aim here is to get all the settings correctly balanced so that your image gets the correct exposure – ie it's not too dark or too light. If you shoot in manual (M) mode, you make all these adjustments yourself and can truly tailor what the photograph looks like. There is, however, a simpler way to adjust the settings, and I recommend beginners start by experimenting with this.
Simplifying the settings
You can set your DSLR so that the camera takes care of some of the calculations for you. Put it in AUTO mode and it'll do everything – great for when you do want to point and shoot, but it won't give you much creative control. For now we will look at the TV (time value or shutter priority mode) and AV (aperture value or aperture priority) settings on your camera.
Try this: play with shutter speed
Put the camera in TV mode with AUTO ISO and experiment with different shutter ratings. Try shooting at 1/15th of second compared to 1/250th. You'll quickly notice that it's best not to go below 1/60th of a second as the images are likely to come out blurred. Later in the series we'll discuss why tripods are essential for night-time photography, but for now remember to keep the shutter rating at 1/60th of a second when holding the camera in your hand.
Try this: play with depth of field

Take a photo of a friend using a low f-stop and a high f-stop. You'll notice that the first way is best, as the background is kept out of focus (also known as a short depth of field), drawing attention to your subject. It's why it's great for portraits. We'll explore this in more detail later in the series.
Now take a shot of a landscape, using a low f-stop and a high f-stop. Here, you'll soon realise that the latter is best: it ensures the foreground and background are in focus – a deep depth of field – and the sharpness is kept throughout the image. Experiment with different f-stops and see what effects they create.
Lesson two: tackle composition
Along with getting the hang of technical elements, composition is another vital part of photography basics. You can, of course, digitally crop it later on, but there's nothing quite like getting it right without the help of a computer. The 20th-century French photographer Henri Cartier-Bresson was the first to coin the phrase the "decisive moment", the point where all elements of the composition come together to make the photograph. It's especially relevant for images that involve people or moving elements – in street photography for example. With time and practice, you'll learn which compositions work best in certain situations.
When deciding the composition of a photo, remember one thing: the rule of thirds. Look through the viewfinder and see what's in front of you in terms of thirds: three vertically, three horizontally. Rather positioning your subject – say, a friend on a beach – smack bang in the middle of the picture, position them one third from the left or right, or one third from the top of bottom. It's a simple technique that gives an instantly more professional result.
This week's assignment
Keeping these technical lessons in mind, your first challenge is to photograph something which is familiar to you, perhaps a local landmark or a family member. Think about composition, framing and depth of field and see if you can use these to show it from a new, interesting way.