
Changing your acoustic guitar strings is such a treat. You’ll hear new definition from your guitar and it’ll feel and play better too. But how do you know when it’s time for new strings? And if you’ve never done it before, where should you start and what tools do you need?
In this article I will show you step-by-step exactly how to restring your acoustic guitar. I've restrung hundreds of guitars in my time - both my own and those of clients - and so I know from first-hand experience that with some time, patience and a little practice, changing your acoustic strings will become second nature.
For this guide I'm going to show you my process for fitting new strings to an acoustic guitar with bridge pins. I've also compiled guides covering how to restring an electric guitar and how to restring a classical guitar for Guitar World.
Why change your acoustic guitar strings?
So, why would you want to replace your strings? Old guitar strings reach a point where they no longer perform as they first did. For starters, over time they become corroded with sweat and other dirt, which not only changes the color of the strings but also makes them sound duller. Worn out strings can also become deformed, most obviously on wound strings where they can get dented where they press into the frets. This makes them more easily prone to breakage.
The crud that builds up on old strings can even make them play out of tune. When the mass of a string changes it does not intonate as it should, meaning the higher up the fretboard you play, the more out of tune it will be.
Leaving old strings on for too long can also pollute your guitar case; particularly the furry types. If the case gets dirty then even your new strings can become contaminated with old dirt. Yuck!
So, in a nutshell, regularly changing strings will keep the grime at bay and ensure your guitar sounds fuller, brighter and fresher.
What you’ll need
- Fresh strings
- String winder
- Wire cutters
- Pliers
- Tuner
To restring your acoustic guitar you won’t need too much gear to get the job done. You’ll need a fresh set of strings (duh!), a string winder to help save you some time, some sturdy wire cutters, pliers and a guitar tuner. It’s worth noting that some companies such as D’Addario offer an all-in-one tool that includes a winder, bridge pin puller and string cutter to make the job even easier.
While restringing your acoustic guitar is a pretty basic job, string ends can be sharp, so take it slow and steady and watch your hands. Younger readers should enlist the help of a grown-up for this job.
How to restring an acoustic guitar: Step-by-step
Ok, let's update the strings on your acoustic guitar, using my tried, tested and refined process.
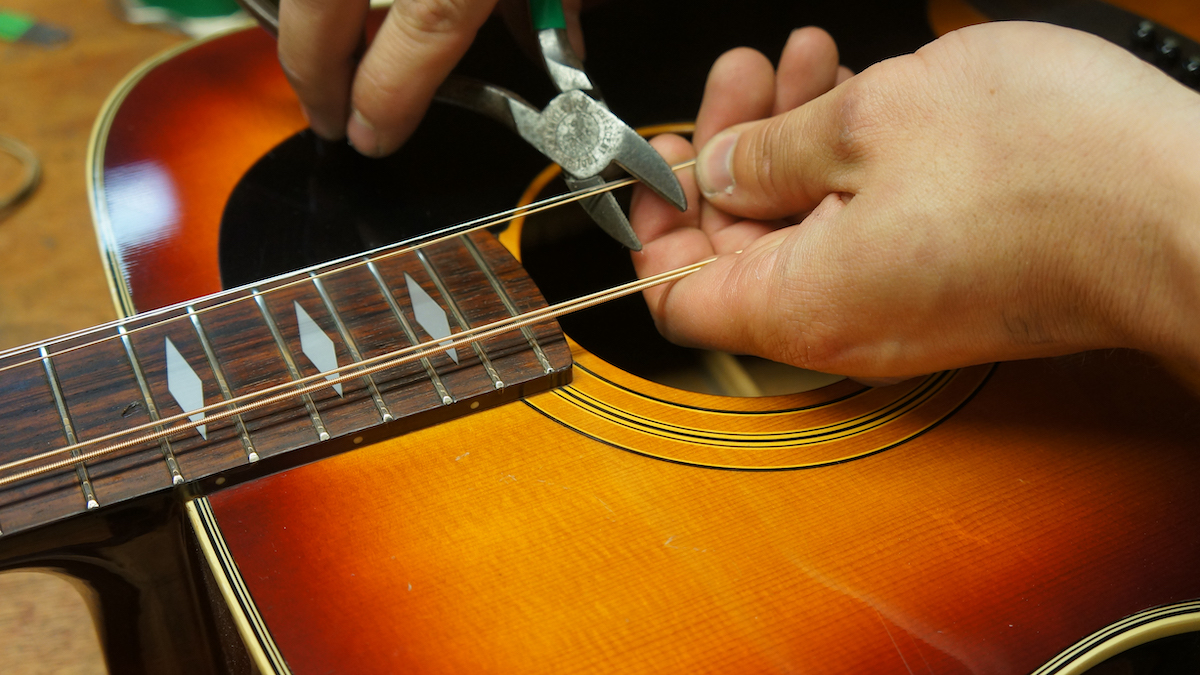
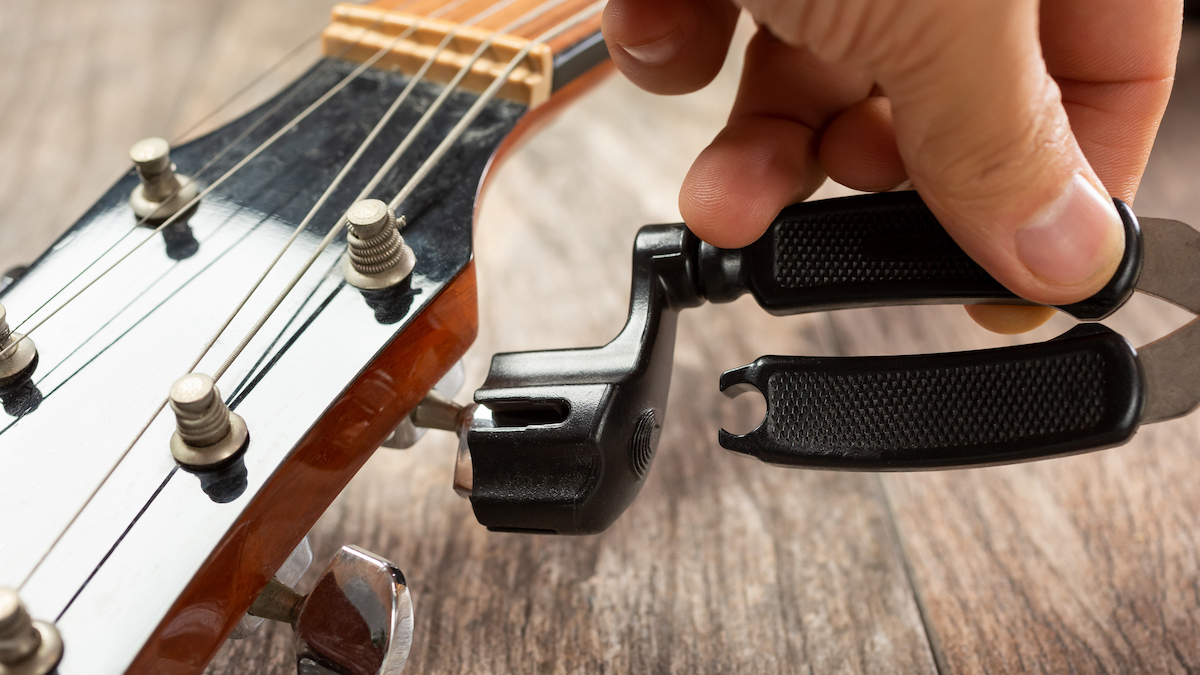
1. Slacken off and cut the old strings
My Yamaha acoustic is long overdue some new strings, so this guitar will be the subject of this tutorial. To begin with, slacken off the old strings using the machine heads. You can speed up this process with a manual string winder or even a motorized one if you’re really impatient. Once they’re loose you can cut the strings with a pair of quality wire cutters – scissors will not hack it, unless you’re happy to blunt them.
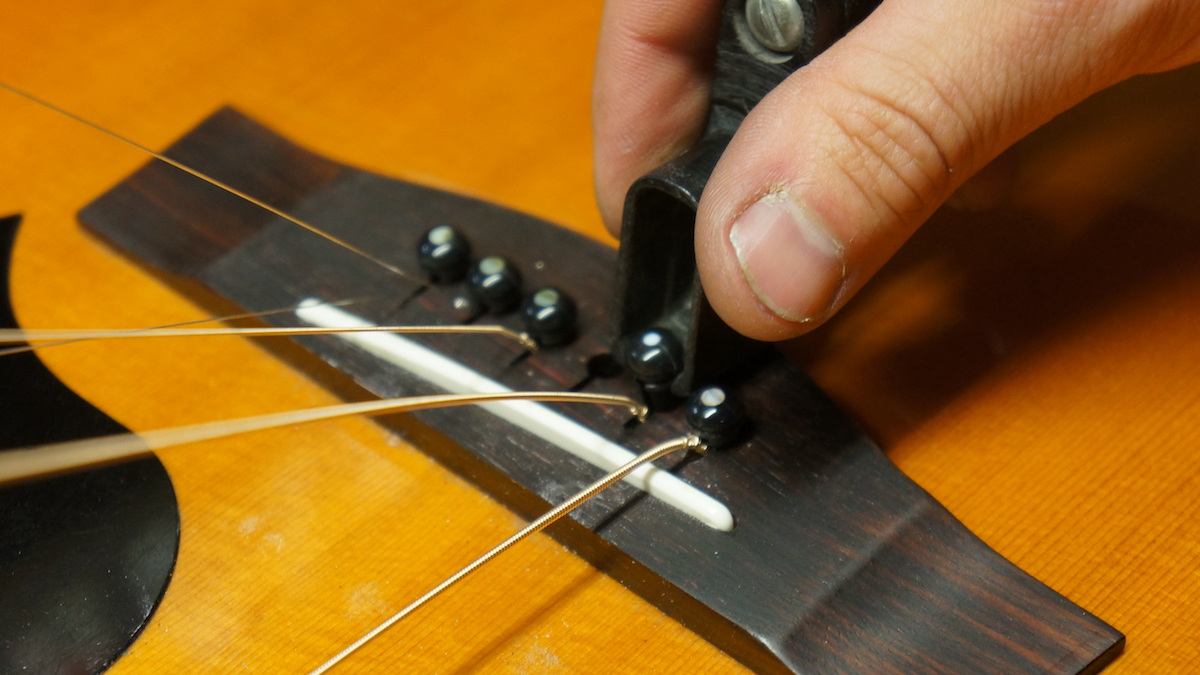
2. Remove the string pins
Most string winders also feature a tool for string pin removal built in. Pull each string pin out to release the string ball ends from the bridge. Be sure to observe the small groove in each string pin – that’s for each string to sit in and therefore must be installed the right way round when you’re fitting your new strings; the groove should point towards the neck of the guitar. I suggest storing your string pins somewhere safe – like a bowl or coffee cup – until you need them.
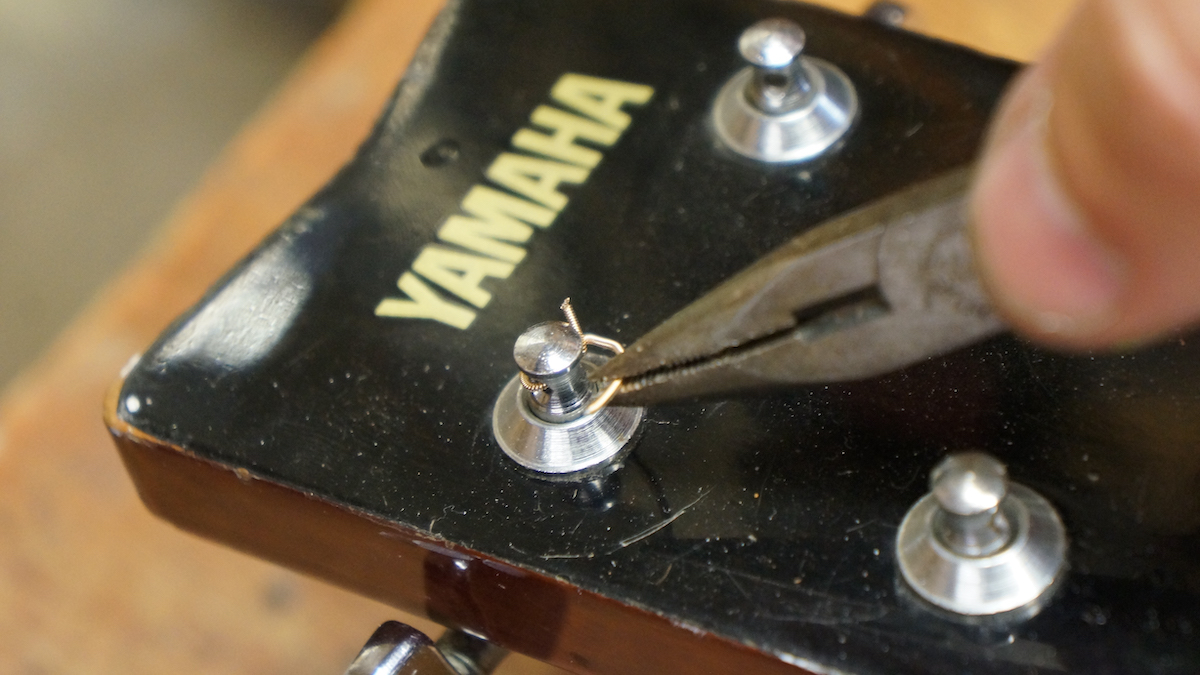
3. Remove string remnants from machine heads
Now it’s time to remove the pieces of string still wrapped around your machine heads. Use pliers for this. These little guys are vicious and sharp so show them no mercy (but watch your hands!).
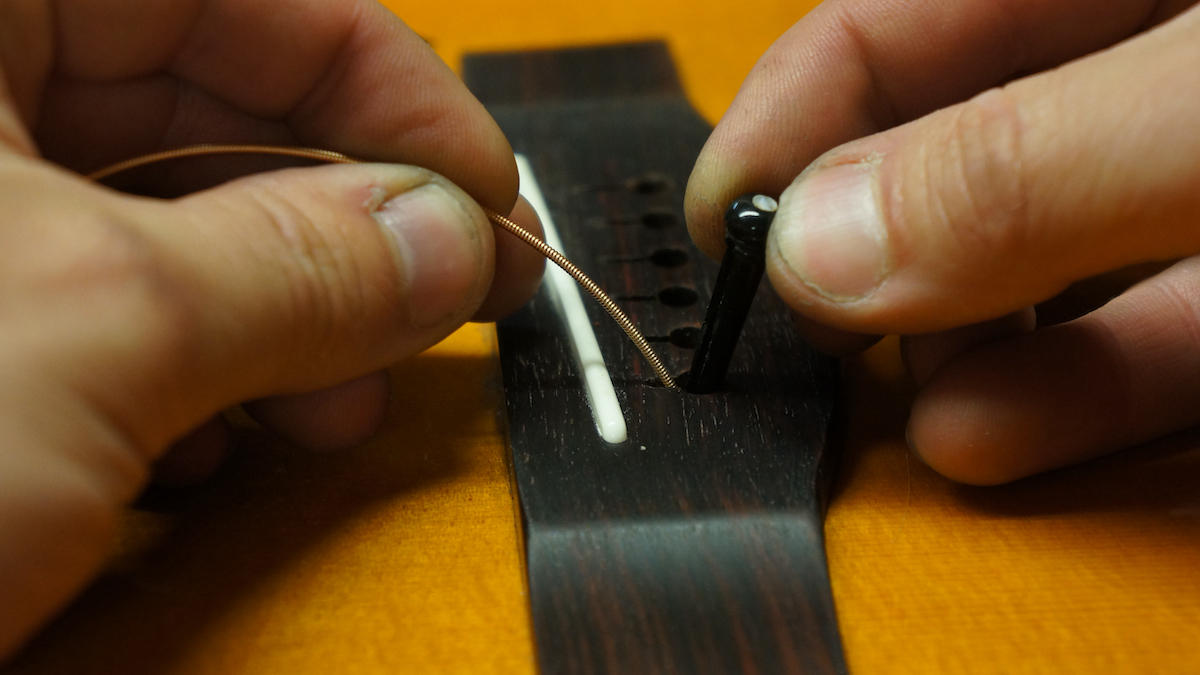
4. Start installation of your new strings
With your old strings removed, now could be a good time to give your guitar’s body, neck and fretboard a quick clean with a lint-free cloth. A lot of grime builds up over time and it’s harder to get to with strings in place. Once you’re ready to start fitting your new strings, the first step is to thread the ball end of your first string through the hole in your guitar’s bridge. Then push the string pin in after it (with the groove pointing towards the neck).
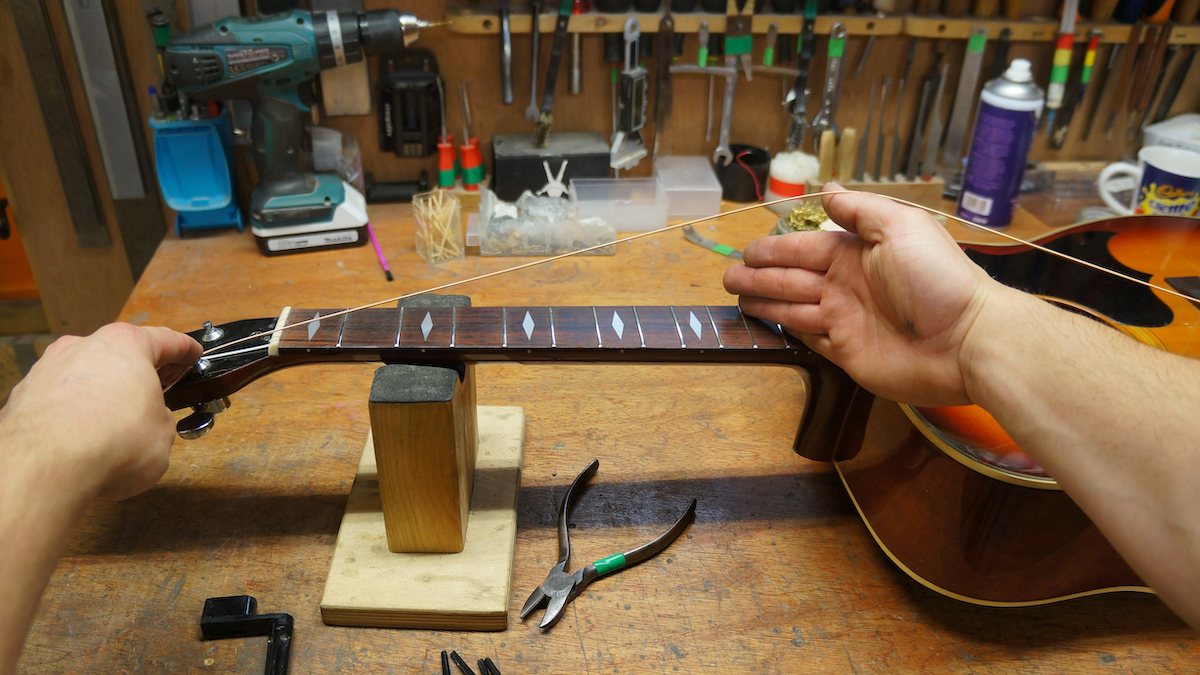
5. Factor in some slack for each string
Next, feed the string through the hole in the corresponding machine head (also known as a tuner or tuning peg). It’s important to build some slack into each string before tightening so there’s enough excess string to wrap a handful of times around the tuner. To do this, while holding the string at the machine head end, do a ‘karate chop’ on the neck – place your hand upright, halfway up the neck, and run the string over the top of your hand.
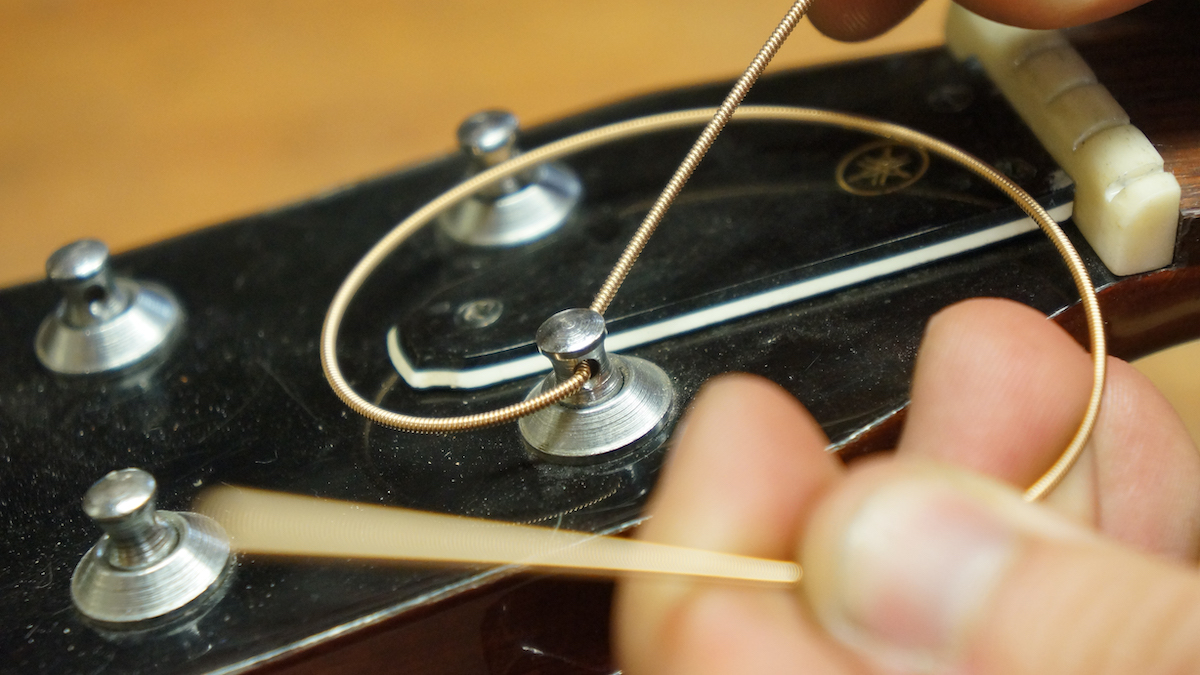
6. Secure the string in place
With the right amount of slack, now it’s time to start securing the string ready for tightening. Feed the tail of the string back around the tuner and tuck it underneath the string. Pull the tail tight and upwards, this will create a kink in the string that will help hold it in place.
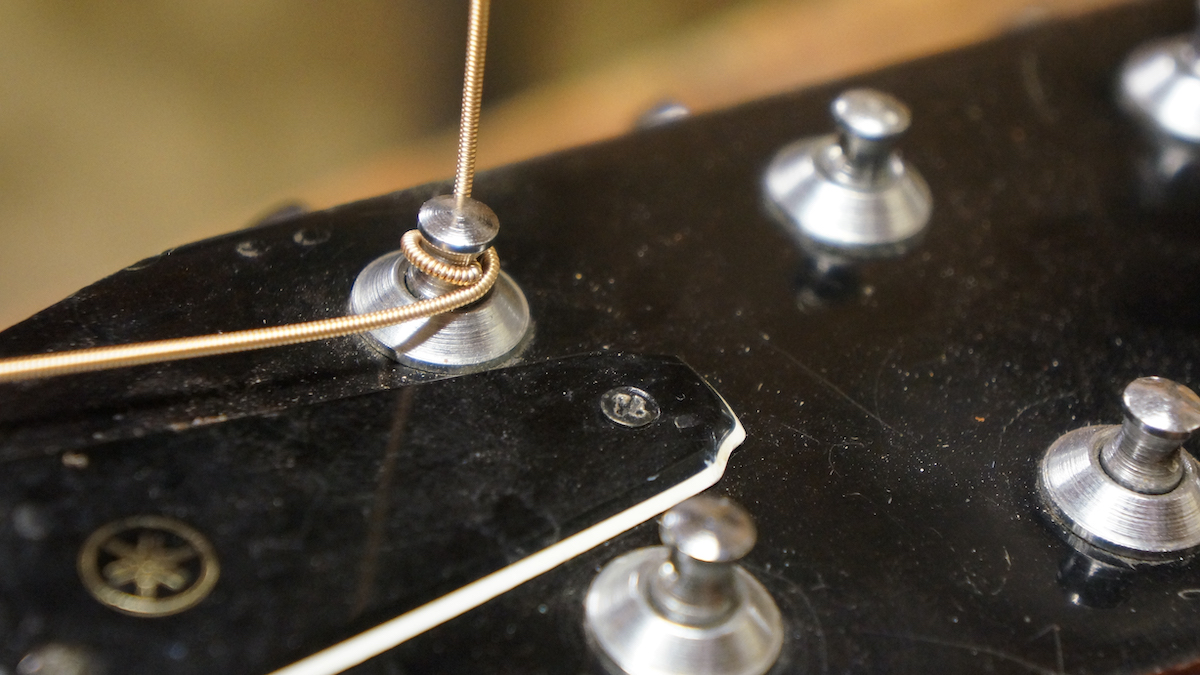
7. Wind the strings on
With the kink in the string at the machine head end it should be fairly secure under a little tension. Pull on the main body of the string and begin to turn the machine head to start winding the string, ensuring the string tail remains underneath the main part of the string. The strings should be wound to the inside of each machine head. On acoustic guitars the top three strings (the fattest strings) will need to be turned in an anti-clockwise direction, while the bottom three (thinner strings) go in a clockwise direction. Aim for four or five neat windings on the tuner post with no unsightly overlaps. Now repeat this process on the five remaining strings.
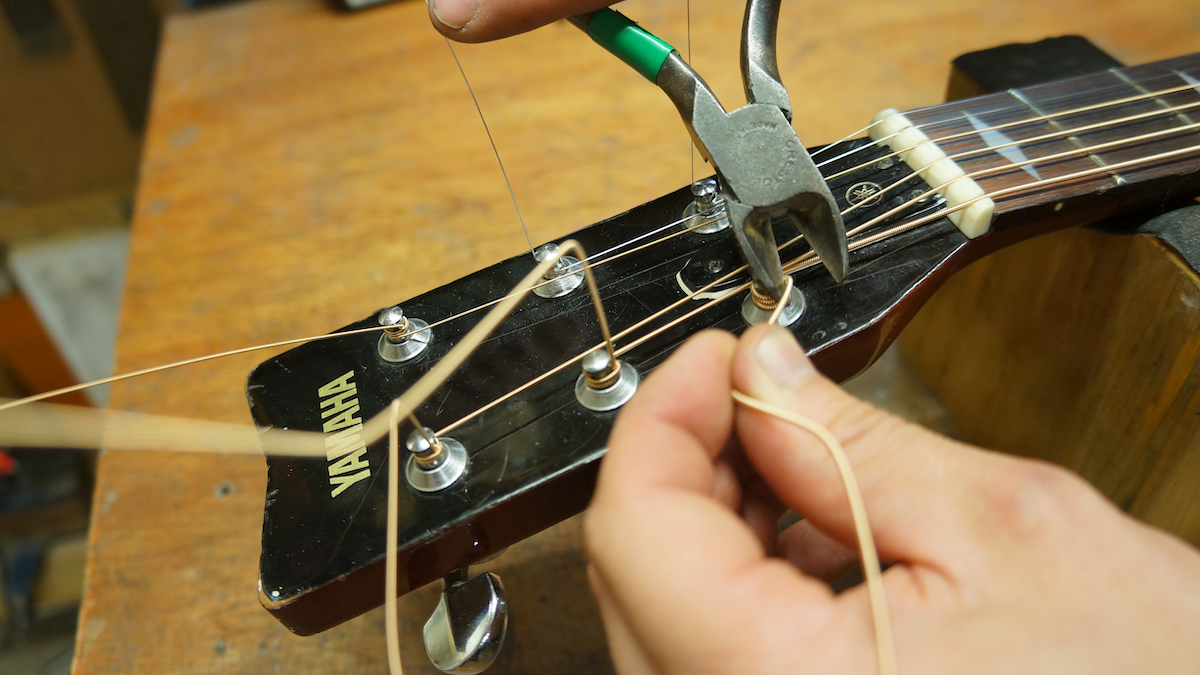
8. Tune up and trim excess string
With all six strings installed, now it’s time to grab your guitar tuner and start tuning up properly. Turn the tuners to get each string up to pitch but remember to keep a thumb over the string pins just in case they think about flying out before full tension is reached; sometimes the ball end rests on the end of the string pin which can cause it to pop out. Finally, take your wire cutters and trim the excess string at each machine head. Dispose of the string tails safely ad recycle the string packaging if possible. Now you’re ready to start playing your freshly-strung guitar!
Read more:
- Best electric guitar strings: top strings for every budget
- Best bass strings: boost tone and feel
- Best flatwound bass strings: choose the right ones for you