In your attic, cupboards or basement, you may have boxes full of old photos that haven’t been seen for years (or even decades). You may also have envelopes full of negatives. Some of your prints may be easier to access in physical photo albums, but, over the decades, time and chemical reactions often cause colours to shift in hue and tones to fade. Other well-loved (and well-handled) prints may suffer from tears, scratches and even coffee stains. You may also have photos stored on long-lost memory card formats that you can’t access.
Fortunately it’s never been easier to digitise these precious assets and share them as prints or post them on social media sites to delight friends, family members and followers. These days, practically everything is recoverable and digitizable, whether it's an old file from a long-obsolete digital camera, or a years-old print from one of the best instant cameras.
Here we explore a range of ways to recover photos from a variety of formats and restore them to their former glory. If you want to snap a few old-looking photos of your own, check out our guide to the best disposable cameras.
How to restore old photos
01. Scan photos

Photomyne’s Photo Scan app scans and restores old prints straight from your iPhone. You can try it for three days for free. Place up to four prints on a flat surface. Tap and hold the Scan button for three seconds to scan them.
02. Restore photos
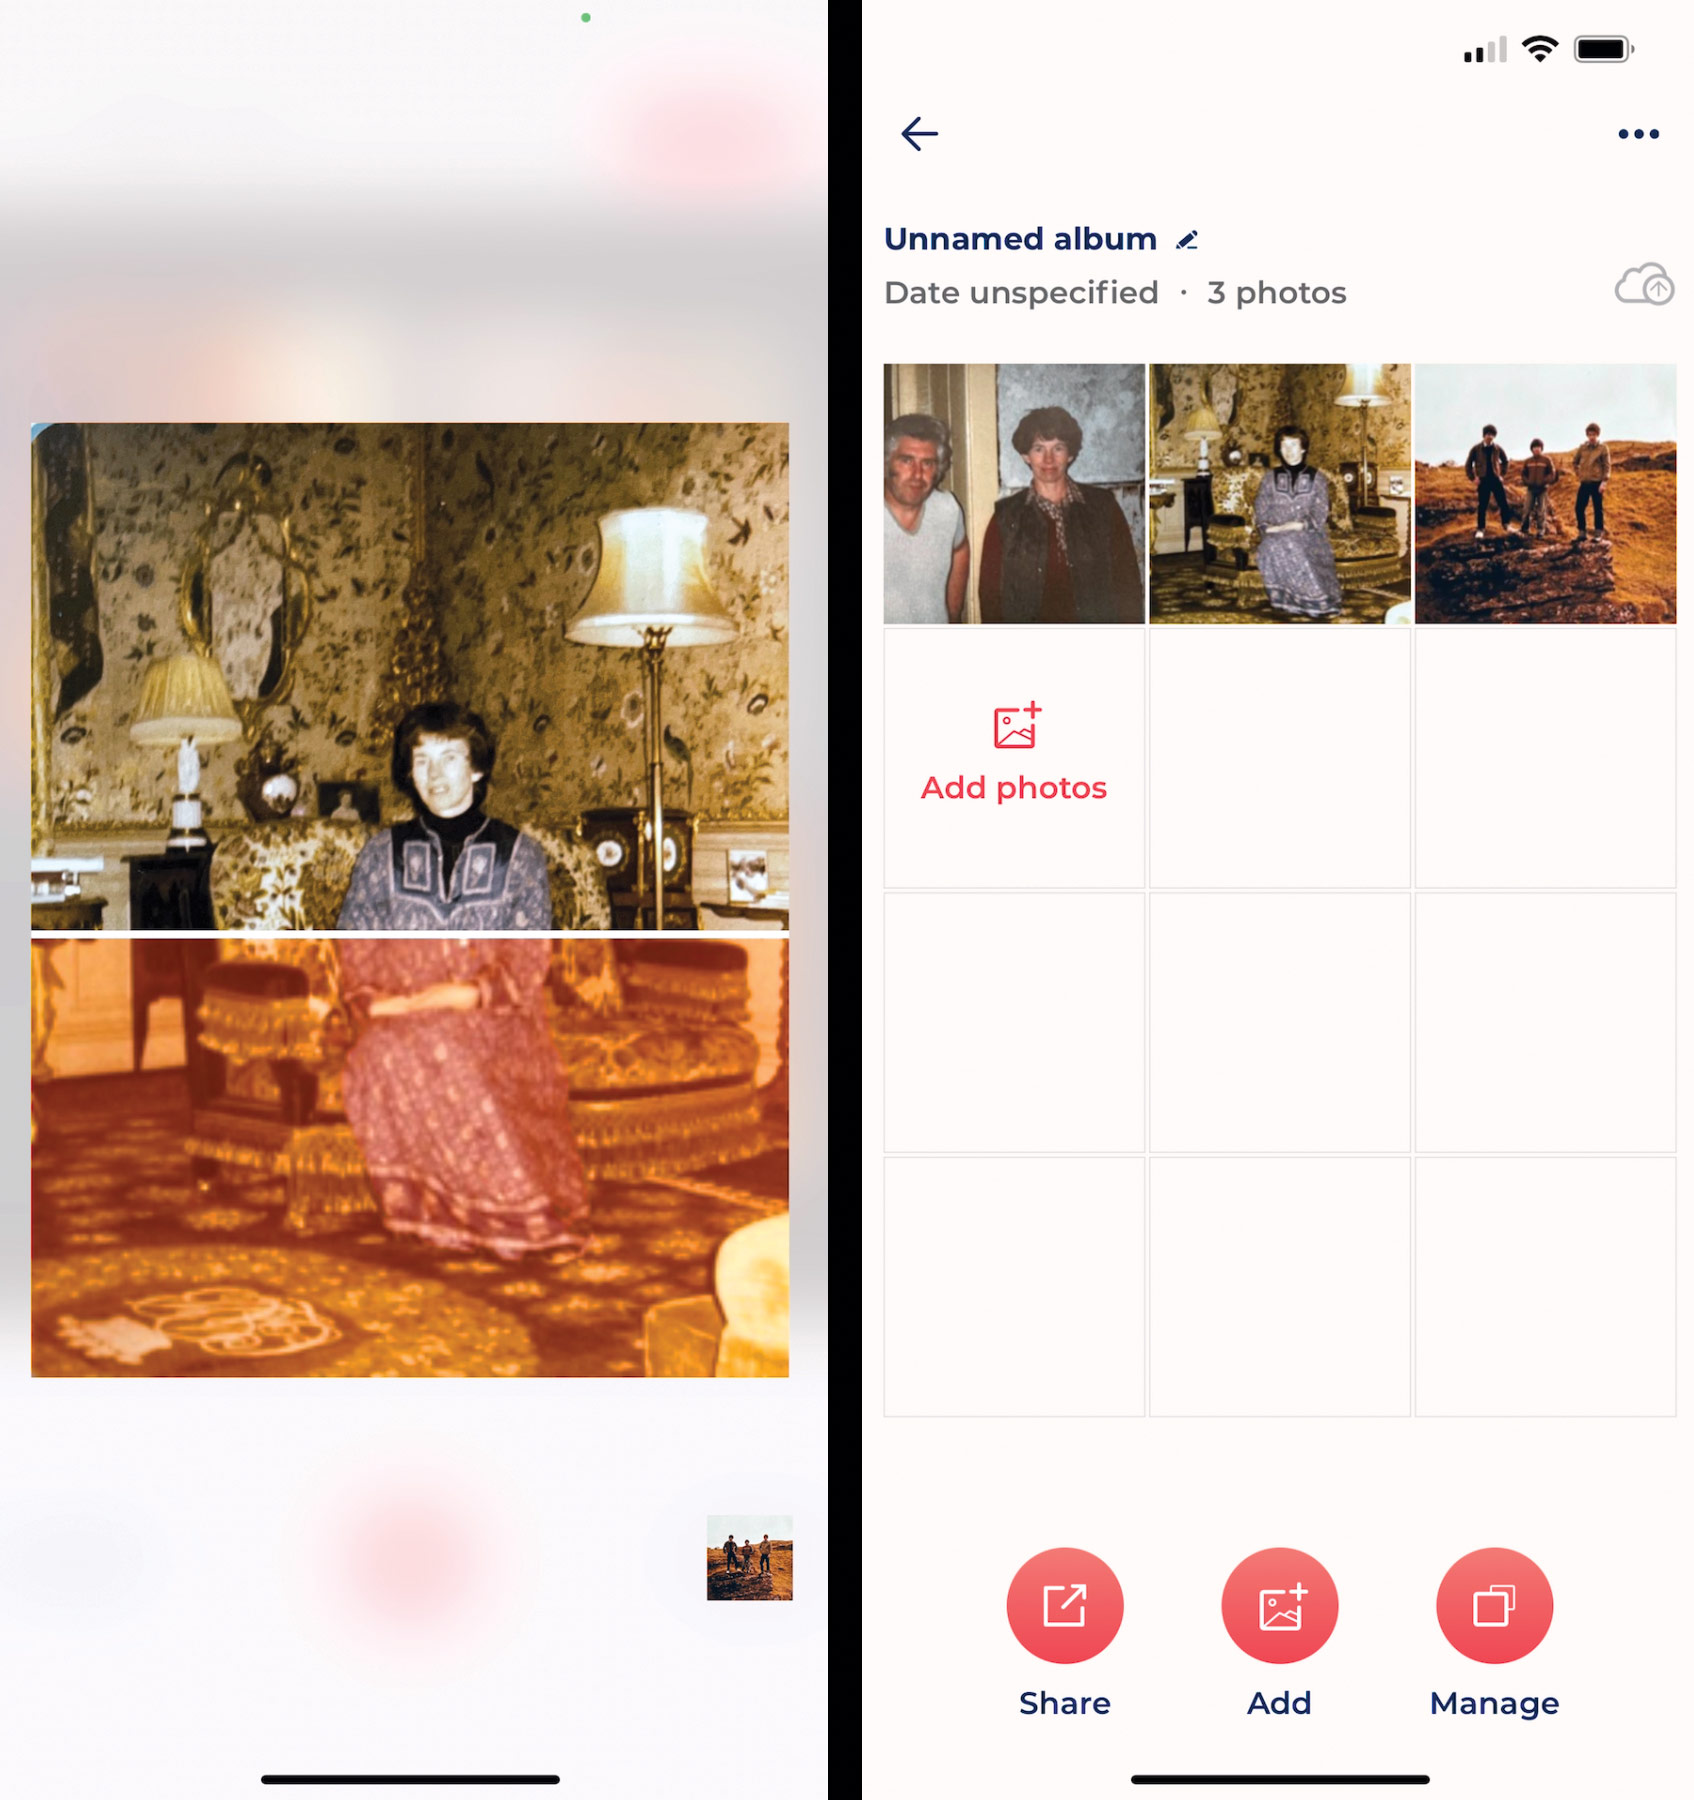
Photo Scan crops and rotates each scanned shot and then restores it by sharpening detail, increasing contrast and cooling down warm colours for natural skin tones. You can fine-tune the results using presets.
03. Colorise photos
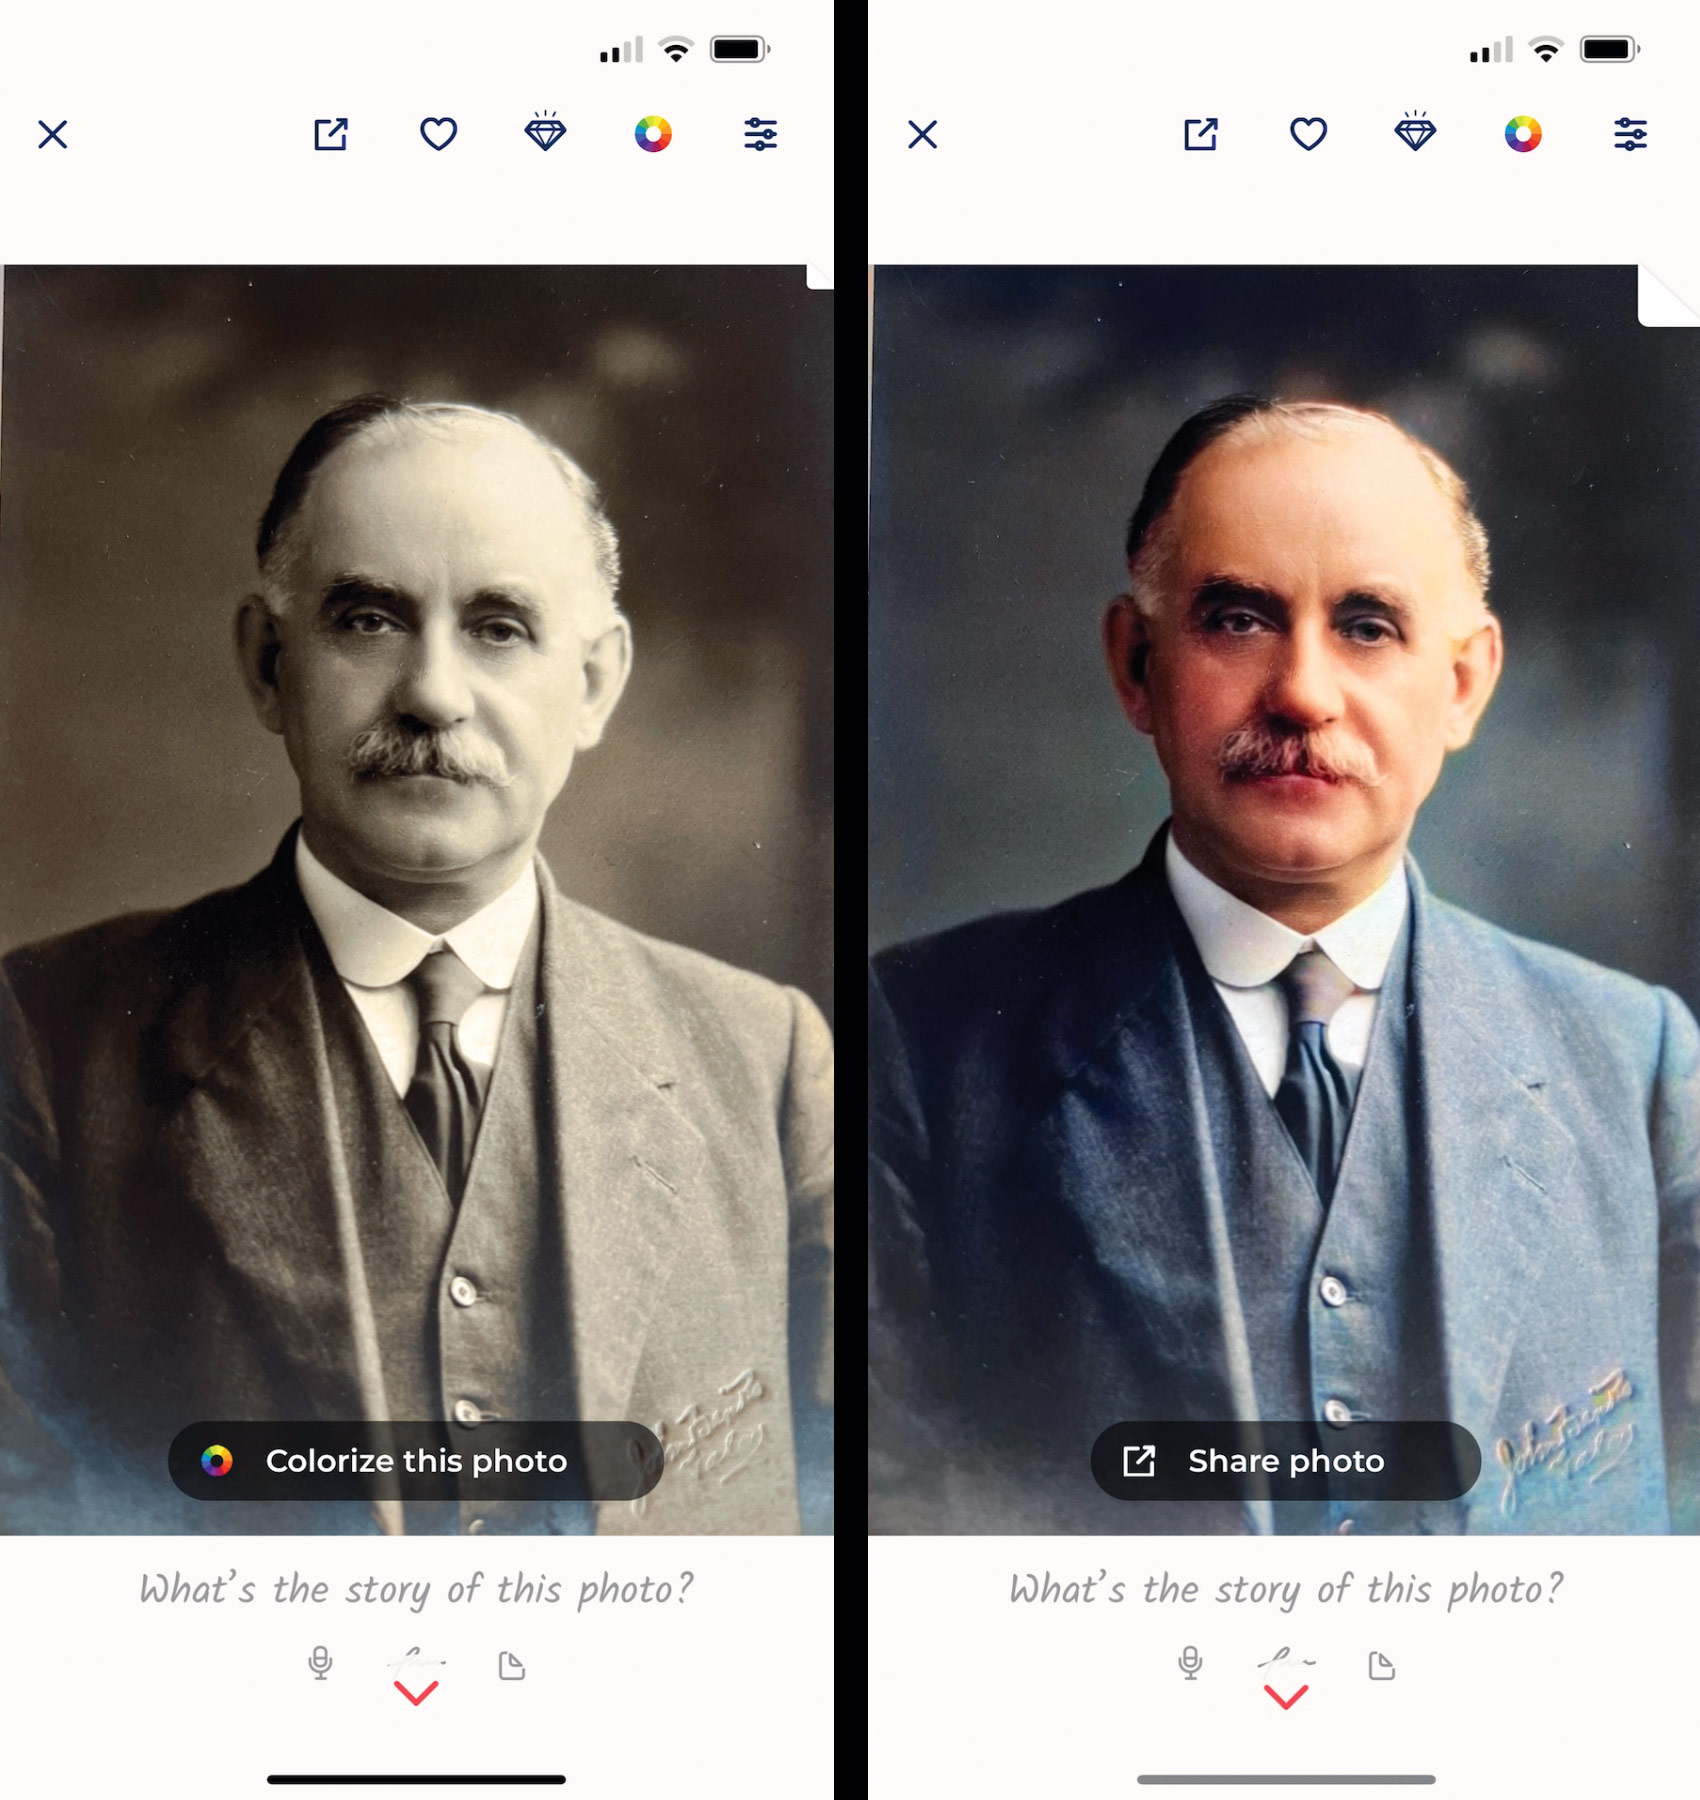
Photo Scan can bring people back from the past and into the present by colourising old black-and-white shots. Simply scan the shot via the app (see step 1), then tap on the ‘Colorize this photo’ button. And then say ‘Wow!’
04. Repair damage

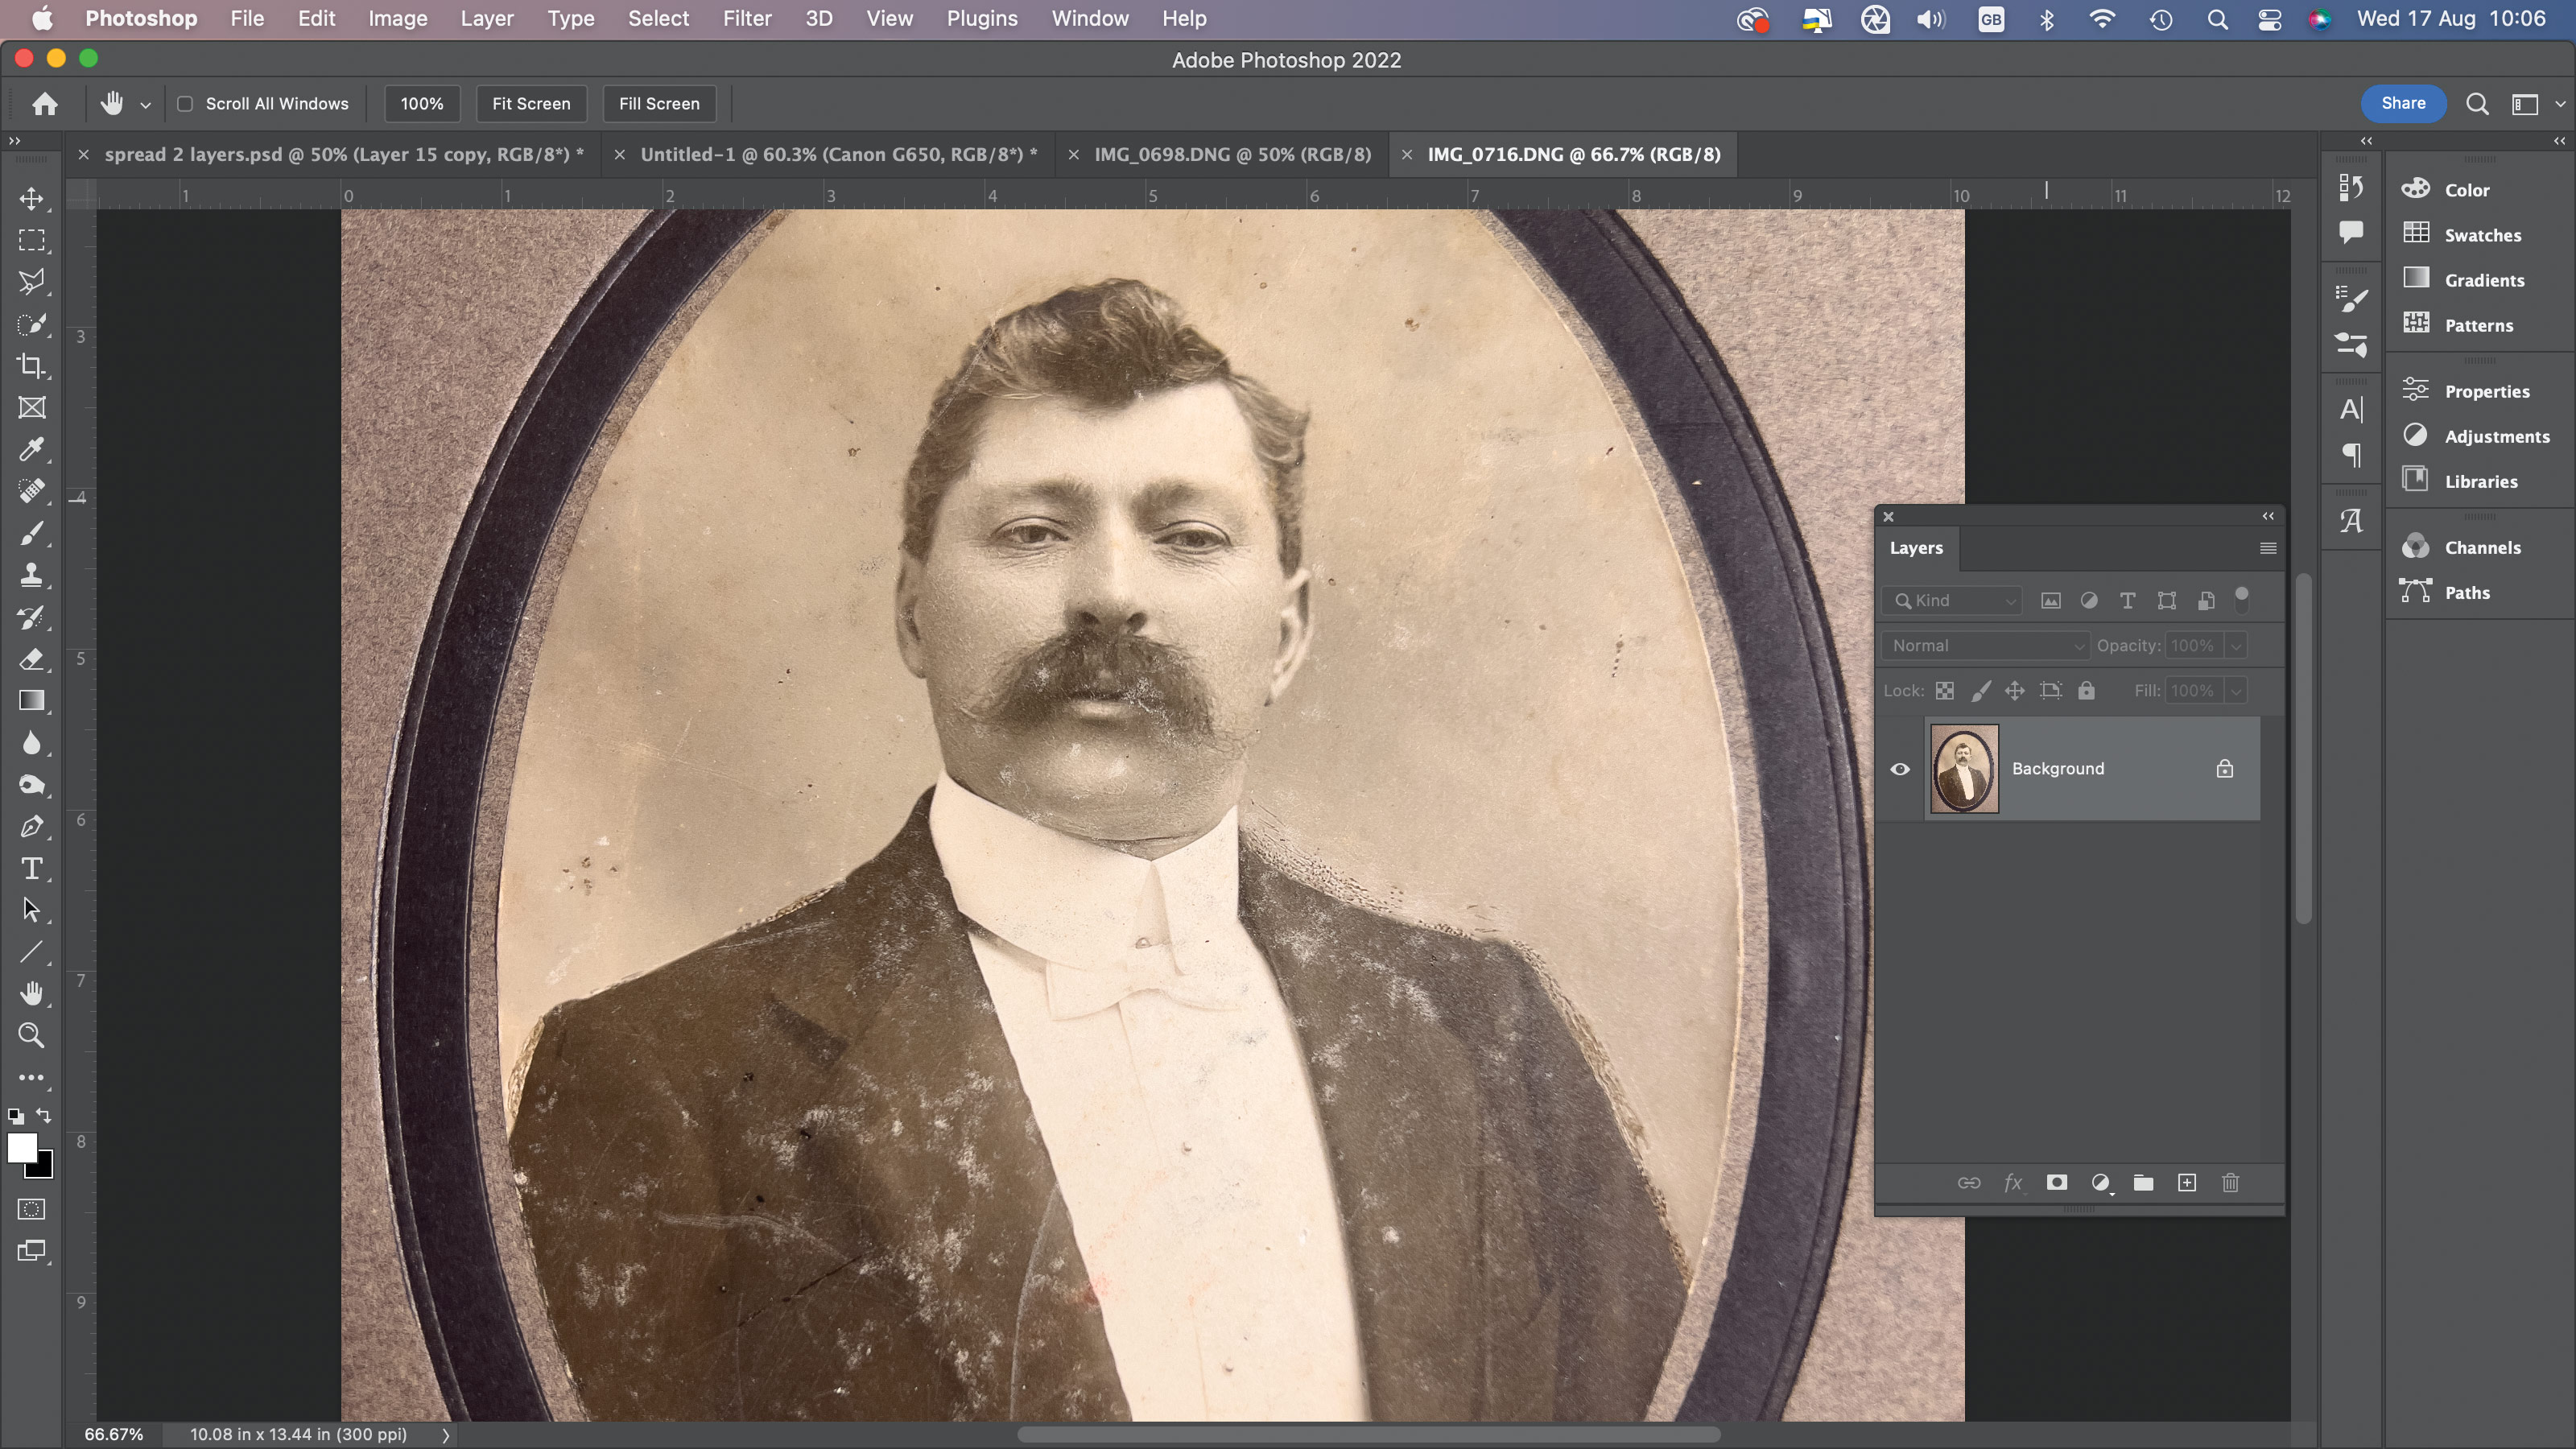
iOS apps such as Photo Scan do a great job of sprucing up the colours and tones of digitised prints, but to repair dust specks and scratches you need to manually retouch using desktop apps such as Photoshop CC.
05. Use Photoshop CC
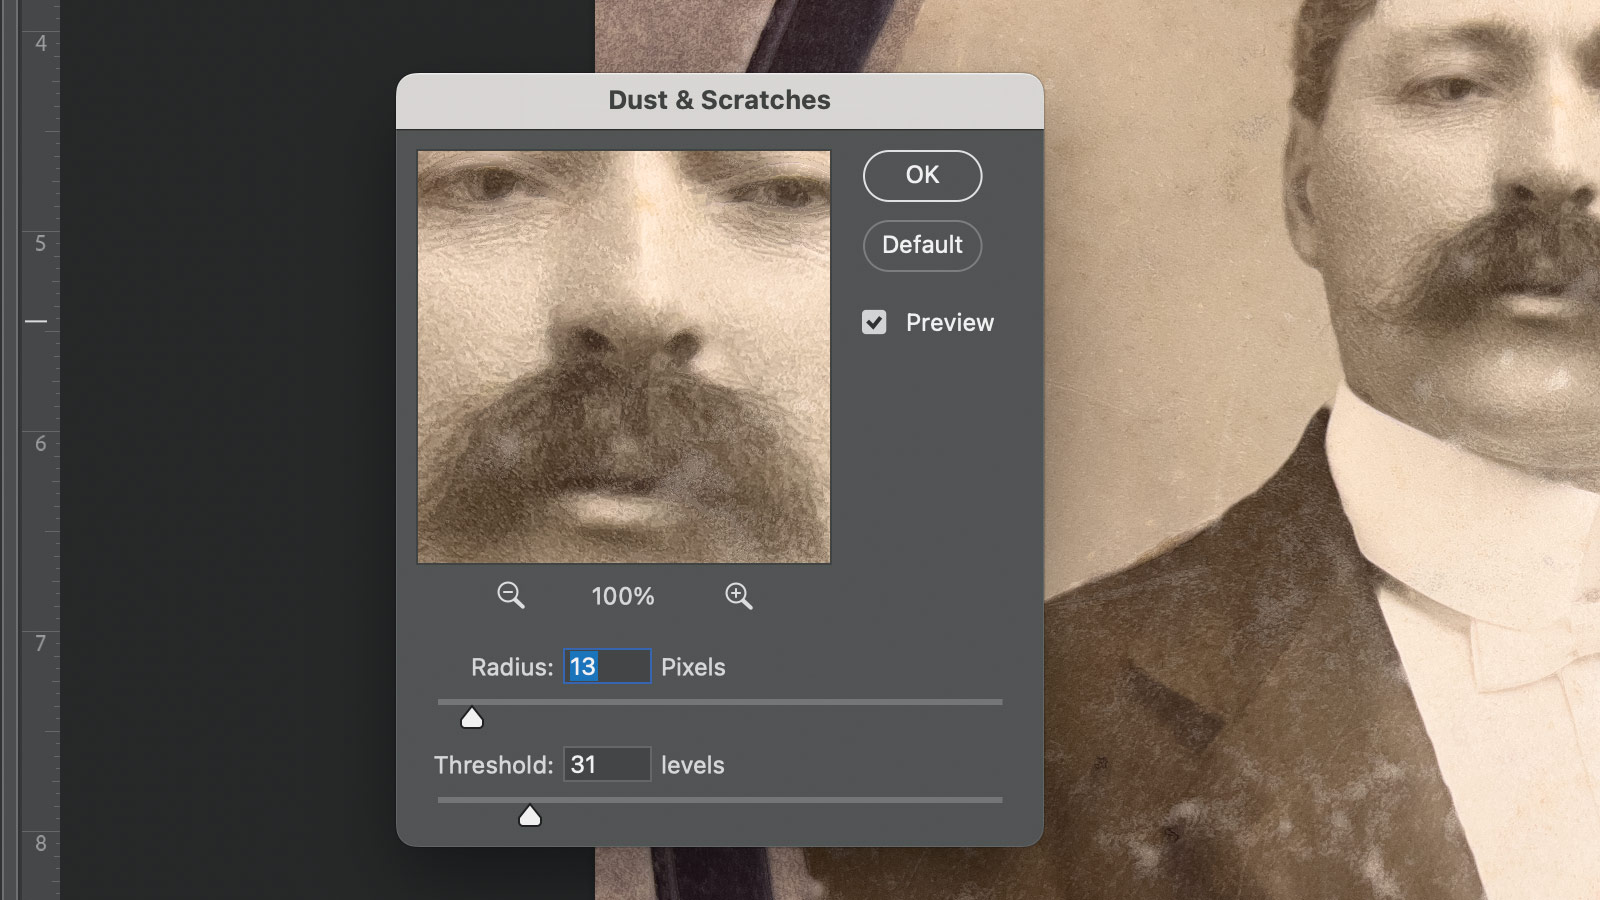
Choose Filter > Noise > Dust & Scratches. Increase Radius. A larger value hides bigger specks and scratches but can lose facial detail. Drag Threshold to the right to compromise between hiding scratches while preserving detail.
06. Spot healing
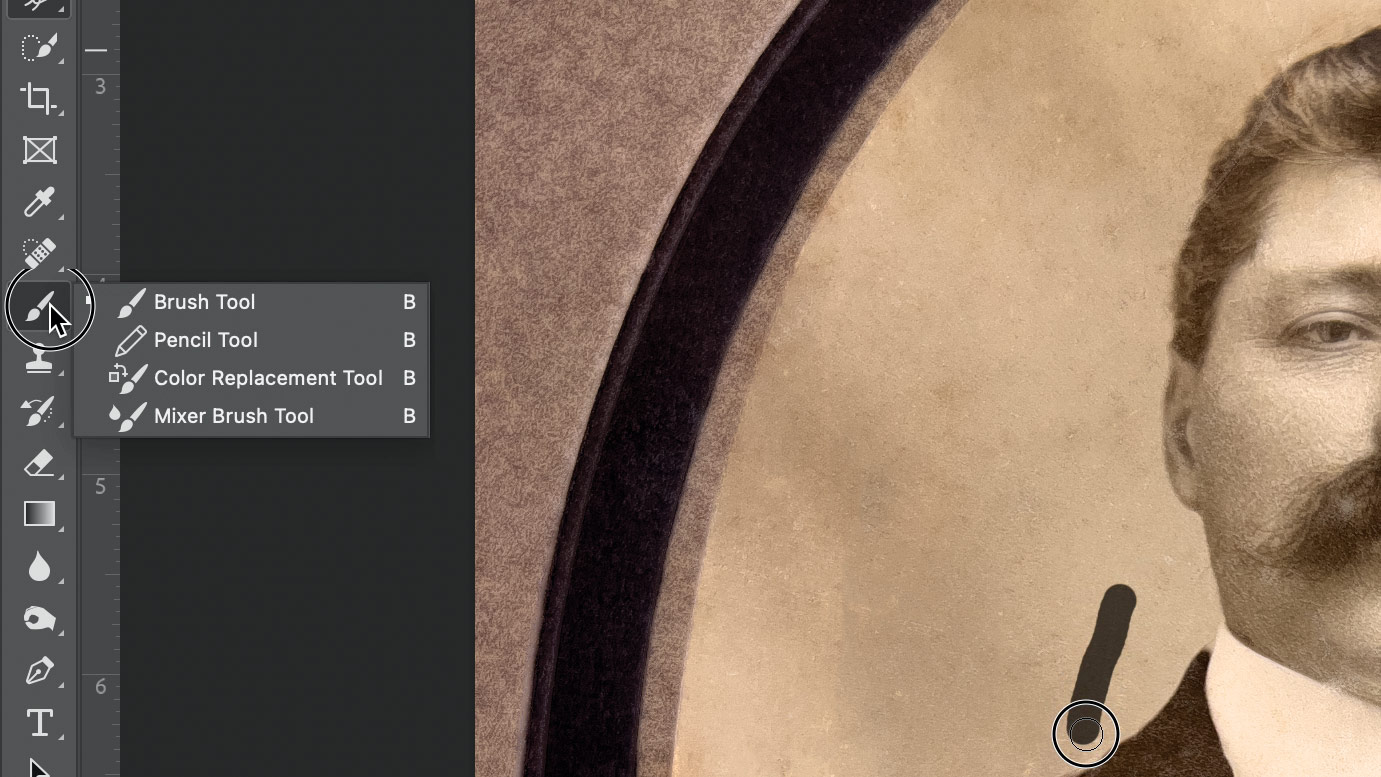
Grab the Spot Healing Brush tool. Spray over remaining spots or scratches. The tool fills the sprayed areas with adjacent patches of clear texture. Finish things off by choosing Image > Auto Contrast for healthier tones.
07. Get smart
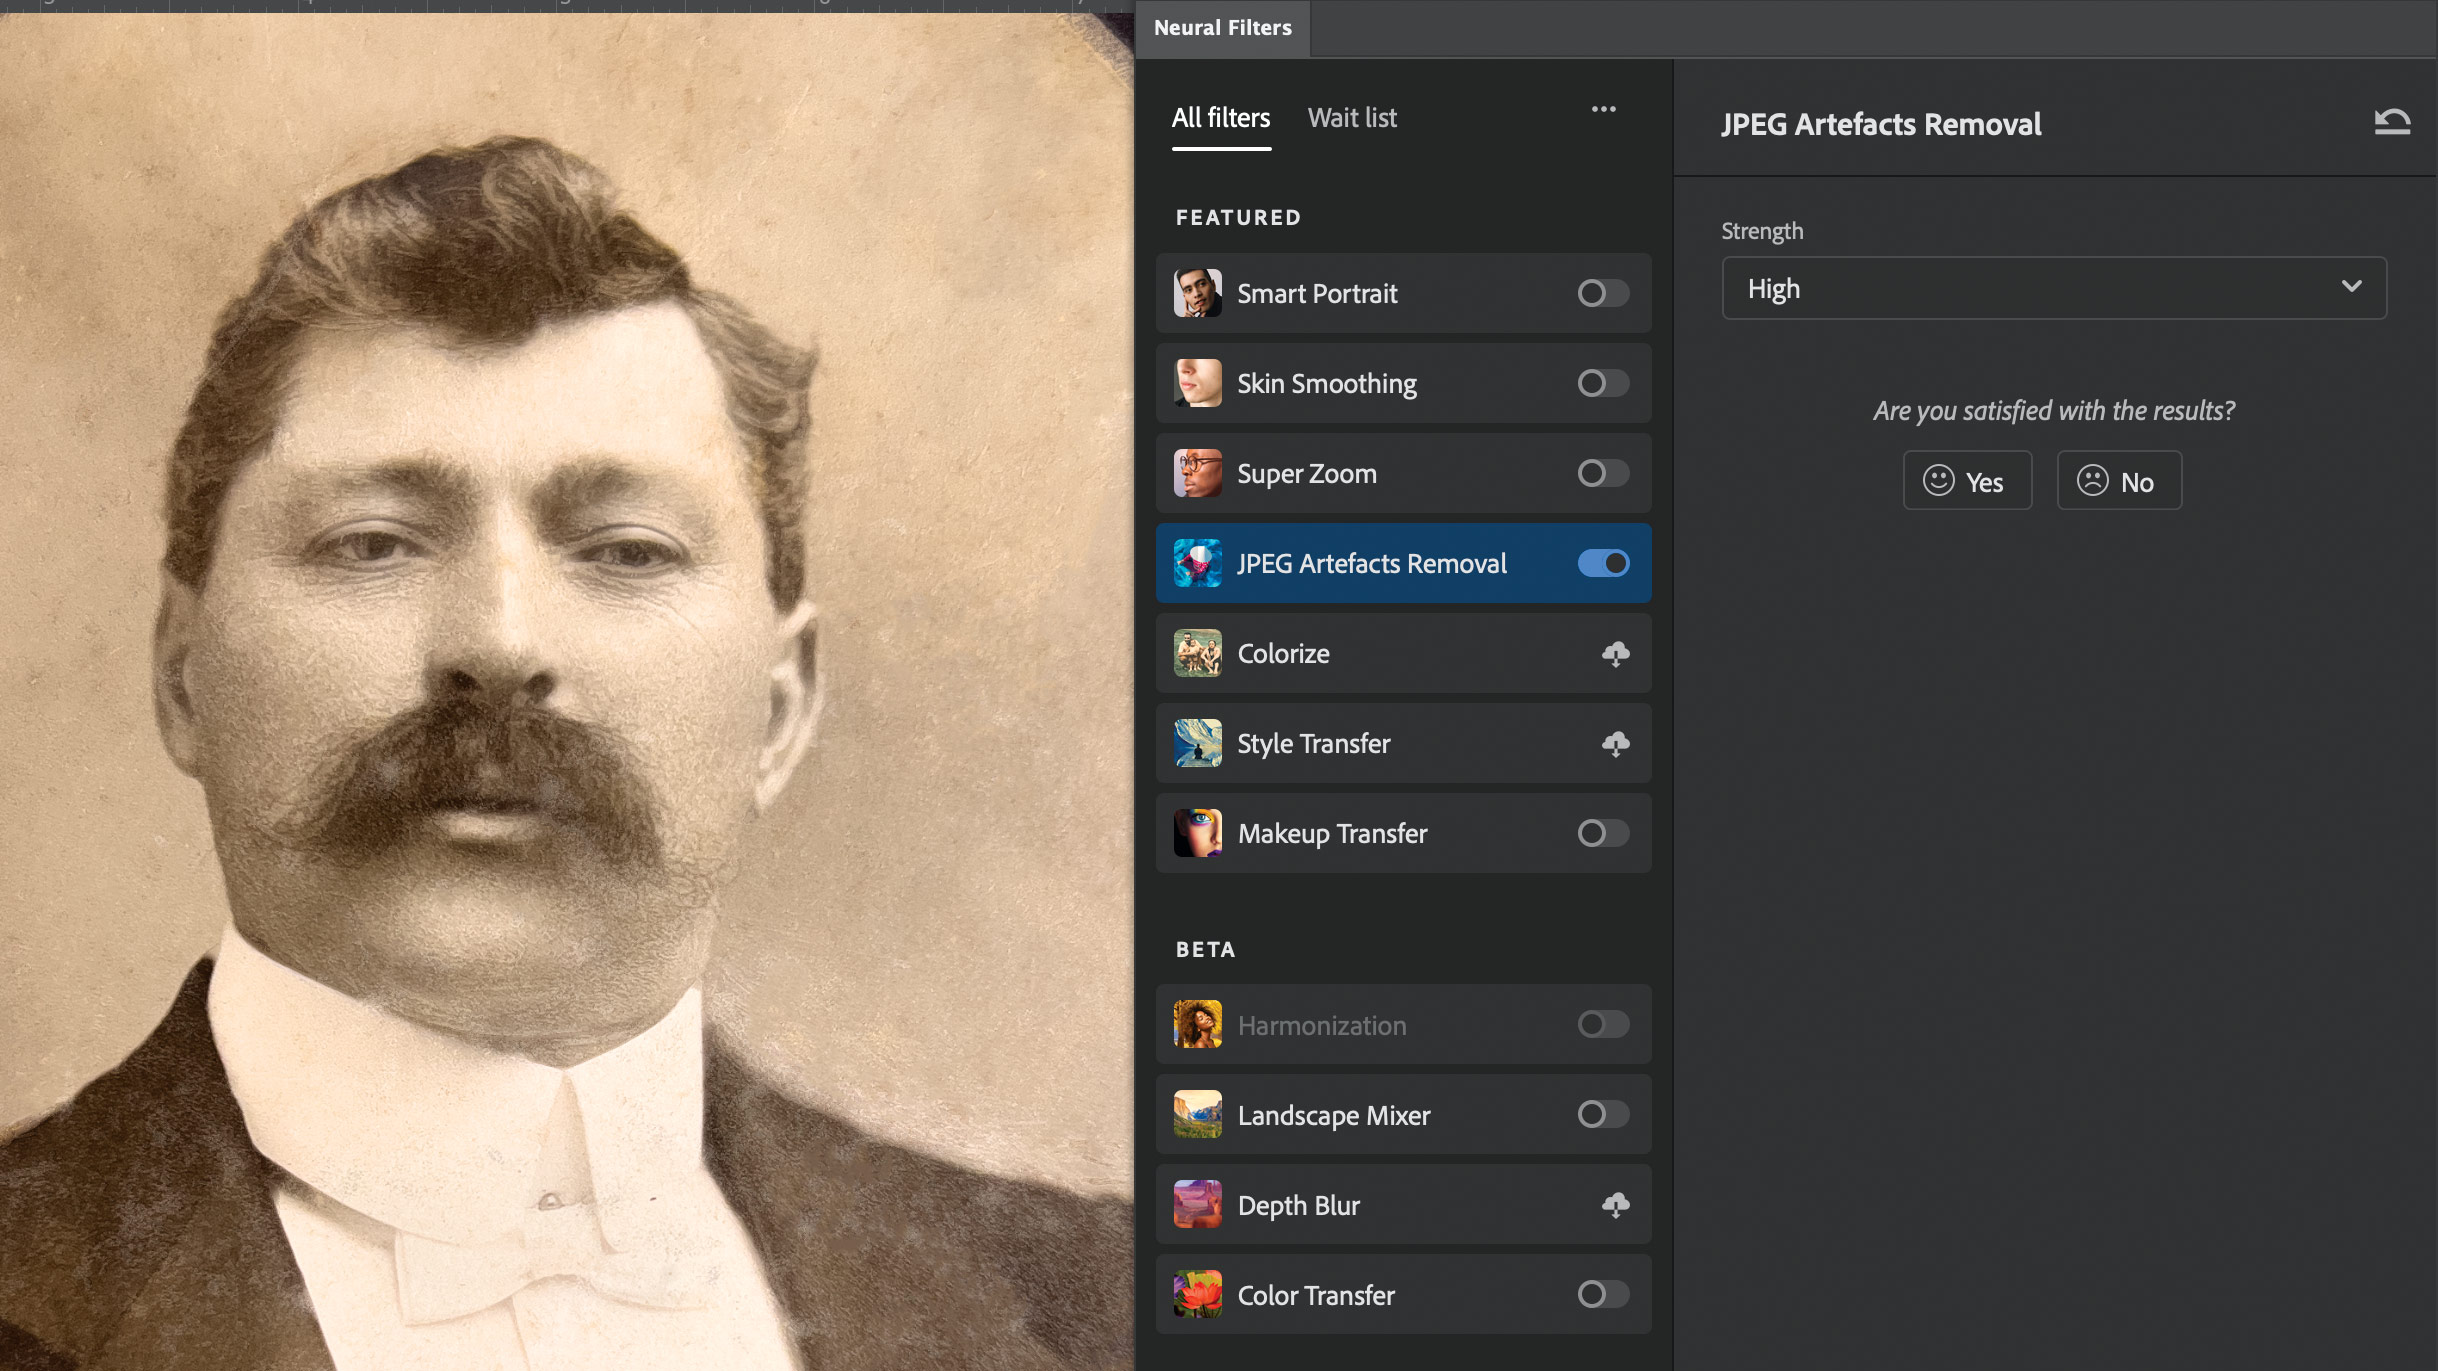
Photoshop can assist your restoration using machine learning (ML). Choose Filter > Neural Filters. Turn on ‘JPEG Artefacts Removal’. This analyses the shot and smooths out some of the portrait’s rough texture.
08. Skin smoothing
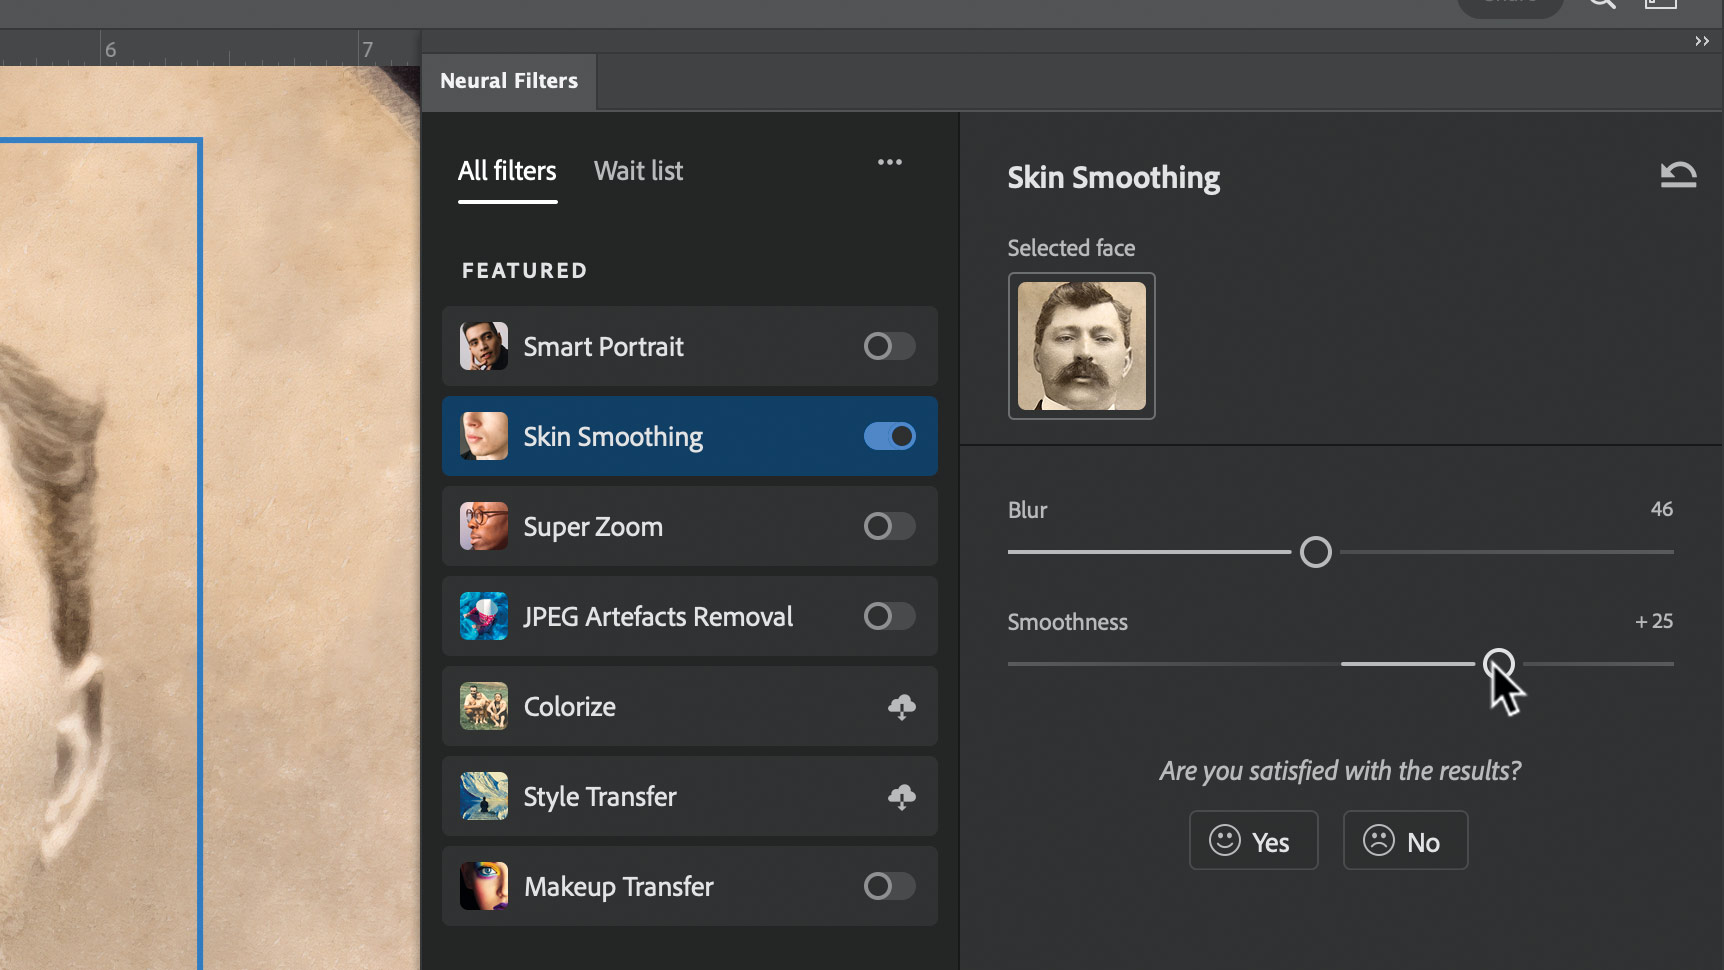
To give the face a smoother complexion and reduce the presence of grain, turn on the Skin Smoothing filter. Experiment with the Blur and Smoothness sliders to help preserve important detail.
09. Colourise
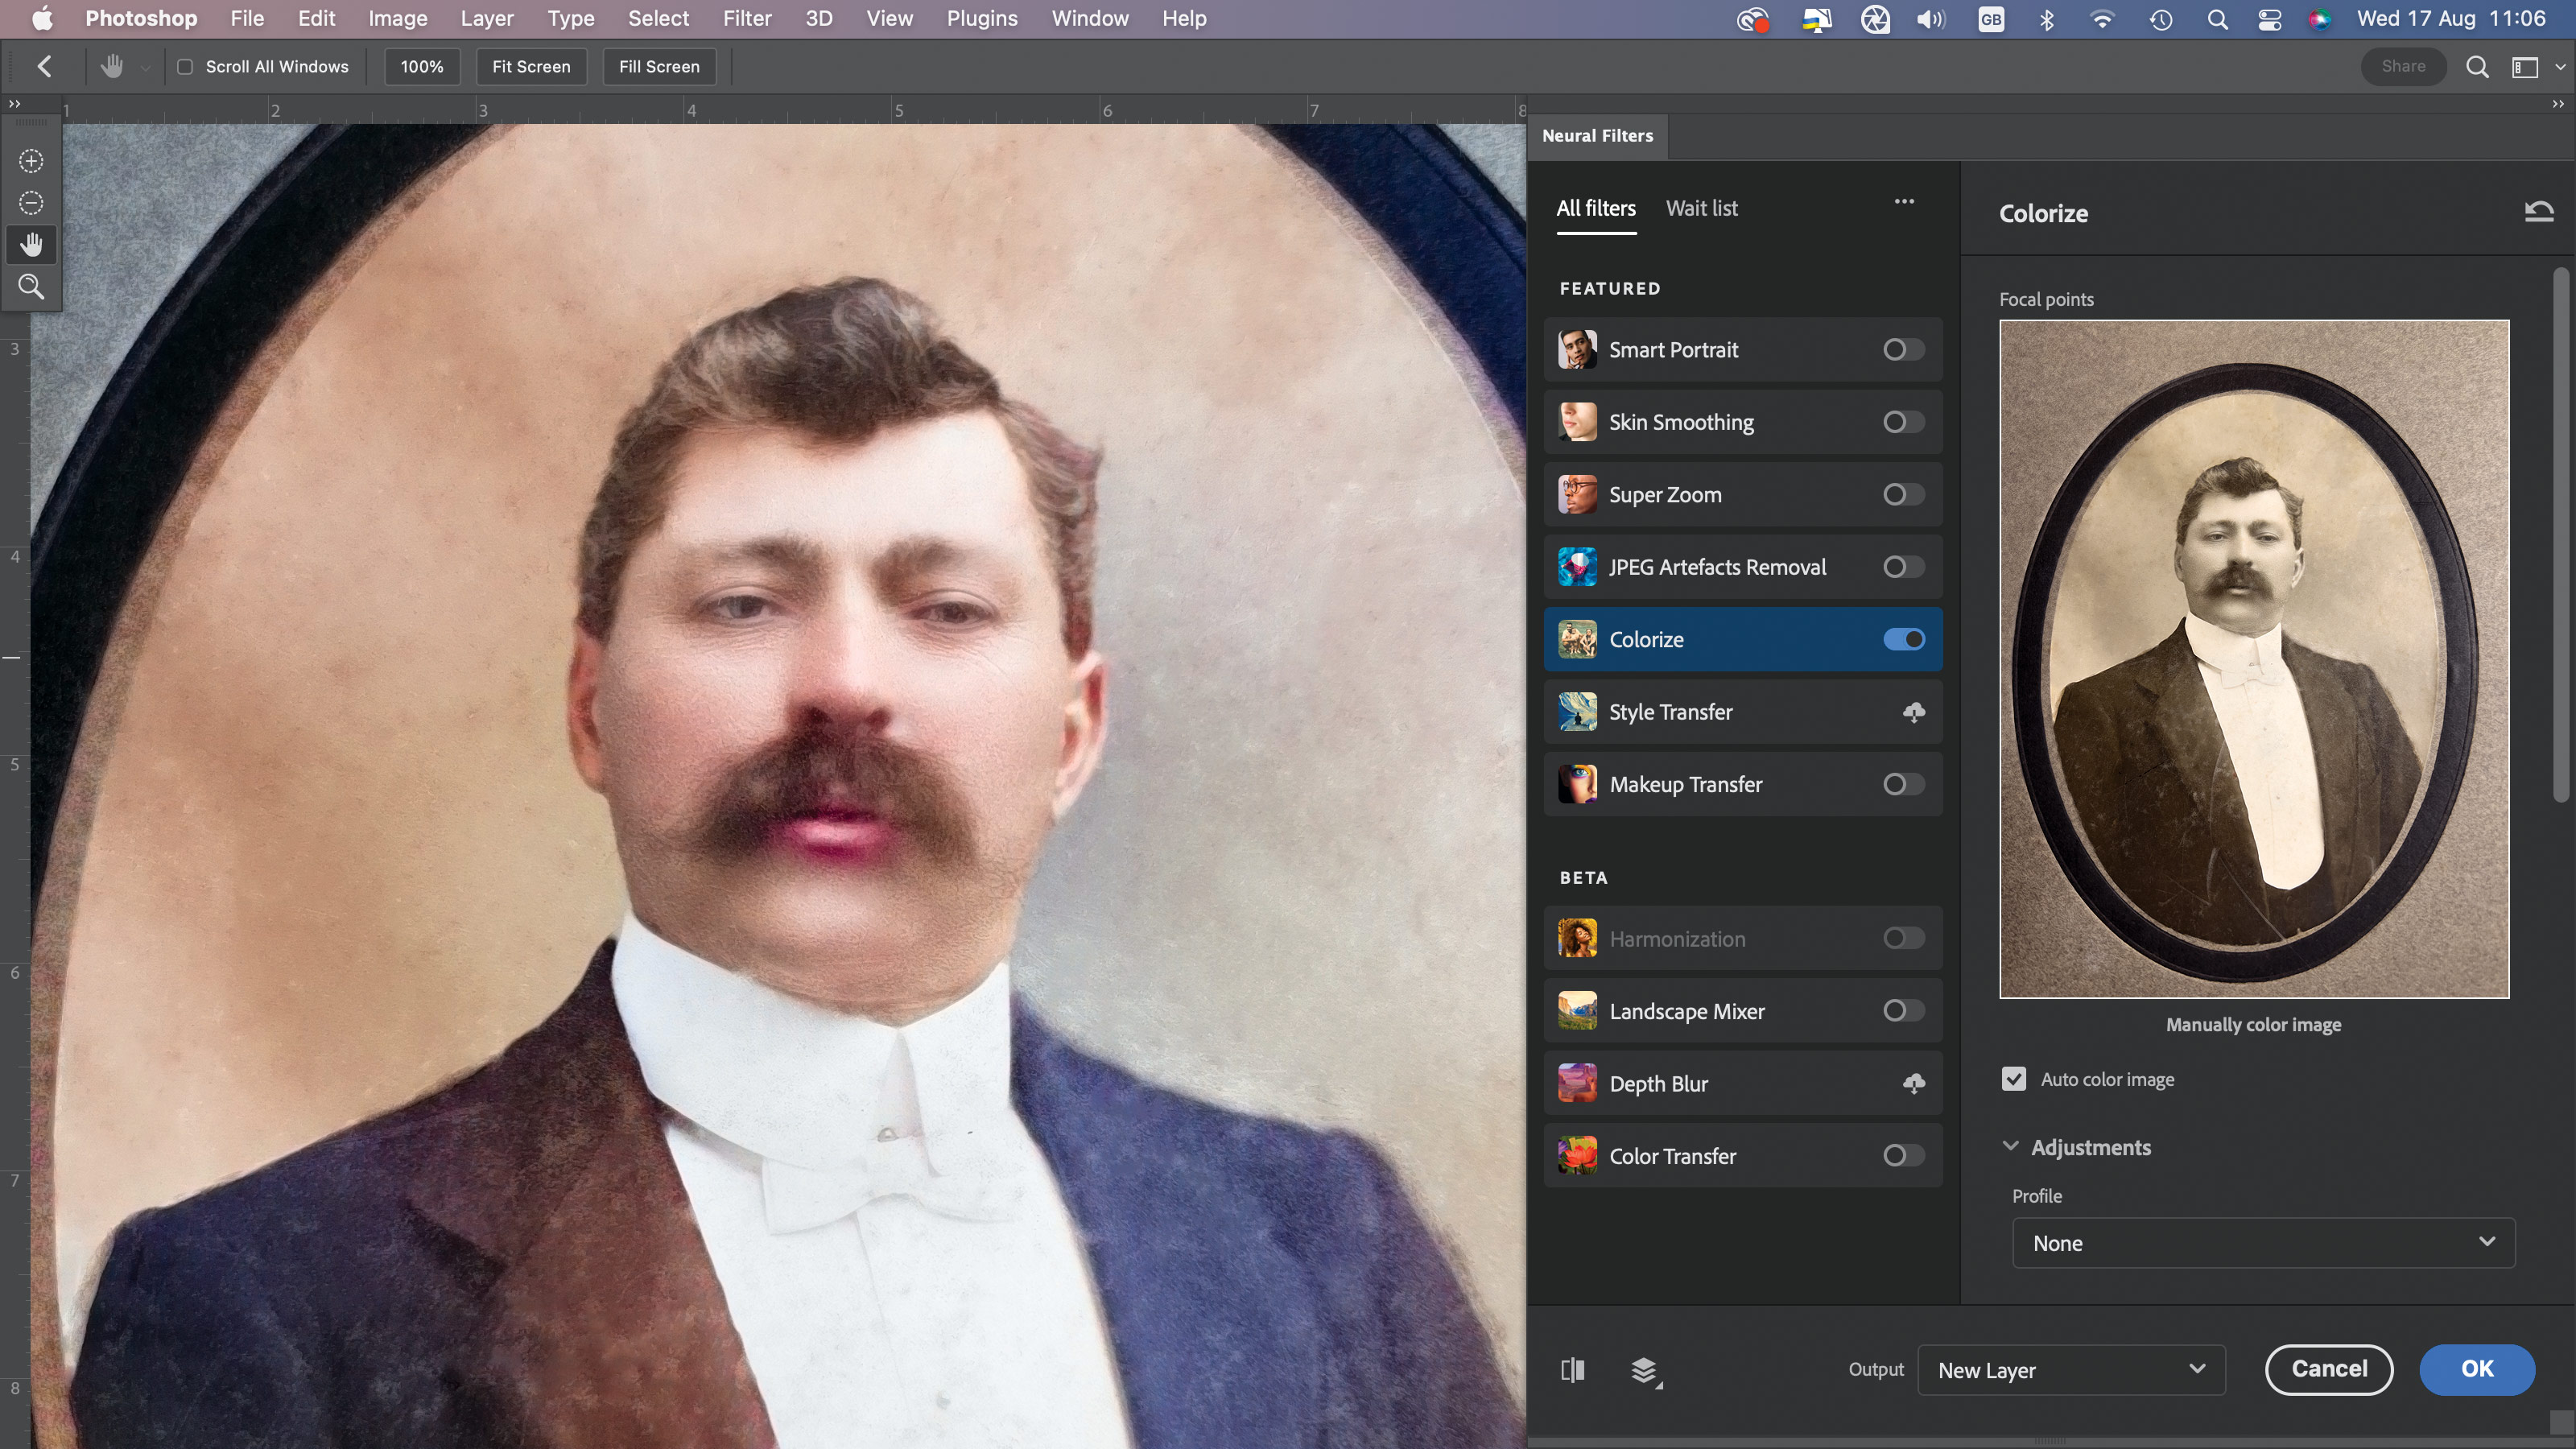
As a finishing touch you can add a wash of colour to the restored photo. Toggle on the Colorize neural filter. You can experiment with different looks by exploring the presets in the Profile drop-down menu.
This content originally appeared in MacFormat magazine. Subscribe to MacFormat at Magazines Direct.