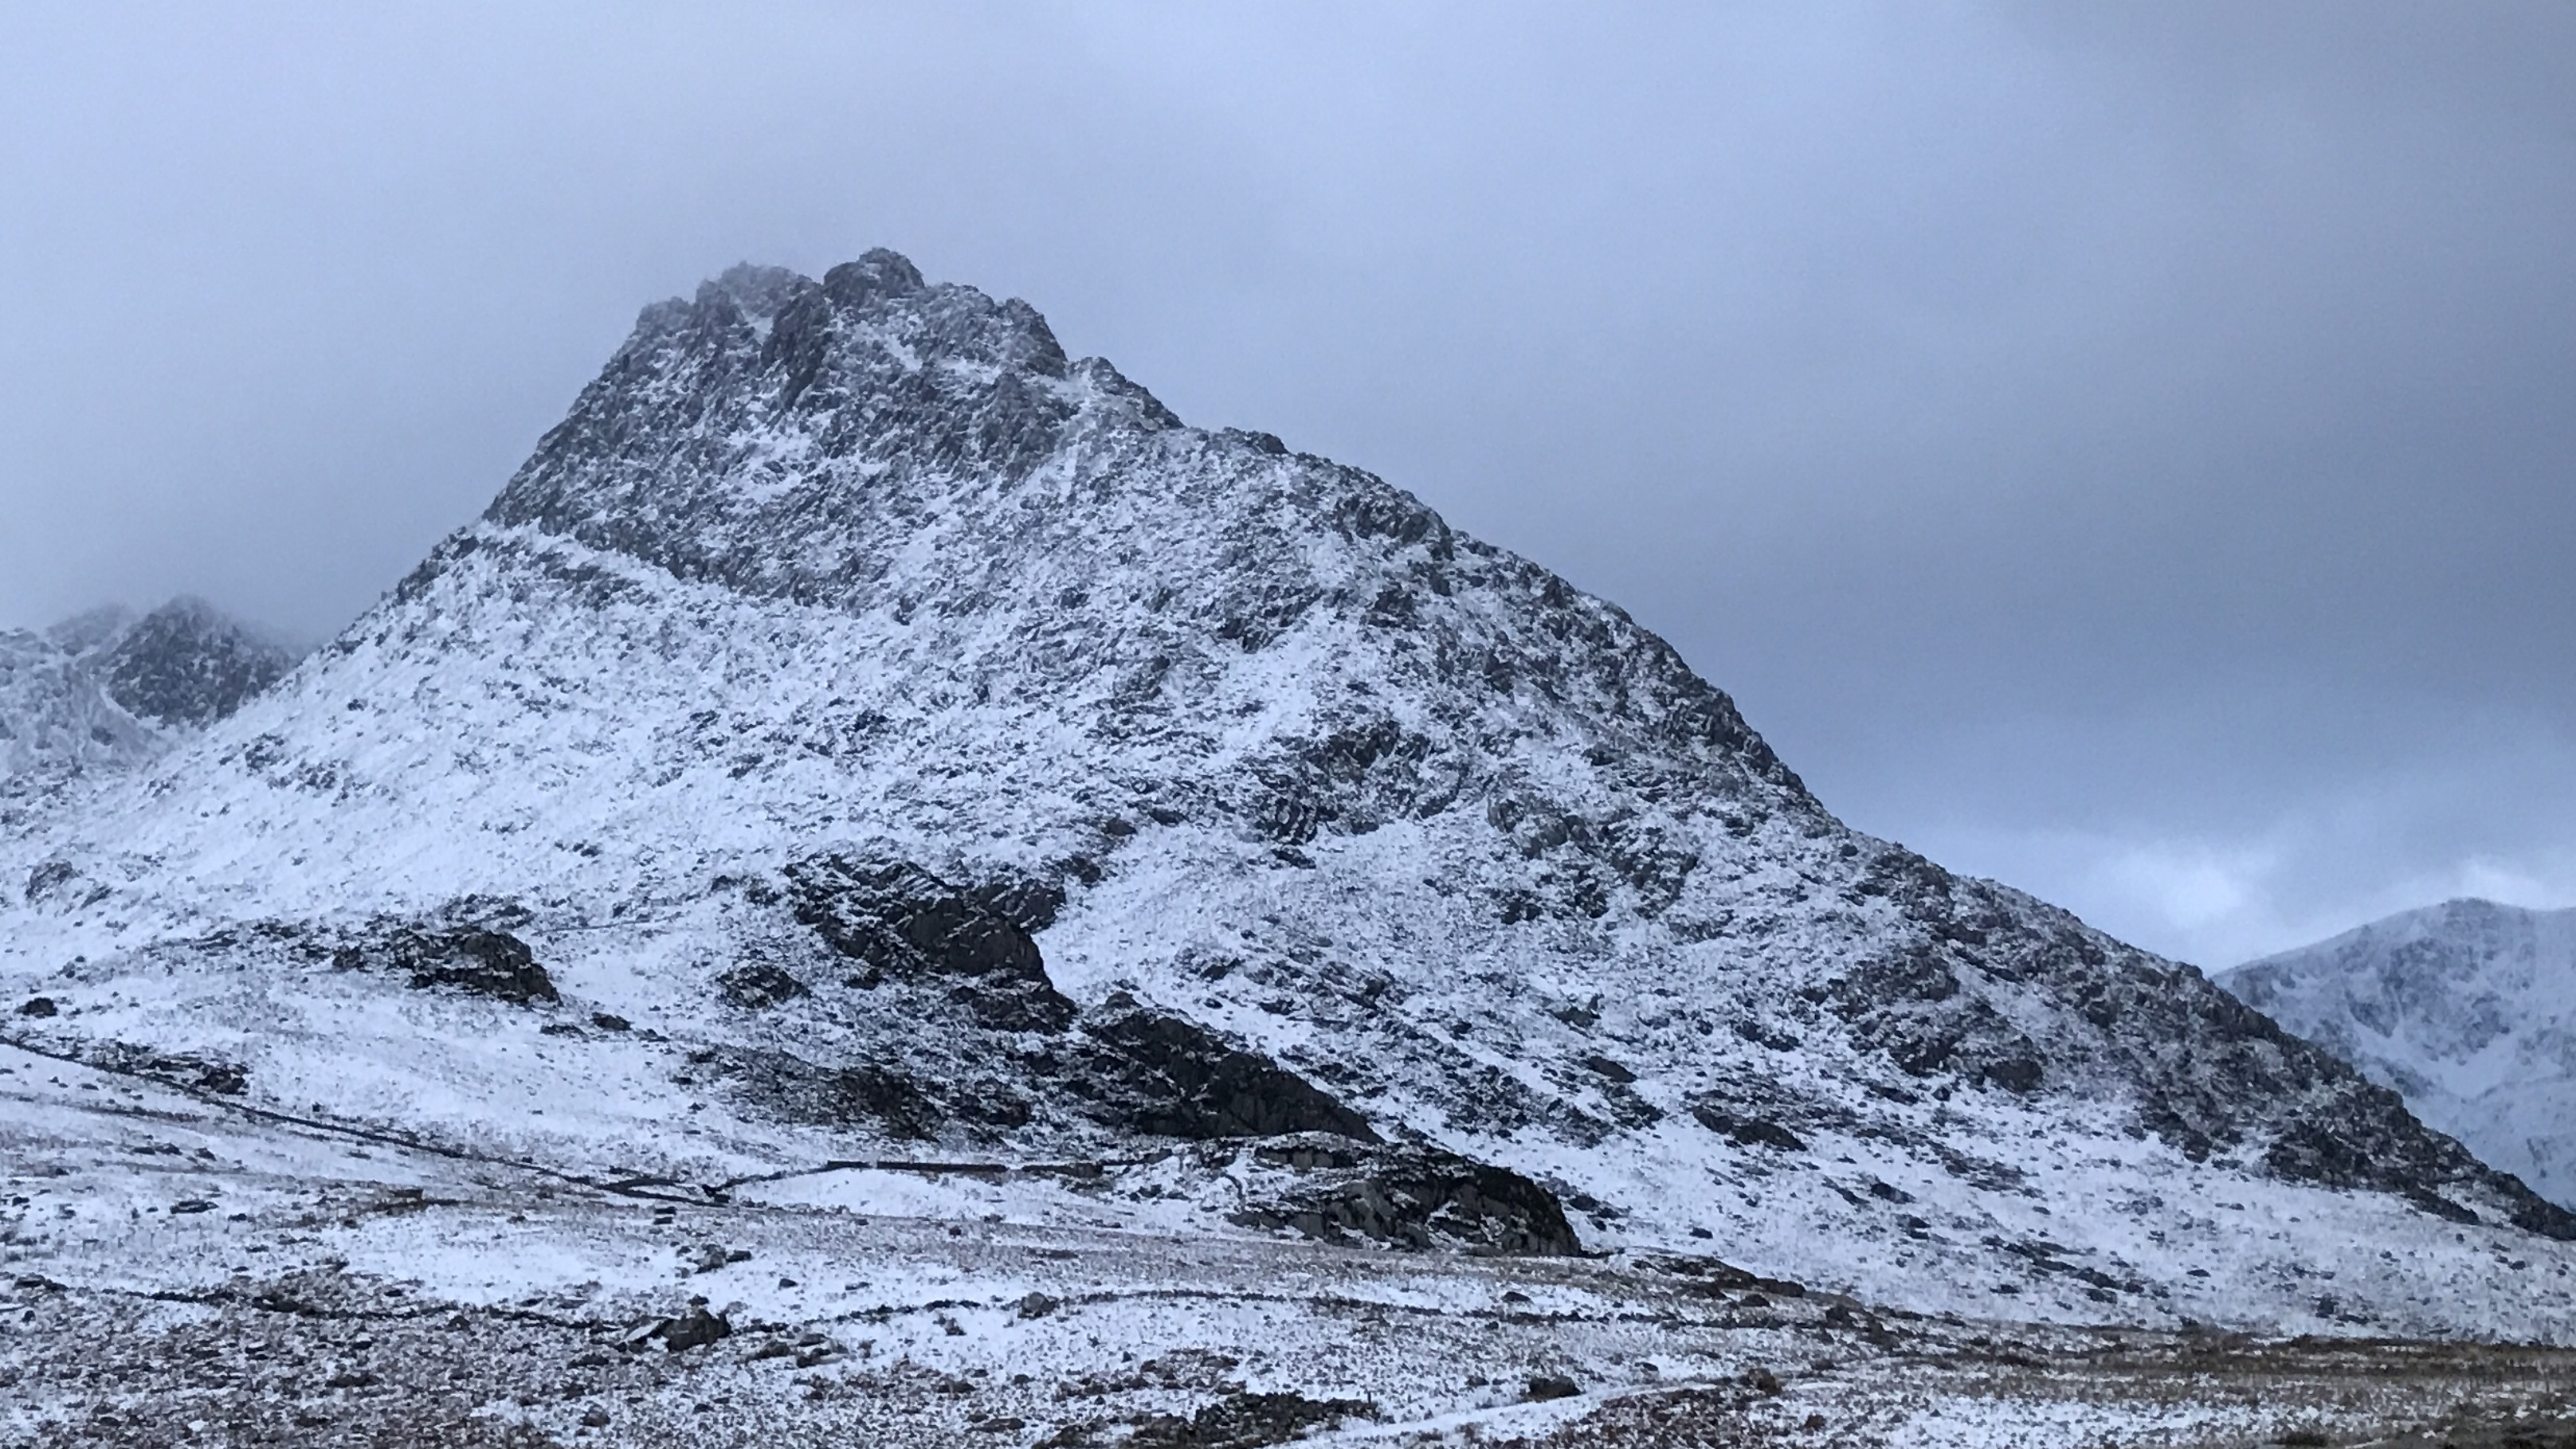
It was a London Mountaineering Club meet in early February and Eryri National Park’s stunning Glyderau range were blanketed in snow. We’d set our sights on two of the UK’s classic mountaineering ridges: Tryfan’s North Ridge and Glyder Fach’s Bristly Ridge. These are two spectacular yet relatively easy Grade 1 scrambles in summer. In winter conditions, however, they really bare their icy teeth and become much more challenging Grade 2 winter climbs.
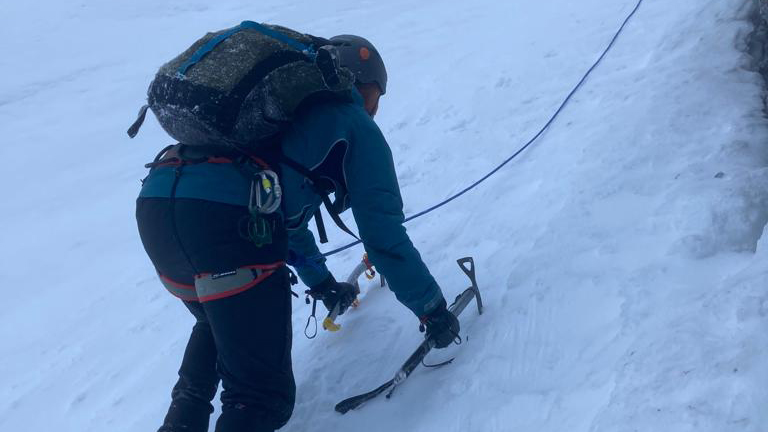
My friends Will and Andrew had decided to bring their harnesses and ropes. I didn’t. I didn’t even own a harness. I’ve done them in summer, no problem, I thought. How much harder can they be under snow and ice? Making this kind of judgement is what’s known as falling into a heuristic trap. I’d made my decision based on familiarity and without considering the wider picture and the nature of the conditions. Neverthless, Tryfan was marvellous fun. But, on Bristly Ridge there were admittedly a few spicy moments. With daytime waning, we ended up having to escape the ridge with a rappel.
Will sent his harness up to me on the rope after he’d already rappelled down to safer ground. I wasn’t at all sure how to put on a climbing harness, as it had been a while since I’d worn one. With all its loops, straps and buckles, it wasn’t immediately obvious how to go about it. Fortunately, I had an expert in Andrew alongside me and before long it was on, checked, and I was ready begin my rappel.
“Tomorrow, Alex, you’re buying a harness,” Will said to me, as our hiking boots crunched through the headlamp-lit snow on the descent to the car. “You’re a climber, not a hiker.” Can't I be both? Anyway, the next day, in an outdoor gear shop in North Welsh adventure capital Llanberis, I was trying on my brand-new climbing harness and many exciting days lay ahead.
Meet the expert
The climbing harness
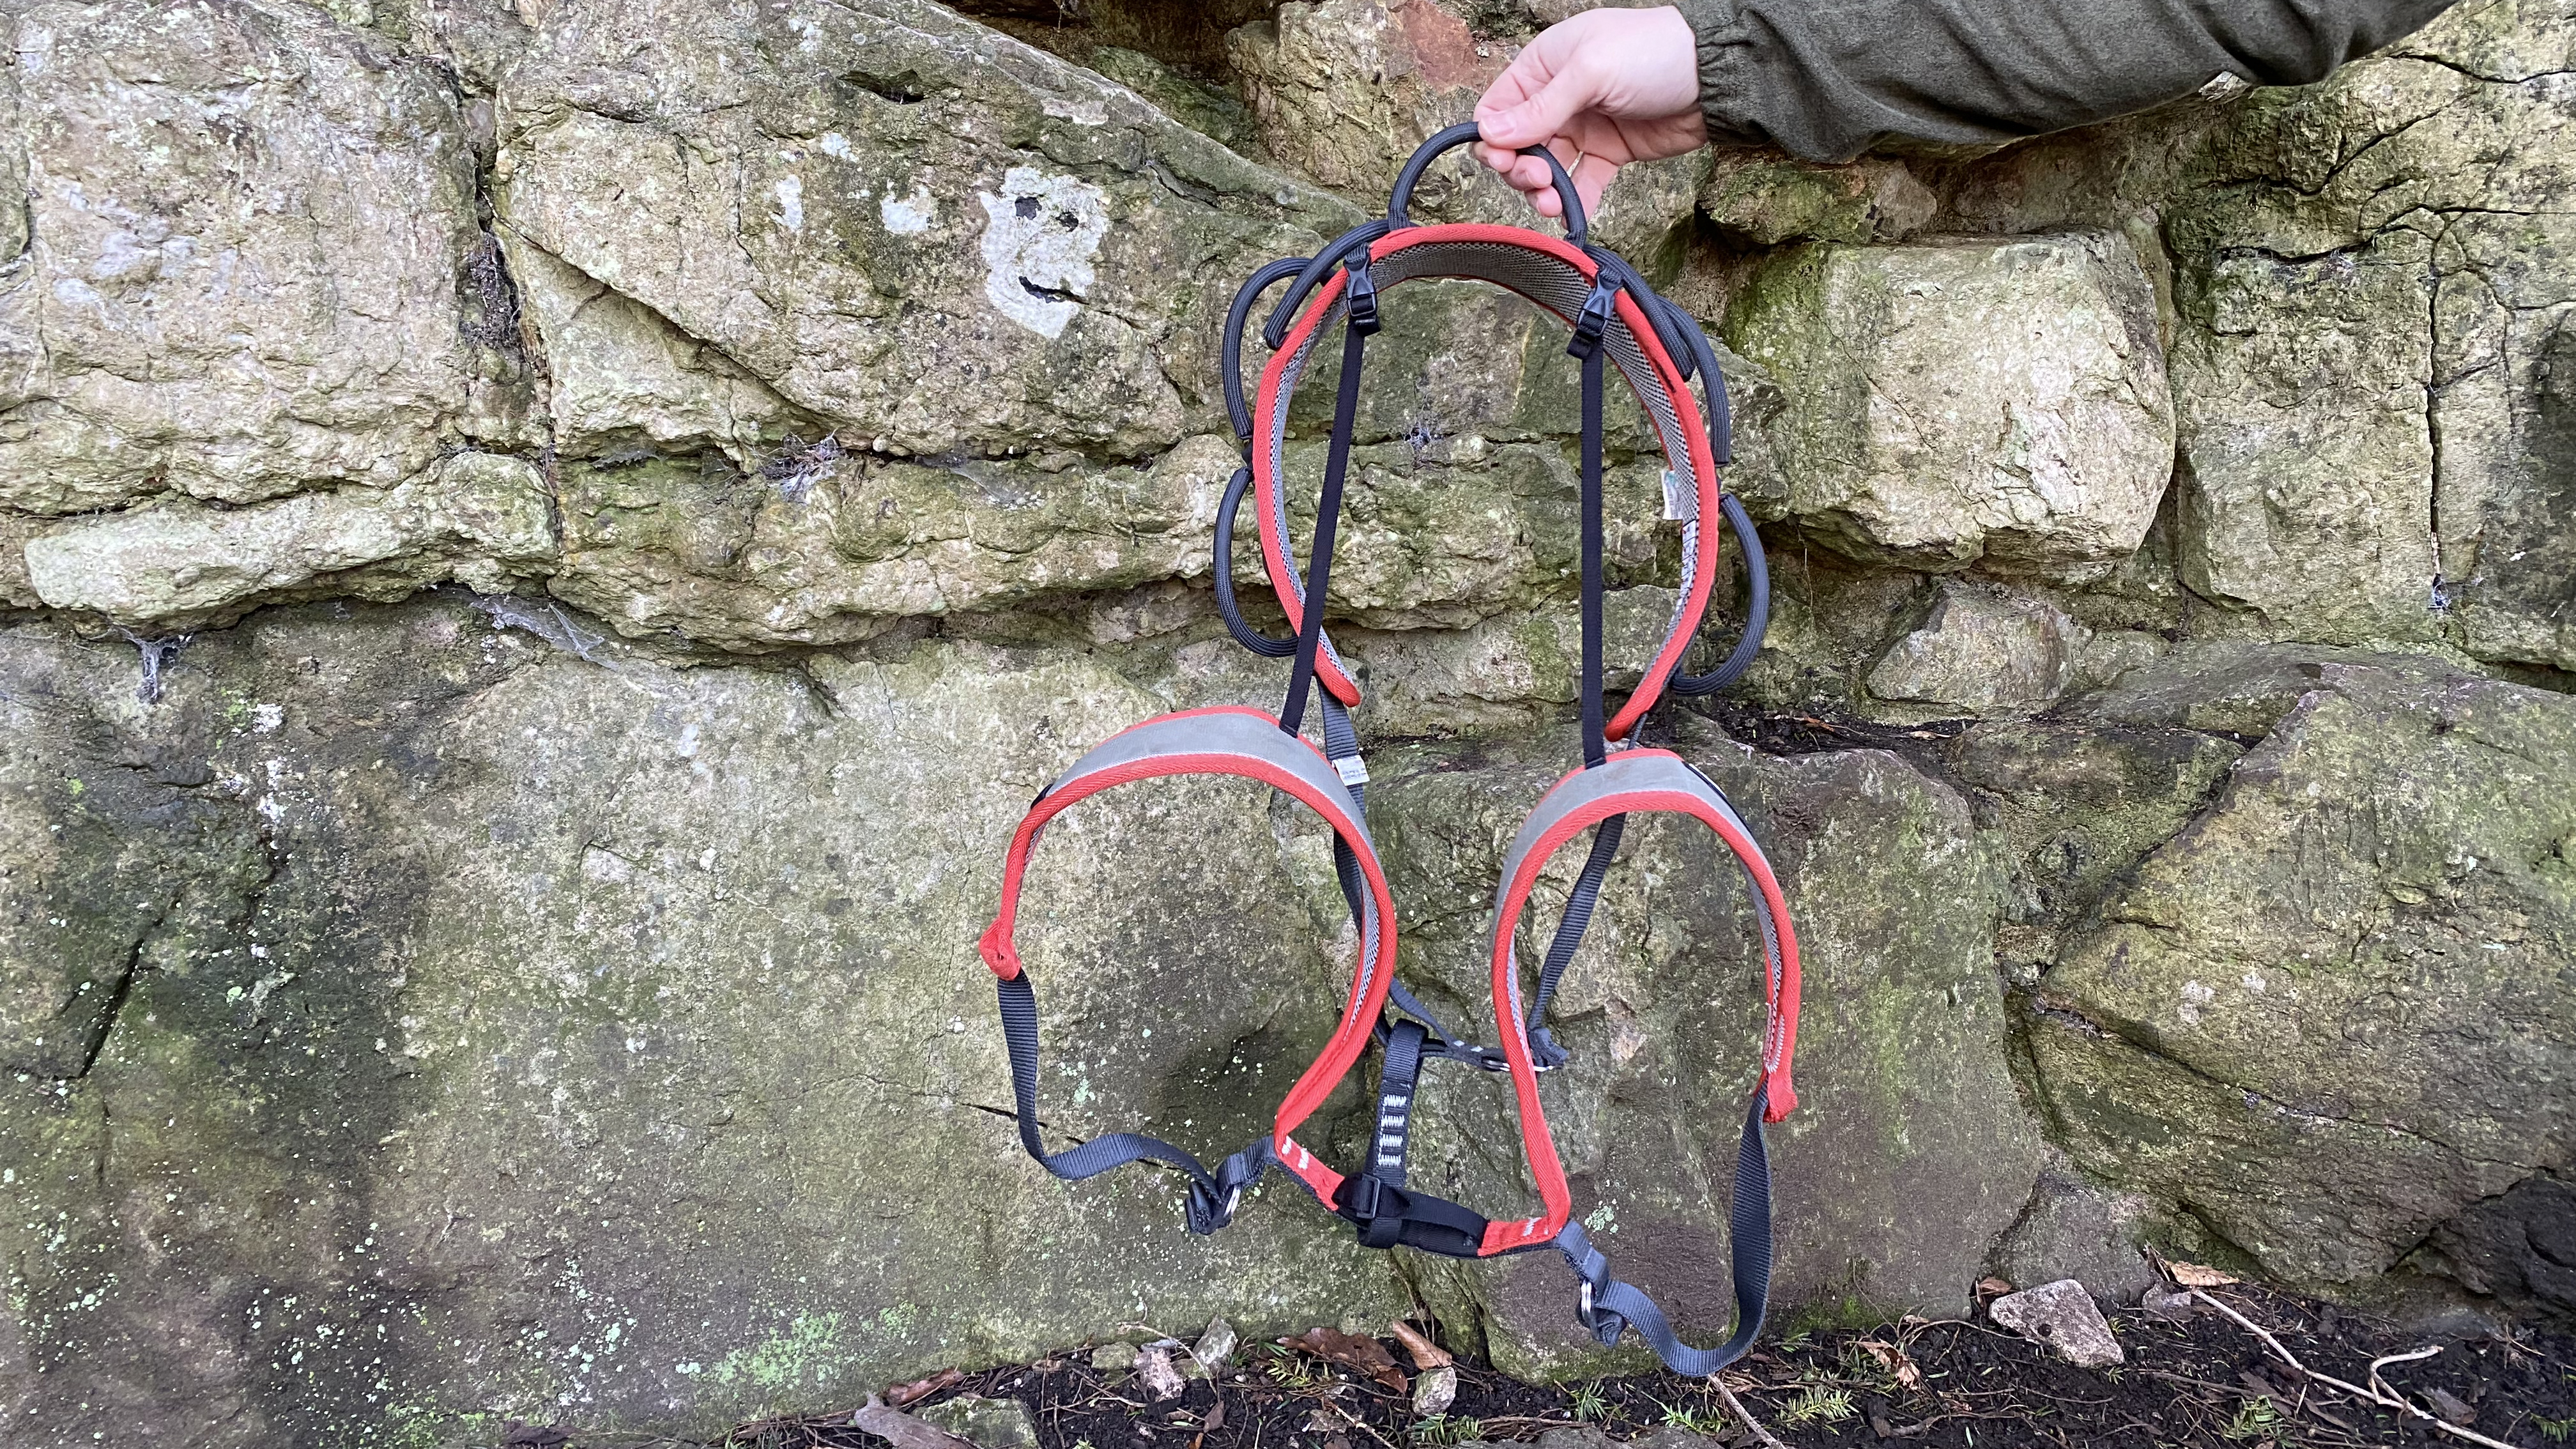
- A climbing harness is a padded belt with two thigh loops
- It has attachment points for climbing ropes and gear
- It's the harness that's attached to the rope that holds you in the event of a fall
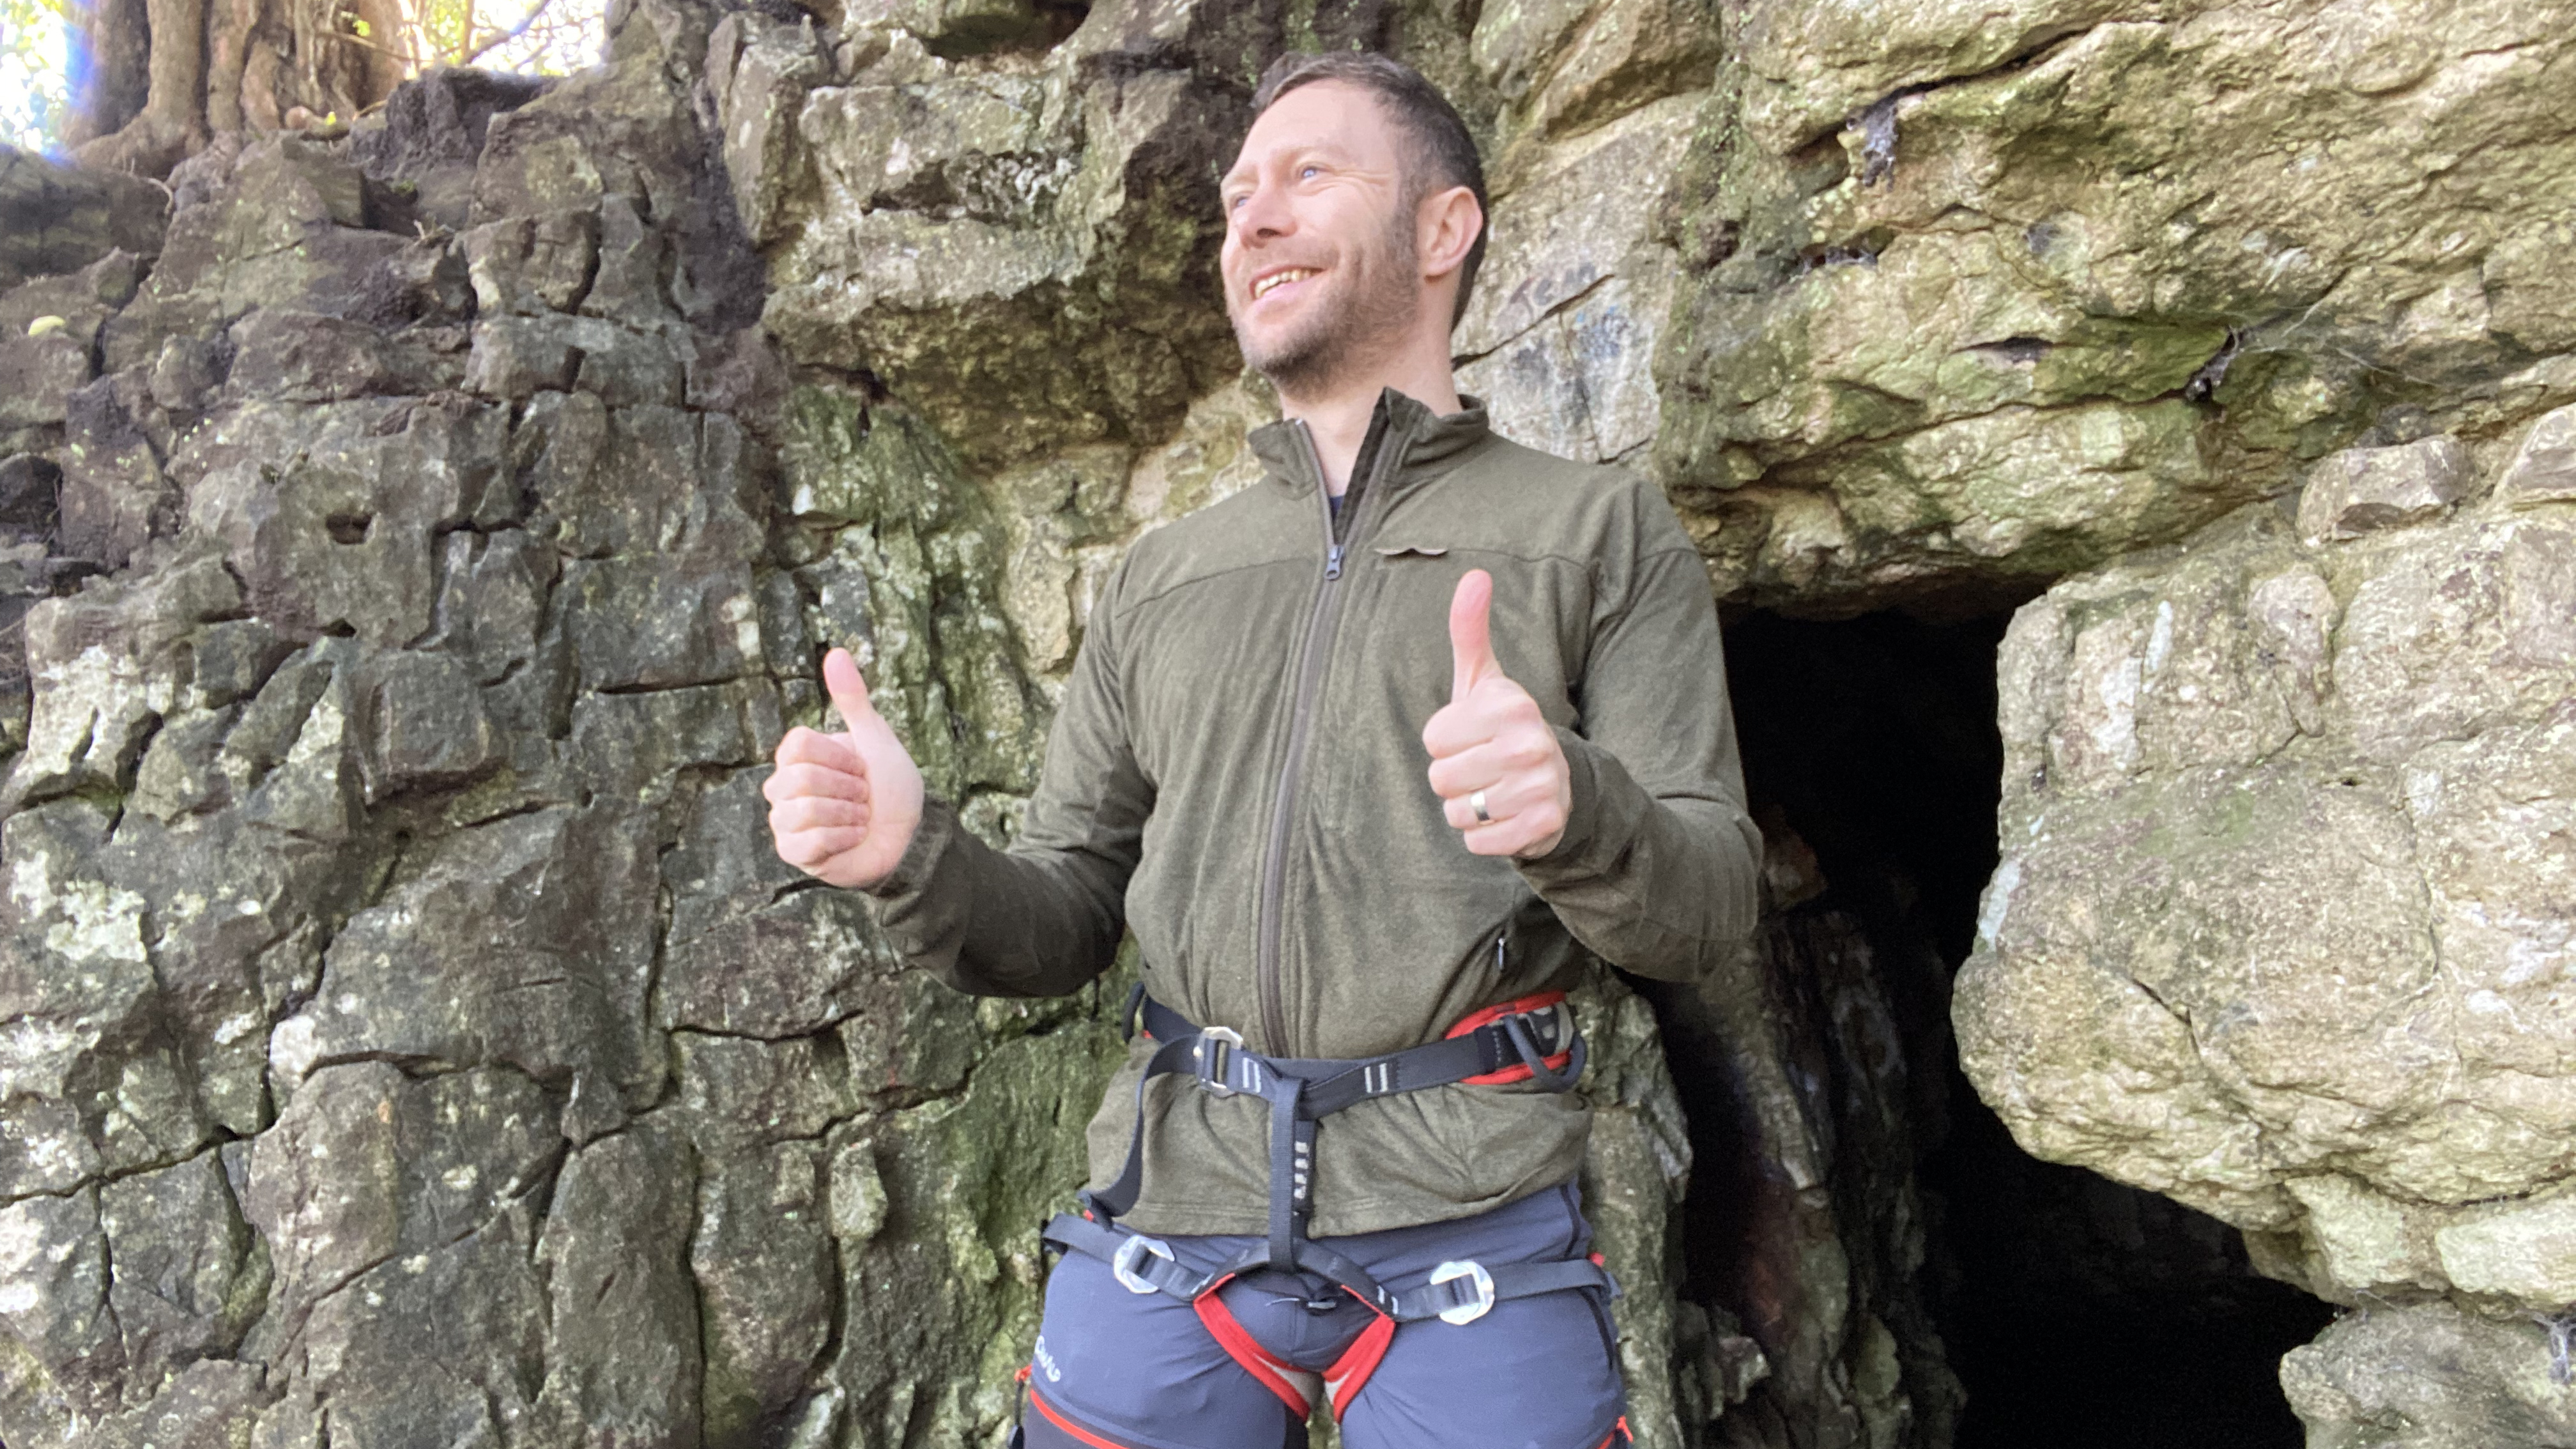
A climbing harness is an essential bit of safety kit that, when used correctly, opens up many exciting adventure types, such as indoor climbing, sport, trad, mountaineering, ice climbing and canyoneering, to name a few. They’re basically padded belts with thigh loops that tighten around the waist and thighs of the climber. They have various attachment points for ropes and climbing gear. If you were to fall while on a route, it's the harness that's attached to the rope that holds you. Needless to say, knowing how to put on a climbing harness is important.
If you’re getting into climbing or if, like I had on Bristly Ridge, you’ve hit the ceiling of what’s manageable for you without ropes in terms of your outdoor adventures, it’s time to choose a climbing harness and make the investment.
Learning how to put on a climbing harness is very straightforward and once you’ve done it a few times, you’ll be an expert yourself. Here’s how to do it:
1: Loosen the waist and thigh buckles
Start by loosening the waistbelt straps and thigh loop straps fully using their buckles. A climbing harness is much easier to put on if these are as loose as possible to begin with.
2: Check everything is in order
Before stepping into it, hold the harness up in front of you to inspect that nothing is twisted and that everything is broadly in line. Correct it if not. The padded part of the waistbelt should be facing the same way as the padded part of the leg loops and all the straps should be straight.
This is also an opportunity to check for any potential damage or defects. The other important time to do this is at the end of a day’s climbing, as you’ll have time to sort it, rather than being stood at the bottom of the crag with a faulty bit of gear.
3: Lay the harness out
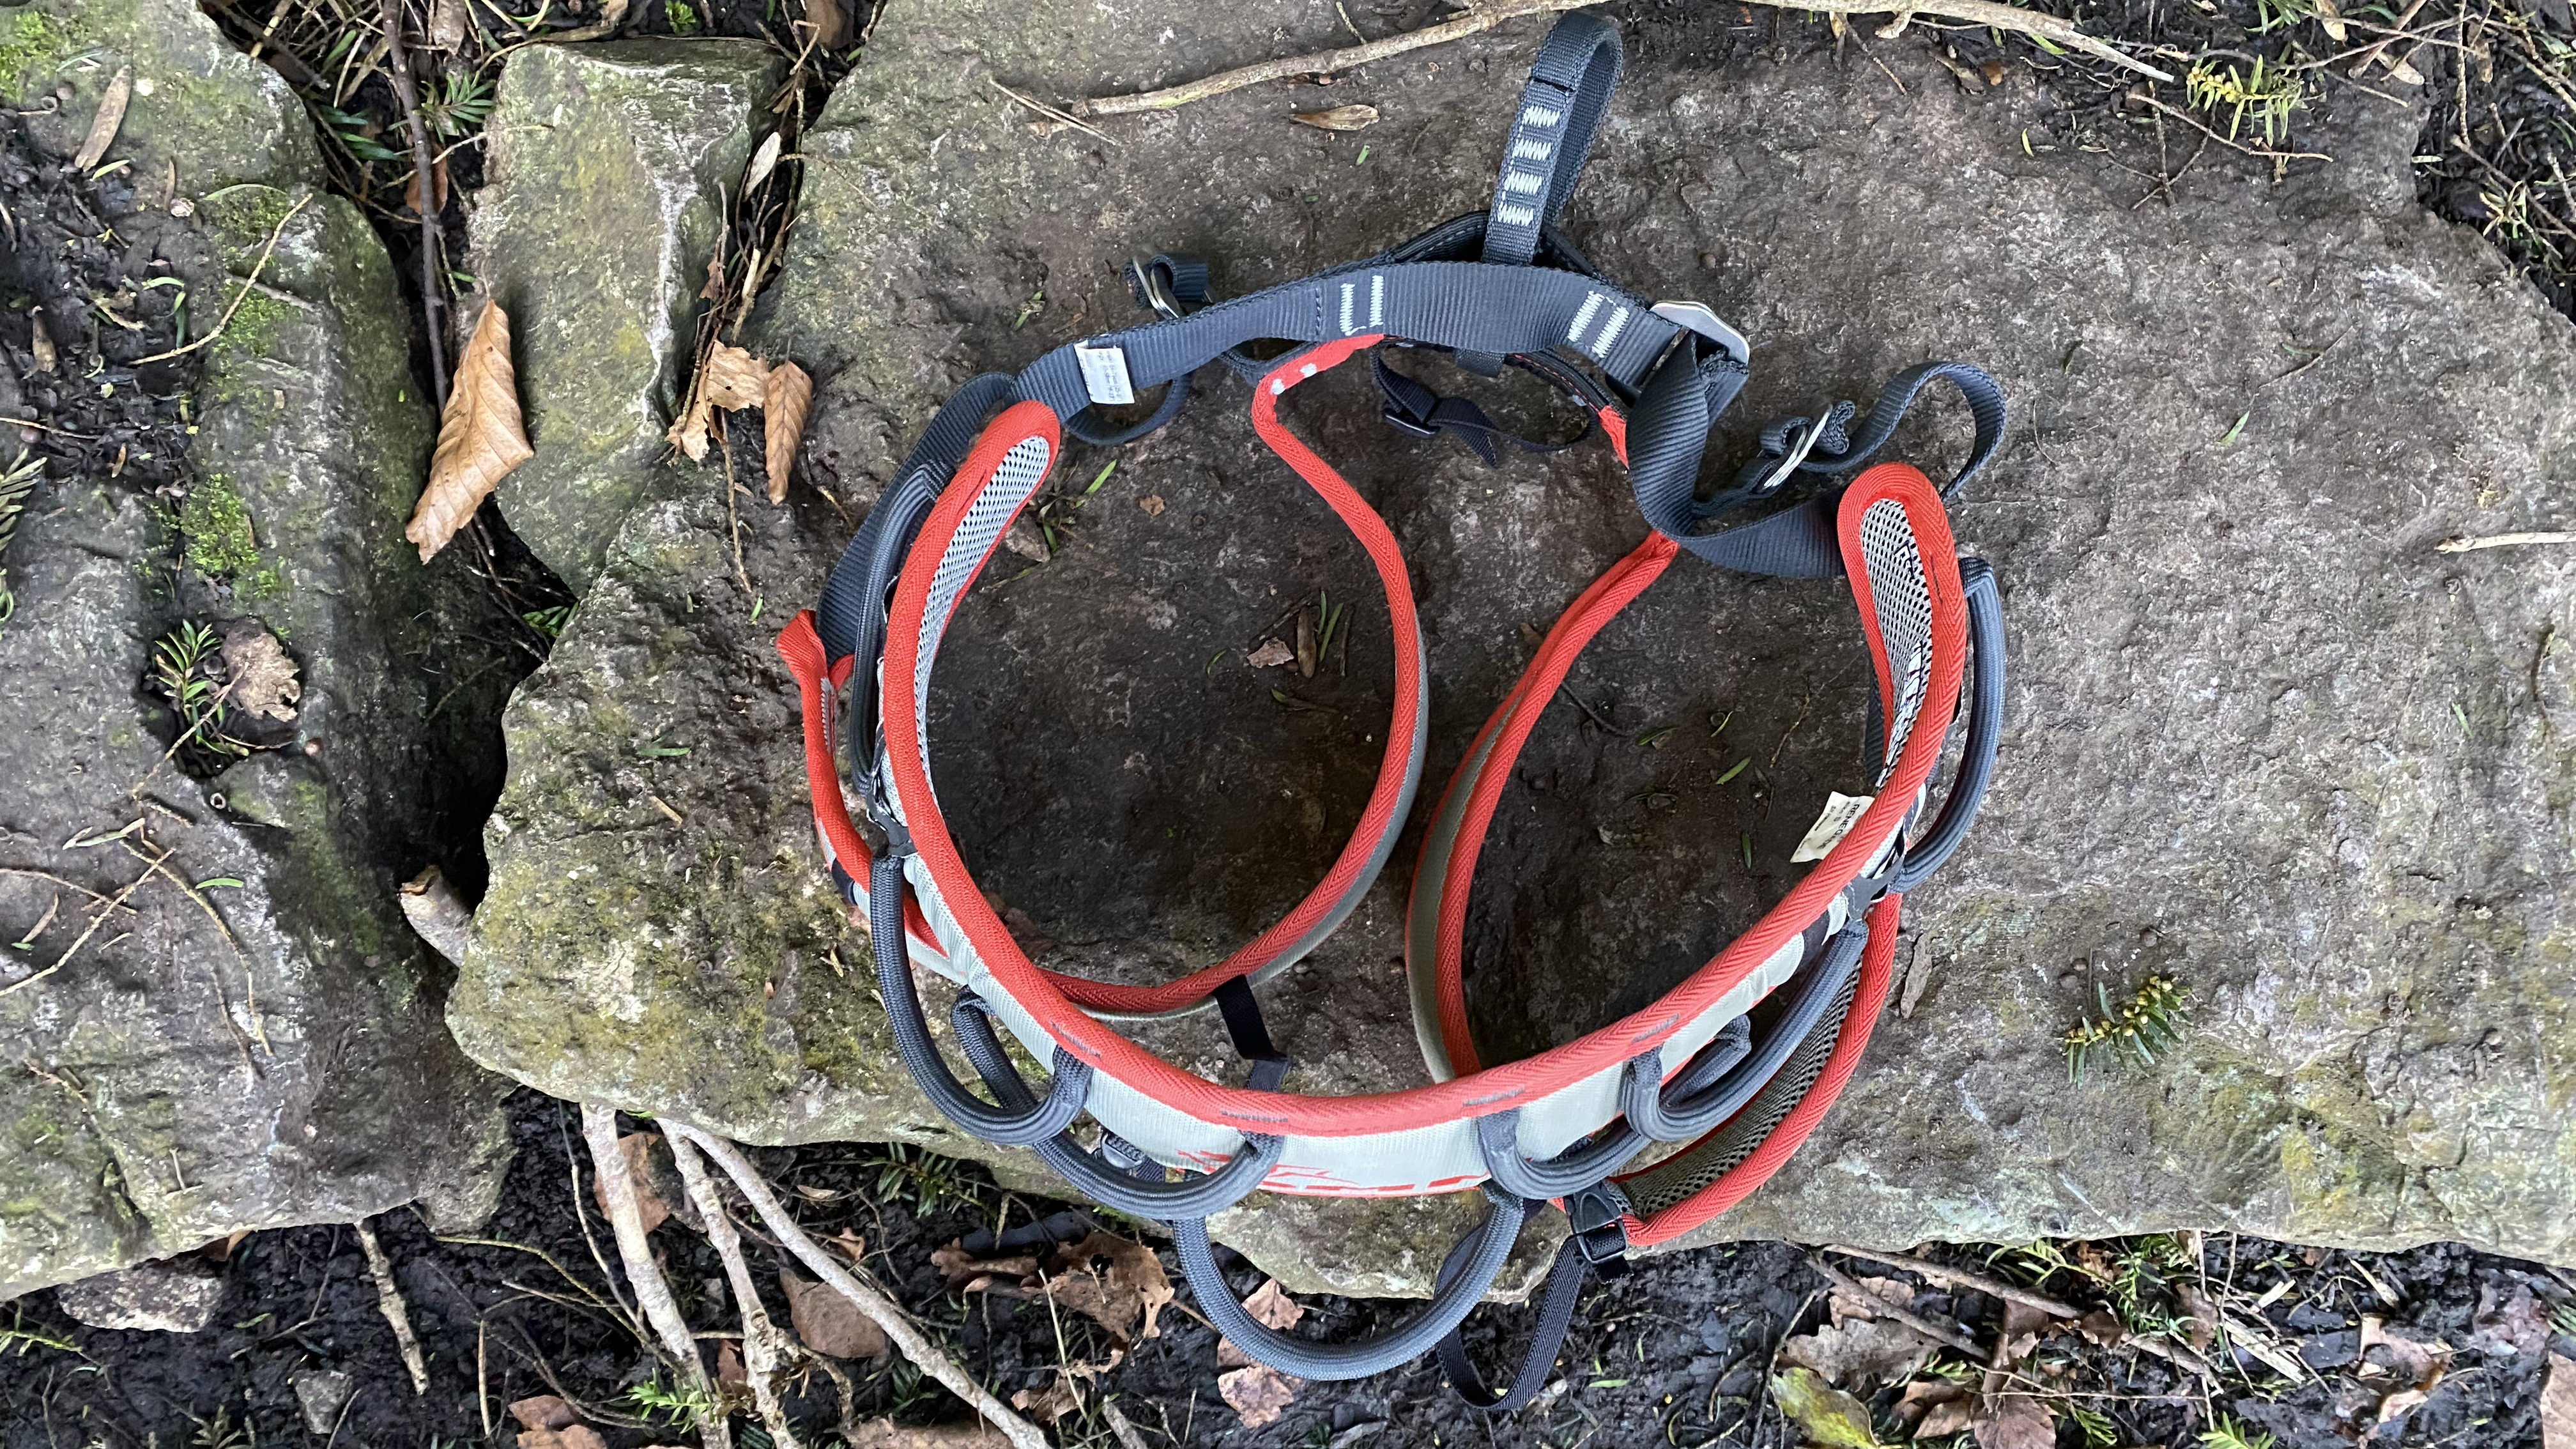
Lay the harness out on the ground with the thigh loops below and within the waist loop. Remember that the padded sections are for your back and the back of your thighs. Once you're well practised, you may not need to lay the harness out like this but it's a good method for beginners to get used to putting it on.
4: Step in and pull up
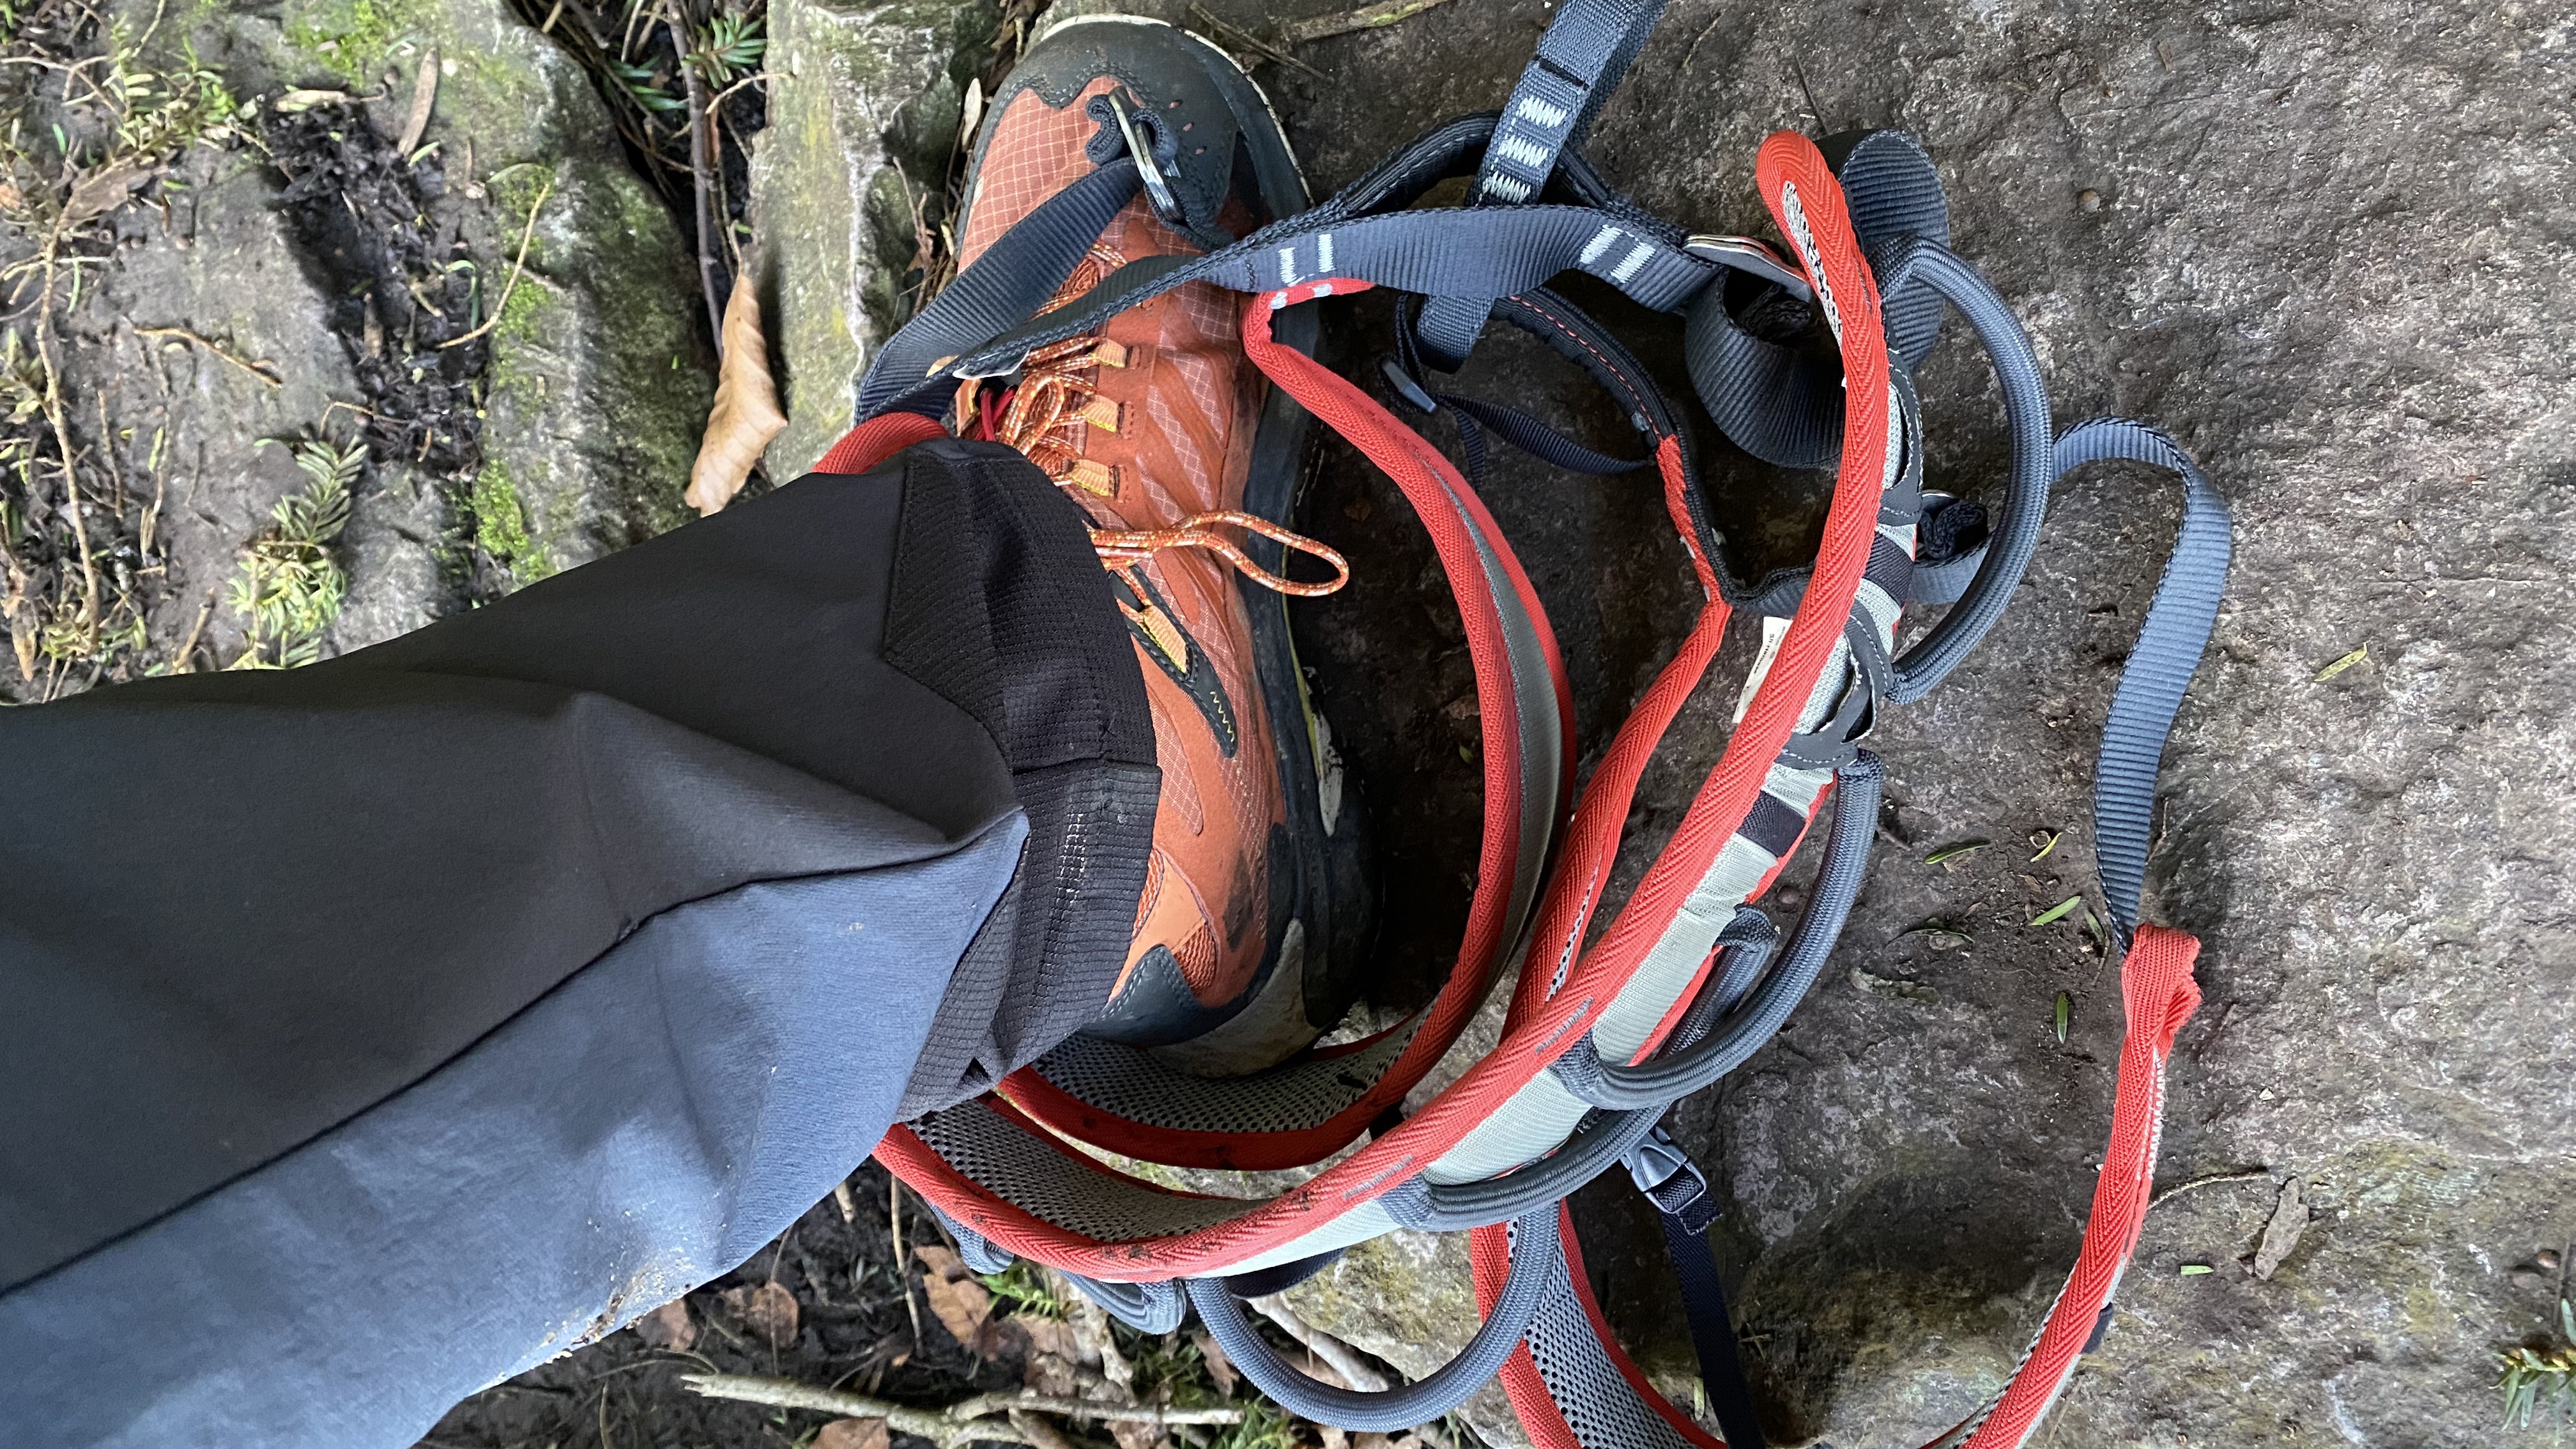
Step in through the loops with both feet and pull the waistbelt up so that it sits above your hip, bringing the thigh loops with it, which should sit nicely around your upper thighs. Basically, it’s a bit like pulling up your boxers or briefs.

Before tightening the loops and belt, take time to sort out and straighten any garments the harness now sits on top of. The last thing you want is your down jacket getting in the way when you’re reaching for quickdraws and the like.
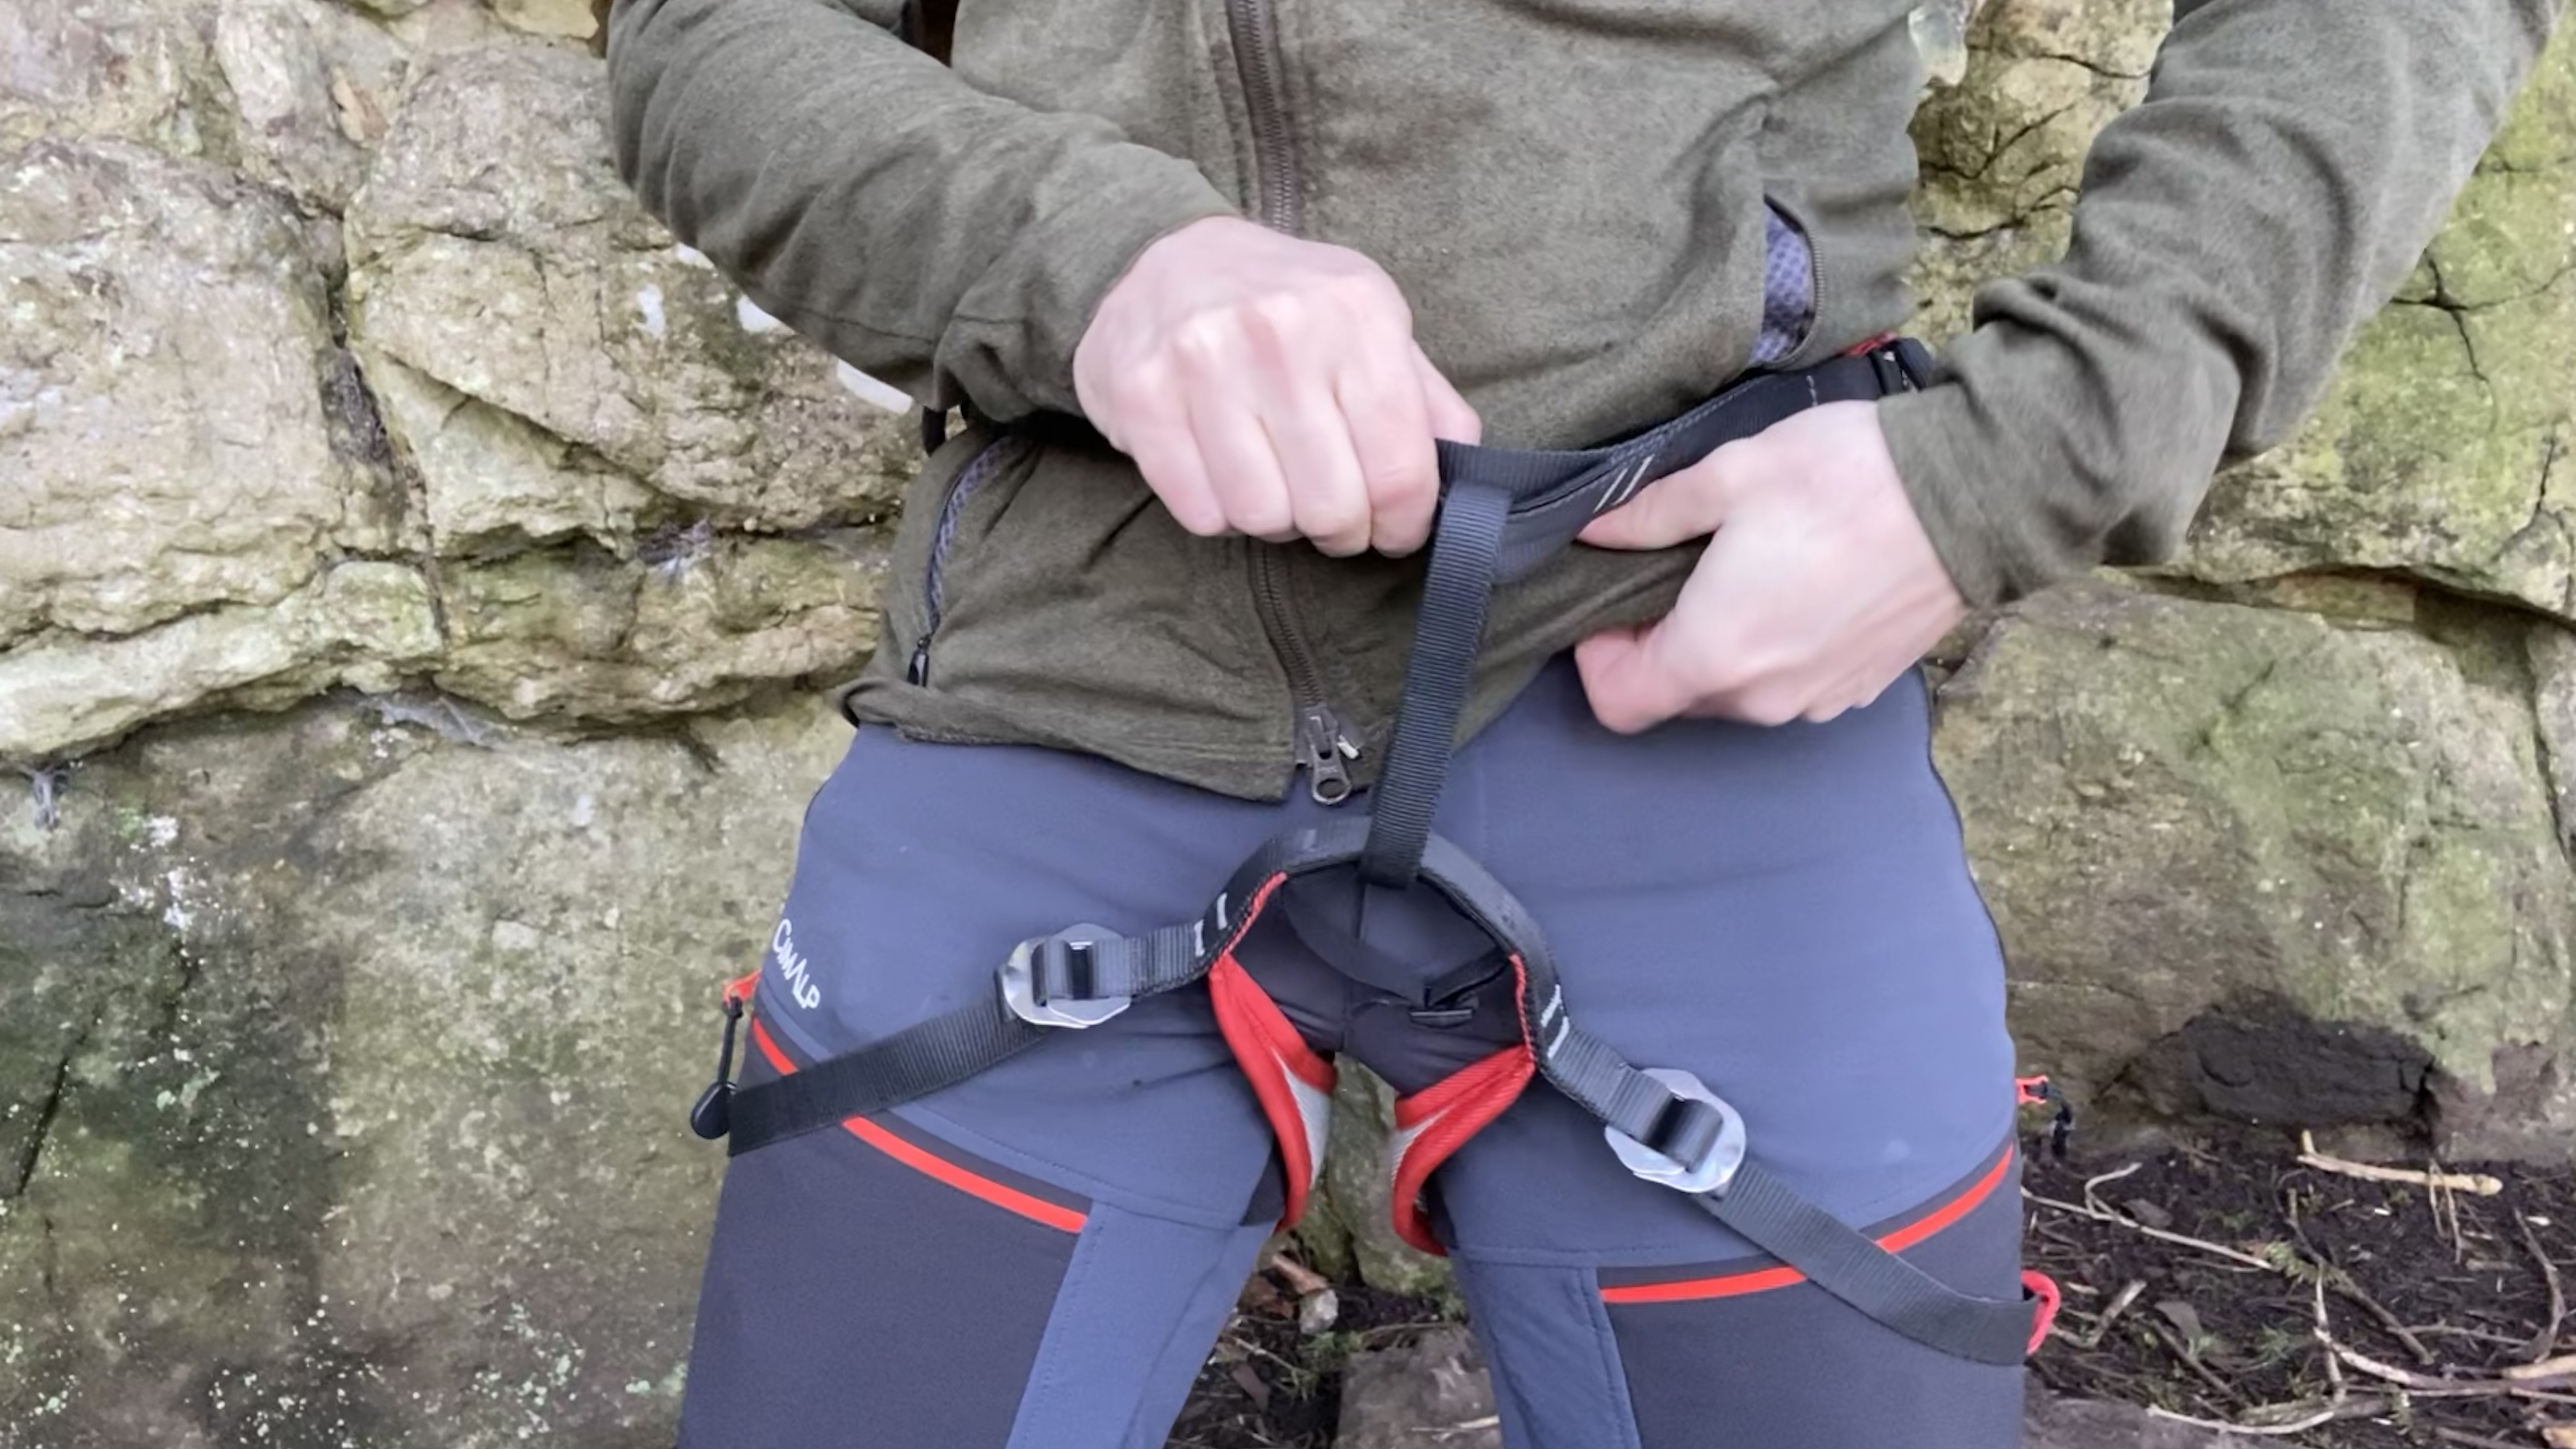
5: Tighten things up
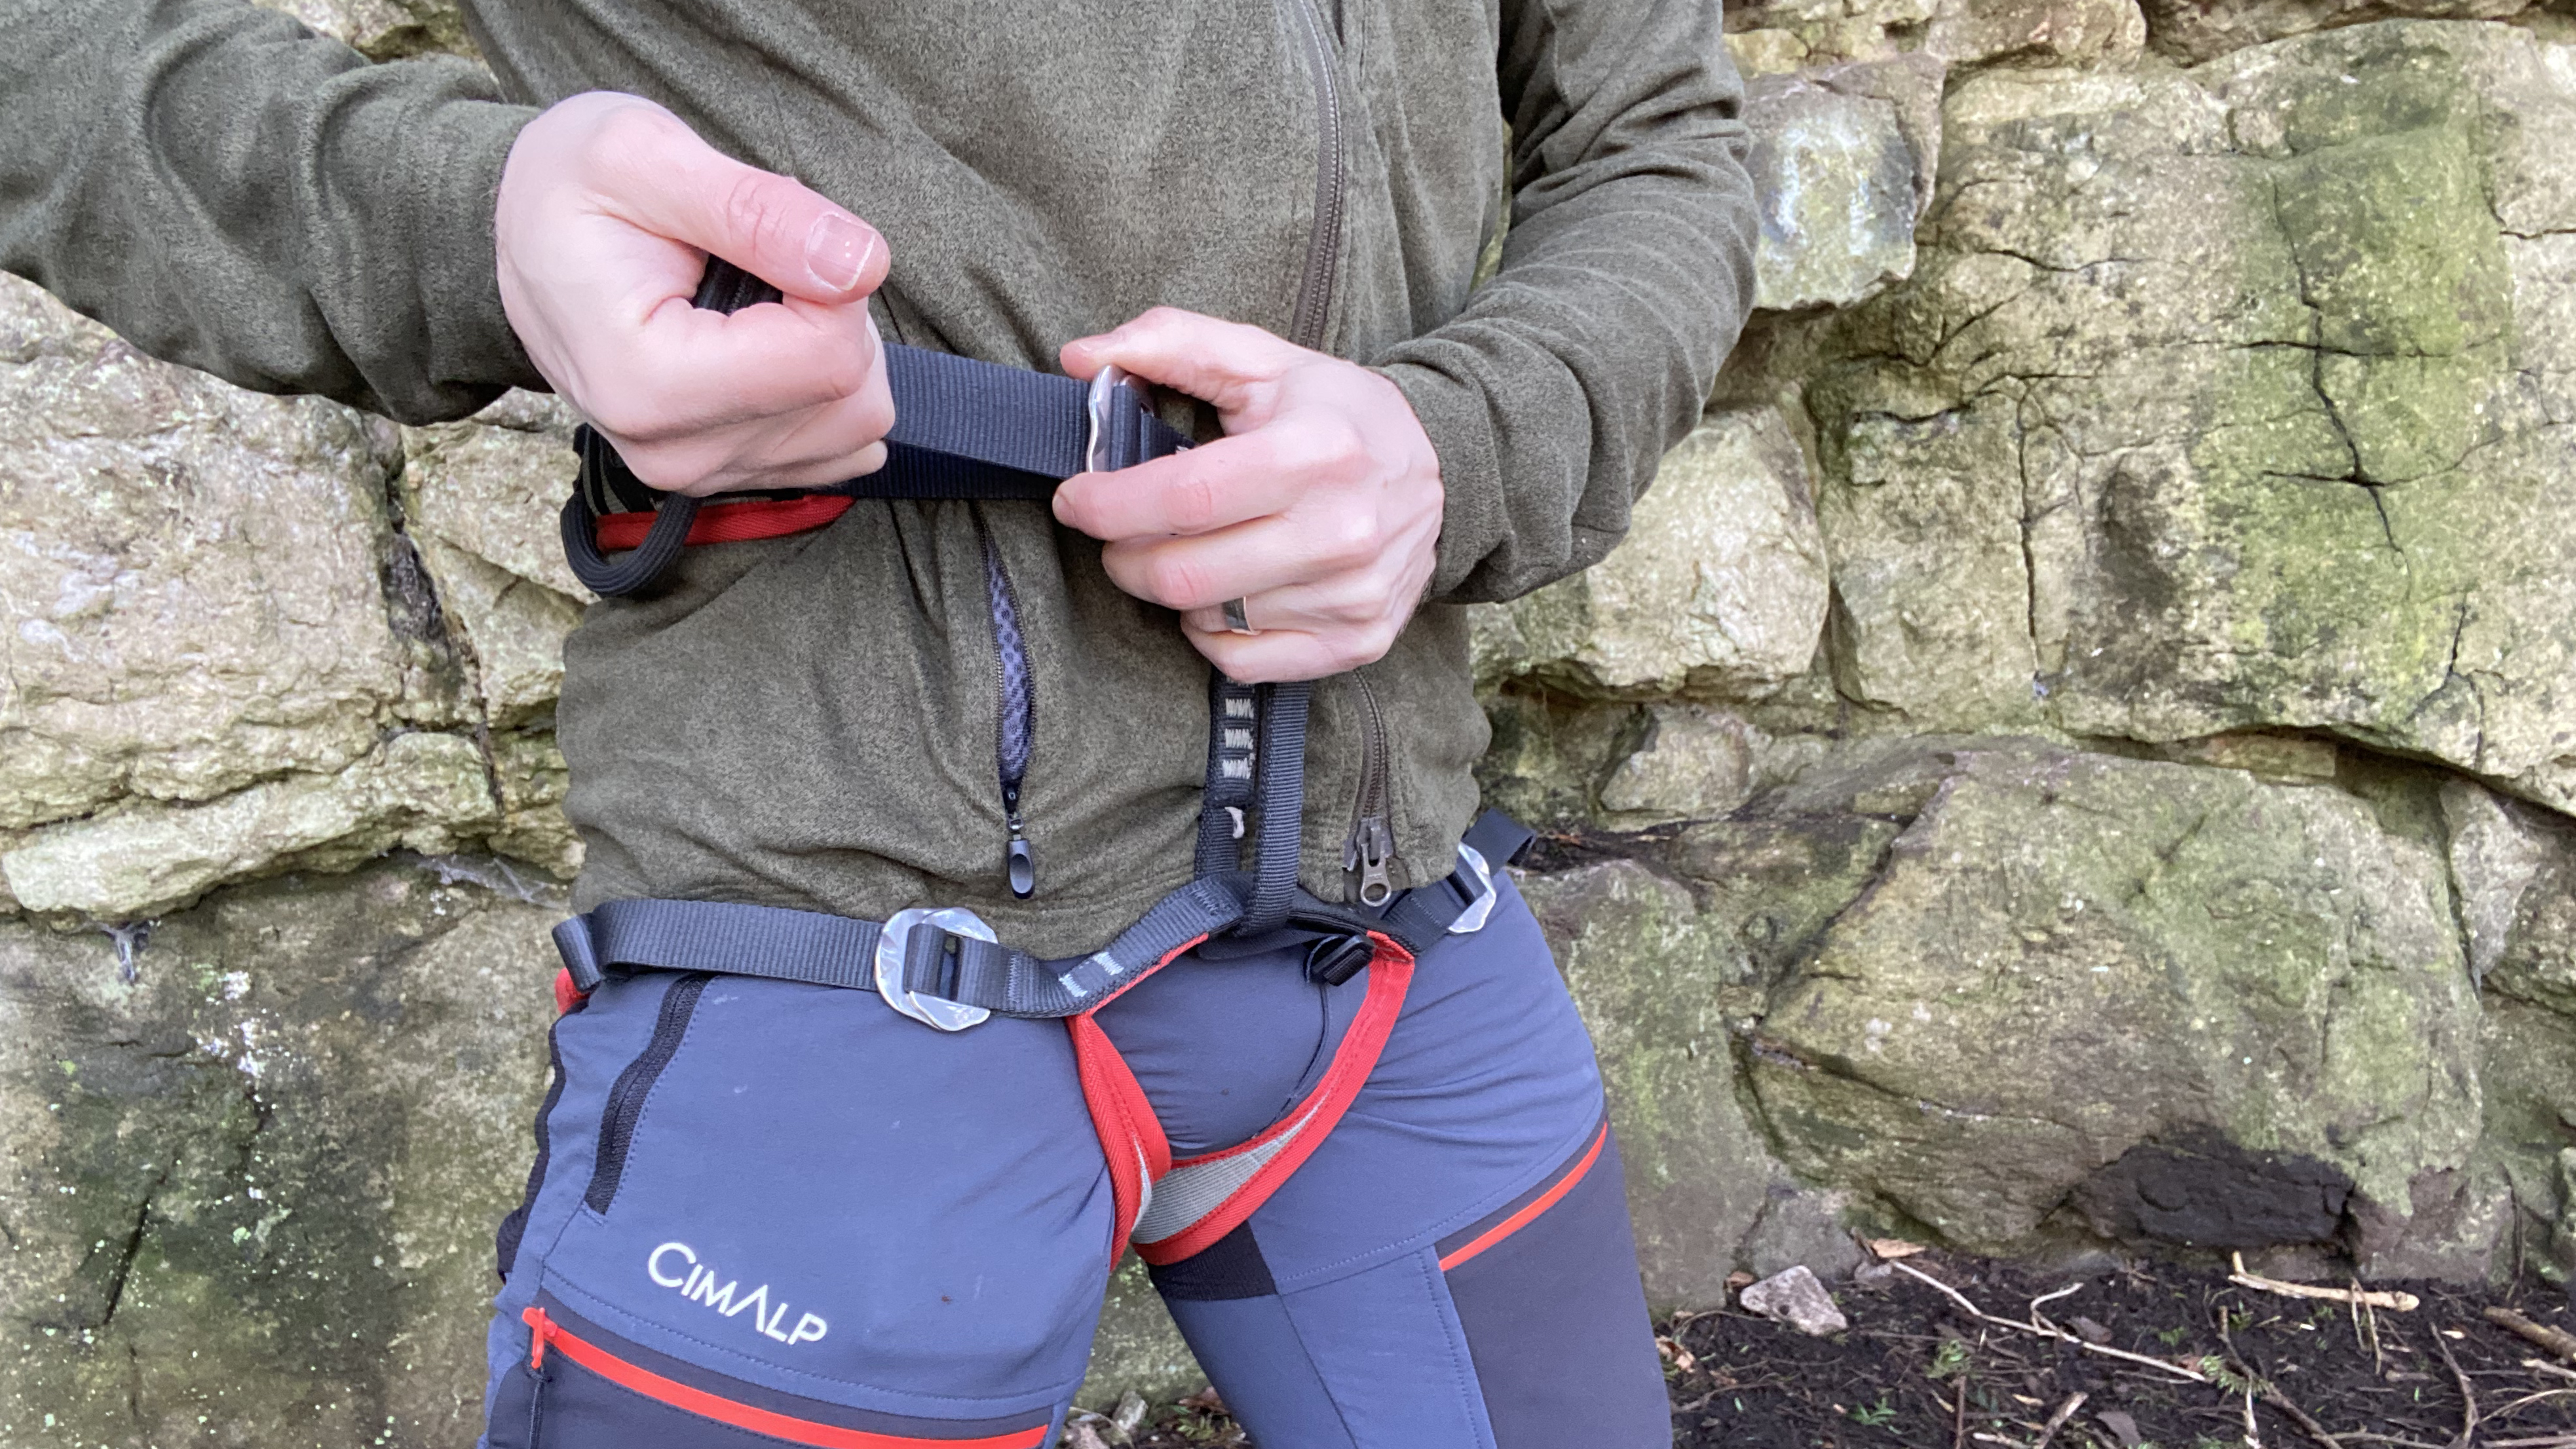
Now, tighten up the thigh loops and the waistbelt. It doesn’t need to be uncomfortably tight, but you mustn't be able to pull the harness down below your hips. A good rule of thumb is that you should be able to slide a flat hand under the straps.
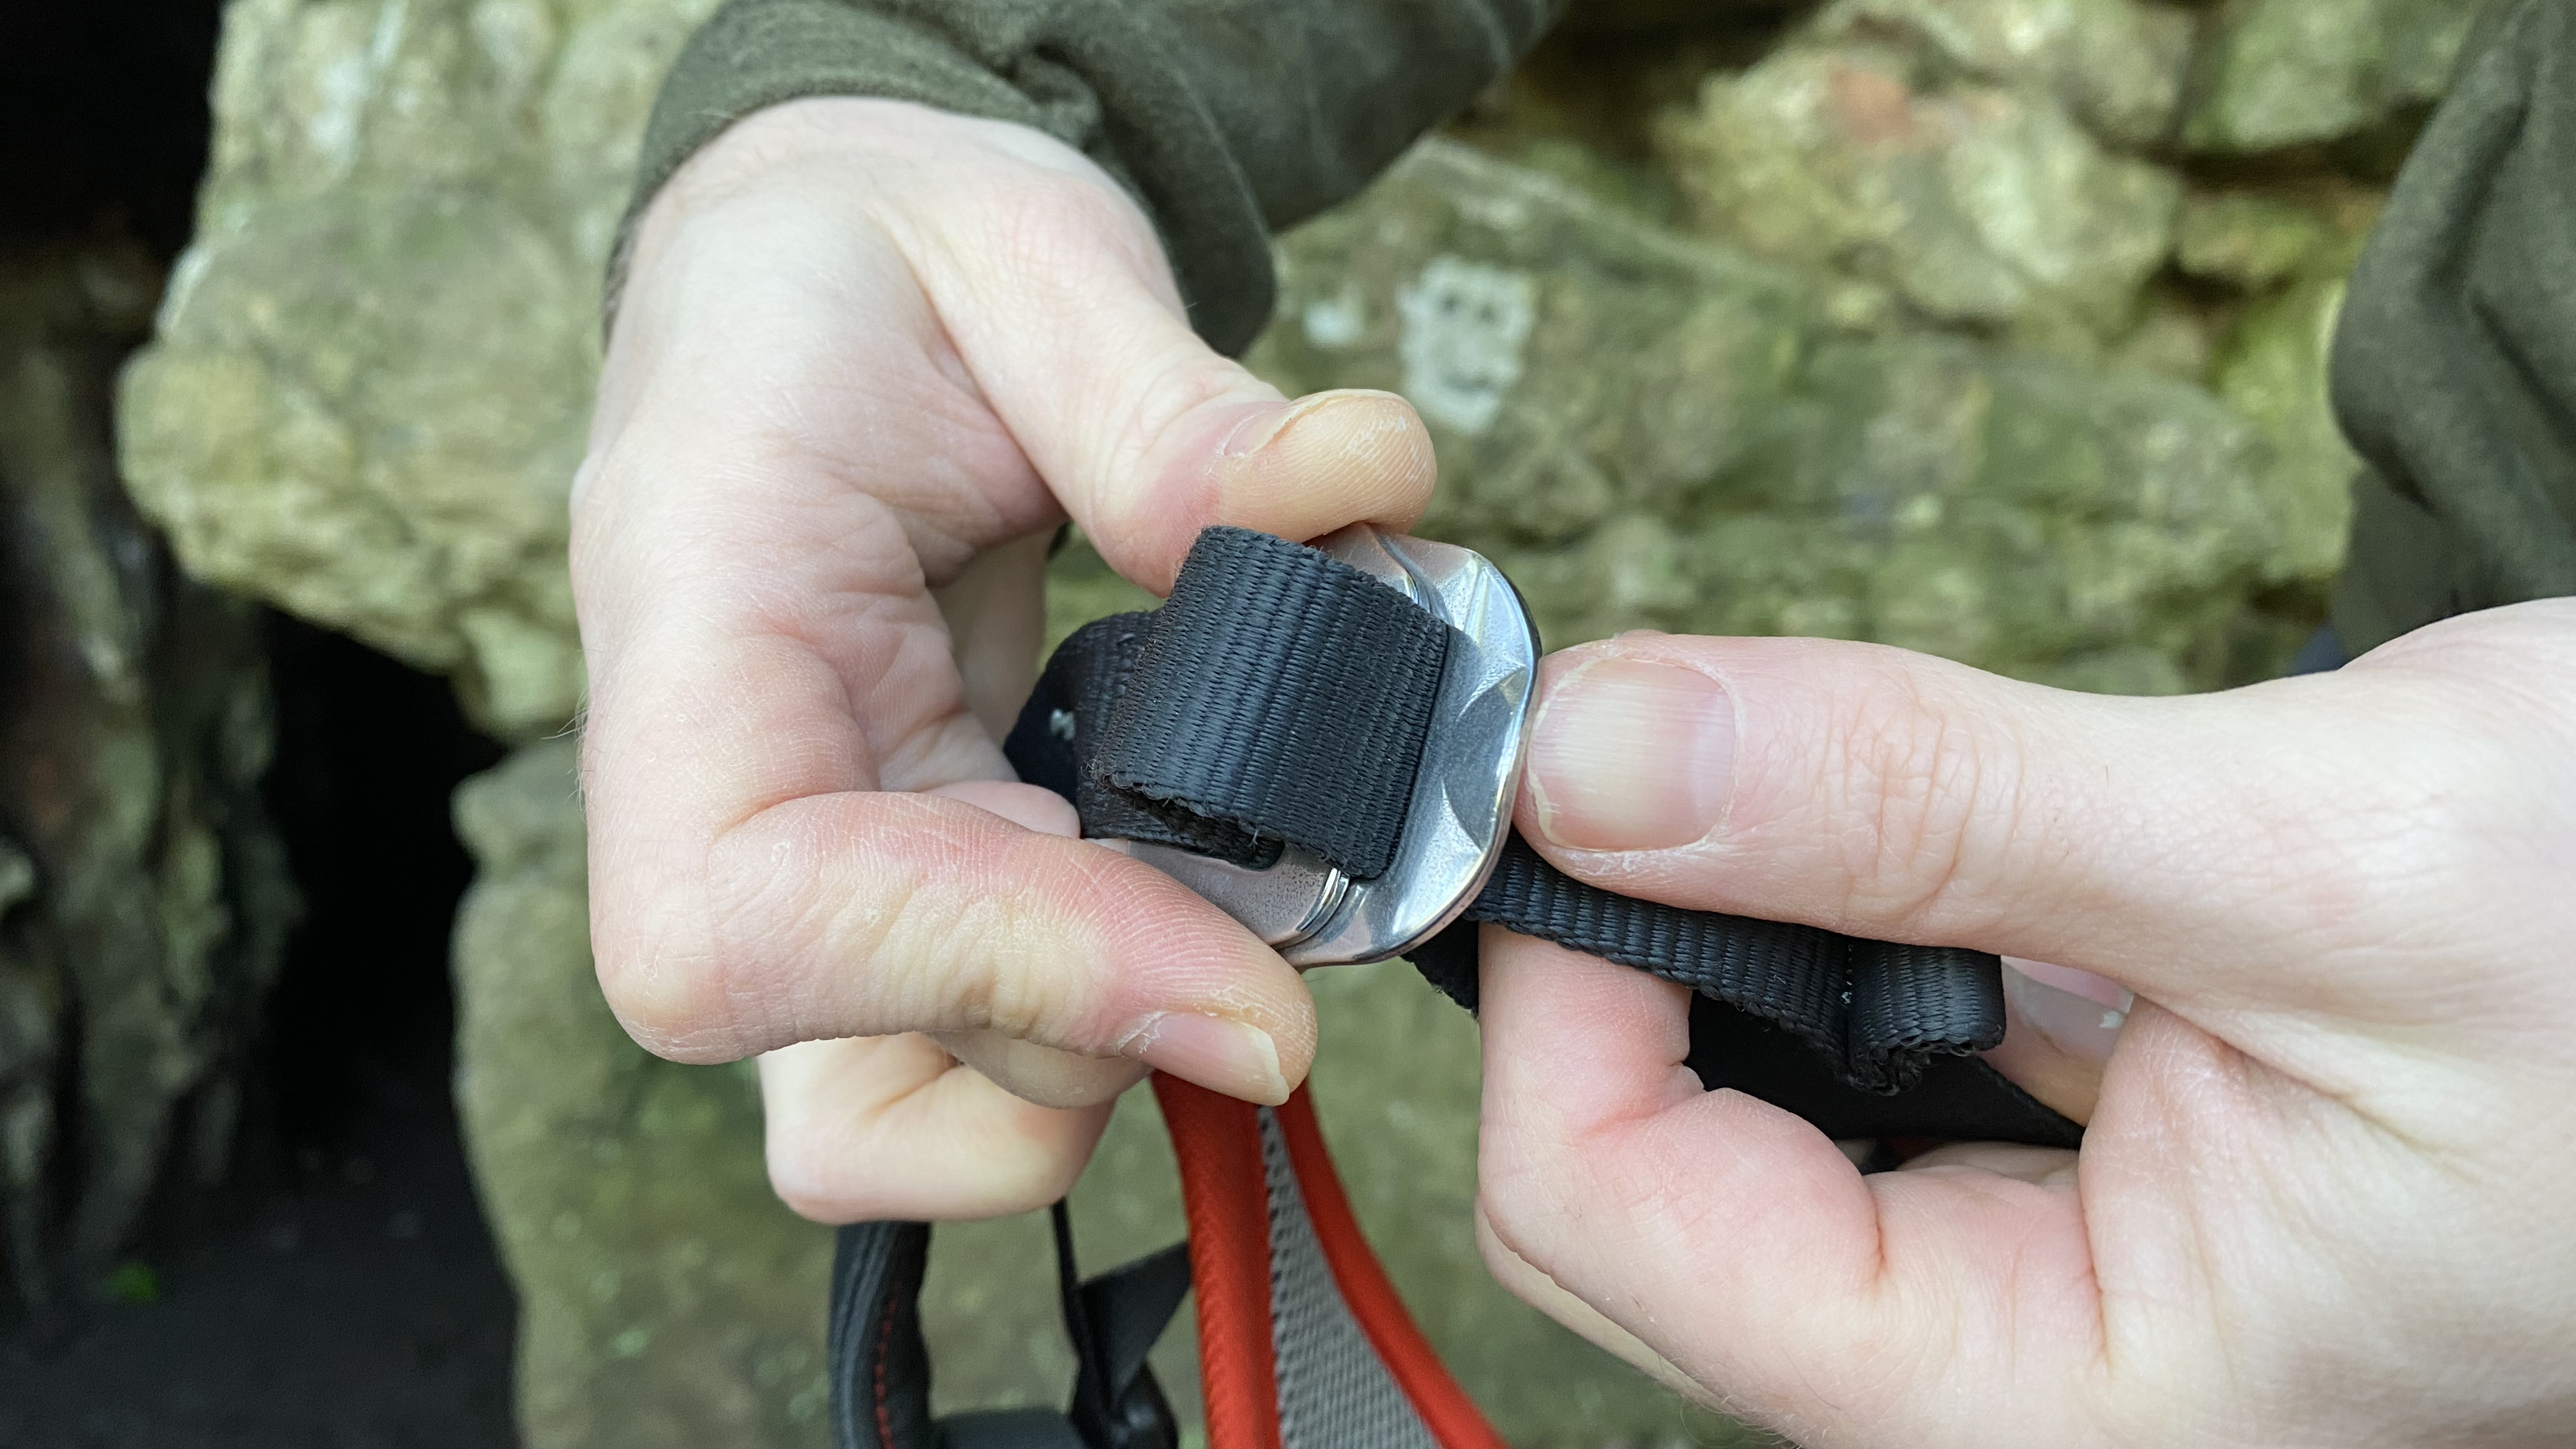
Modern harnesses tend to feature pre-threaded buckles that are configured in a double-back manner and stay this way when loosened and tightened. However, other harnesses require the user to thread the strap back through the buckle in order to properly secure it. Every harness is different, so it’s important to study the instruction manual before use.
6: Final checks
You’re almost set to “climb when ready!” But first, it’s good practice to both check your own harness and your climbing partner’s harness before the climb begins, just as you do with each others’ figure 8 knots. Again, check for any defects, any twists in the straps and check each buckle closely.
All done? Now it’s time to tie in.
7: After the climb

When your climb is done and it’s time to pack away, don’t forget to take the opportunity to check your harness over once again for damage. Try to pack it away neatly and, if it gets particularly dirty, it might be worth cleaning your harness when you get home.