
If you’re concerned about online security, private browsing is one of the most effective ways to stay safe online. Fortunately, most web browsers offer private browsing modes to enhance user privacy.
Safari, the famous web browser pre-installed on Apple devices, has a private browsing mode that keeps you under the radar. Under this mode, you can surf the web without your search history, browser history, and AutoFill information being saved. Cookies are also blocked from the browser under this mode, preventing third parties from building a profile of your online activities.
However, private browsing isn’t the only way to protect yourself when using Safari. Additional measures include using a VPN and regularly updating your Safari browser. This guide explains how to browse privately on Safari and other measures to enhance your online privacy.
Private browsing mode on Safari
Safari's Private Browsing mode lets you visit websites that won't appear in your browsing history. This mode works on a MacBook, iMac, iPhone, or iPad.
How to enable private browsing on iOS/iPadOS
iPhones and iPads use similar operating systems, iOS and iPadOS. Hence, you can follow the same steps to browse privately on an iPhone and iPad. However, the steps slightly differ according to your OS version.
For iOS/iPadOS 17 upwards
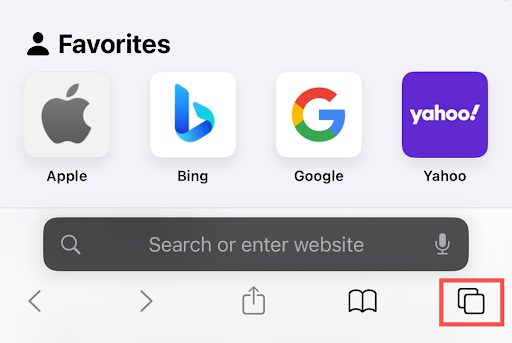
- Open Safari from your iPhone or iPad’s apps menu.
- Tap the tabs icon (two overlapping squares) at the bottom-right corner.
- Swipe right on the tab bar until Private Browsing opens, then tap Unlock.
- Tap the + button to open a new tab and begin browsing privately.
For older iOS/iPadOS versions
- Open the Safari app.
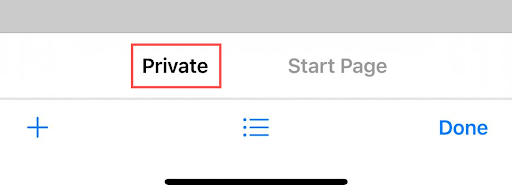
- Tap on the tabs icon. Safari will show two options at the bottom: Private and Start Page. If you already have tabs open, the Start Page option will be replaced with the number of tabs.
- Tap on Private to open the private browsing mode.
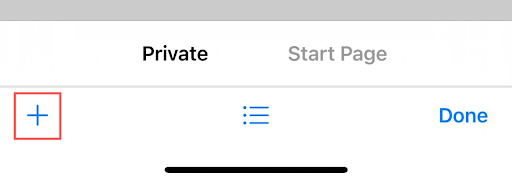
- Tap the + button to open a new private tab and start surfing the web.
How to enable private browsing on macOS
MacBooks and iMac PCs run on macOS. You can follow the simple steps below to privately browse on macOS:
- Open Safari from the apps menu.
- Select File from the menu bar to open a dropdown menu.
- Click New private window in the dropdown menu. You can start browsing with the new private window.
Alternatively, when Safari is opened, you can use the Shift + Command + N shortcut to launch a new private browsing window on macOS.
To exit private mode, you can simply close the private browsing windows you’ve previously opened. Then, repeat the steps whenever you want to browse privately again.
Private browsing features on Safari
Let’s dive deeper into what private browsing mode entails on Safari:
- Safari won’t remember the webpages you visit.
- Your open webpages won't be stored in iCloud.
- Recent searches aren't recorded, so they aren't included in the results list when you use the search bar.
- The items you download won't be included in your download list, even though they remain on your iPhone, iPad, or Mac.
- Any installed plug-ins that support Private Browsing won't store cookies and other tracking information.
- Safari automatically sends "Do Not Track" requests to every website you visit, although it's up to the website operators to honor these requests.
Private Browsing mode affects how some websites function. Because websites can't store cookies in this mode, you'll need to re-login each time you visit and close a site that requires an account to access.
Also, websites won't remember your preferences, such as themes and language settings, because they can't store cookies on private browsing windows. These are tradeoffs you should be aware of when optimizing for utmost privacy.
Enabling Fraudulent Website Warning
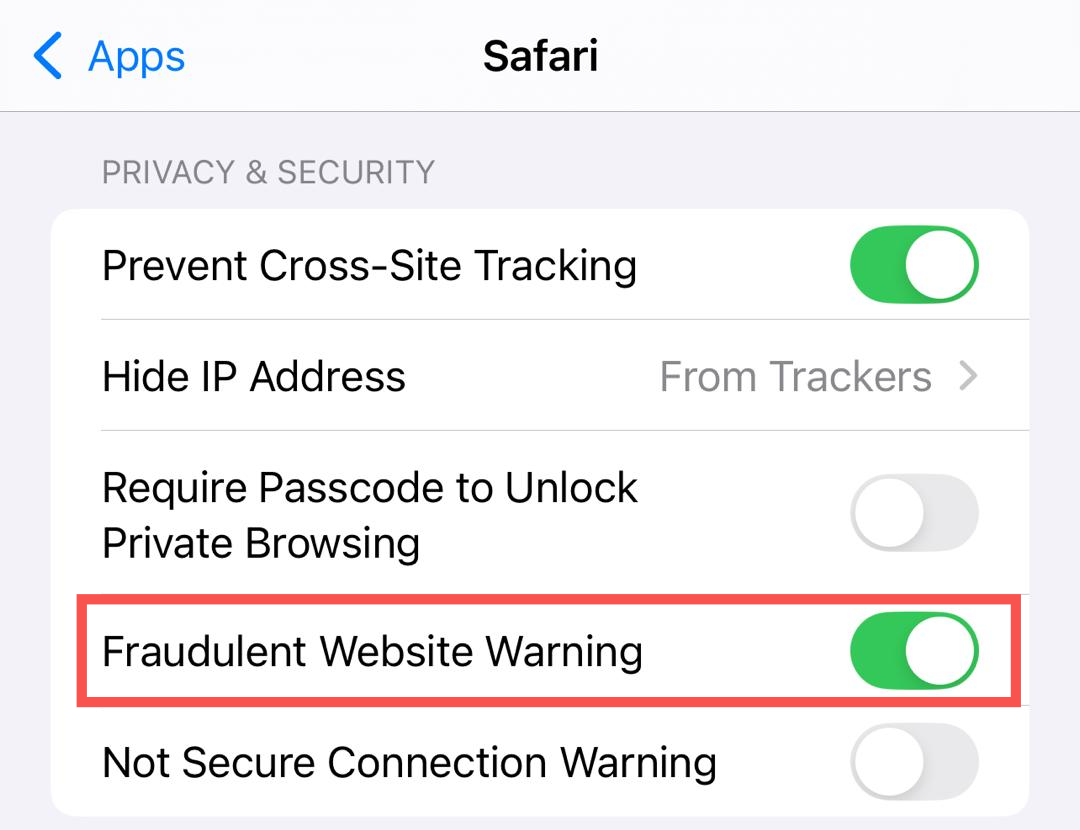
Safari has a Fraudulent Website Warning feature that helps protect users from online threats. When this feature is enabled, Safari displays a warning if any website you visit is suspected of being a malware or phishing operation designed to steal your data.
Phishing websites often impersonate legitimate ones, such as financial institutions, to trick users into handing over their credentials. Malware sites can install malicious software to steal data without your knowledge.
Apple maintains a real-time database of sites containing malware and phishing elements. With Fraudulent Website Warning enabled, if you visit such a site, you’ll immediately receive an alert to avoid falling victim.
How to enable Fraudulent Website Warning on iOS/iPadOS
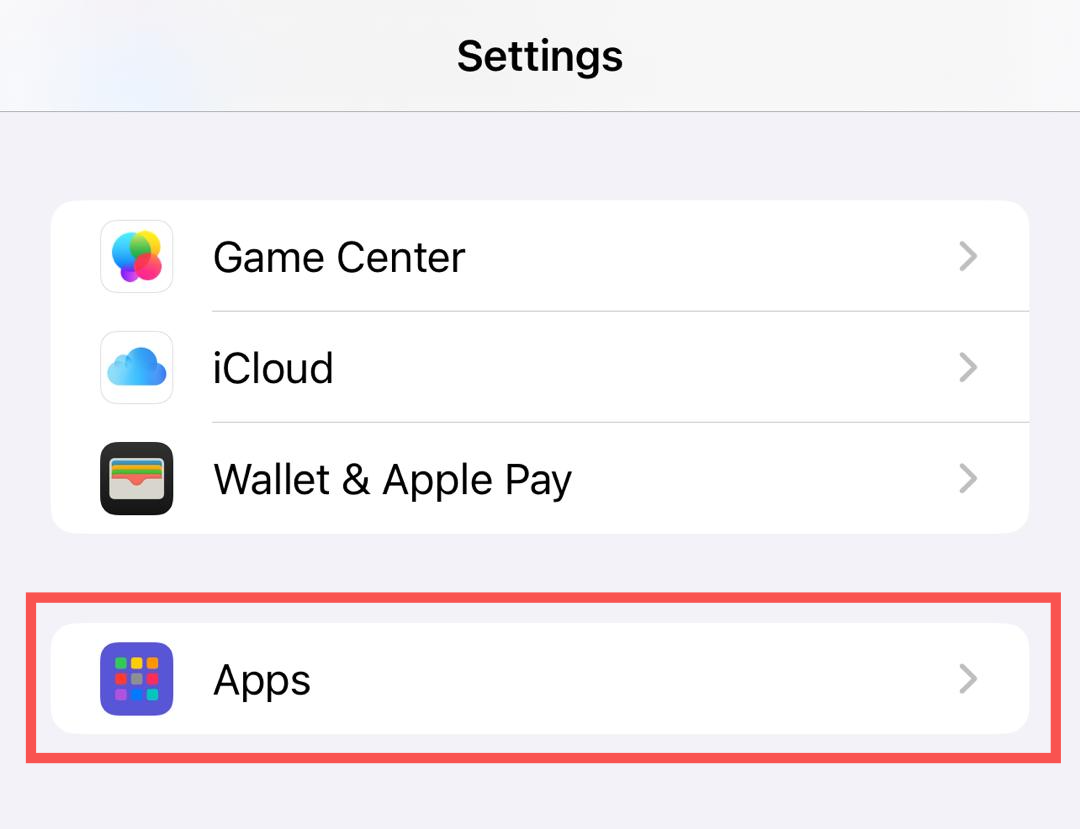
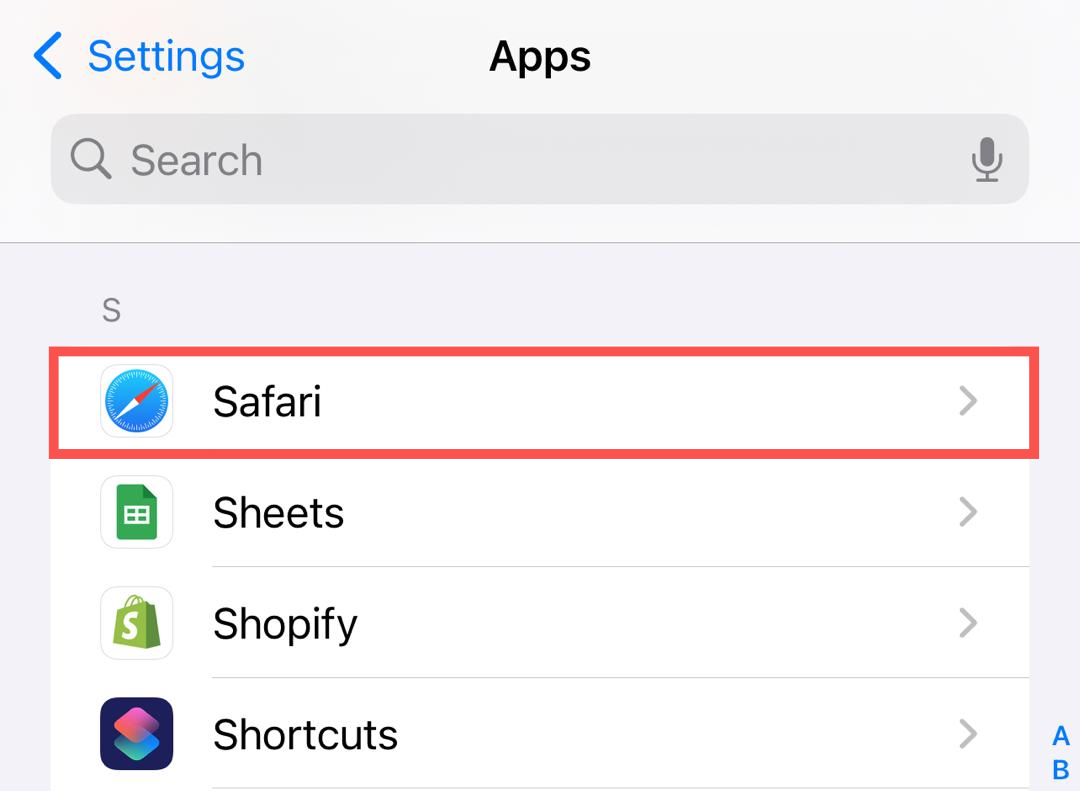
- Open the Settings app on your iPhone or iPad.
- Scroll down and open the Apps menu.
- Look for Safari and click on it.
- Scroll down and turn on Fraudulent Website Warning.
How to enable Fraudulent Website Warning on macOS
- Open Safari.
- In the top menu bar, click on Safari, then Settings (or Preferences in older macOS versions).
- Navigate to the Security tab.
- Check the box next to Warn when visiting a fraudulent website.
Block cross-site tracking
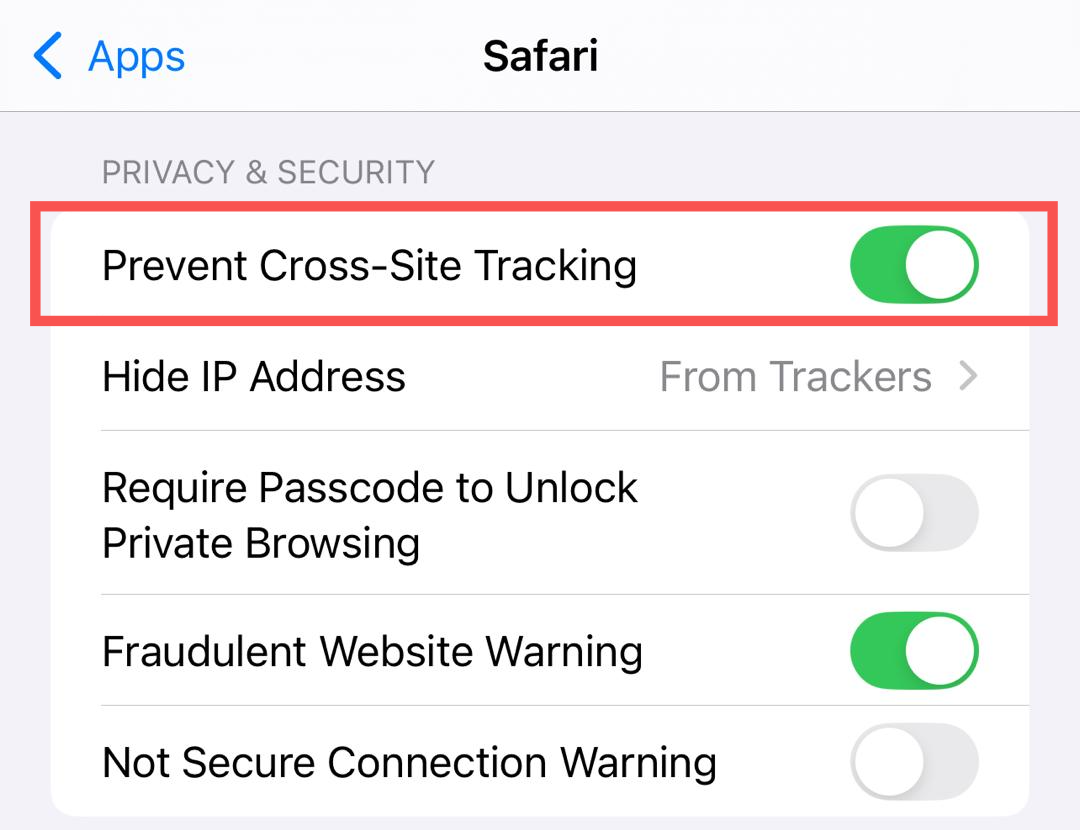
Safari lets users block cross-site tracking when browsing in normal mode. With this setting enabled, advertisers will be unable to track you across multiple websites.
Notably, this option is enabled by default; however, you can always verify that it’s turned on.
How to block cross-site tracking on iOS/iPadOS
- Open your iPhone or iPad’s Settings app.
- Scroll down and open the Apps menu.
- Click Safari on the Apps list.
- Toggle Prevent Cross-Site Tracking if it isn’t already turned on.
How to block cross-site tracking on macOS
- Launch the Safari app.
- In the top menu bar, click on Safari > Settings or Preferences.
- Turn on the Prevent Cross-Site Tracking option.
iCloud Private Relay
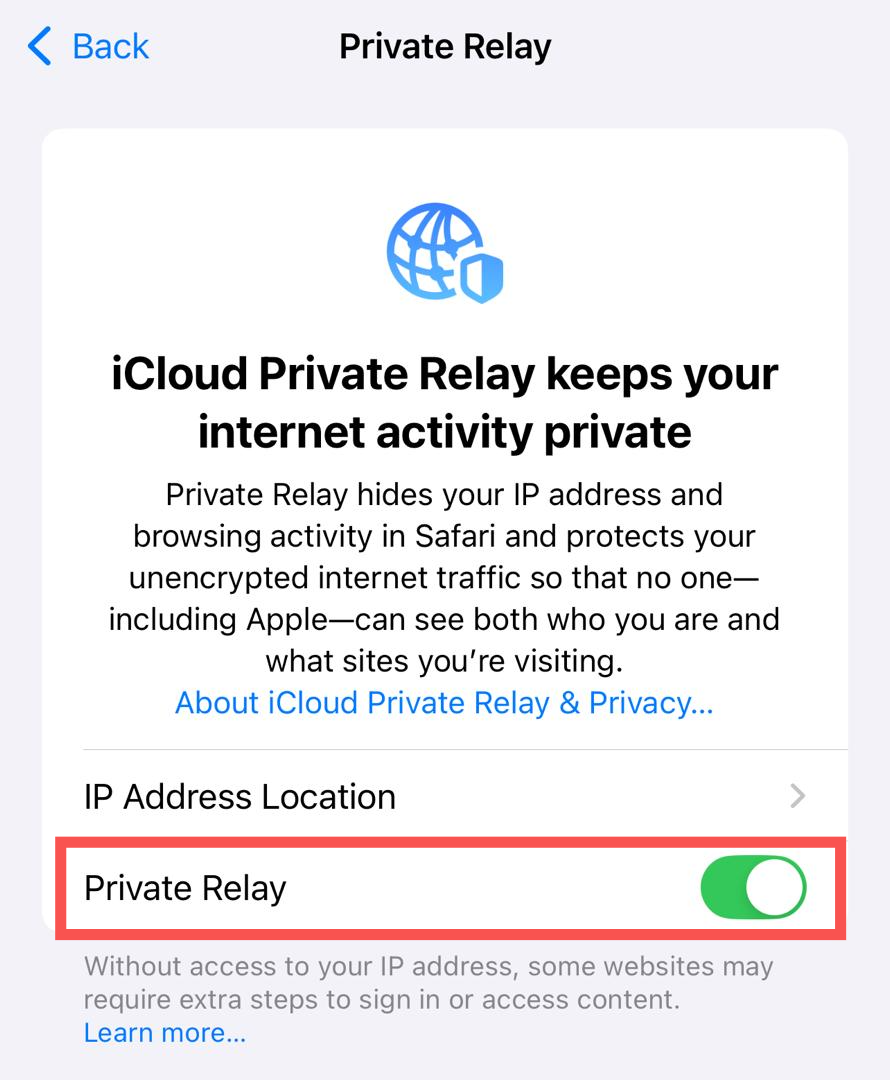
iCloud Private Relay is an optional feature Apple provides to enhance privacy on Safari. This feature is available to users who have an iCloud+ subscription.
Typically, when you browse the web, your DNS records and IP address can be easily viewed by your ISP and the websites you visit. To prevent exposure, iCloud Private Relay routes your traffic through two separate, secure relays.
Apple operates the first relay, to which your IP address is visible. This relay encrypts your DNS records, so neither Apple nor your ISP can see the website addresses you visit.
The second relay, operated by a third-party provider, generates a temporary IP address and hides your real one. This mechanism prevents ISPs, website operators, and other third parties from viewing your real IP address.
If you have an iCloud+ subscription, follow these steps to enable iCloud Private Relay:
On iPhone or iPad
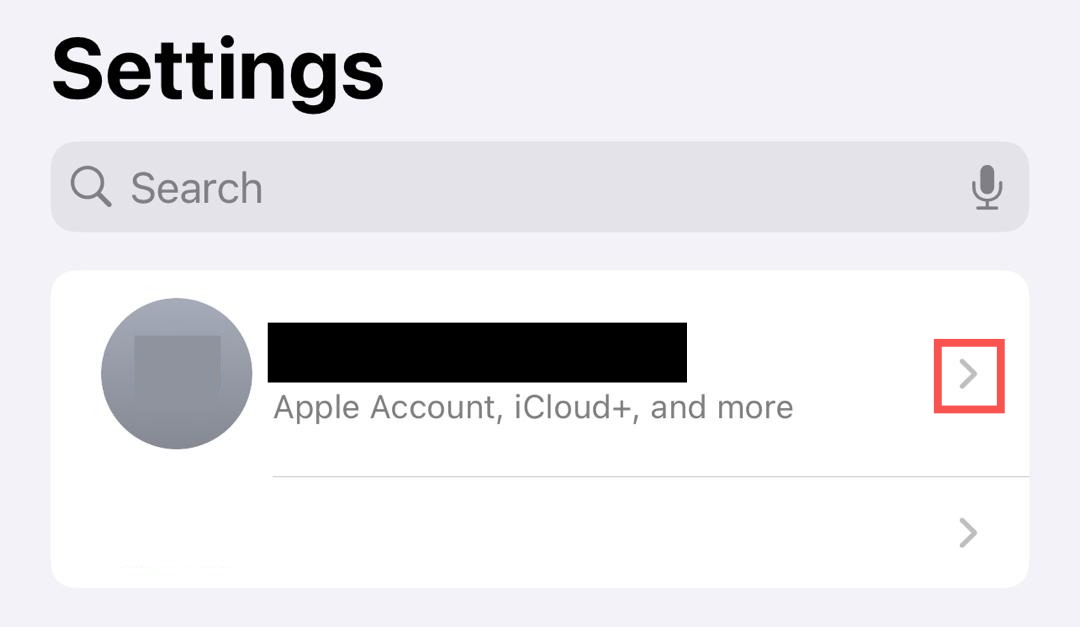
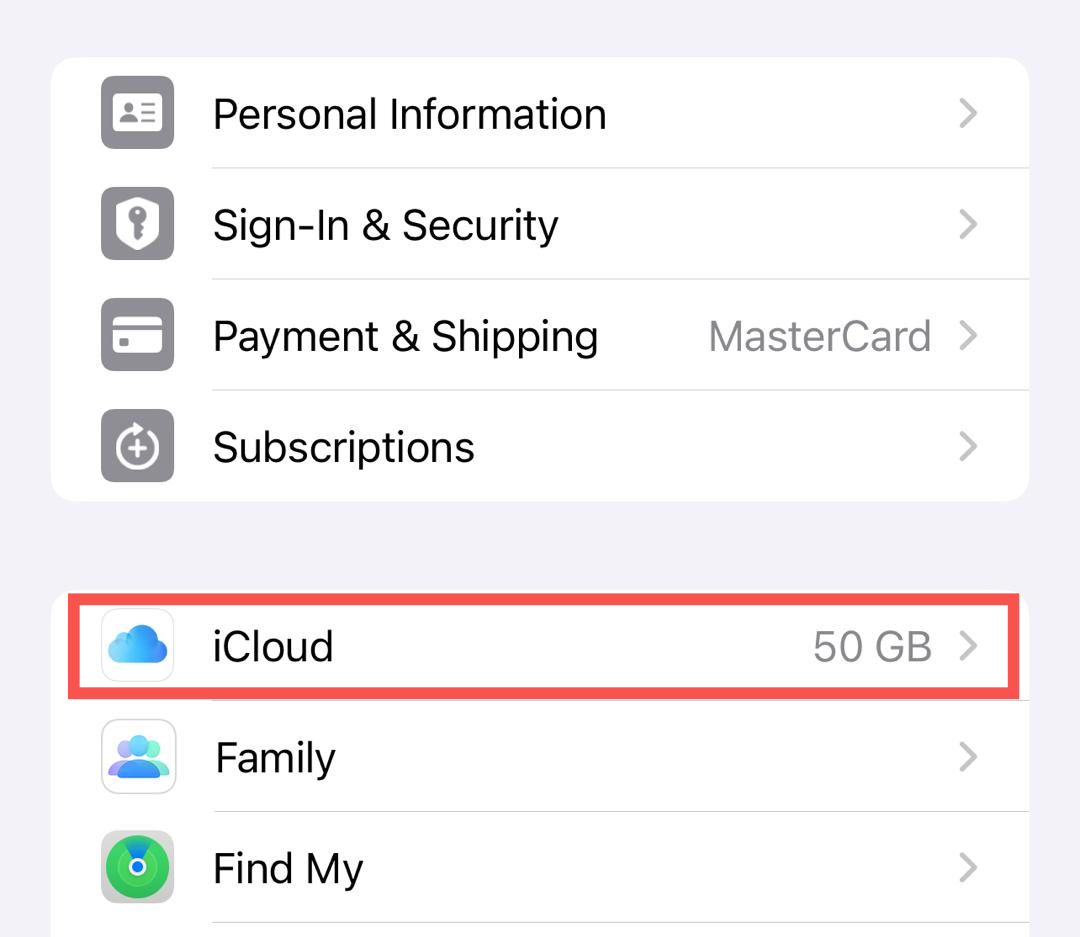
- Open the Settings app.
- Go to [Your Name] > iCloud.
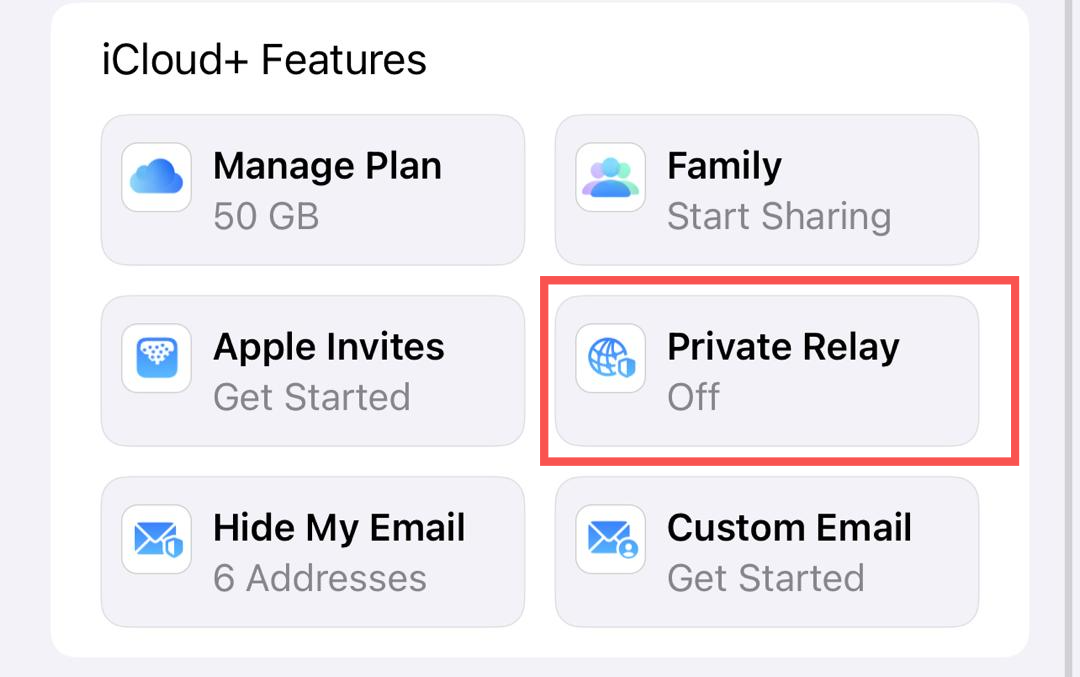
- Tap Private Relay under iCloud+ Features.
- Turn on the Private Relay button.
On Mac
- Open the System Settings app from your apps menu.
- Click on your name at the top of the sidebar. If your name isn't displayed, click Sign in and enter your Apple ID credentials.
- Click iCloud > Private Relay.
- Turn on the Private Relay button.
Using a VPN
A virtual private network (VPN) is an external way to enhance your online privacy when using Safari. It creates an encrypted connection between your device and the internet. Hence, third parties, such as your internet service provider (ISP), won't be able to monitor your online activities.
VPNs conceal your actual IP address by routing your traffic through a remote server in a different location. It’ll appear like you’re browsing from another city or country, preventing third parties from creating a profile of your activities. Most VPN apps allow you to select specific server locations.
We’ve reviewed many of the best VPN services, such as PrivadoVPN, NordVPN, and ProtonVPN. These VPN apps offer abundant server locations, strong encryption, DNS leak protection, and excellent speed and performance. For more information, you can see our detailed guide on the best VPN services.
Turn on rapid security updates
Automatic updates are often overlooked, yet vital for enhancing online privacy. Apple occasionally finds security bugs in Safari and deploys quick updates to fix them.
Safari updates automatically alongside iOS, iPadOS, and macOS, so you should turn on auto-updates for your iPhone, iPad, or Mac.
Waiting for regular OS updates might be enough time for hackers to exploit a vulnerability. Hence, ensure that Rapid Security Responses updates are turned on, i.e., security improvements are pushed to your device more quickly before they are included in general iOS, iPadOS, or macOS updates.
How to turn on Rapid Security Responses on an iPhone or iPad
- Open the Settings app.
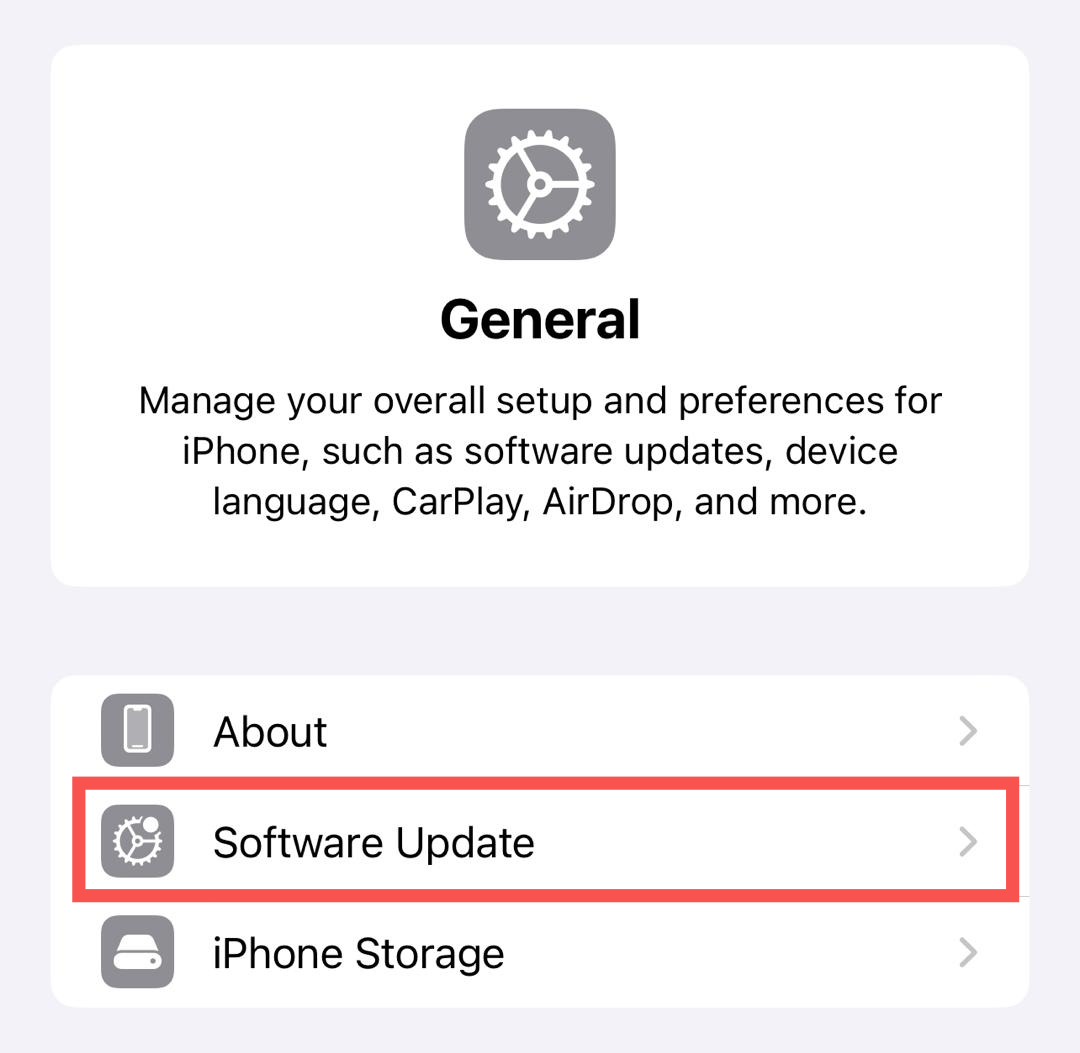
- Go to General > Software Update.
- Tap Automatic Updates.
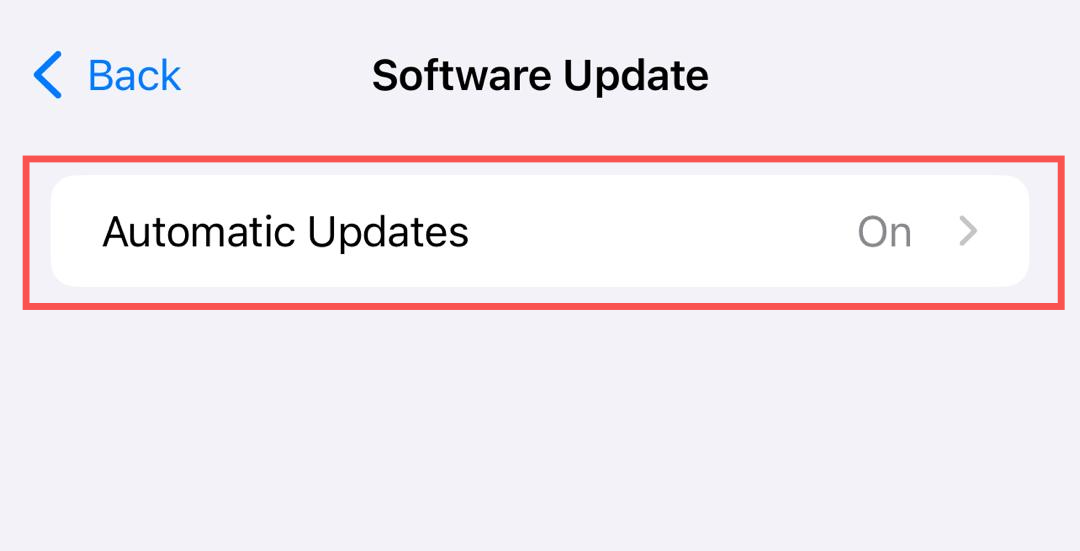
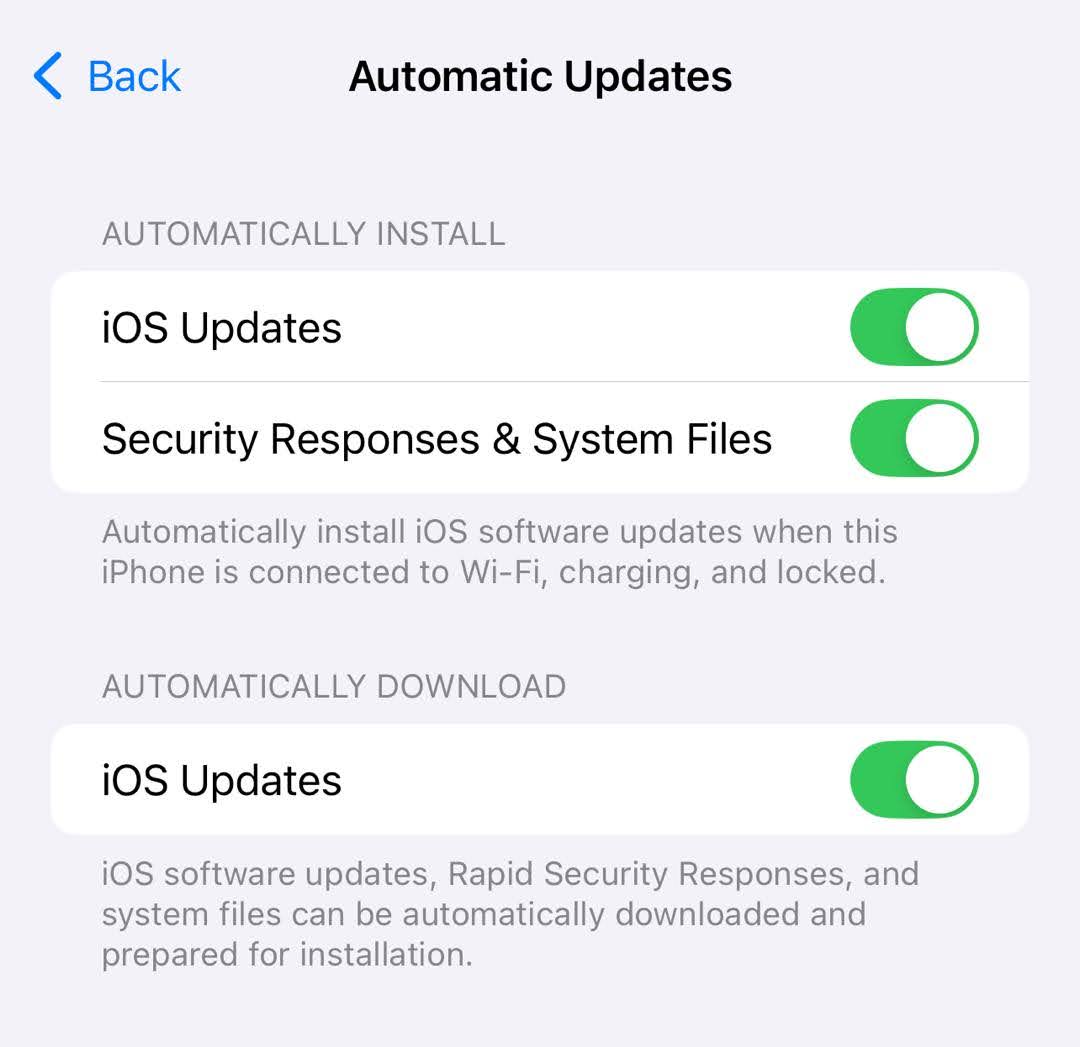
- Turn on Security Responses and System Files. On the same menu, ensure that the iOS Updates/iPadOS Updates button is also enabled, allowing you to download general updates automatically.
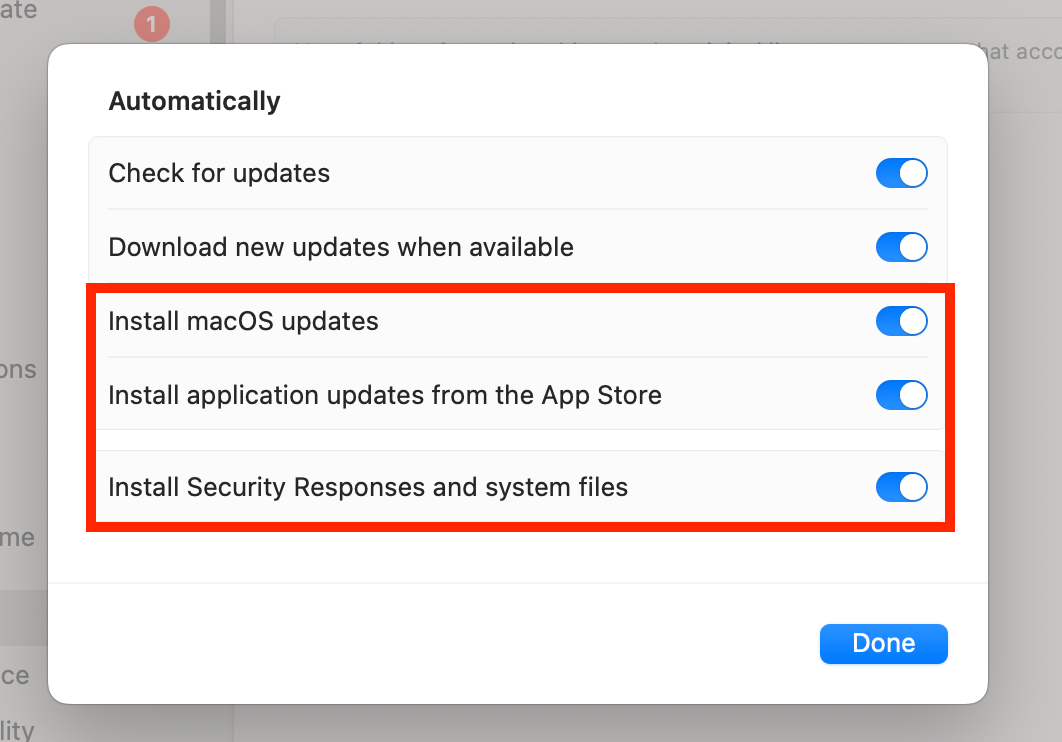
Turn on Rapid Security Responses on macOS
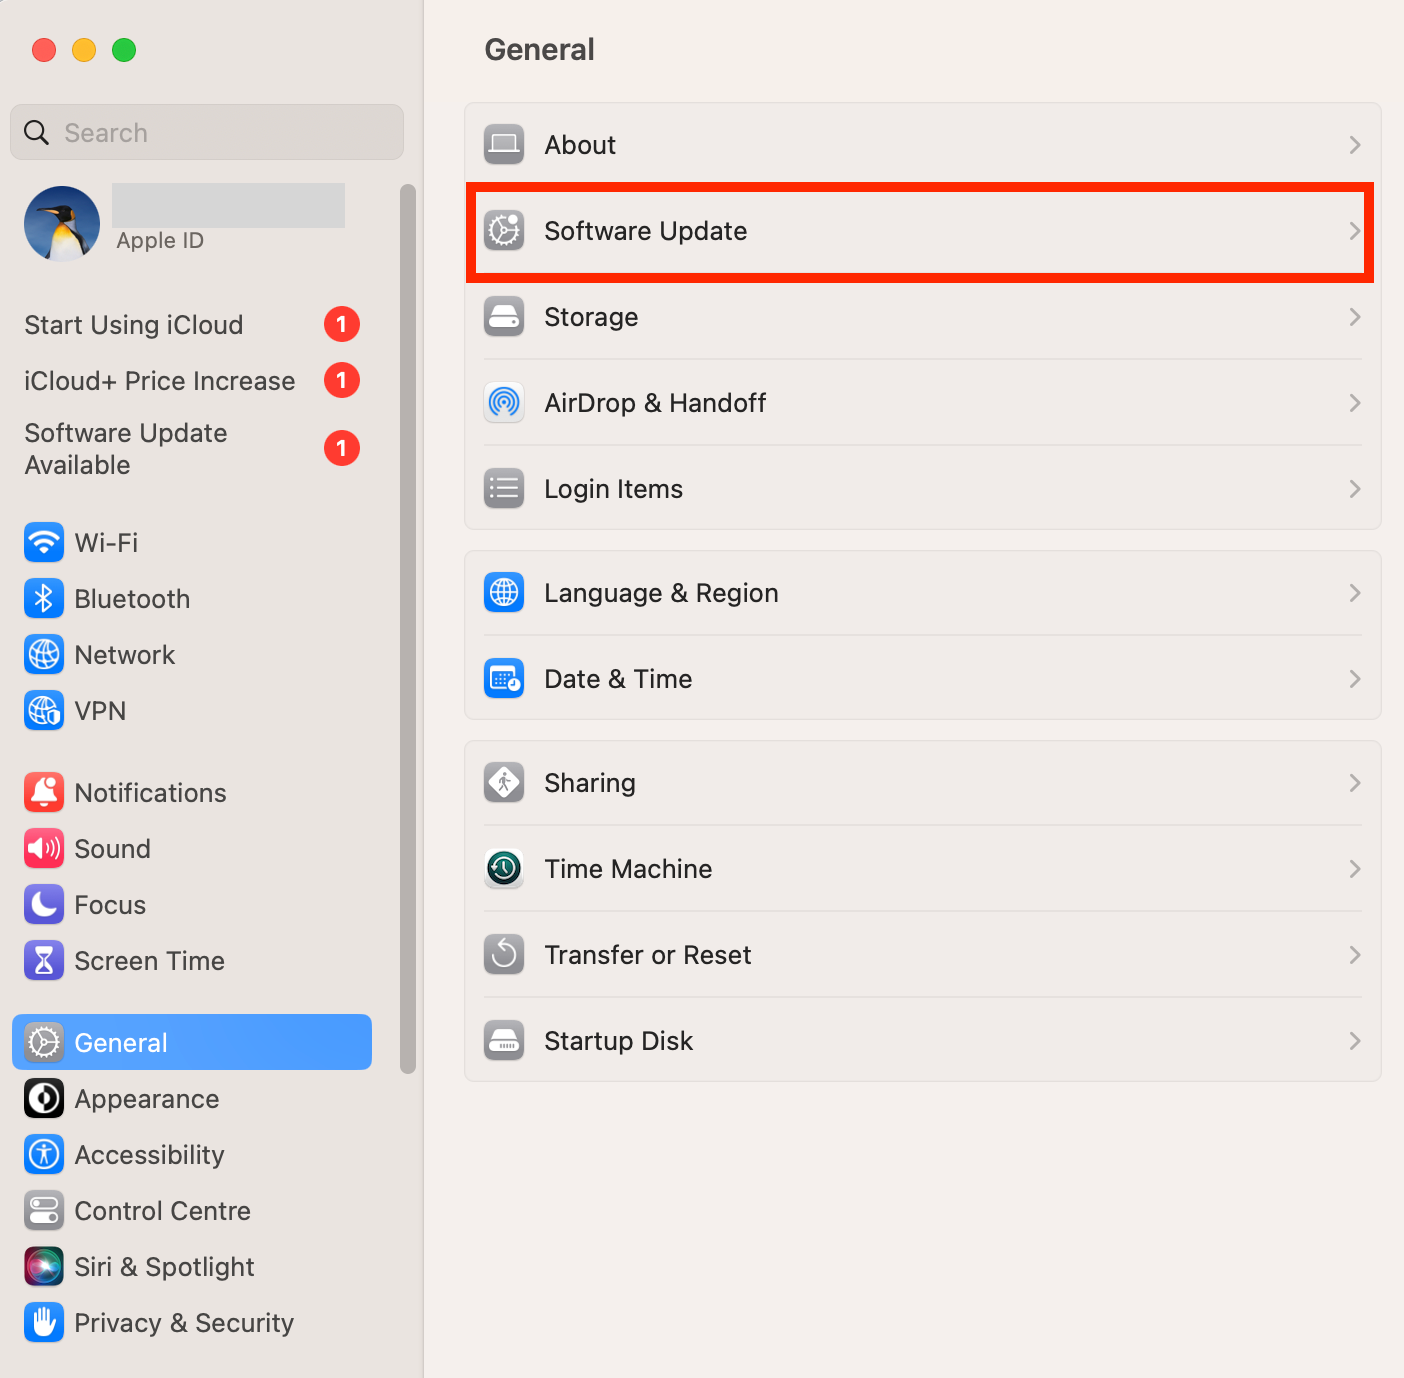
- Open the System Settings app.
- Click General in the sidebar, then select Software Update on the right.
- Click the Show Details button (the letter “i” enclosed in a circle) next to Automatic Updates.
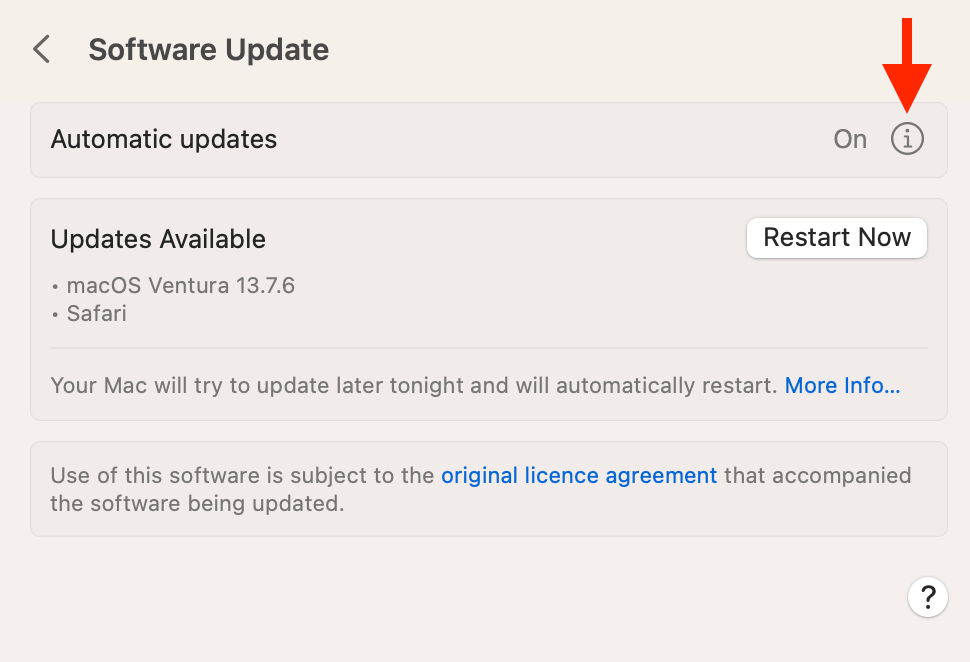
- Turn on Install Security Responses and system files. On this same menu, ensure that Install macOS Updates and Install application updates from the App Store are turned on.
Final Words
Maintaining the utmost privacy when surfing the web requires taking crucial steps. This guide explains the most effective steps for browsing privately when using Safari. Follow these guidelines to browse the web with optimal privacy on your iPhone, iPad, or Mac.