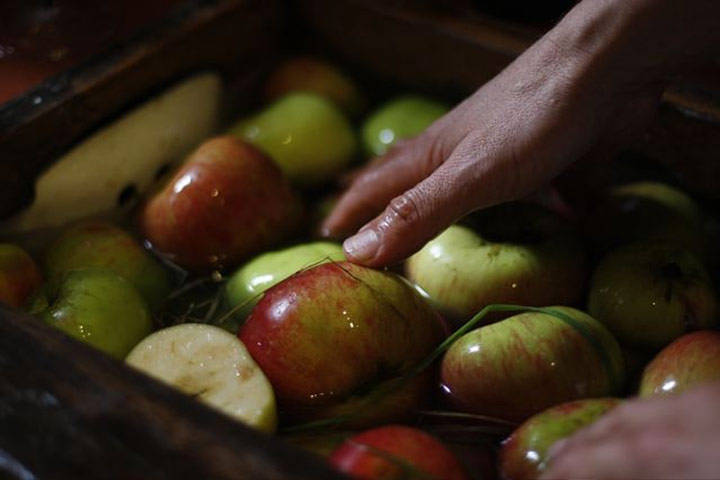
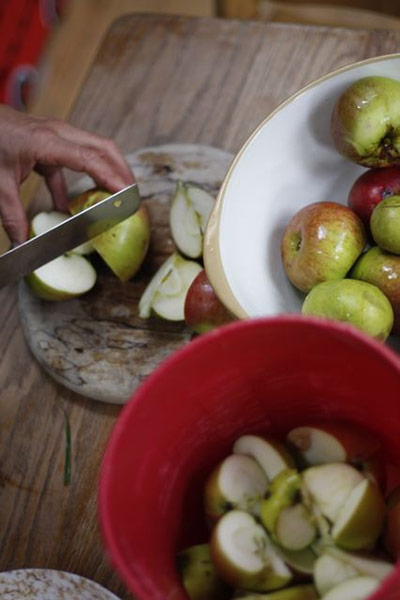
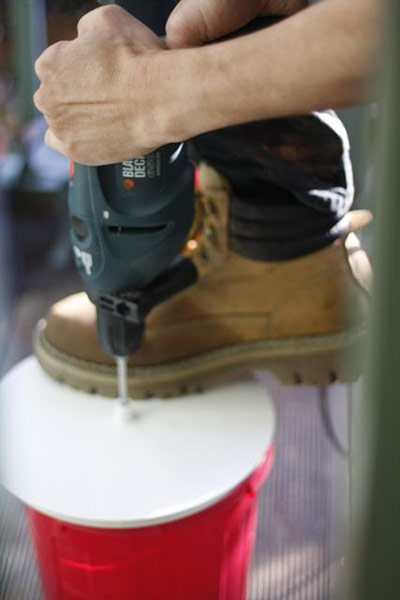
1. Choose your apples. I like a fairly tart juice. Here I'm using almost all Bramleys. That's fine at the end of October, when the sugars have built up. But pure Bramley juice made in mid-September would be too sour, and you'd need to blend them with dessert apples. Unless you have a sweet tooth, you'll probably want at least a few cookers in the mix, or a perhaps a handful of the less acidic cider apple varieties. Experiment with different varieties and proportions until you find the blend that suits you best. Wash themPhotograph: Hugh Warwick/Zoe Broughton/www.urchin.info2. Cut them up. You'll need to do this only if you're using a drill-bit scratter (or pulper) like mine or a kitchen juicer. If you're lucky enough to have a hand-cranked scratter you can feed them in whole. But in any case, cut out all rotten or wormy flesh: if this goes into the press, it will make the juice taste musty. Recent bruising won't hurt, however: in fact it tends to make the juice sweeter. You don't need to remove the coresPhotograph: Hugh Warwick/Zoe Broughton/www.urchin.info3. Here I'm using the cheap scratter I don't like very much. It's a drill bit, threaded through a tough plastic lid, with which you cover a bucket containing the chopped apples. The first time I used it, it wasn't properly secured and the bit went straight through the side of the bucket. To prevent that from happening, you need someone else to put their foot on the other side of the lid (in this photo it's just my foot, so you can see it more clearly. But don't do this alone). If you've got a variable-speed drill, turn it down (to about 3/10). Once the lid is on securely, pull the trigger and raise and lower the drill for around 20 secondsPhotograph: Hugh Warwick/Zoe Broughton/www.urchin.info
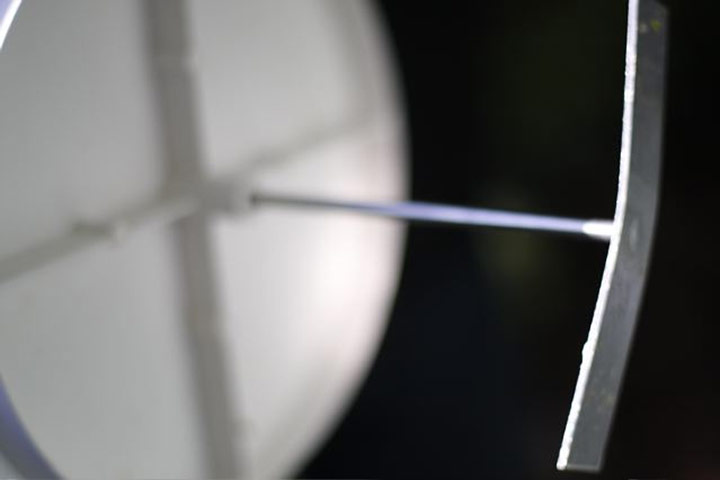
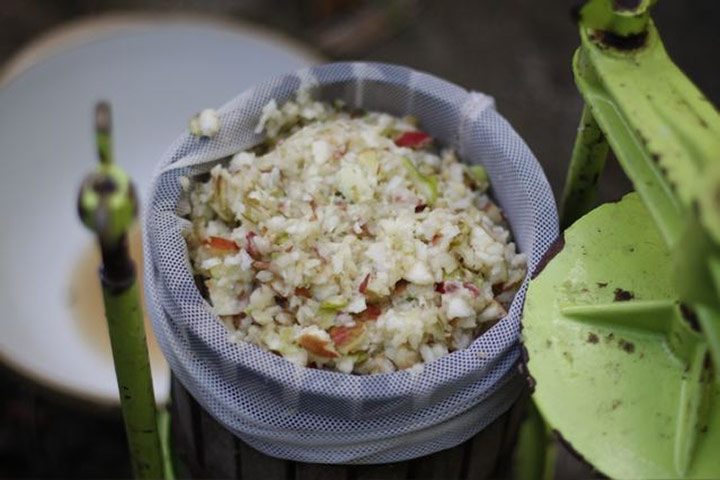
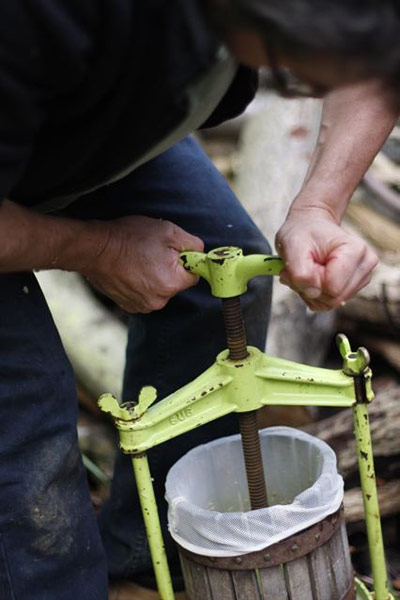
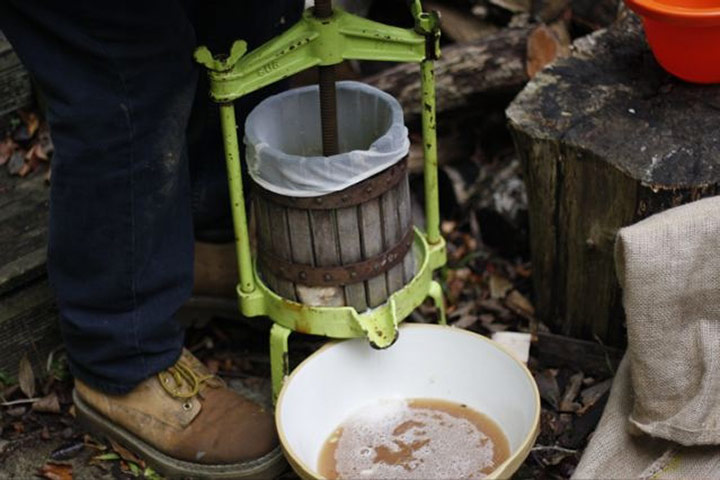
4. Here's what the bit looks like. Unless your bucket is only marginally deeper than the drill bit, you'll then need to turn the pulp with your hands, to raise the unmashed bits to the surface. At this point throw more apples in. You'll probably have to turn it three or four times before the bucketload is pulpedPhotograph: Hugh Warwick/Zoe Broughton/www.urchin.info5. Stretch the straining bag over the press. Fill it with pulpPhotograph: Hugh Warwick/Zoe Broughton/www.urchin.info6. It will take a couple of bucketloads to fill. Make sure you've got a bucket or bowl under the press before you start loading it, as the juice will begin to trickle out as soon as the pulp is in the bagPhotograph: Hugh Warwick/Zoe Broughton/www.urchin.info7. Crank it down as far as it will goPhotograph: Hugh Warwick/Zoe Broughton/www.urchin.info8. When it's done, empty the worked pulp onto the compost heap. If you are producing a lot of pulp you'll need to mix it with other material - newspaper, cardboard, straw or crop wastes - or it won't compost wellPhotograph: Hugh Warwick/Zoe Broughton/www.urchin.info9. Taste the juice to make sure the balance is right. If it's not, change the mix of applesPhotograph: Hugh Warwick/Zoe Broughton/www.urchin.info10. You need to have sterilised the bottles before you fill them. This means washing them out thoroughly, then filling them with warm water containing a little sodium metabisulphite. Screw the lids on firmly and lay the bottles on their sides. Leave the solution in the bottles for at least half an hour, turning them once or twice to ensure that every part of the inner surface has been disinfected. Immediately before filling them with juice, rinse the bottles out with warm waterPhotograph: Hugh Warwick/Zoe Broughton/www.urchin.info11. Gently heat several large pans of water, bringing them to 77CPhotograph: Hugh Warwick/Zoe Broughton/www.urchin.info12. Fill the bottles with juice and, leaving the caps off, put them in the pans of water to pasteurise. You should keep them as close as possible to 77C for half an hour. You might need to add some cold water to the pans from time to time to keep the temperature steady. Don't overheat the juice or it will oxidise, spoiling the flavour. Before the pasteurised juice cools down, screw the tops back on the bottles. Then lie them on their sides, so that the warm juice sterilises the lids, which might have picked up some germs while the bottles were cooking. And you're donePhotograph: Hugh Warwick/Zoe Broughton/www.urchin.info
Sign up to read this article
Read news from 100’s of titles, curated specifically for you.